Last month we had the pleasure of reviewing another one of ASUS’s gaming boards, the ROG STRIX B450-F Gaming motherboard which overall scored quite well. Today, we’ll be taking a deep look into the similar ASUS ROG Strix X399-E Gaming TR4 motherboard for the AMD Ryzen Threadripper processor.
This particular motherboard appears to come packed with a few additional features. For instance, this time around you get built in WiFi, more RGB control, a heatsinked M.2 slot, and active CPU VRM cooling just to name a few.
The latest AMD Ryzen Threadripper processors are based on the TR4 socket which is backed by the AMD X399 chipset. Other than the fact that the TR4 CPU socket is absolutely massive which takes up a good portion of the motherboard surface, the socket is definitely unique and in my opinion was a definite good move for AMD. AMD always had a hard time trying to fit into the HEDT scene although now with the introduction of the Ryzen Threadripper series and the TR4 socket, this will allow for easy expansion for years to come.
HEDT? But…. this is a gaming motherboard!
So what do HEDT and gaming have to do with each other? Personally, I only spend about 25% of my time gaming while on the computer. Occasionally, I do render or trans code video, render 3D animations, and other CPU intensive tasks. There are plenty of users out there who want a kickass gaming machine while having the ability of crunching CPU intensive loads in the mean time. For those, HEDT makes perfect sense for a gaming machine which is the exact market ASUS is dipping into with this particular board.
Okay, enough introductions, let’s take a closer look at the specifications of this board before we crack it open.
ASUS ROG Strix X399-E Gaming Motherboard Specifications
ASUS’s new X399 based motherboard comes equipped with quite a few features. Since we’ve covered the CPU already, let’s cover RAM. The motherboard features support for up to 128GB of DDR4 in quad-channel configuration (8 modules total). Officially Ryzen Threadripper processors officially only support DDR4-2666MHz RAM, though faster speeds can be used by manually entering in memory specifications into BIOS.
Hard drive support was a bit of a downer as the ASUS ROG STRIX X399-E only has two NVMe M.2 SSD ports. One is located towards the bottom underneath the heatsink. Another is a vertical mount option which sits just south of the 24-pin motherboard power connector. As far as I/O device support goes, the motherboard supports onboard 802.11AC WiFi , front side U.2 and front panel USB 3.1 Gen2 port.
| Model | ROG Strix X399-E Gaming |
|---|---|
| Processor | AMD Socket TR4 1st and 2nd Gen AMD Ryzen Threadripper Processors |
| Chipset | AMD X399 |
| Memory | 8 x DIMM, Max. 128GB, DDR4 3600(O.C.)/3466(O.C.)/3333(O.C.)/3200(O.C.)/3000(O.C.)/2800(O.C.)/2666/2400/2133 ECC and non-ECC, Un-buffered Memory Supported |
| Multi-GPU Support |
|
| Expansion Slots |
|
| Storage |
|
| Networking |
|
| Audio | ROG SupremeFX 8-Channel High Definition Audio CODEC S1220A |
| USB Ports |
|
| Back I/O Ports |
|
| Internal I/O Ports |
|
| Form Factor | 12 inch x 10.6 inch ( 30.5 cm x 26.9 cm ) |
While the motherboard is technically considered an E-ATX motherboard, I personally find it closer to the ATX form factor than the traditional E-ATX form. I had no issues mounting this in typical ATX case. Officially E-ATX motherboards are 12 × 13 inches. This measures in a 12×10.5 inches.
Now that we’re all experts in all things ROG Strix X399, let’s jump into the review!
Unboxing
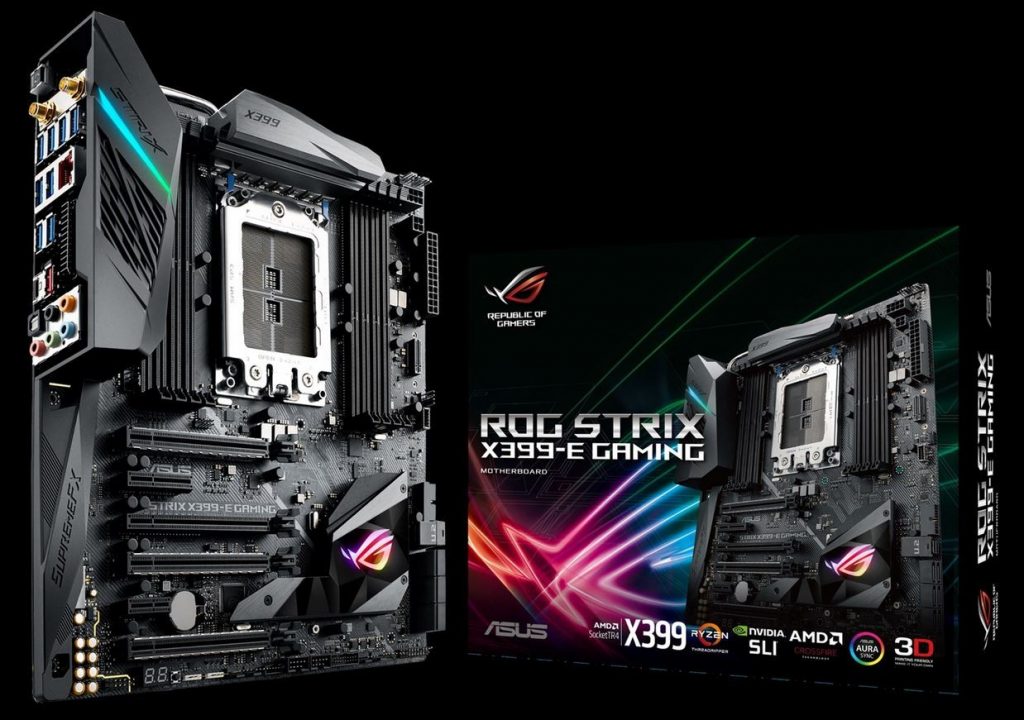
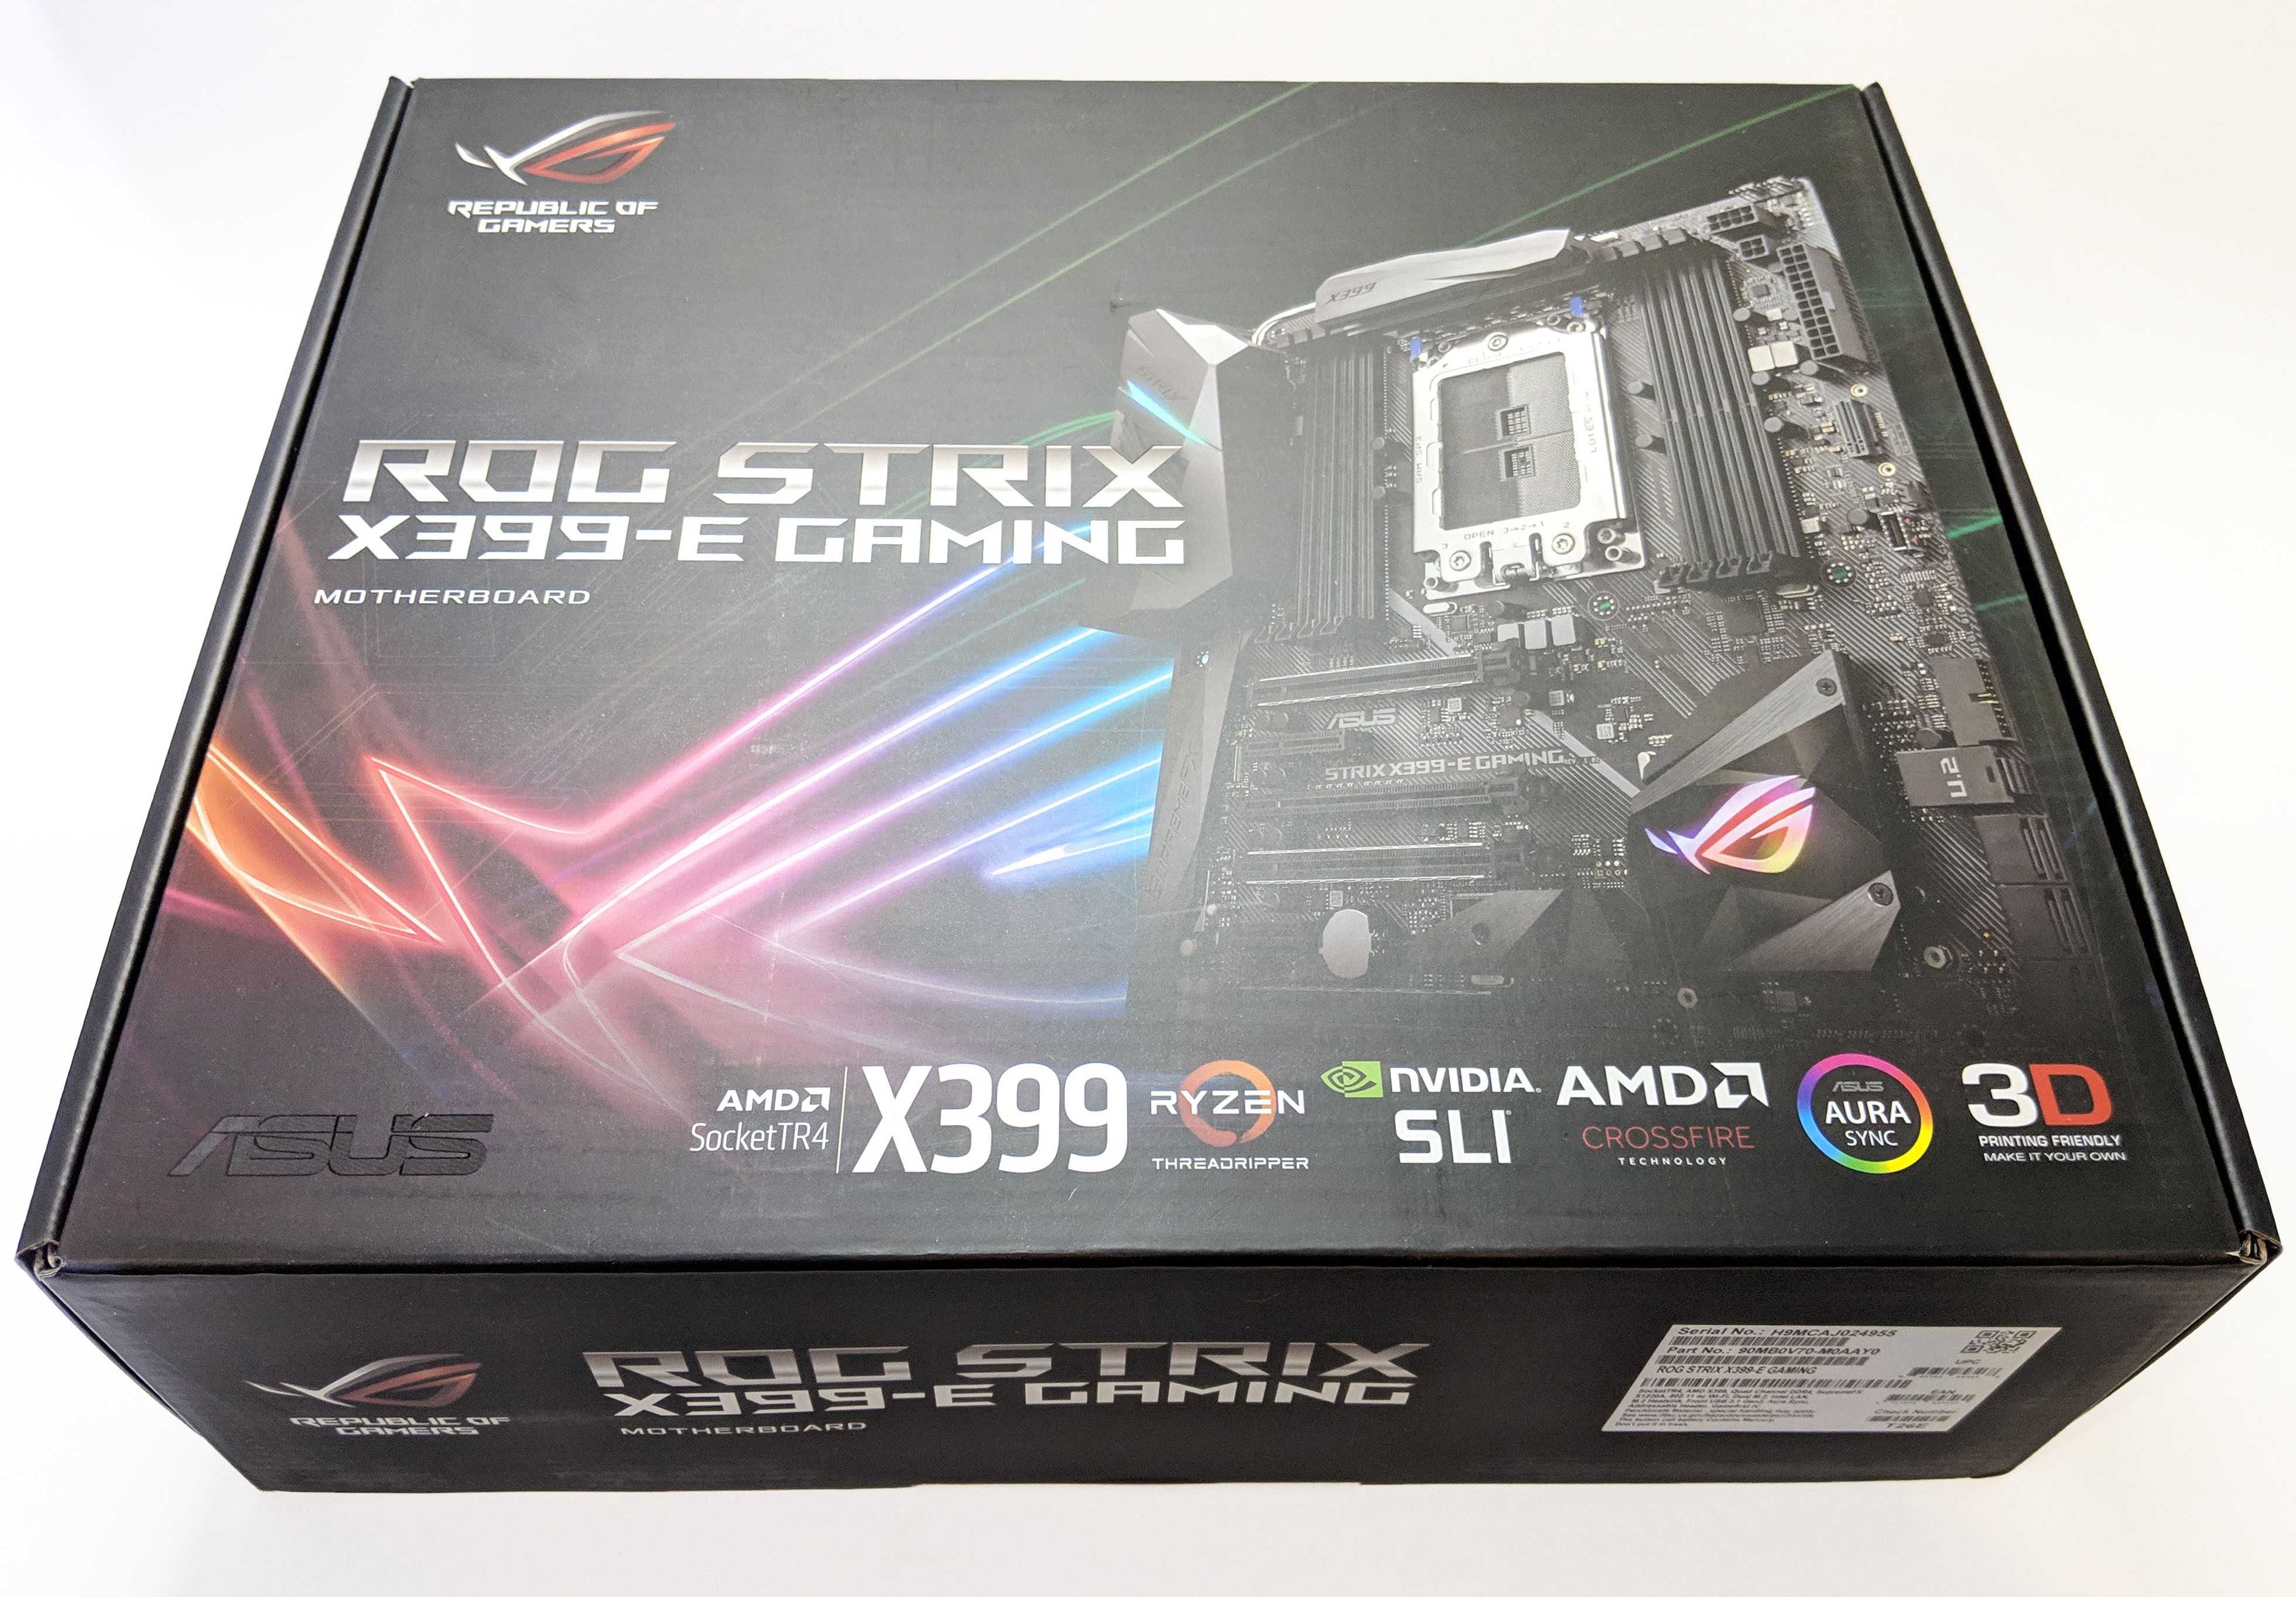
The ASUS ROG Strix X399 Gaming motherboard’s box arrived undamaged and in a perfect bill of health. The box features an image of the motherboard itself with some few supporting features such as Socket TR4 support, SLI Ready, and AMD Crossfire support.
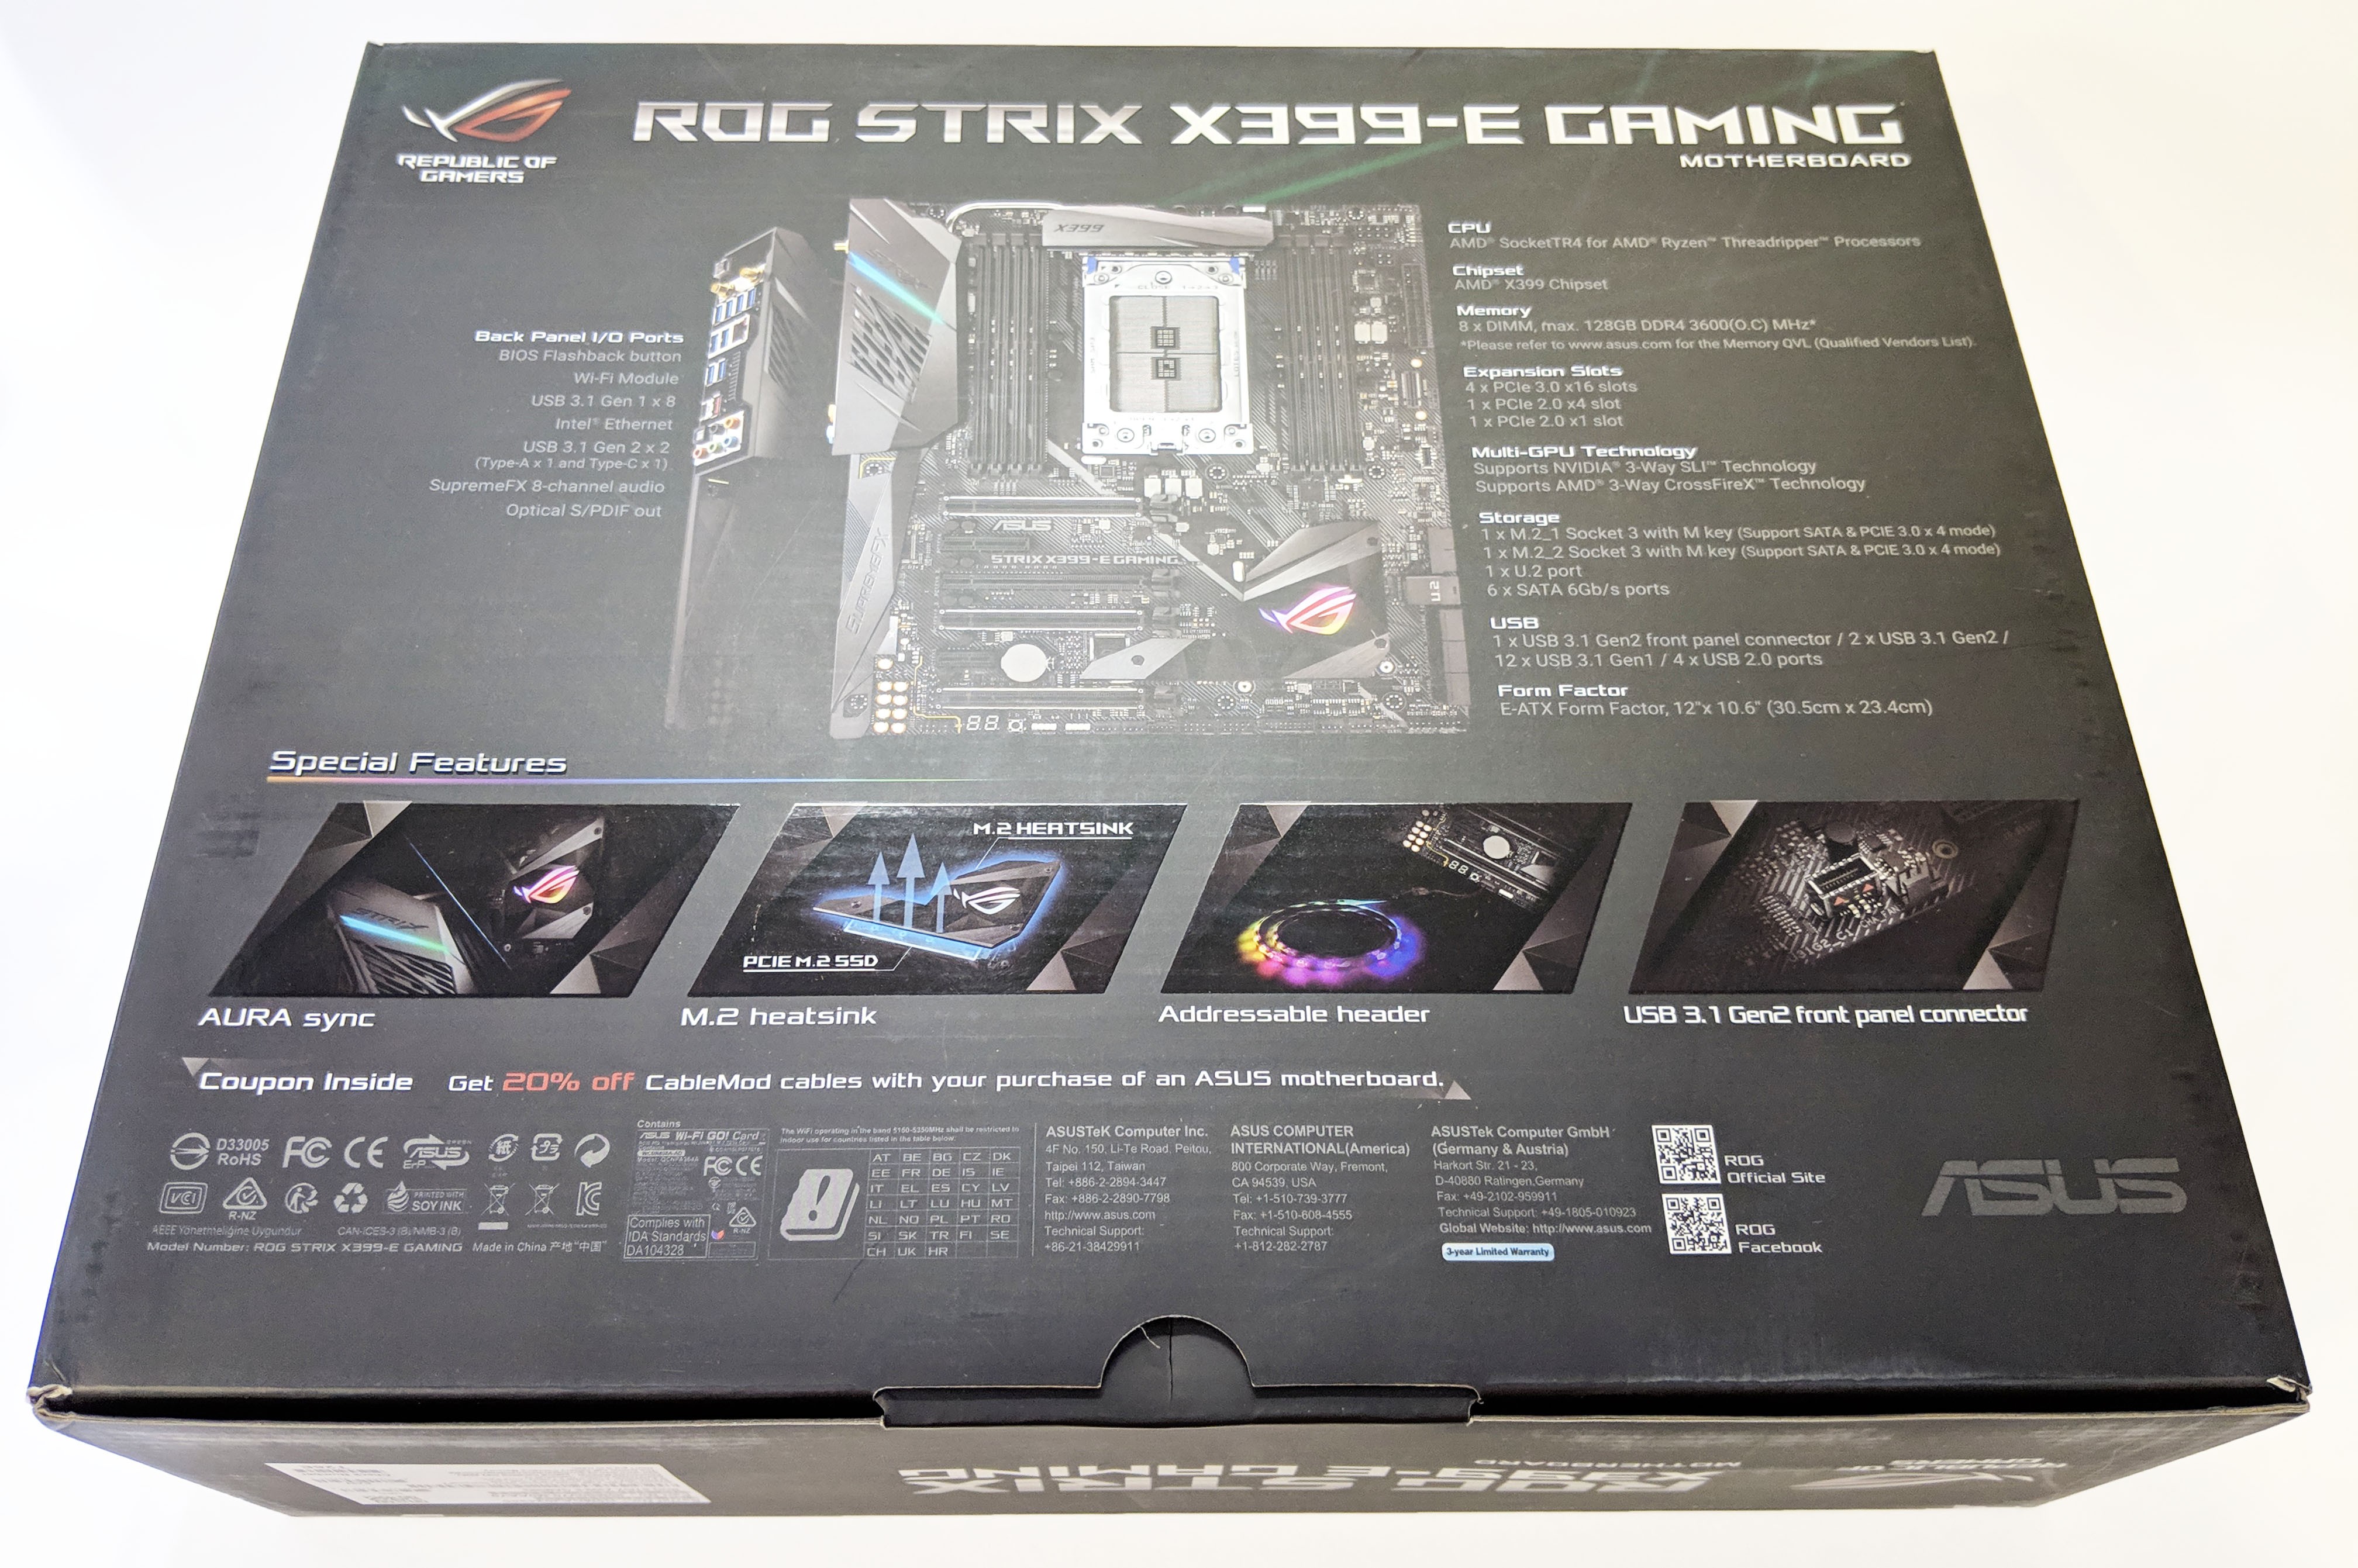
The back includes a few more details with a few closeups highlighting even more features such addressable RGB control, a front panel USB 3.1 Gen2 header, M.2 SSD heat sink,s and a few others. Be sure to look over all the technical information before you buy. It would be a shame realizing this is an AMD board as you attempt to install your Intel CPU after purchasing.
With the box’s outer seal cracked open, the top cover lifts up to reveal its contents. The first thing you’ll notice is the motherboard nestled safely inside an anti-static bag. The motherboard is wedged in between two custom cut and folded pieces of cardboard on either side. Pretty common packaging for any motherboard.
The slew of components is located under the cardboard flap which is accessed once the board is removed.


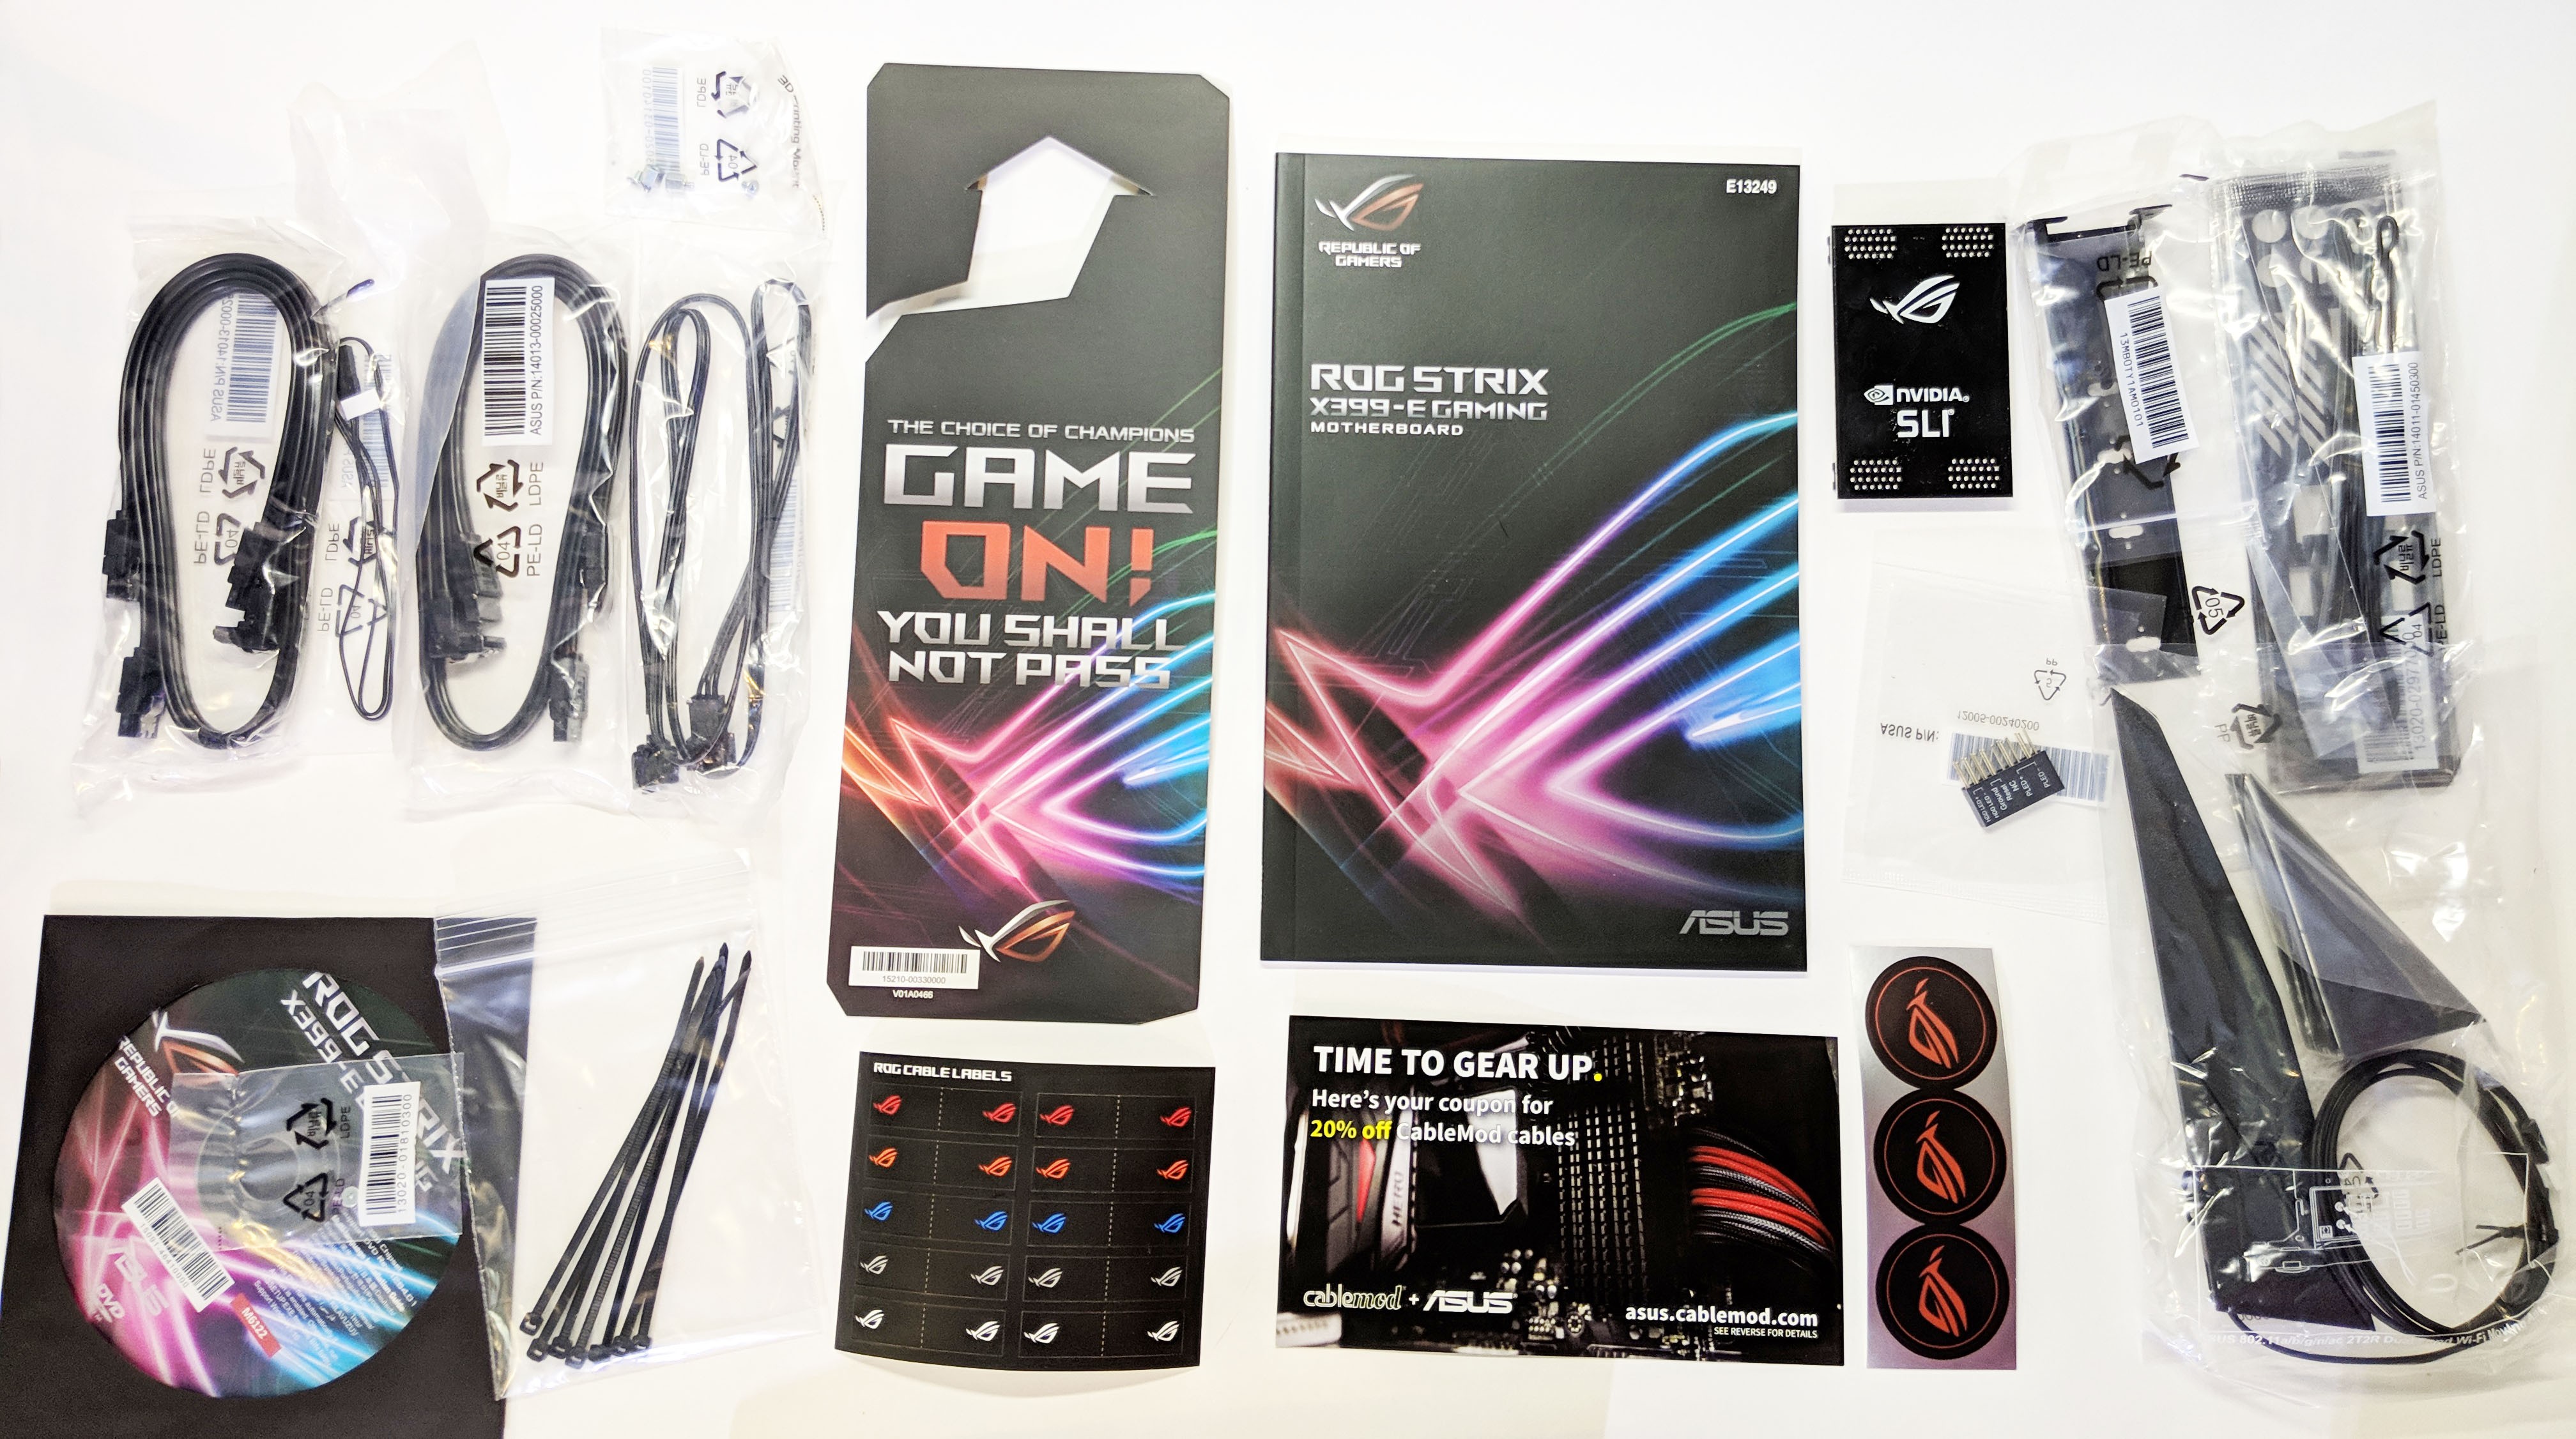
Here’s a shot of everything that’s included in the box. This includes:
- User´s manual
- ASUS Q-Shield
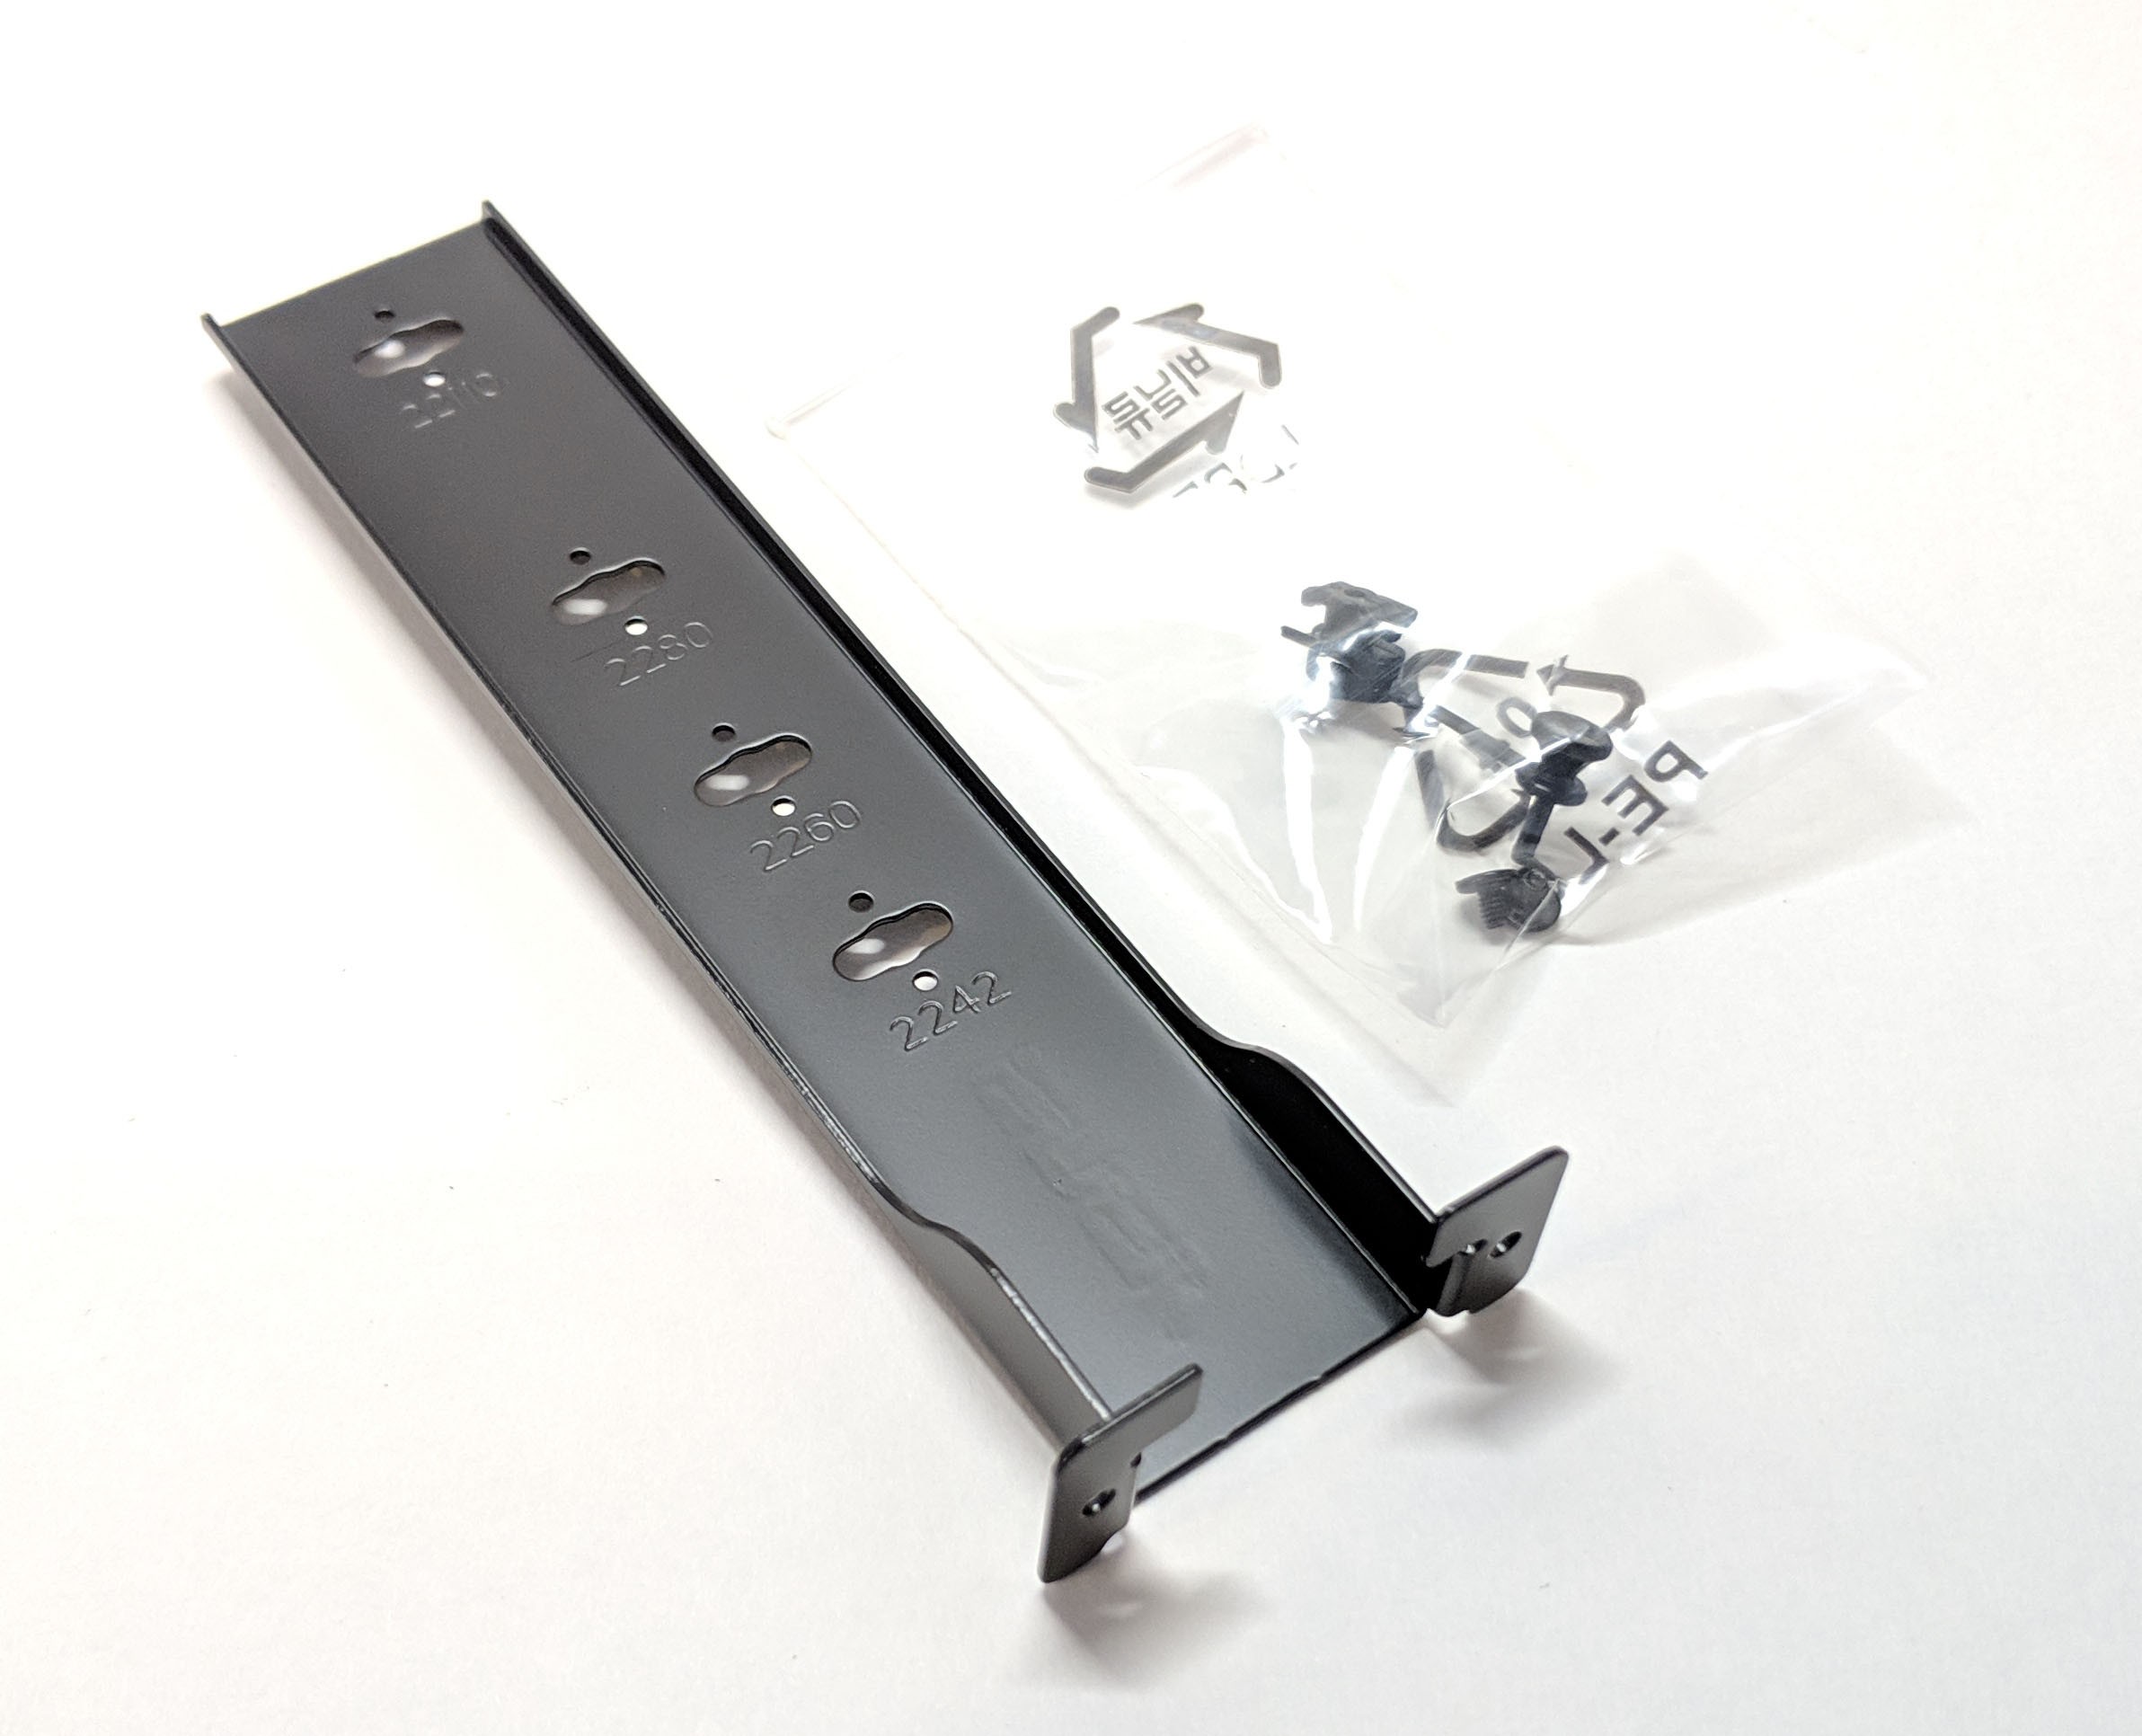
- 1 x Vertical M.2 bracket set
- 4 x SATA 6Gb/s cable(s)
- 1 x M.2 Screw Package
- 1 x pack of cable ties
- 1 x Driver/Software DVD
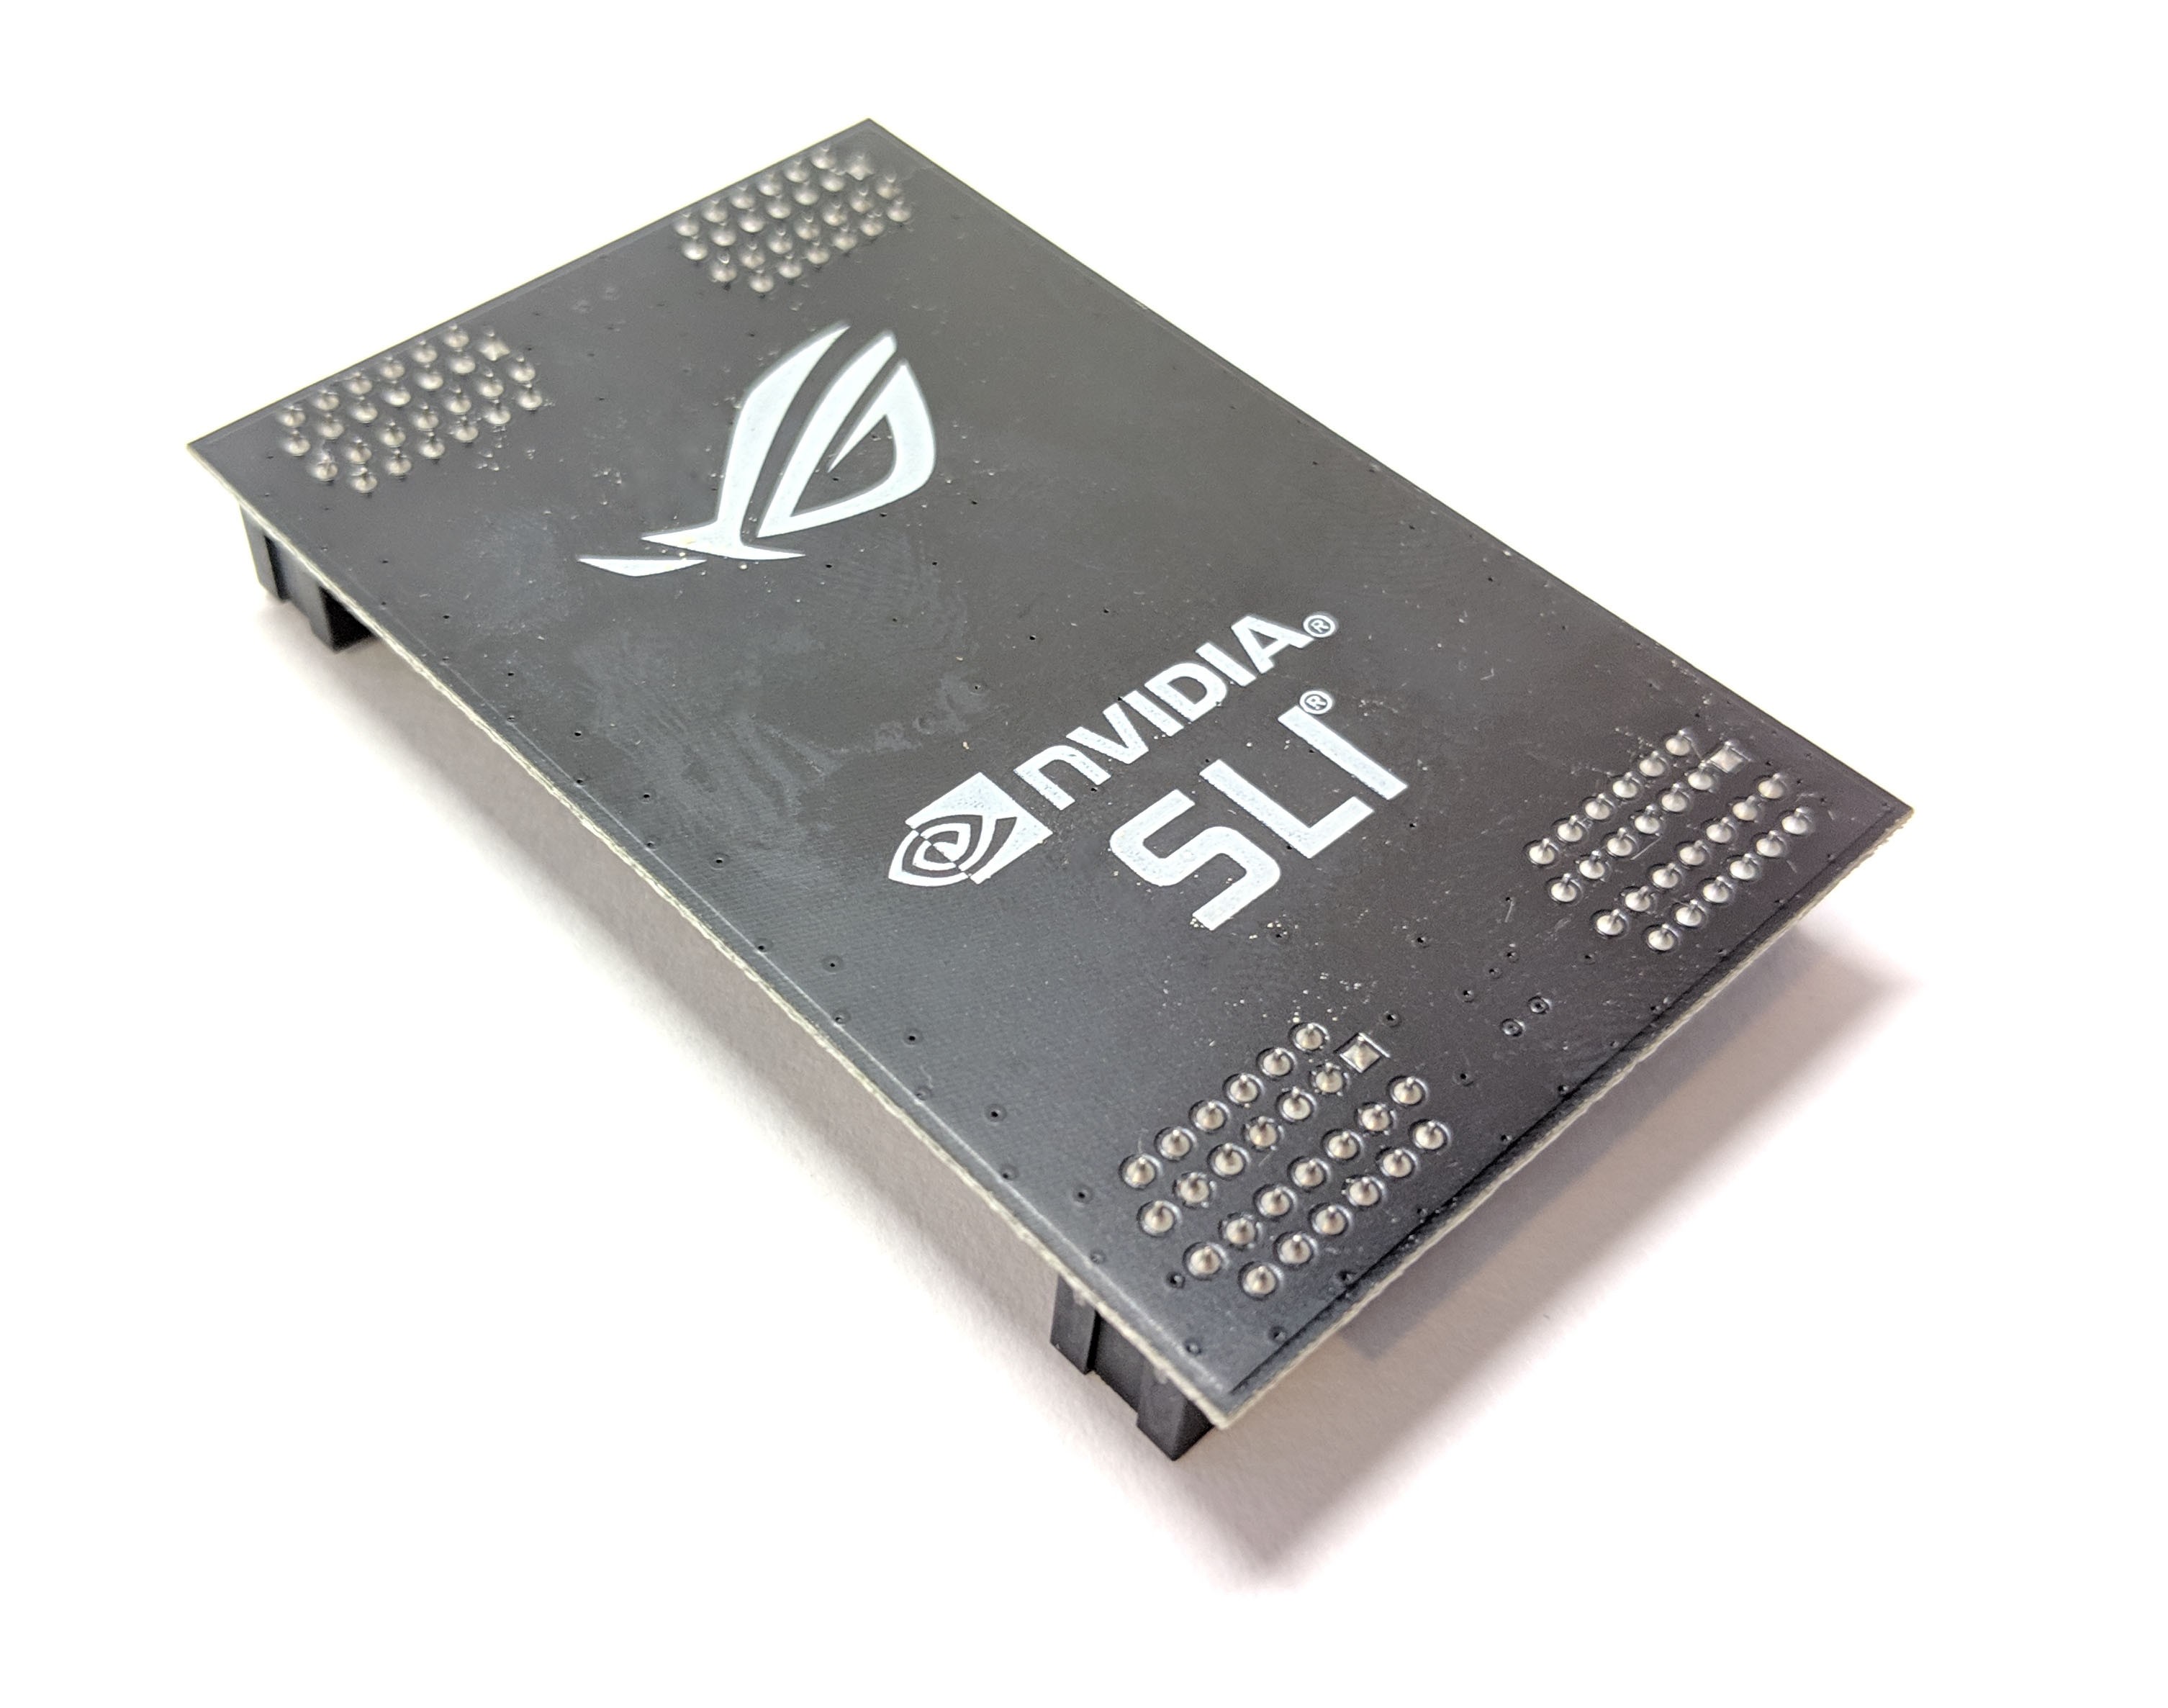
- 1 x SLI HB BRIDGE(2-WAY-M)
- 1 x Q-Connector
- 1 x 10-in-1 ROG cable label
- 1 x Thermal sensor cable pack(s)
- ROG Fan Label
- 1 x ROG Door Hanger(s)
- 1 x Extension cable for Addressable LED
Here are a couple closeups of a few of the components. The first is some kind of ancient technology called an SLI Bridge, and the other is the vertical M.2 SSD bracket.
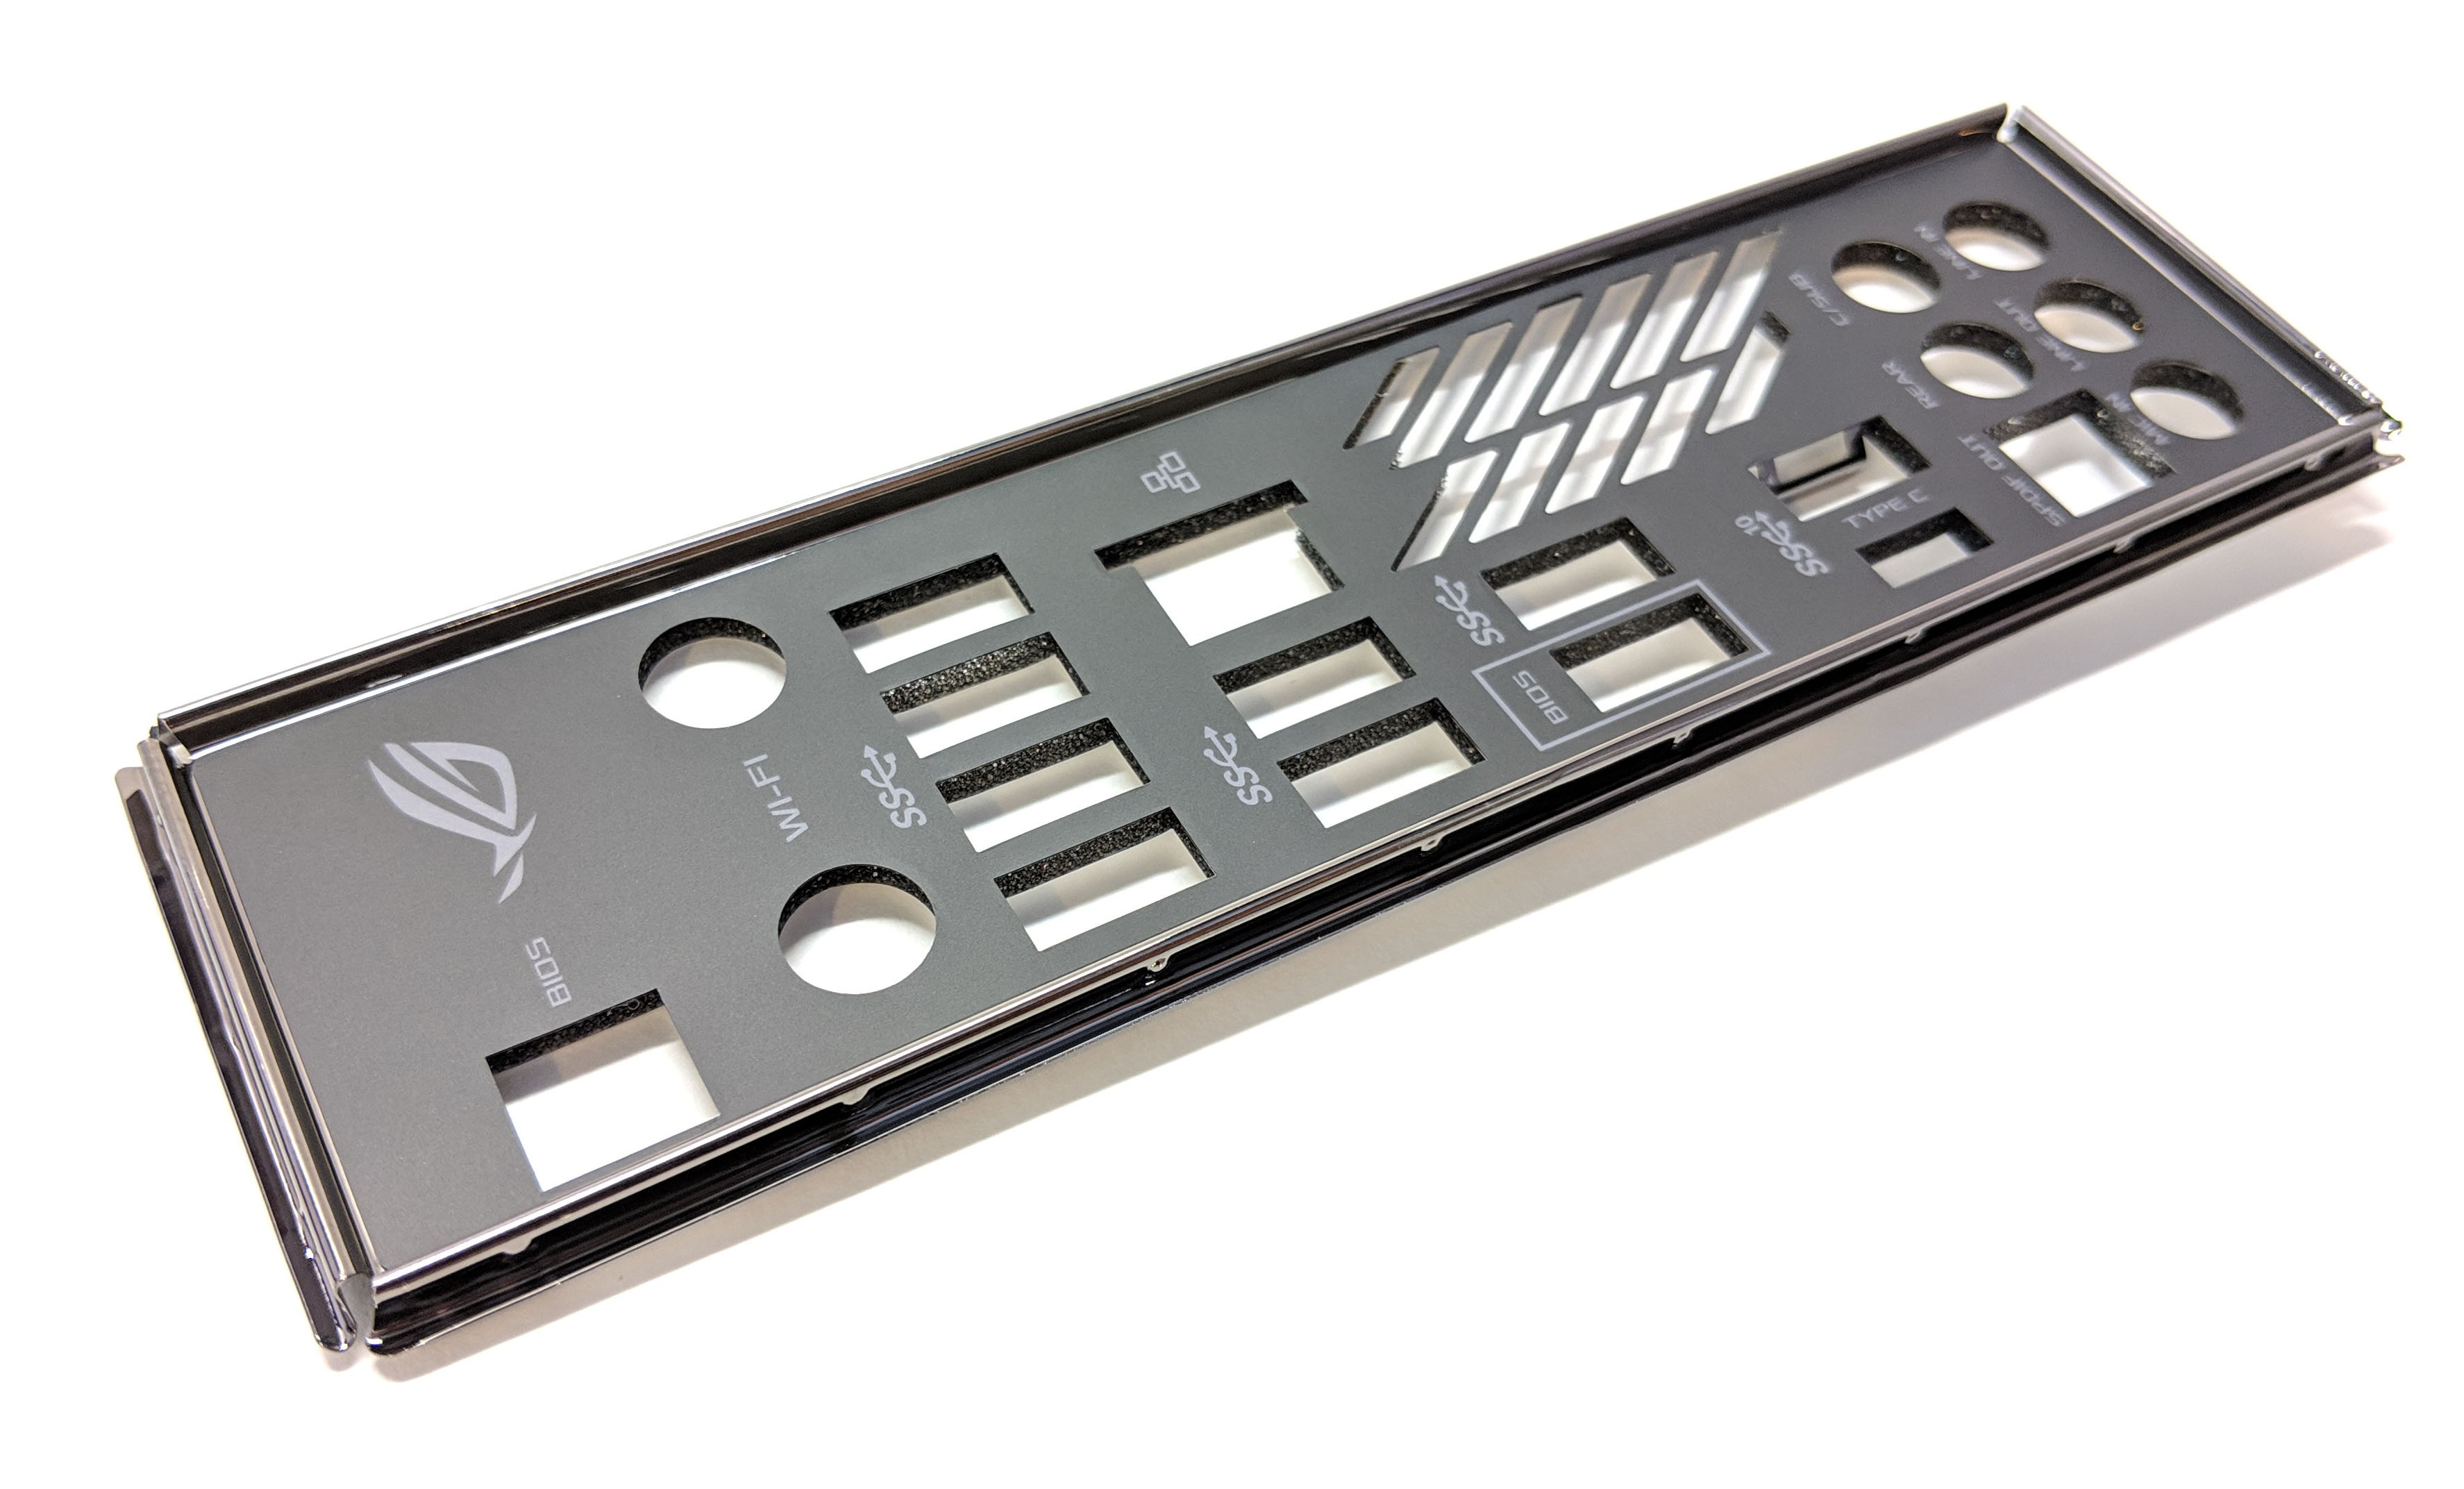
Next is the I/O shield. I was slightly disappointed that the motherboard did not come with a built in I/O shield as most motherboard seem to come with them pre-installed now days.
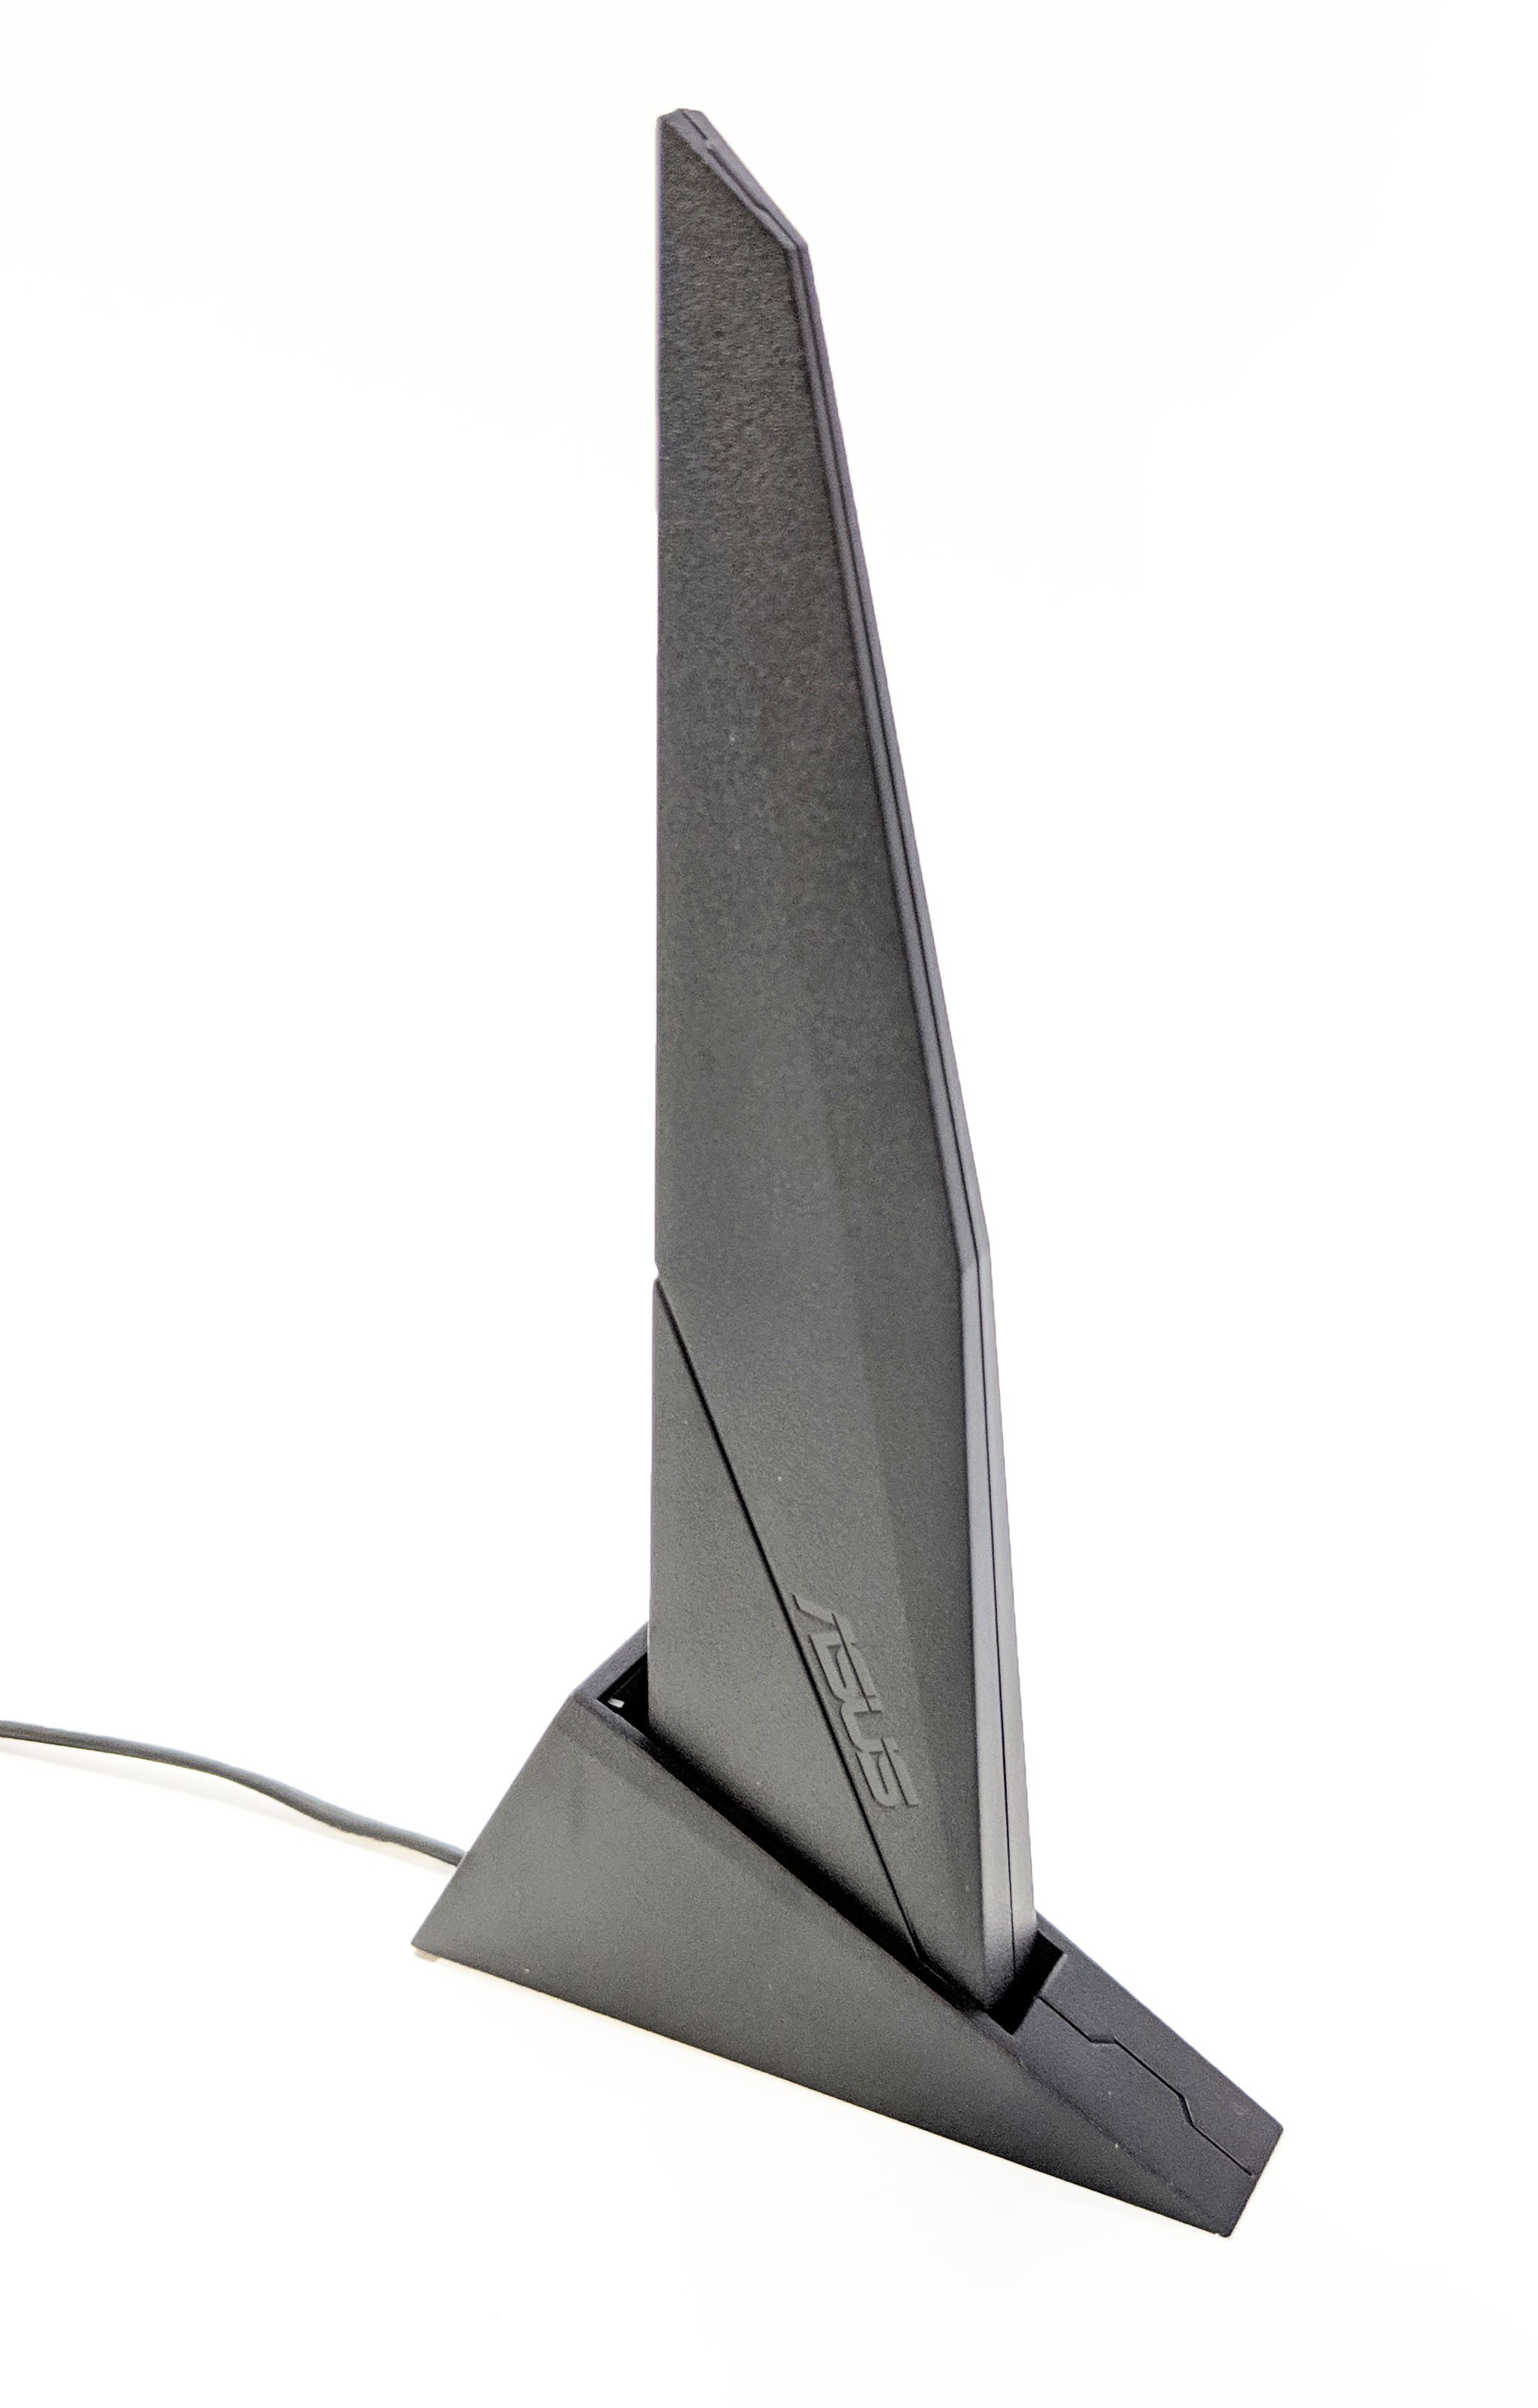
The WiFi antenna comes disassembled into two main pieces. Simply insert the long skinny antenna portion through the base until you hear a click.

As far as accessories go that’s pretty much everything worth mentioning. Next, let’s get the motherboard out of the bag and take a closer look!
A Closer Look…
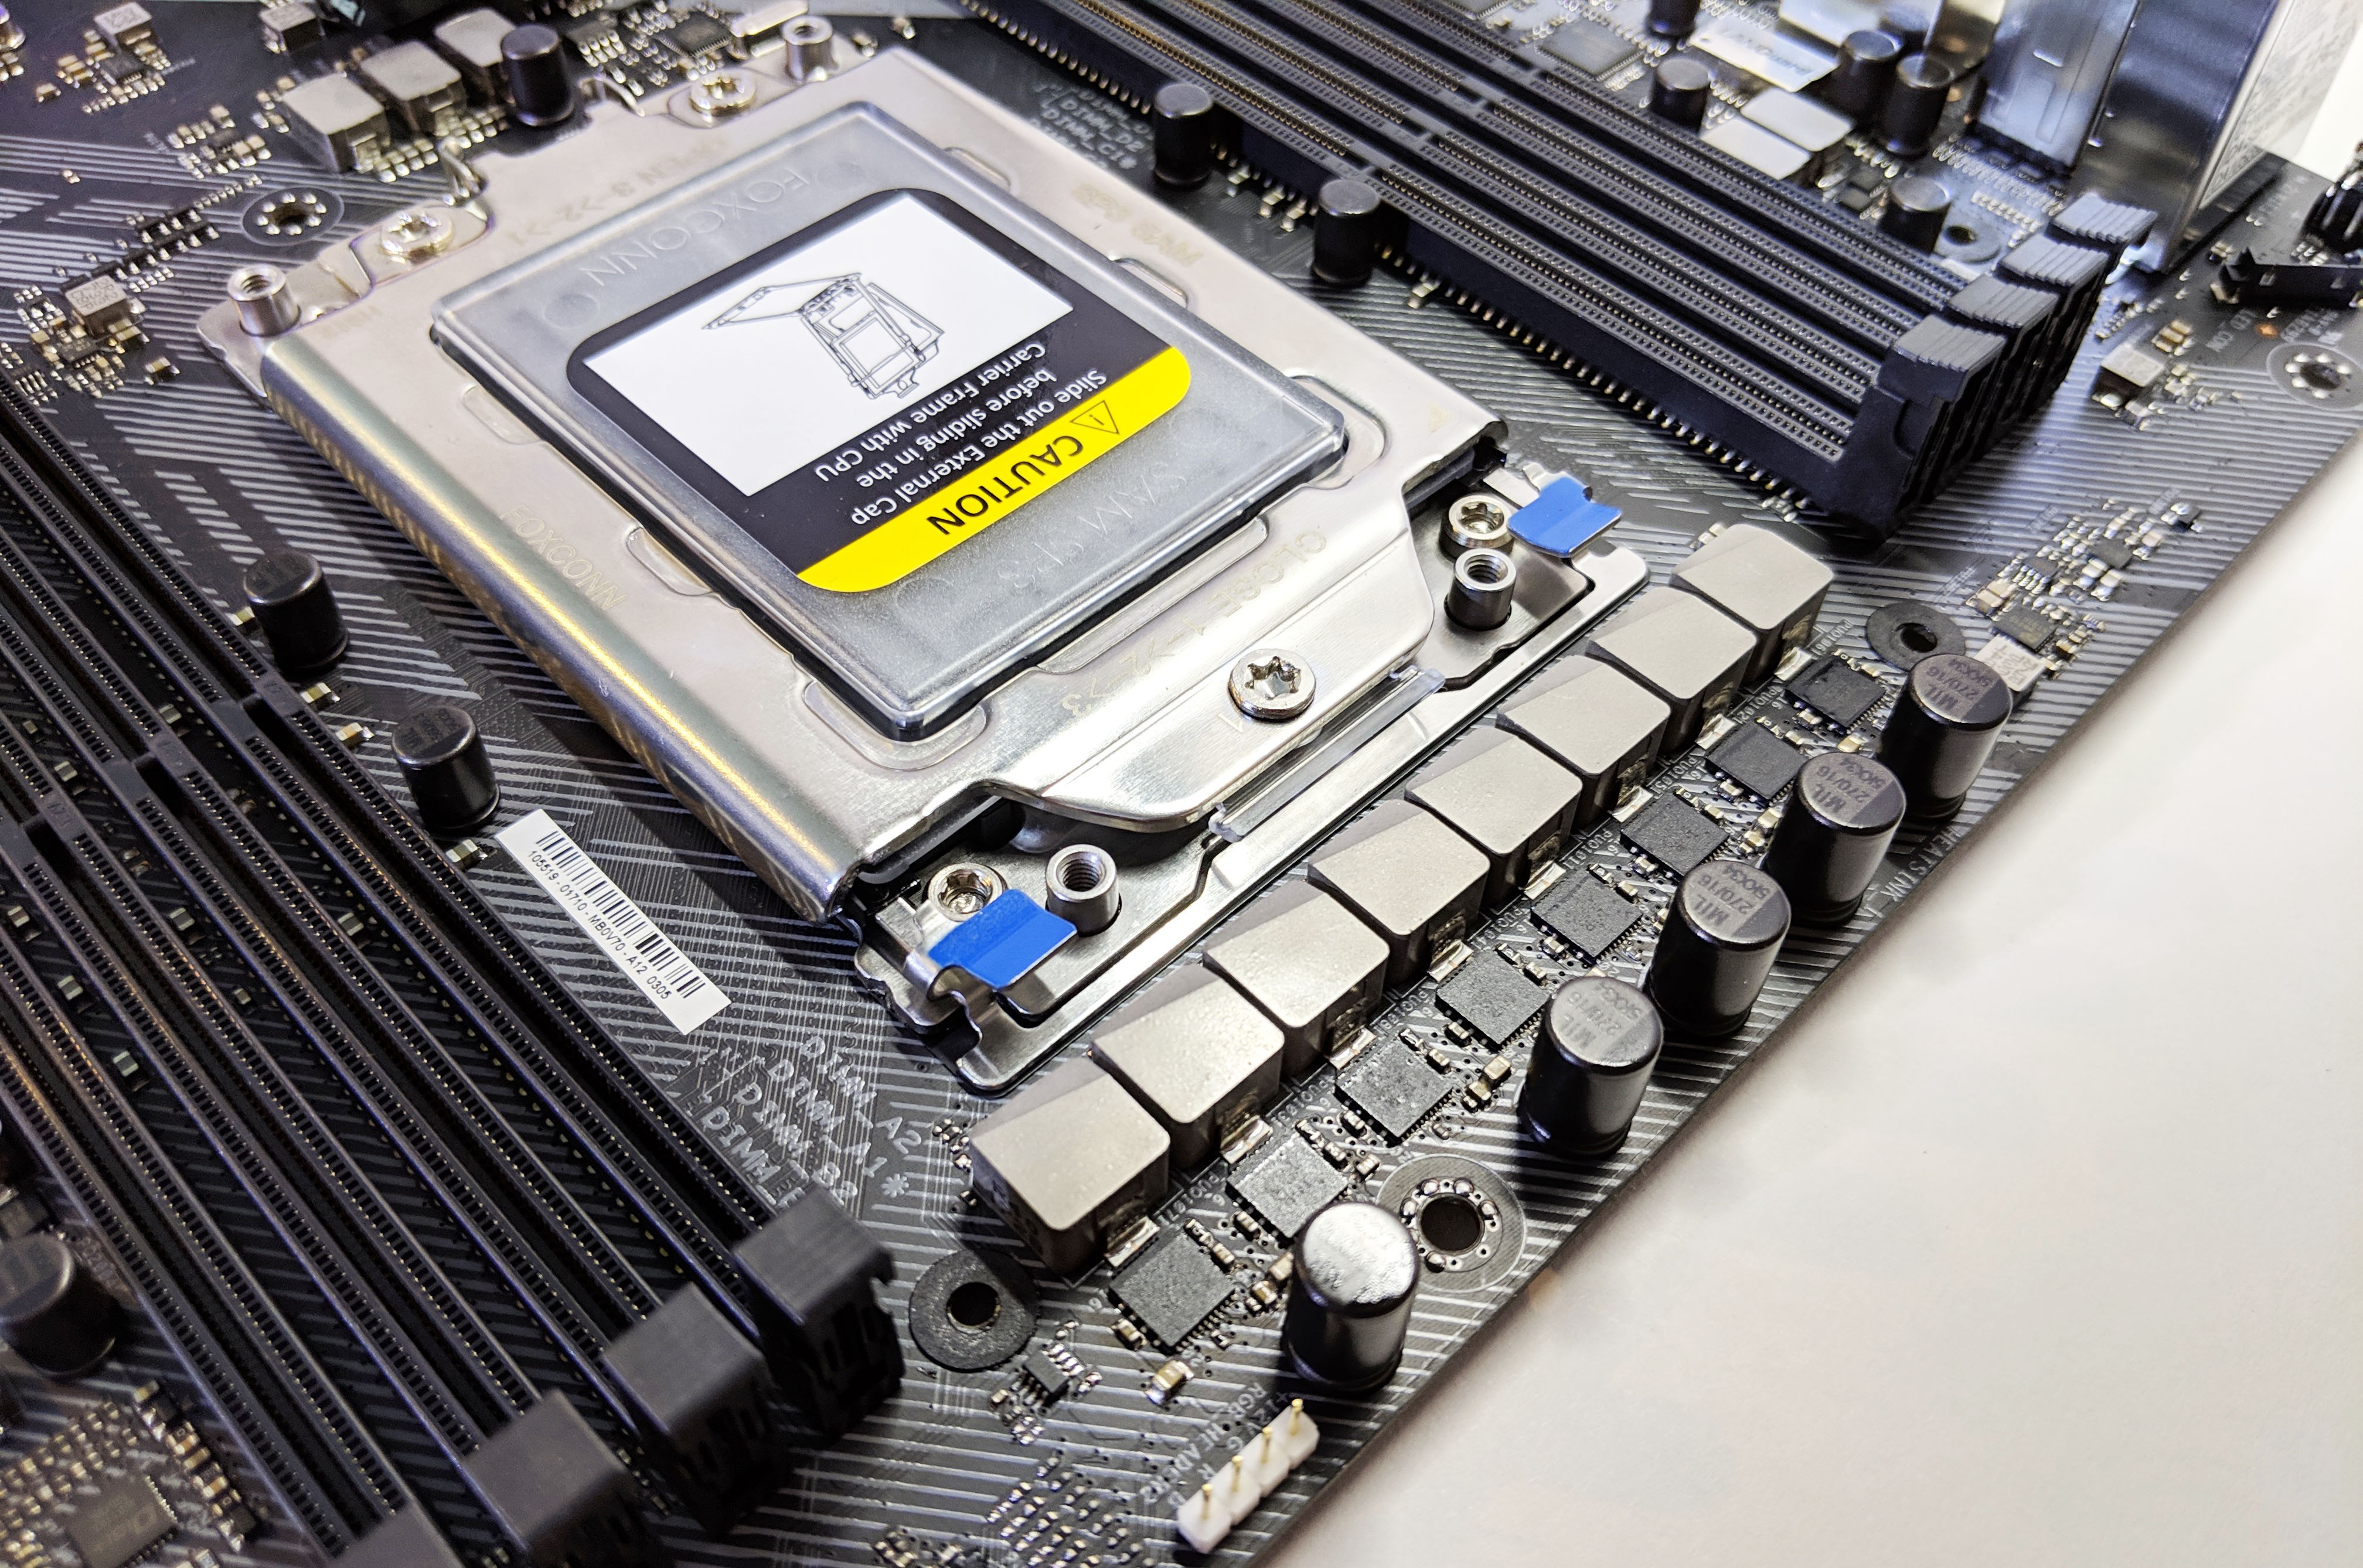
The “E-ATX” motherboard is overall a bit larger than your standard motherboard. Those of you unfamiliar with the TR4/Threadripper socket will likely first notice how massive the thing is, extending almost the entire length of your DDR4 memory banks.
Overall, the layout of the ASUS ROG Strix X399-E Gaming motherboard is quite good. It’s design features a black PCB with white silk screen overlay which adds to the uniqueness of the board.
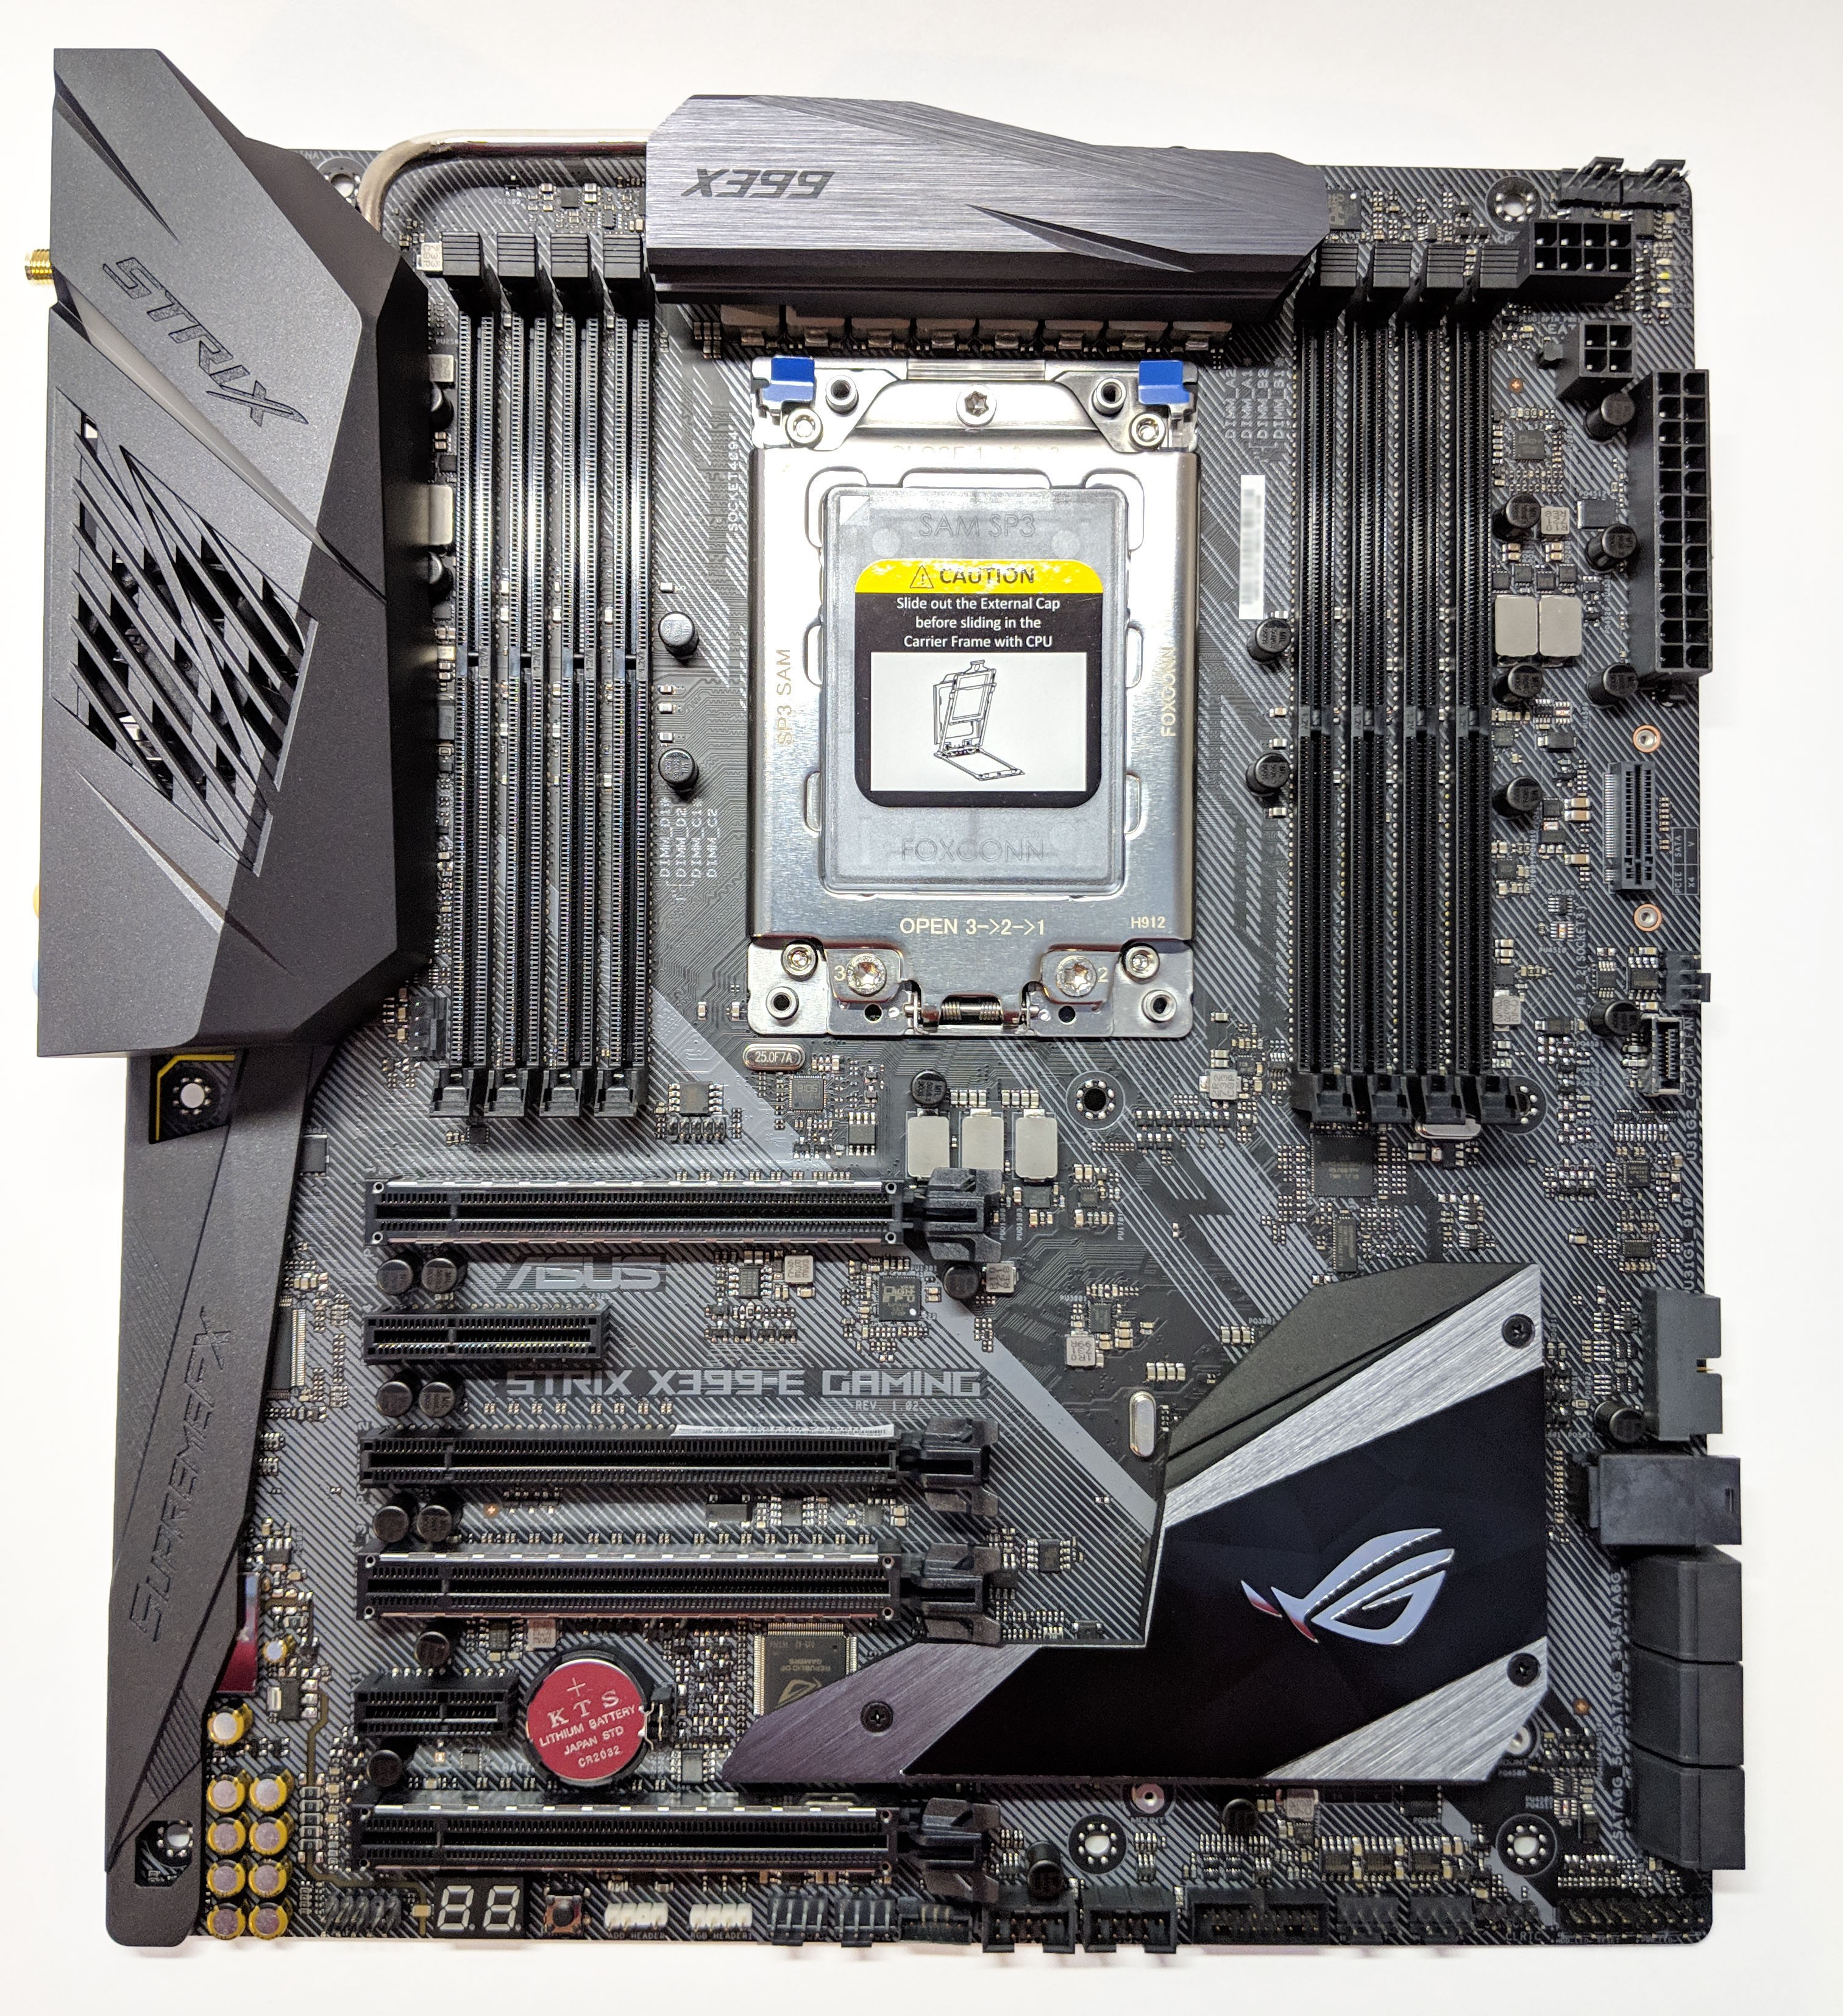
Next, let’s take some time an go over the motherboard’s many features. We’ll start at the bottom and work our way up.
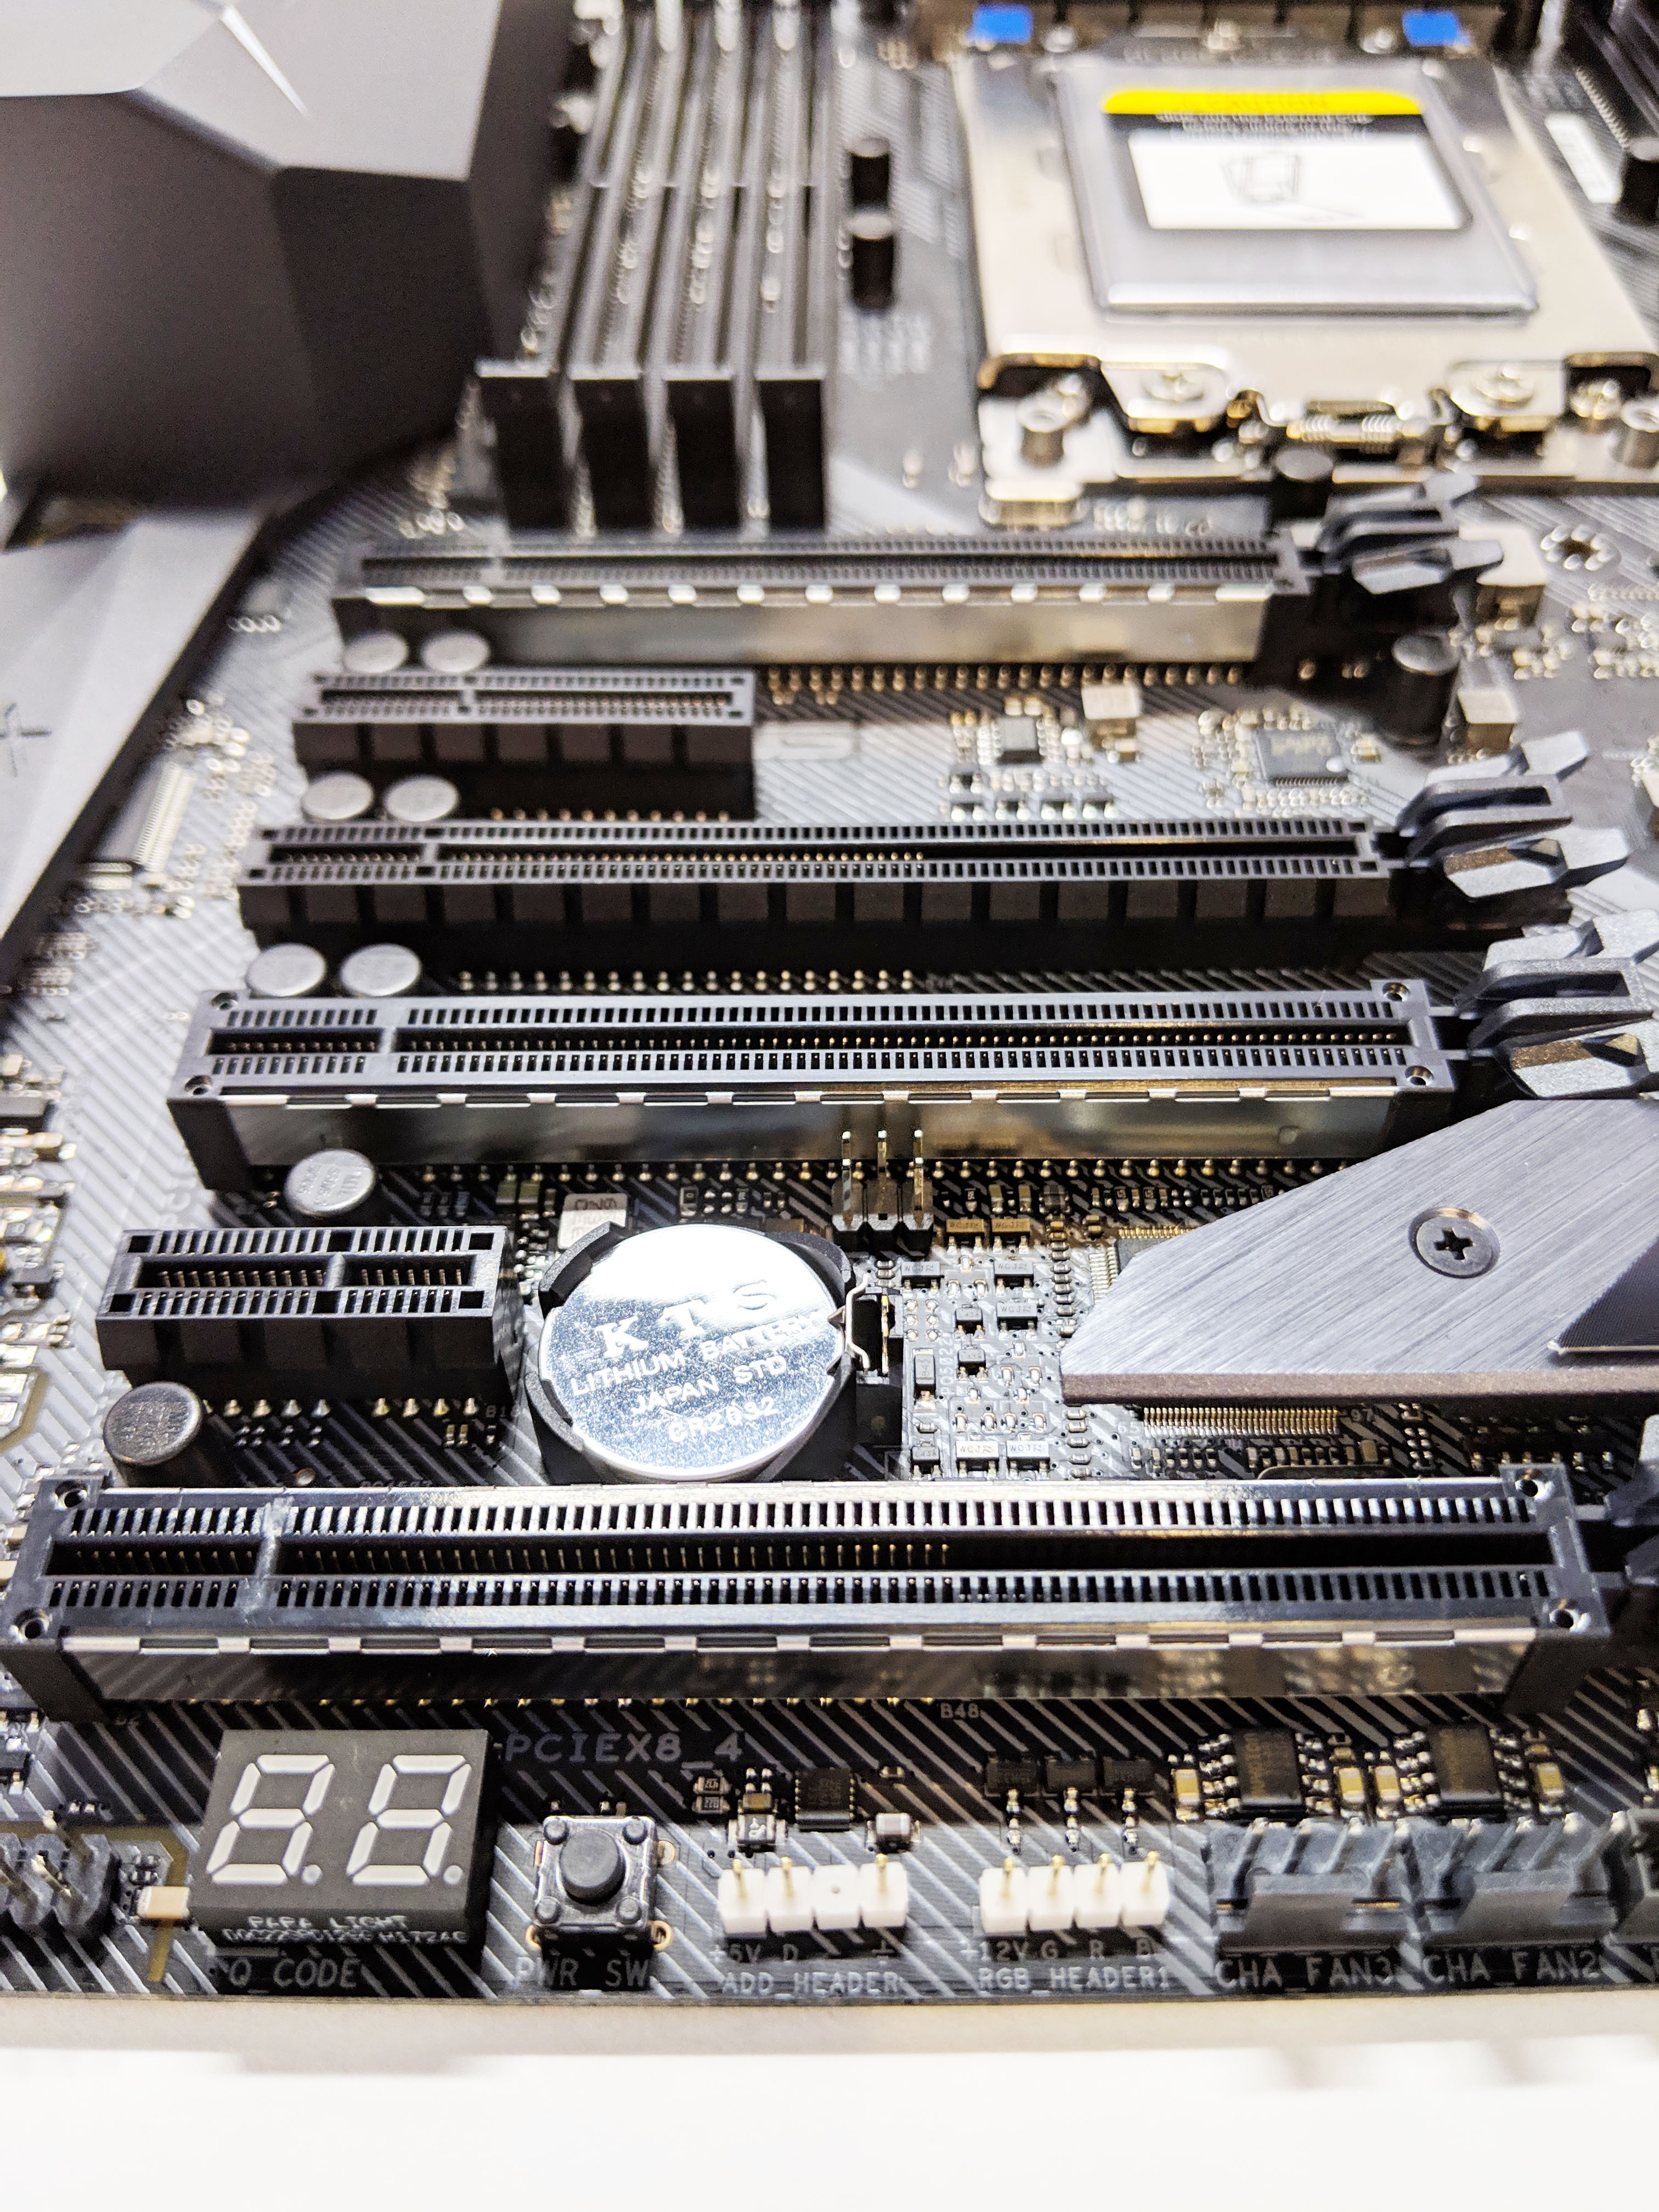
The motherboard features six PCIe 3.0 slots with four of them being x16 a single x1 and a single x4 slot. Three of the PCIe slots are metal reinforced. I assume that this is where ASUS is subtly telling you to install your massive GPUs. When three graphics cards are used, the PCIe lanes will run at x16/x16/x8 mode. The last lane is downgraded because X399 motherboards support up to three M.2 NVMe drives that operate at x4 mode. Meaning at least 12 lanes are put towards storage, two in this case.
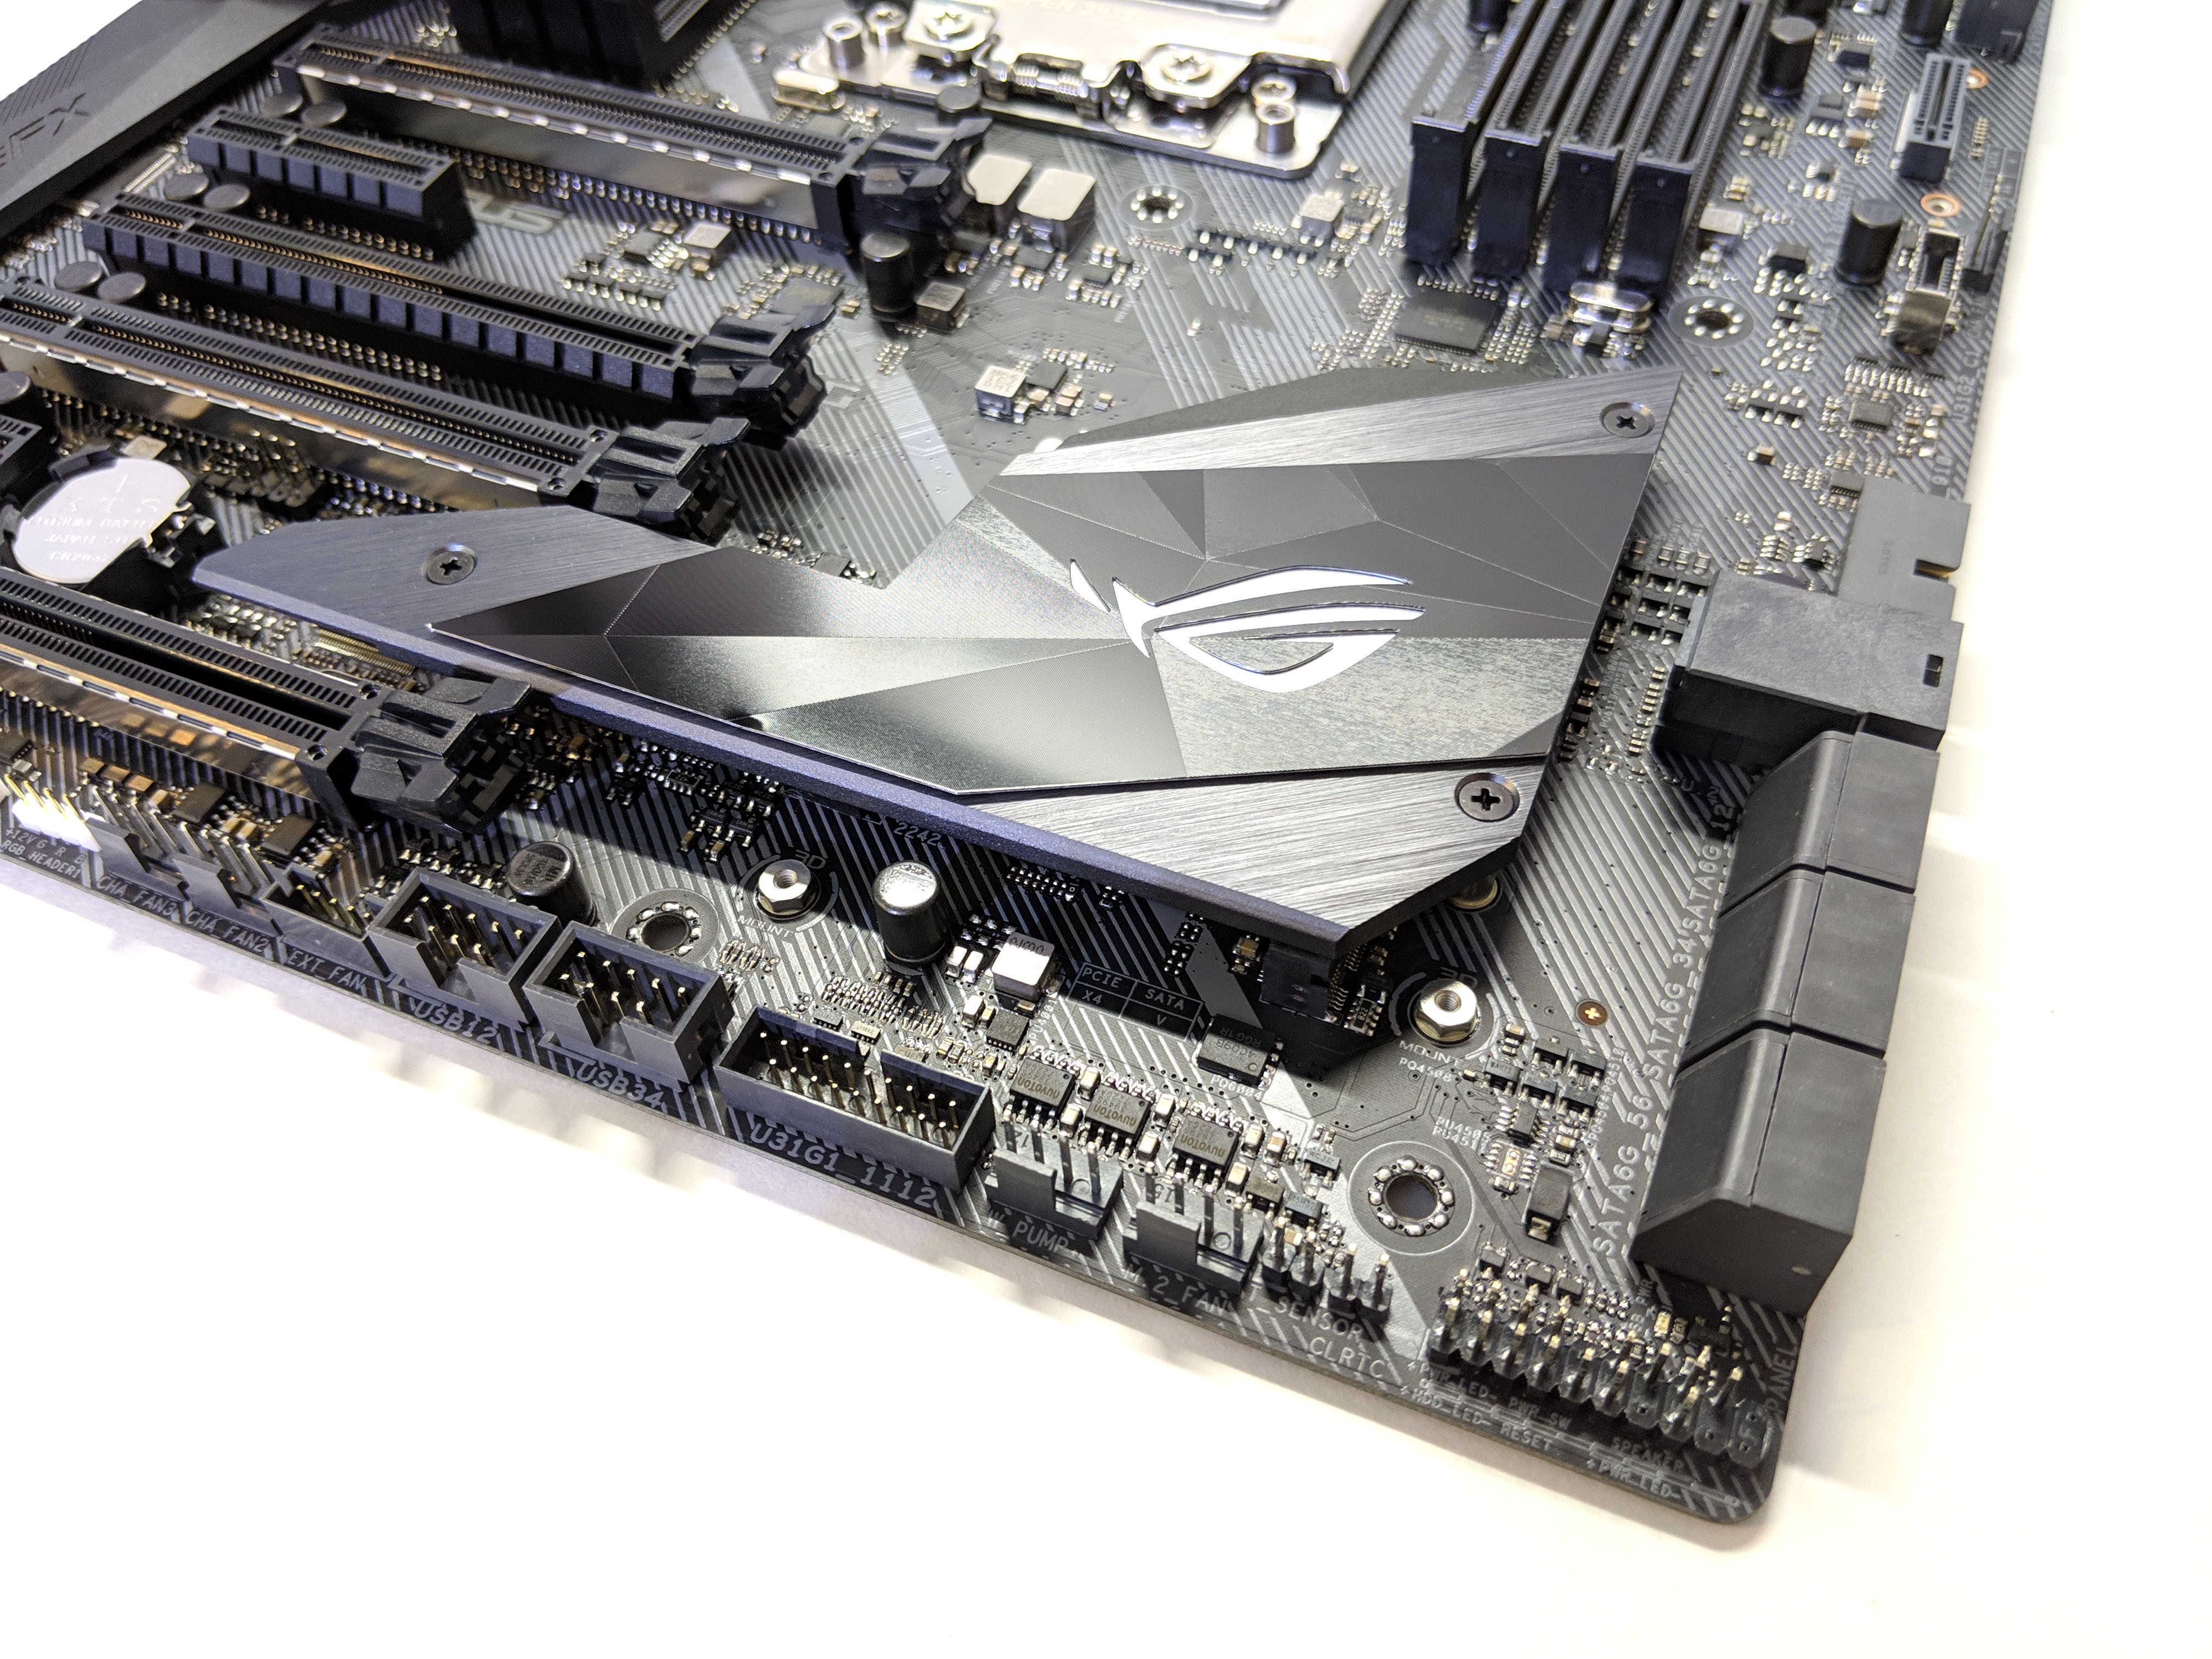
To the east of the expansion slots is the chip set cooler which also doubles as a M.2 SSD heatsink. Simply remove the three screws holding the heatsink in place to reveal the M.2 slot. The three screws tighten down inside fixed standoffs, no reverse side motherboard access is needed.
Along the bottom of the motherboard we’ve got a host of ports. Starting from the left there is the front panel button/LED connector, CMOS reset pins, two 4-pin PWM fan connectors, A USB 3.0 Gen1 front panel connector, 2x USB 2.0 front panel connectors, an EXT_FAN connector (used with an ASUS fan extension card), 2x more 4-pin PWM fan connectors, a 4-pin analog RGB connector, and a 3-pin addressable RGB connector.

Along the right edge there are six SATA6 ports each angled 90 degrees for easy cabling. Next to that is a U.2 drive connector. U.2 is a double decker connector that receives a similarly double-decker cable from the SSD which provides both power and data to the SSD. Currently, U.2 SSDs are much more expensive than your typical M.2 or SATA drives, so it’s likely today you might not use it. It’s good to be future proofed if things ever change.
Lastly, there’s another 90-degree angled USB 3.1 Gen1 connector just north of the U.2 connector.

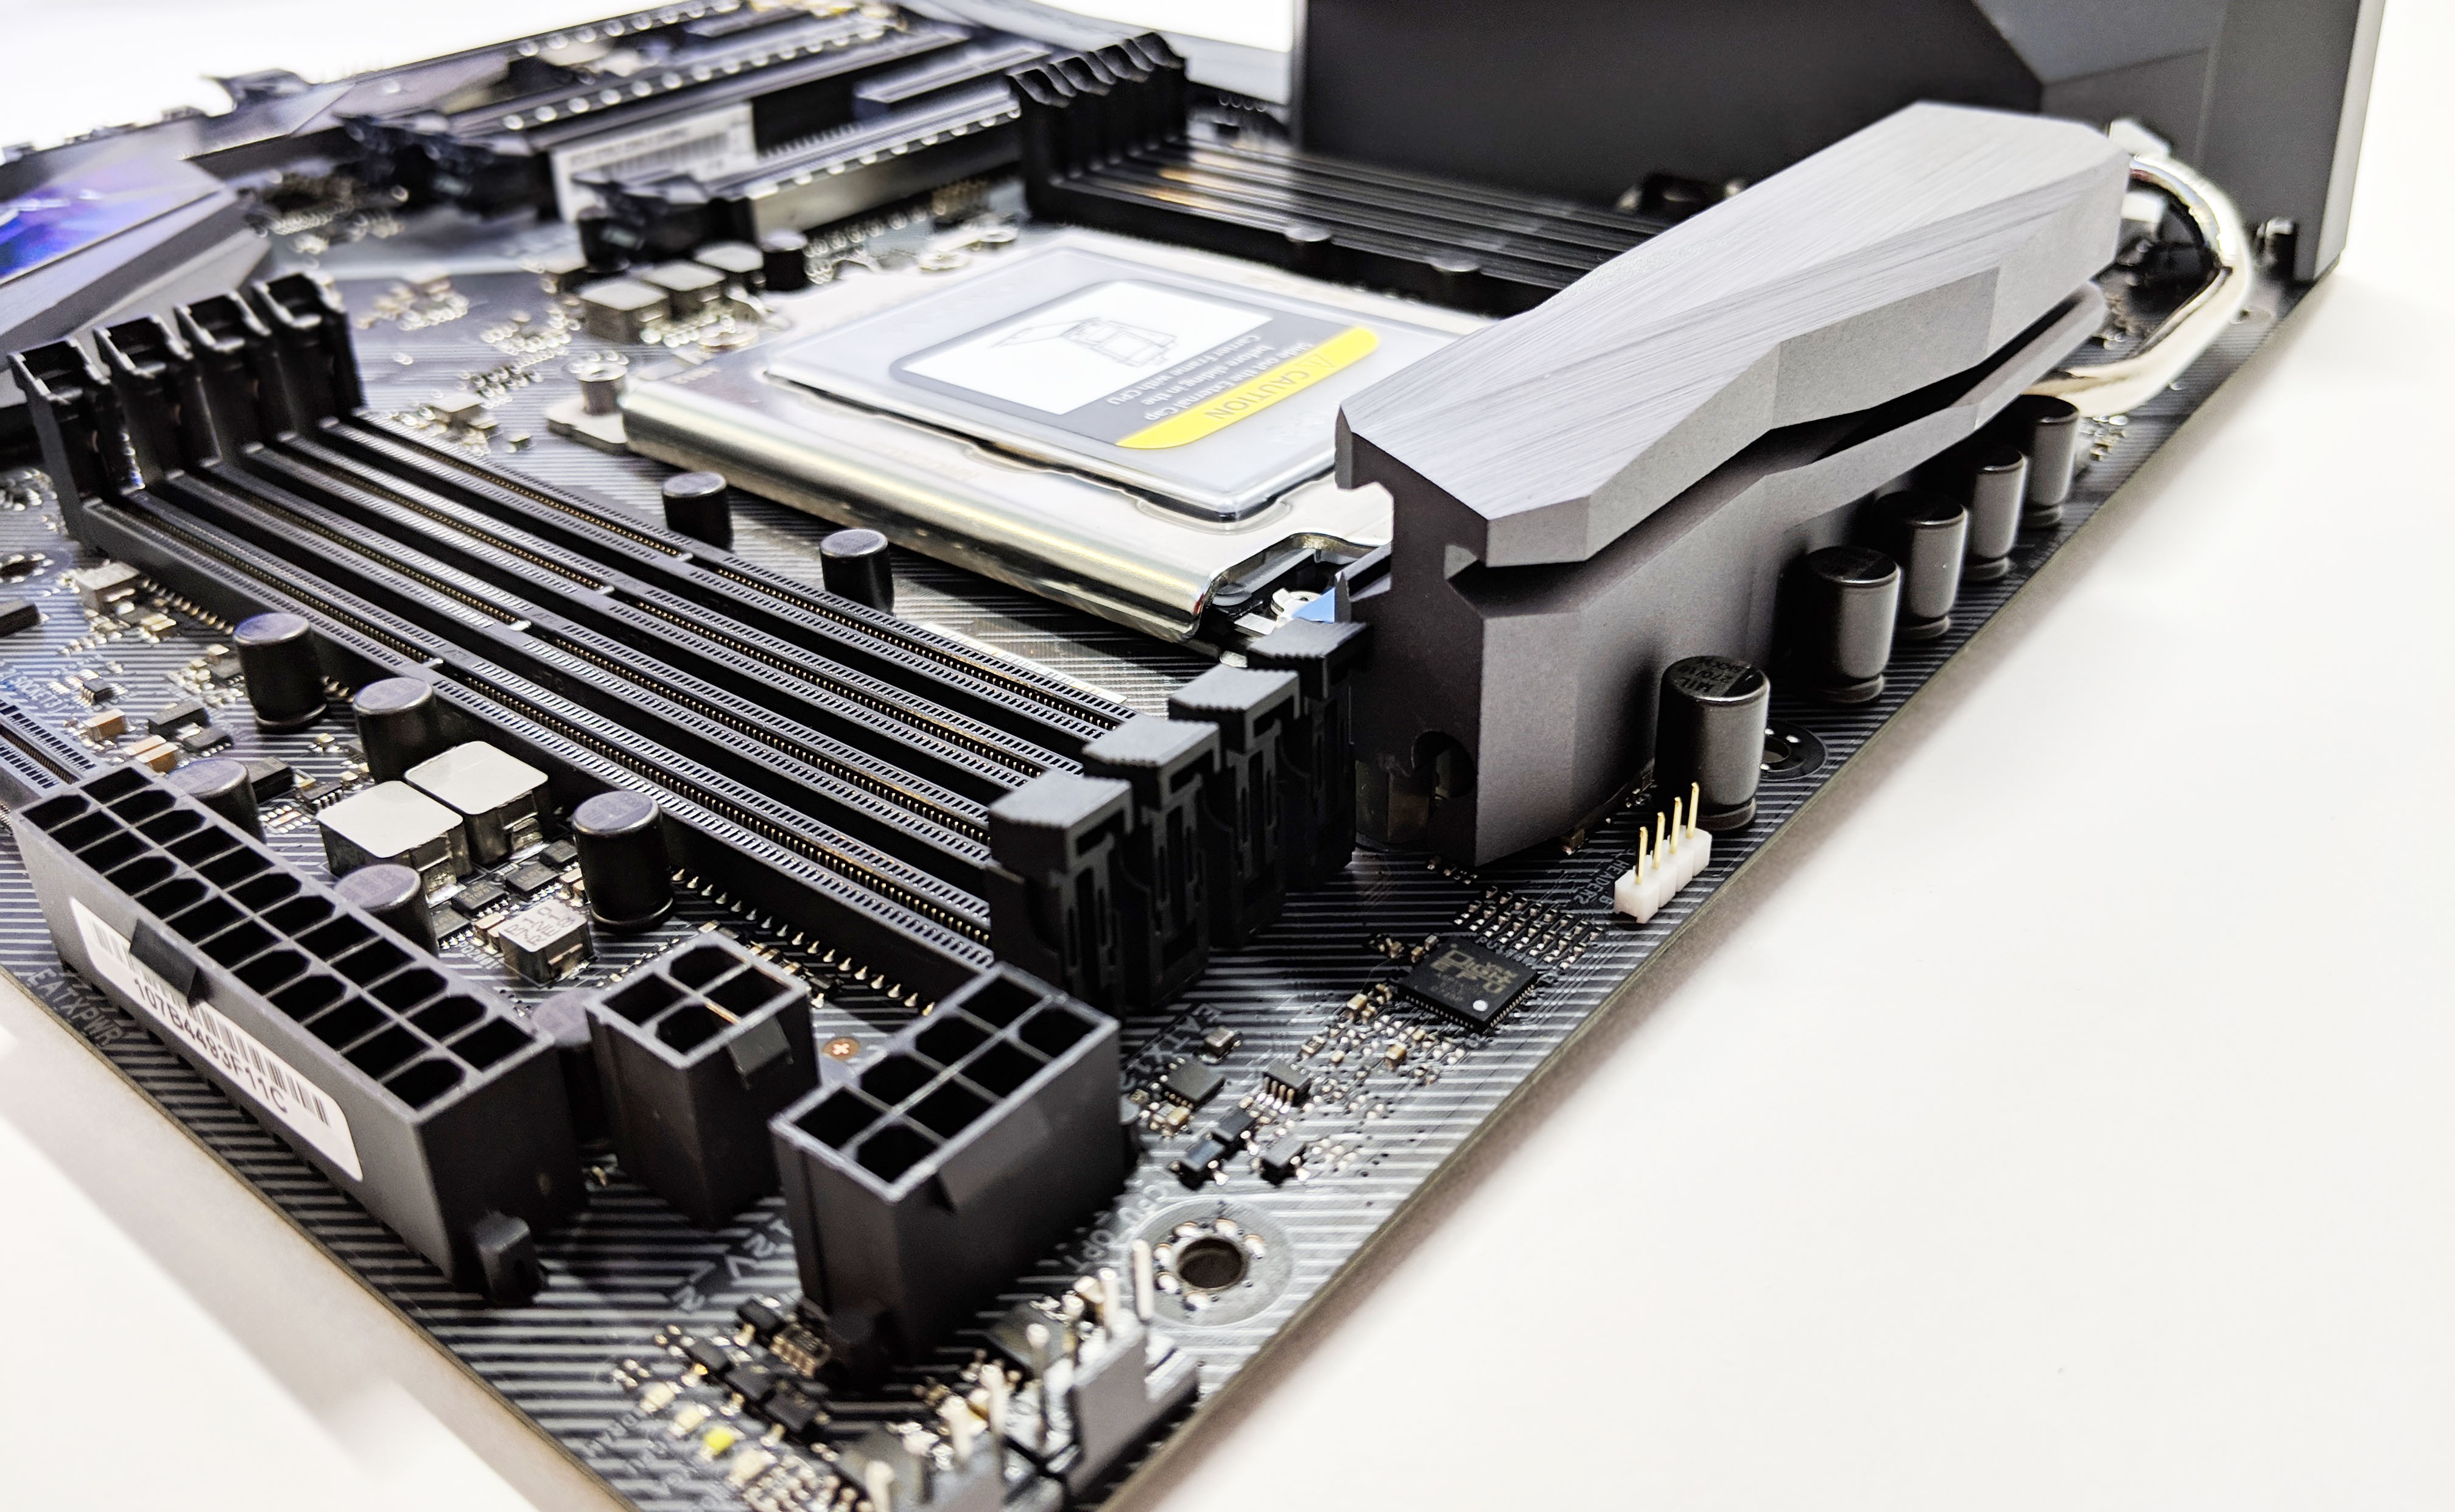
Sliding up the motherboard we’ve got even more connectors! The shiny left-most connector is a USB 3.1 Gen2 connector next to another 4-pin PWN fan connector. Next to that is the vertical mounted M.2 drive slot.
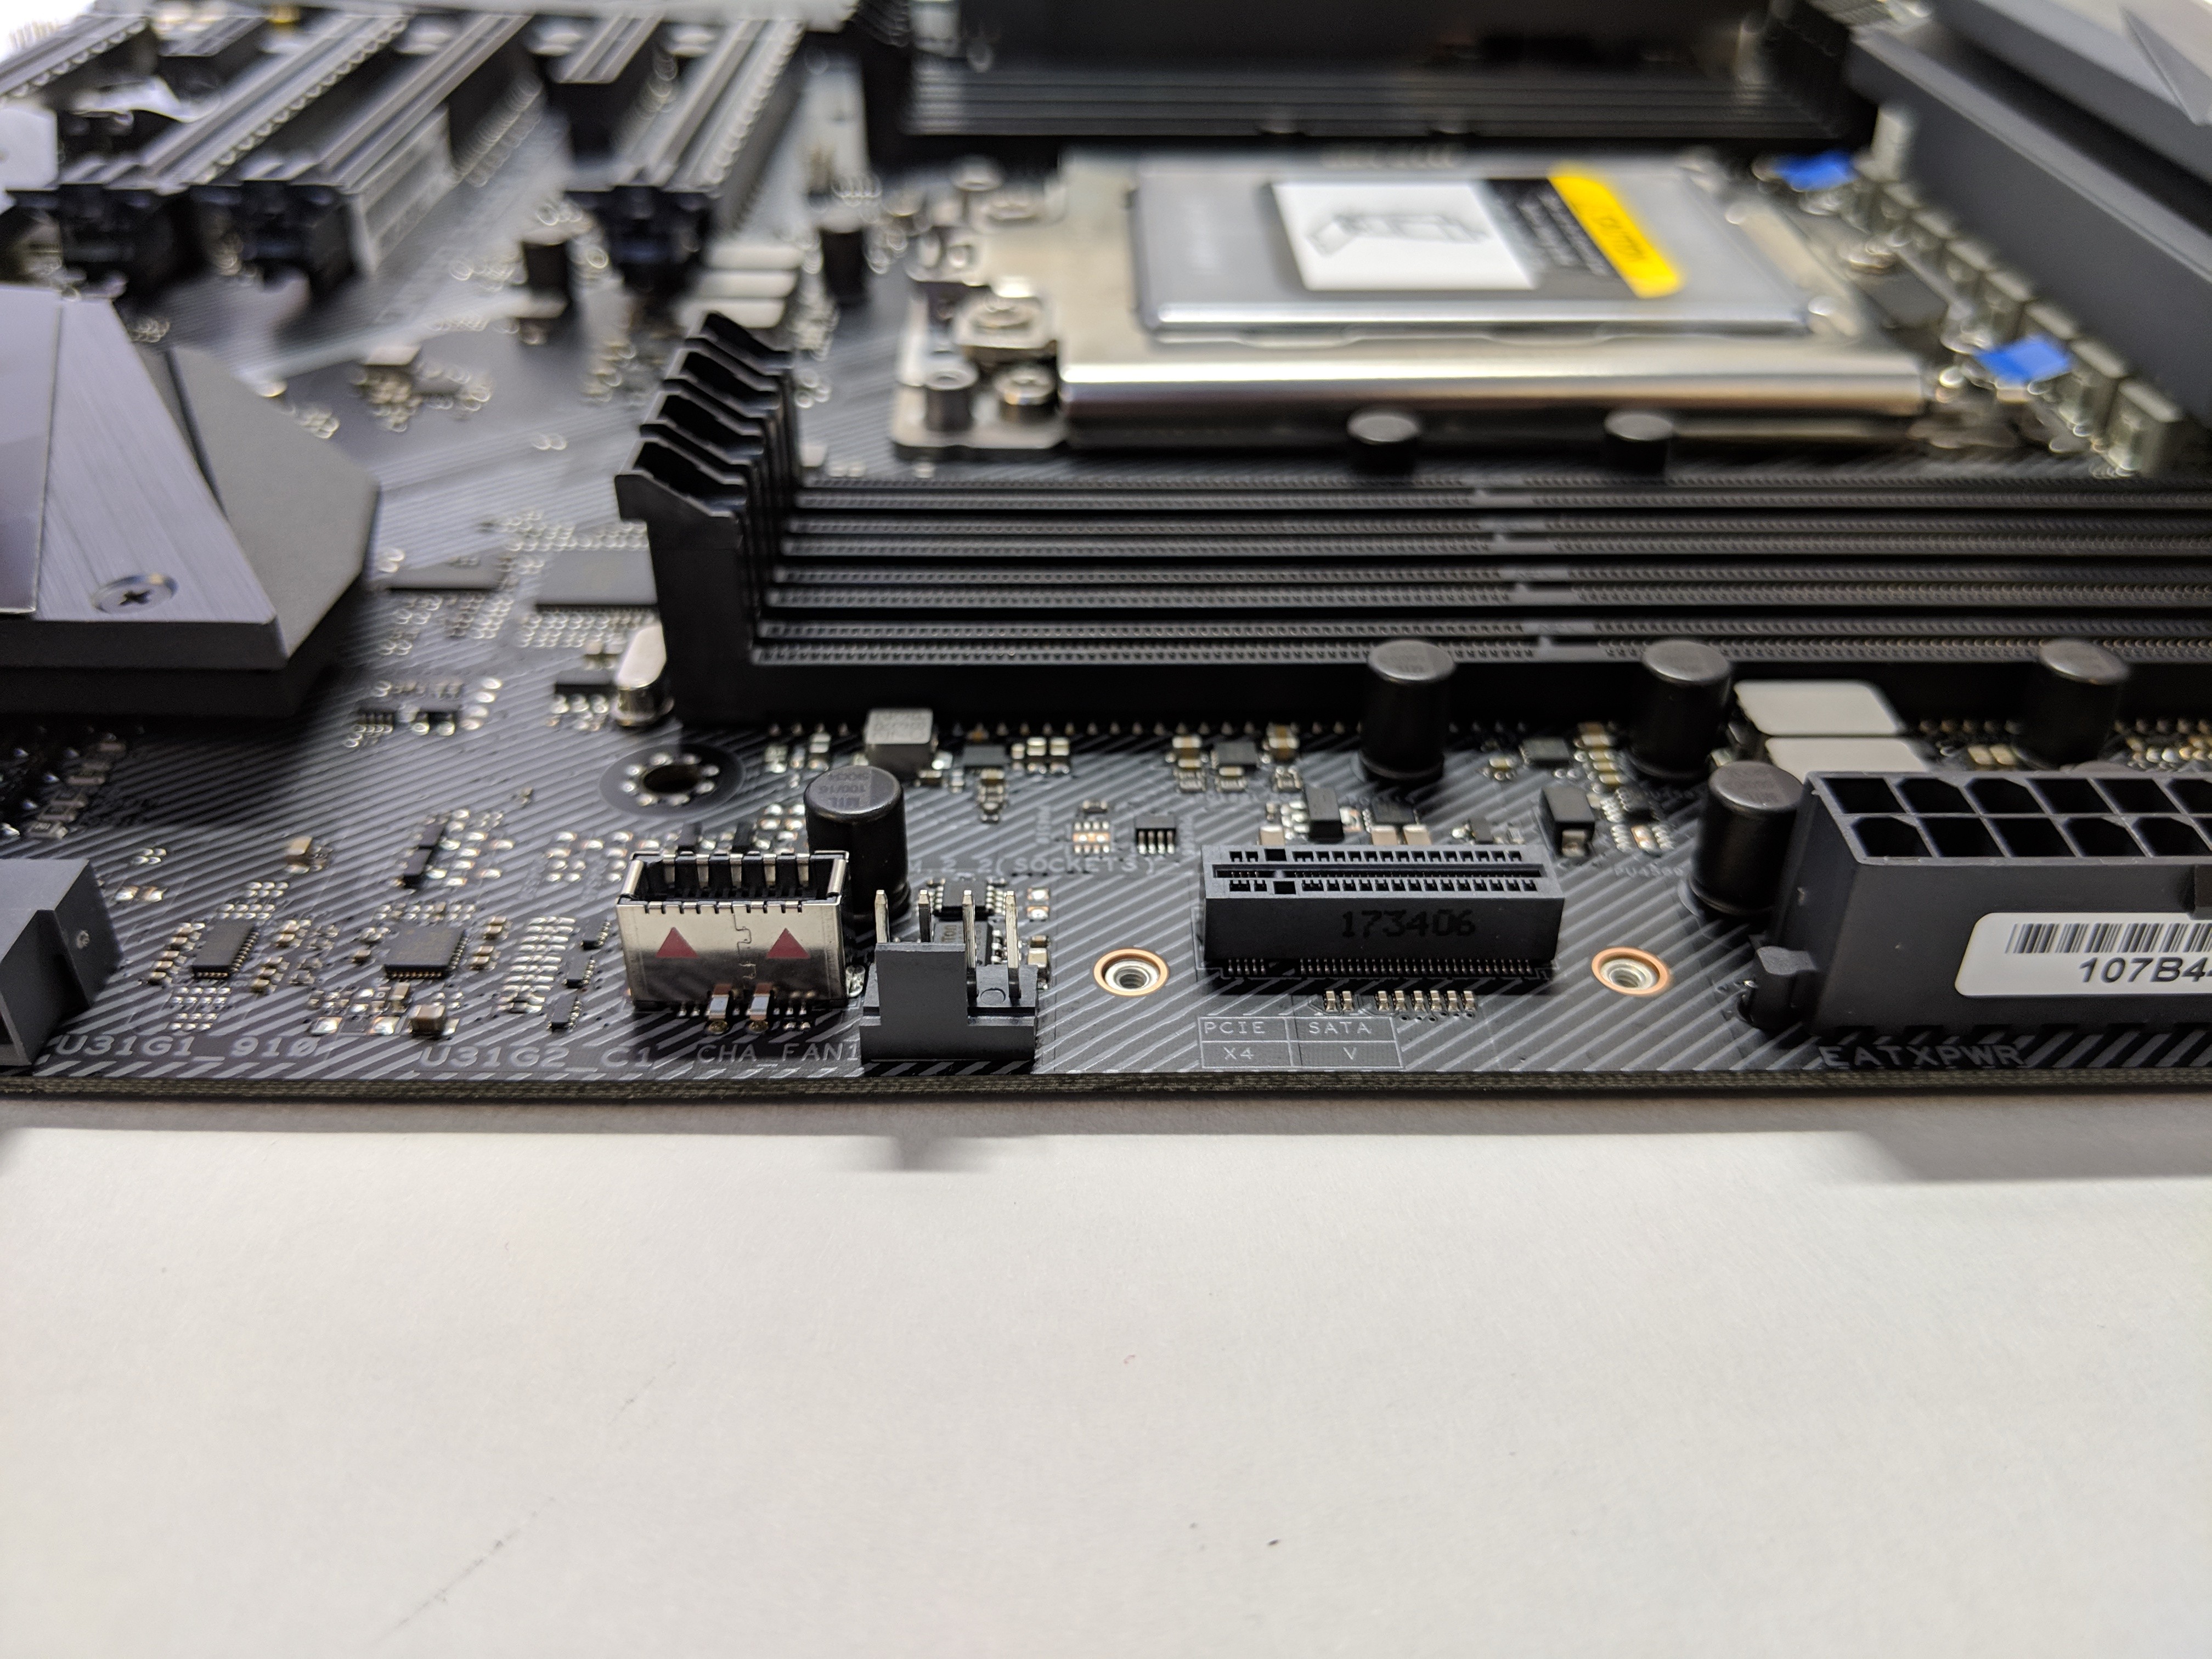
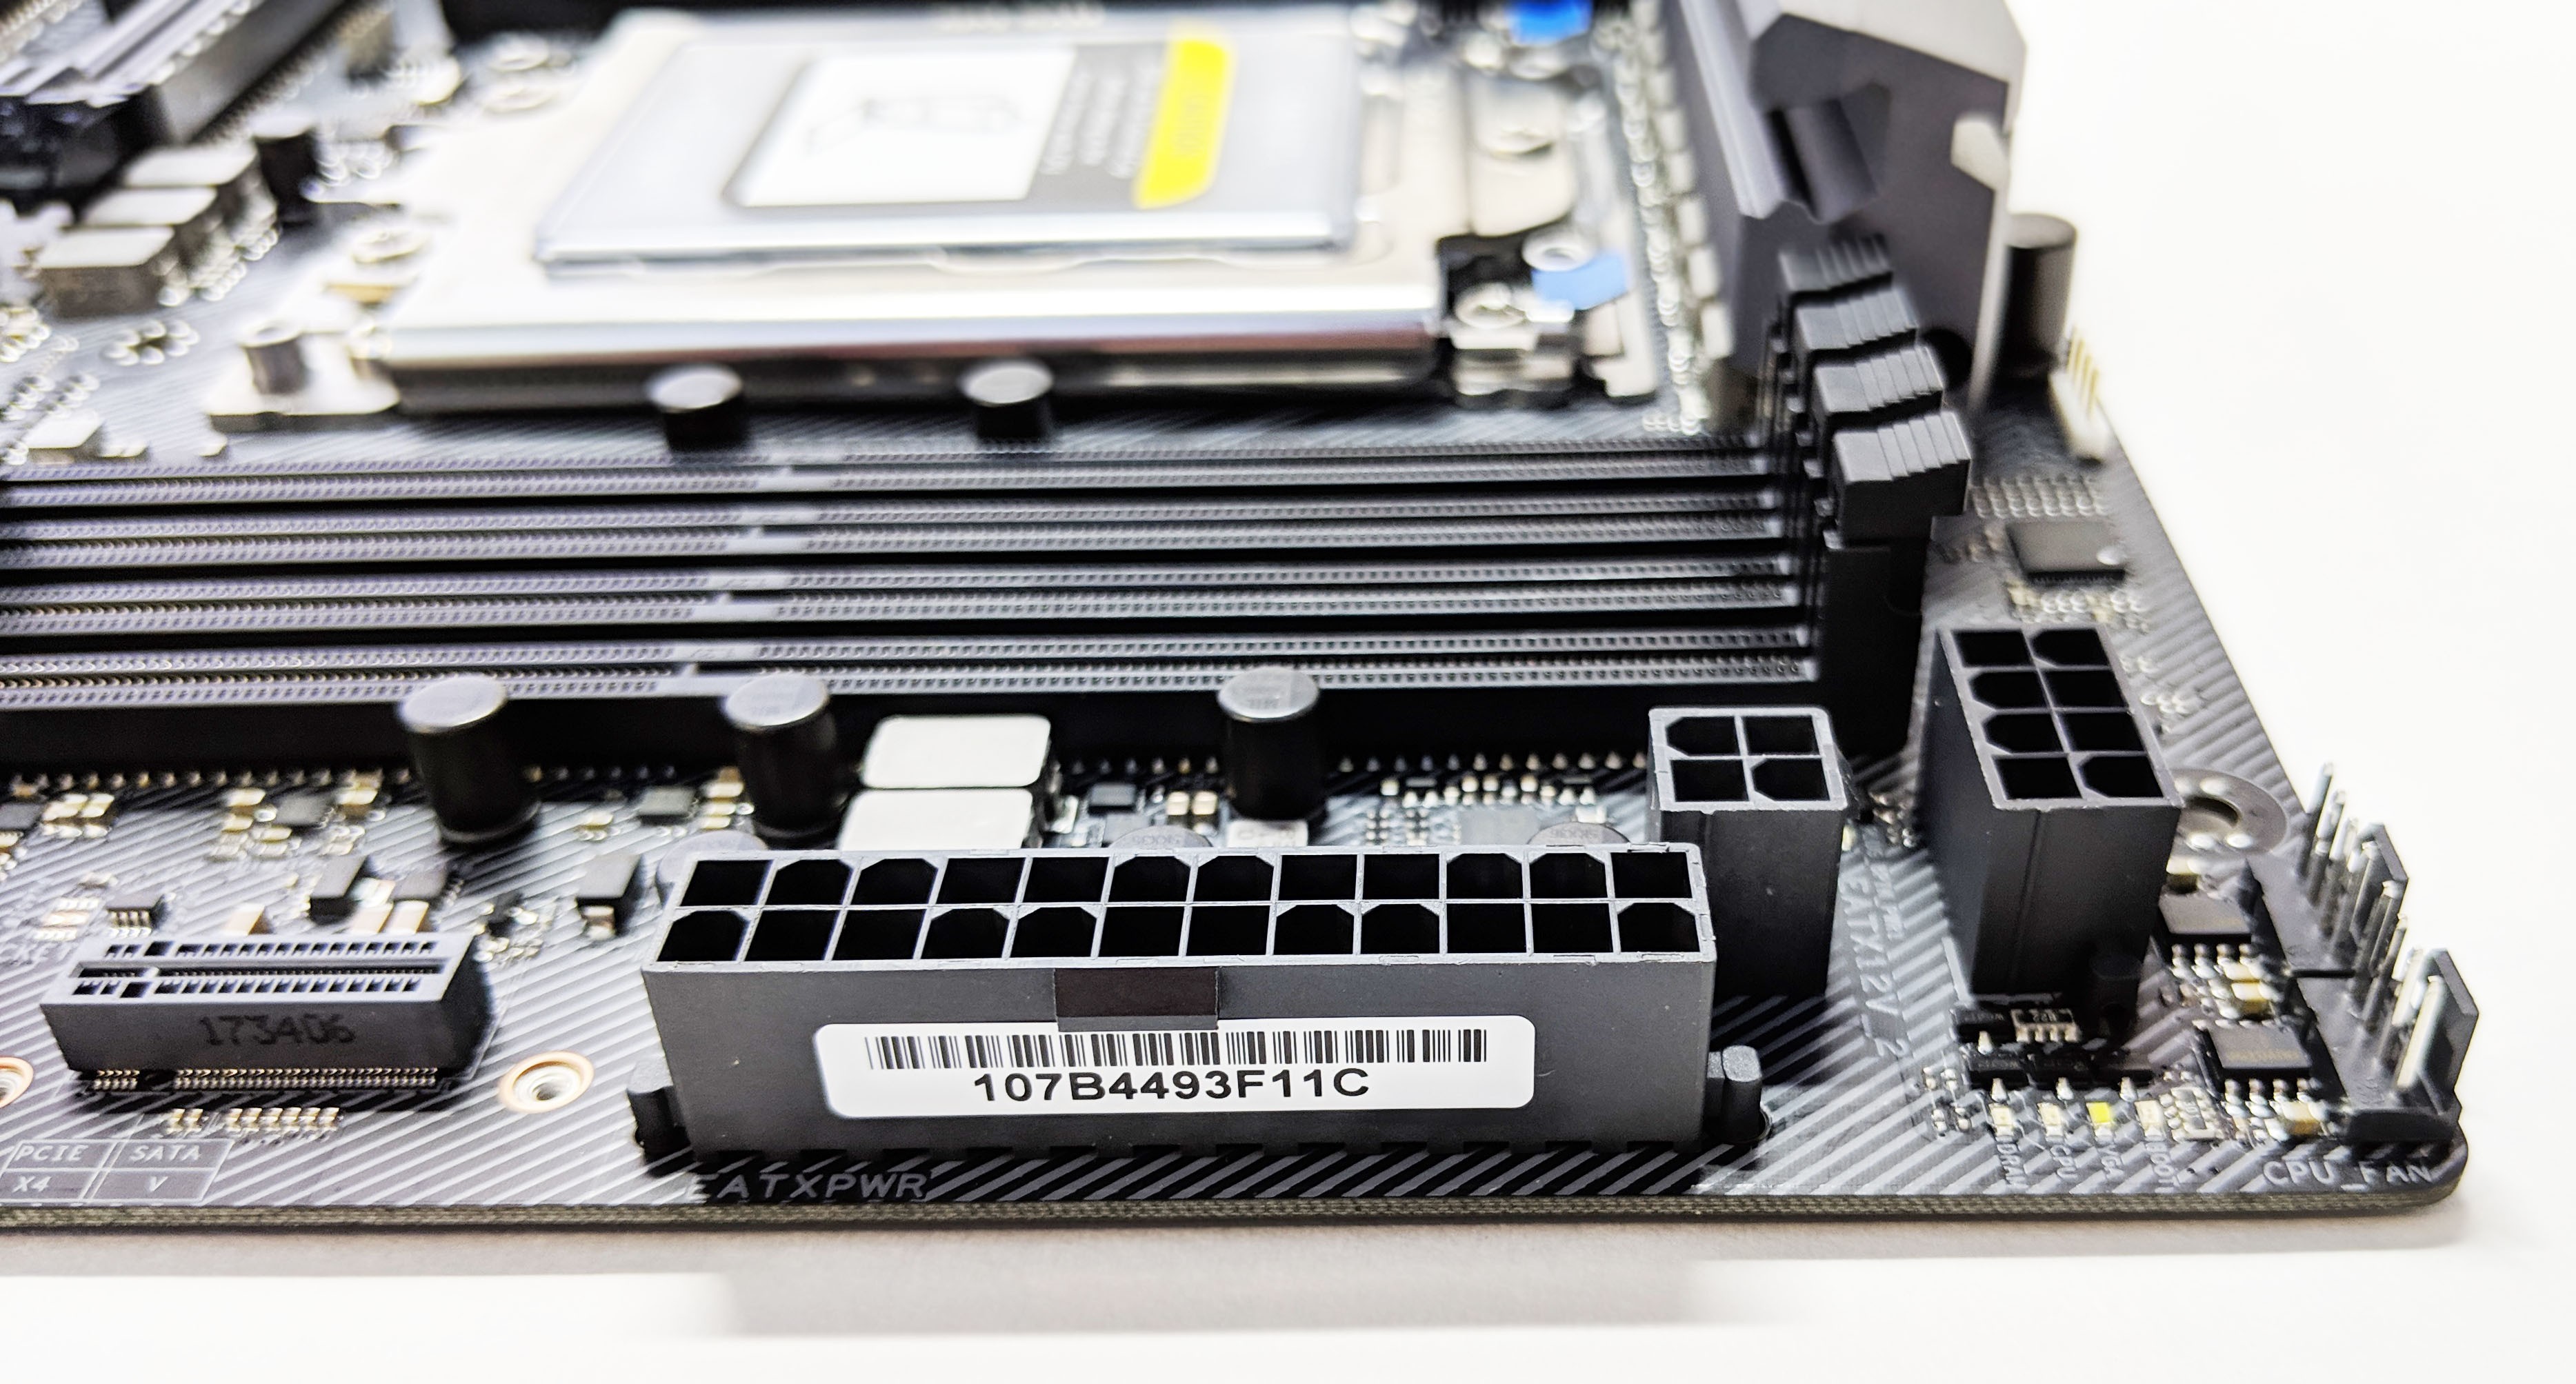
Moving up again we see the 24-pin motherboard power connector, a 4-pin CPU power connector and an 8-pin power connector. While your motherboard will work off of just the single 8-pin, ASUS recommends using both especially when overclocking as power requirements for Threadripper processors are so high. Be sure to invest in a power supply that has both just to be safe as most PSUs only come with a single 8-pin connector. An 8-pin and 4-pin should provide 450W which is more than enough to power the CPU, SoC and memory modules.
Along the top there are two more 4-pin PWM Fan connectors and a single white 4-pin analog RGB header.
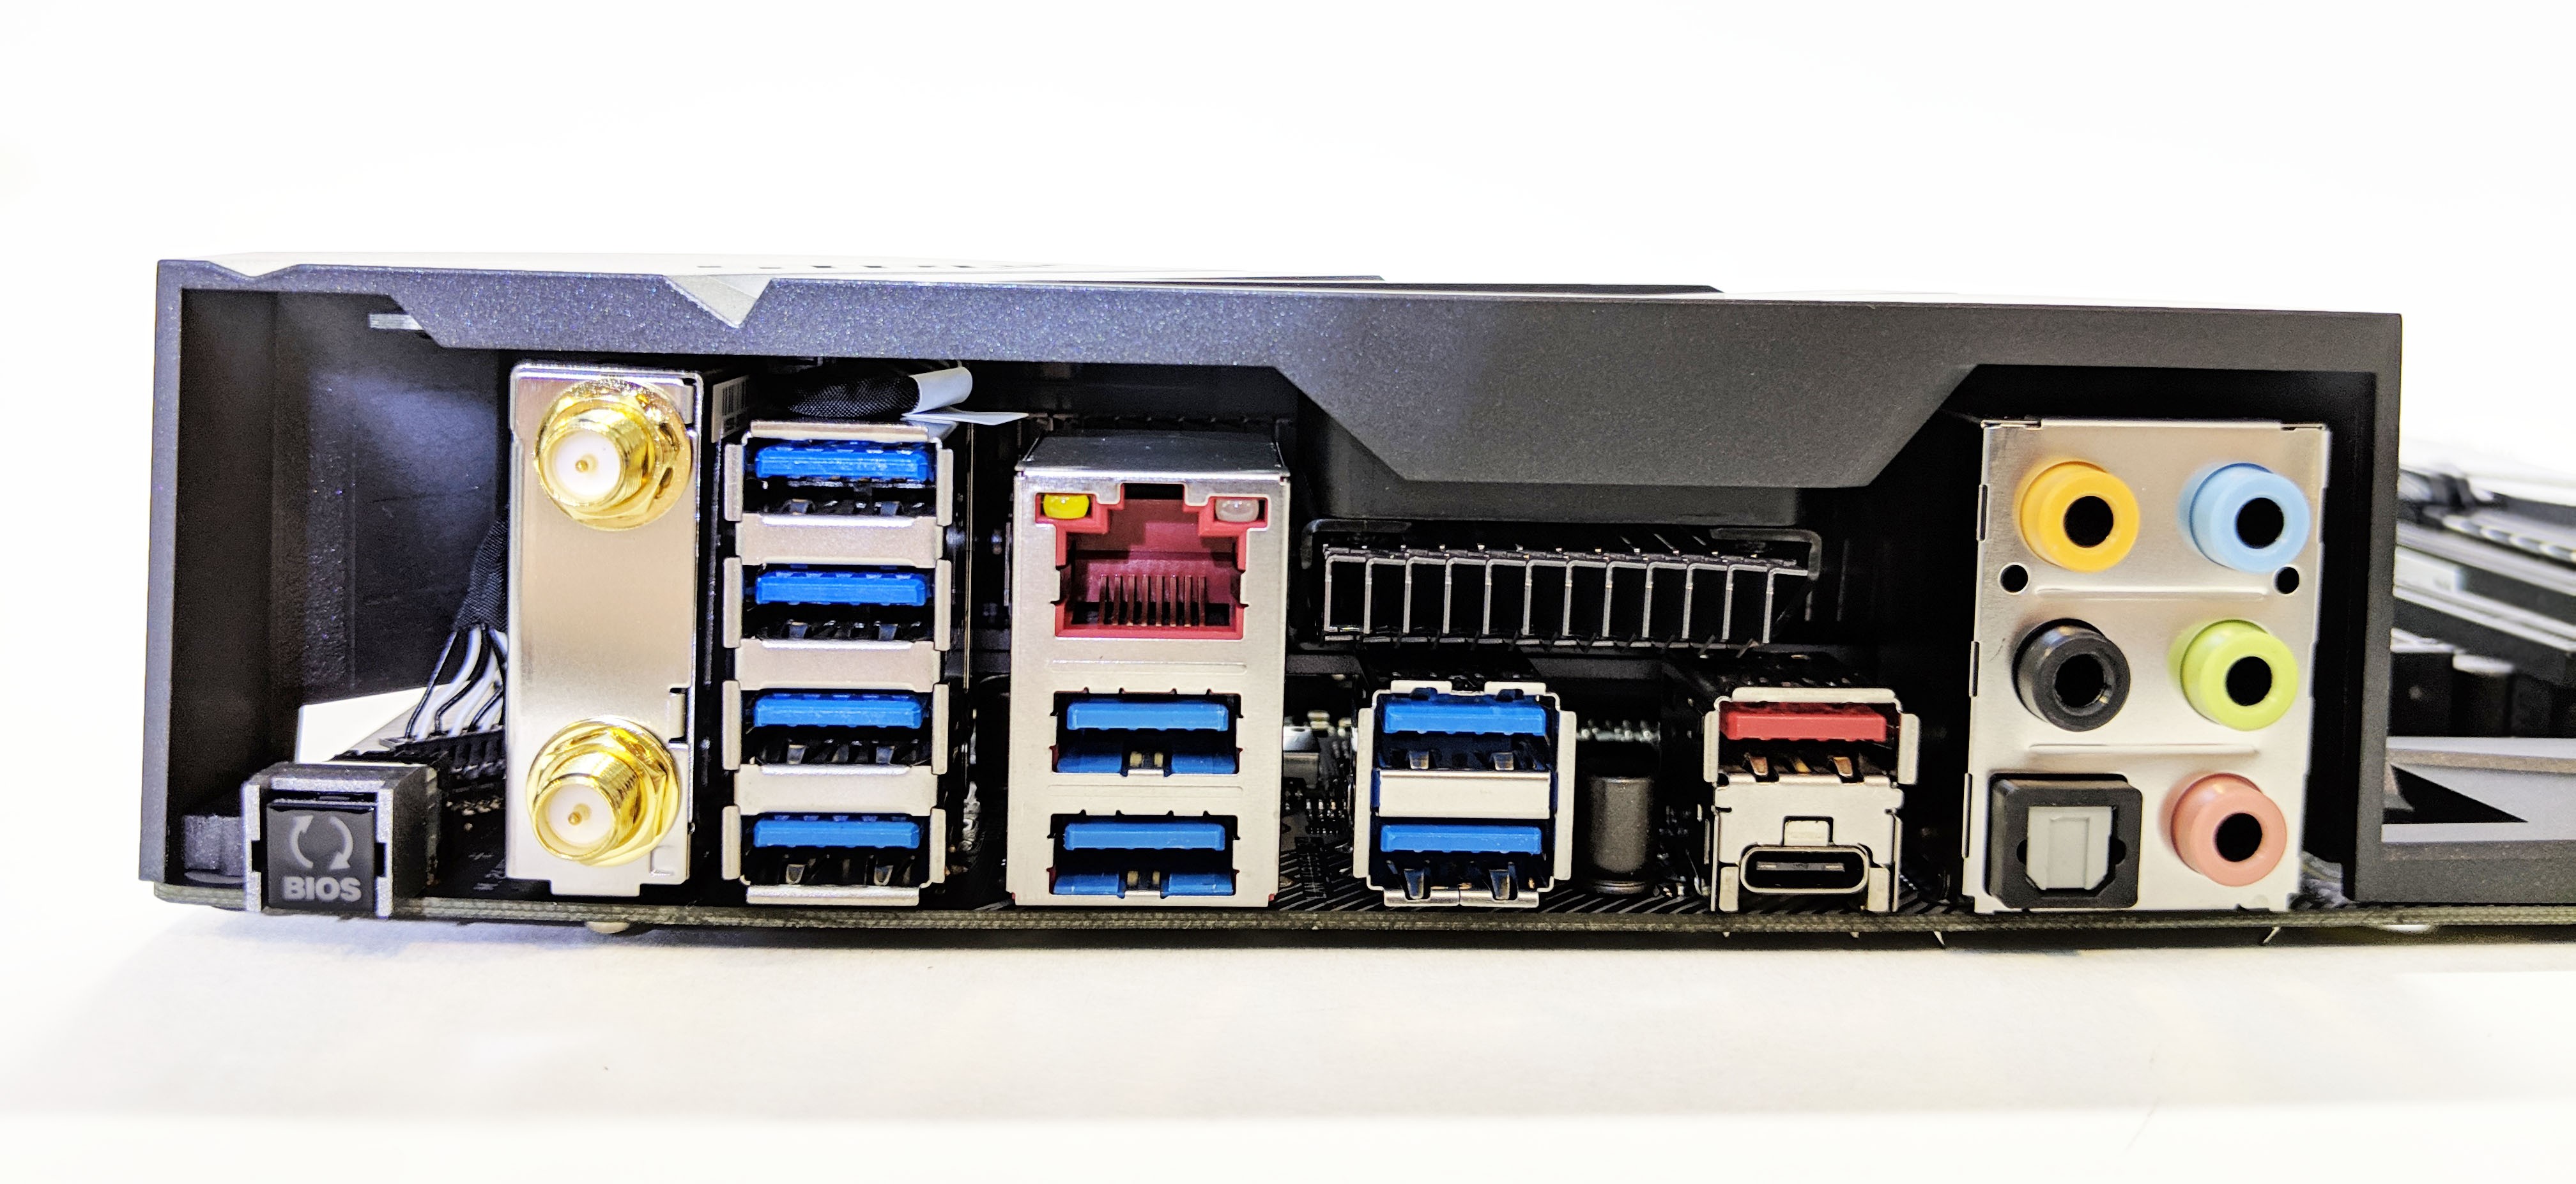
Here’s a shot of the rear I/O ports. The BIOS reset switch is definitely handy feature if you plan on overclocking your CPU or RAM.
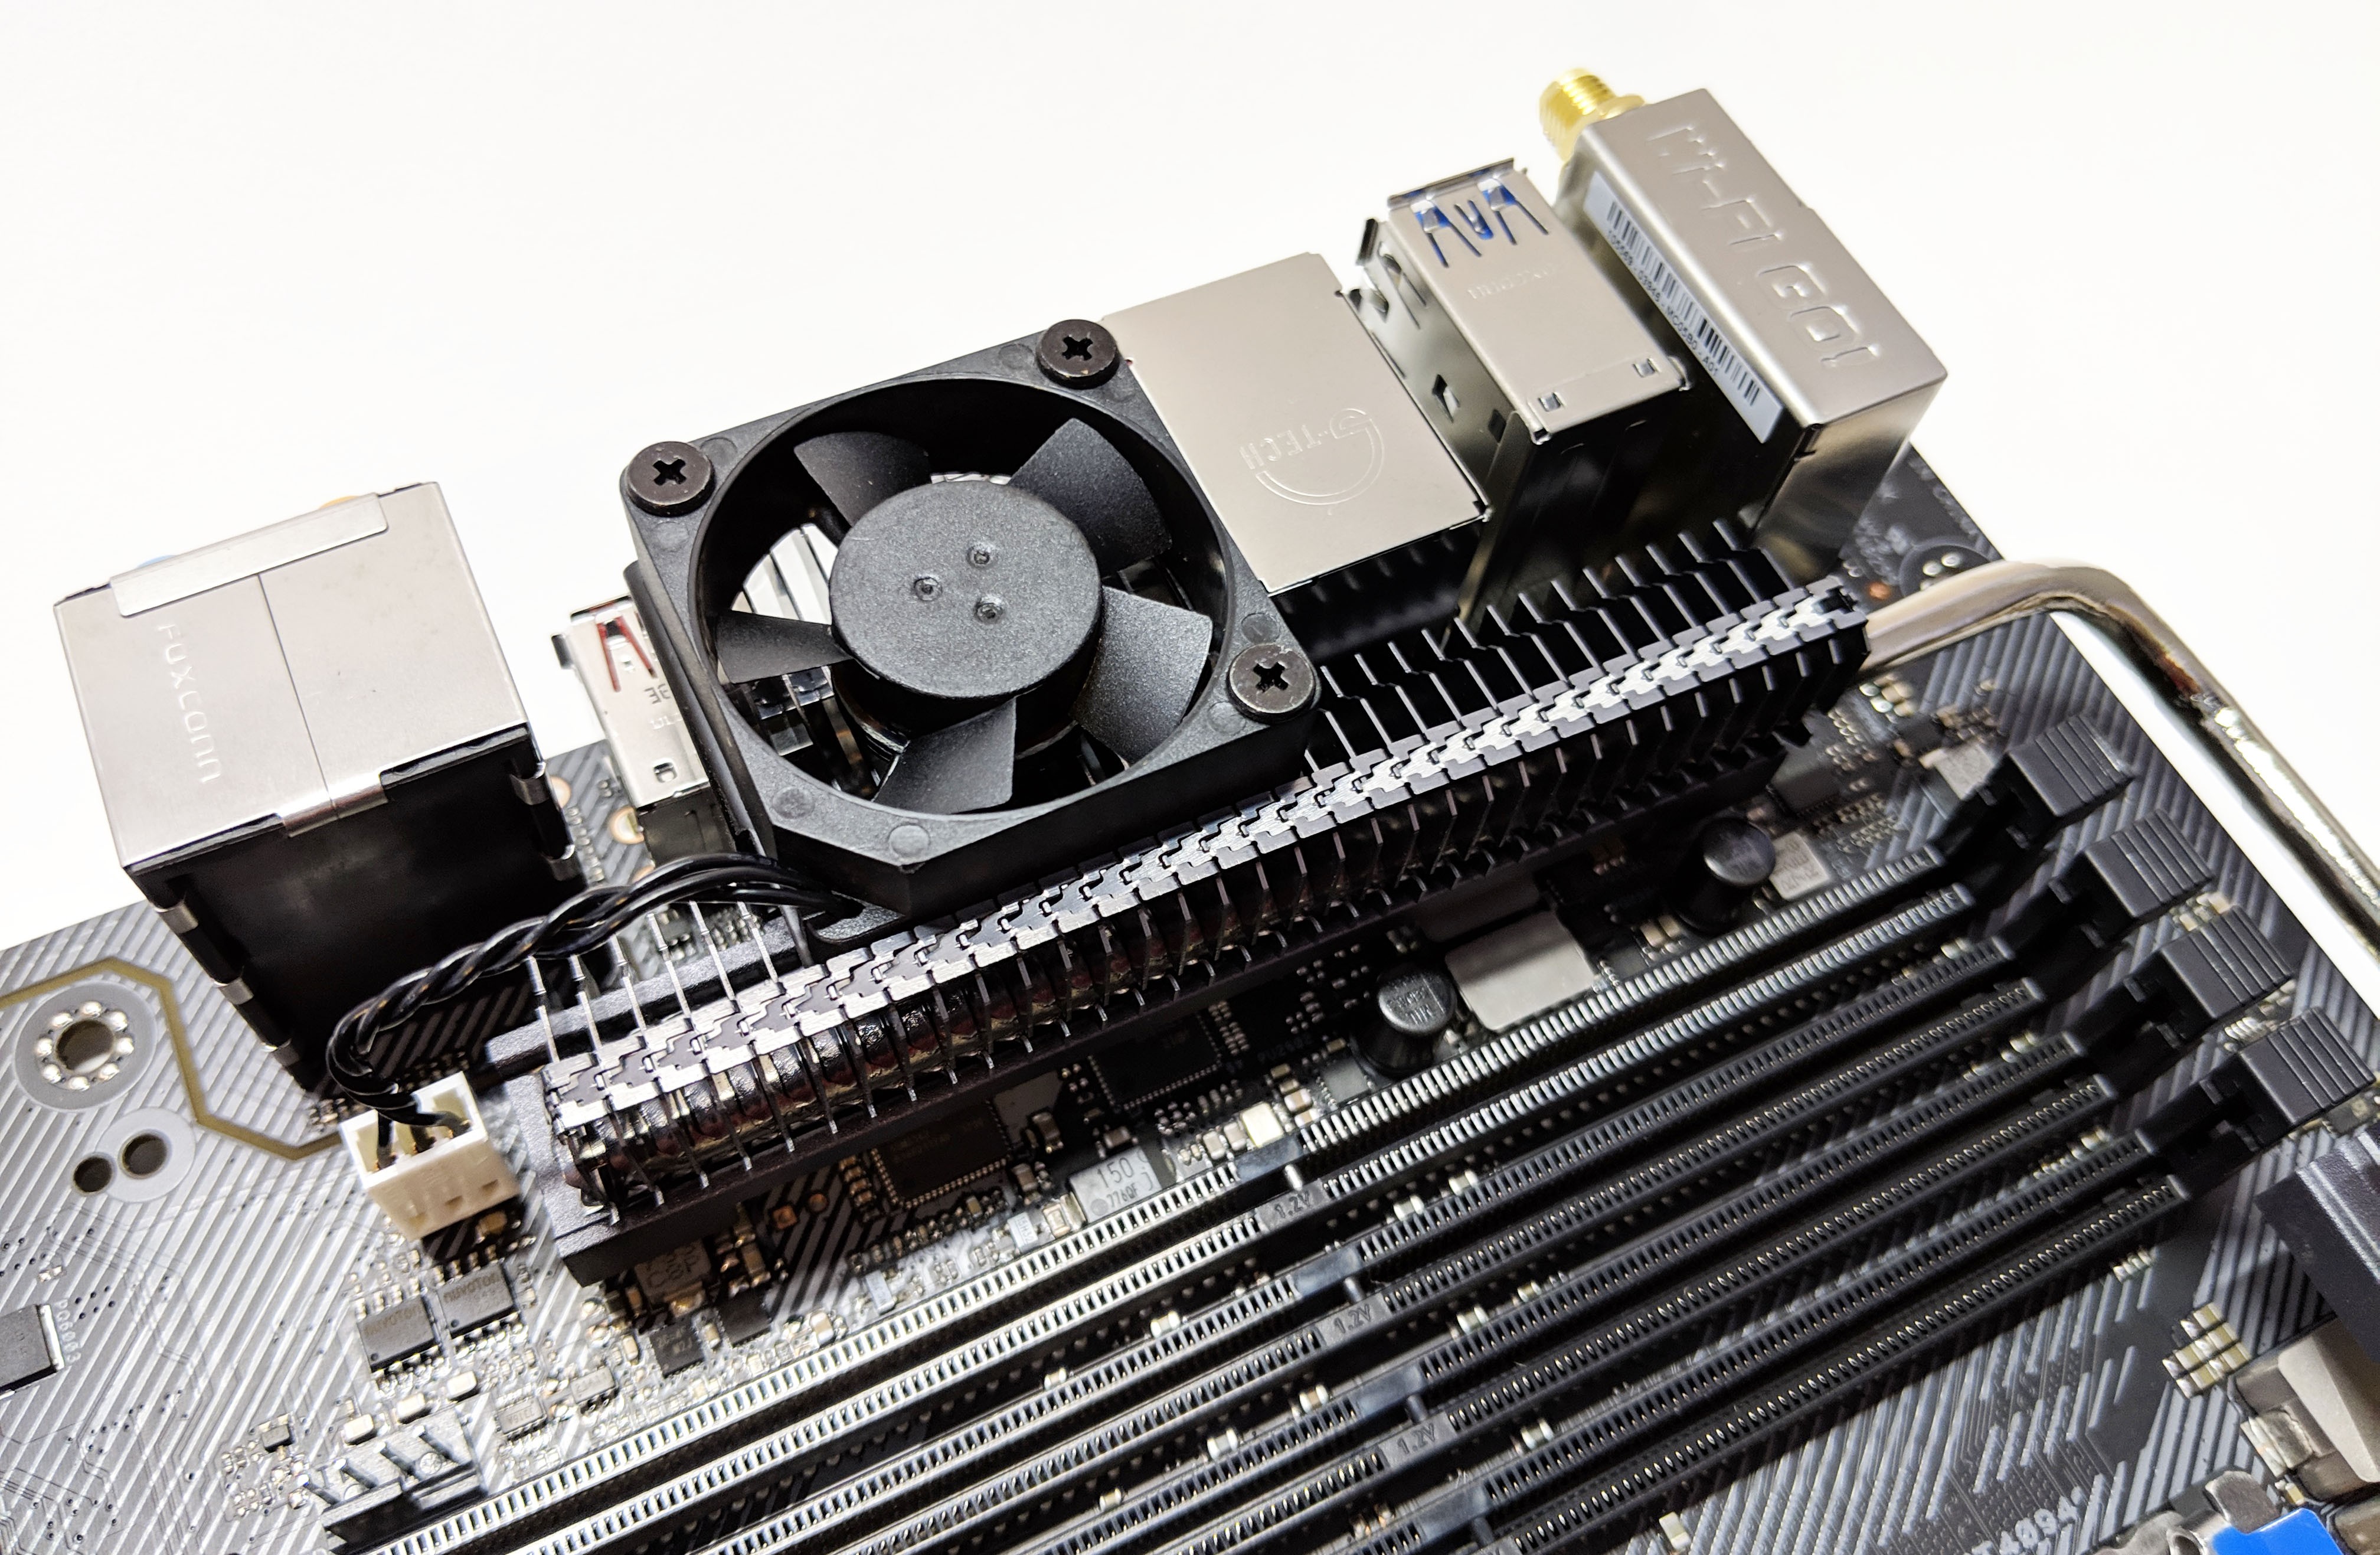
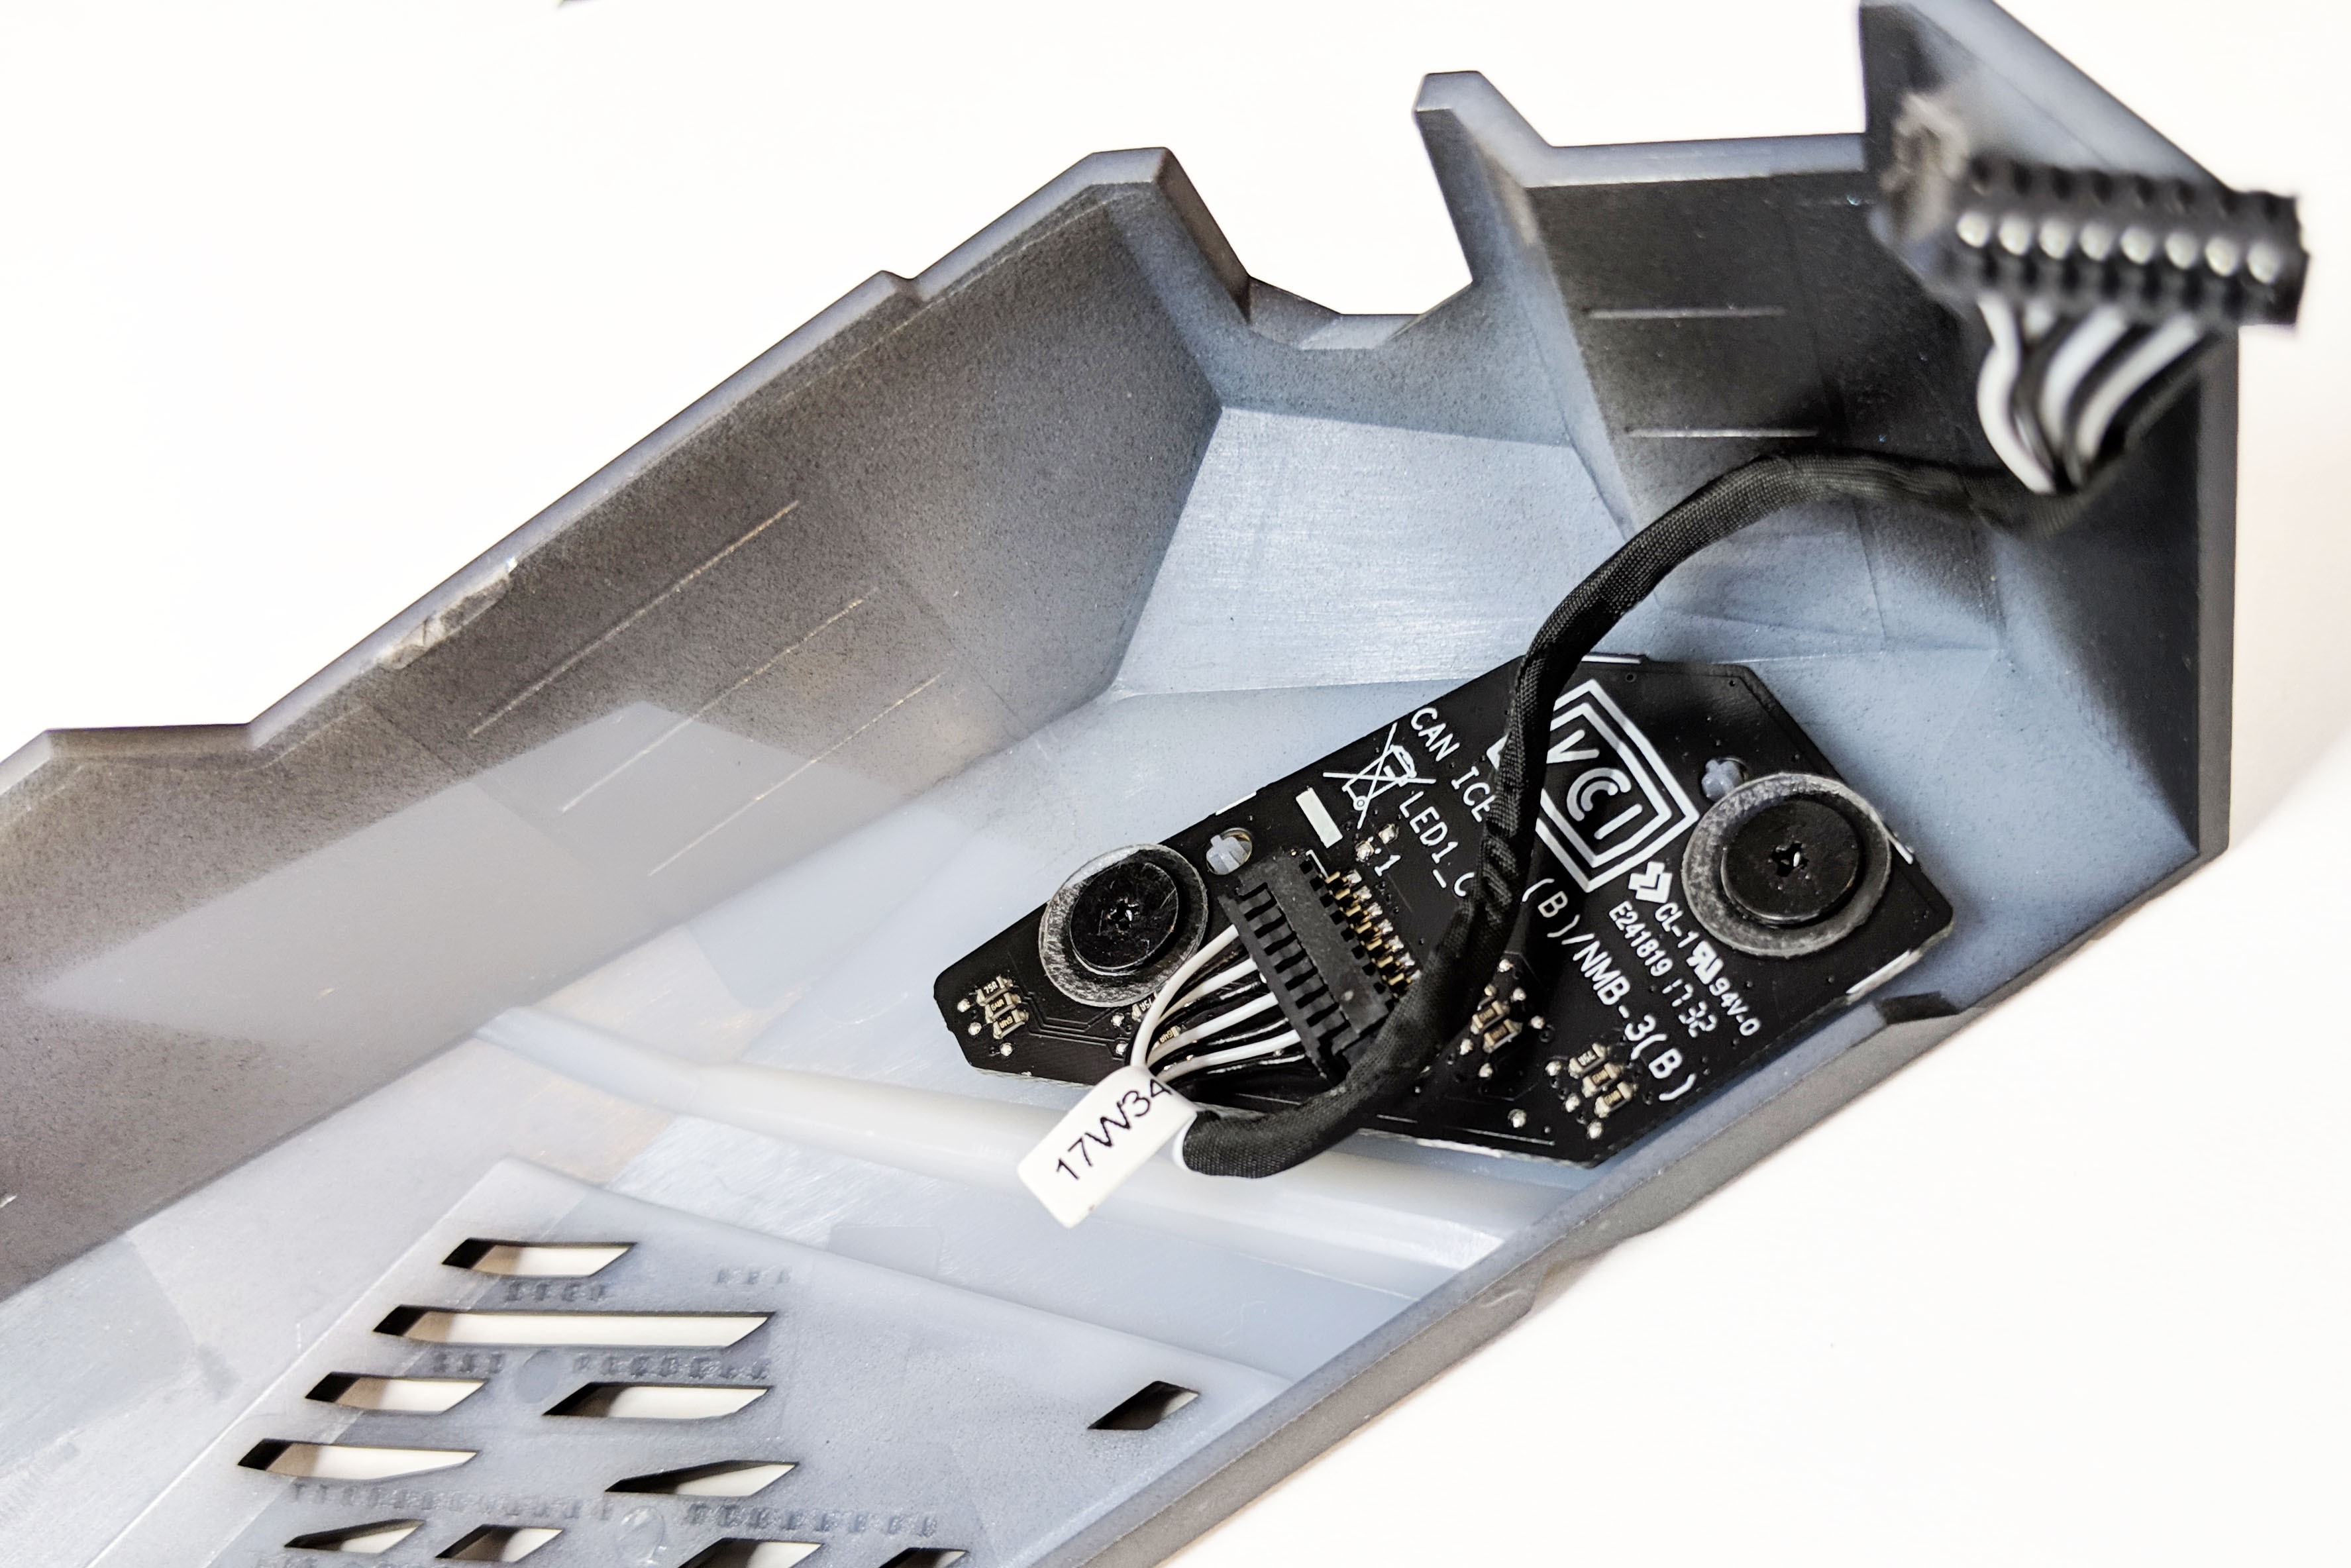
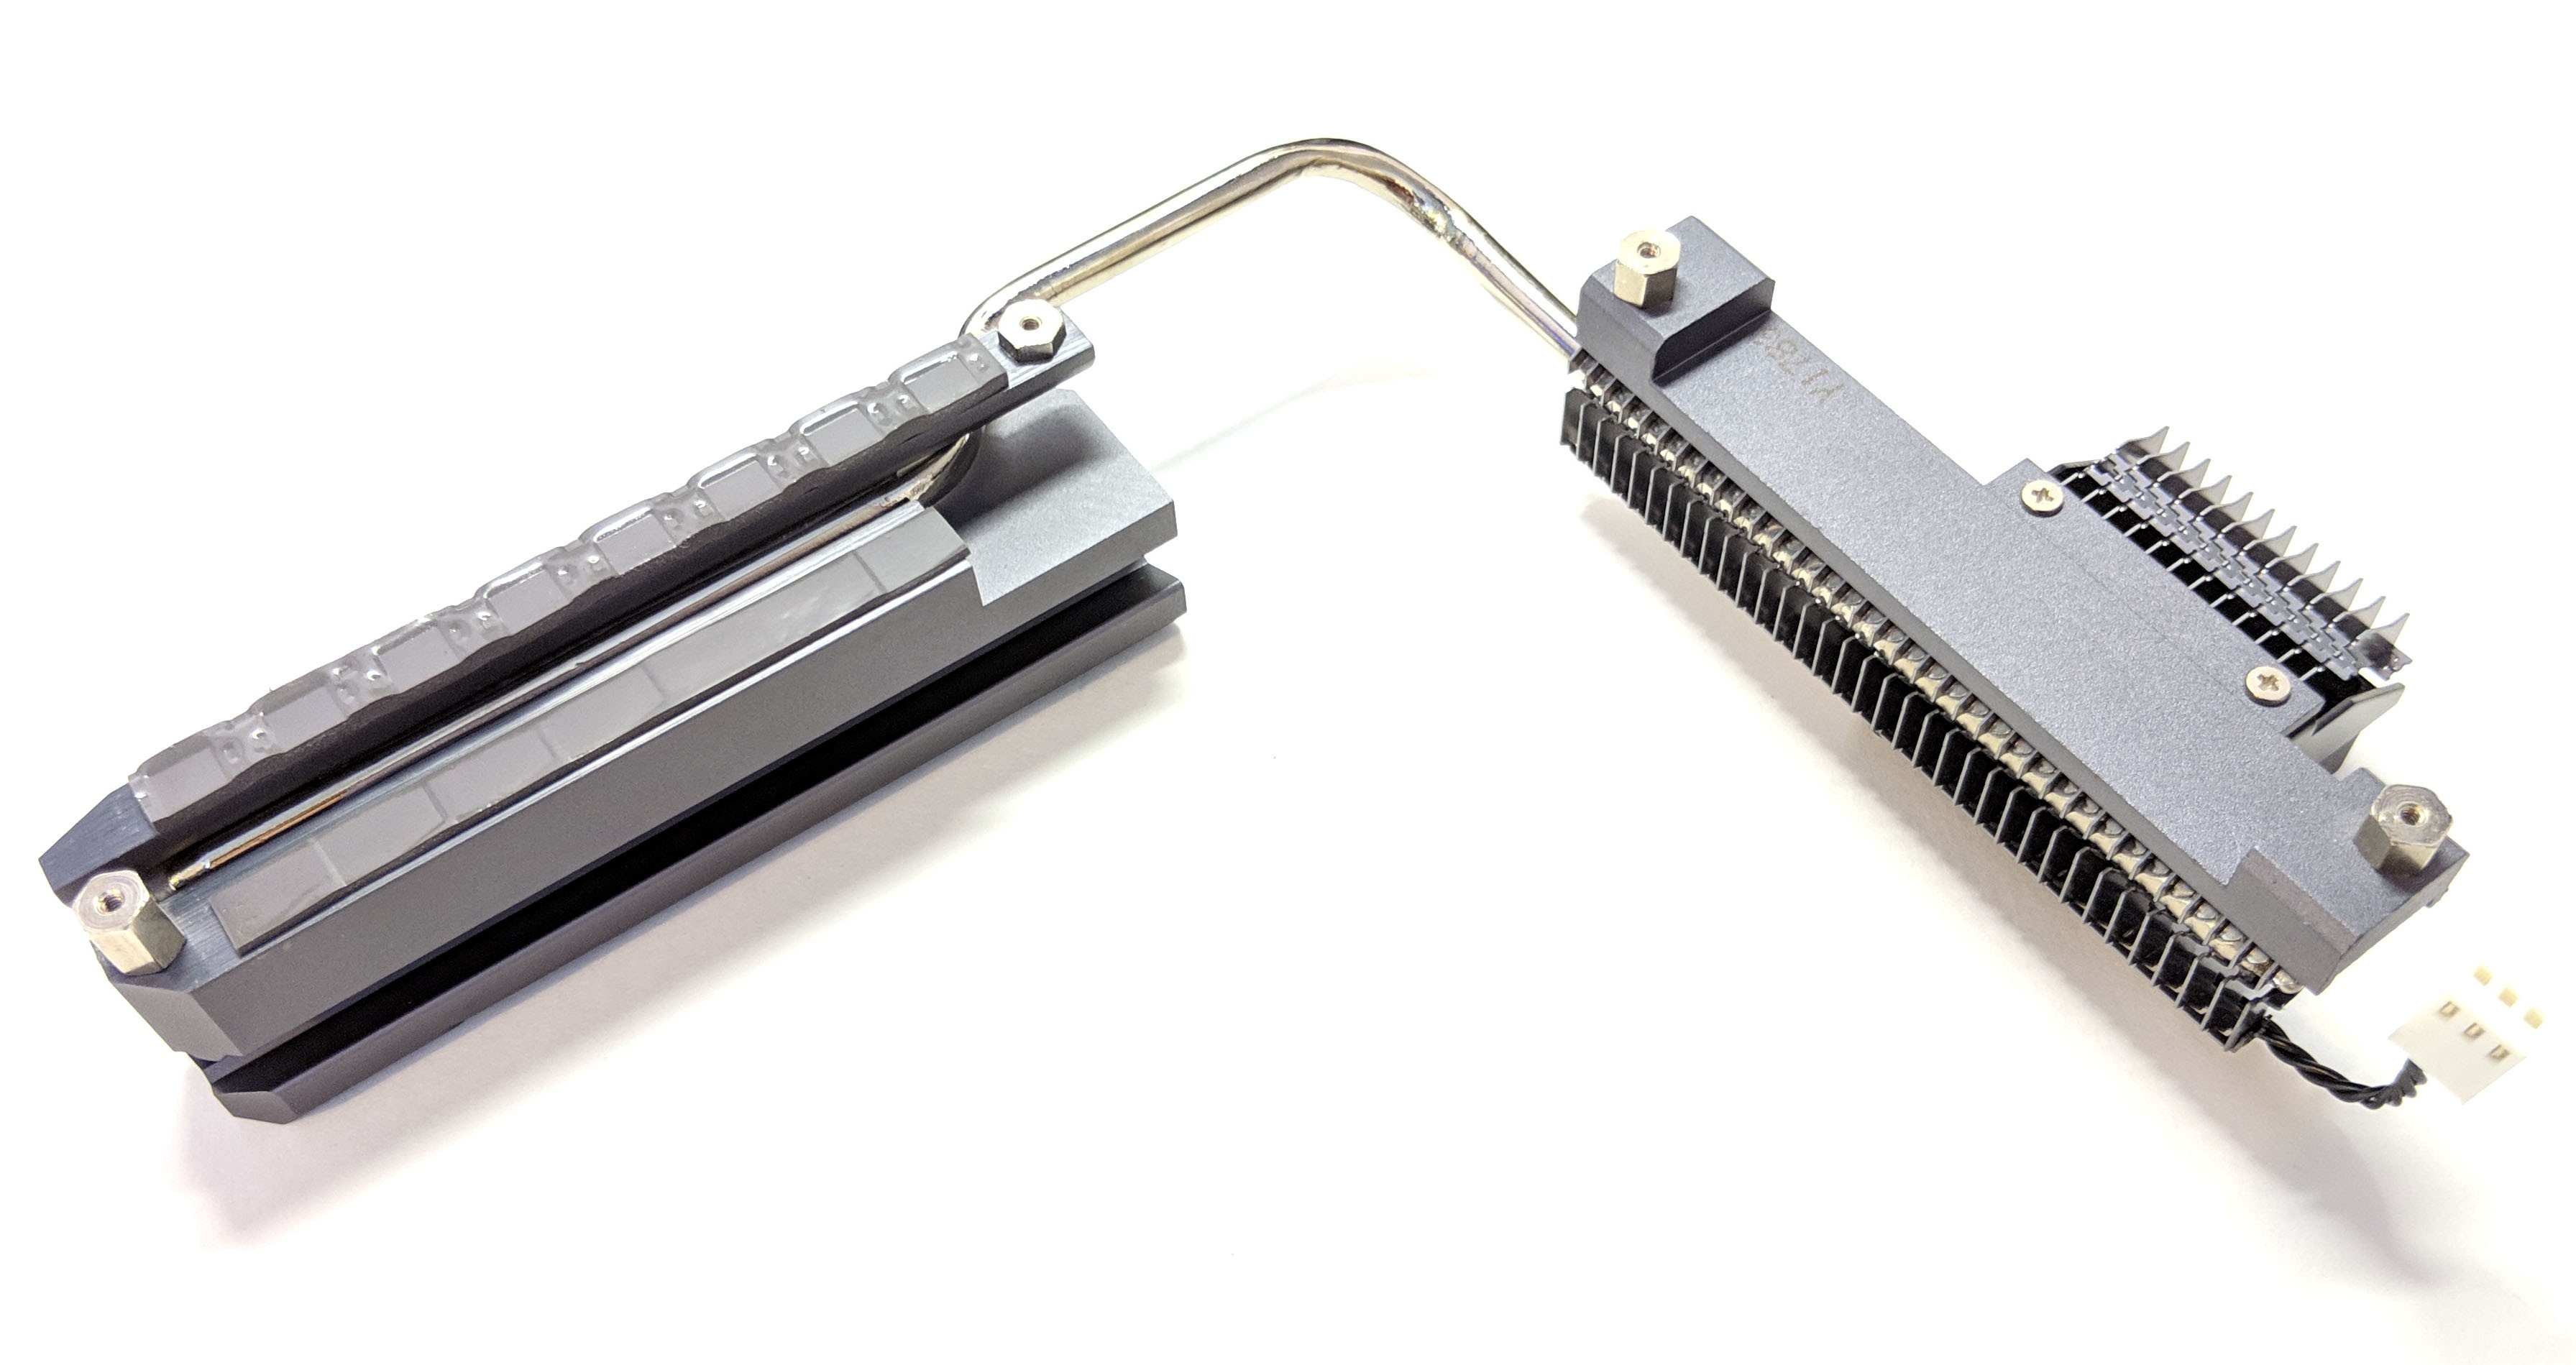
Next, let’s remove the I/O shroud and take a peek underneath. With the shroud removed we get a better look at the actively cooled CPU VRM heatsink fan assembly. The fan is powered by a single 3-pin 40mm fan. When powered on it runs silent so you shouldn’t have to worry about excess noise coming from it. The shroud itself has integrated RGB lighting which can be controlled by ASUS AURA Sync software.
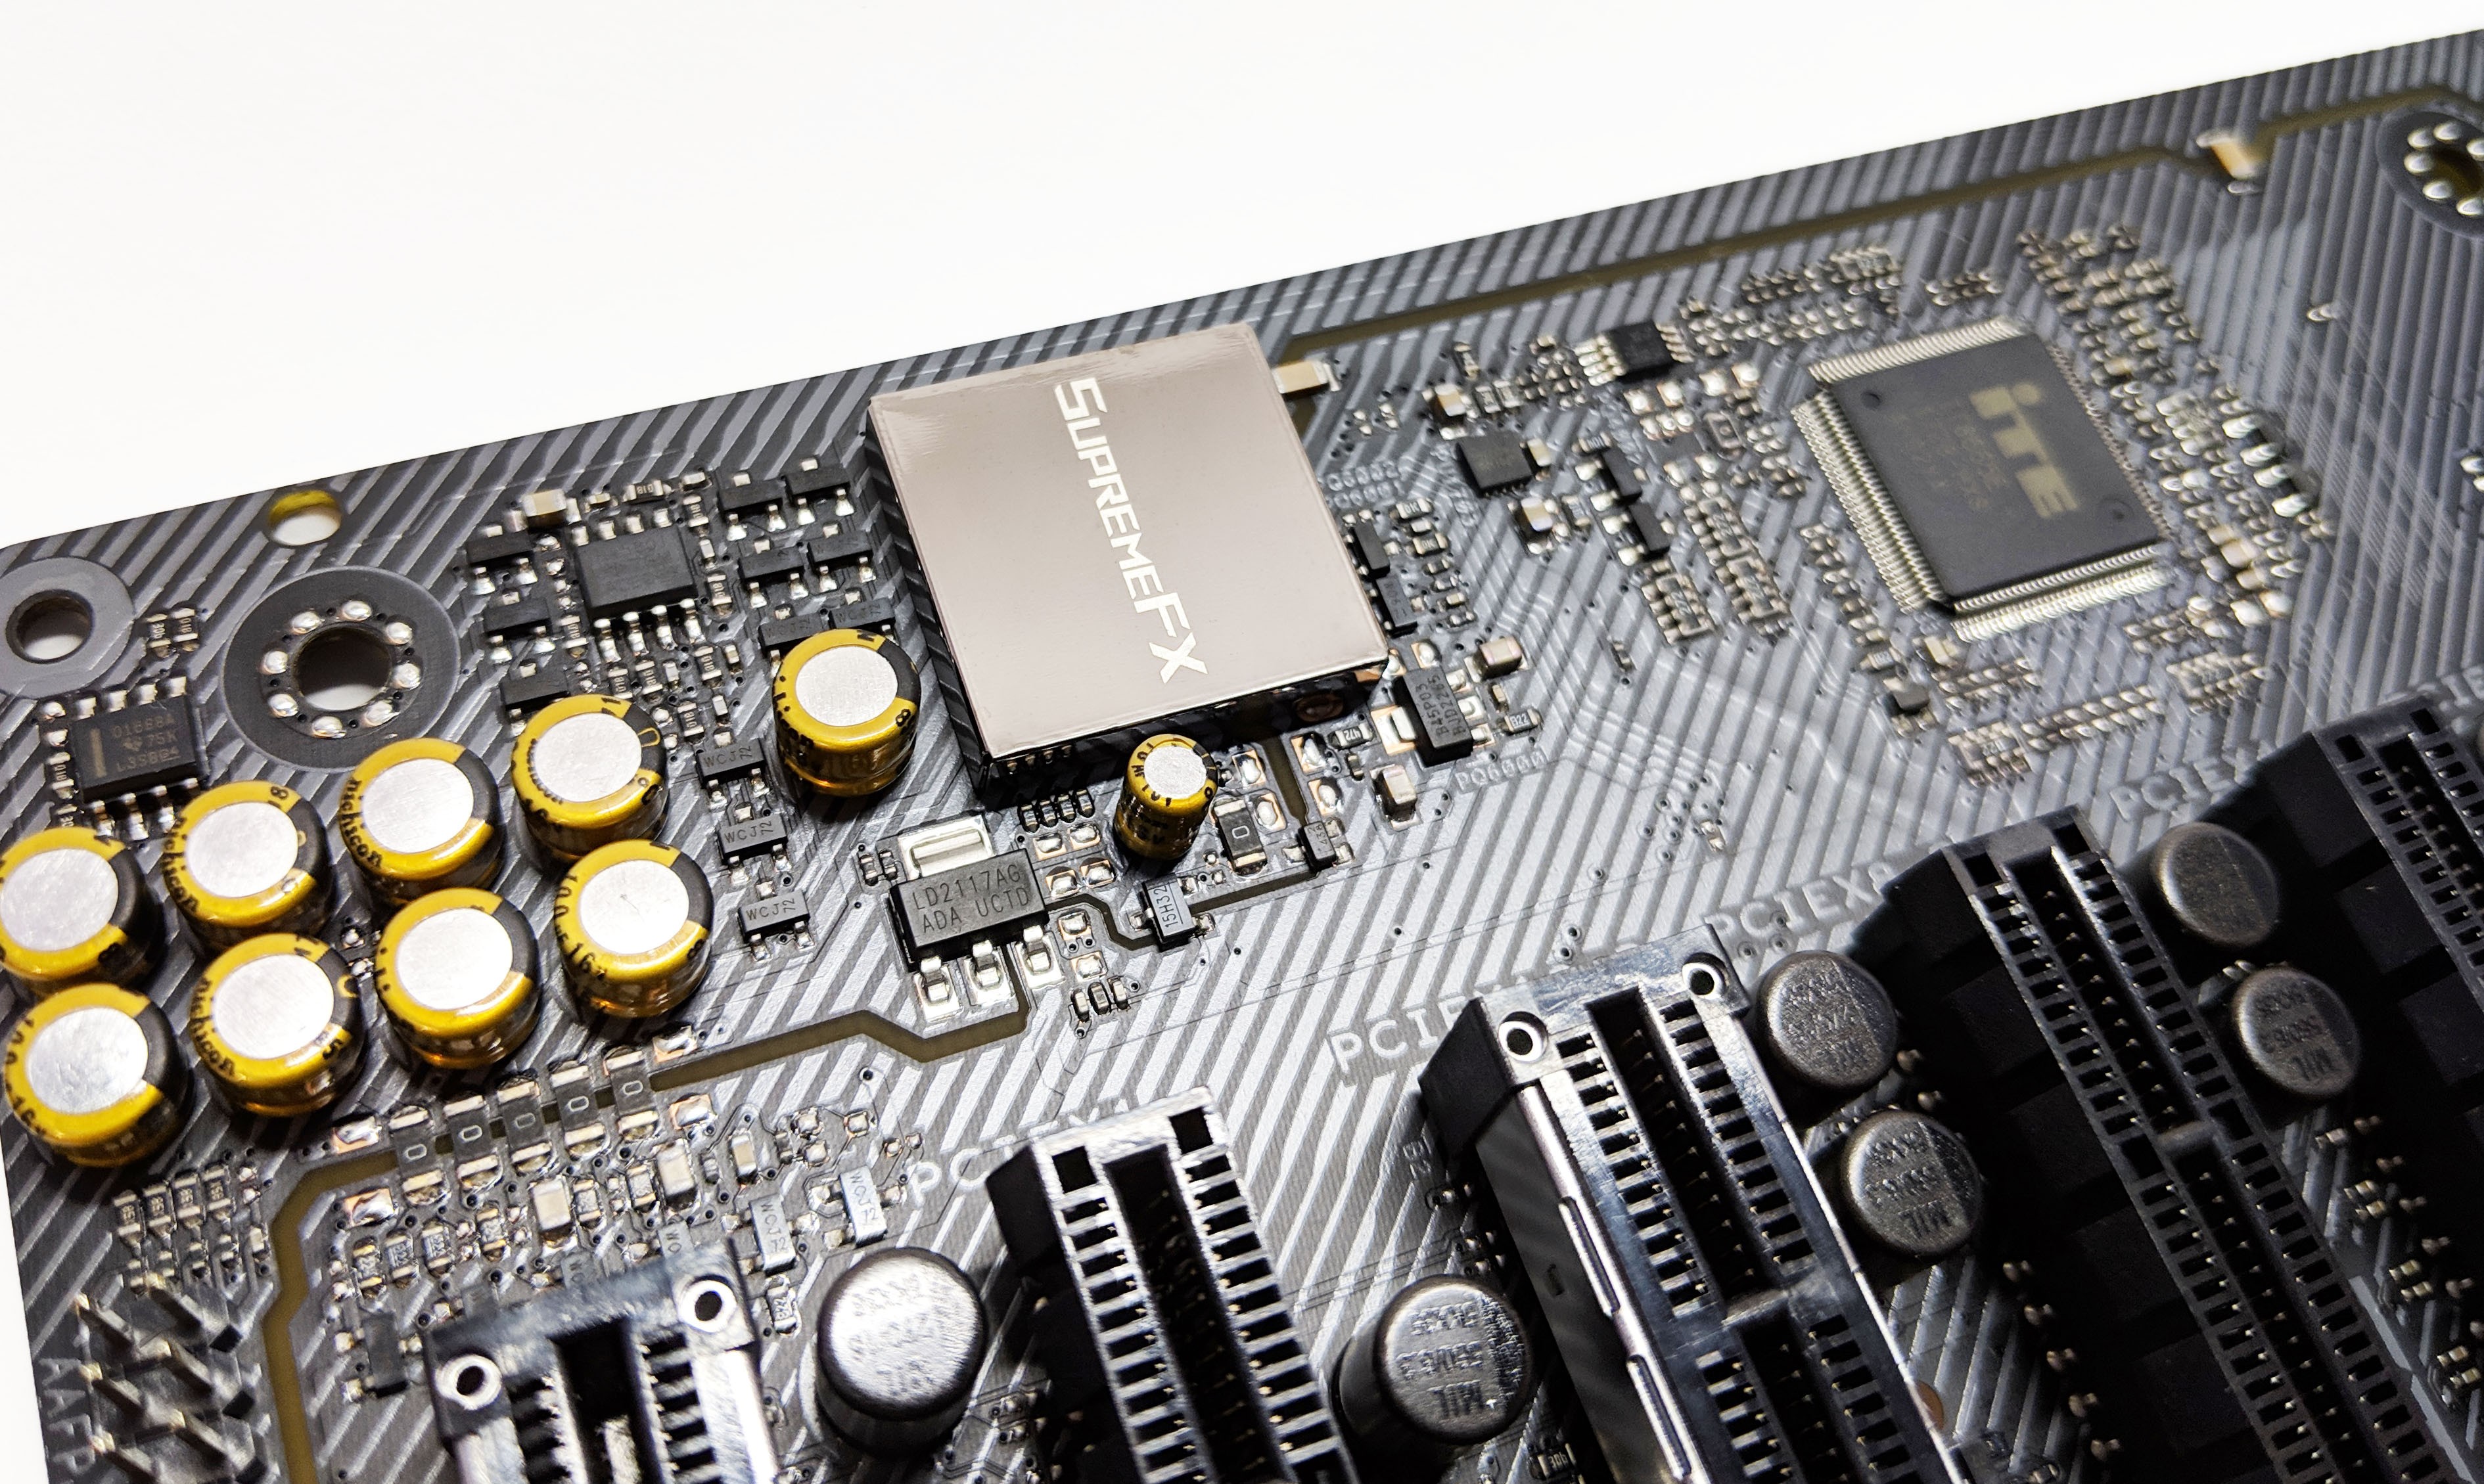
Also with the shroud removed we can see the SupremeFX metal housing and related audio components.
Let’s keep digging! Moving on to the CPU VRM, let’s pull the heatsink off and get an even better look at what lies beneath.
The higher the phase count, the higher the quality or stability of power that’s being fed to the CPU. This is especially important during overclocking as not only does increasing the voltage put added strain on the processor, it also puts added strain on the VRM as the CPU is drawing more current than it normally would.
Ryzen Threadripper motherboards commonly use a true 8-phase VRM design and it looks like that’s exactly what we’re seeing in this case. The ROG Strix X399-E Gaming is controlled by an IR3556 integrated IR PowIRstage rated at 60A in an 8+0 configuration. I couldn’t find any info on the inductors used but considering the high ratings on the IR components, I would guess somewhere between 60-76A. The components are definitely able to handle some serious abuse and will certainly get hot. I’m glad to see an active cooling solution implemented.
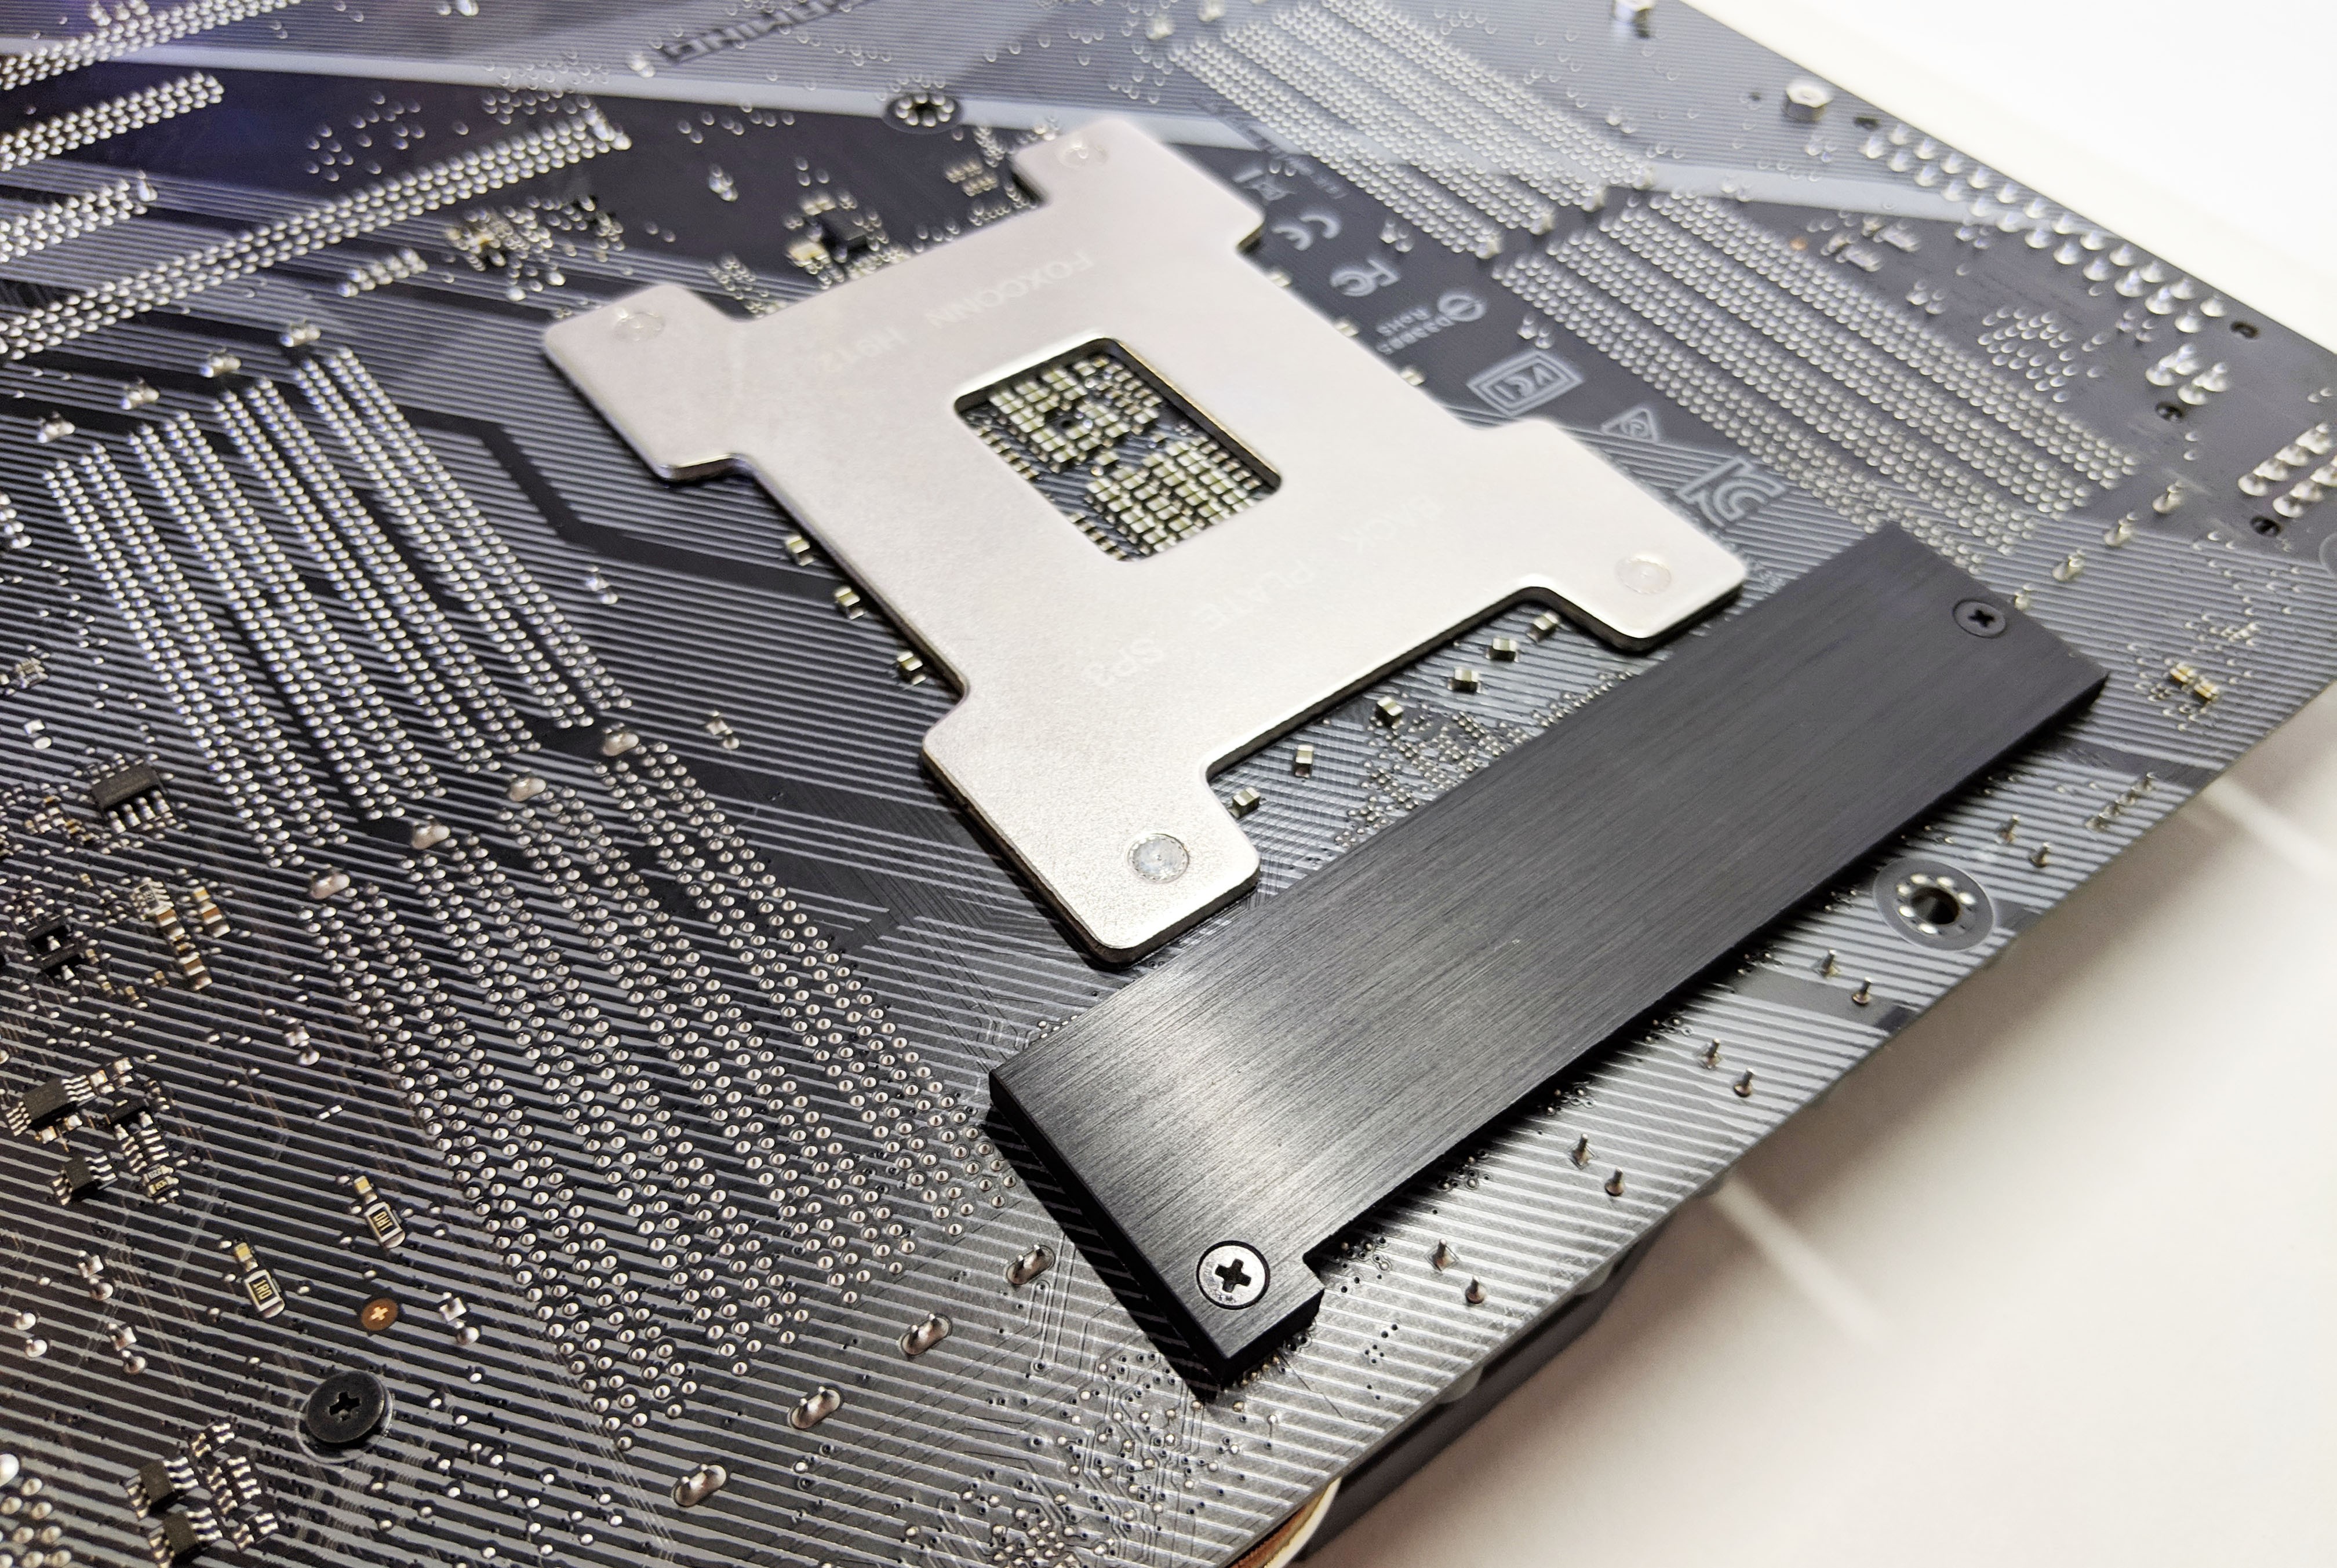
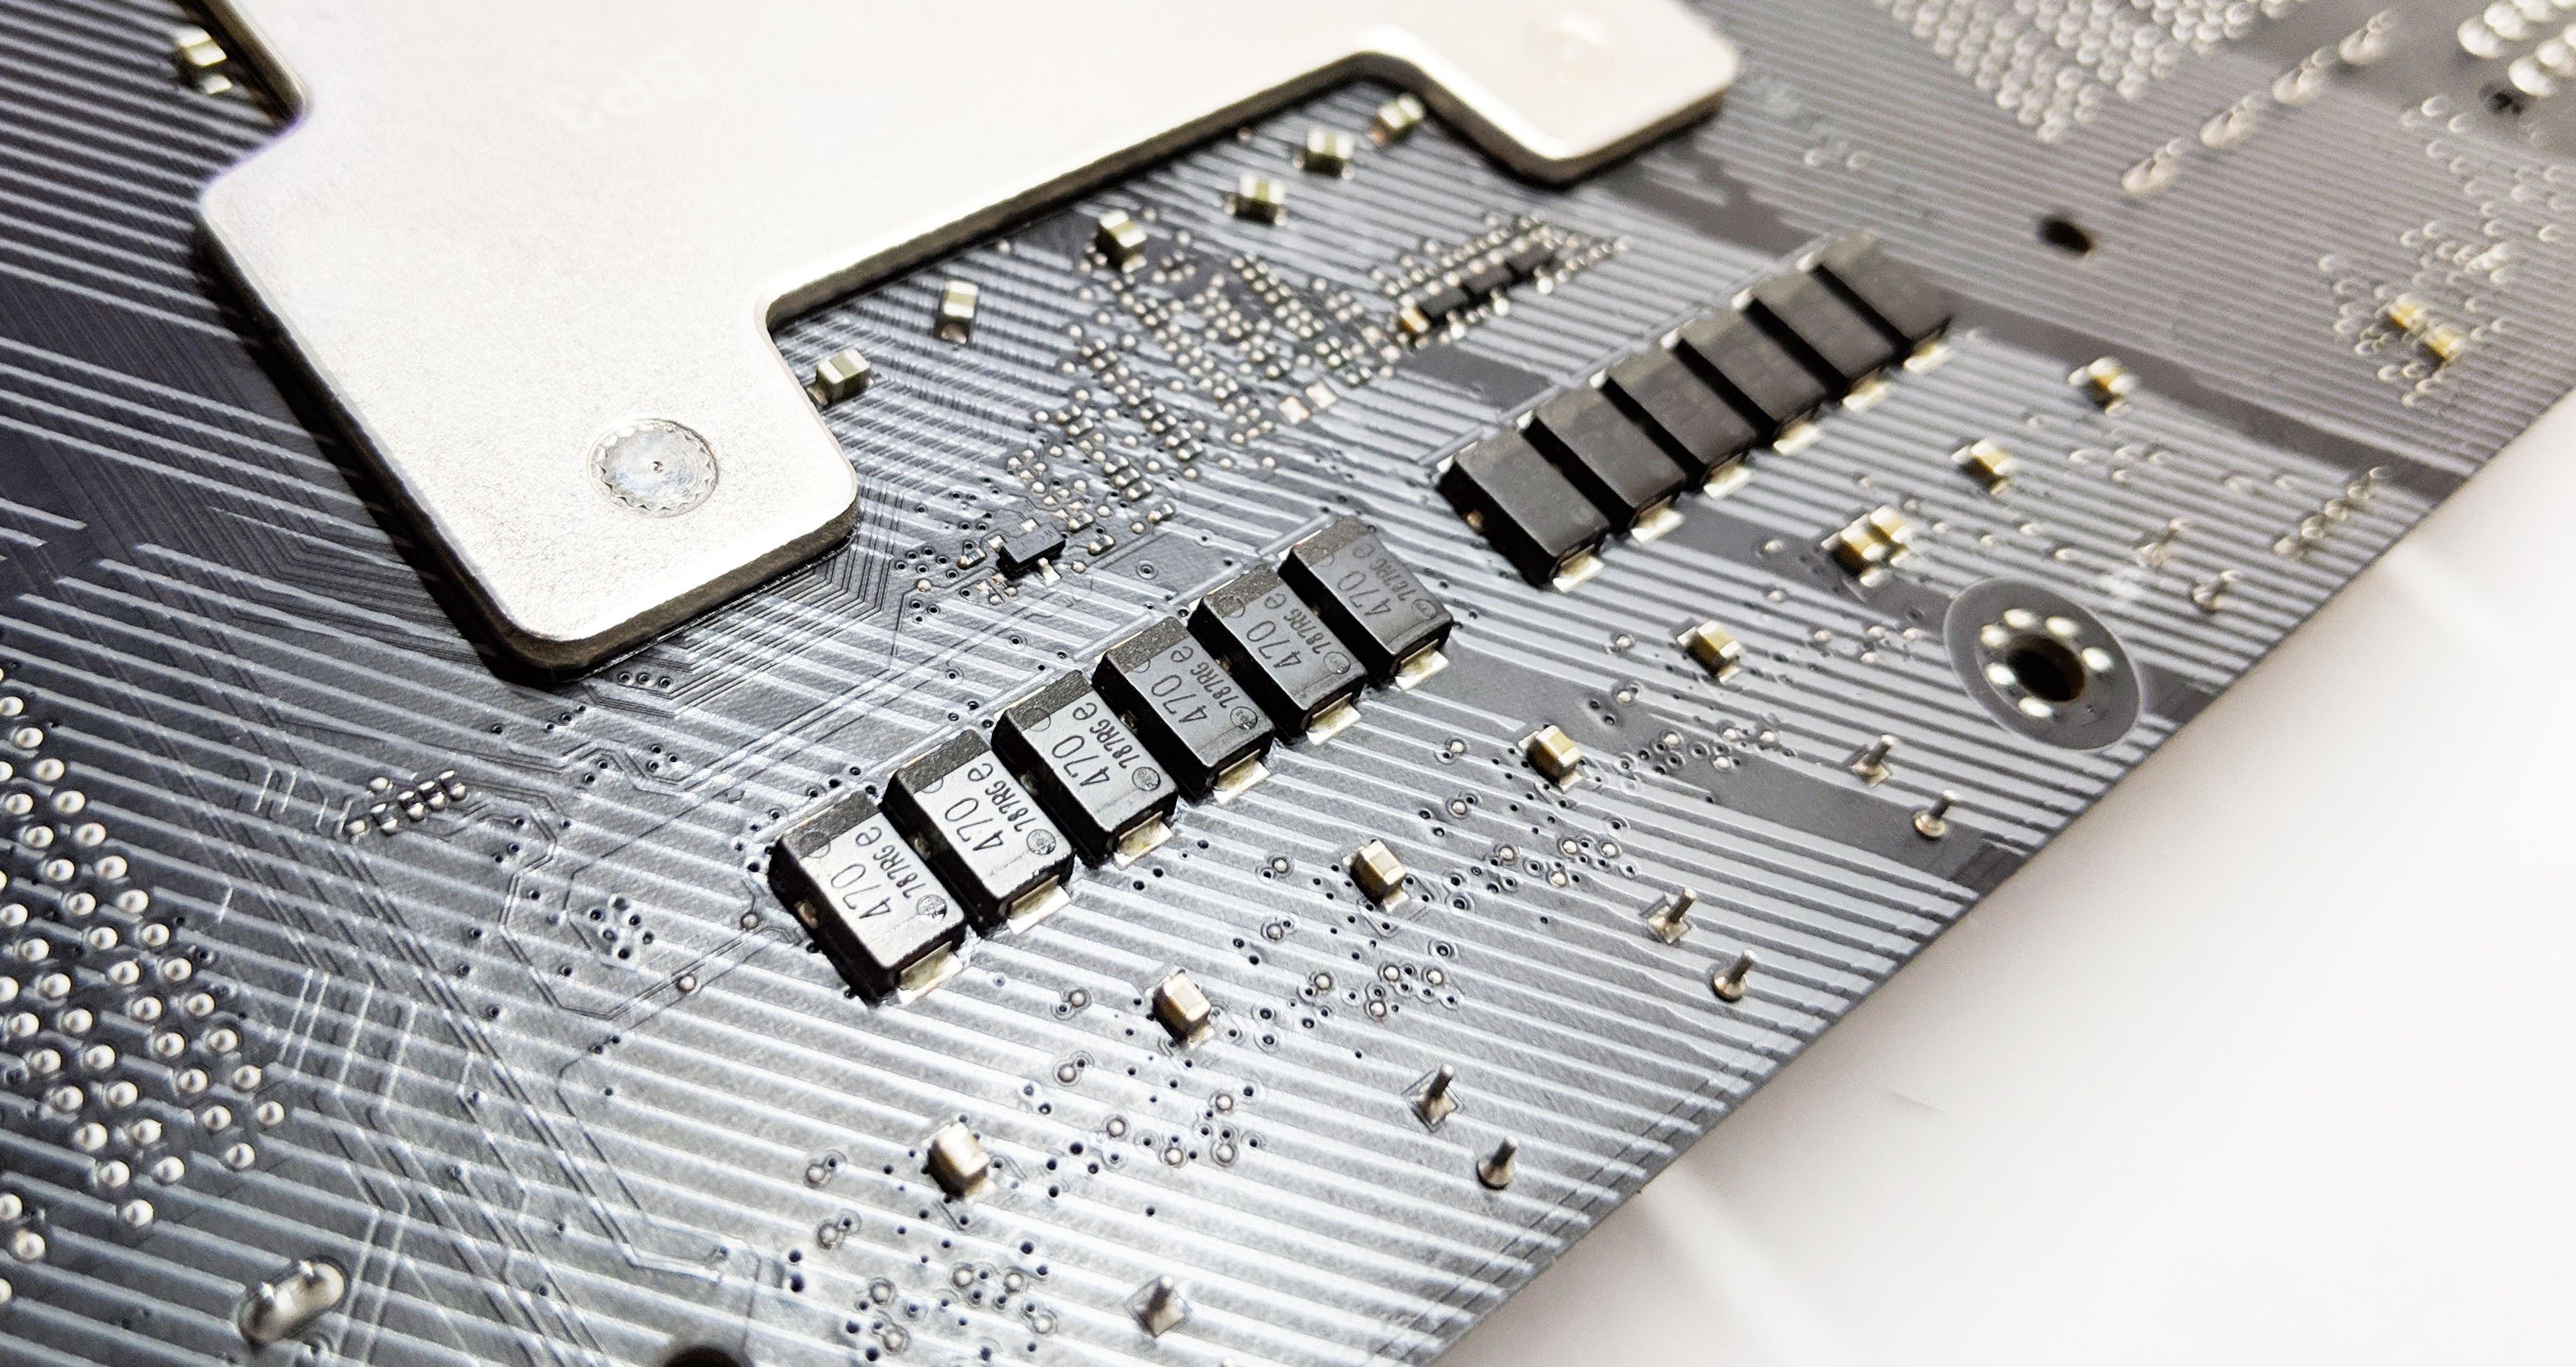
On the reverse side of the motherboard, there’s another slim aluminum heatsink which appears to be covering an array of current regulator diodes, but I’m not 100% sure on that based on part number 470 787RG.
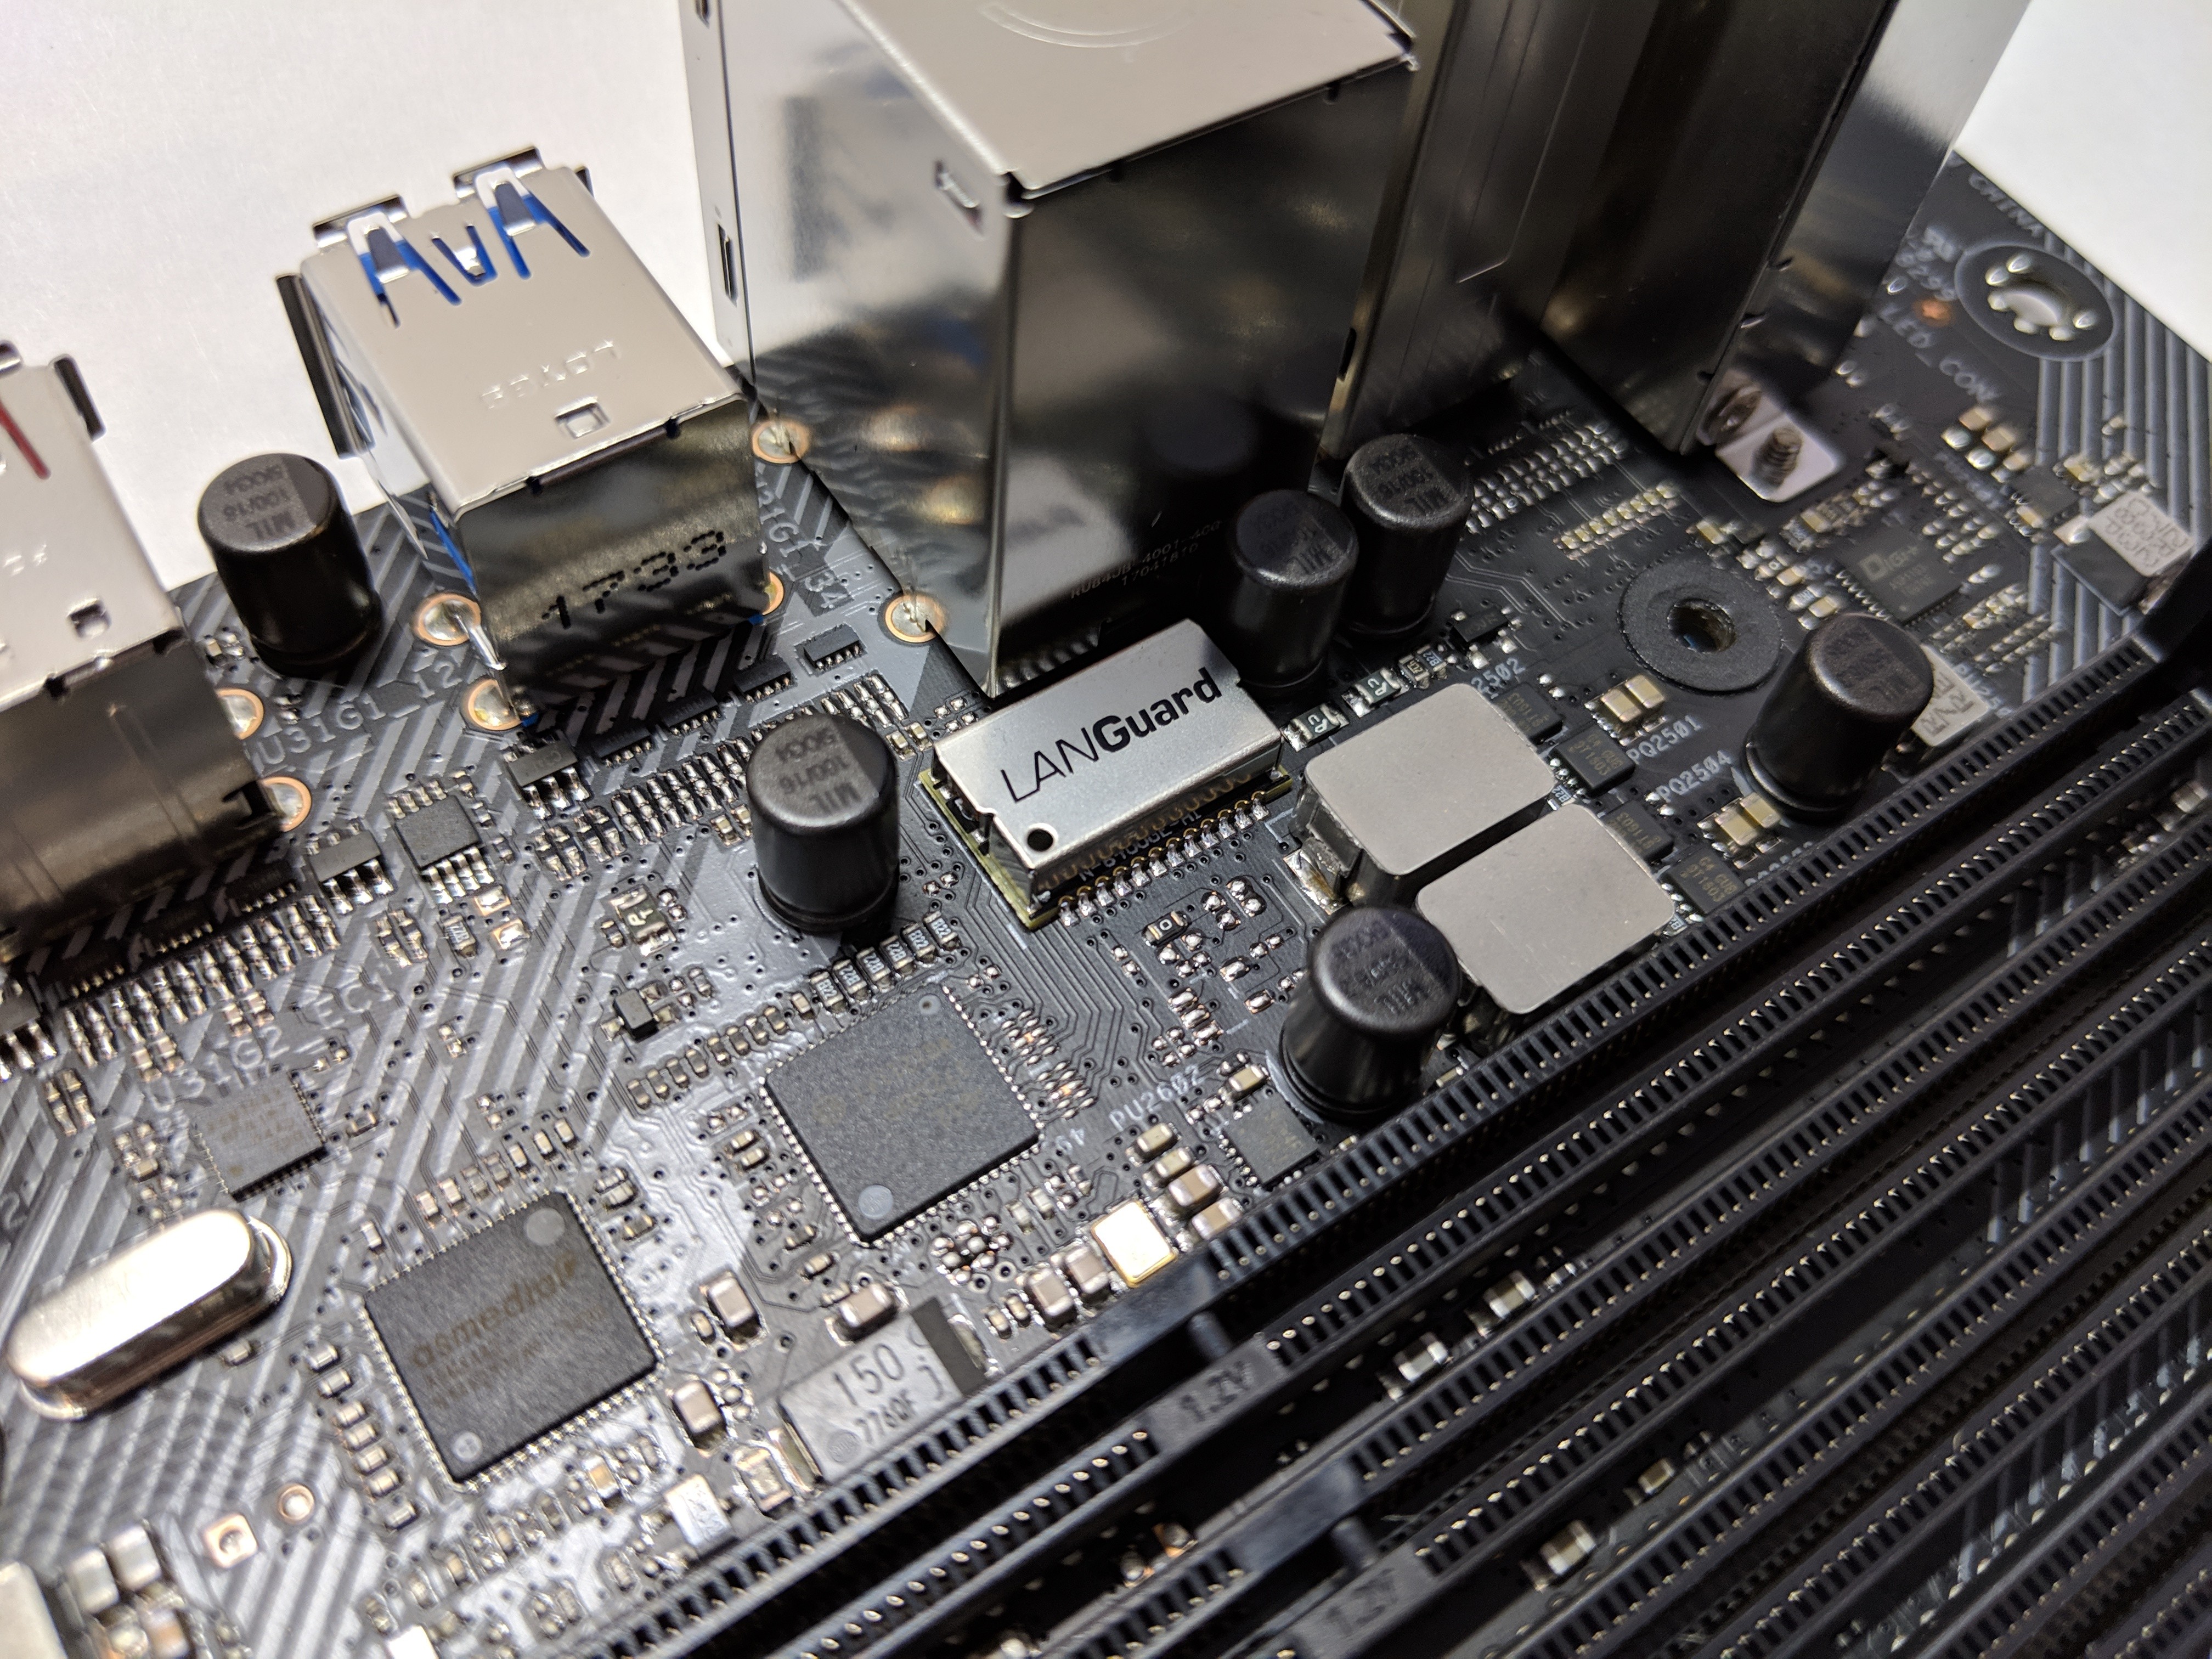
While we’ve got the CPU VRM heatsink assembly off, let’s get a closer look underneath the I/O area. As promised, we can see the LANGuard cover installed which is suppose to help reduce signal noise.
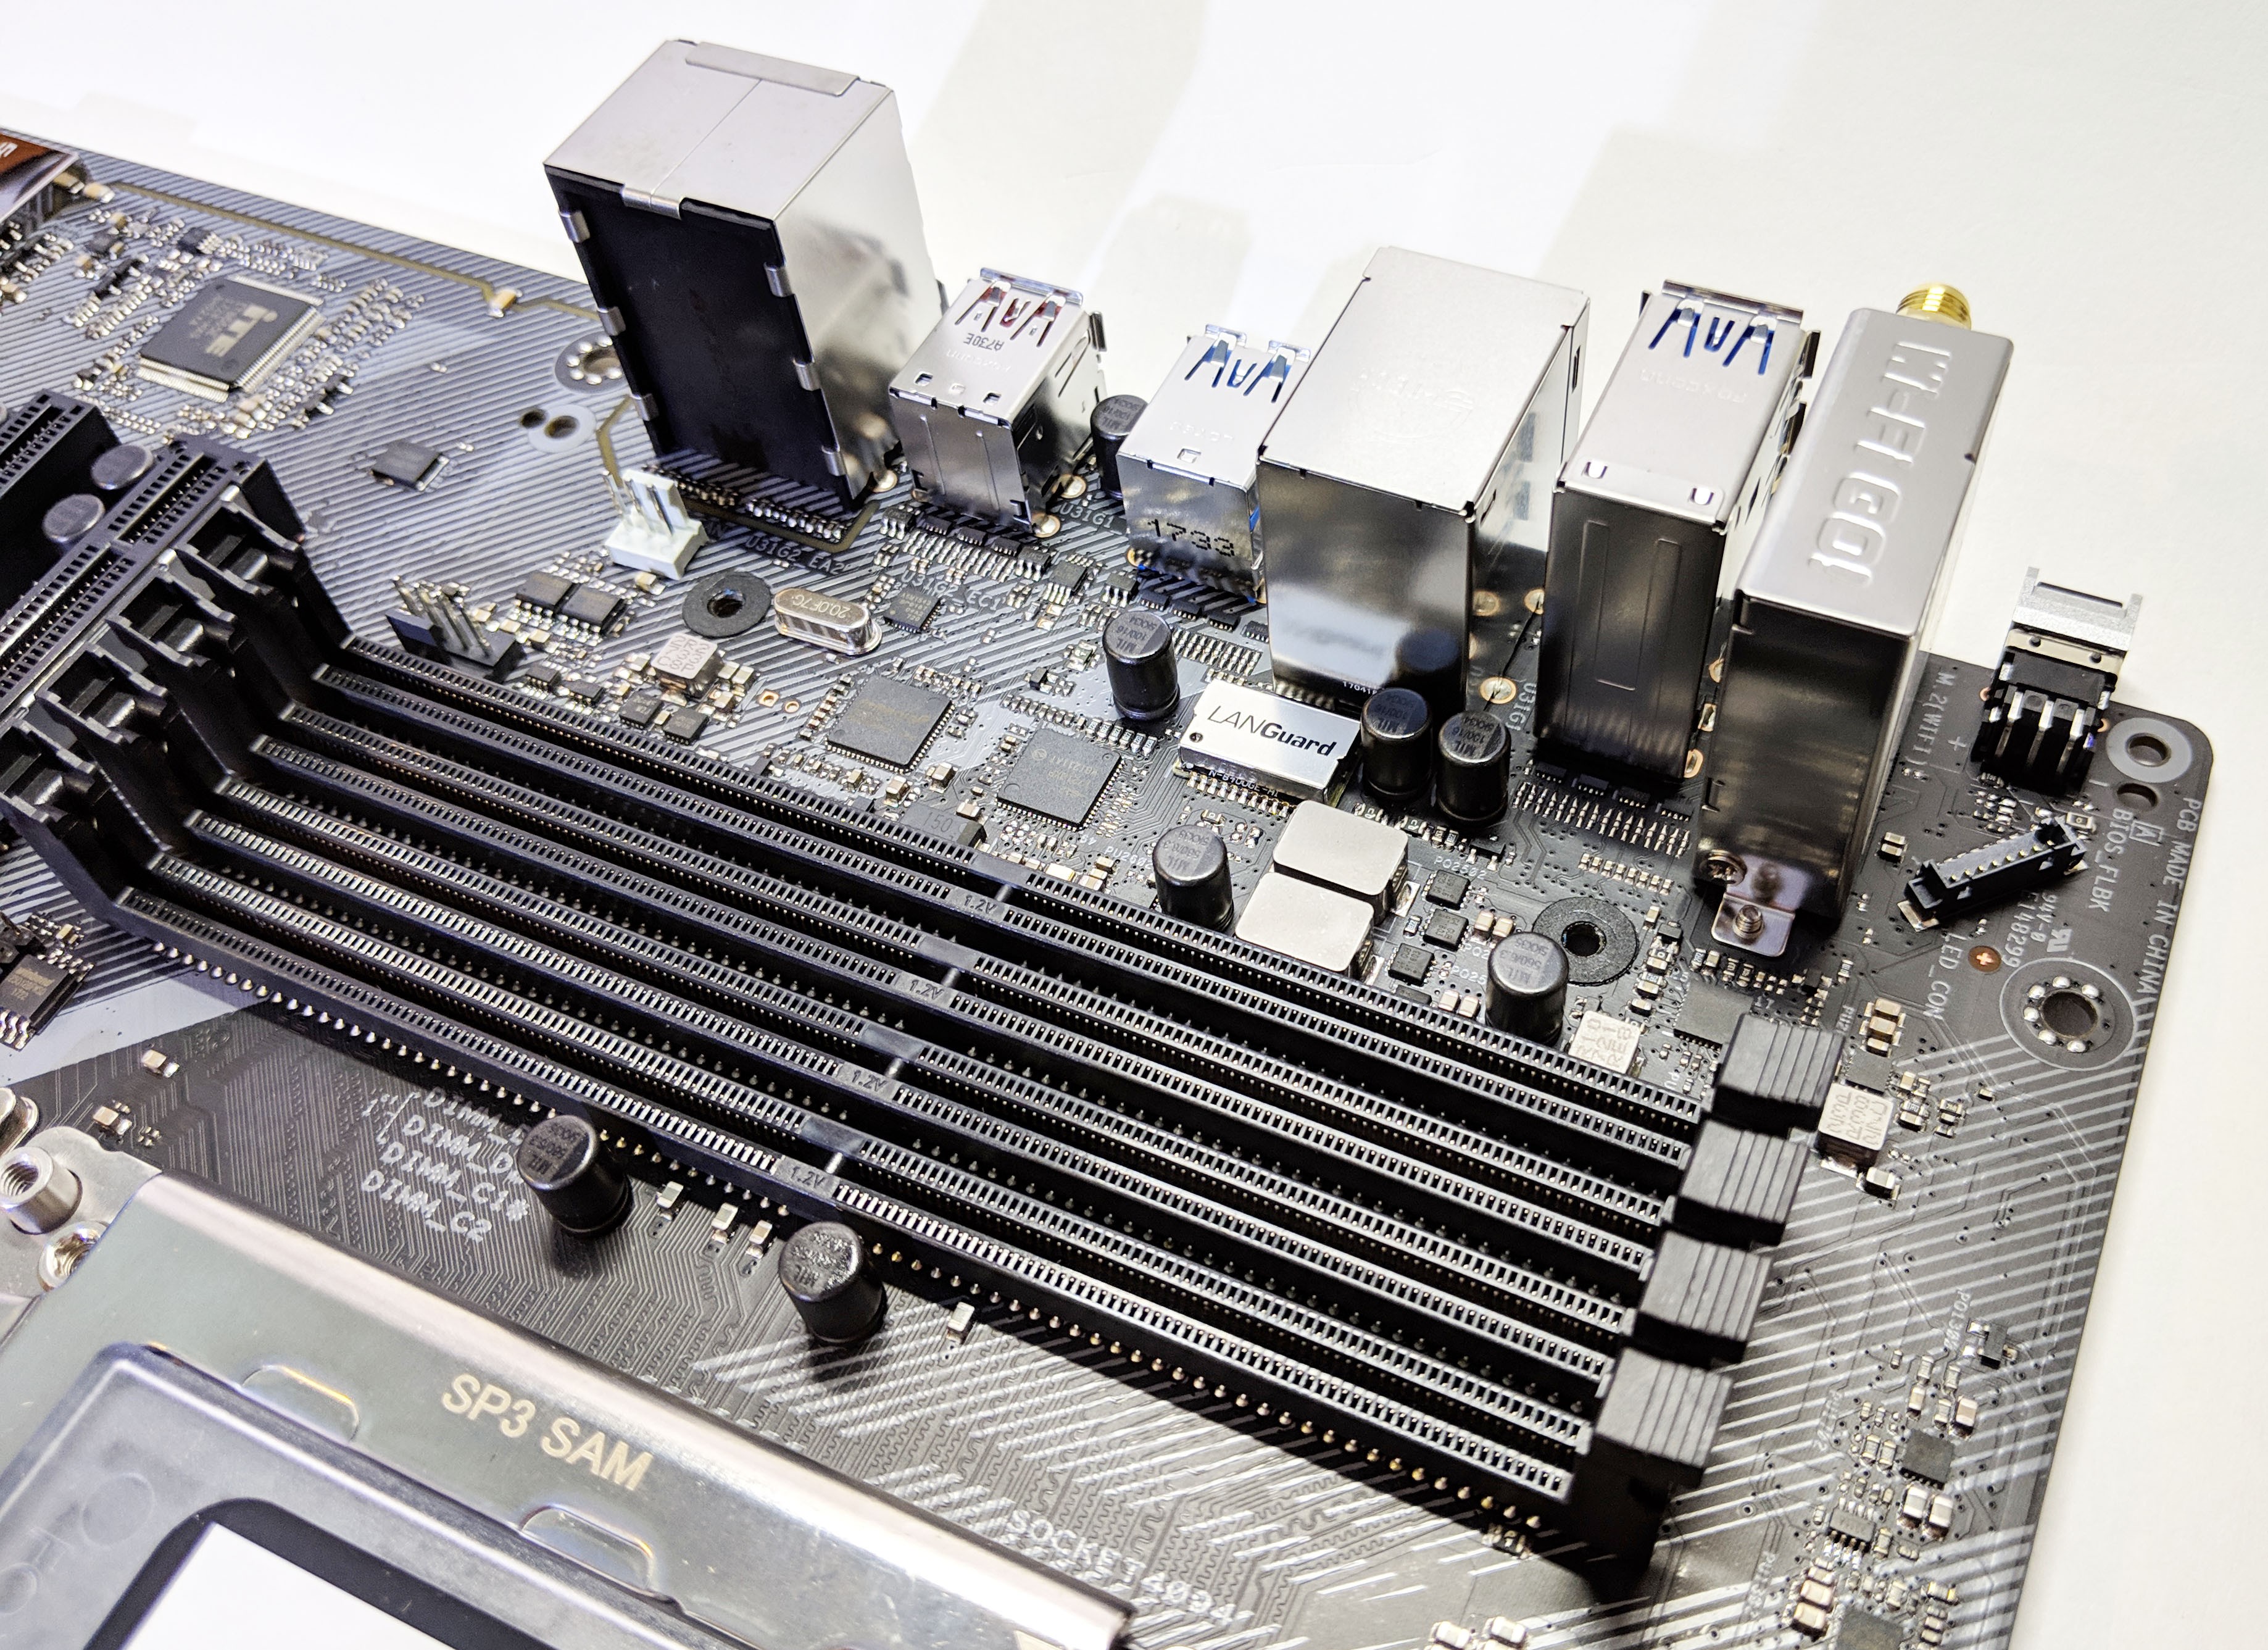
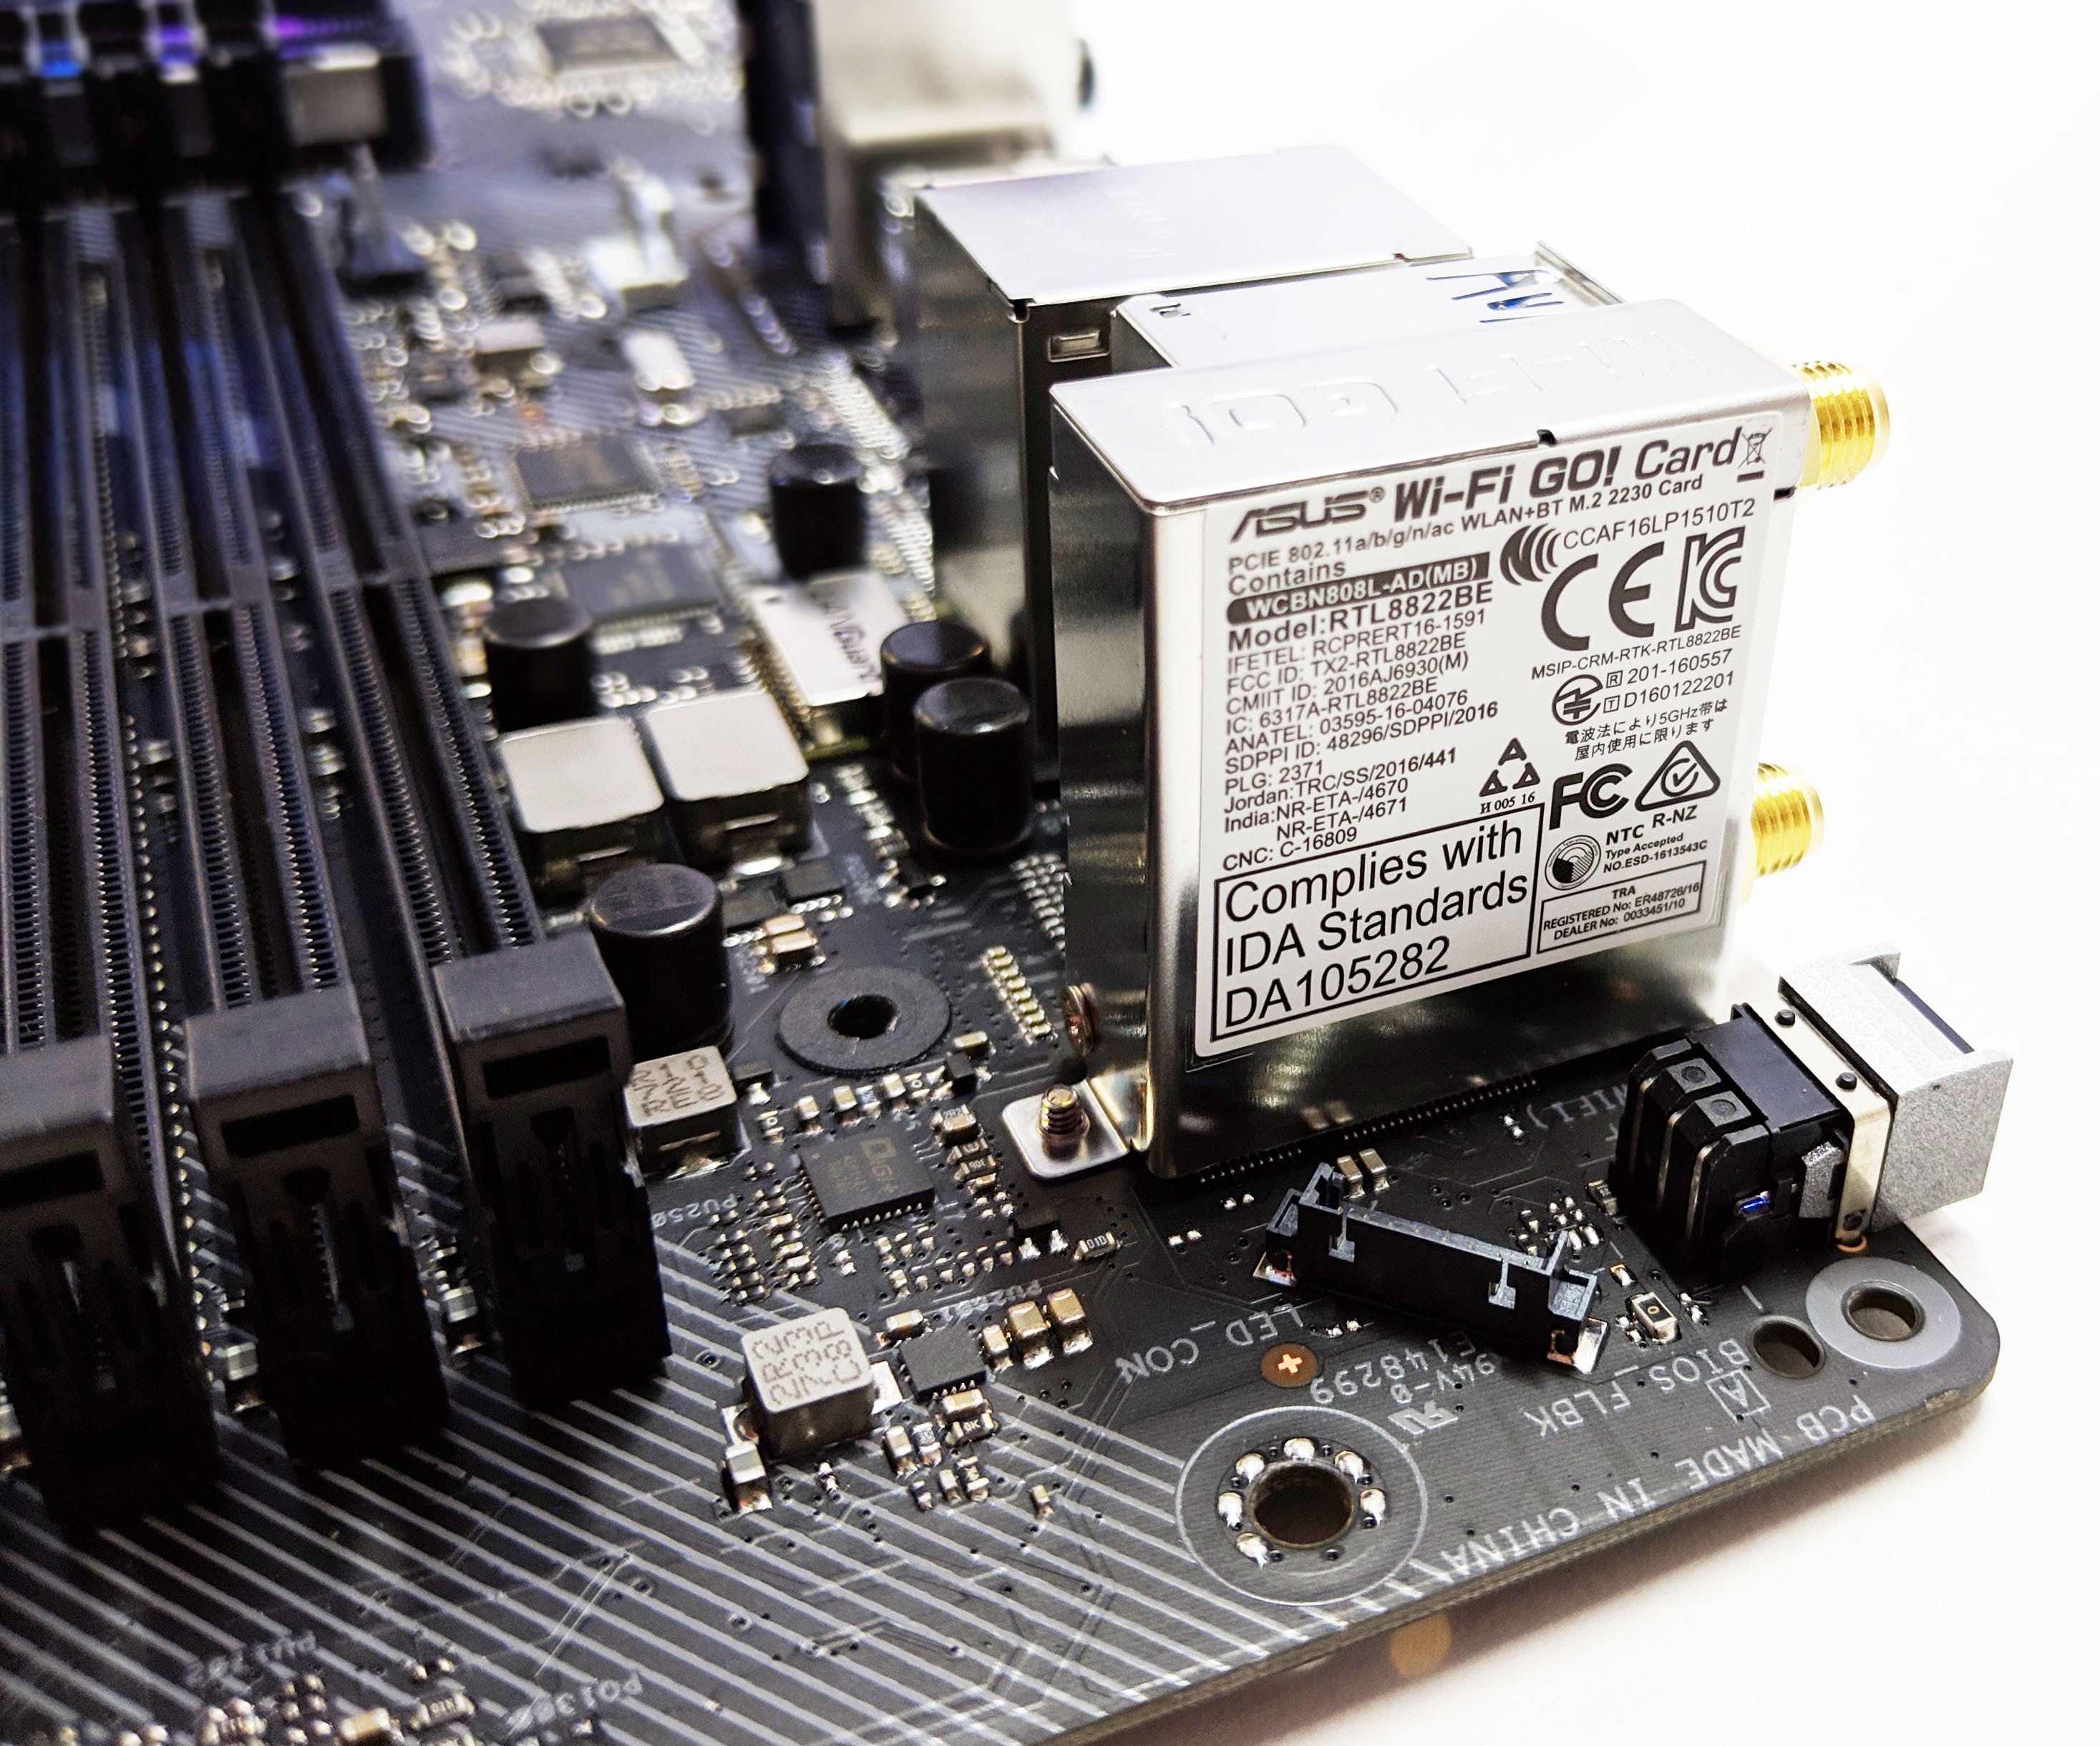
Lastly, with the shroud off we get a better view of the built in WiFi card. It appears to be an ASUS Wi-Fi GO! adapter with model number WCBN808L-AD/RTL8822BE which means this uses a RealTek controller and driver. Also according to the label this appears to be using an M.2 2230 interface. I guess now we know where our third available CPU SoC controlled M.2 slot went!
Hardware Installation
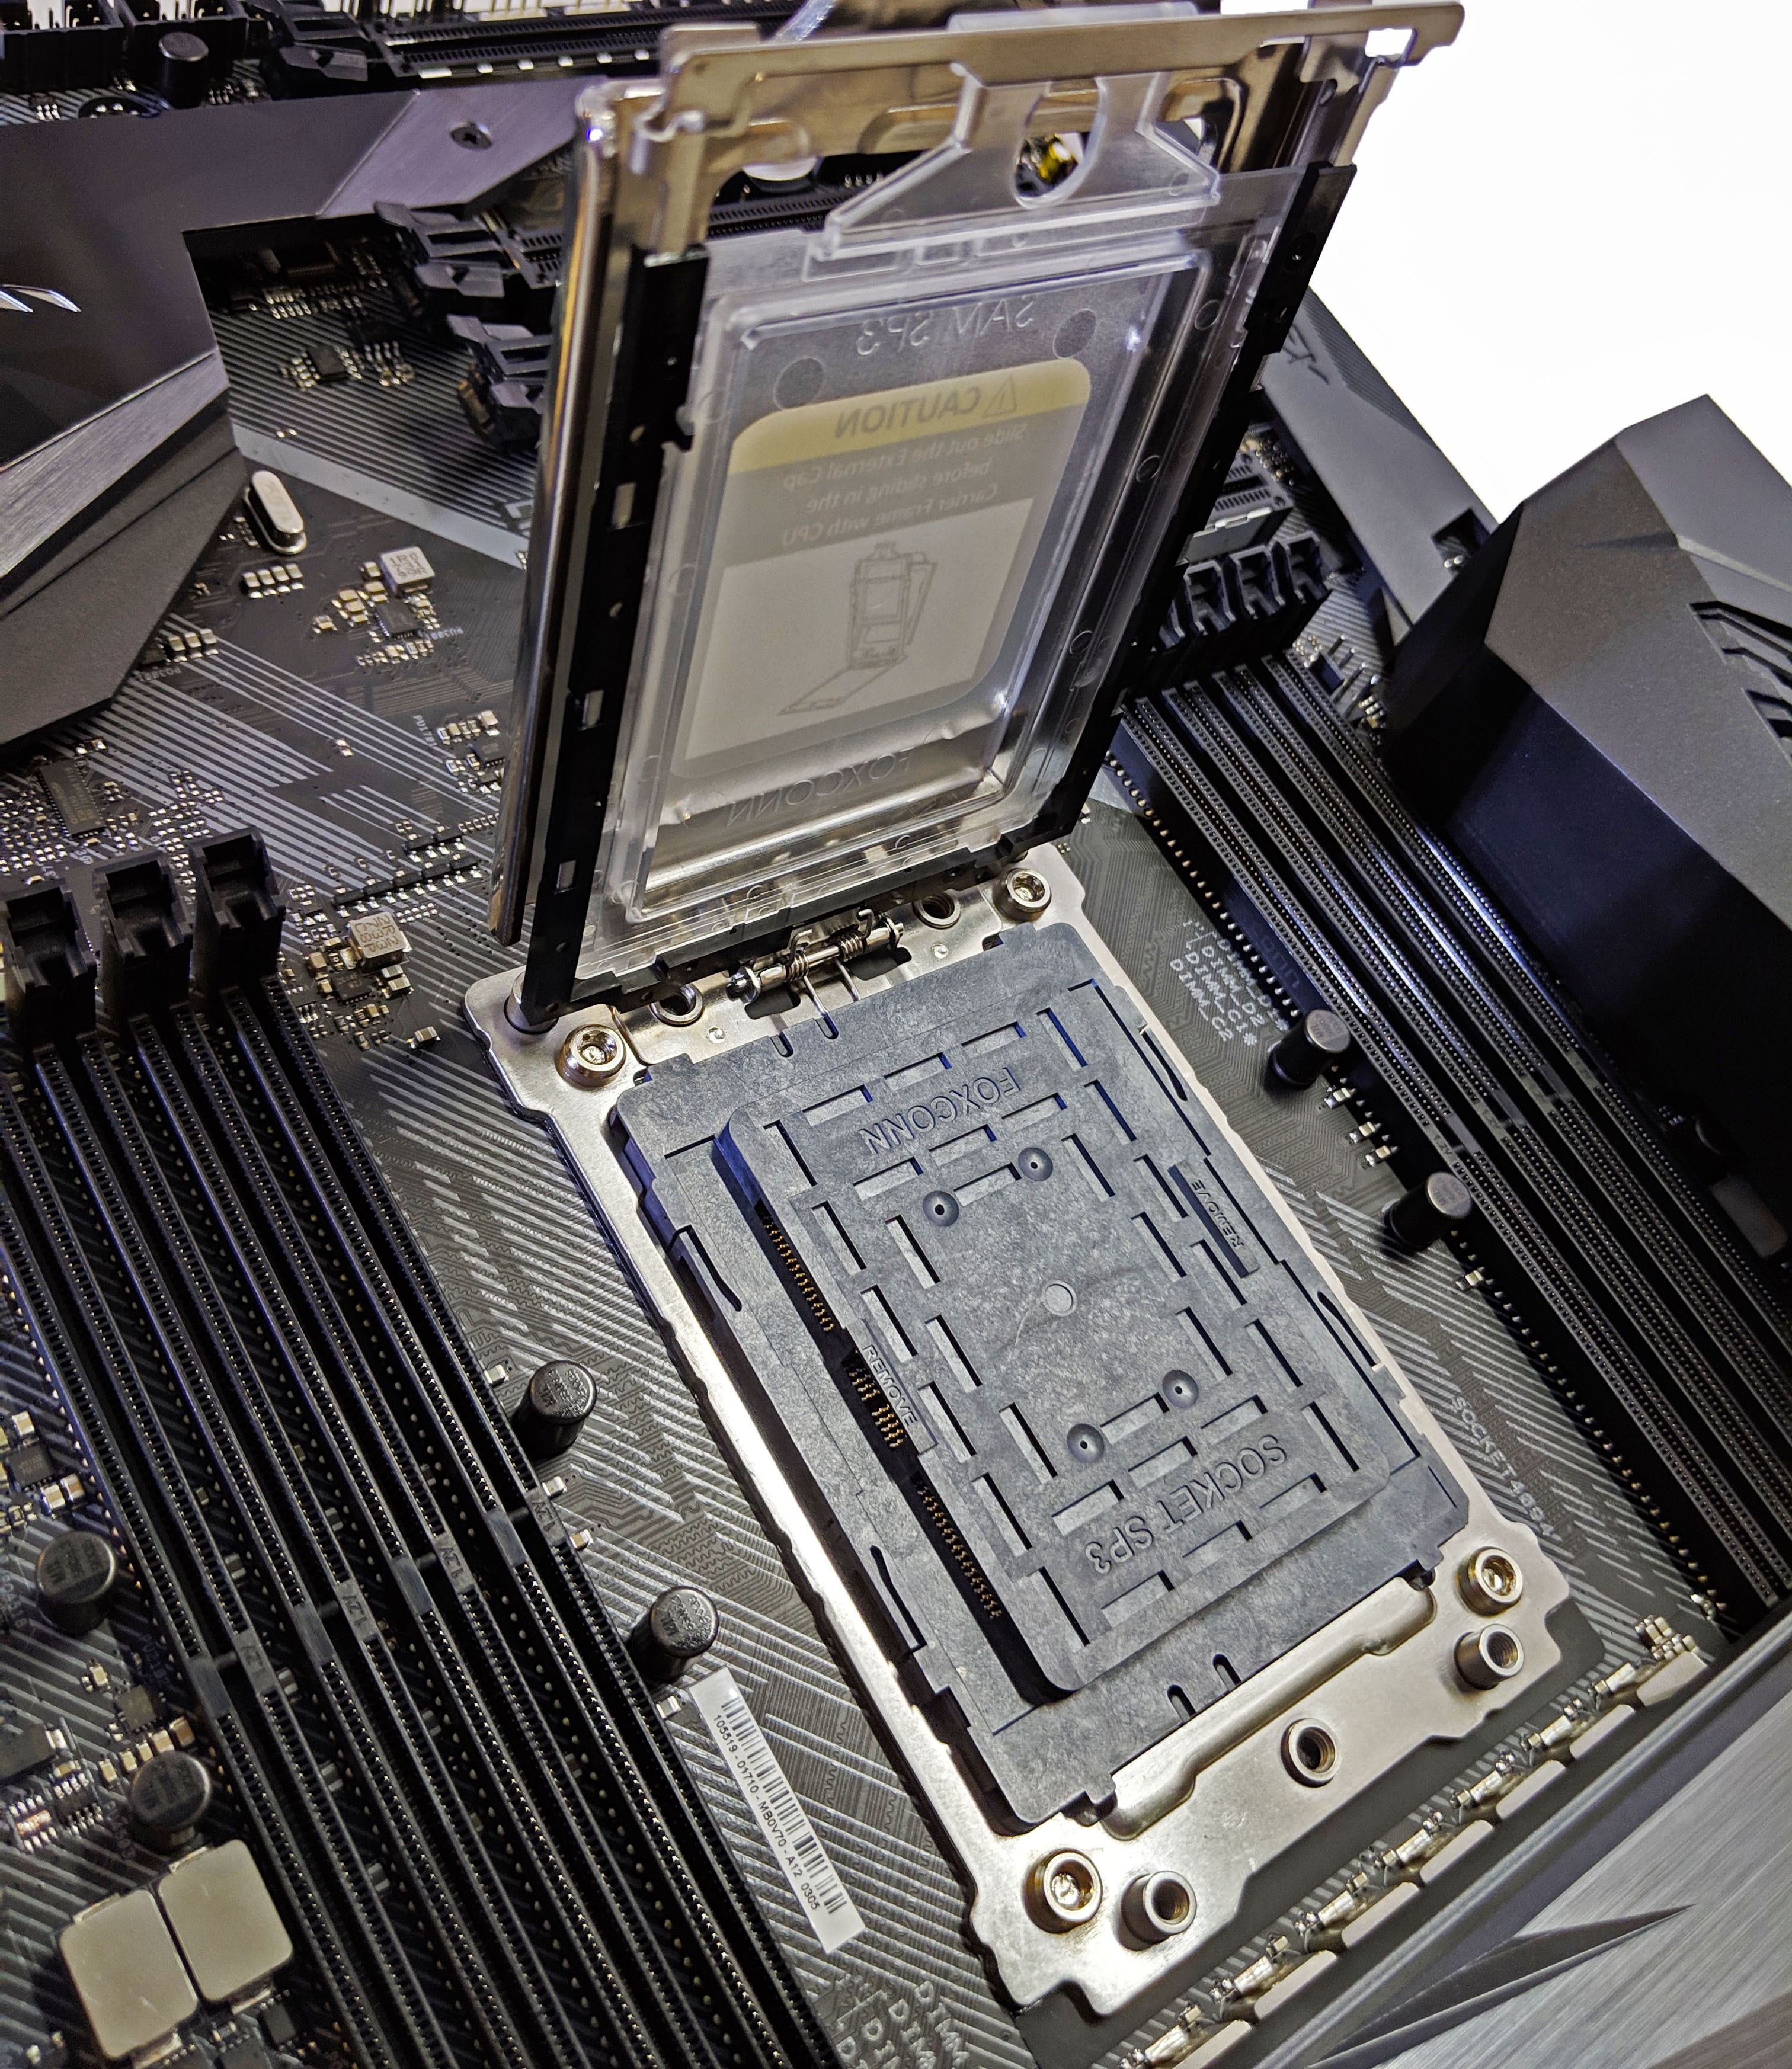
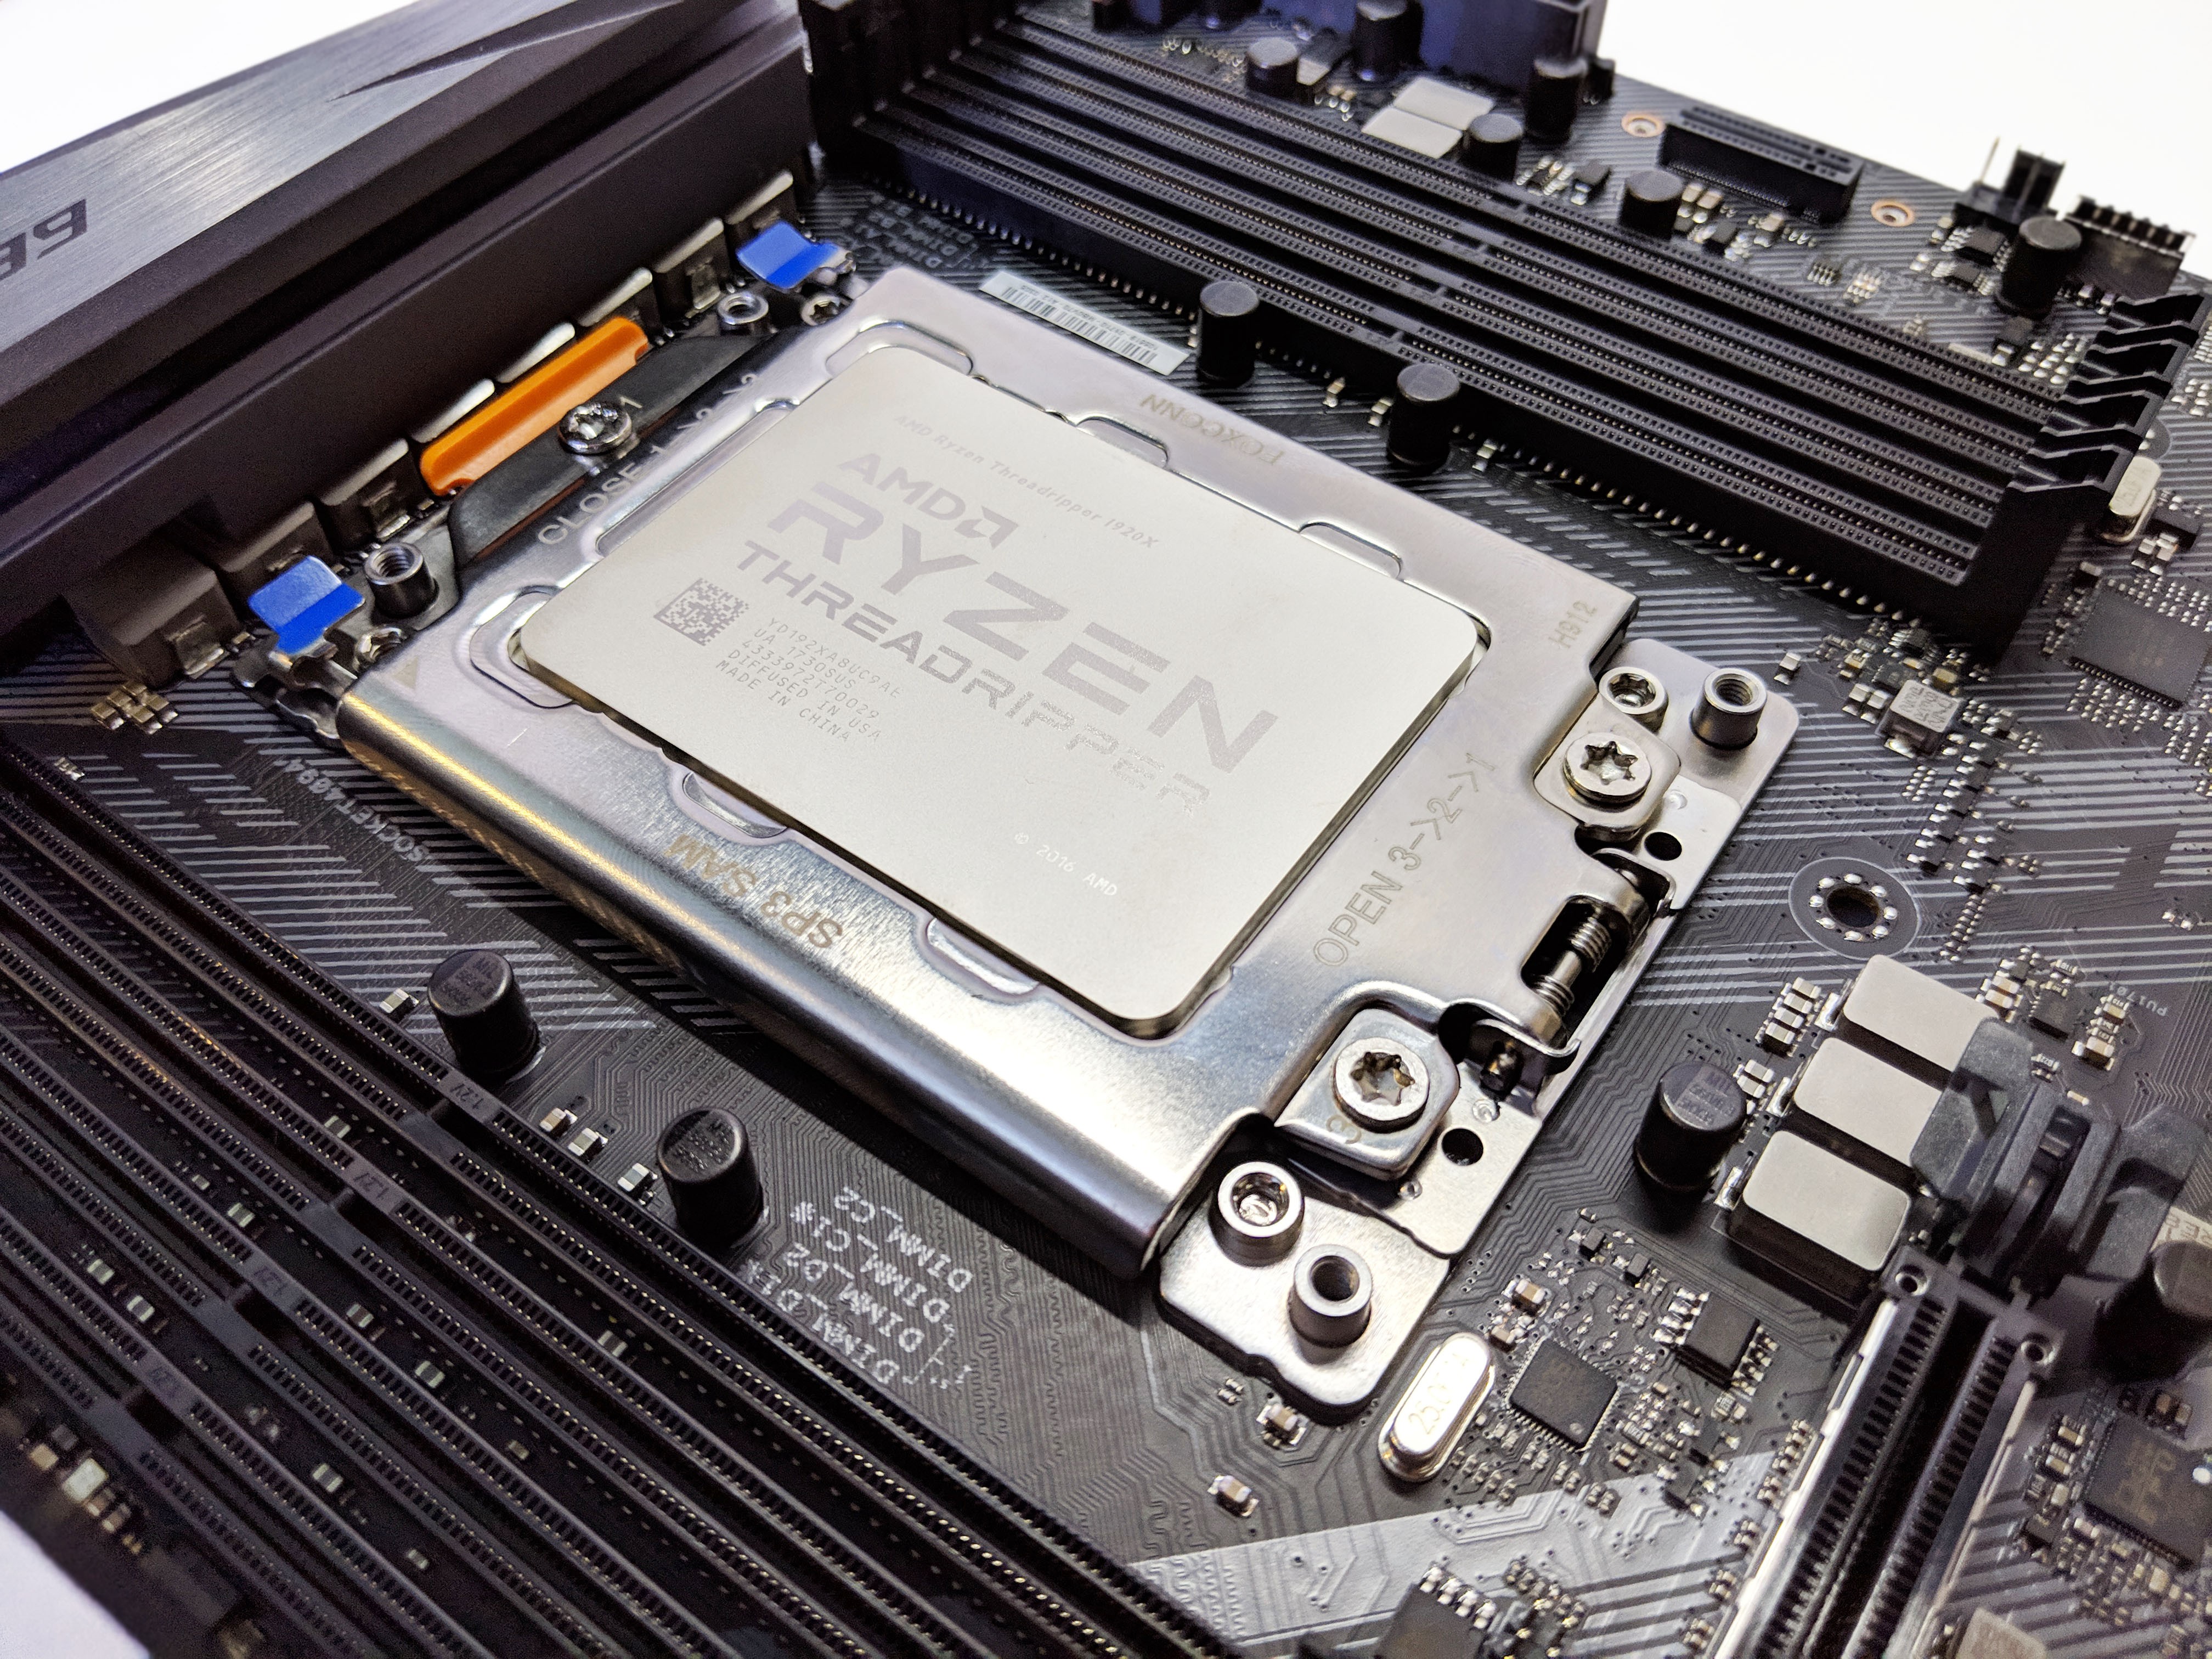
Let’s first start by installing the CPU. This will be much easier to do outside the case and will allow us to work without any distractions. For first timers installing a TR4 CPU, I highly recommend watching this video from HardOCP and taking your time.
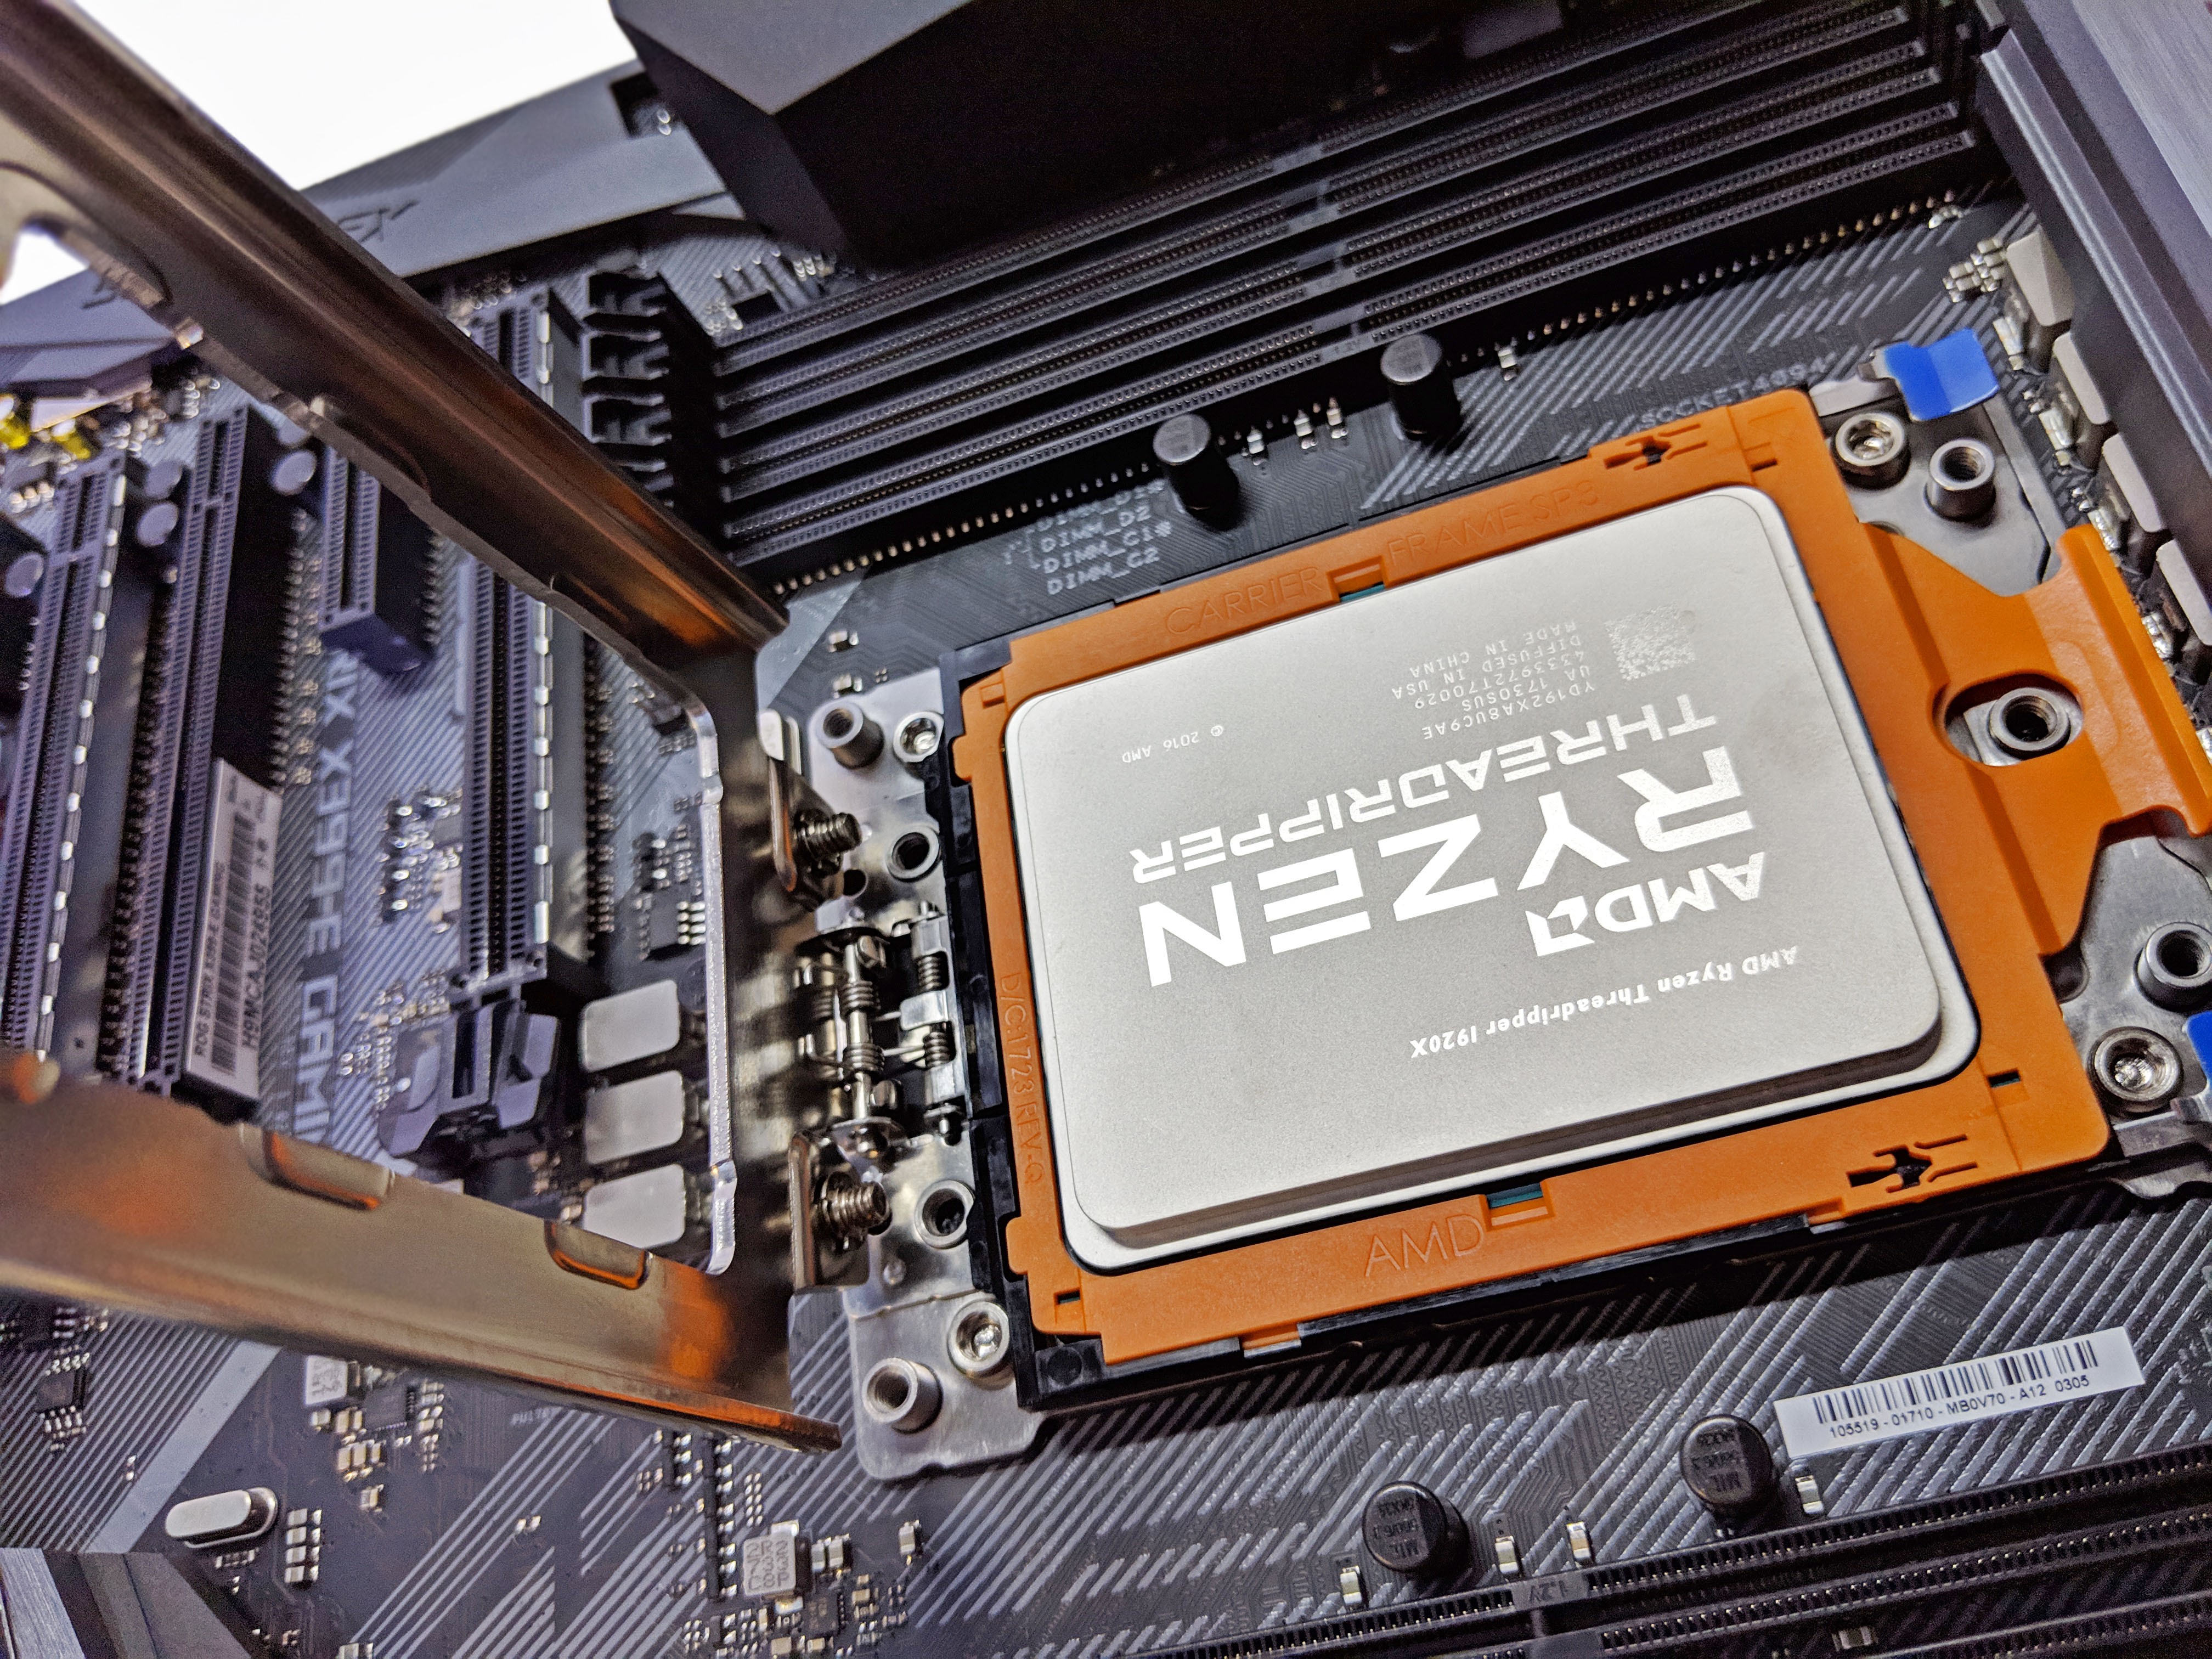
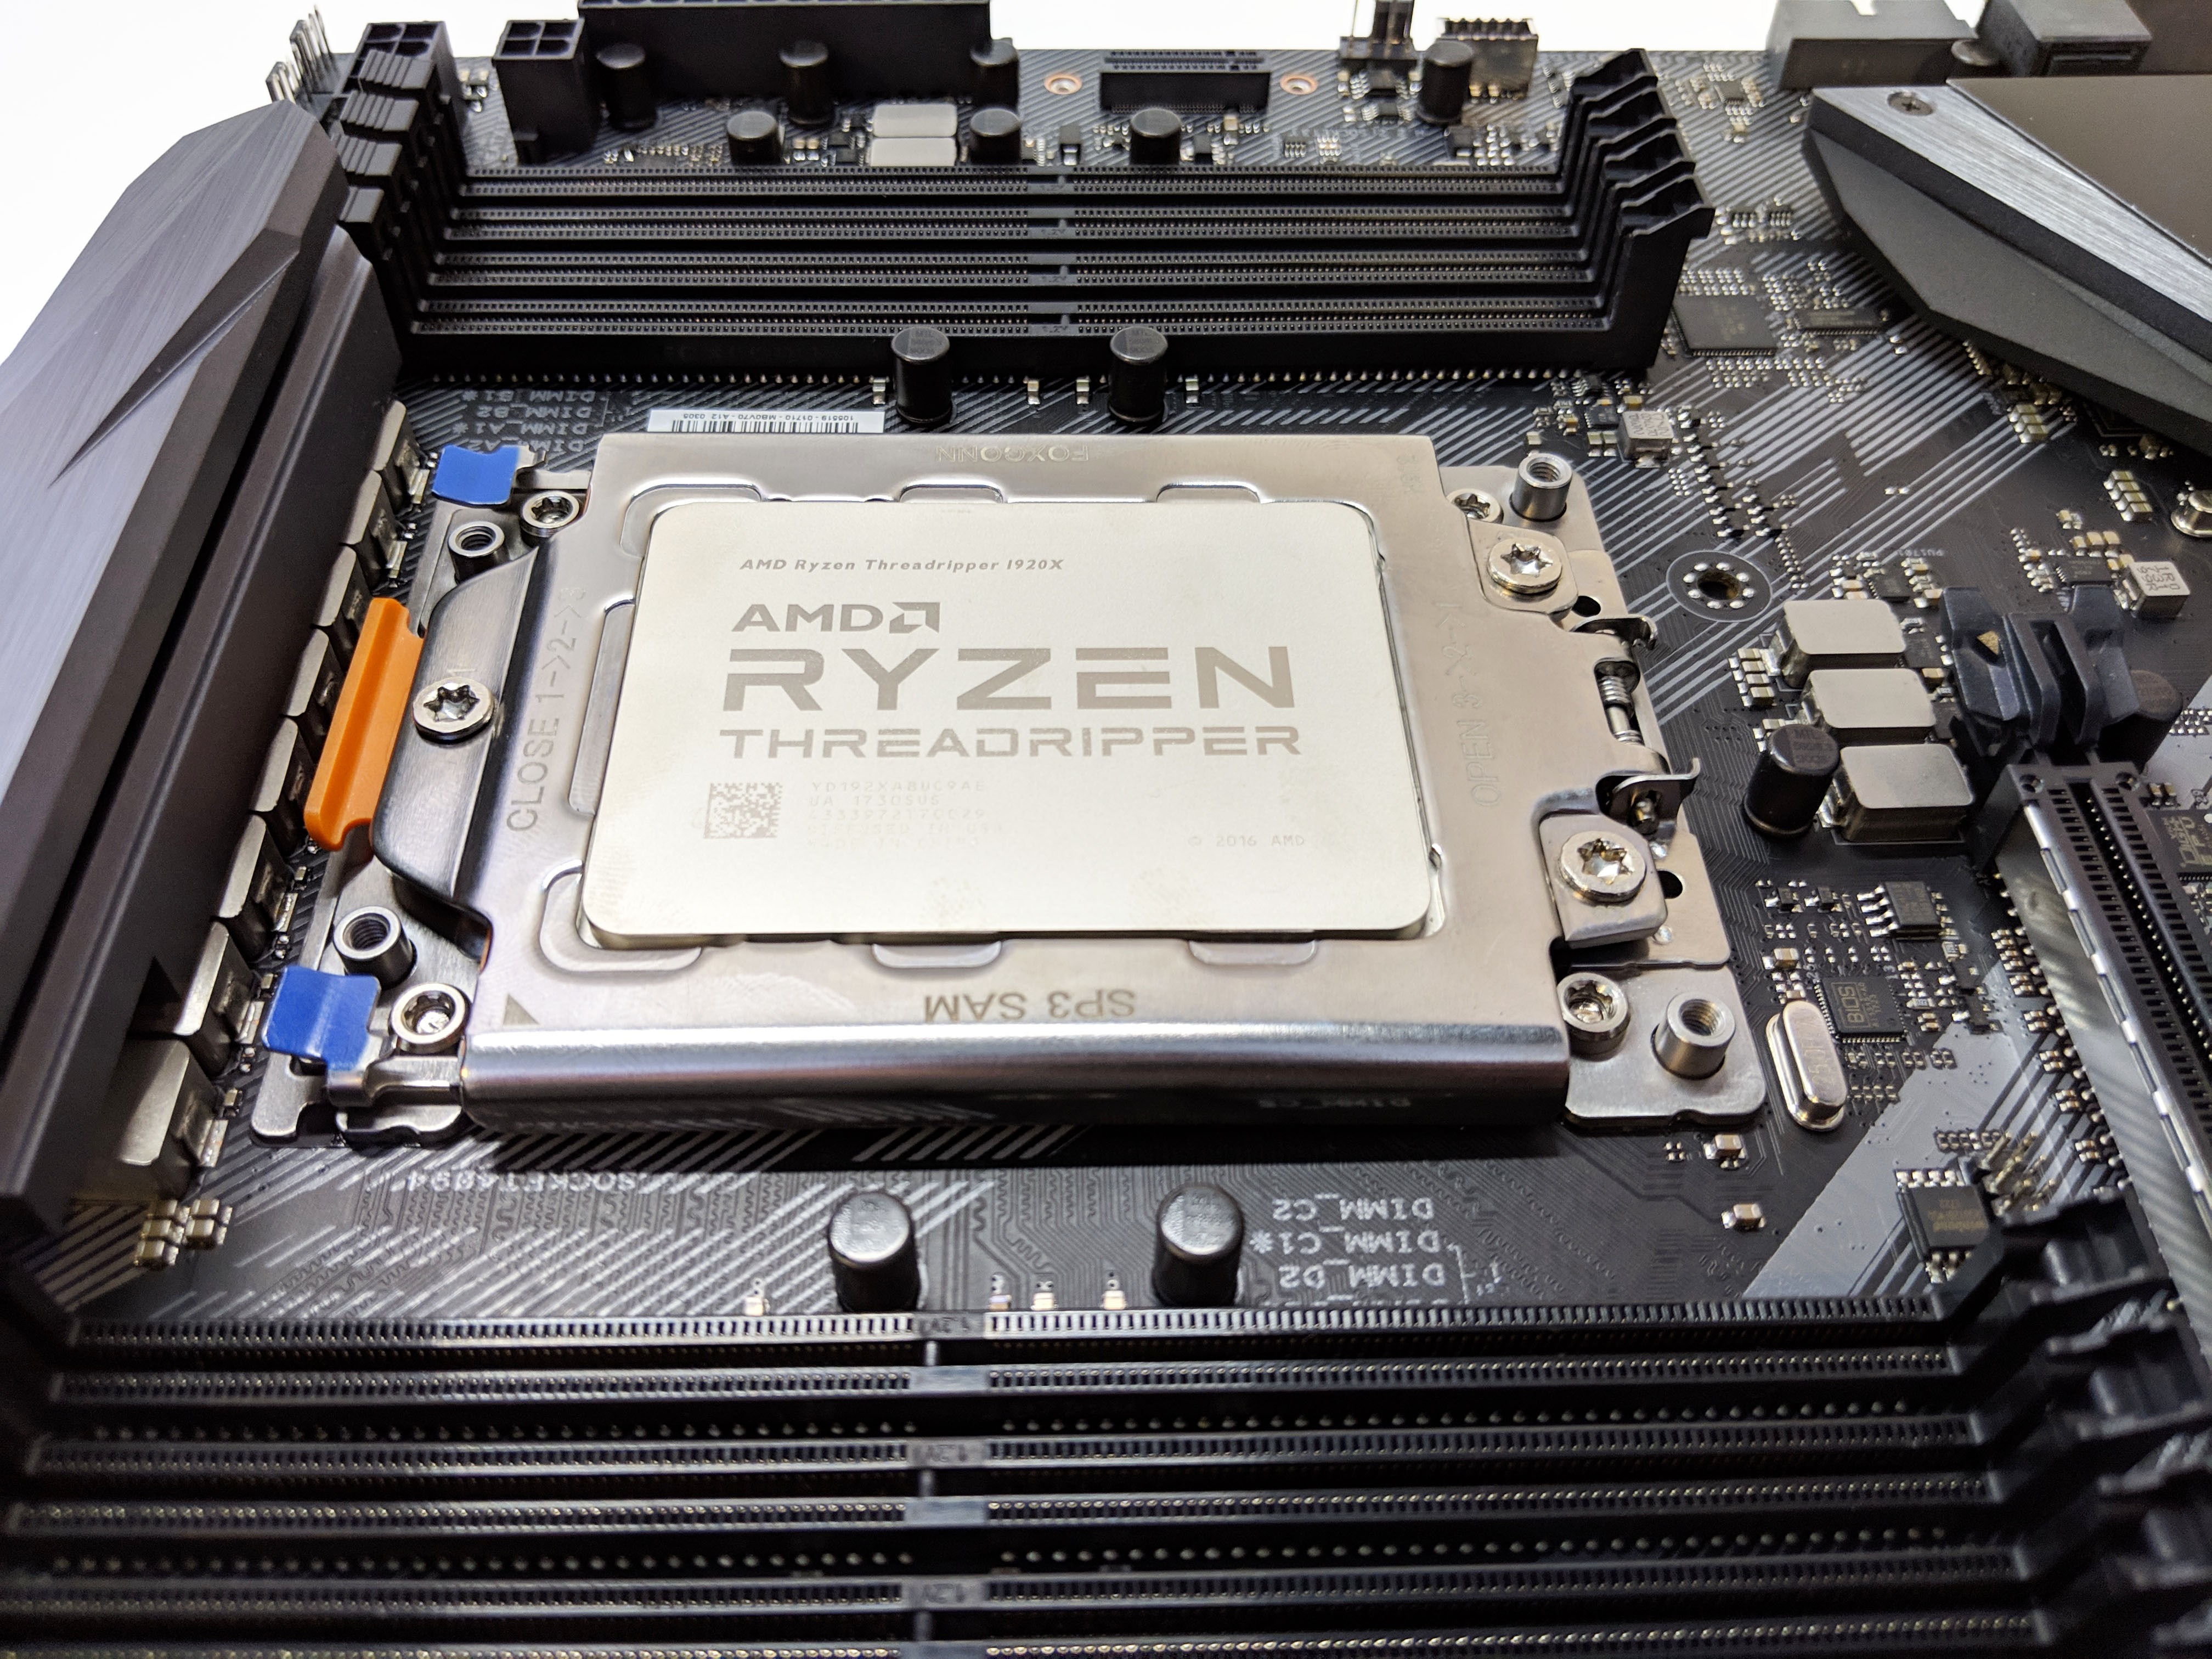
In my case, the CPU installed without a hitch. Be sure to tighten the retaining bracket torx screws using the provided torque wrench that comes with the CPU so you don’t damage anything.
At this point, feel free to install your RAM now or once your motherboard is mounted into the case. I normally like to install everything including the CPU cooler outside the case, that way if I have any fitment issues with the cooler, it’s much easier to address.
If you are using an M.2 SSD, installing it before mounting the motherboard in the case will be easier as well. This goes for both the heatsink and vertical options but is not required.
Cabling was easy and the placement of all the various connectors was logical and easy to access. Fan connectors were distributed around most major areas so you probably won’t have issues finding a connector.
The only thing I would change if I could is using a 90-degree angle 24-pin motherboard/power connector rather than the flush, traditional vertical style. An angled connector is always easier to cable in my opinion. I was quite happy with the placement of the CPU power connectors. Having them right next to the 24-pin motherboard connector made cable routing a bit easier and I couldn’t imagine how fun that would have been to install those cables (or remove) those power connectors with the Cooler Master Wraith ripper hogging the scene!
With everything installed on the motherboard, and the board safely mounted in our Cooler Master MB530P case, we’re ready to turn it on and start tweaking the BIOS!

BIOS Options
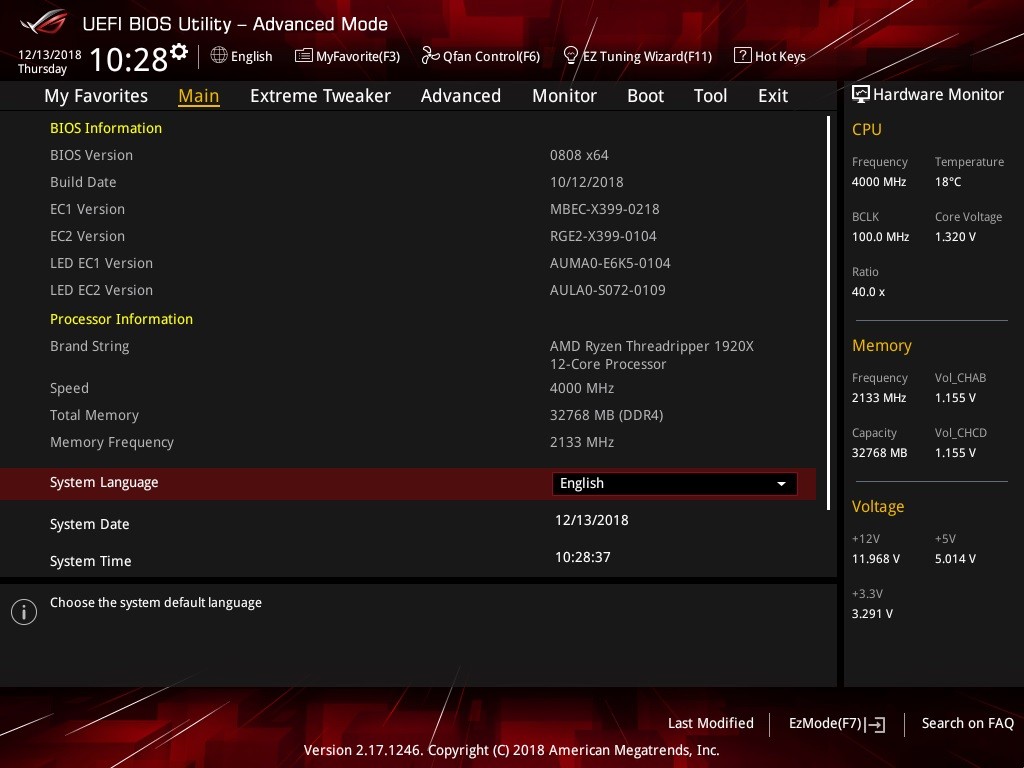
When you power on your system for the first time, BIOS will complain about a CPU change and you’ll need to press F2 (normally DEL) to enter BIOS. The first thing you’ll probably want to do is check to make sure that BIOS has properly detected all your components such as RAM and SSD/HDDs.
ASUS UEFI BIOS has two modes, EZ Mode and Advanced Mode which can be toggled using F7. EZ Mode presents us with a ton of information such as installed devices, CPU/Memory information, Fan speeds, and temperatures. Advanced mode is where you’ll probably spend most of your time tweaking settings.

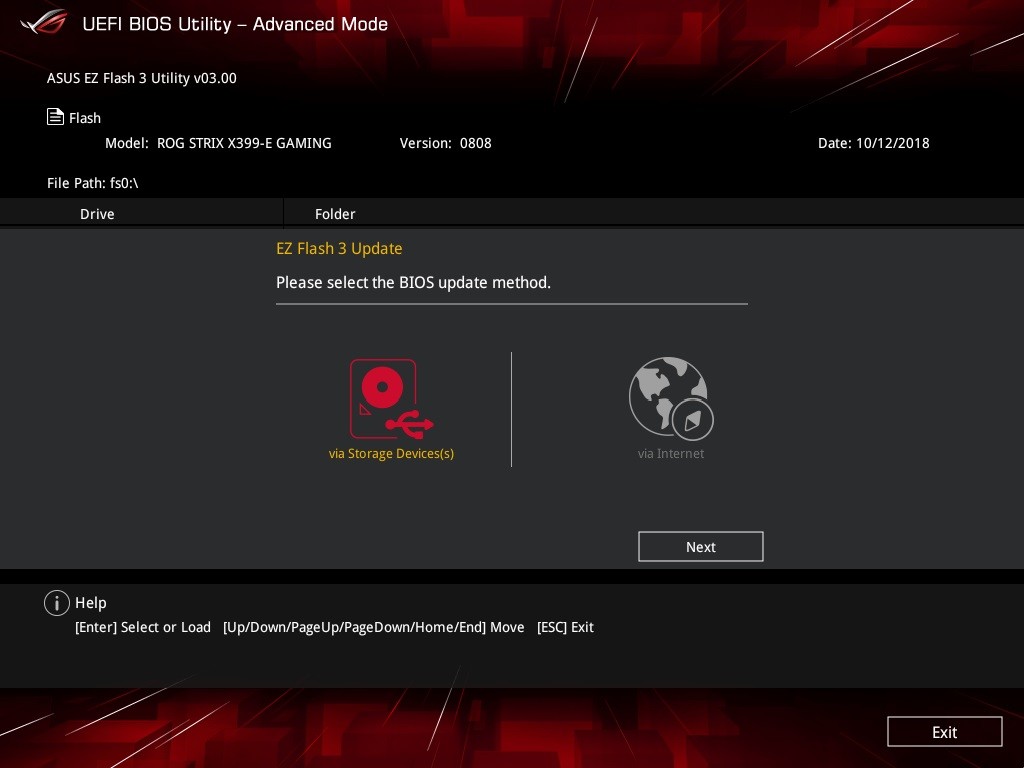
Before we go hog wild and start overclocking, let’s check for any BIOS updates which in my case there was. ASUS makes BIOS updating easy. This particular BIOS has a built in network stack meaning it’s able to download and install the latest BIOS automatically. If this method isn’t available, you can download it to a USB drive and import manually.
Once updated, the system will reboot. At this point, feel free to change settings.
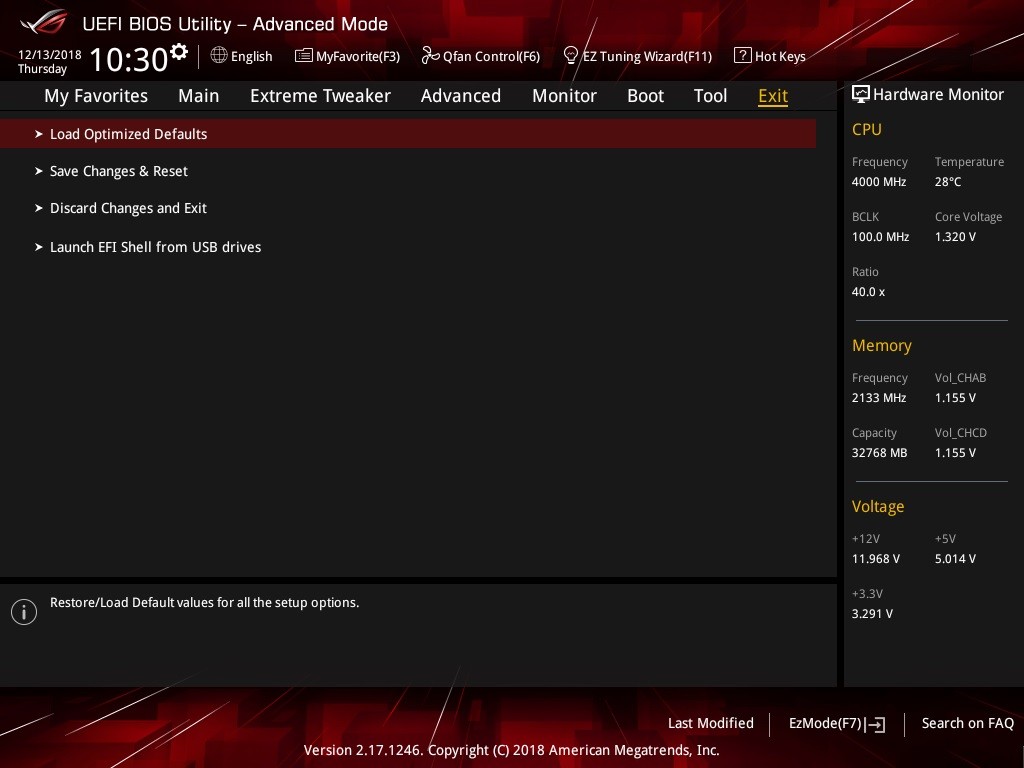
The BIOS has a ton of options, especially when it comes to overclocking and tweaking CPU and memory settings. While this is not an overclocking guide (which will come later) overclocking these processors is incredibly easy. Here are some more screenshots of various locations in BIOS for your enjoyment.
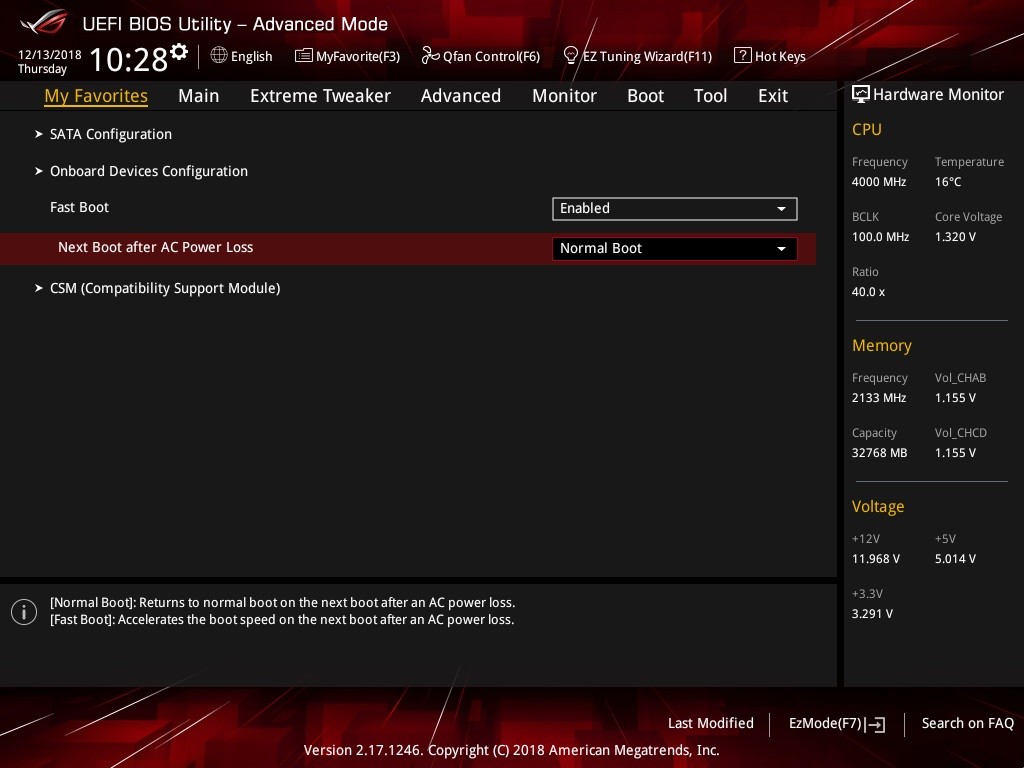

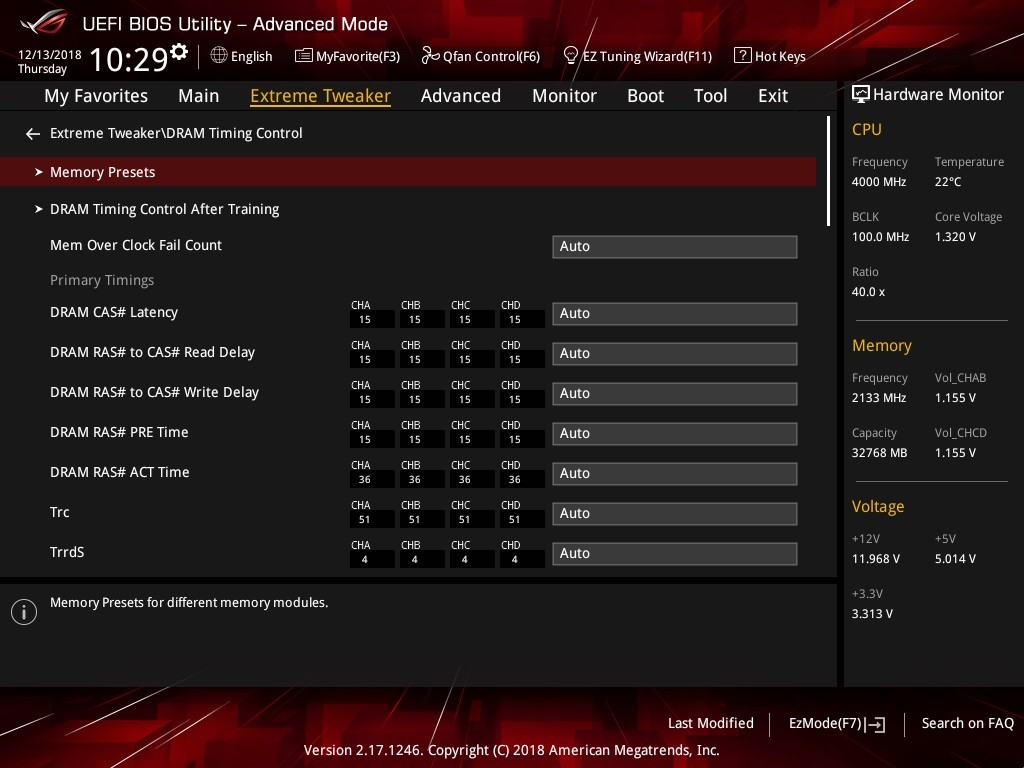
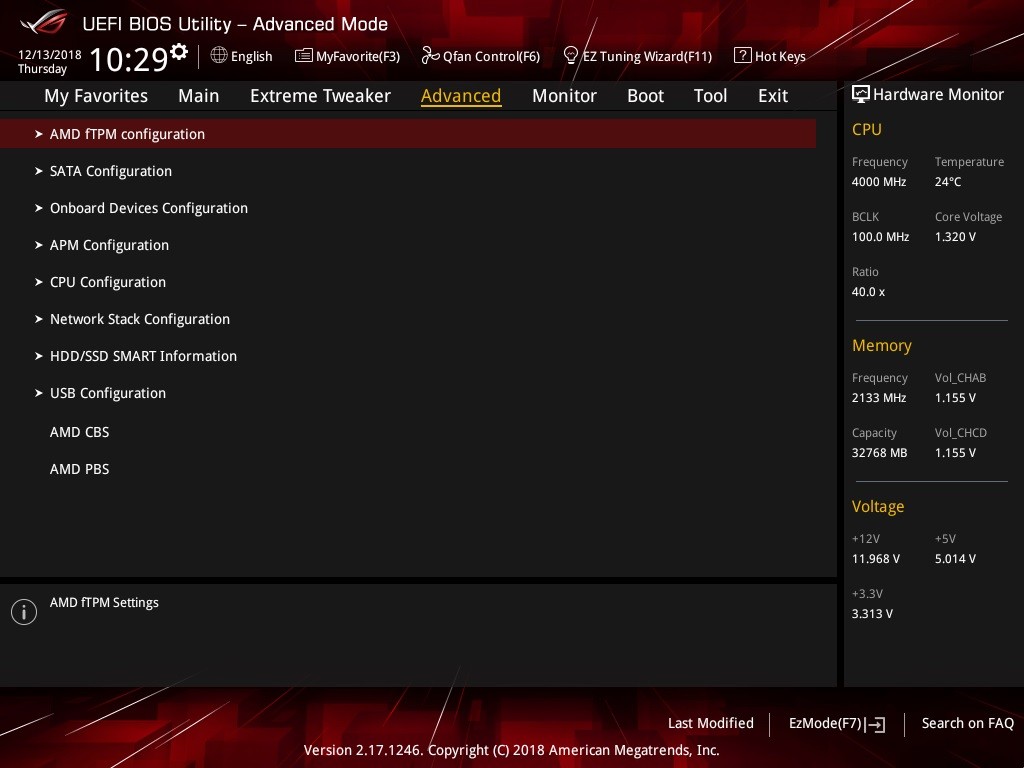


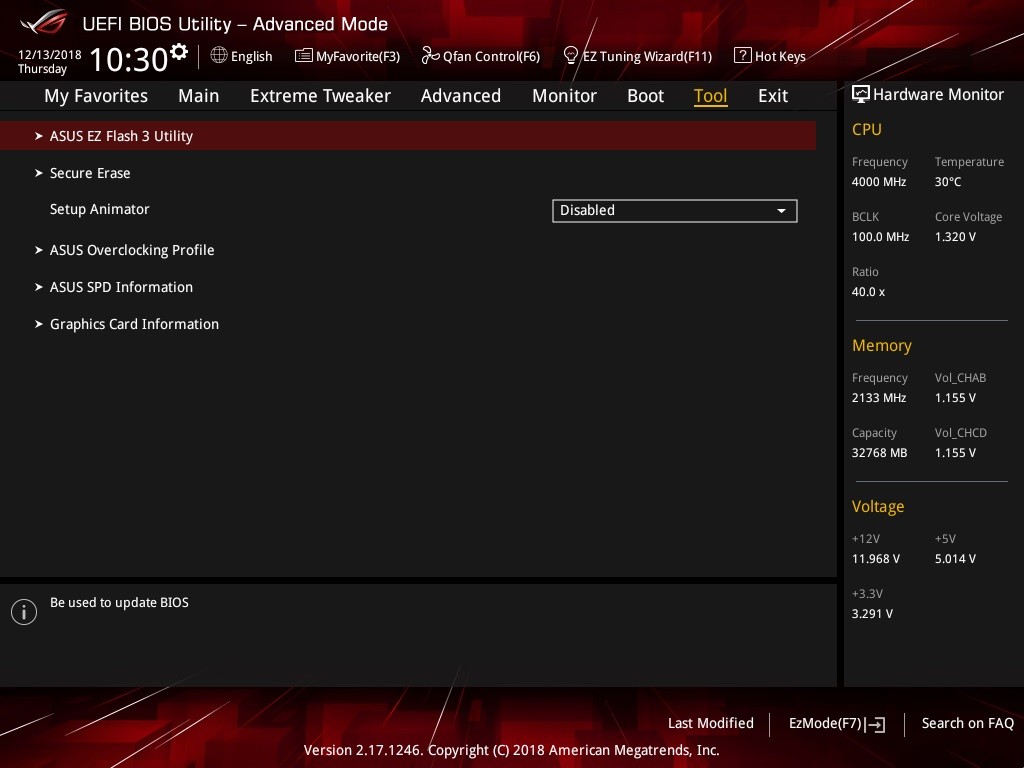
RGB Lighting Options
We mentioned earlier that the ASUS ROG Strix X399-E Gaming had onboard RGB lighting options. These LEDs are located on two different areas of the motherboard, on the I/O shroud, and another on the M.2 SSD heatsink on the bottom right.
The onboard RGB lighting can be controlled via ASUS AURA Sync software which can be downloaded from ASUS’s website. Lighting is also provided by two additional 4-pin analog RGB headers, and a single addressable RGB header located on the motherboard.
Final Thoughts and Scoring
The ASUS ROG Strix X399-E Gaming is a feature-packed motherboard that has everything most gamers and non-gamers would need at a reasonable price. At the time of writing this review, the motherboard can be purchased from any major PC component retailer for around $349.99 USD which is about what you would expect to pay for a Threadripper motherboard.
Its robust features and sturdy components such as CPU VRM definitely added a lot of value to the board which should make it a great choice for overclocking should you chose to go that route. Its BIOS is more than adequate for the task as well.
Scoring
All in all, the ASUS ROG Strix X399-E Gaming is a well constructed motherboard bursting with features and makes the perfect companion for any AMD Ryzen Threadripper build. Now let’s examine the motherboard and give a score based on four categories, Quality, Functionality, Performance, and Value.
- Quality: 9.7/10 – Overall the motherboard was really well built. The motherboard’s overall construction feel solid. Solder is very clean and no flux residue could be found. High end components appear to be used which will translate to a longer lifespan.
- Functionality: 9.0/10 – This is definitely another on of the motherboard’s strong suits. The board is bursting with features. The only two mild “dings” I could come up with was the lack of an integrated I/O shiled which is very common now days (even on other ROG boards), and the small number (2) of M.2 SSD slots.
- Performance: 9.8/10 – Not a lot of negativity here. The motherboard has a host of overclocking features with the hardware to back it.
- Value: 9.1/10 – This is a tough category as it’s definitely on the high end as far as general motherboards go. When going with any HEDT board wheather it’s TR4 Threadripper, or LGA 2066 on the Intel X299 platform, you can expect motherboard to be priced a bit higher than desktop motherboards. Considering the amount of features this motherboard has and that it will do the job for both gamers and non-gamers alike, I would say that the price about what you would expect to pay.
All in all, the ASUS ROG Strix X399-E Gaming is a well constructed motherboard bursting with features and makes the perfect companion for any AMD Ryzen Threadripper build.ASUS ROG Strix X399-E Gaming Final Score:
ASUS Product Page: https://www.asus.com/us/Motherboards/ROG-STRIX-X399-E-GAMING/
Amazon: https://www.amazon.com/STRIX-GAMING-Threadripper-Motherboard-802-11AC/dp/B0756VTD19349.99
Newegg: https://www.newegg.com/Product/Product.aspx?Item=N82E16813119026


You wrote about the actively cooled CPU VRM heatsink fan assembly: “The fan is powered by a single 3-pin 40mm fan. When powered on it runs silent so you shouldn’t have to worry about excess noise coming from it.” Sadly after years now the fan begins to make terrible noise and I have to replace it. But it seems, that the covering plastic piece is held by srews from the backside. I thought it would ony have clips to hold it. Shall I removel the whole motherbord to remove this shroud????