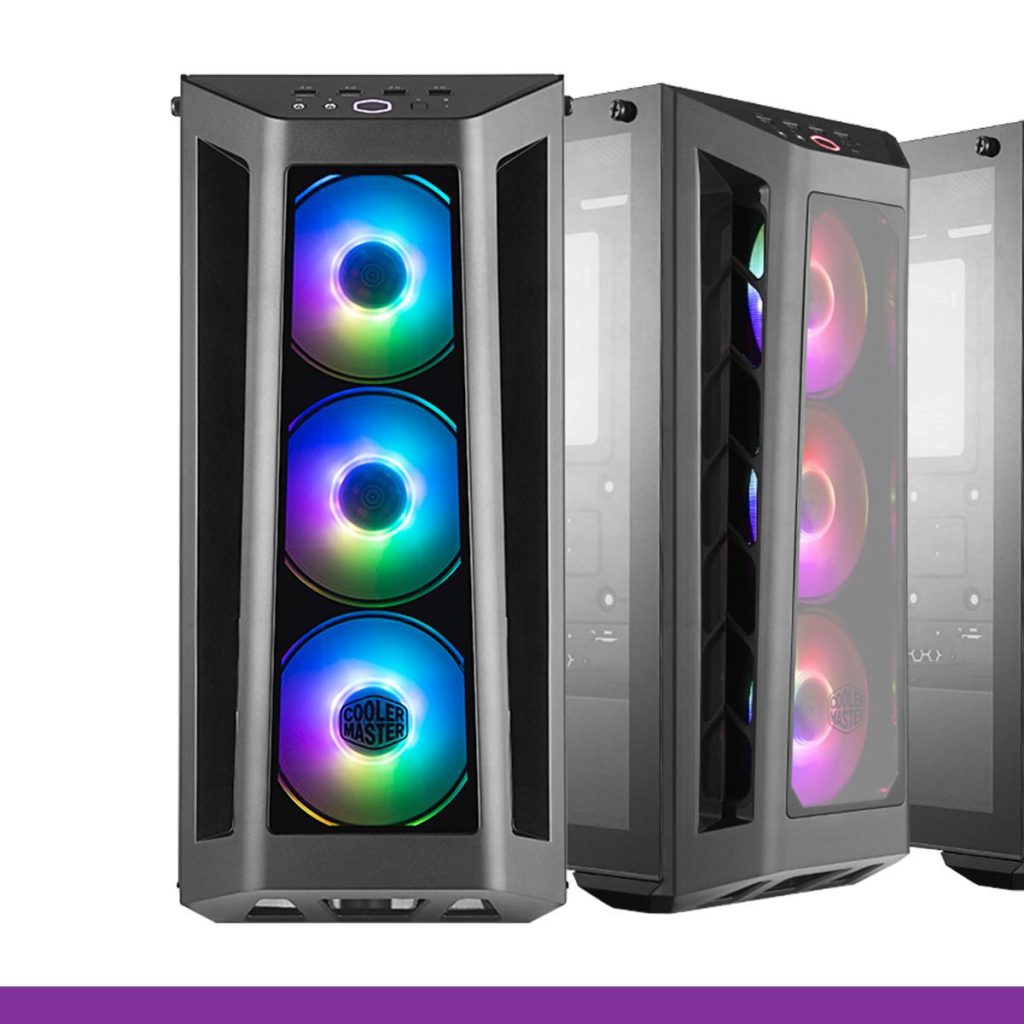
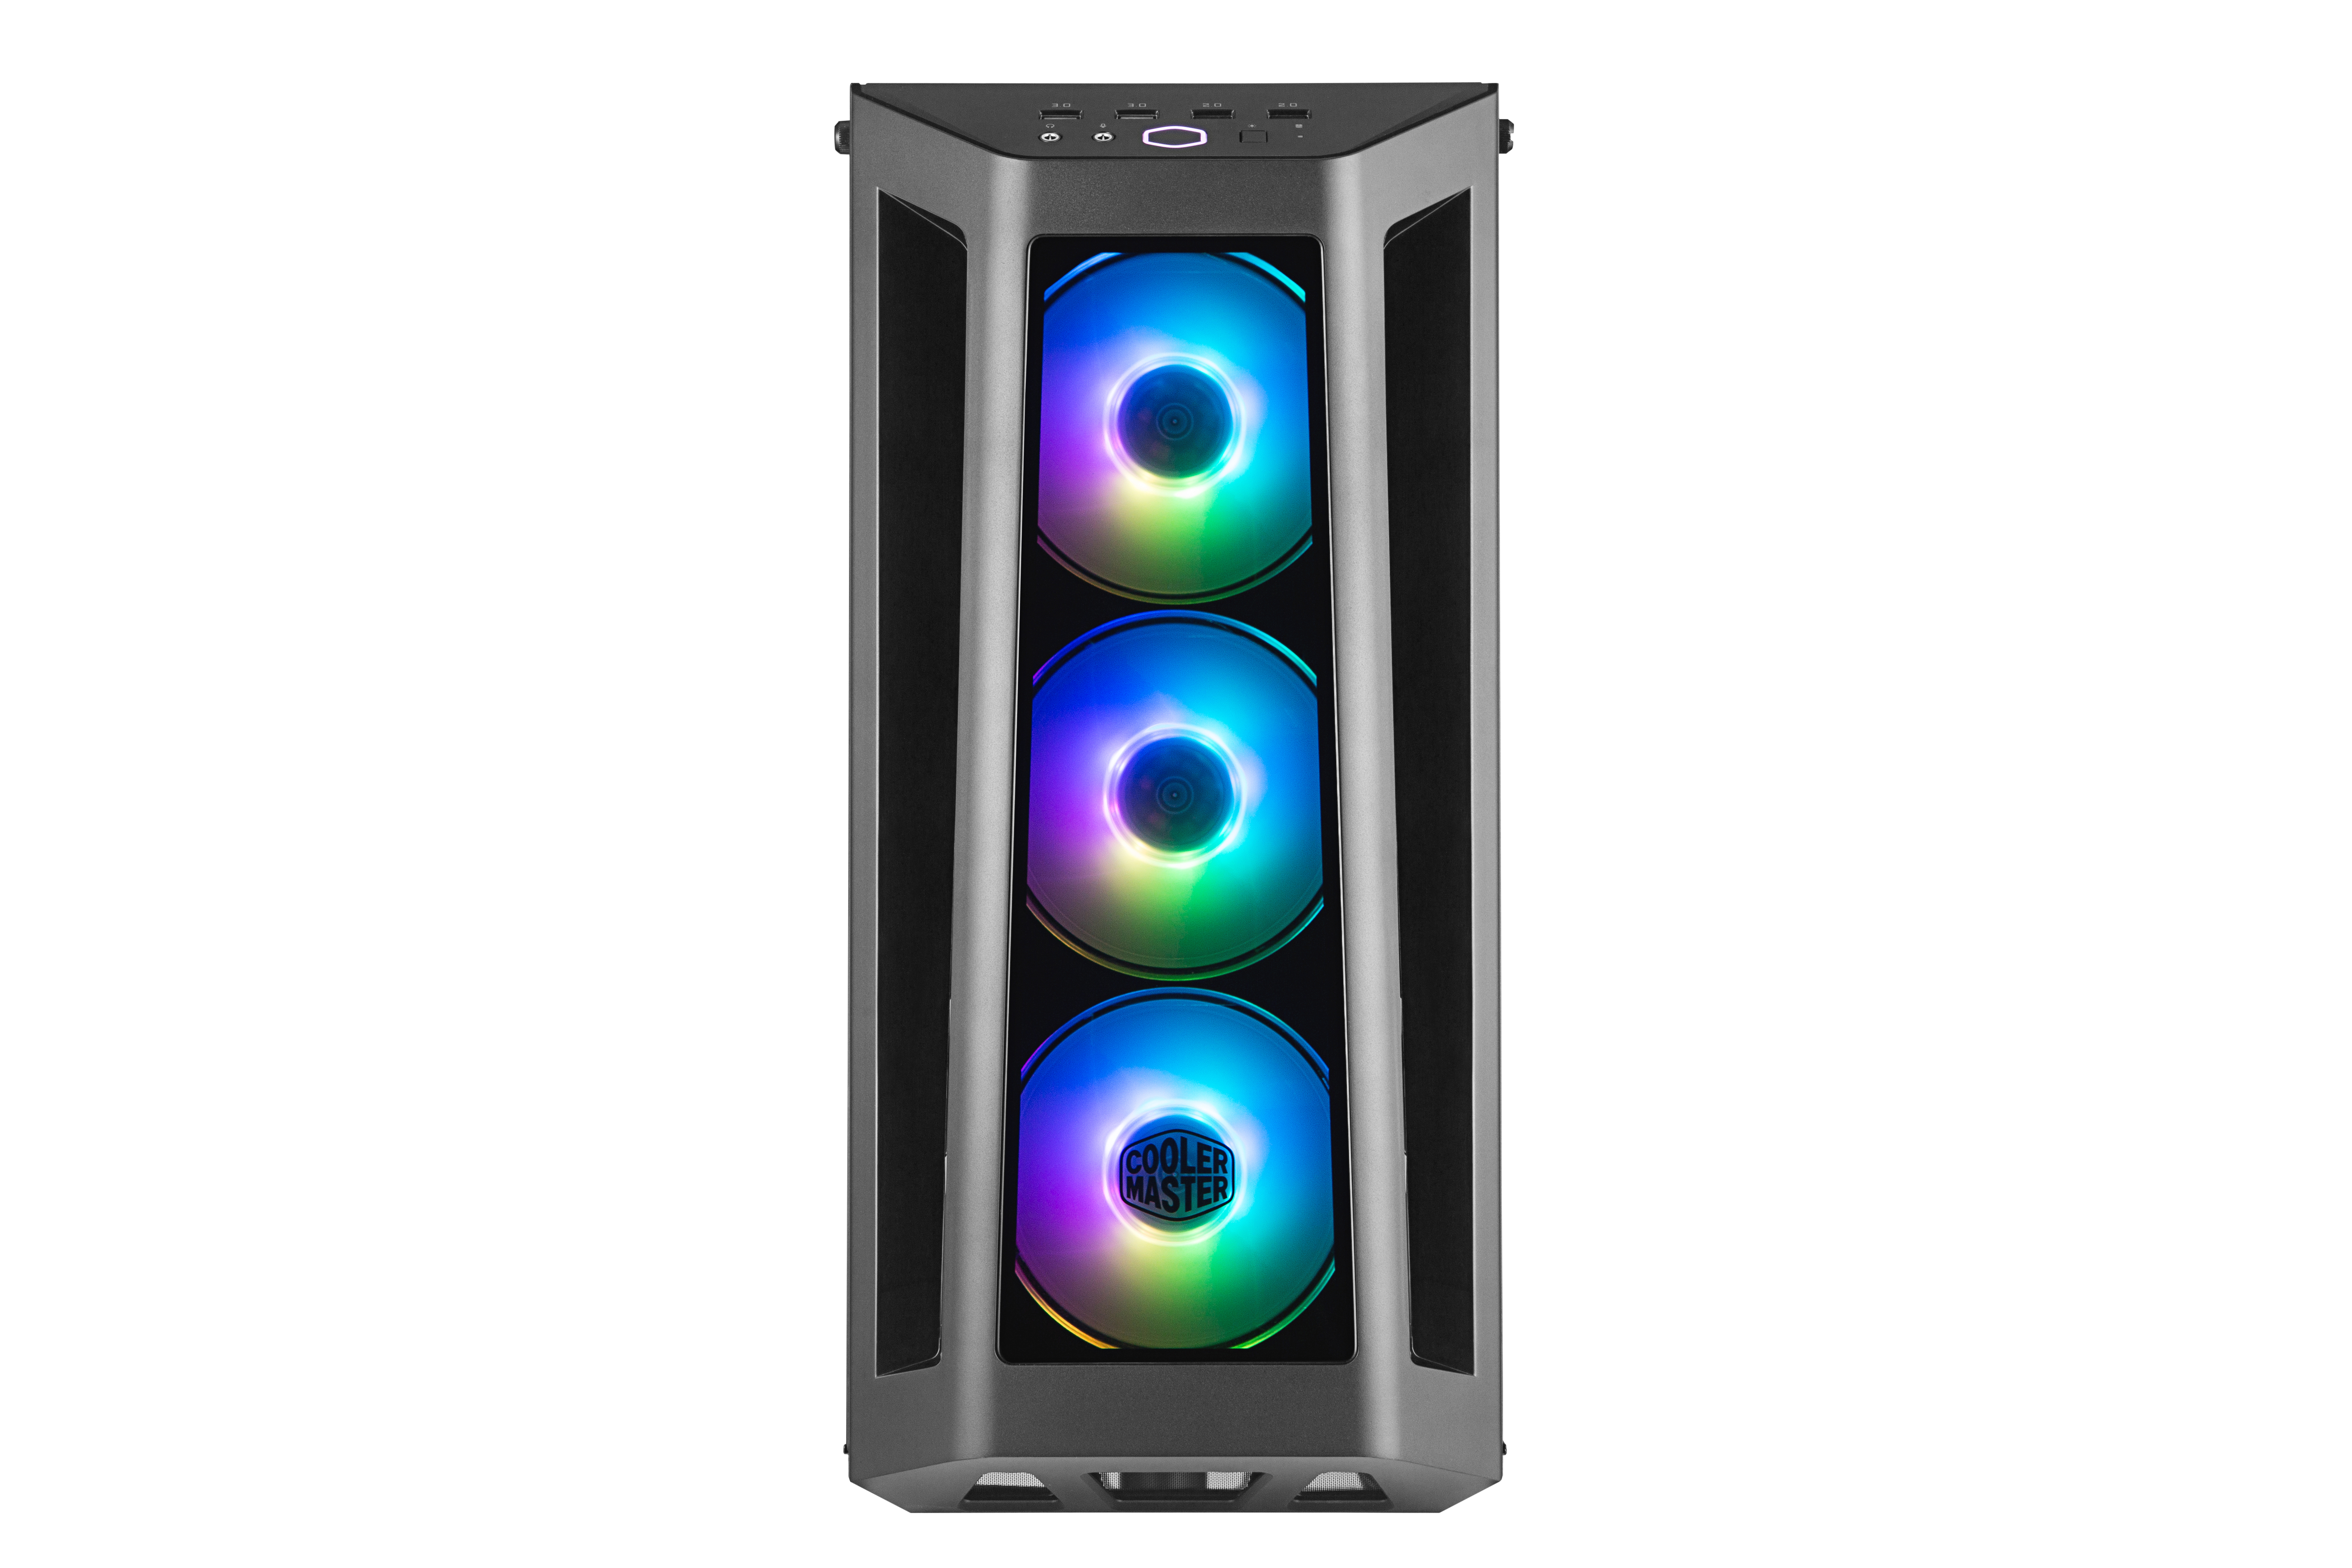
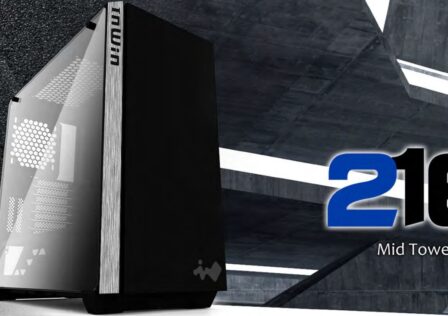
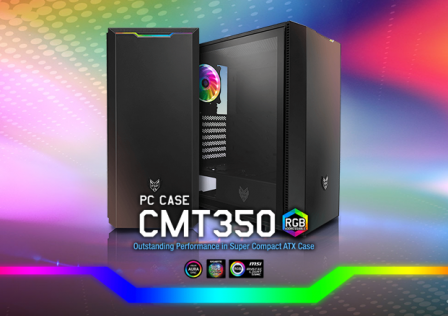
We’re at it again with another PC case review from Cooler Master! This time we’ll be taking a deep look into one of its new RGB enabled gaming PC cases, the MasterBox MB530P. The MB530P is very similar visually to that of the MasterBox MB520 we recently reviewed except for a few premium upgrades. Three front RGB fans are one of the more visually obvious upgrades. Another upgrade are three tinted tempered glass panels on either side and on the front of the case.
The MasterBox MB530P is a mid-range premium case targeted towards gamers and system builders who prefer smaller builds but need premium features such as tempered glass and RGB lighting options. The case is stealthy largely due to the tinted glass, but easily allows RGB lighting to shine through giving the case’s internals a subtle appearance, while not appearing too flashy.
MSRP for the case is $109.99 at the time of writing this review. More details such as product highlights and specifications can be found on Cooler Master’s website: http://www.coolermaster.com/case/mid-tower/masterbox-mb530p/
Features & Specifications of the Cooler Master MasterBox MB530P
Similar to that of previous Cooler Master MasterBox cases we’ve reviewed in the past, the MB530P’s features an open interior design with an isolated PSU and storage section. The front portion of the inside of the case does not feature any storage mounting options such as 3.5″ or 5.52″ drive bays. This seems to be the direction that most case manufacturers are going as let’s be honest, disk storage on the PC has been slowly taken over by removable flash media for years. I personally haven’t utilized a 5.25″ drive in a case for a very long time. With the front drive bays removed, users are free to build much more freely by using that space for options such as a custom loop liquid cooling system, or large radiators.
Needless to say, the MB530P does have 3.5″ storage options which have been relocated underneath the PSU shroud at the bottom of the case. This location really cleans up the inside of the case and does not affect accessibility in any way.
According to Cooler Master, the MasterBox MB530P is “Showroom Ready”. The case features many premium options that make the case a head turner at any event. On either side of the case you’ve got two tinted full-coverage tempered glass side panels. Glass side panels look much more stunning when compared to traditional plastic side panels. They also add a bit of weight which adds to the overall quality “feel” of the case when working with it hands-on. On the front of the case an array of three RGB LED fans can be seen shining through yet another tempered glass panel. With all the RGB goodness shining through the sleek smooth tempered glass, the term “Showroom Ready” really comes to life.
Below are the specifications of the MasterBox MB530 provided by Cooler Master:
| Product Name | MasterBox MB530P |
|---|---|
| Model number | MCB-B530P-KHNN-S01 |
| Available Color | Black |
| Materials | Steel, Plastic, Tempered Glass |
| Dimensions (L x W x H) | 489 x 229 x 469mm |
| Motherboard Support | ATX, Micro-ATX, Mini-ITX |
| Expansion Slots | 7 |
| 5.25″ Drive Bays | N/A |
| 3.5″ Drive Bays | 2 |
| 2.5″ Drive Bays | 4 |
| I/O Panel | USB 3.0 x 2, USB2.0 x2,Audio In / Out, ARGB control button |
| ARGB Controller | ARGB Controller included |
| ARGB Cable | 2 to 3 ARGB Splitter cable included |
| Pre-installed Fan(s) | Front: 120mm ARGB AB fans x 3 (9 blades fan 1200rpm) Rear: 120mm Non-Led fan x 1 (7 blades fan 1200rpm) |
| Fan Support | Front: 120mm x 3 / 140mm x 2 Top: 120mm x 2 / 140mm x 2 Rear: 120mm x 1 |
| Radiator Support | Front: 120 / 140 / 240 / 280 / 360mm Top: 120 / 240mm Rear: 120mm |
| Clearances | CPU Cooler: 165mm / 6.49″ PSU: 180mm / 7.08″ Graphics card: 410mm / 16.14″ |
| Cable Routing | Behind M/B Tray space: 18-25mm |
| Dust Filters | Front, Top, Bottom |
| Power Supply Support | Bottom Mount, ATX |
For a mid tower case, I’m glad to see that the case has such a wide range of cooling options. Overall, the case can support up to six 120mm fans (4 included). If liquid cooling is your jam, then you’ll be happy to know you can fit two large, one 360mm and 240mm radiators on the front and top of the case!
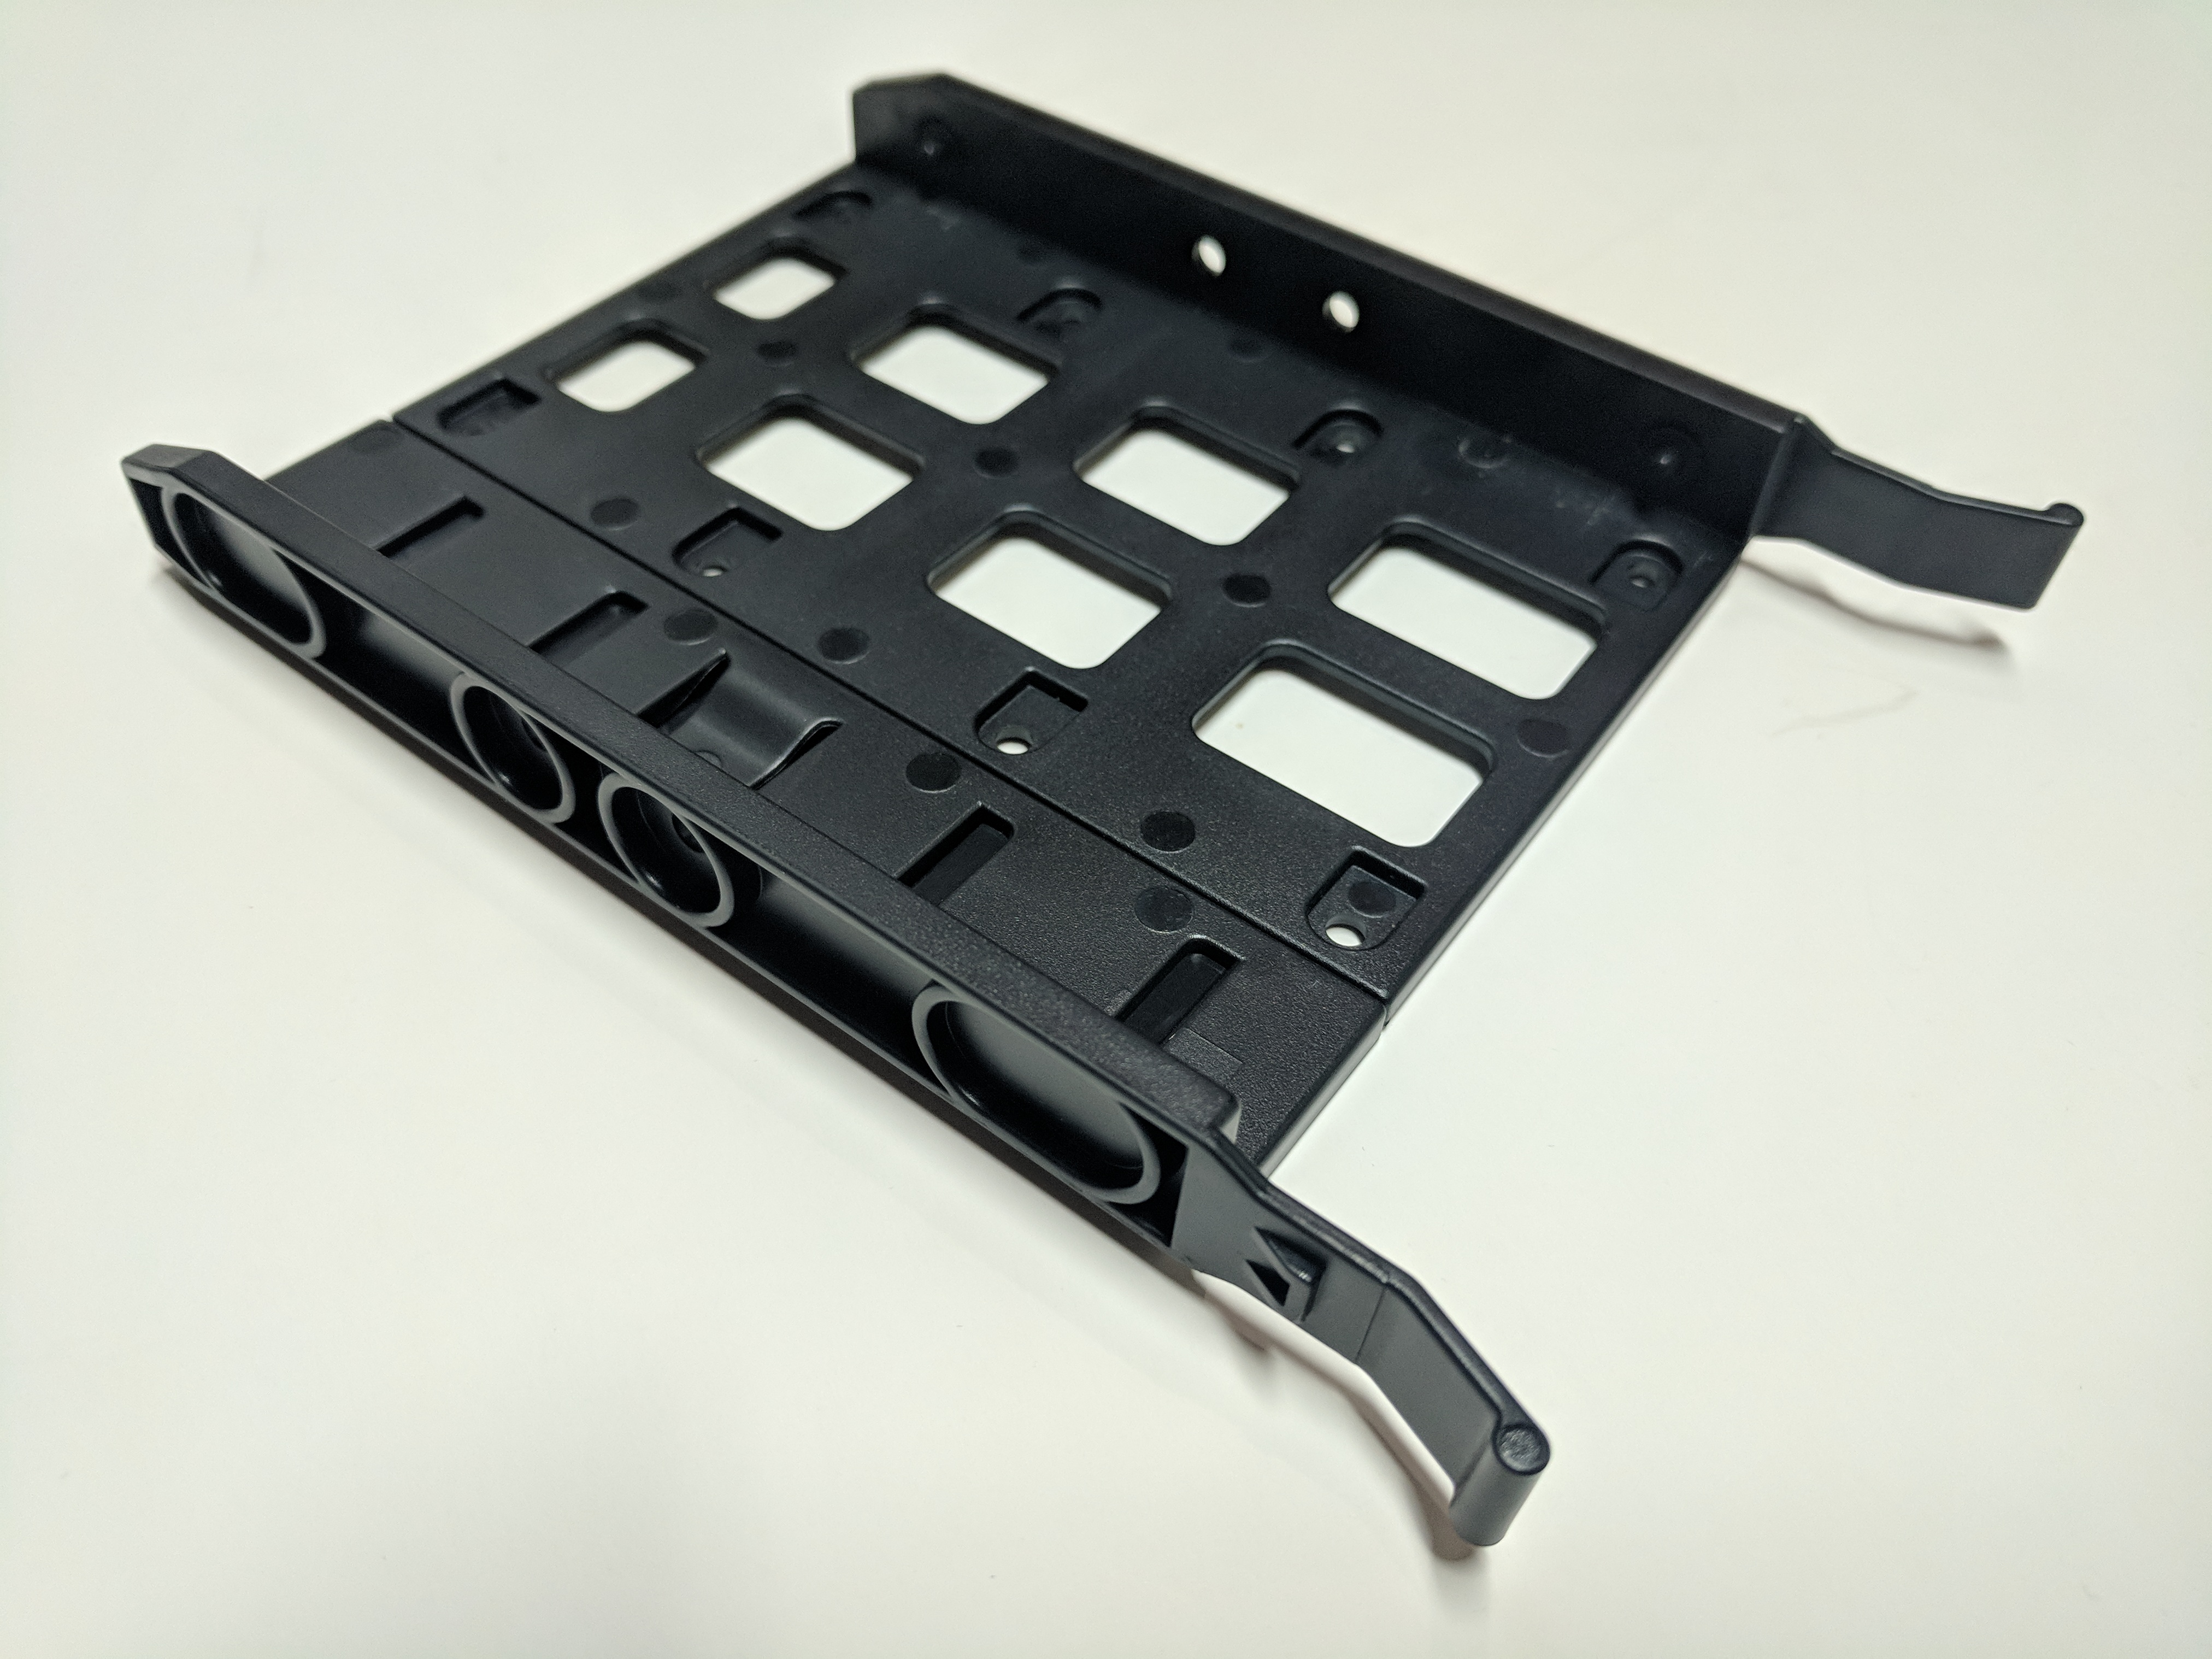
Disk storage options are also a plenty. The case features options to mount four 2.5″ solid state drives, or two 3.5″ HDDs and two 2.5″ drives. Two of the drives can be mounted in the 3.5″ slide lock removable drive trays while another two can be mounted directly behind the motherboard tray using a rubber stand-off system we’ll discuss later on in the review.
Unboxing
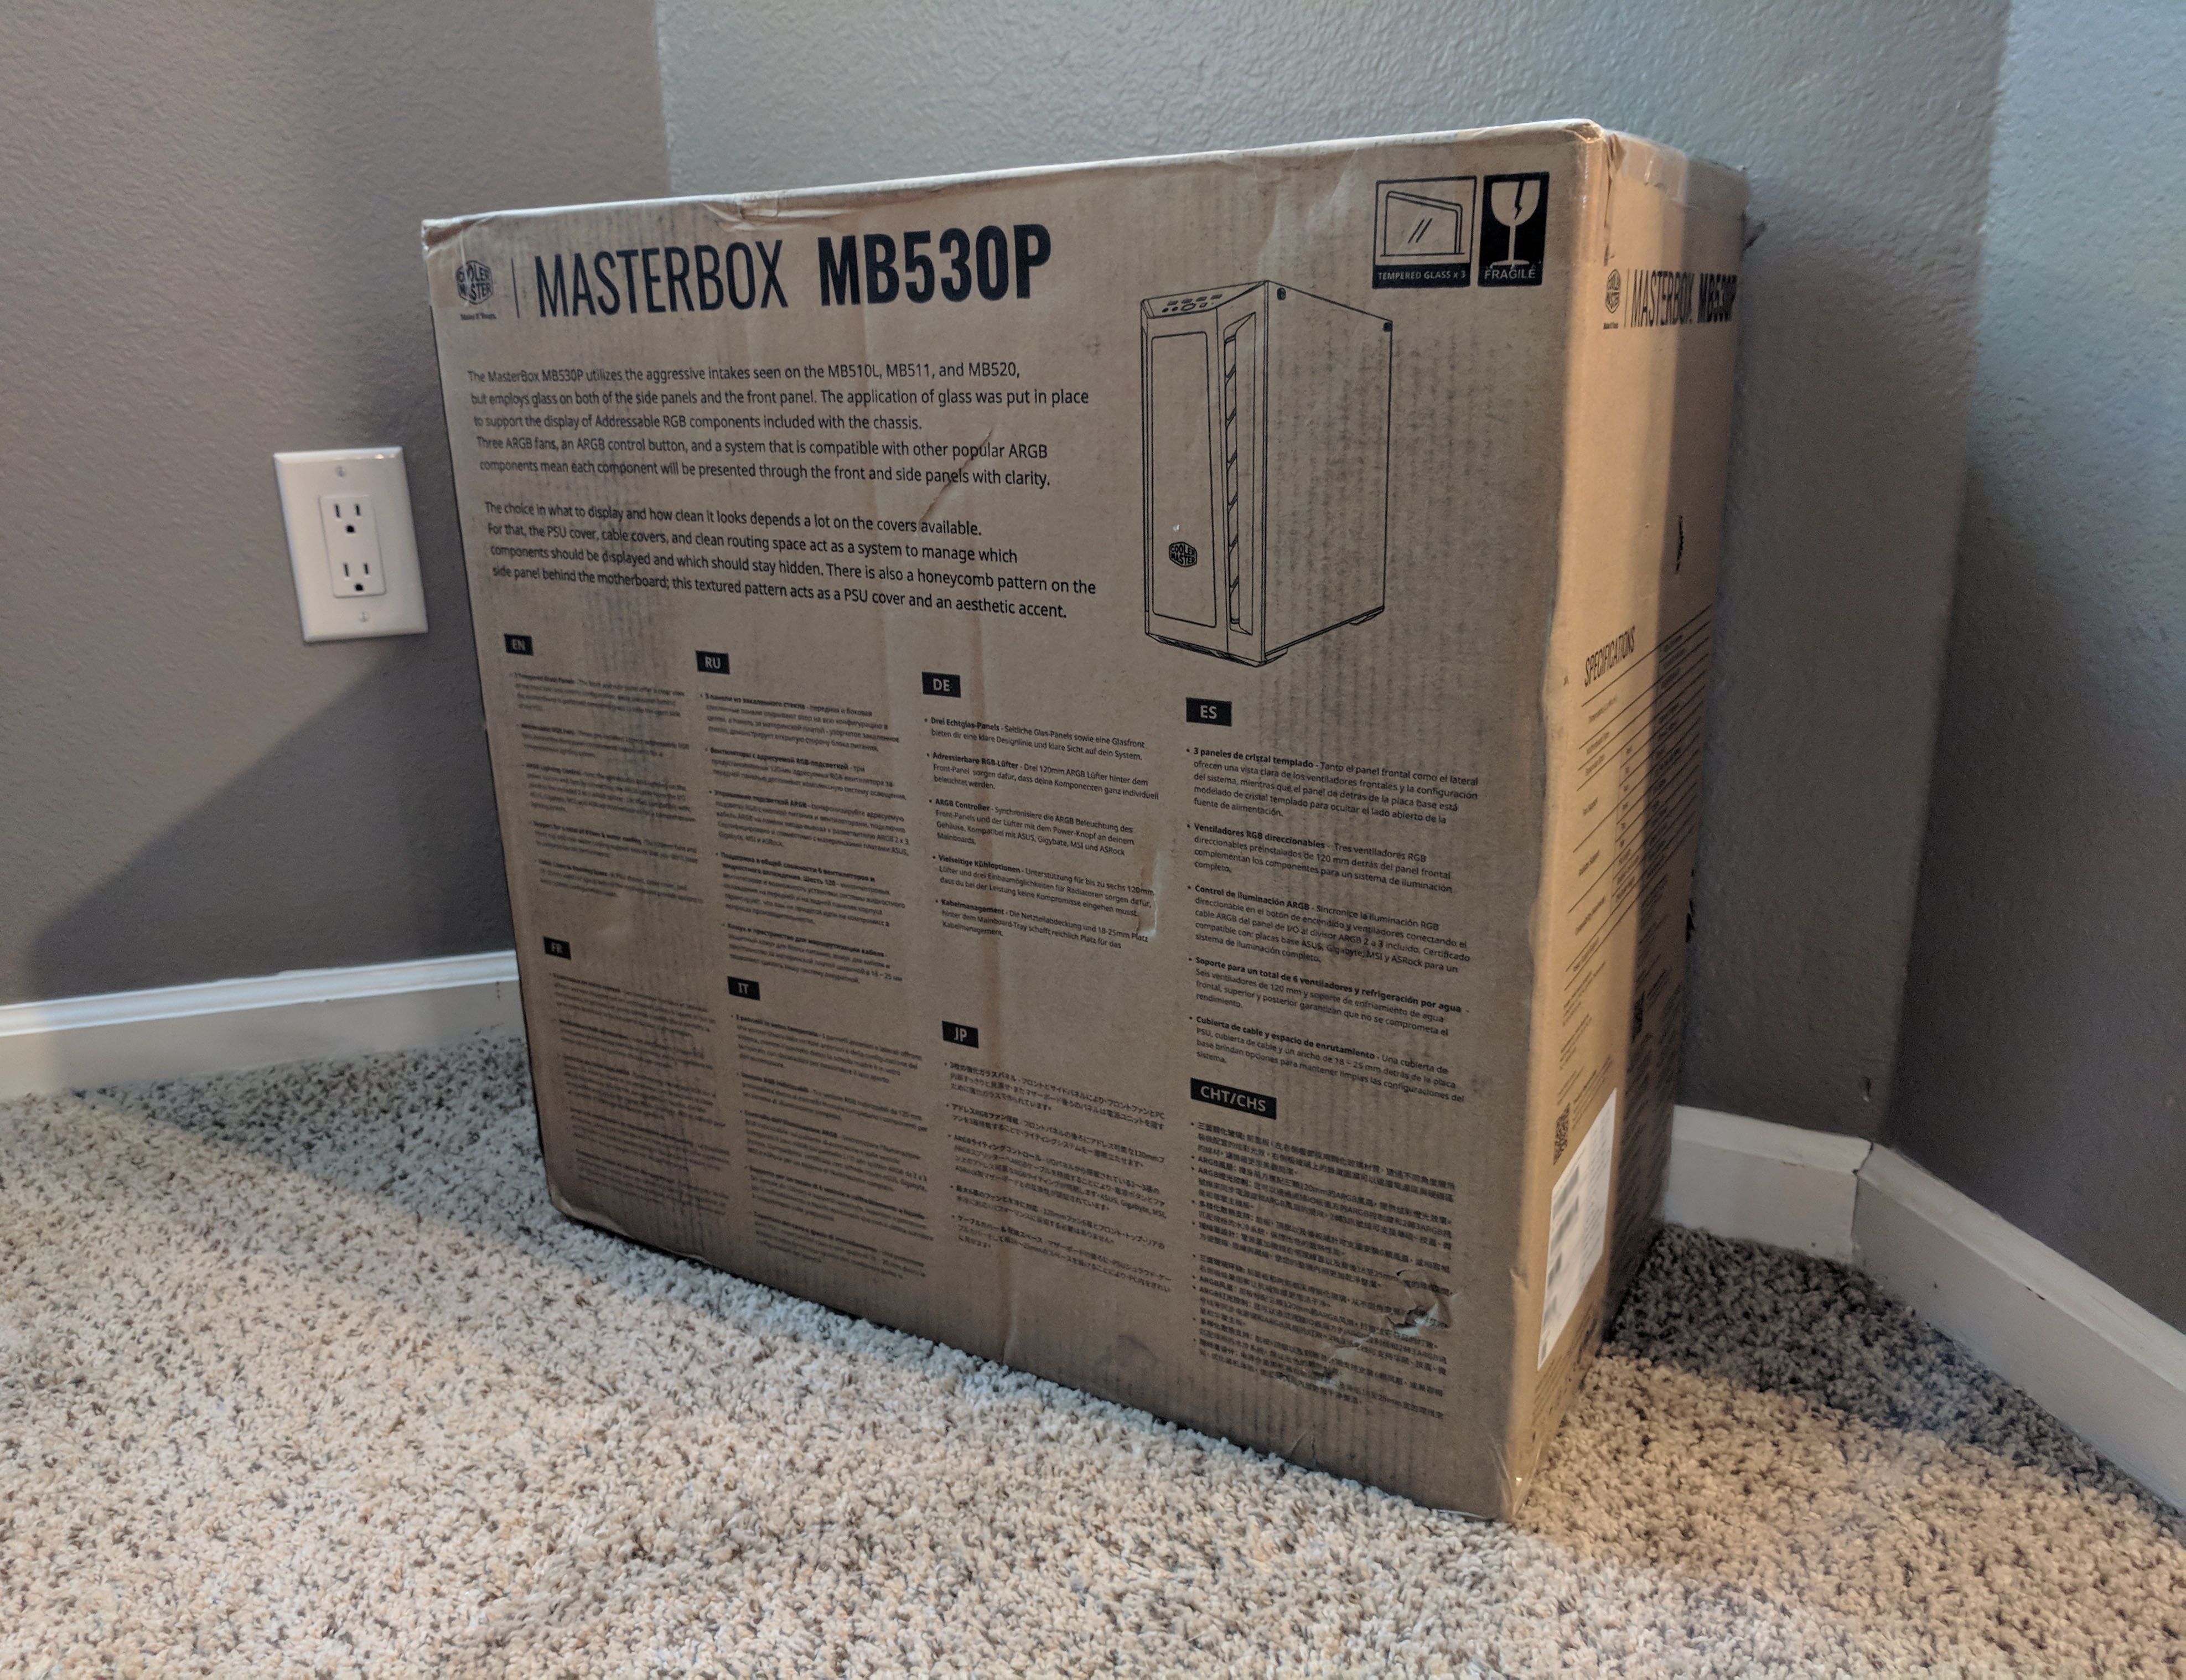
Now that we’re all experts as to the MB530’s many features, let’s pull this thing of of the box and see what we’re working with! The case arrived to our top secret headquarters undamaged and packaged in a double-wall cardboard box. The box featured Cooler Master and MasterBox logos as well as a line diagram of the case itself.

With the unit carefully removed from the box, we get a better look as to how the MB530P is packaged. No real surprises here. The case is placed inside a plastic bag and sandwiched in between two custom formed foam bricks. Overall, a pretty standard yet effective way to package and ship a PC case. With all the case review’s GND-Tech has done in the past, I’m not sure I haven’t seen a case packaged this way.
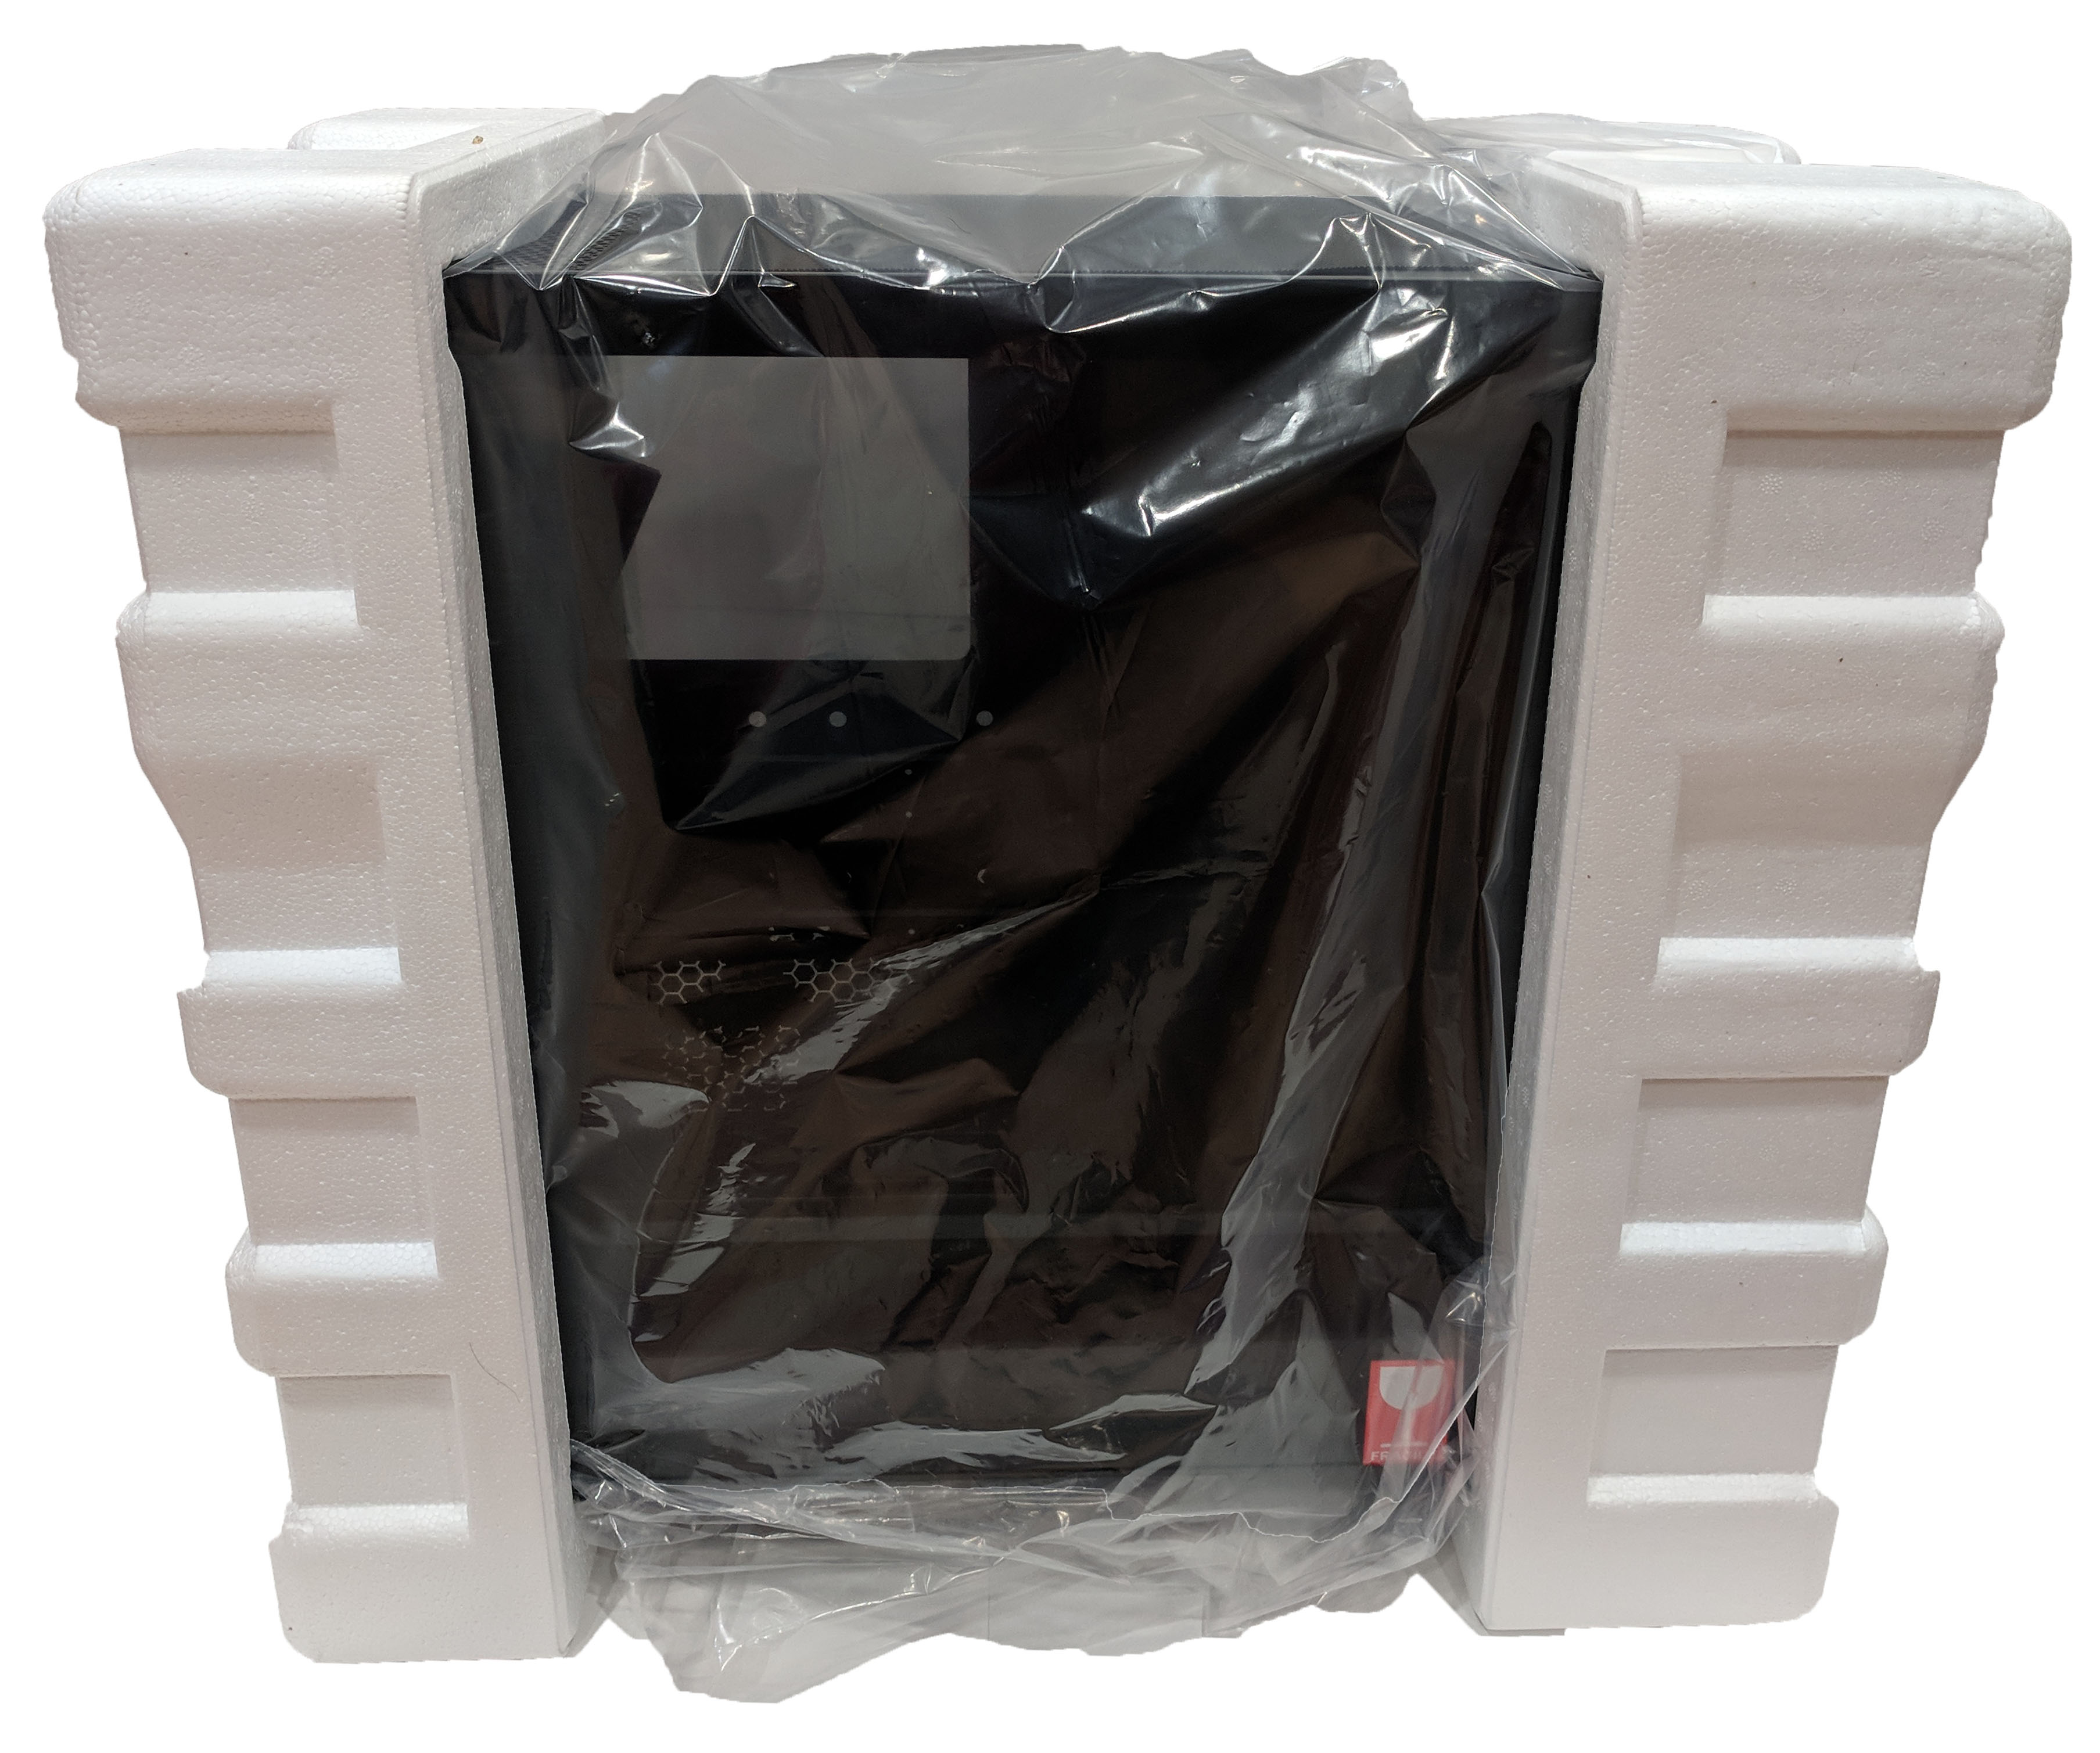
Now freed from the plastic bag and foam bricks, we’re able to get a better look at the case. There’s a few safety stickers on the tempered glass panels that should be removed as well some some peely protection plastic on the front bezel that should come off, but other than that, it’s ready to go!
Since the MasterBox MB530P arrived to us in perfect shape with no dents, dings, or scratches, I’d say that the packaging was overall effective.
A Closer Look…
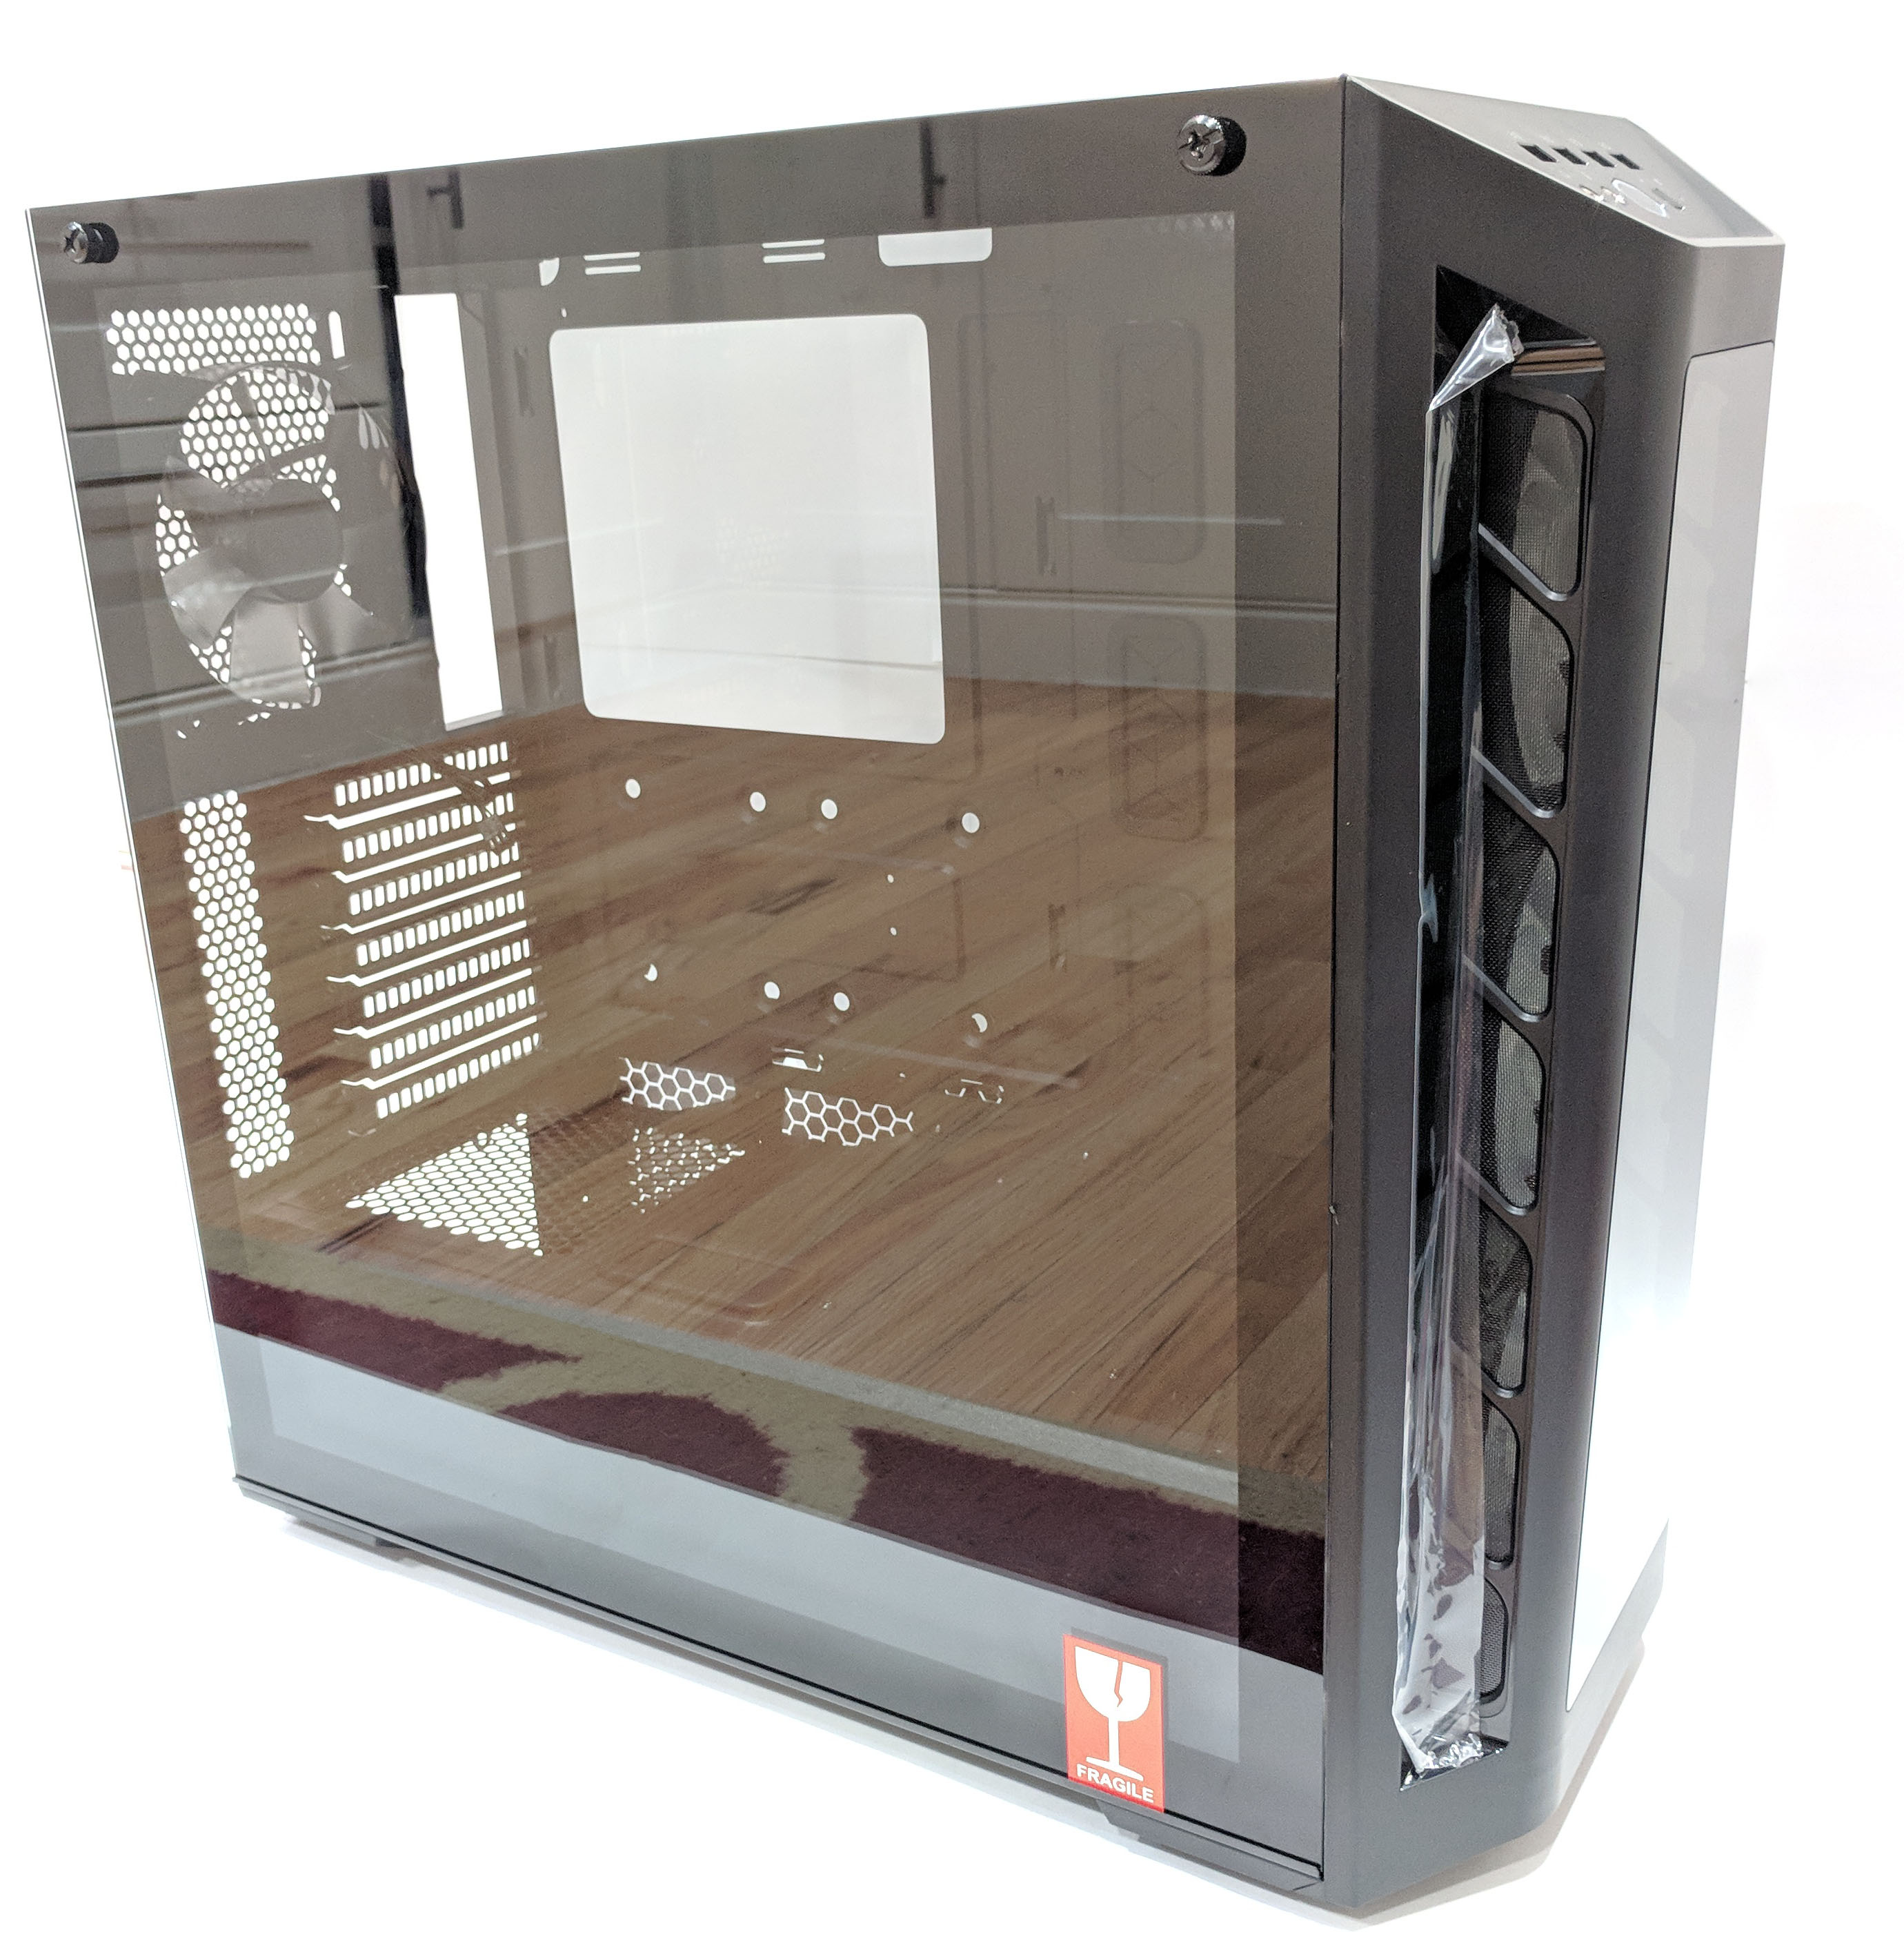
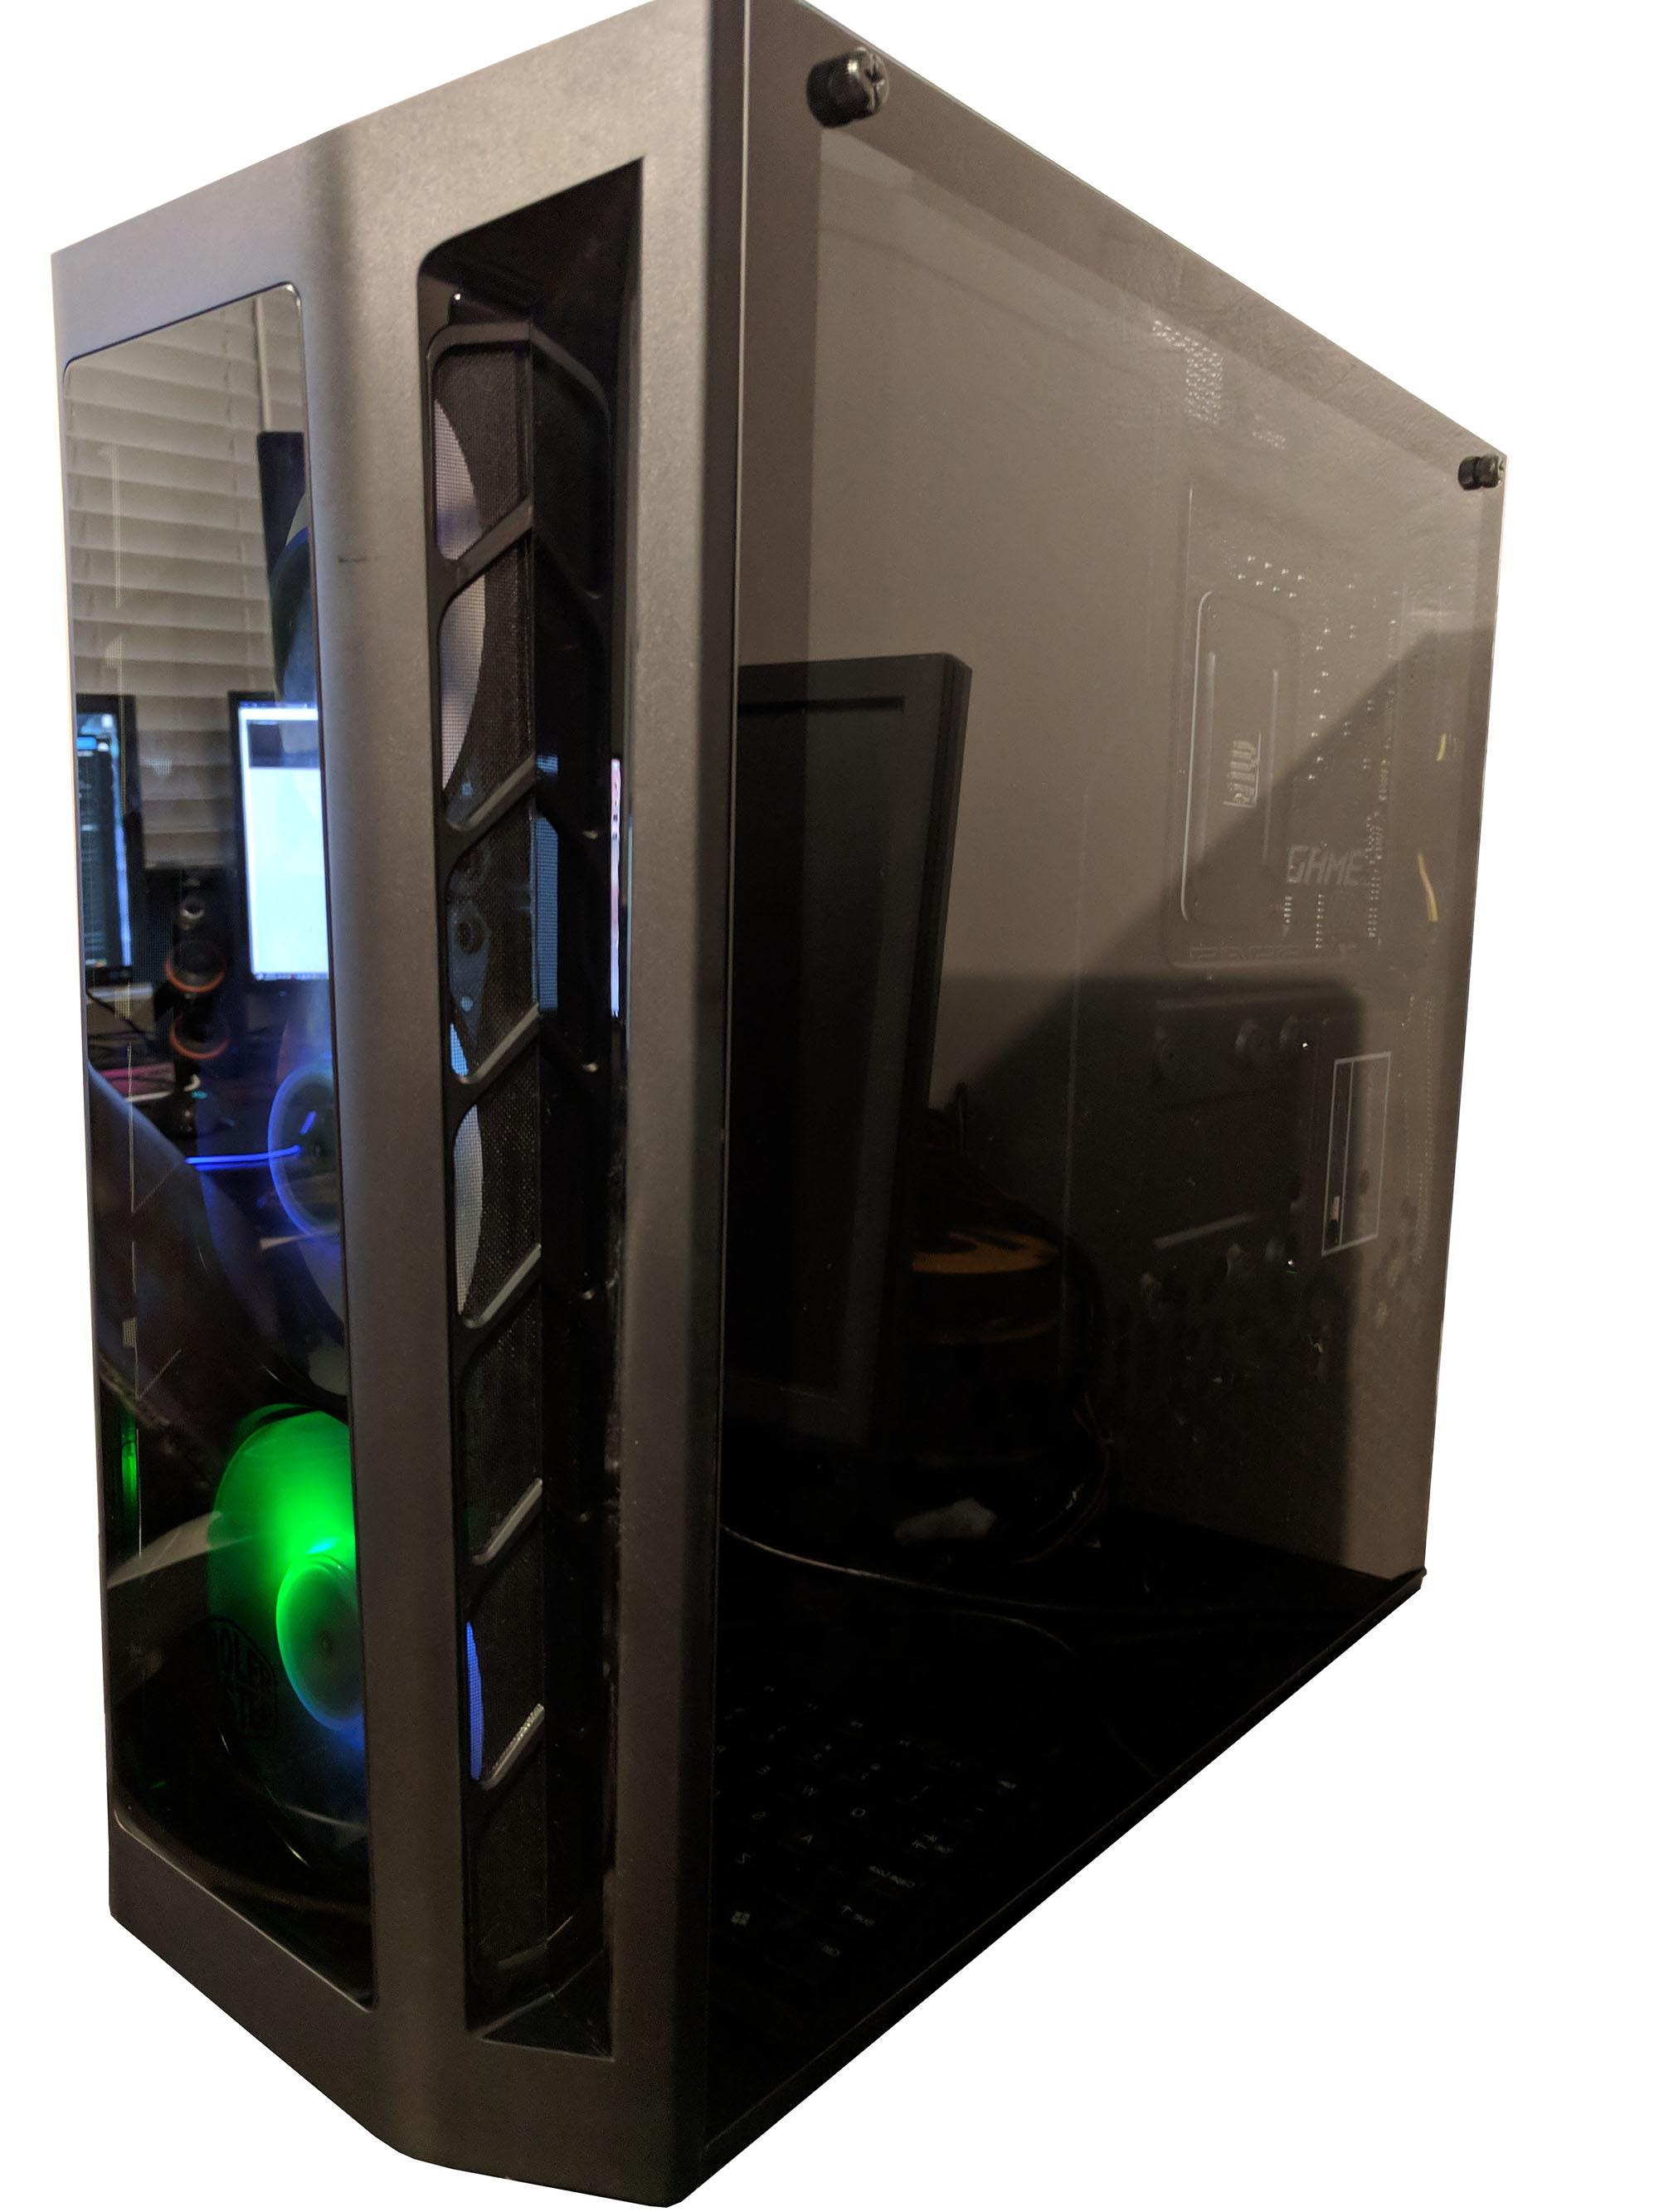
Next, let’s examine as many features of the new case as we can, starting with the exterior and working our way inside. The first thing you’ll notice is how amazingly shiny the MB530P really is. Most of the surfaces tend to reflect which did make photography a bit of a challenge. The tempered glass really adds a lot of character to the case considering its edge-to-edge design.
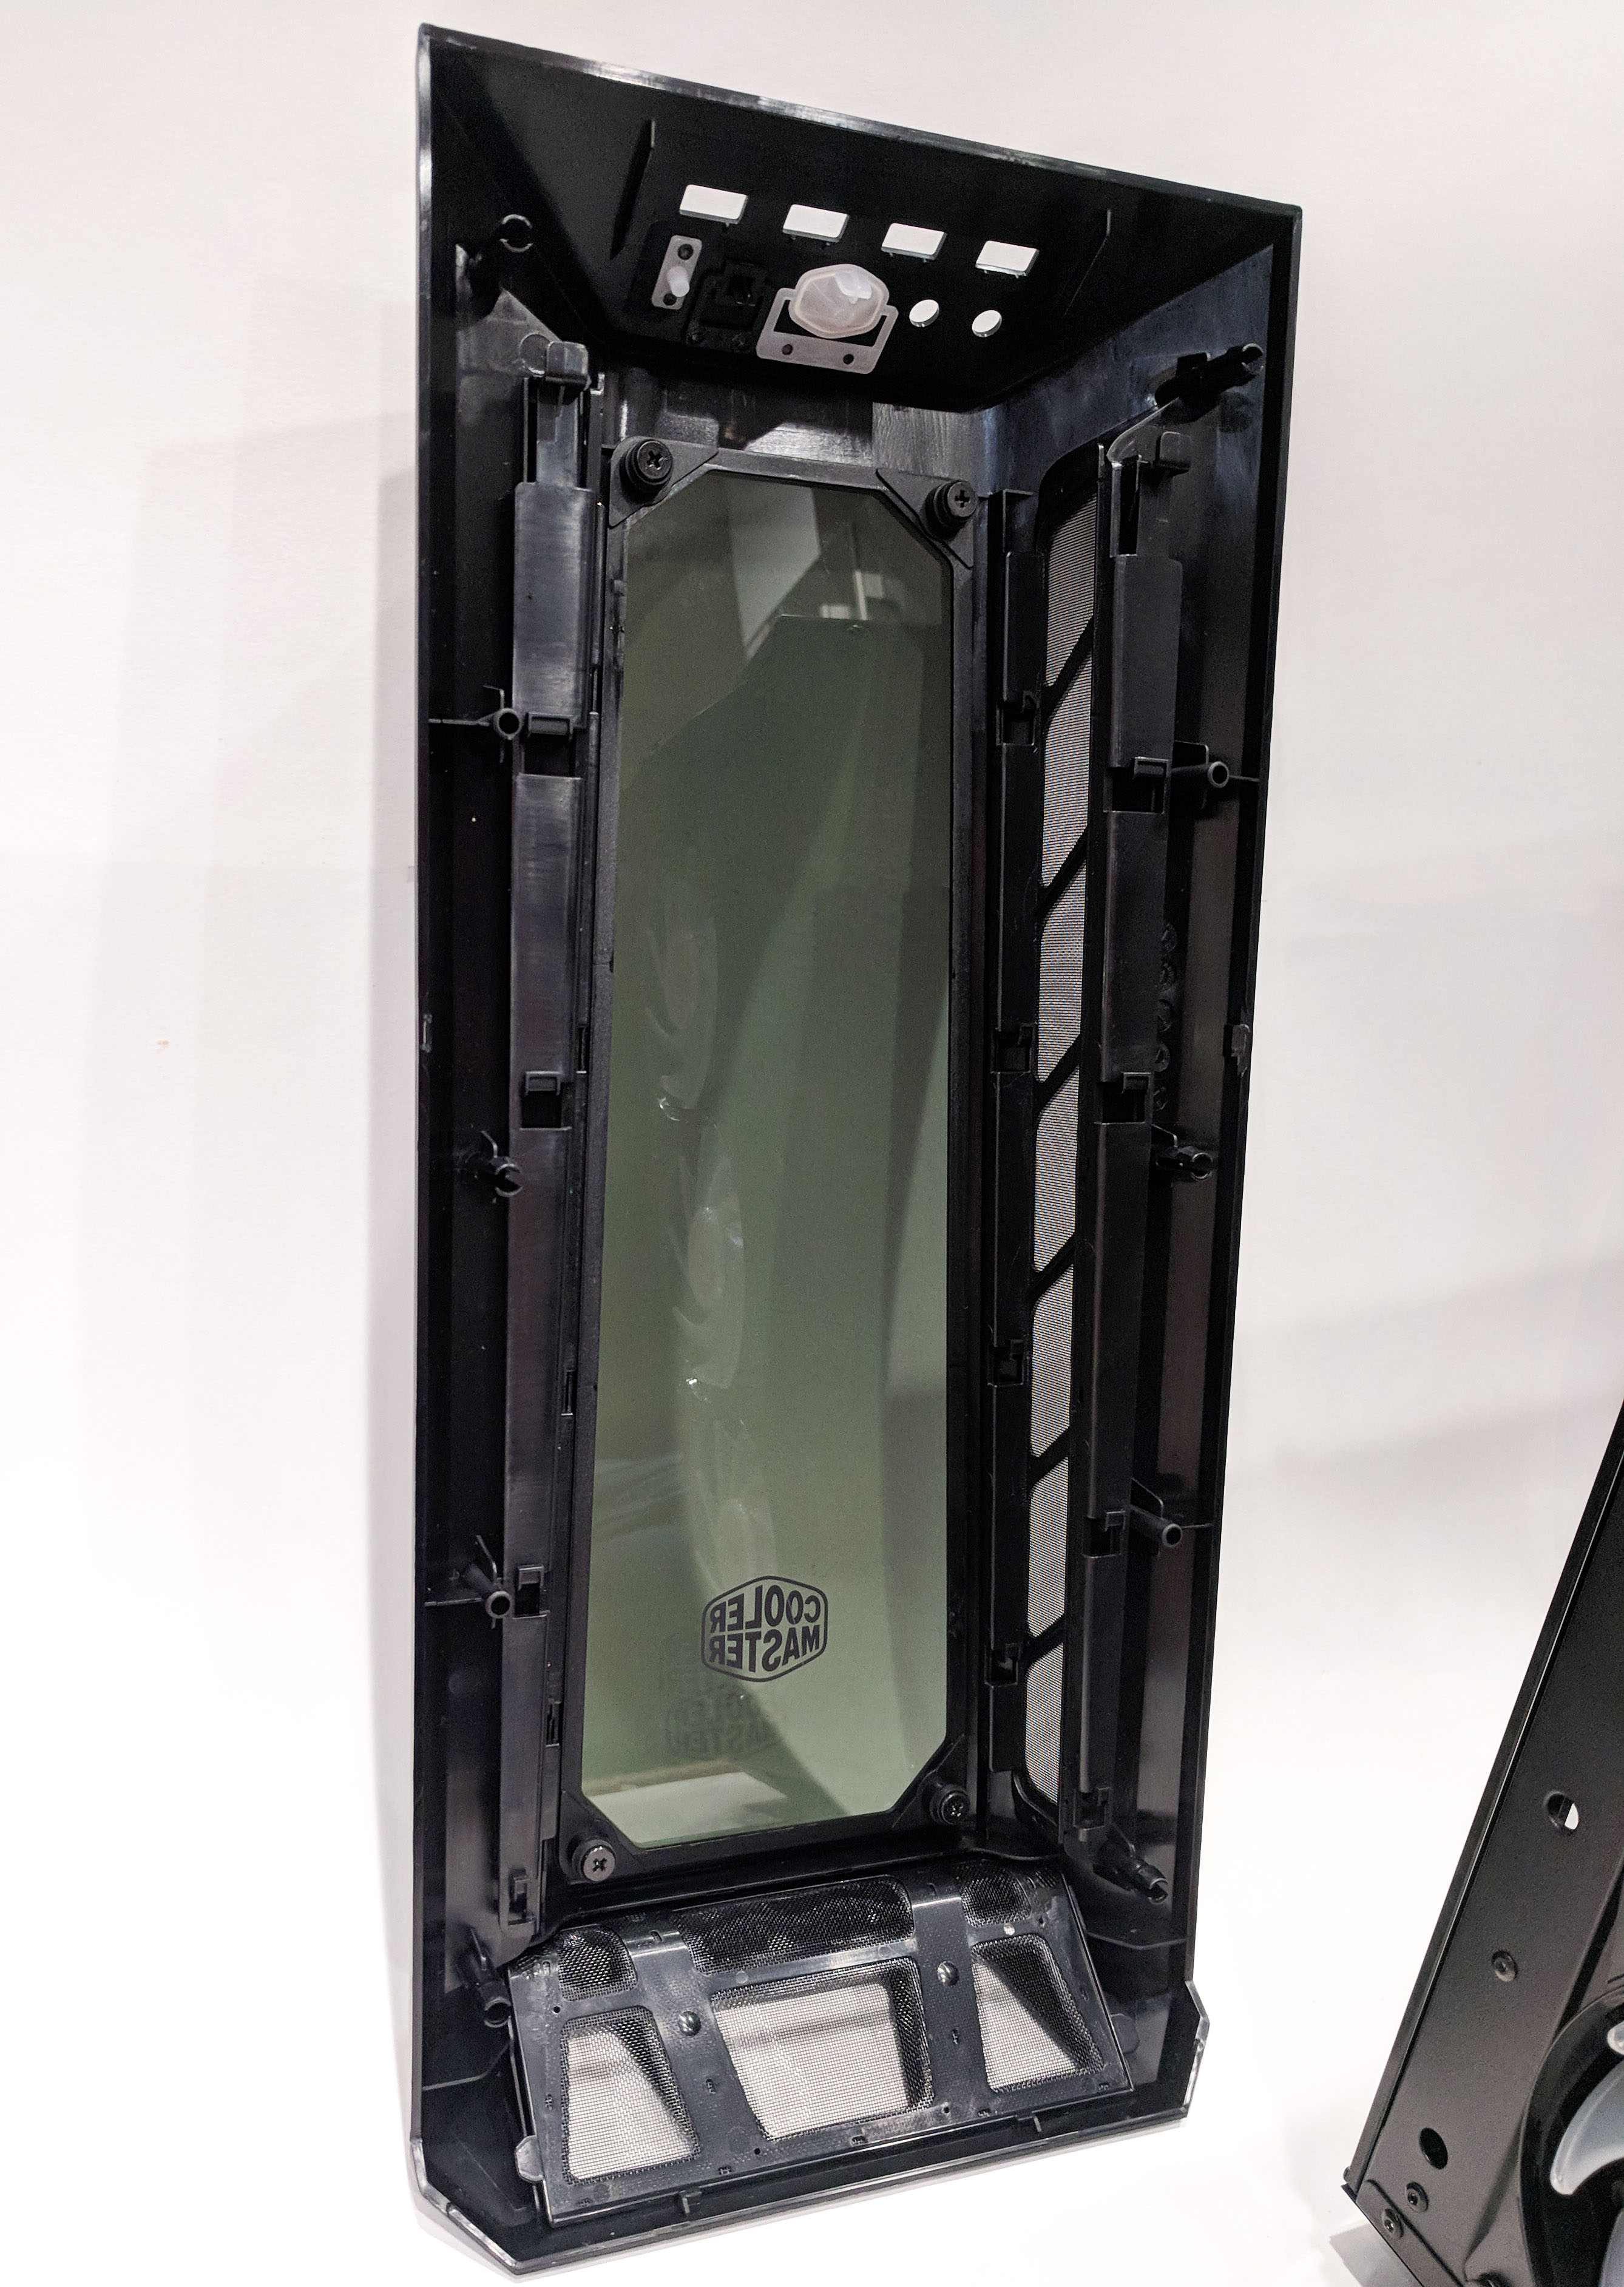
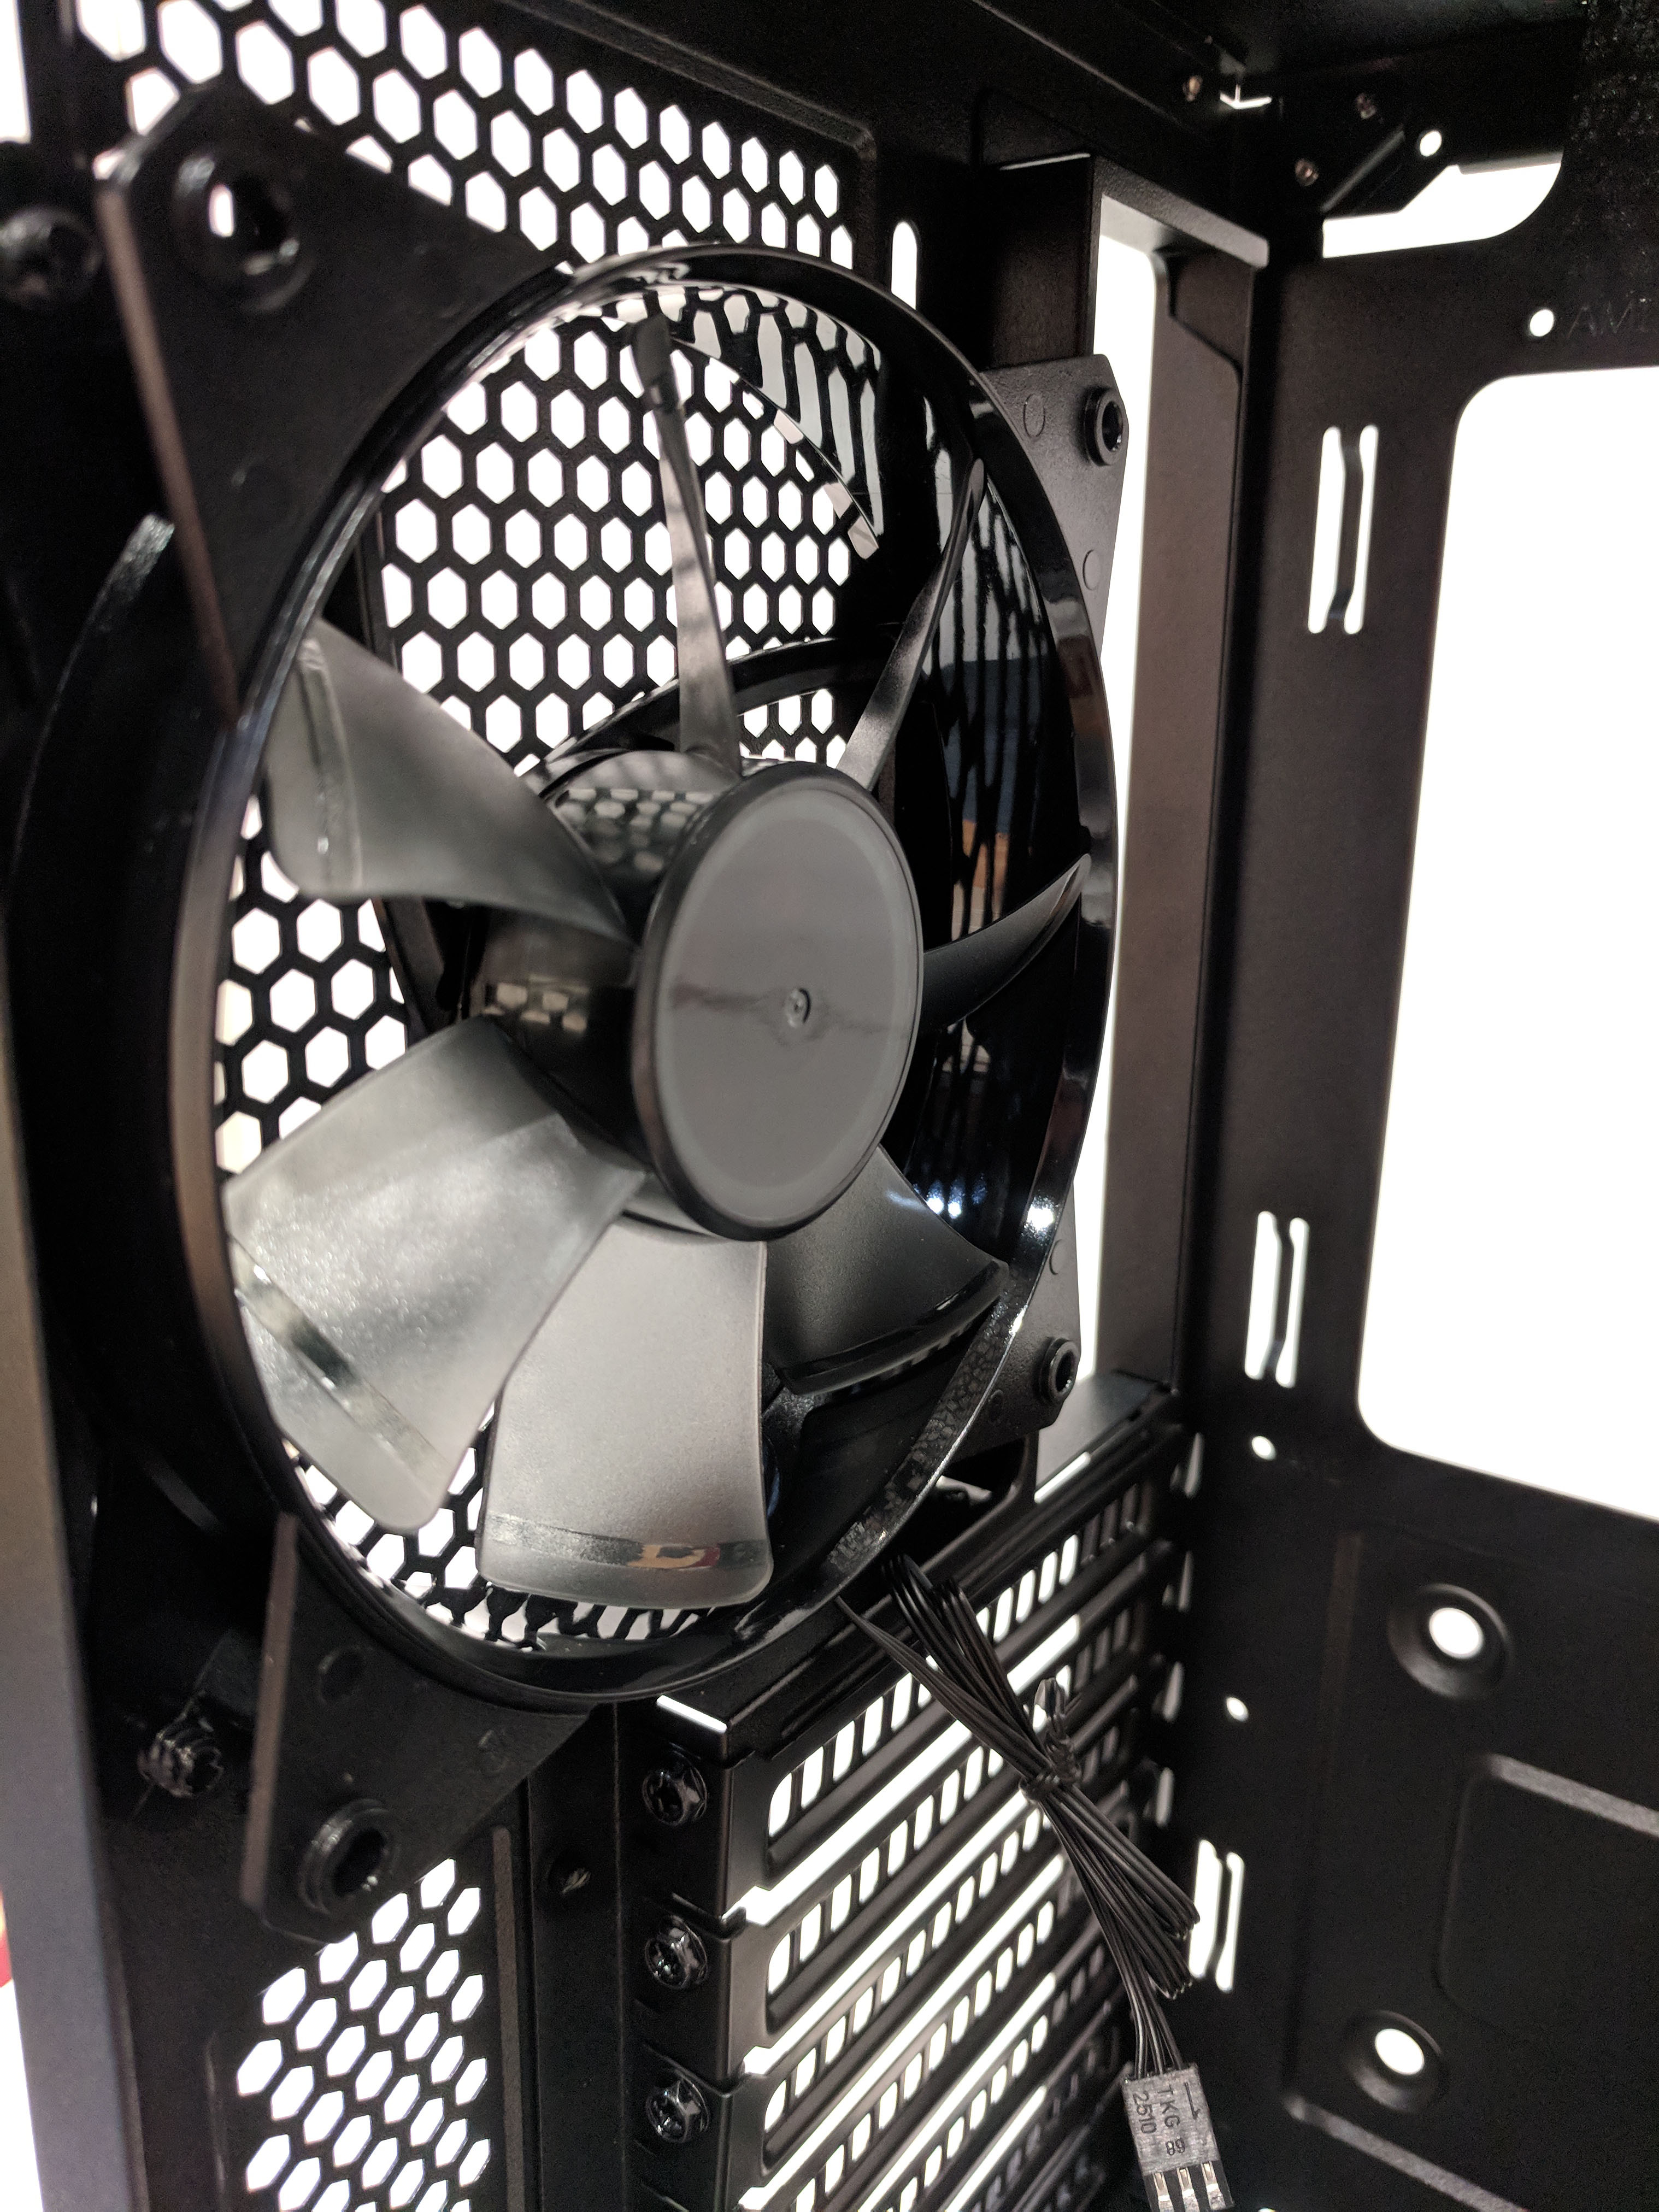
Similar to that of the MasterBox MP520 we reviewed earlier, the MP530P’s front bezel not only looks nice, it doubles as a filtered air intake for the three front fans hidden underneath. The front bezel can be easily removed for fan access or cleaning purposes if desired by grasping the bottom and giving it a firm tug.
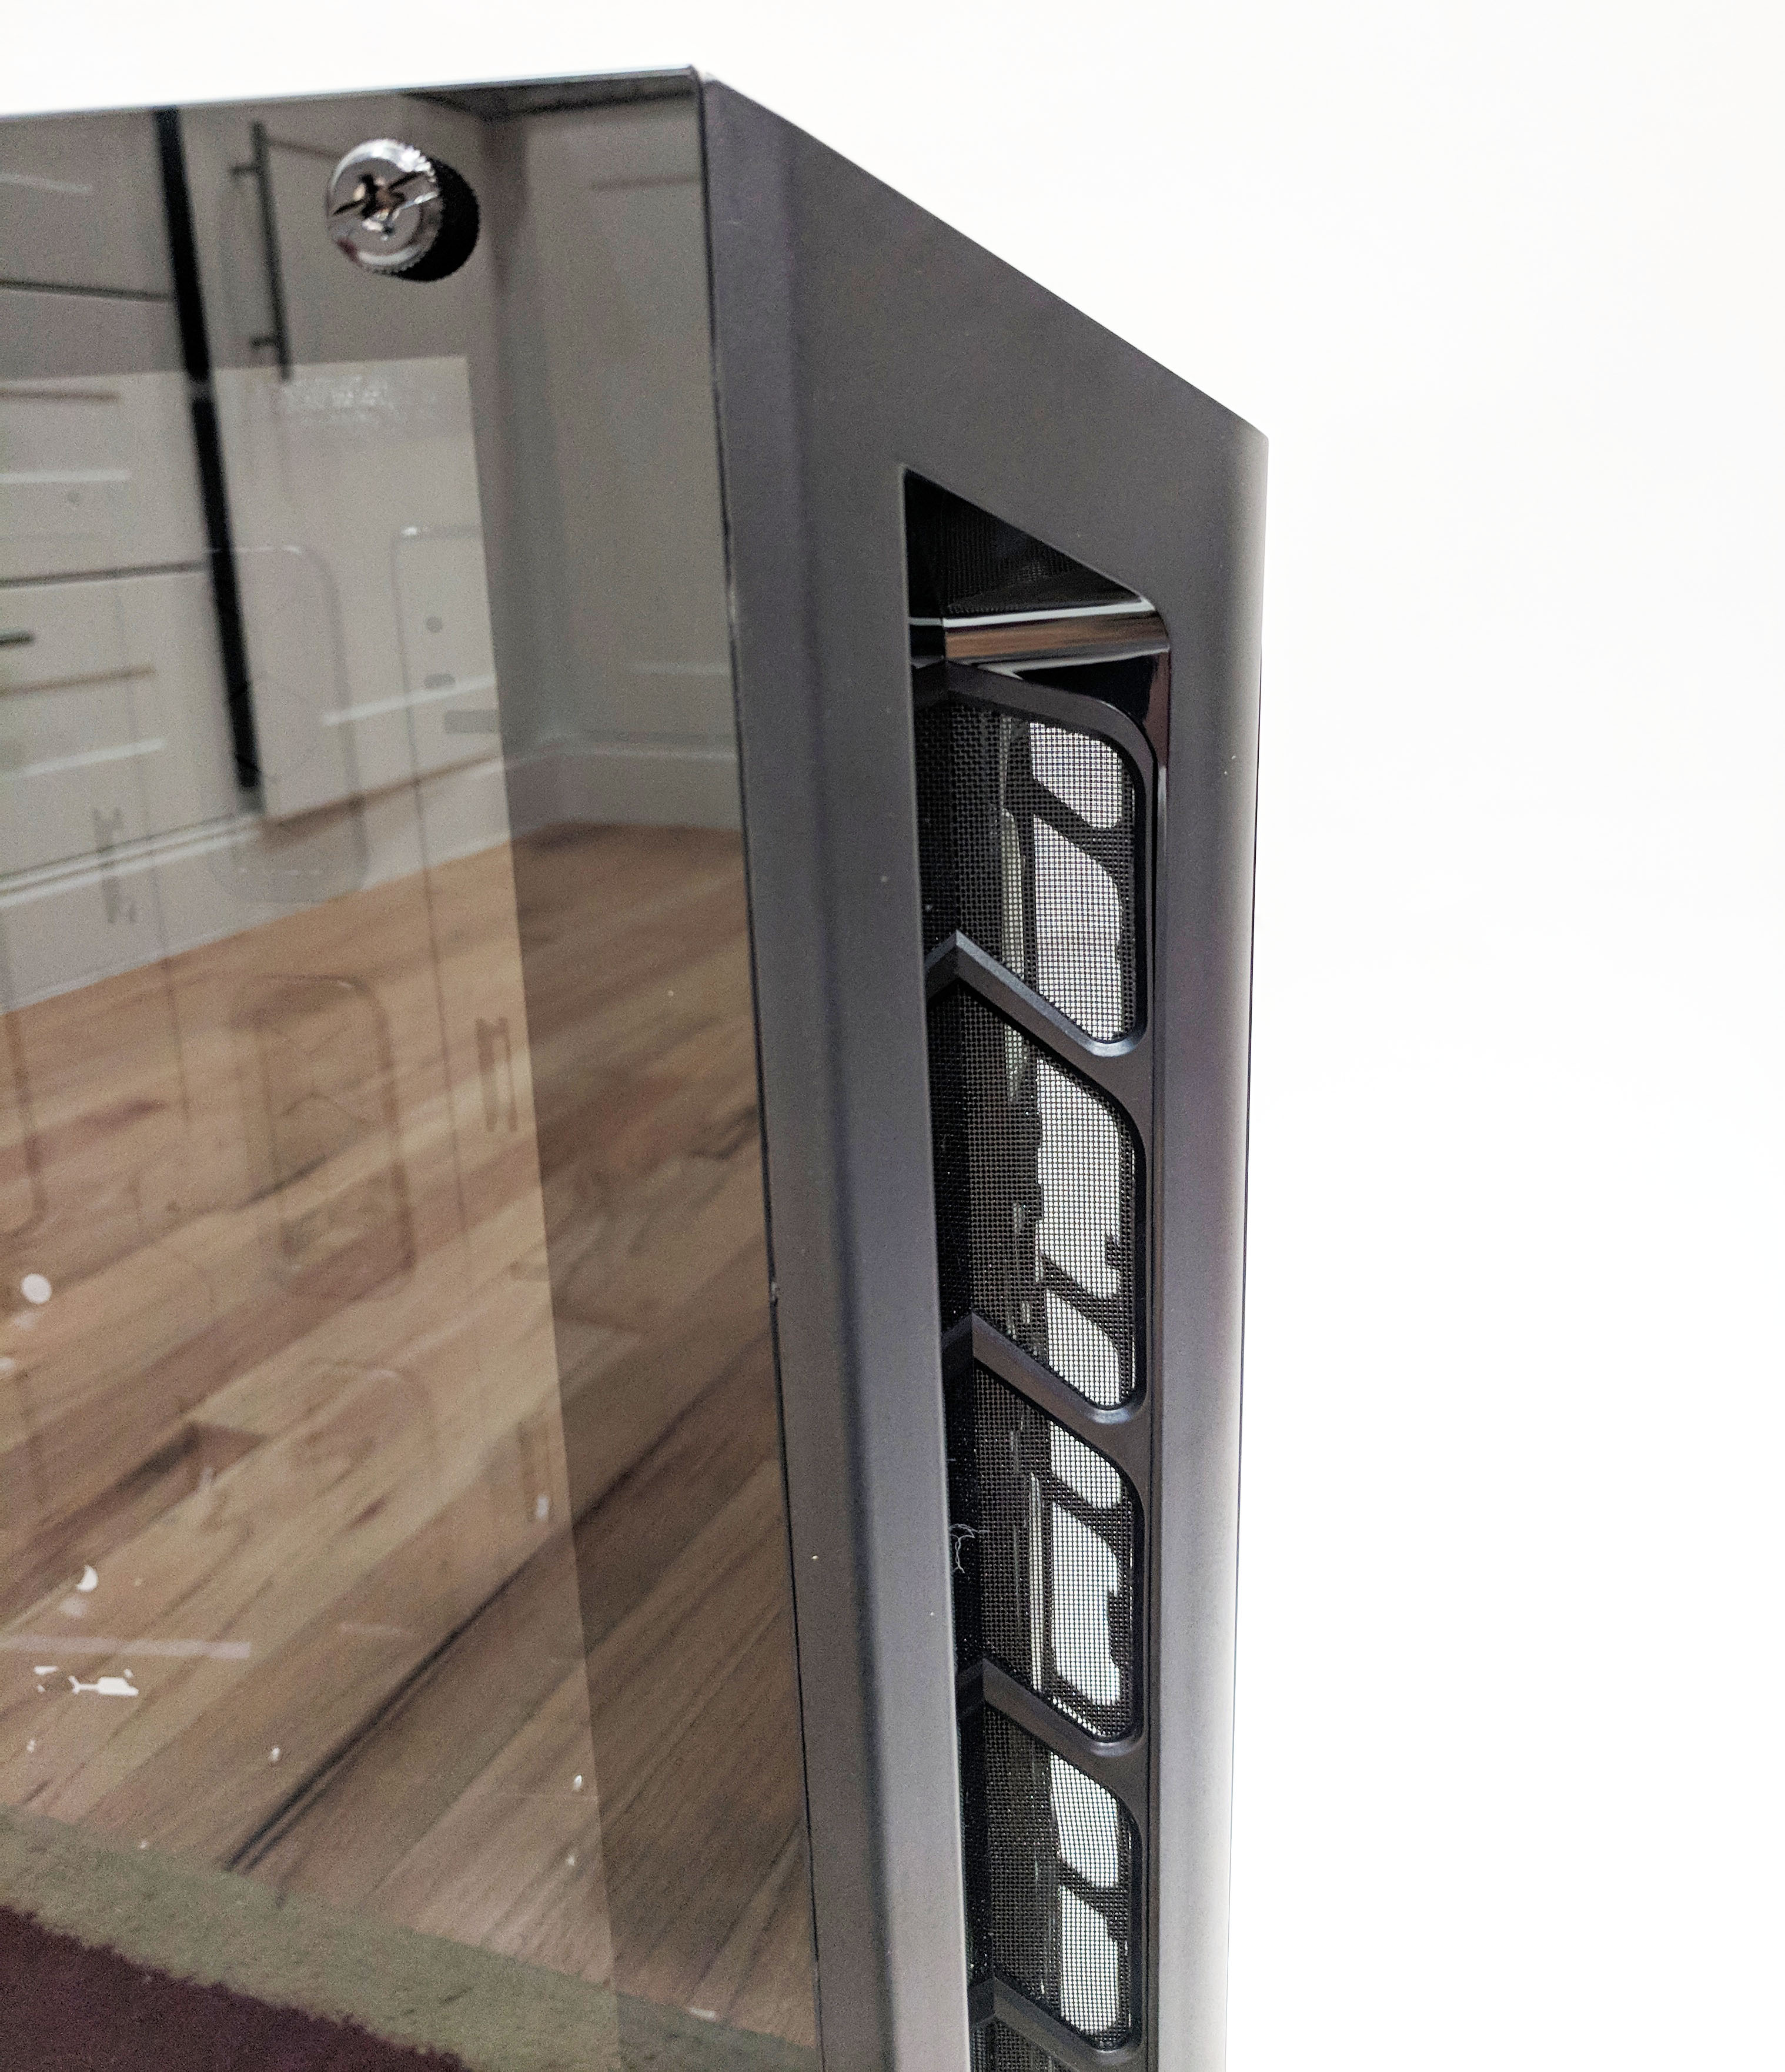
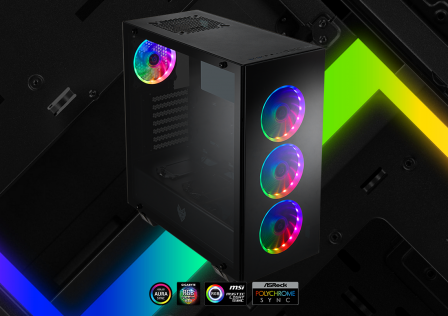
The tinted glass on the front panel really aids in adding to the stealthy look of the MP530P. The three fans underneath are RGB enabled and shine through once system power is on.

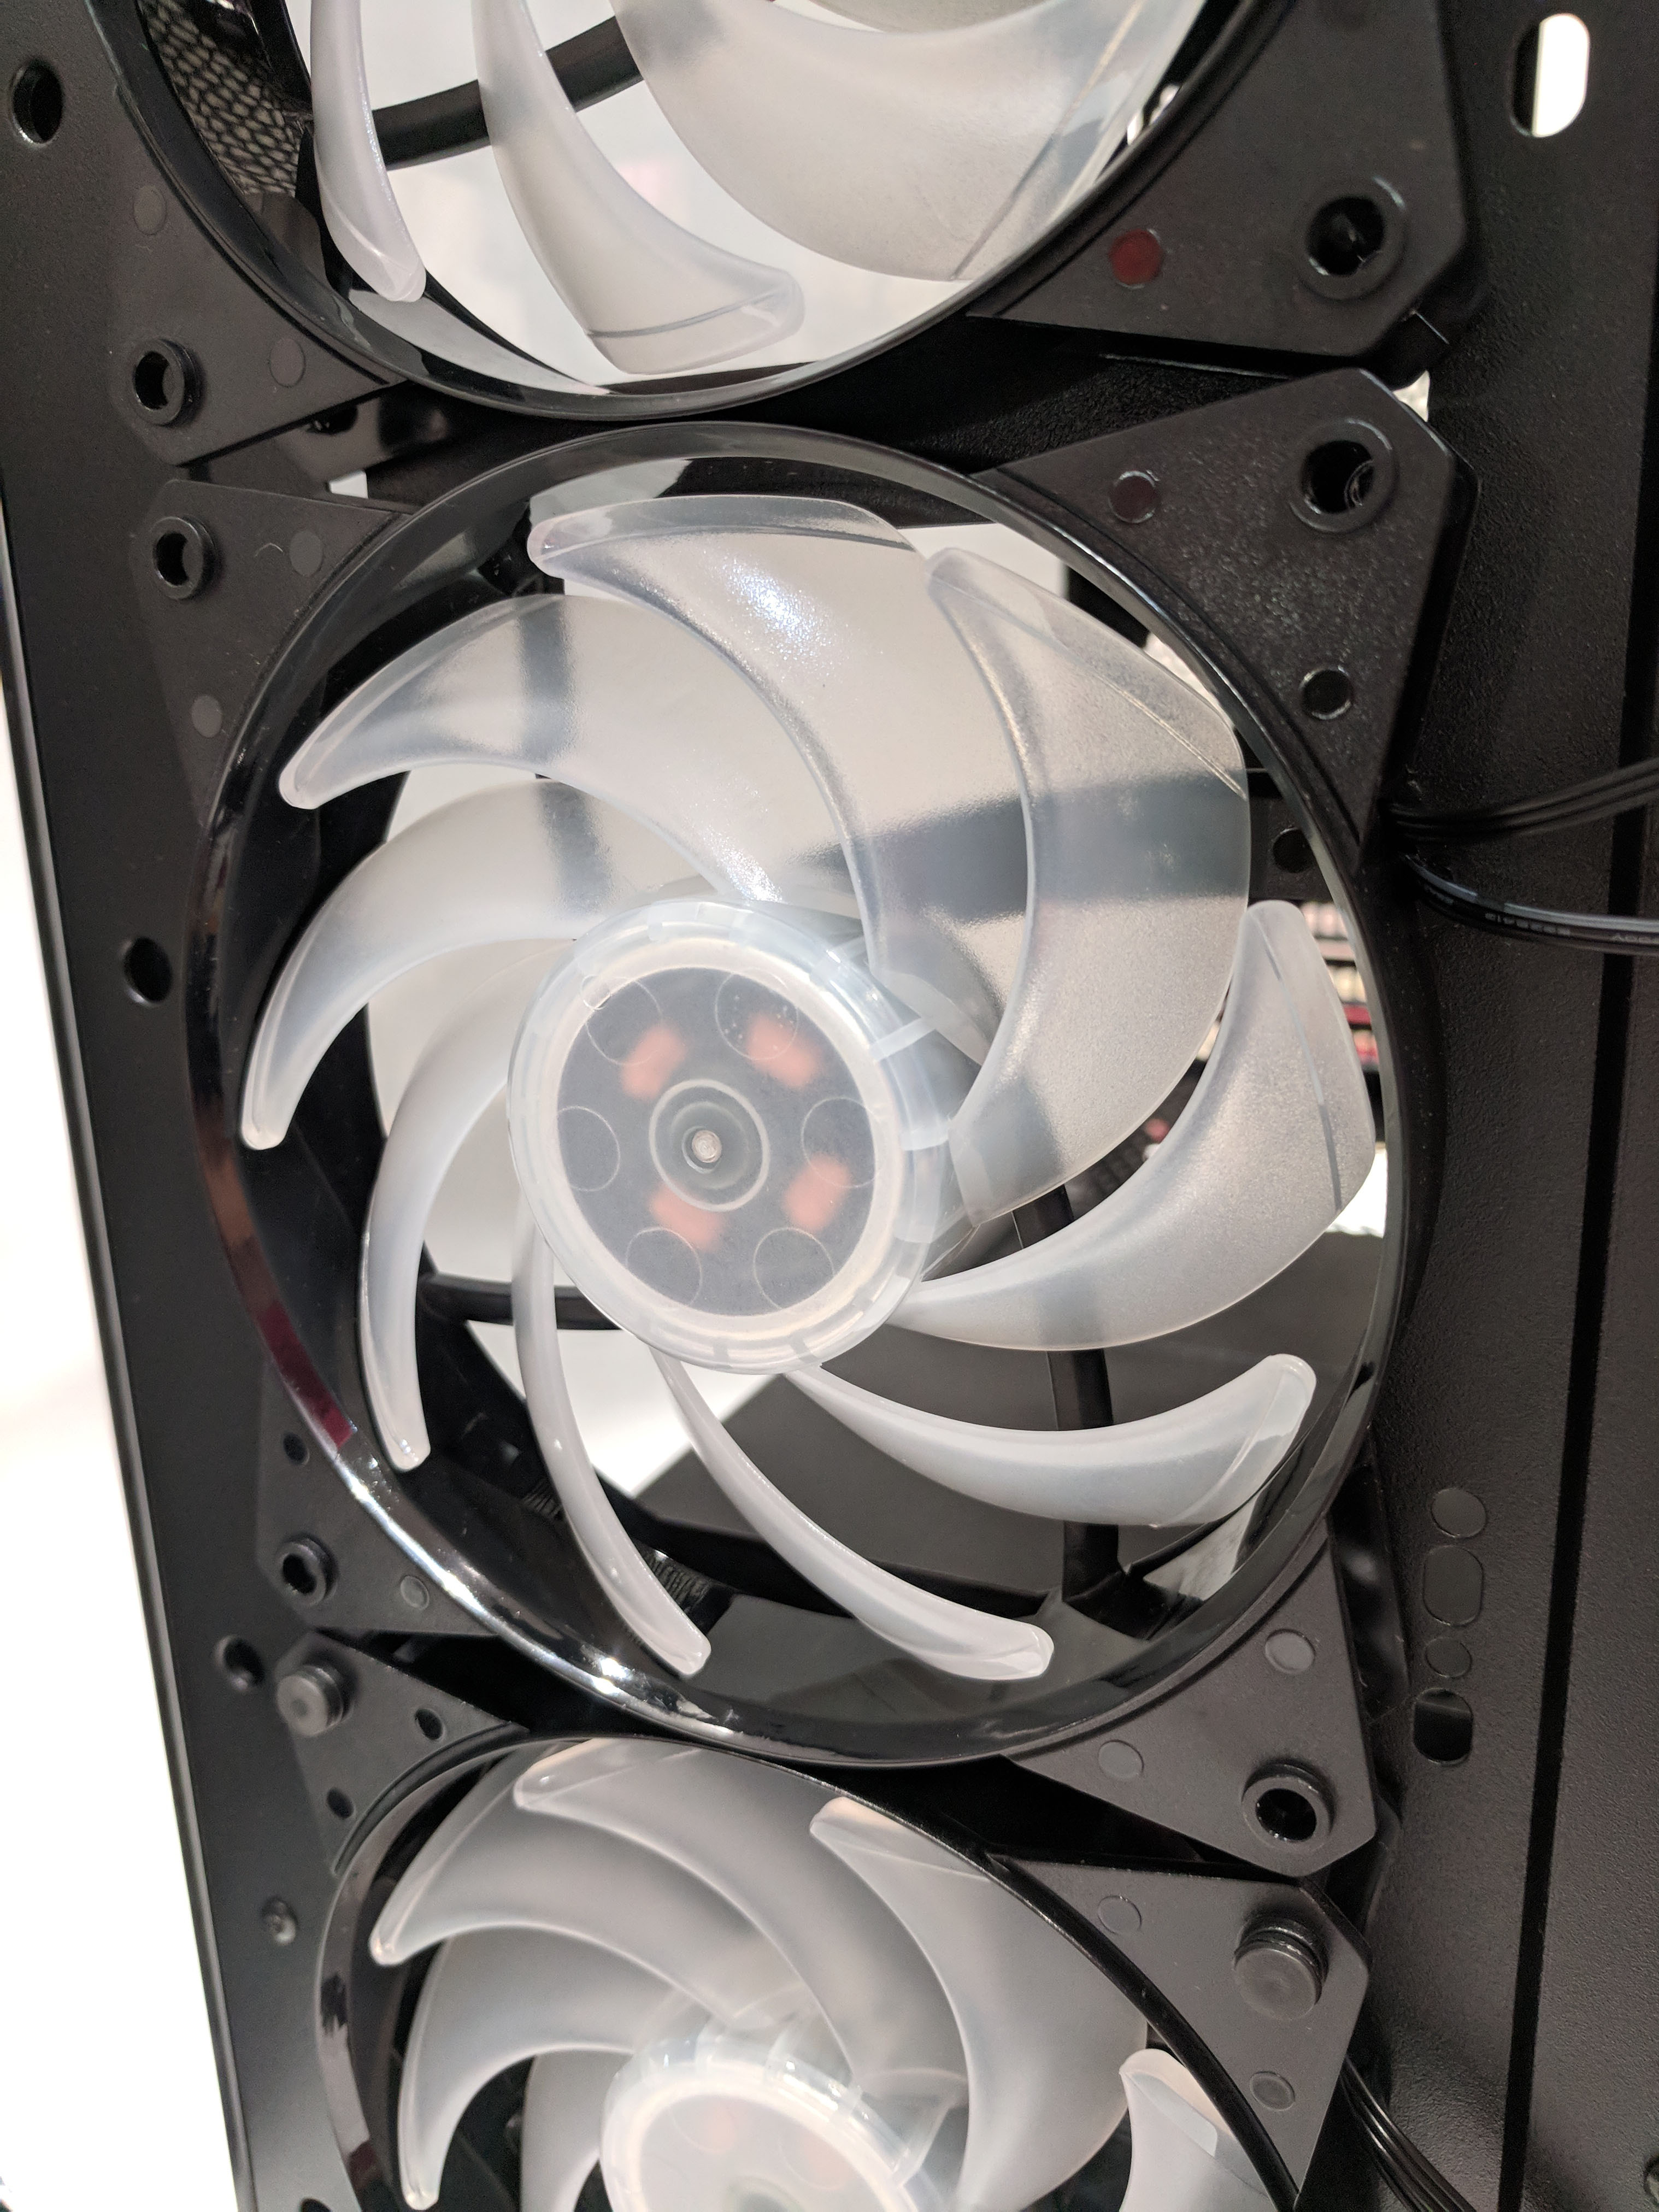
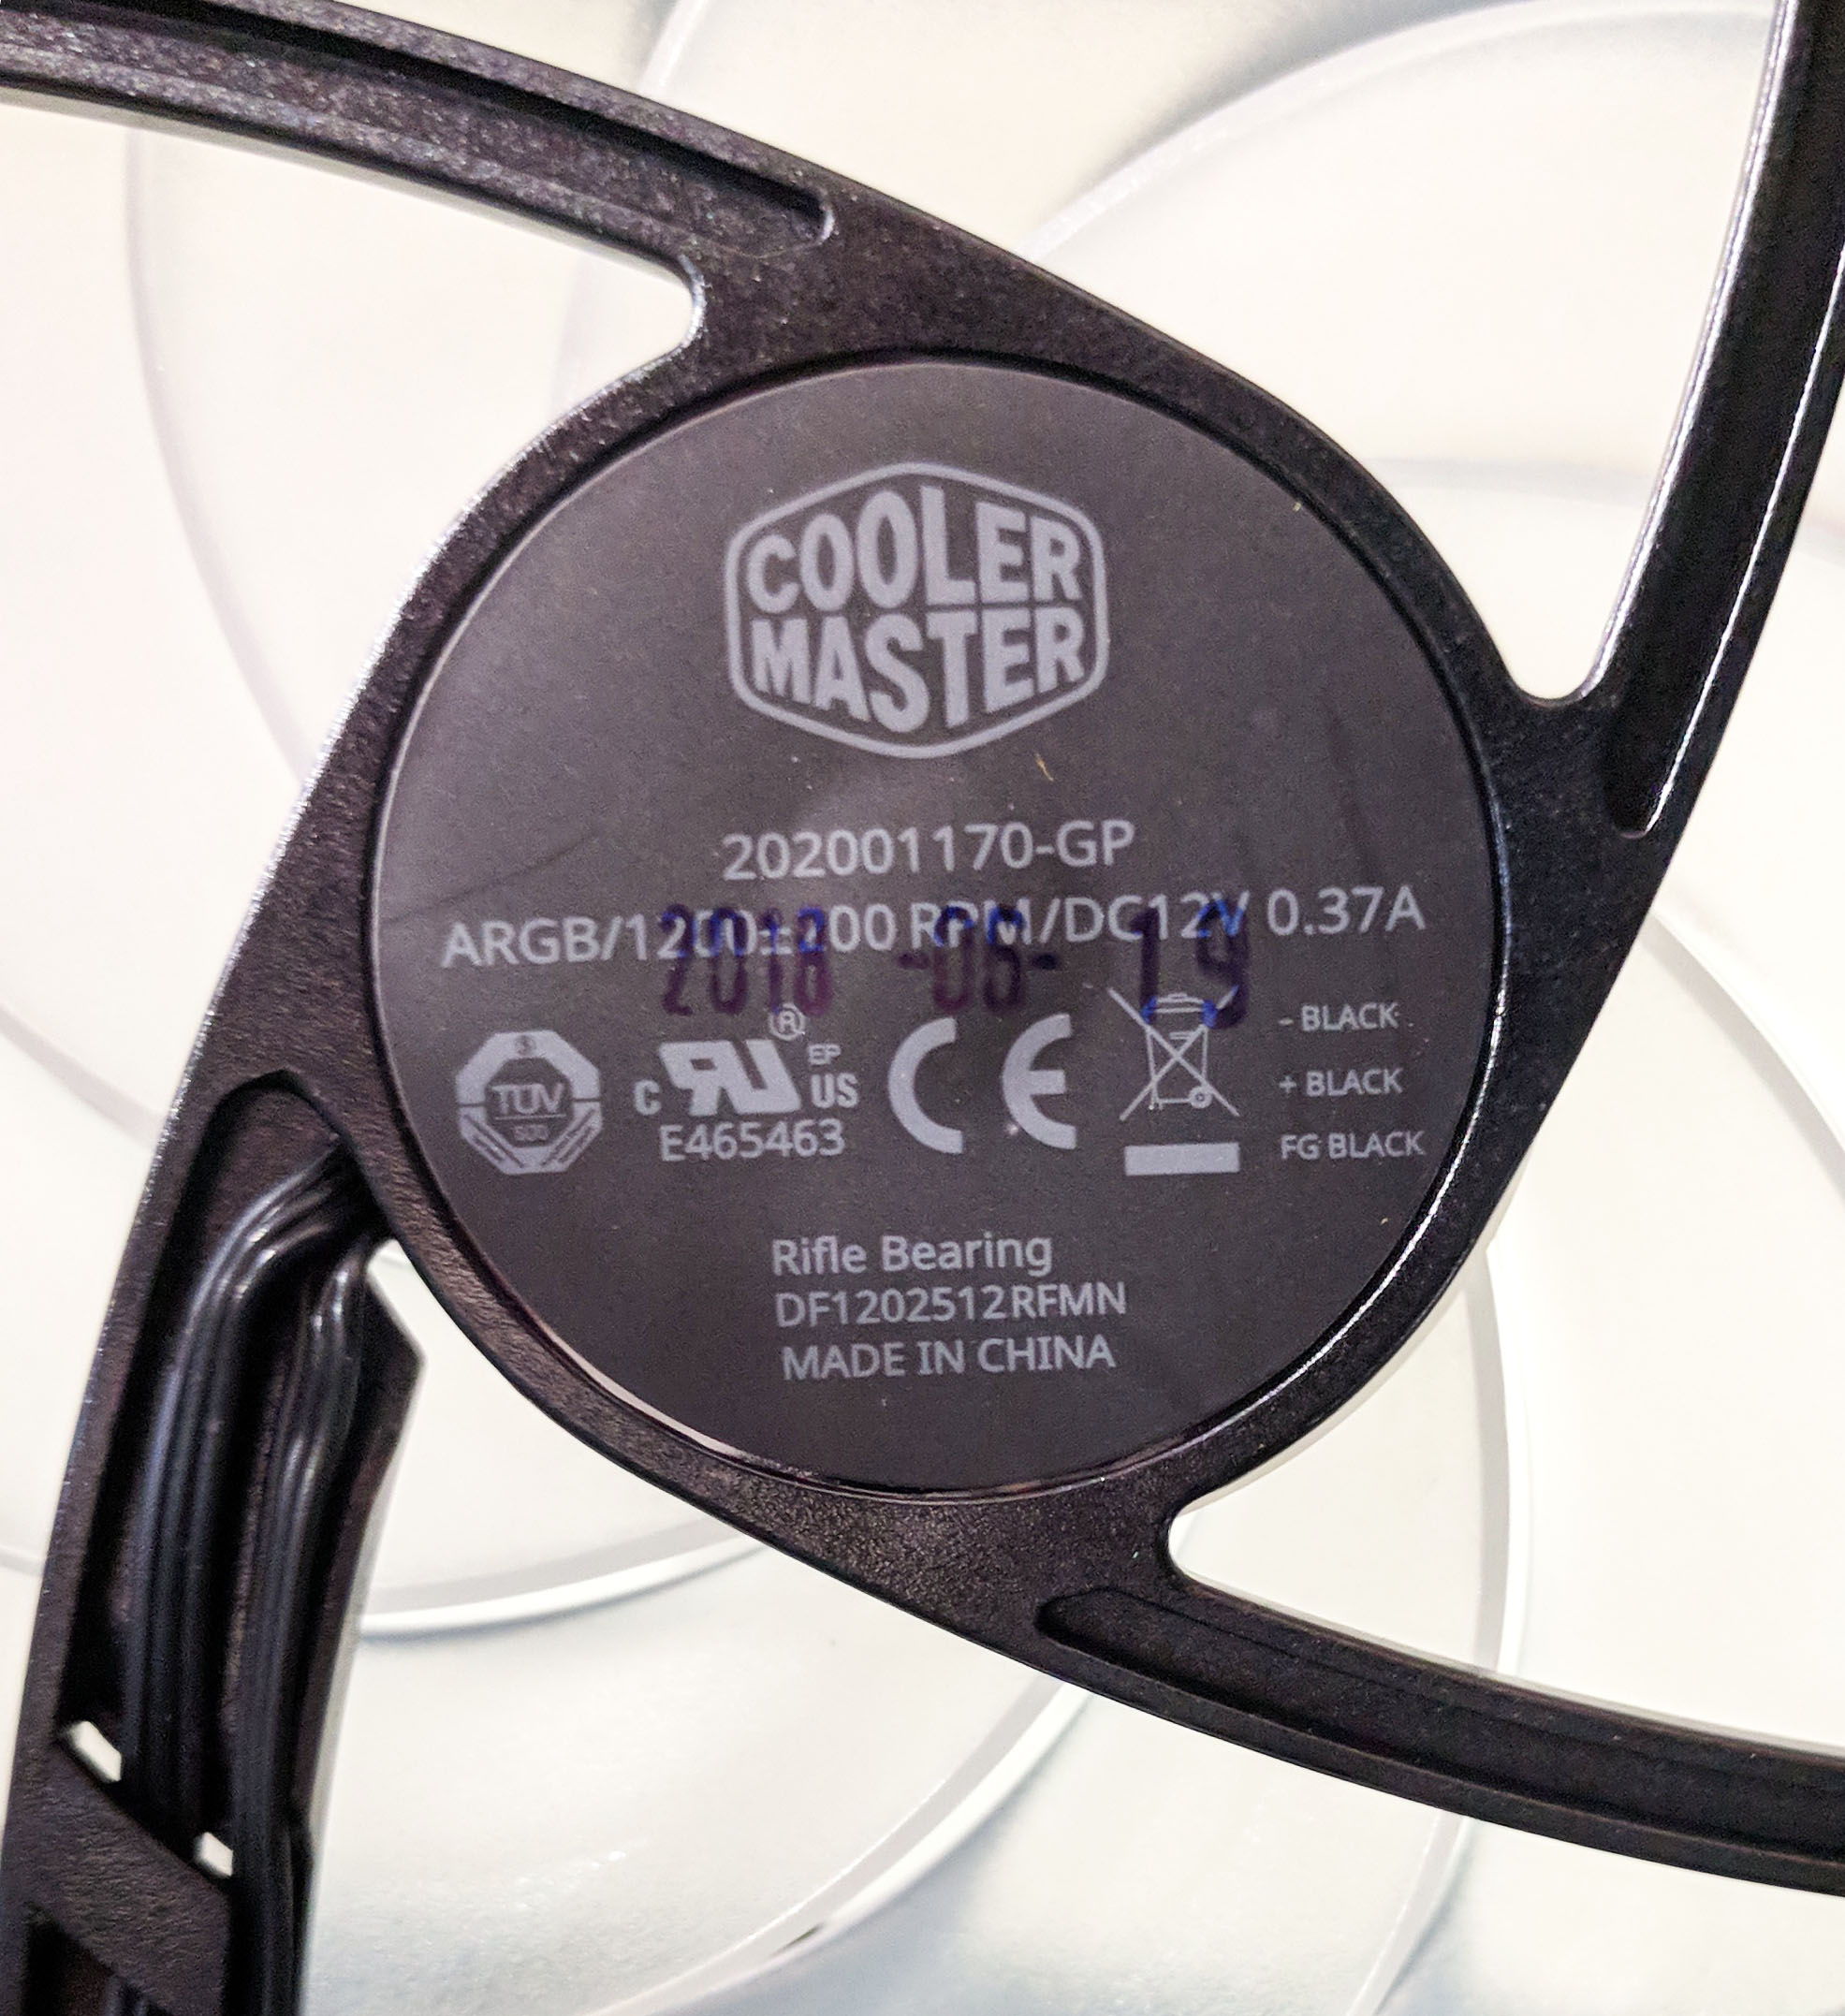
With the front bezel off, we get a better look at the fans. The RGB enabled fans appear to be CoolerMaster MasterFan Pro 120mm RGB Fans.
With the bezel snapped back into place, let’s take a look at the top IO panel. The panel itself is located on the top-front of the case and includes two USB 3.0 ports, two USB 2.0 ports, audio ports, a CM-Logo shaped power button a HDD activity light and a LED lighting option button. When not using the motherboard’s addressable LED control header, the case itself has a few lighting options that can be toggled when the button is pressed.
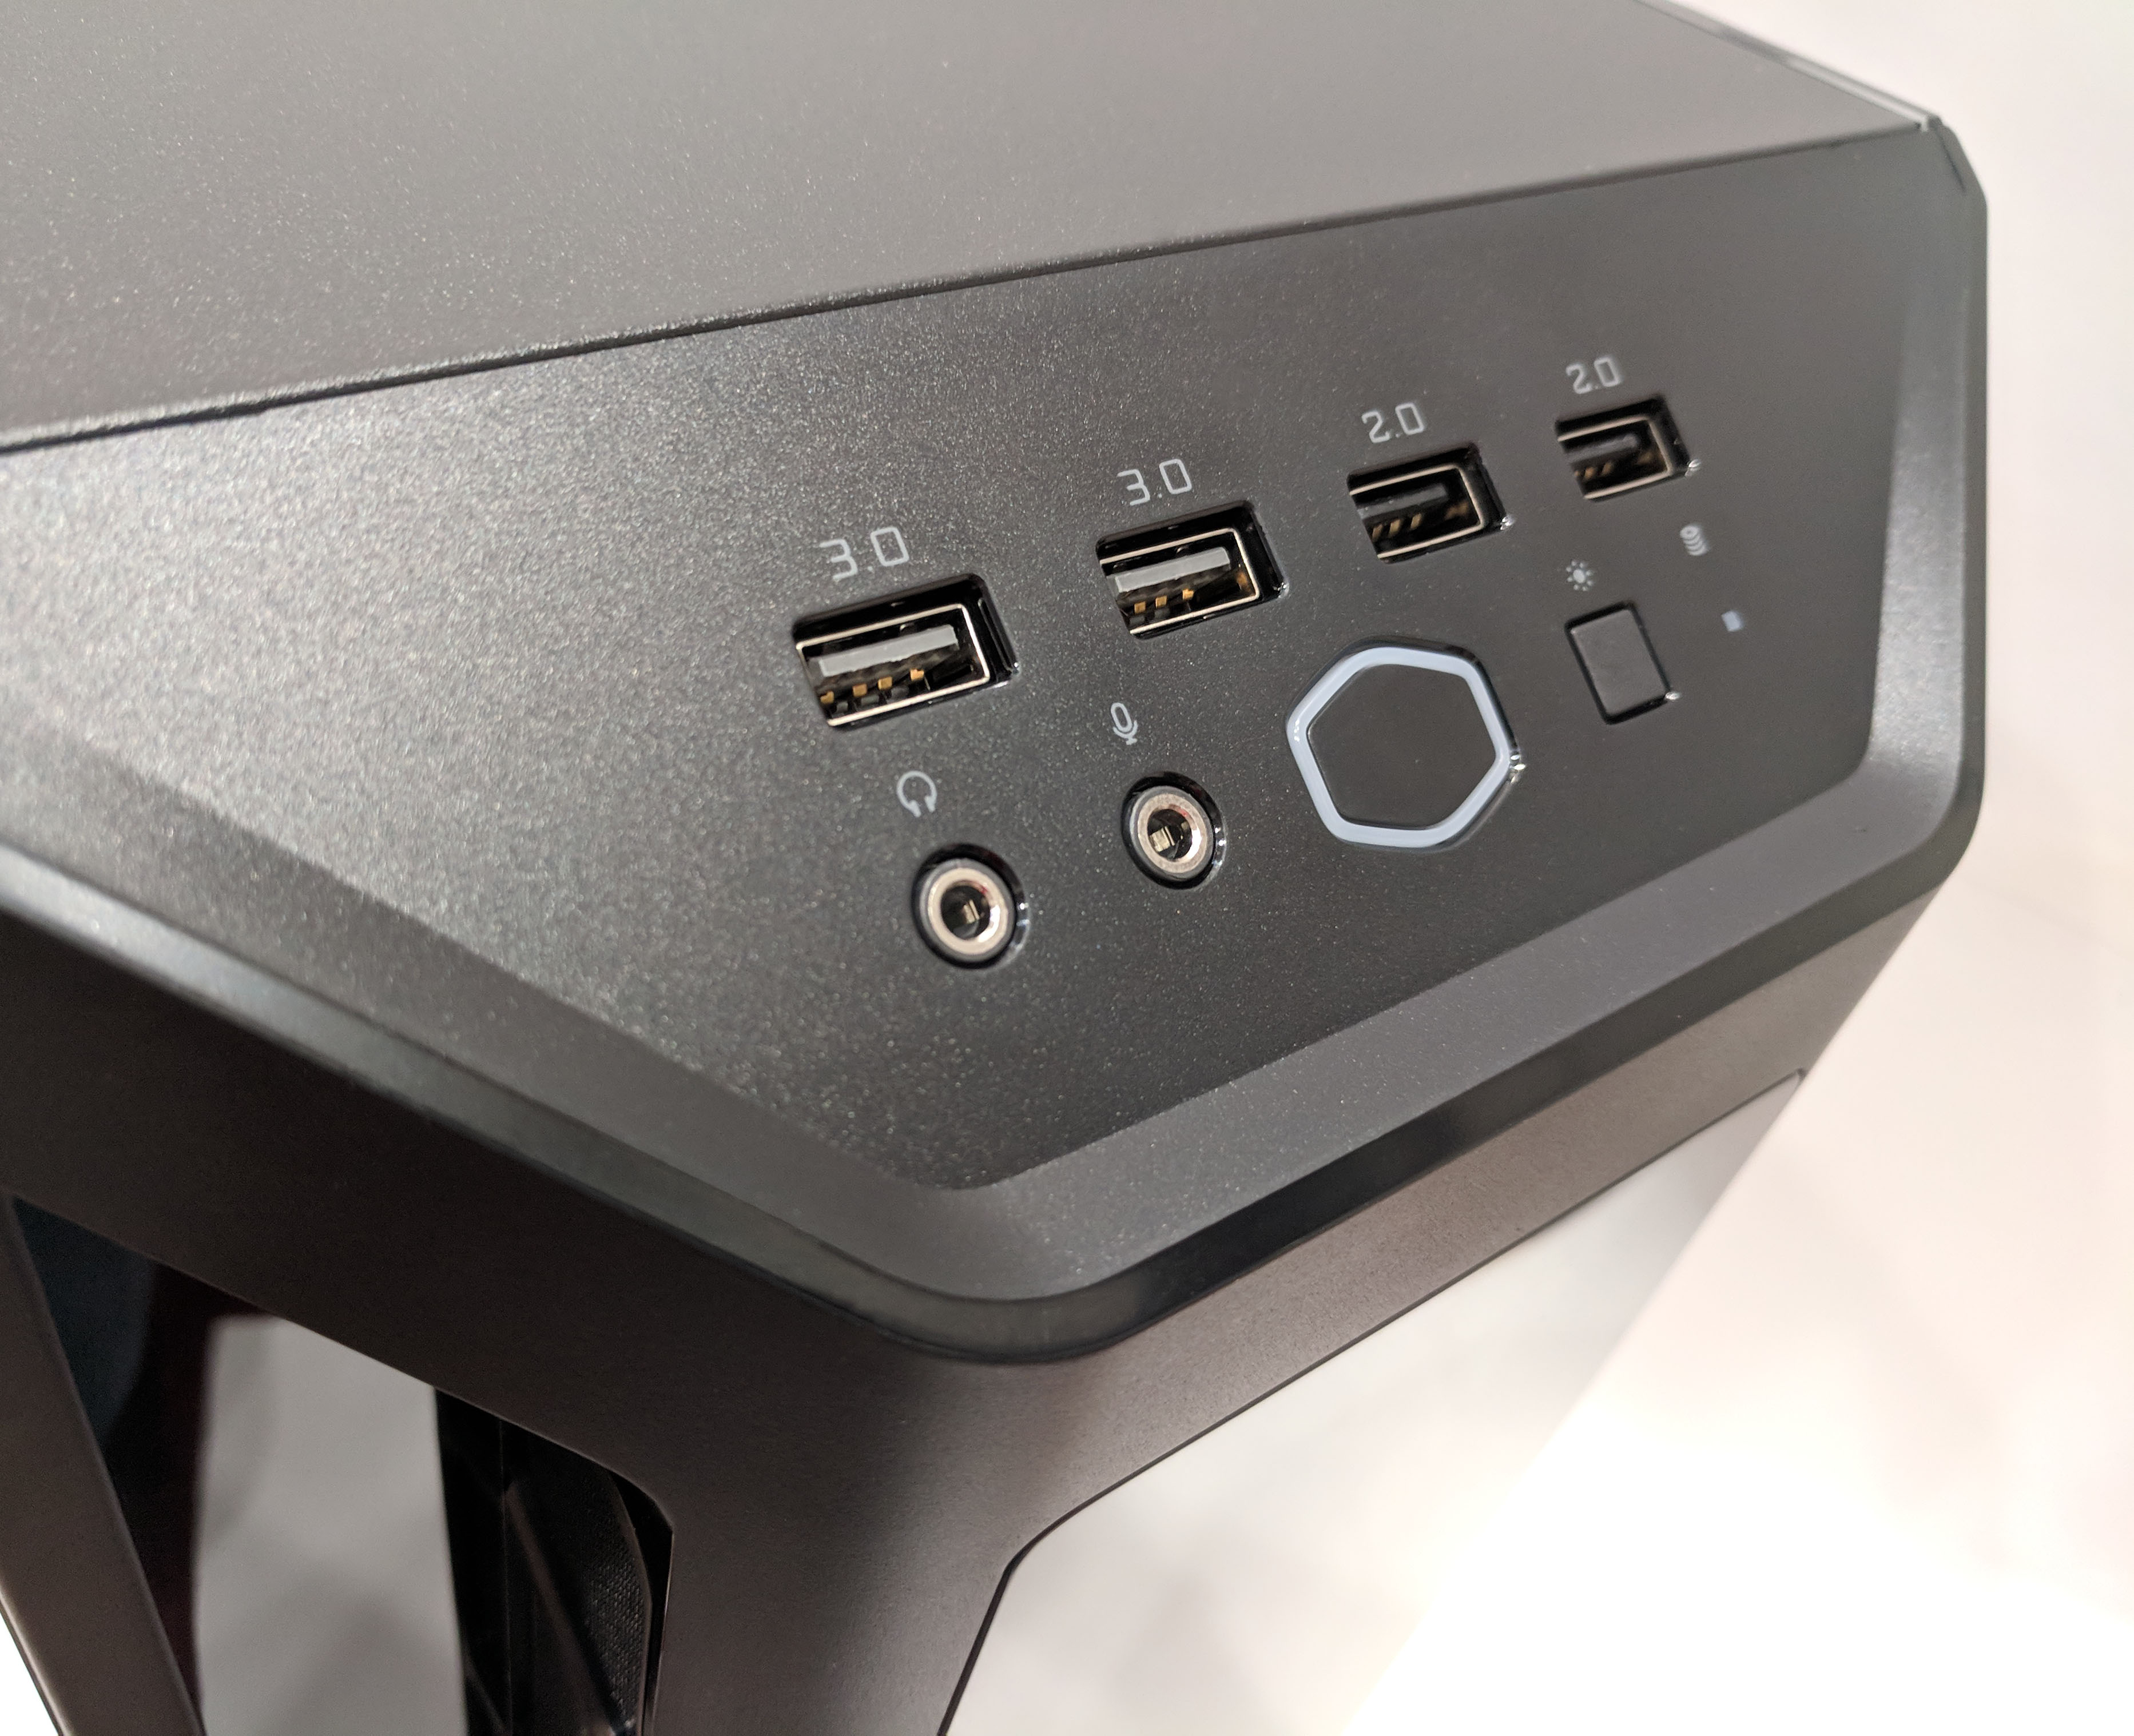
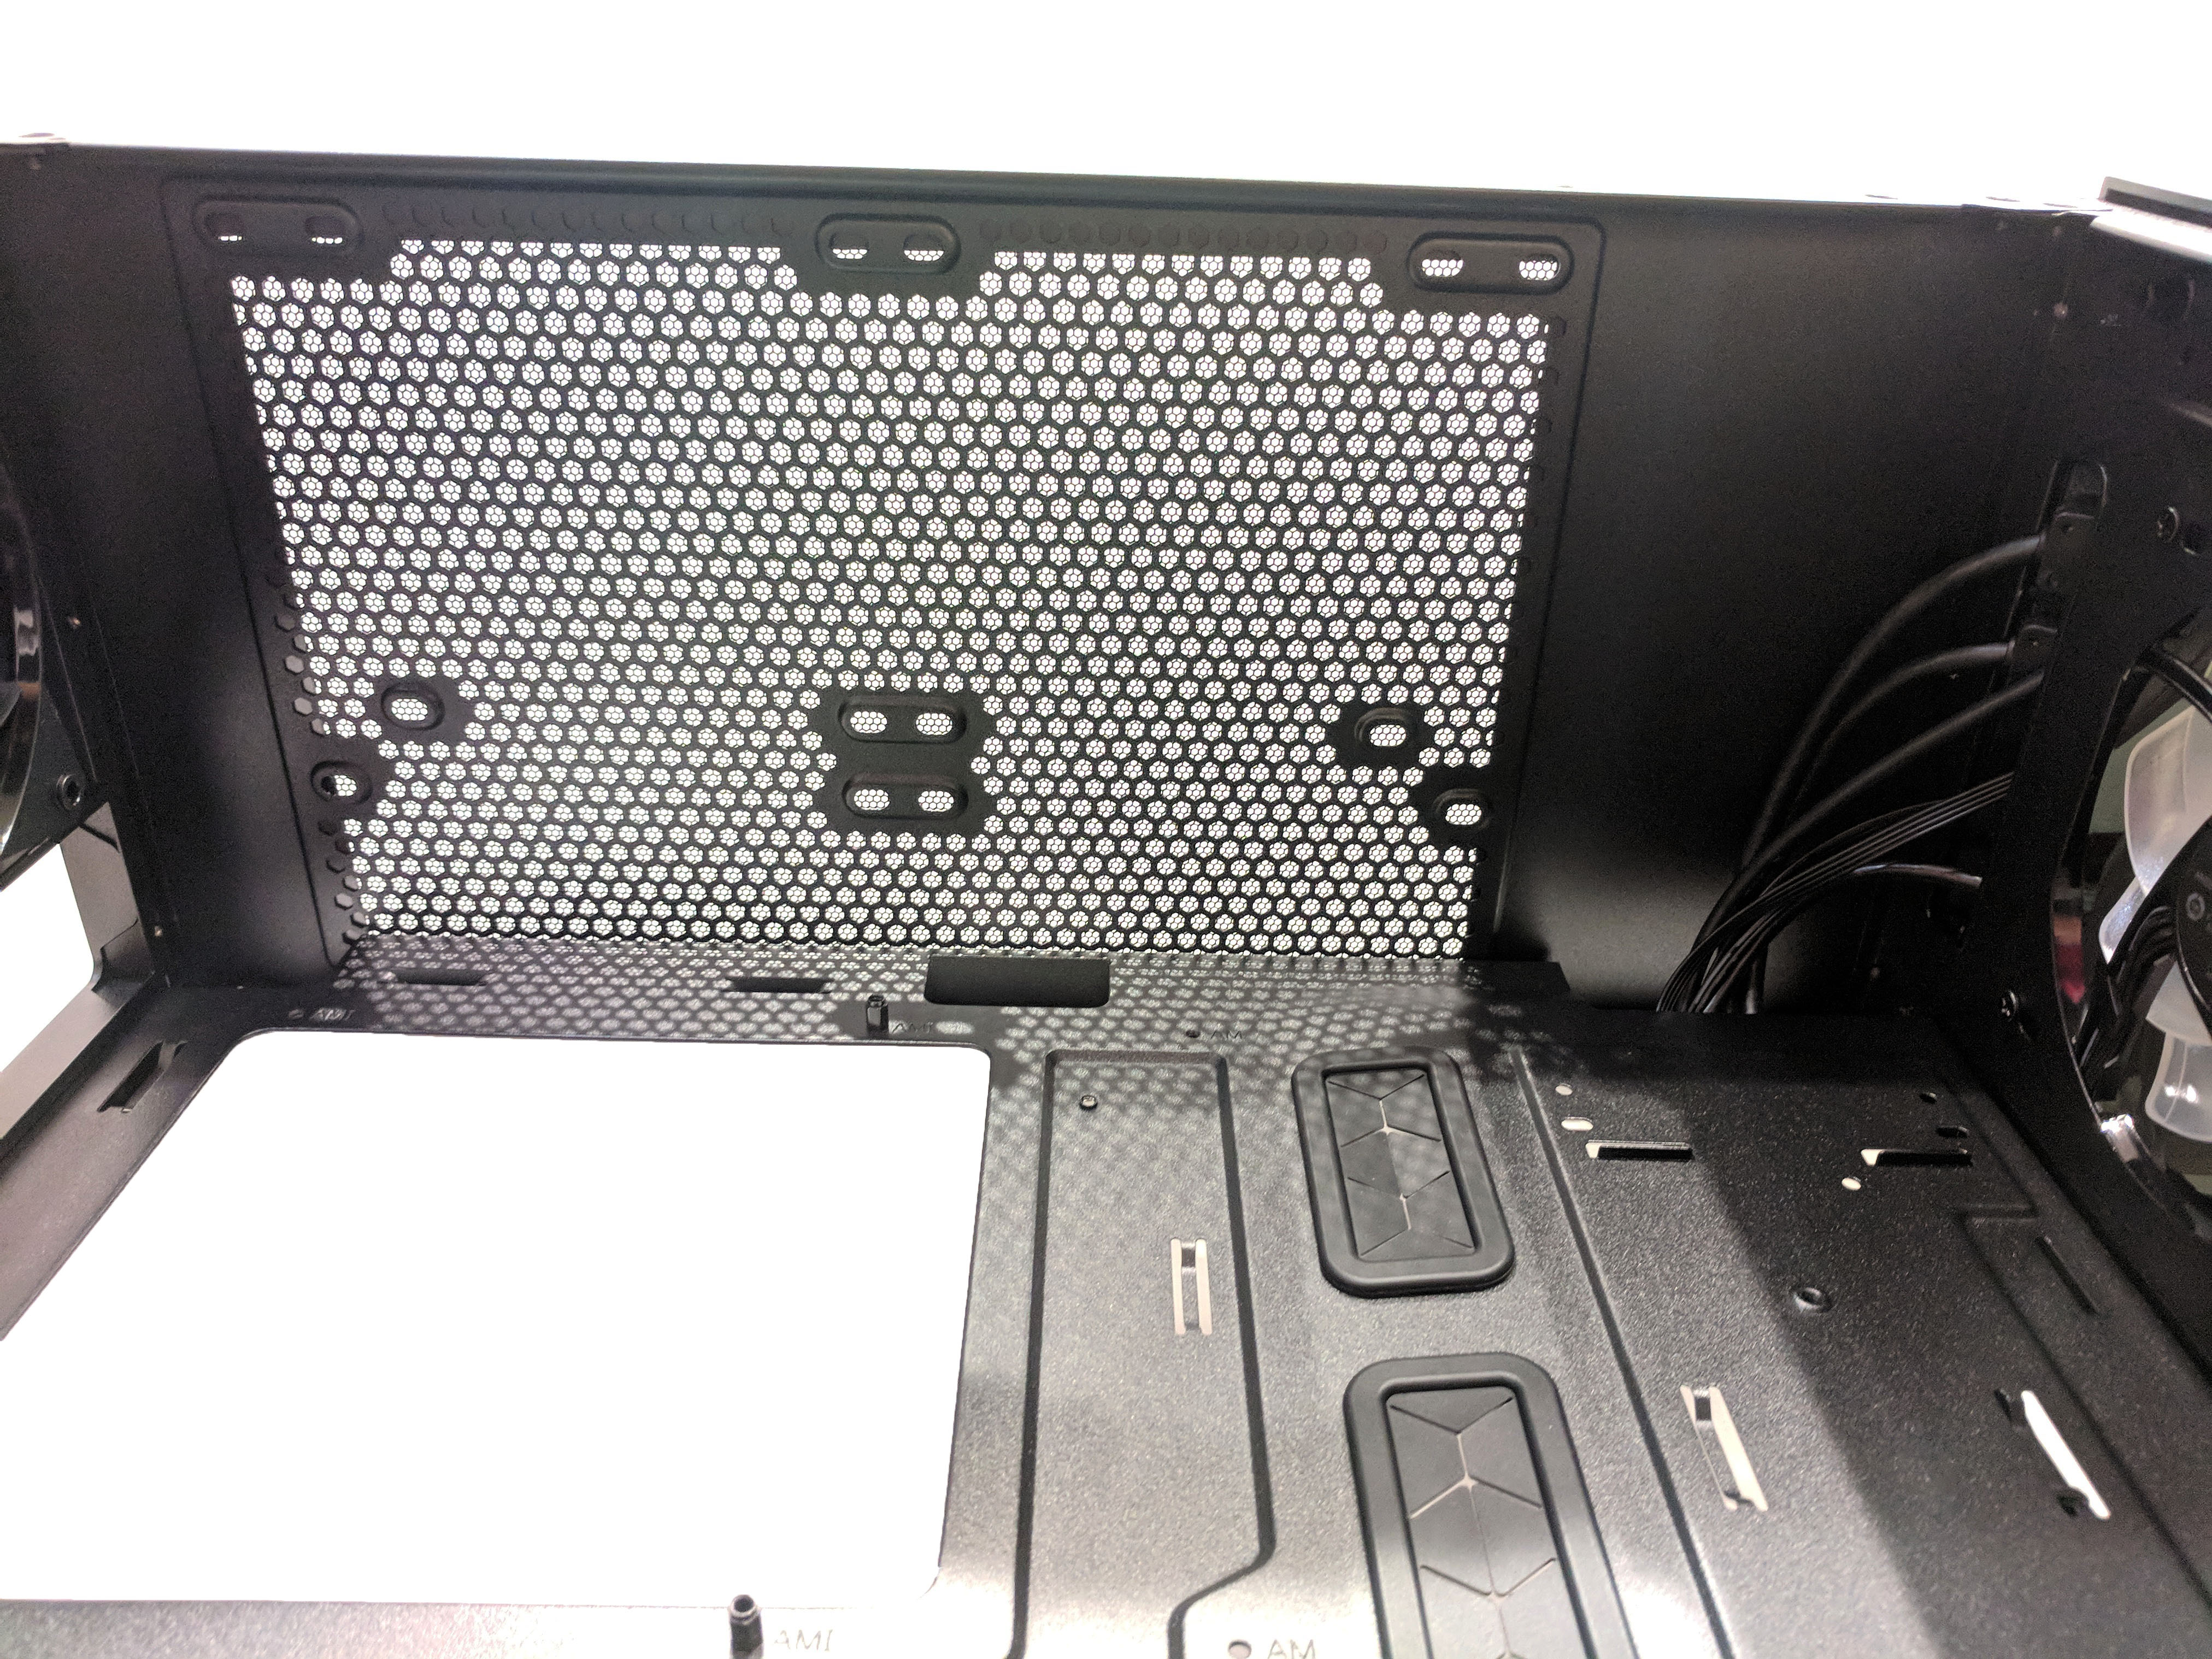
Next, let’s work our way to the top of the case. Other than the front IO panel, the only note-worthy mention is the magnetic dust cover. The cover sits neatly inside the sunken metal grooves and is held in place by a ring of flexible magnets surrounding the outside of the filter. I’d recommend removing this dust cover if you choose to use the top fans as an exhaust as the filter will only obstruct airflow.

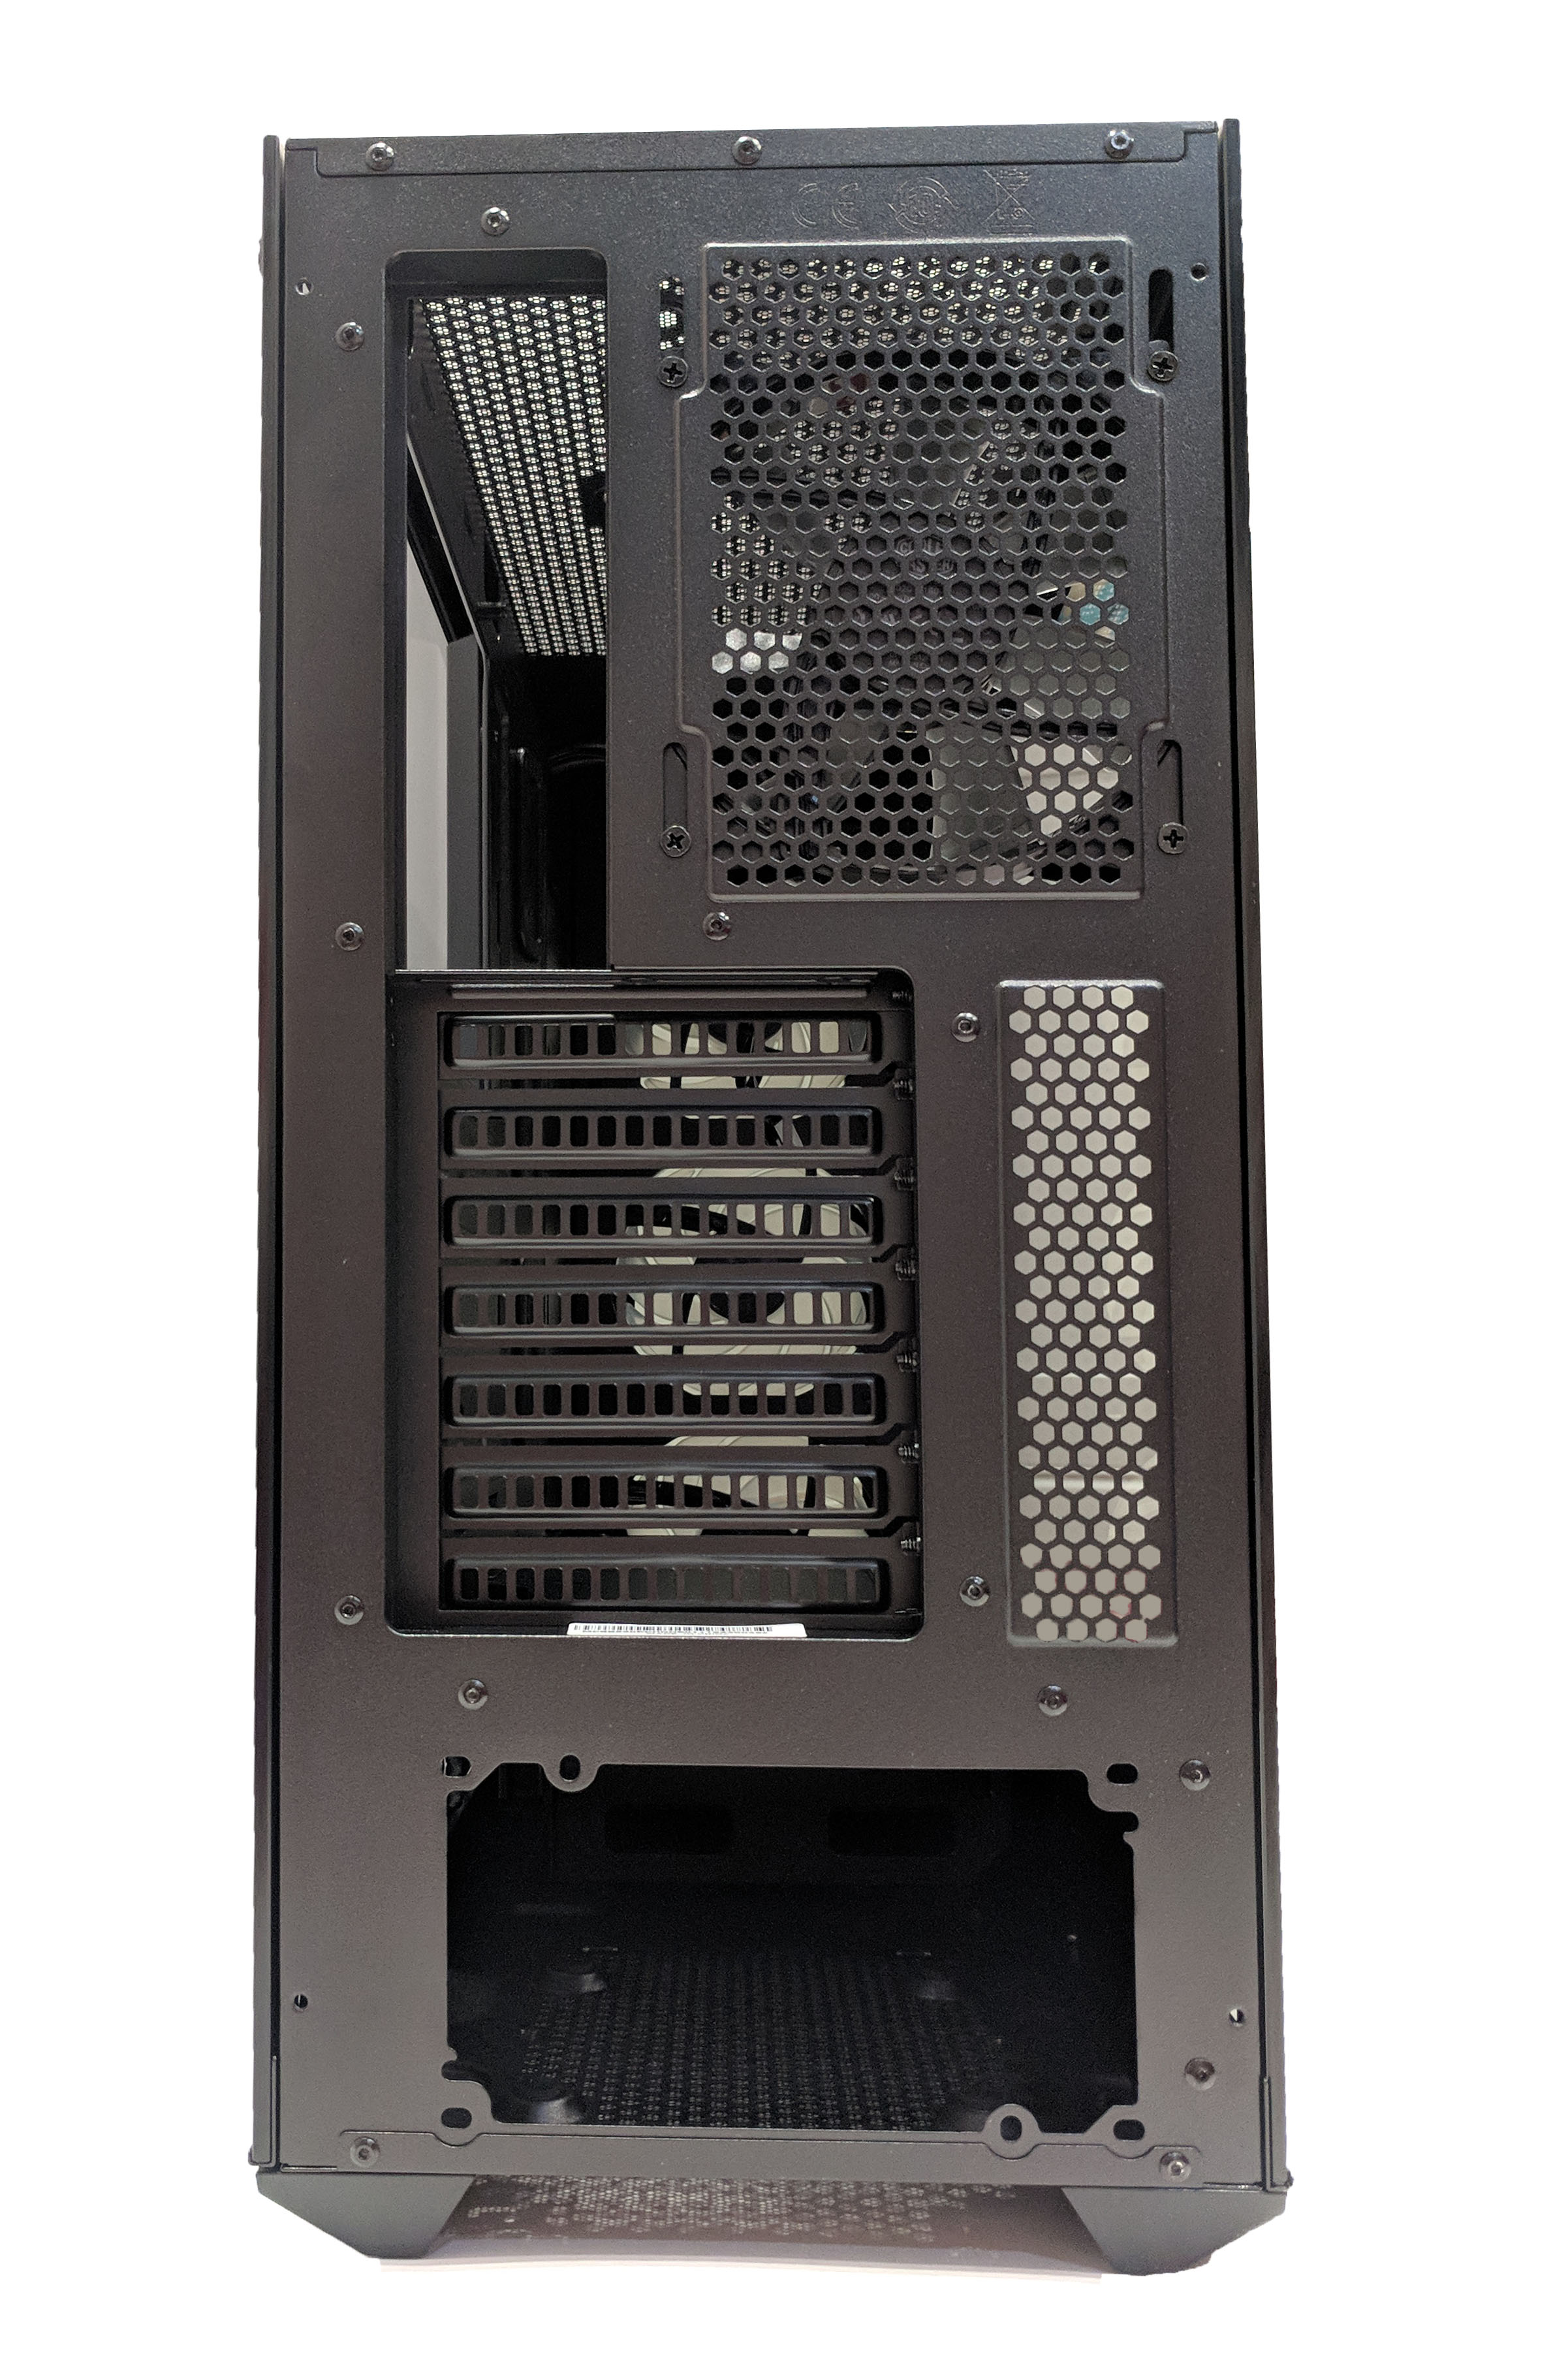
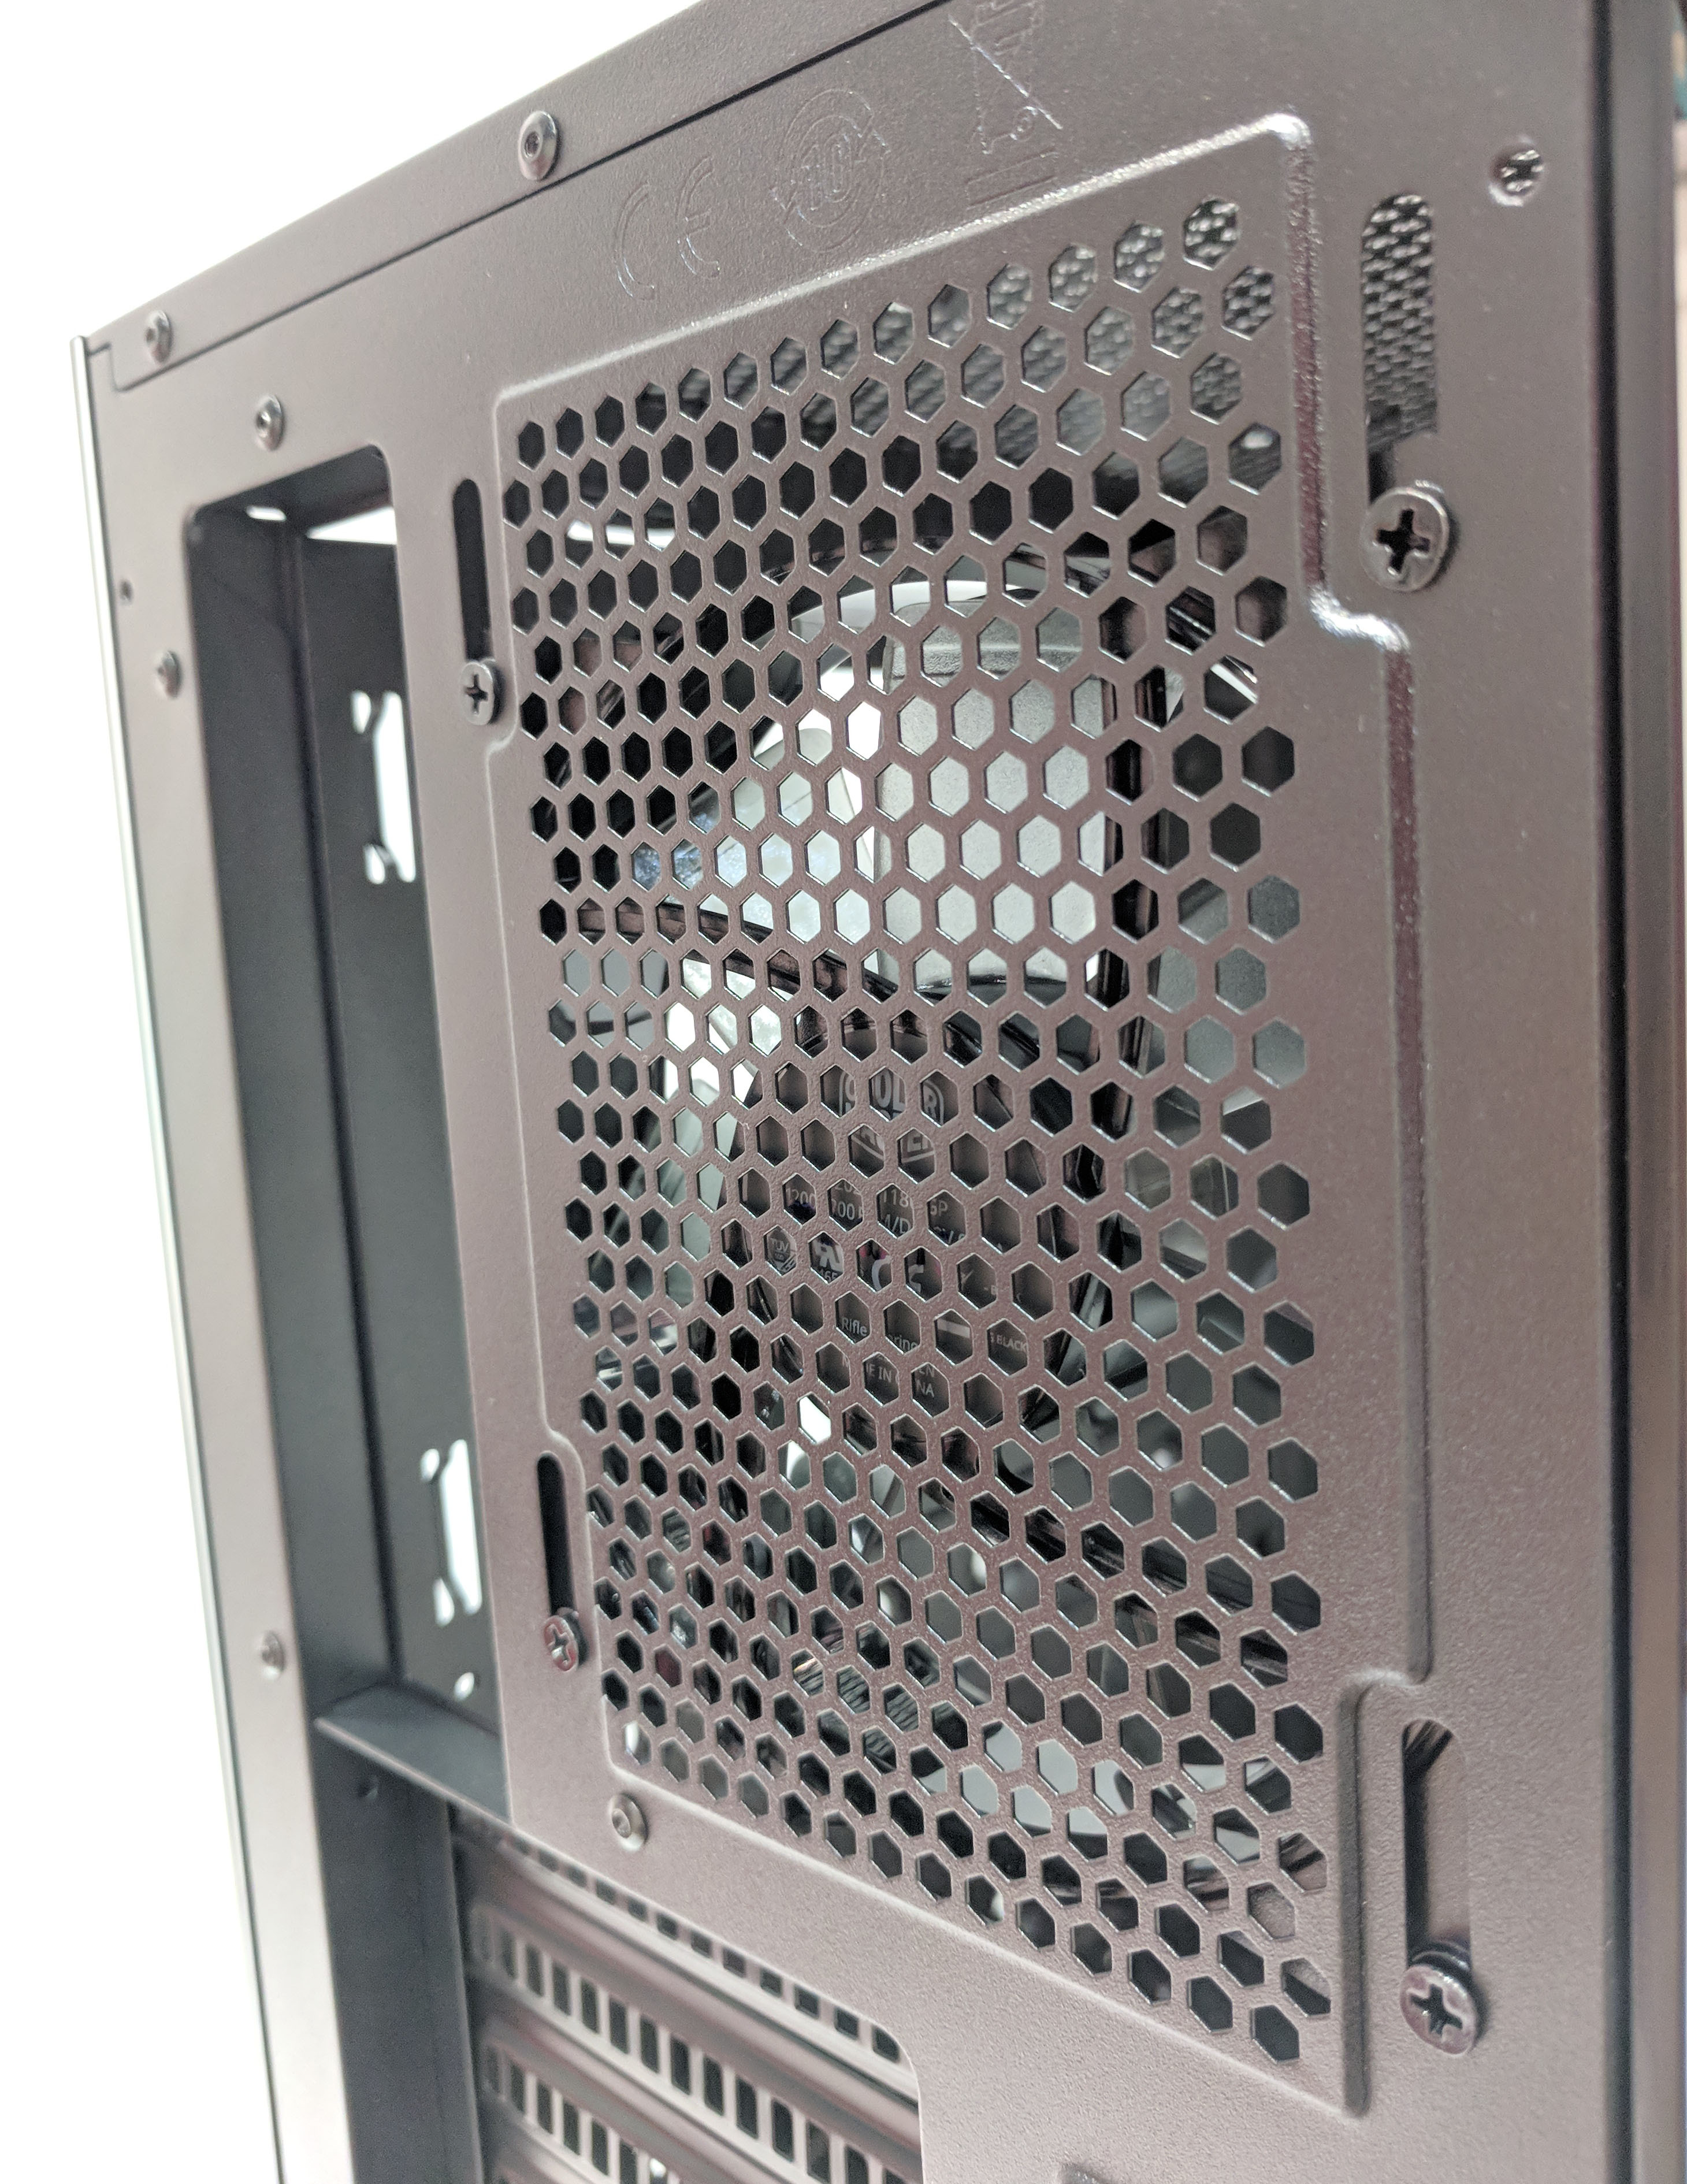
Moving onto the back of the case, overall pretty standard. One interesting feature to note however, is the MB530P’s ability to adjust the rear exhaust fan up or down to provide optimal positioning to remove the hot air from the CPU cooler.
The tempered glass side panels are held on by two rubber-padded thumb screws on the top. The bottom is locked into place by sliding the glass side panel down into the chassis. This locking method also prevents the glass panel from falling away from the case once unscrewed. The bottom mounts extend the entire length of the glass panel which also acts as a protective barrier.

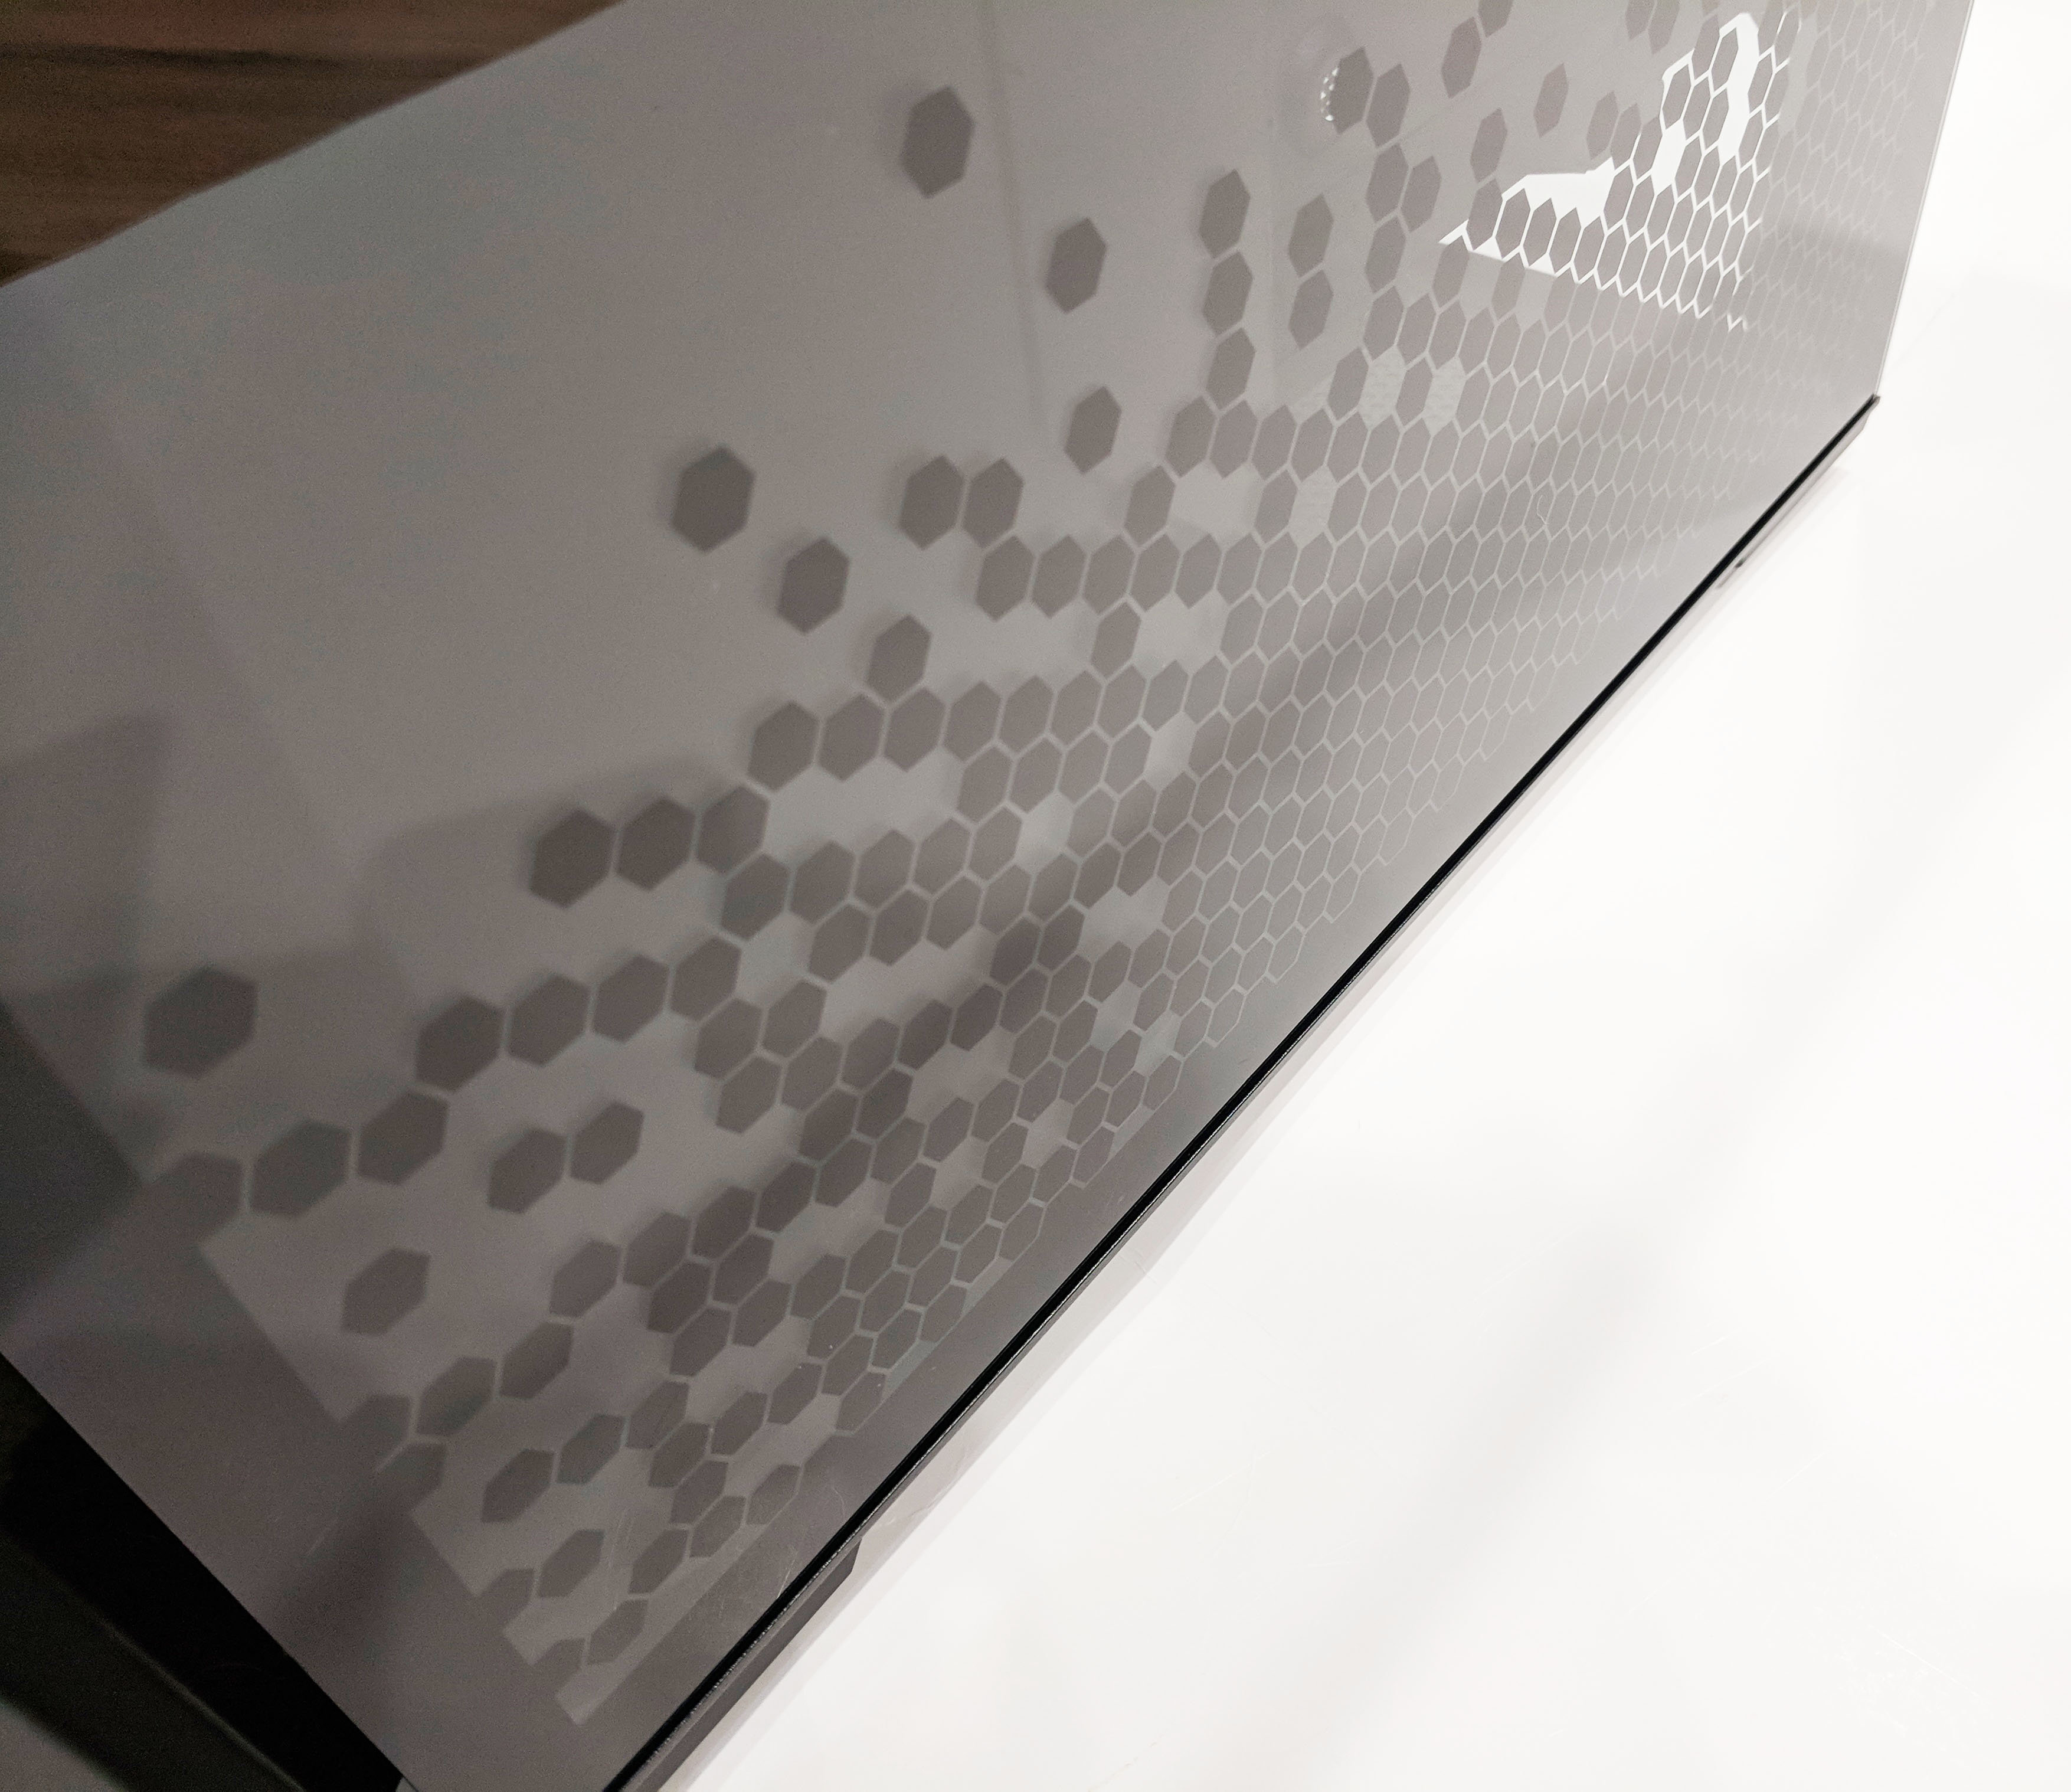
As you can see in the photo above and below, the right side panel has a hexagonal pattern. The purpose of this pattern (besides adding a sweet design), is to hide or mask the PSU and HDD storage areas as that’s where a majority of your messy cables will be hidden. Since the MasterBox MB530P features tempered glass on the right side where typically all those messy wires will go, Cooler Master went to great lengths to make the right side look as clean as possible.
Underneath the right side panel is another metal panel allowing the user to hide even more wires. When the build is complete, if done properly, very few wires should be seen from the right side of the case.
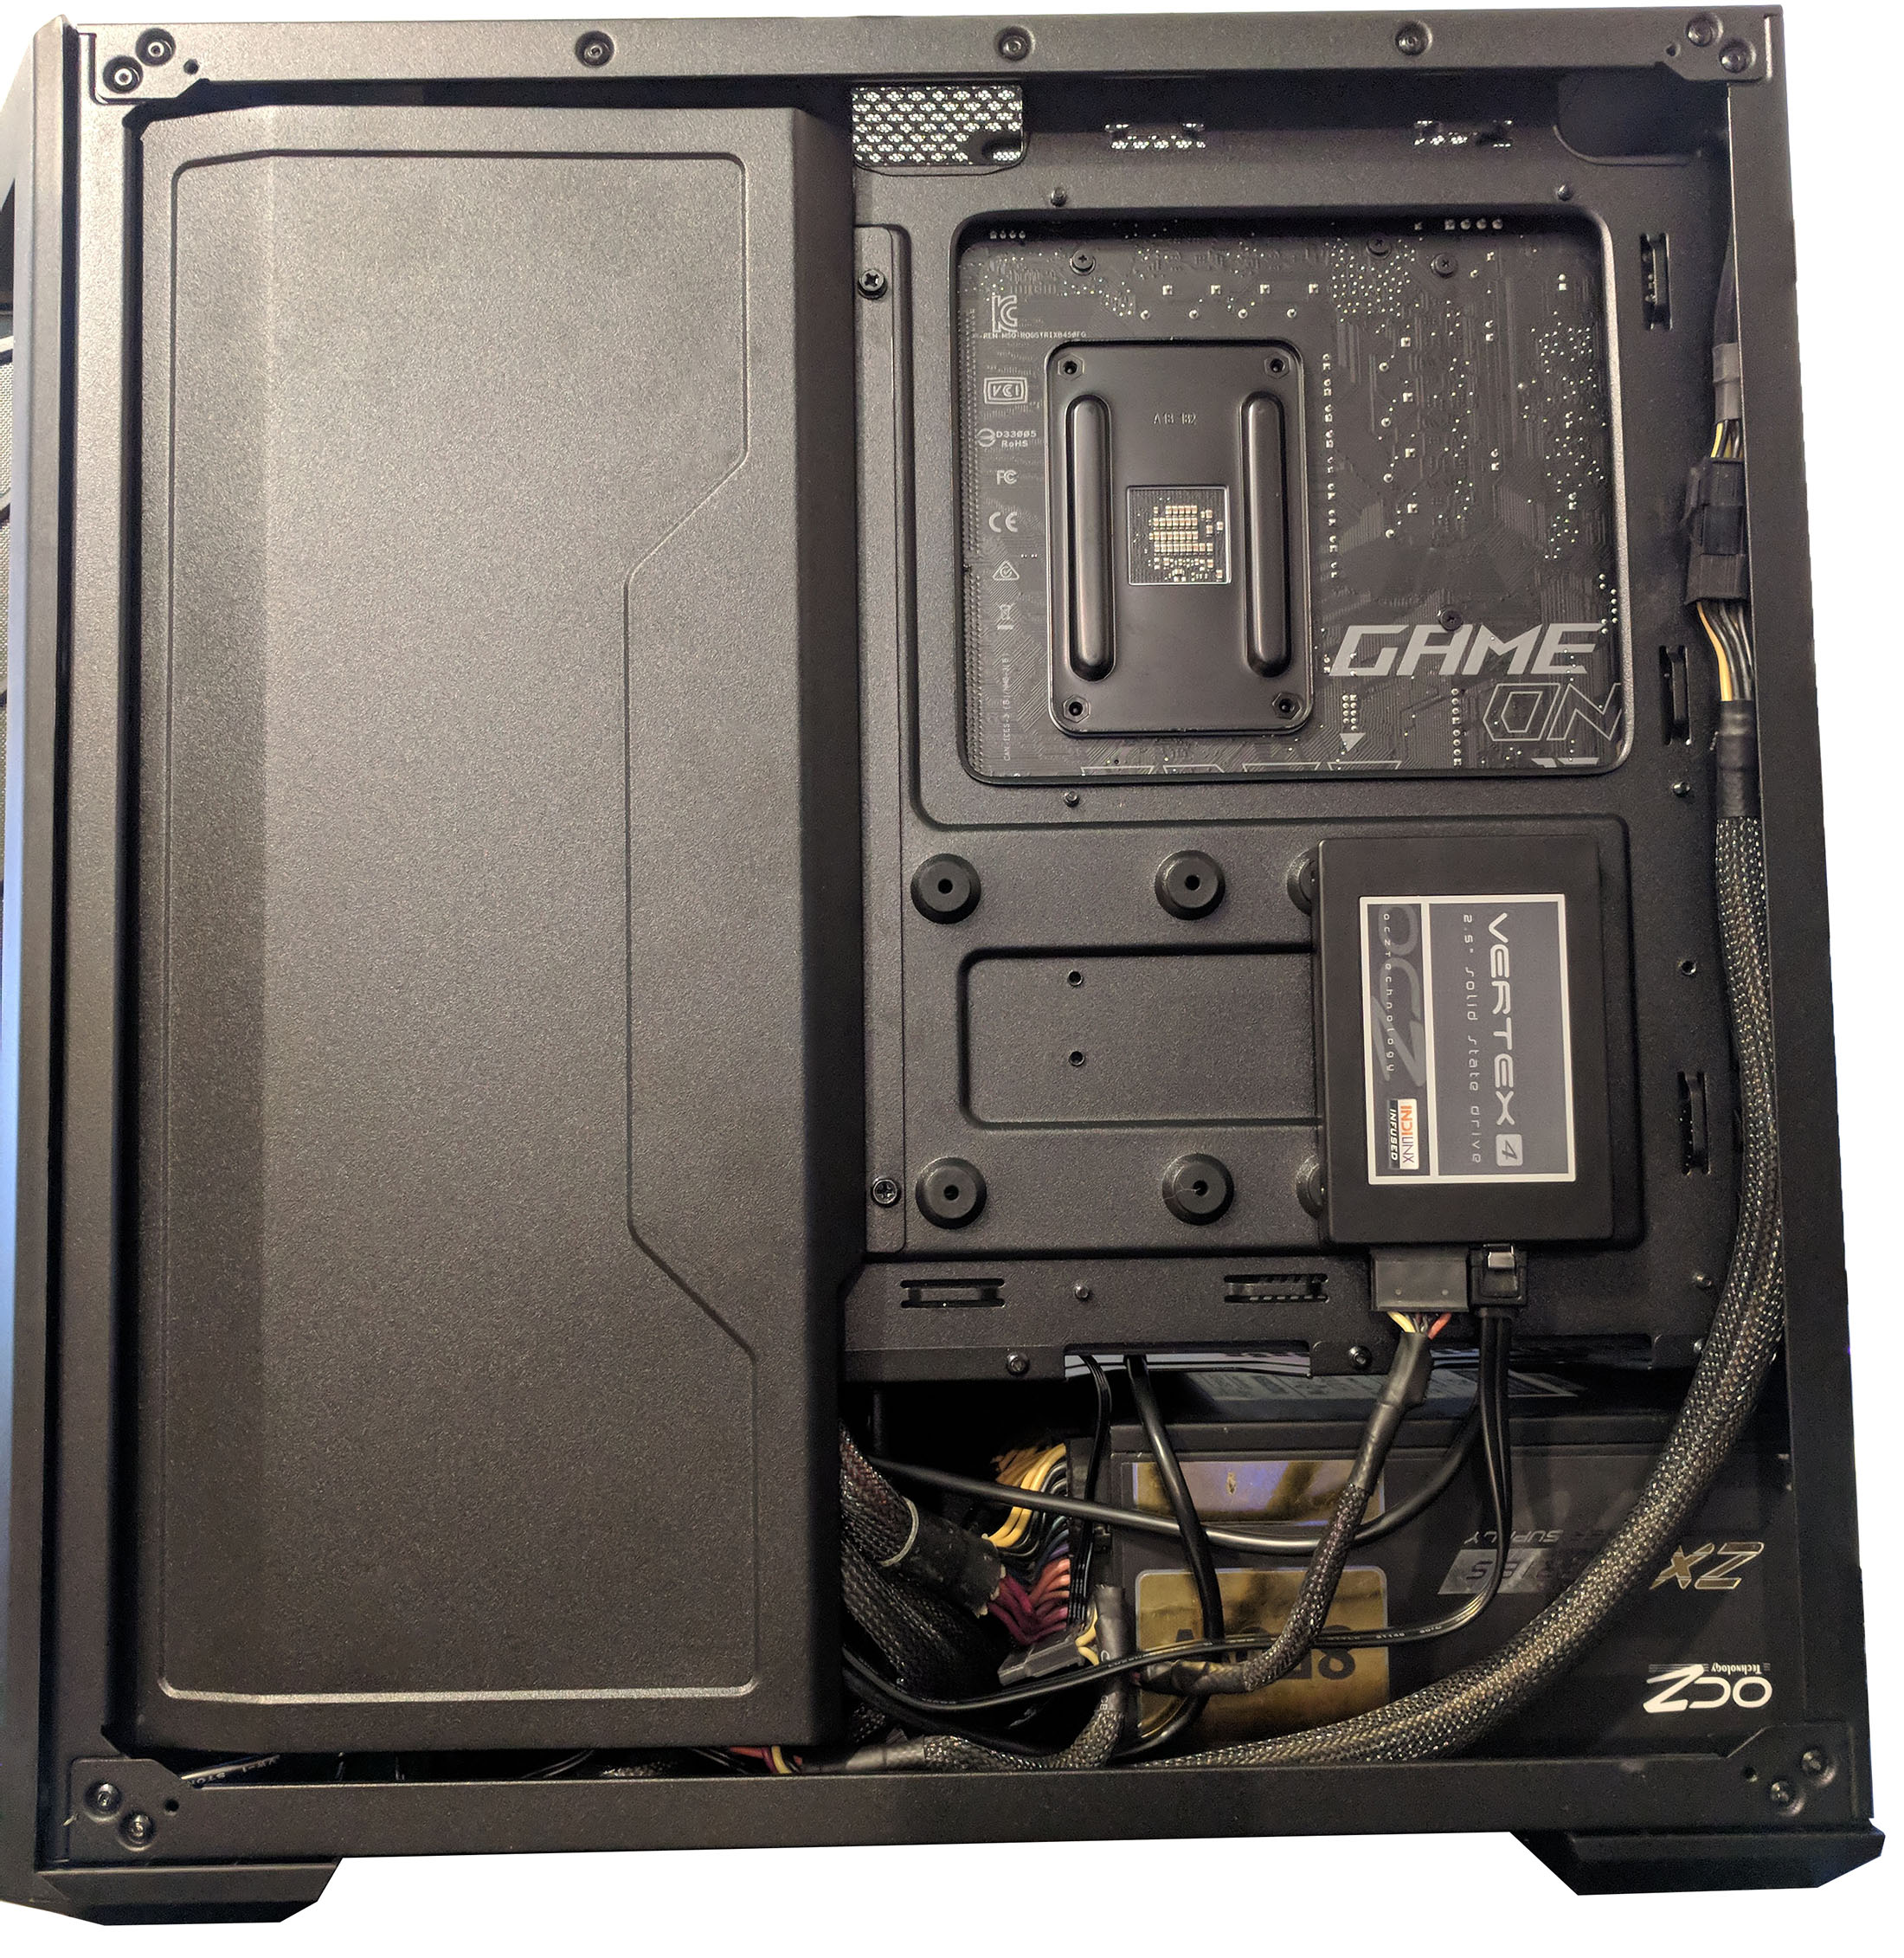
With the right panel removed, we get a better look at the MB530P’s interior. The first thing to note is the large cover on the left side we mentioned earlier. This unscrews and hinges outward which allows for cables to be stuffed and routed underneath. Typically, there is no need to completely remove the side panel as it’s not easily unhinged. However, for the good of the review, we removed the panel so we’re able to see underneath.
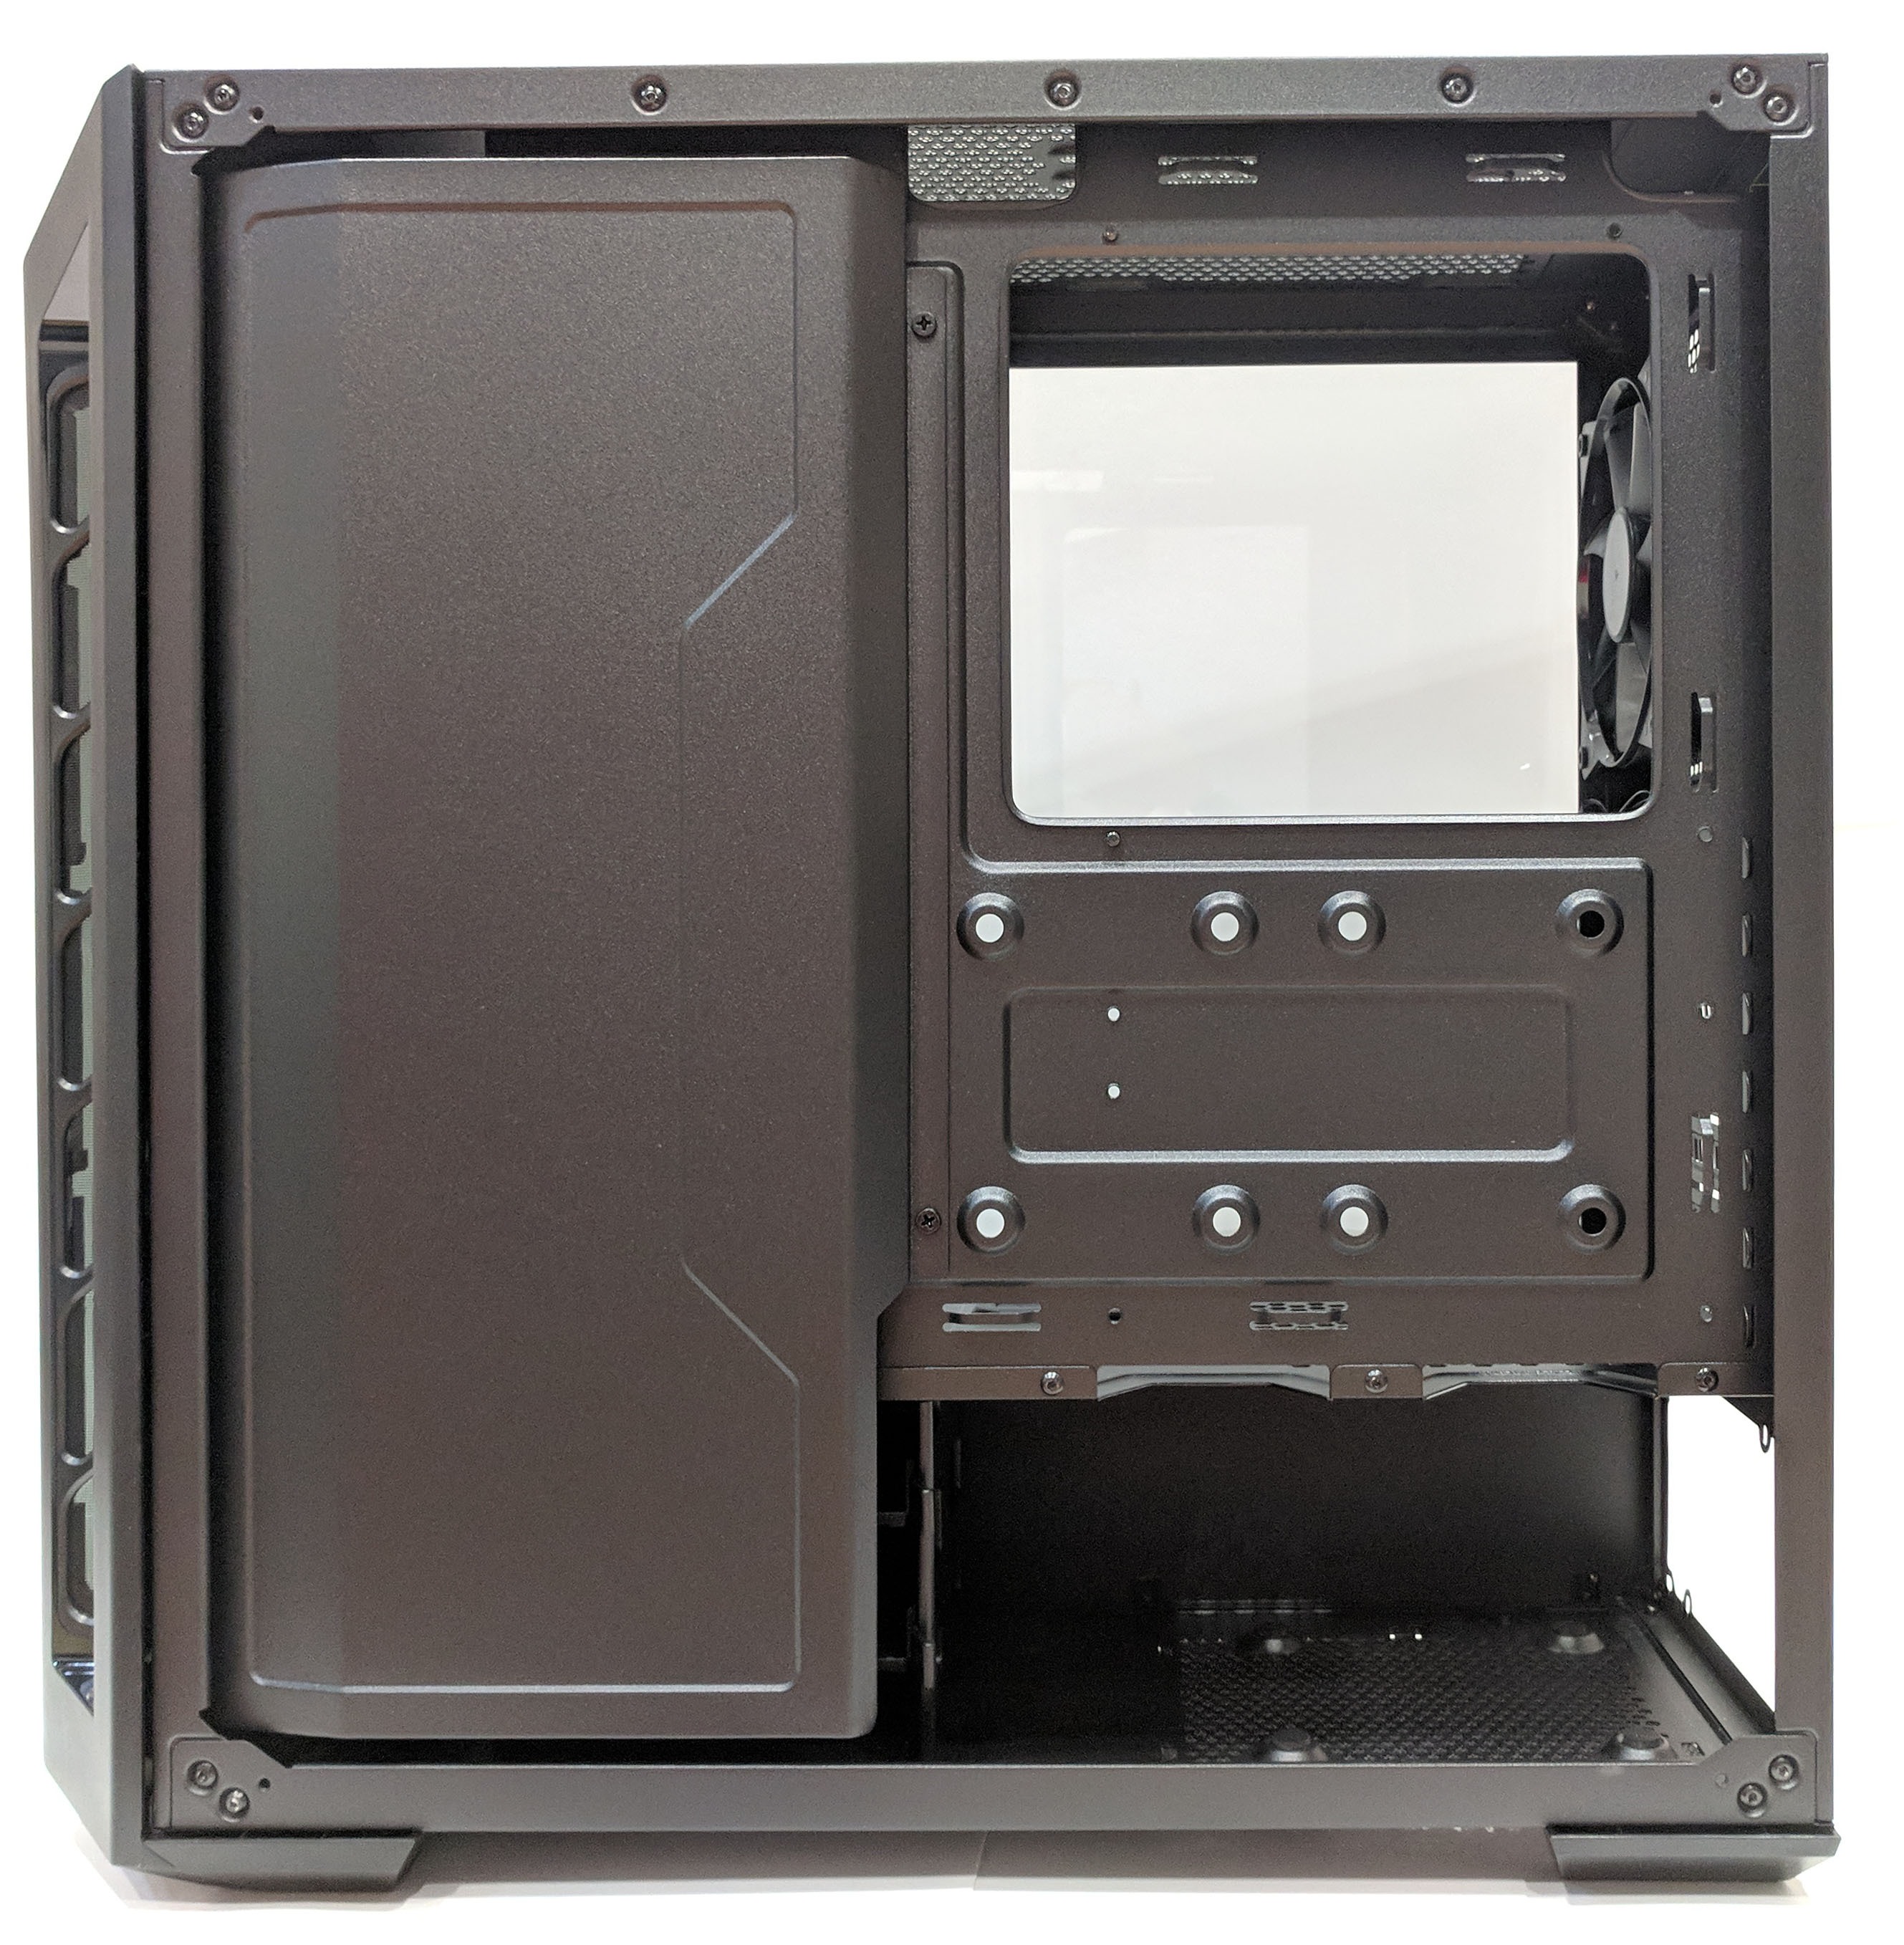
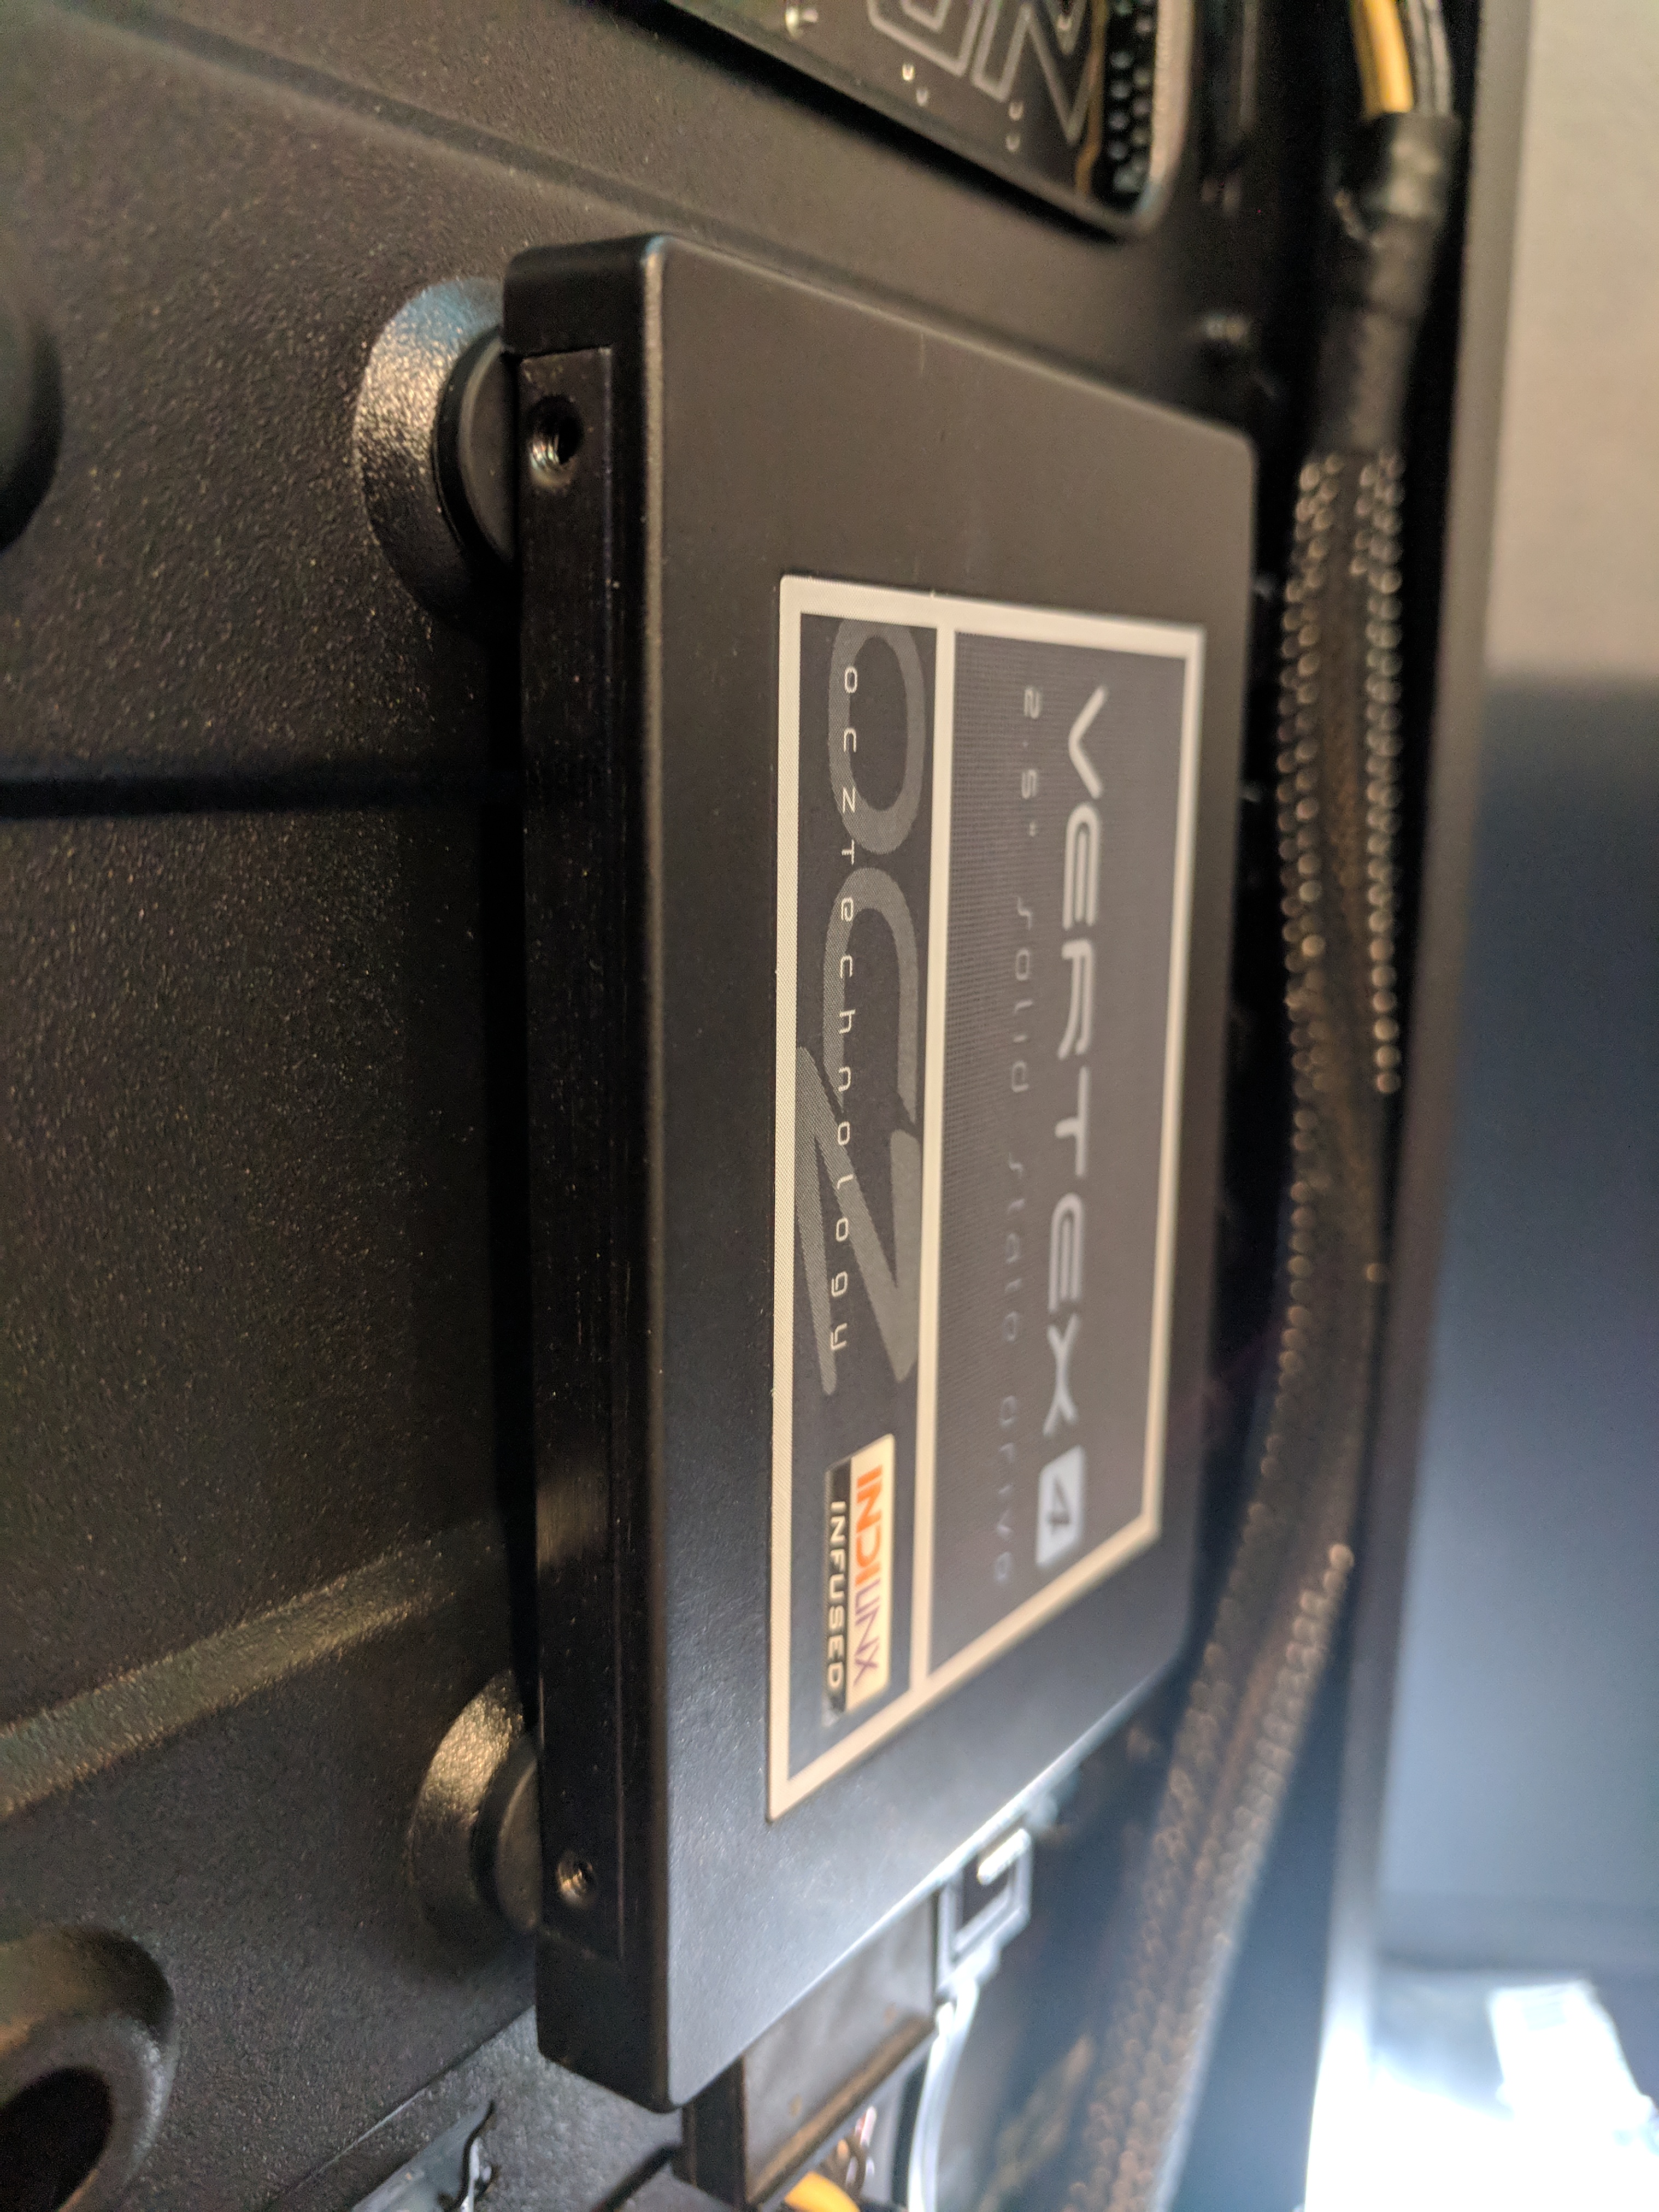
Just below the large CPU cooler access port, there are eight holes on the motherboard tray. These holes are used to securely mount two 2.5″ SSDs. This works by popping in rubber mounts into the holes, and hand screwing in four suds or standoffs into the SSD itself. Then firmly press the SSD into the rubber mounts. As an added bonus the SSD can be seen through the glass once installed.
The case also features rubberized cable ports which adds to the premium feel of the case. Additionally, the rubber ports help control airflow as well as reduce visibility to a typically “messier” area of the case from the front.
The two 3.5″ drive mounts sit at the bottom of the case. Clean airflow from the bottom front fan will assist in keeping the disks cool.
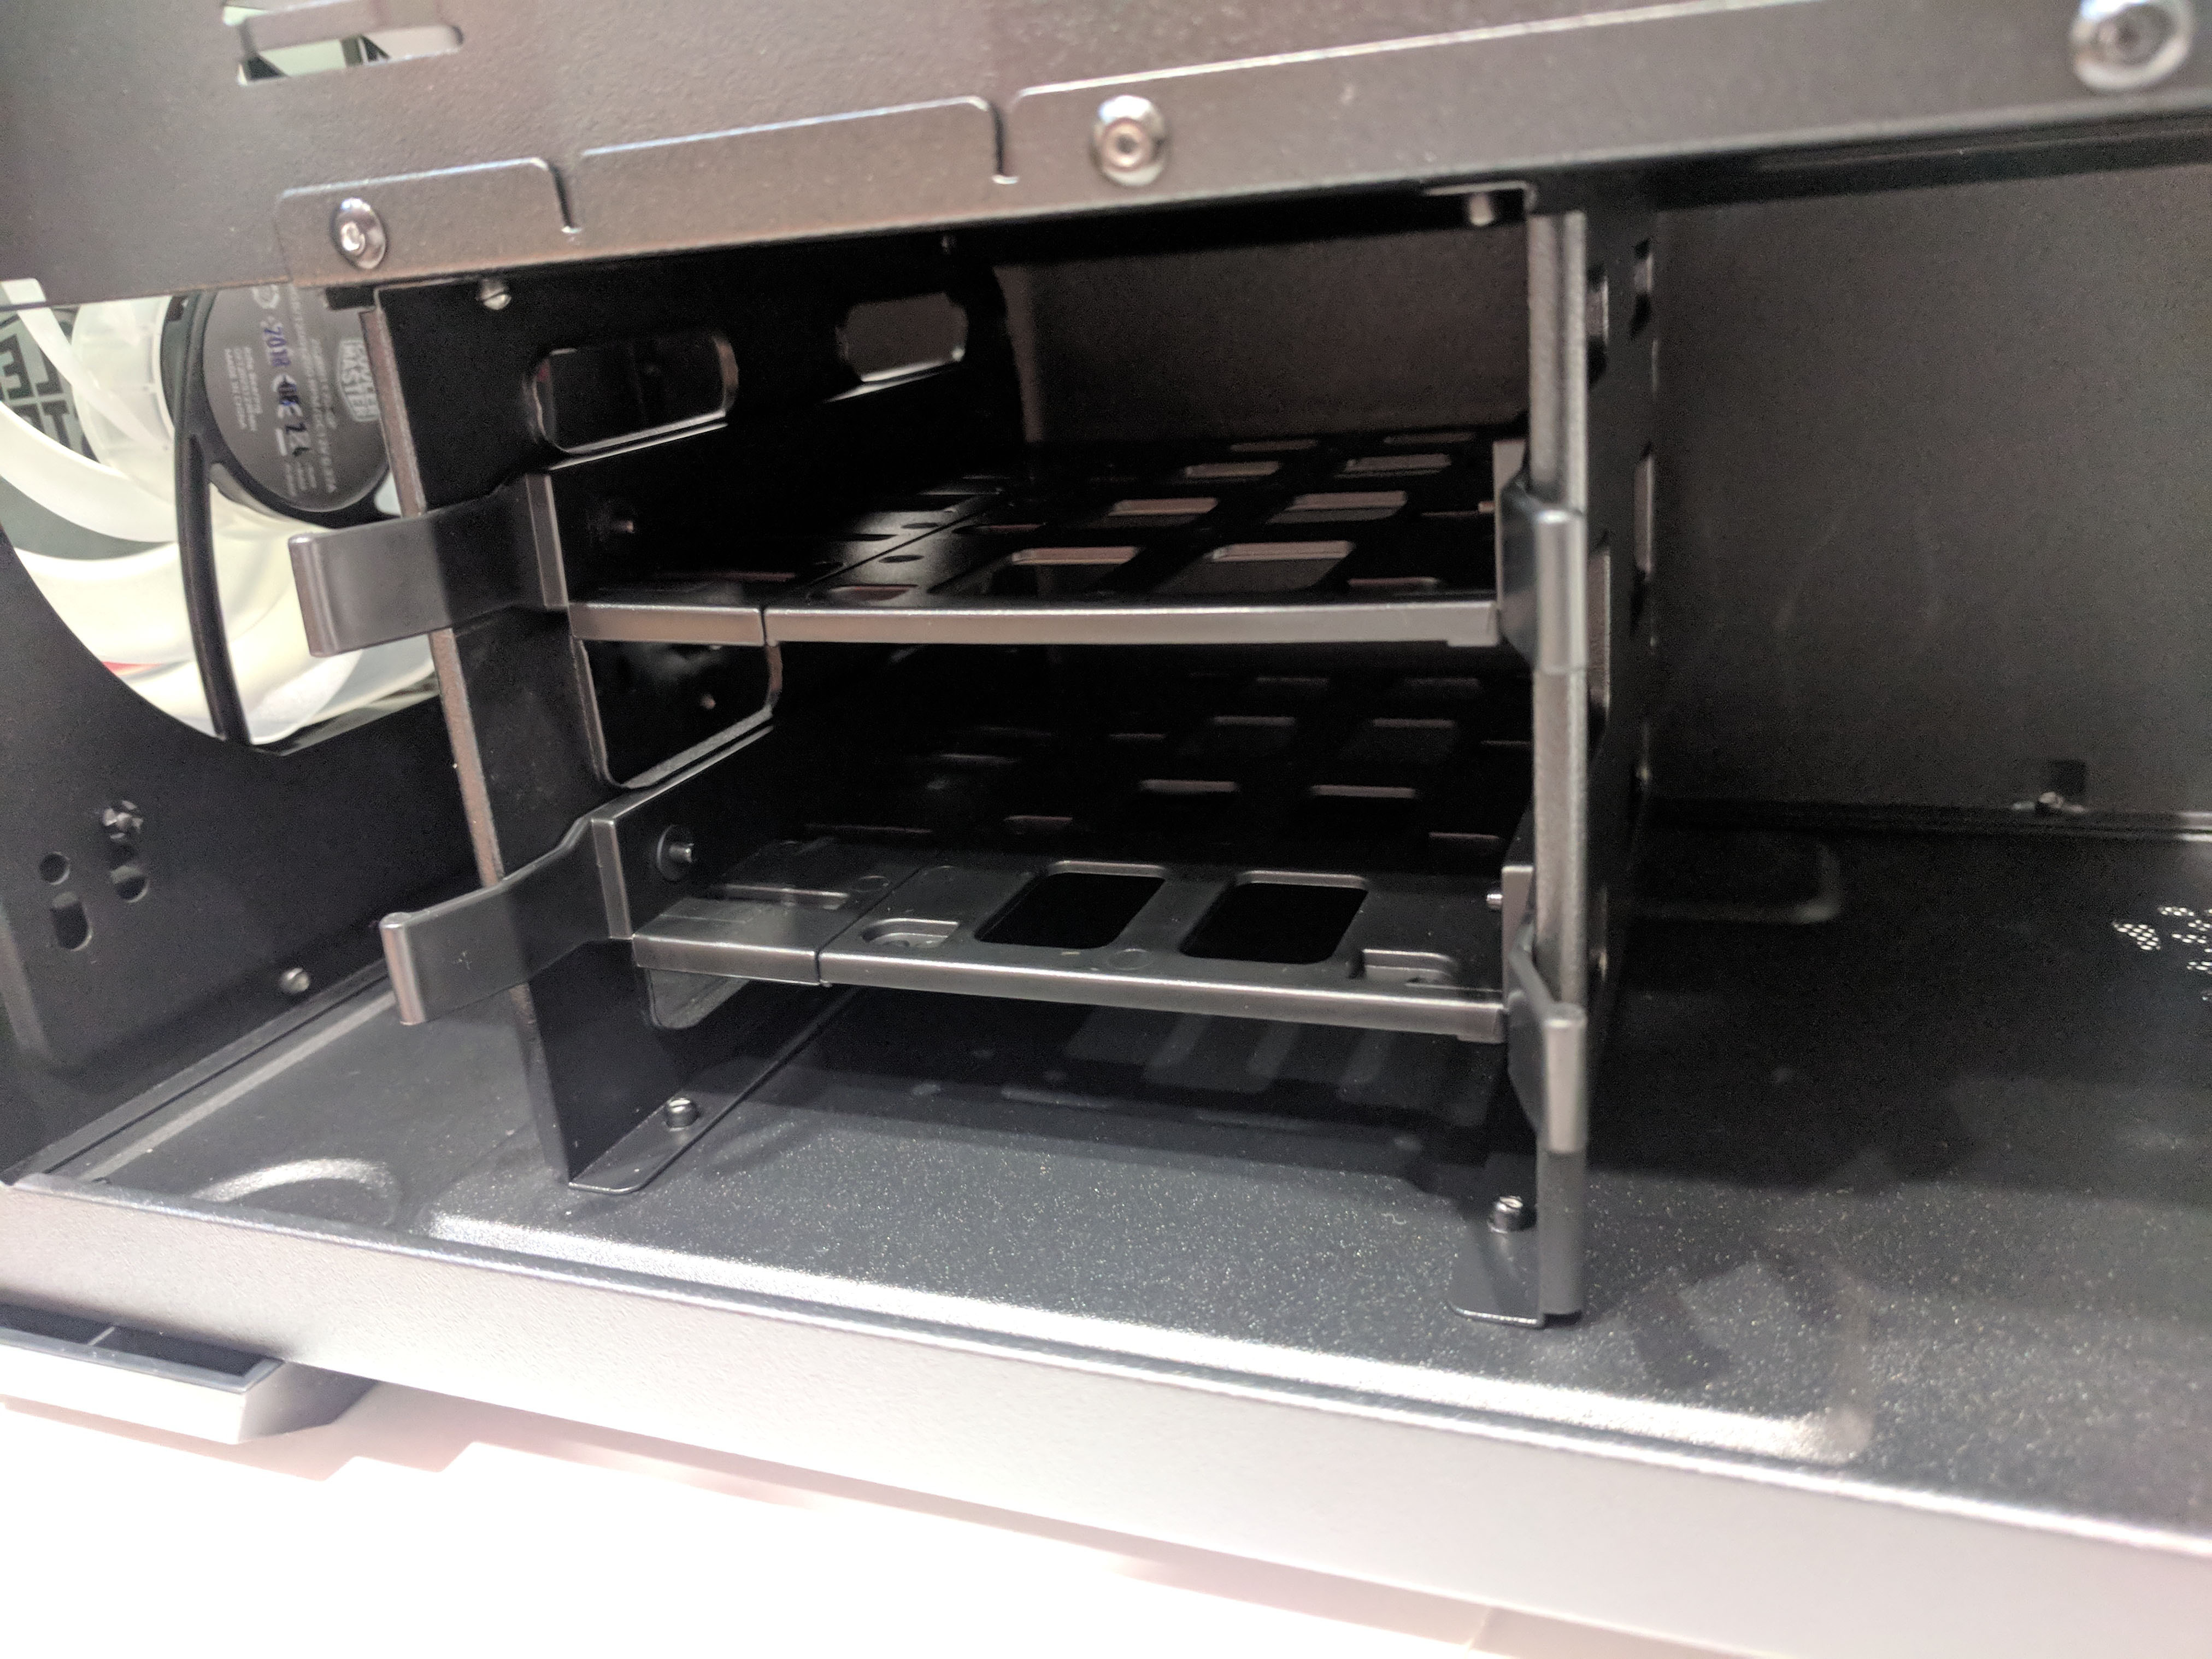
The drive trays themselves are constructed of plastic and feature a screw-less design for locking the HDD into place. Simply pinch the tab on the underside and pull the two sides apart. Then, simply install the hard drive by lining up the screw hole knobs and pressing the two halves together.

The power supply is mounted just below the motherboard and is accessed and installed through the left side of the case. The area is isolated from the rest of the case along with the two 3.5″ HDD mounts. The PSU rests on four rubberized mounts which should help in keeping vibrations low while protecting the PSU from scratching during installation. It should be noted however, that when installing a modular PSU to hook up any needed cables first, especially if you have an extended or oversized PSU. You don’t have a lot of room to insert cables once the PSU is screwed in place.
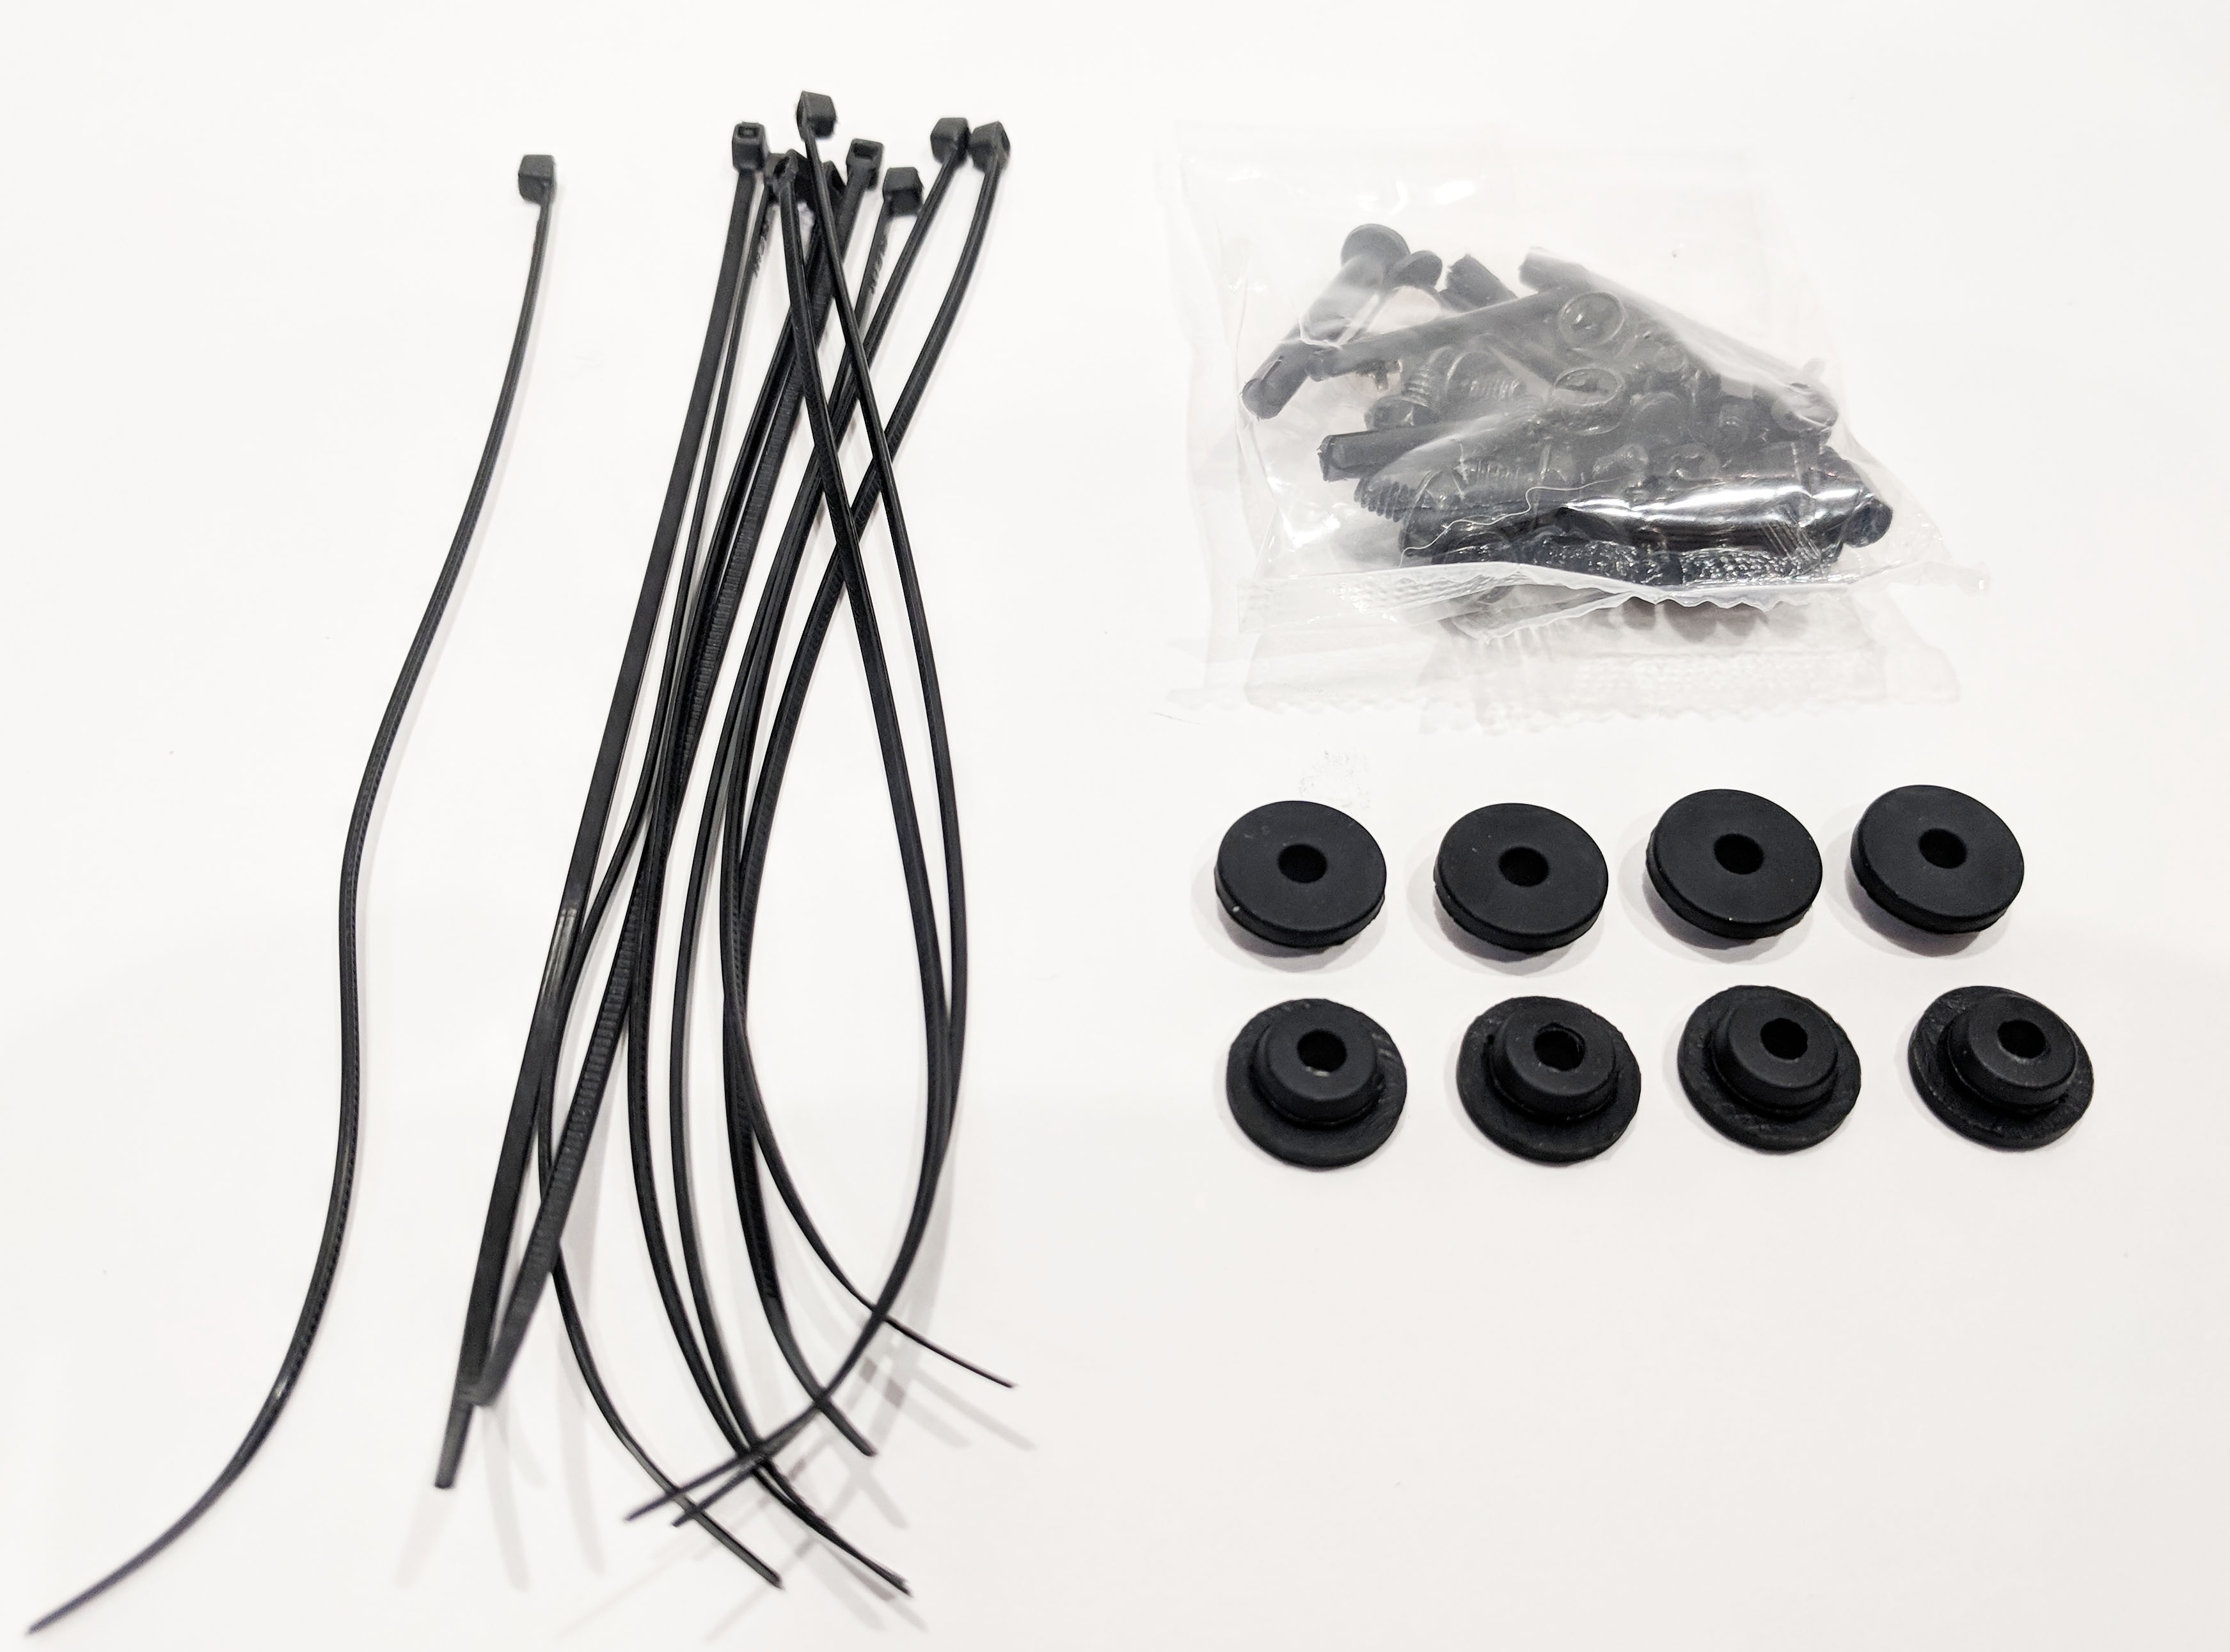
Found tied to the included cables for the IO panel is a bag full of screws and the rubber mounts we discussed earlier for mounting an SSD to the back of the motherboard tray. Also included are zip-ties for cable management purposes and all the screws you’ll need for installing additional hardware such as motherboard stand-offs, and fans.
Here are the rubber pads in action along with the metal standoffs which securely mount the SSD to the back of the motherboard tray.
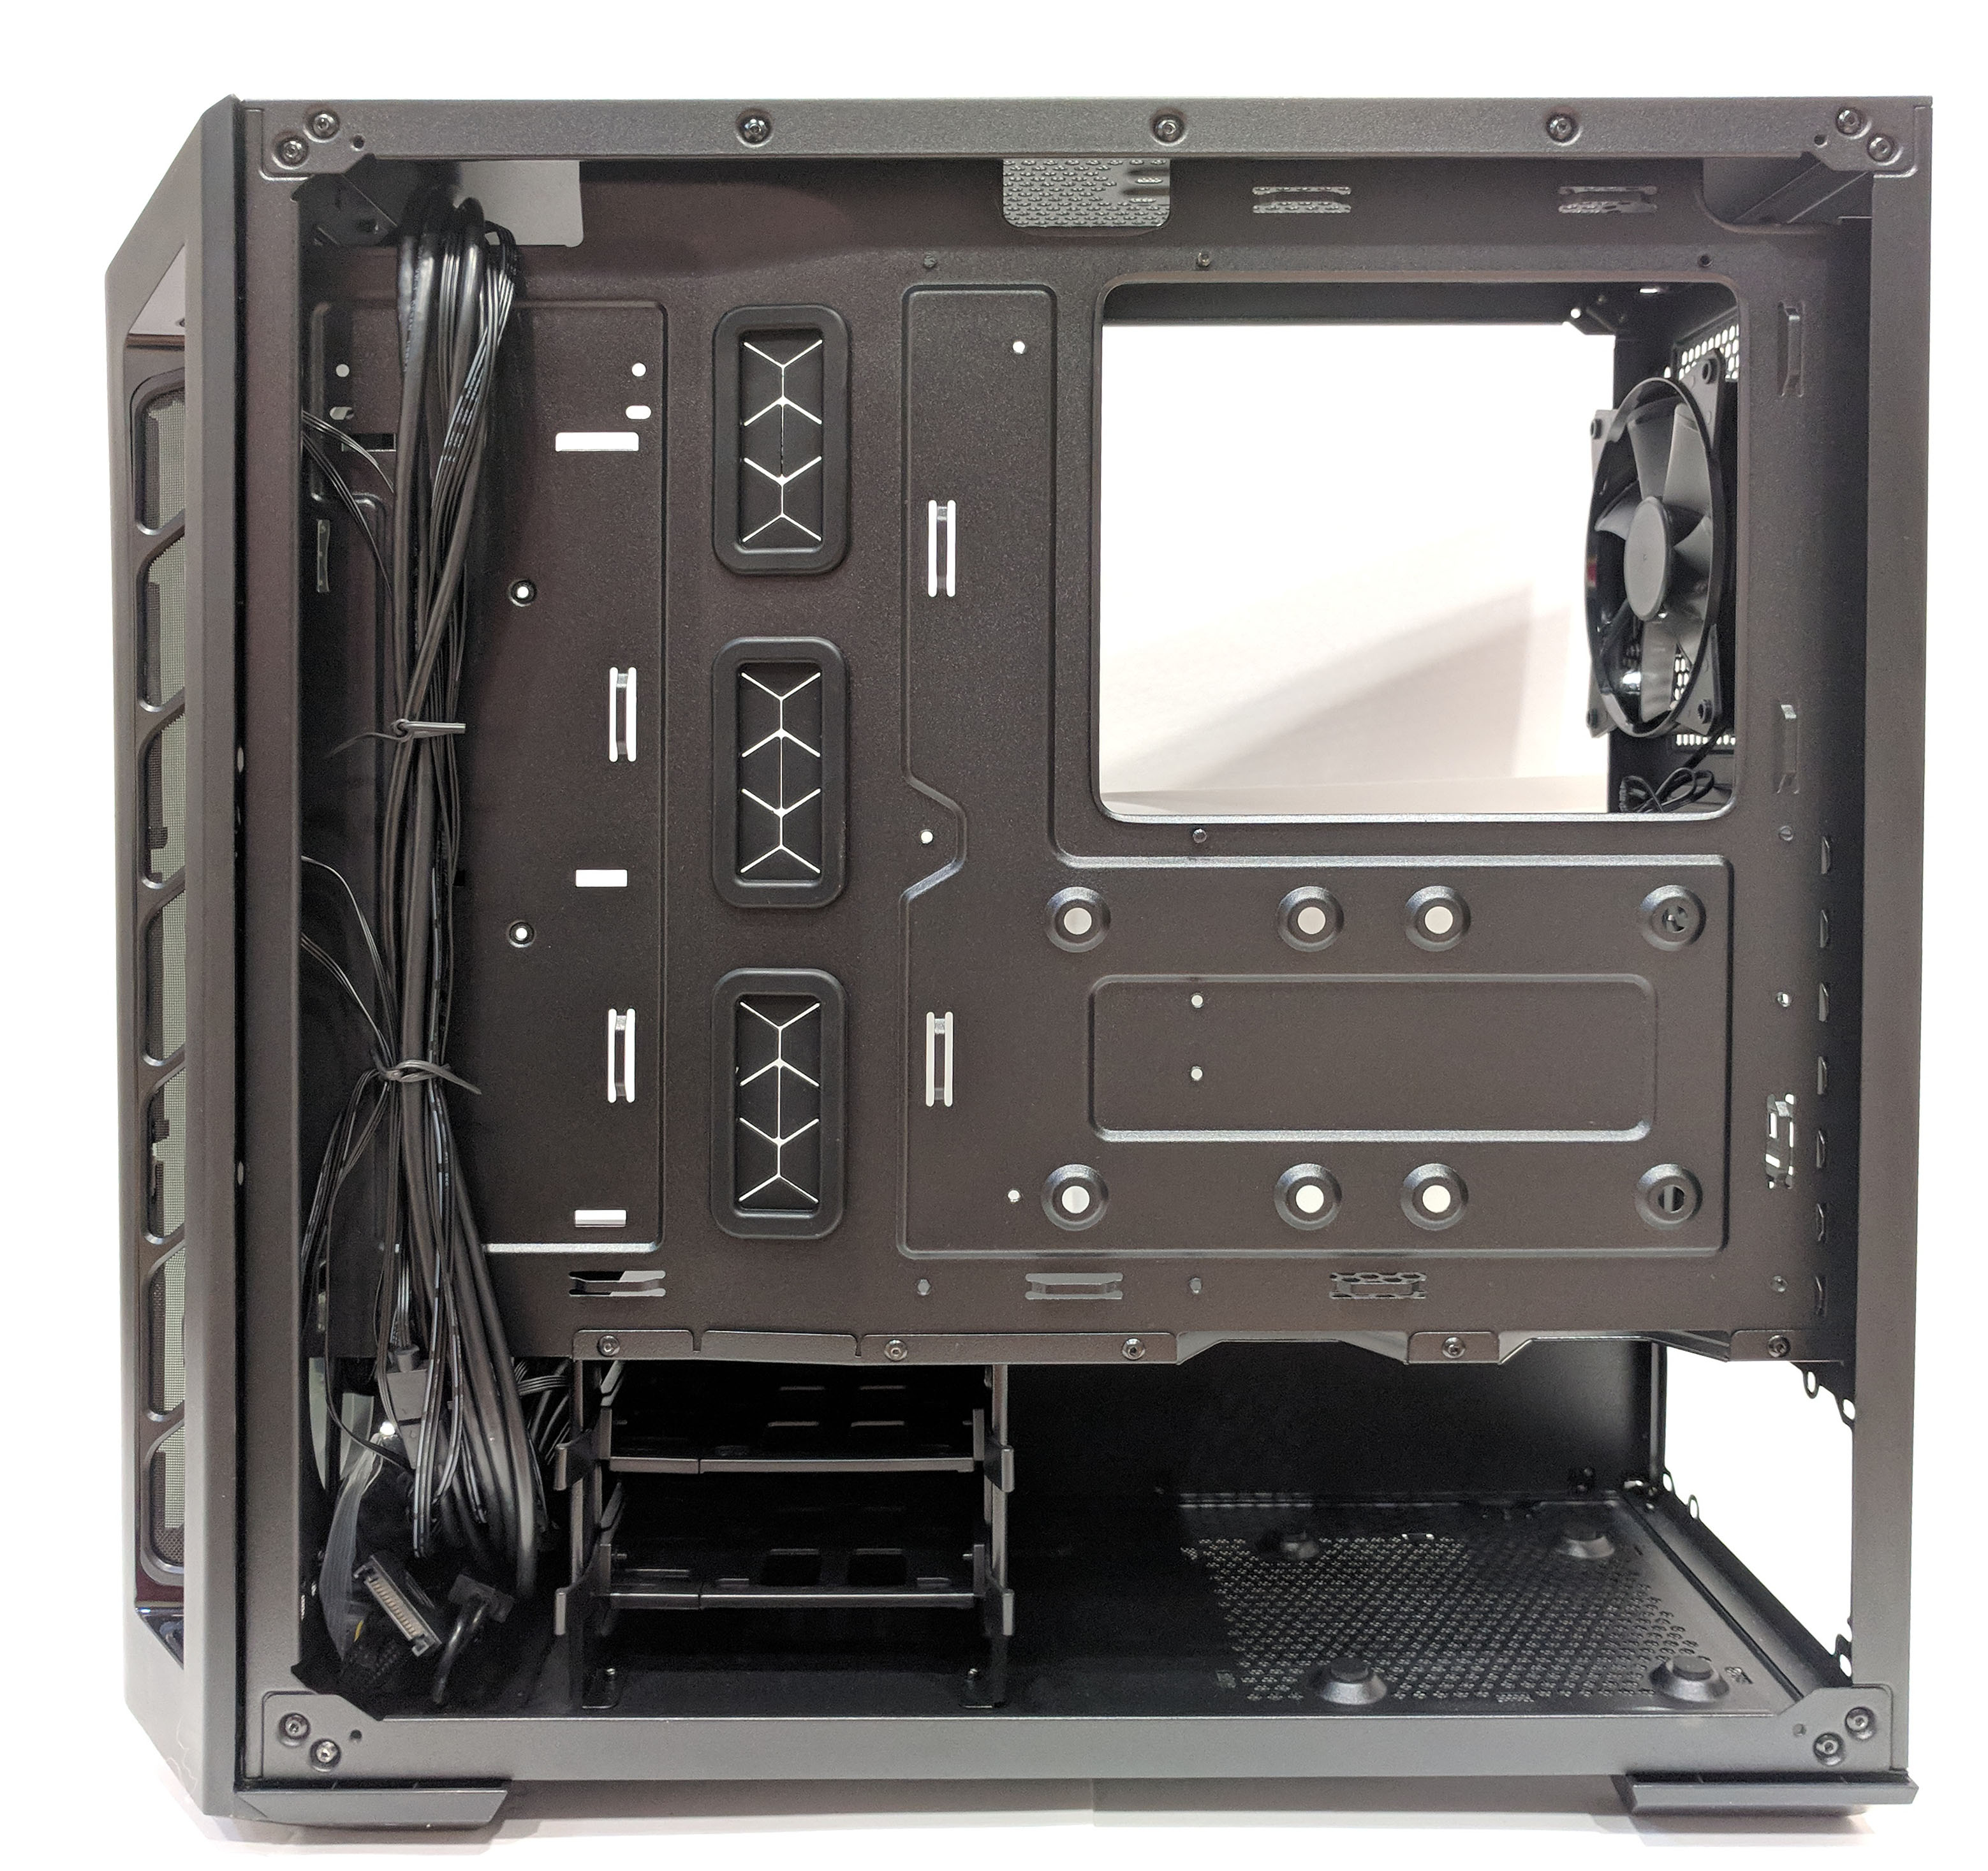
Moving on to the left side of the inside of the MB530P! The first thing you’ll likely notice is how open everything is due to the lack of 5.25″ and 3.5″ drive bays. The compartmentalised interior also adds to the clean and organized theme by isolating the drive bays and PSU in their own shroud.
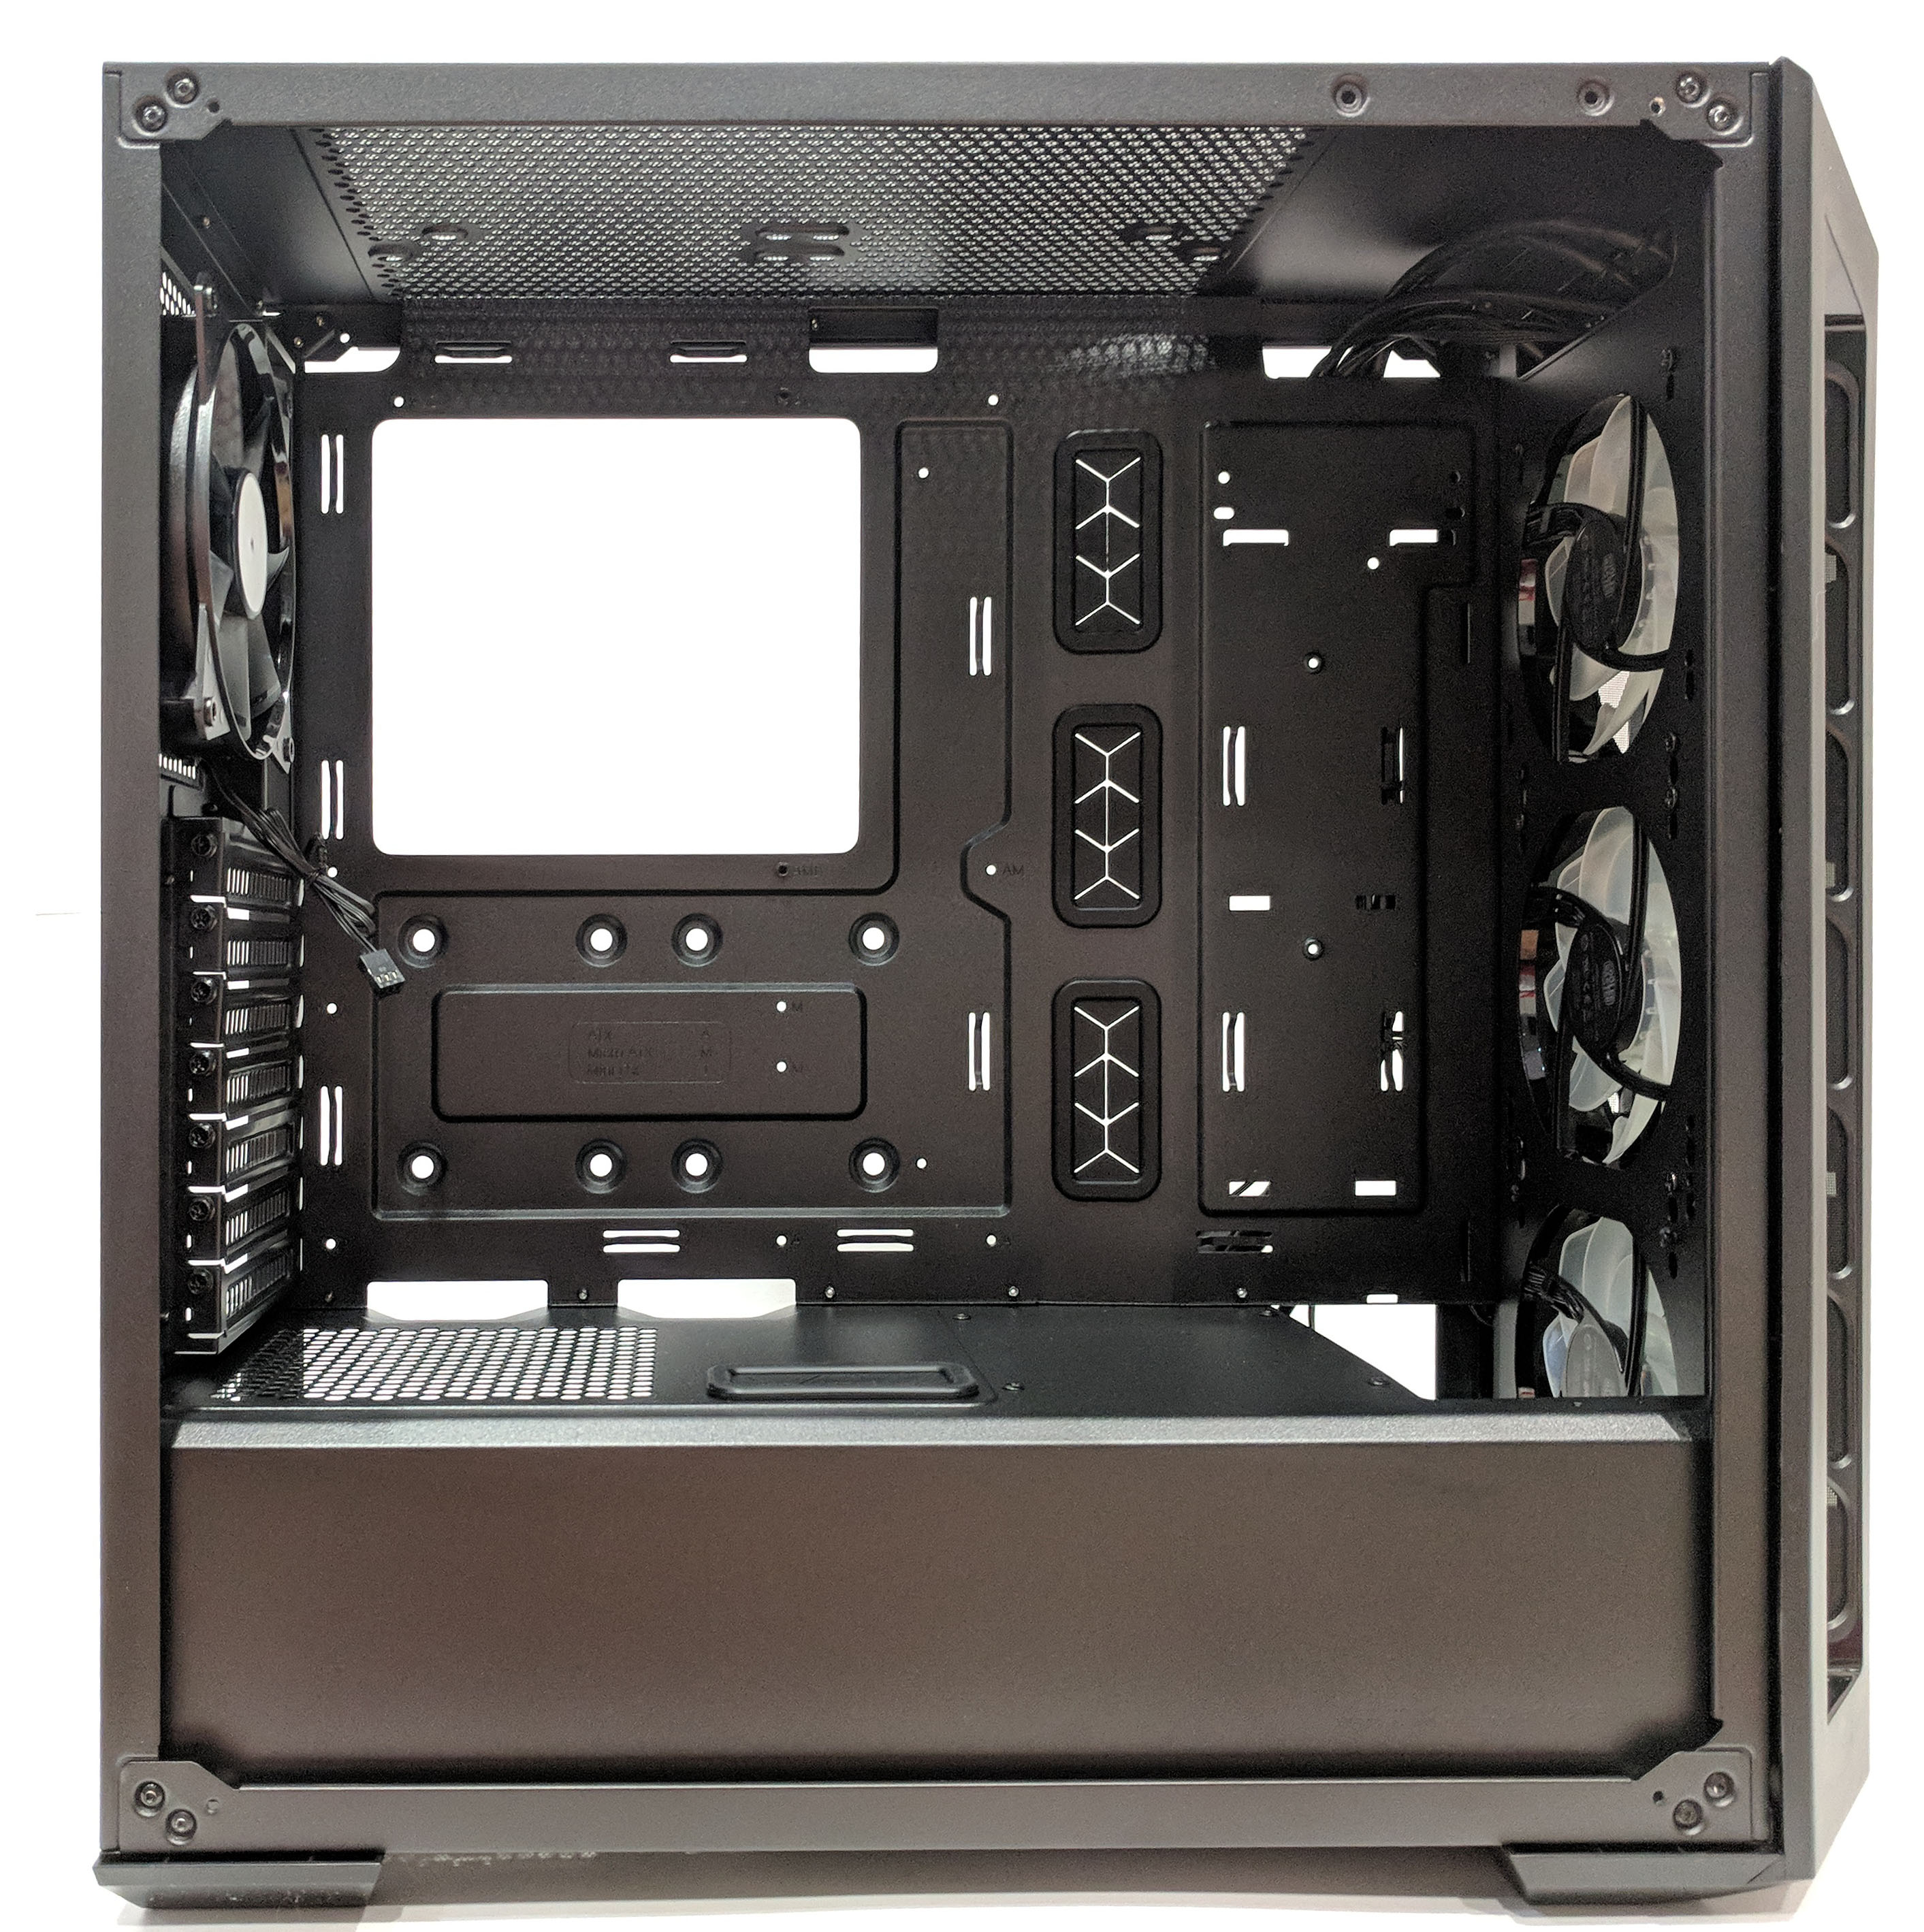
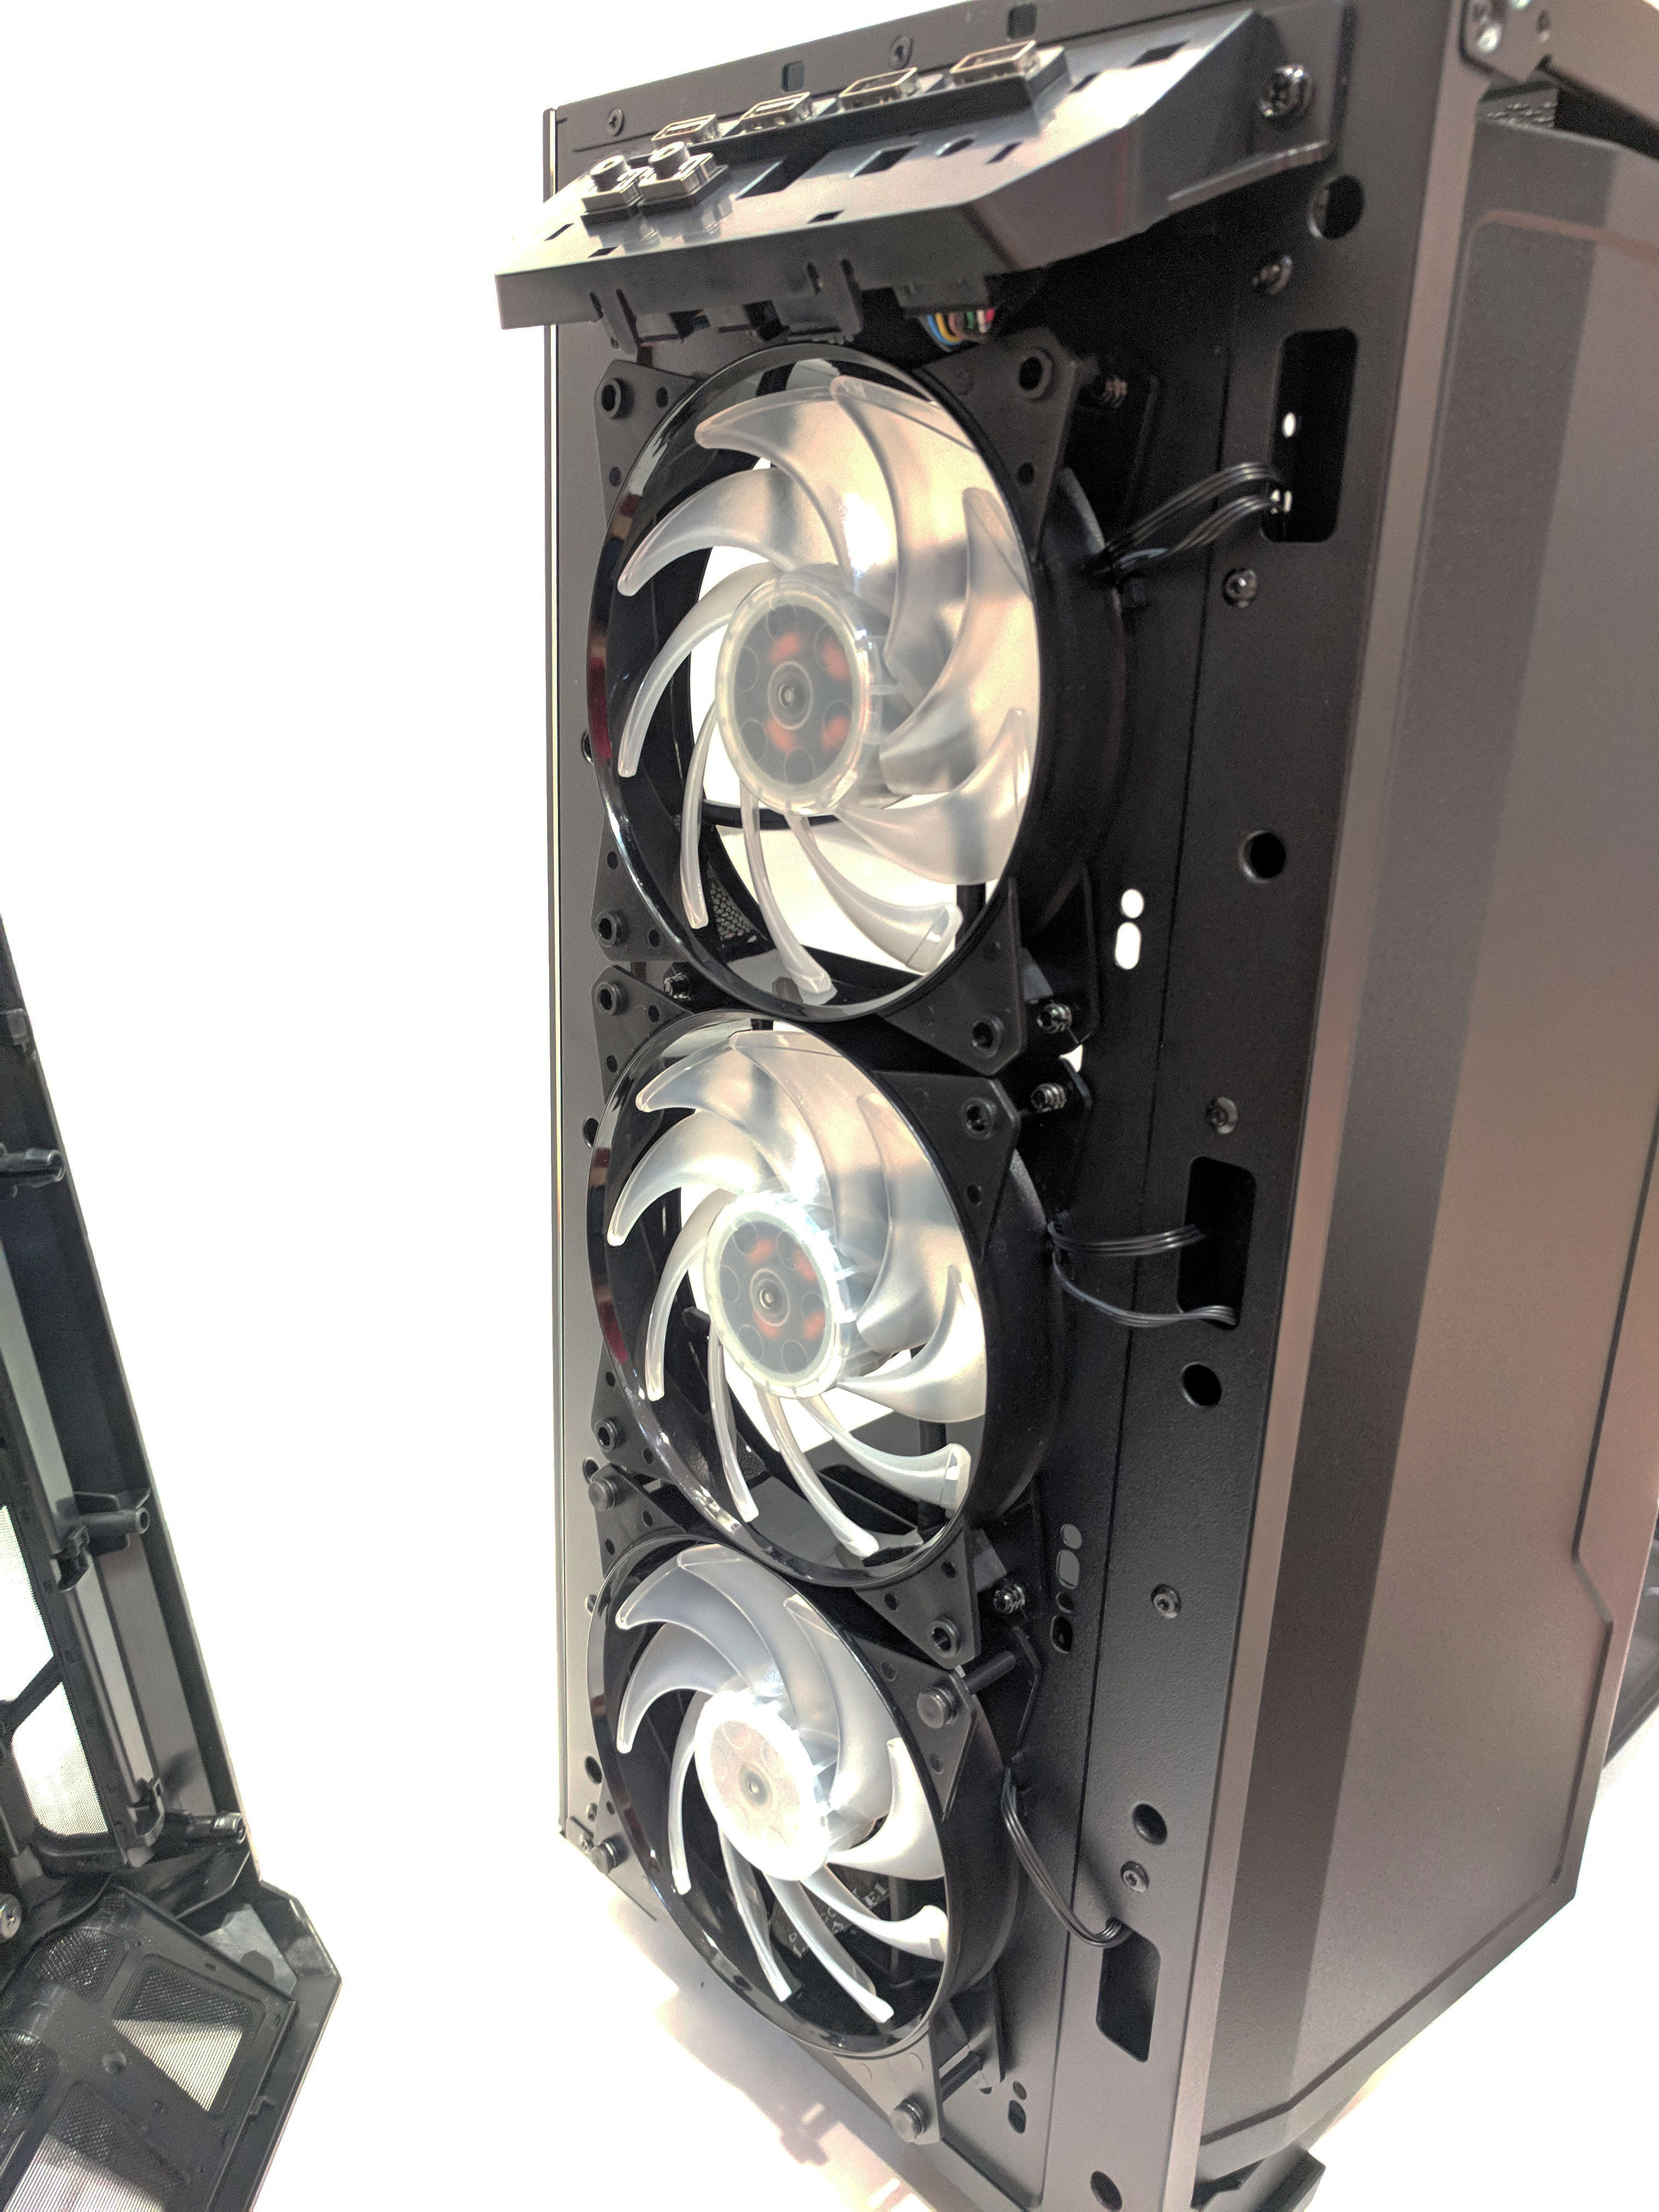
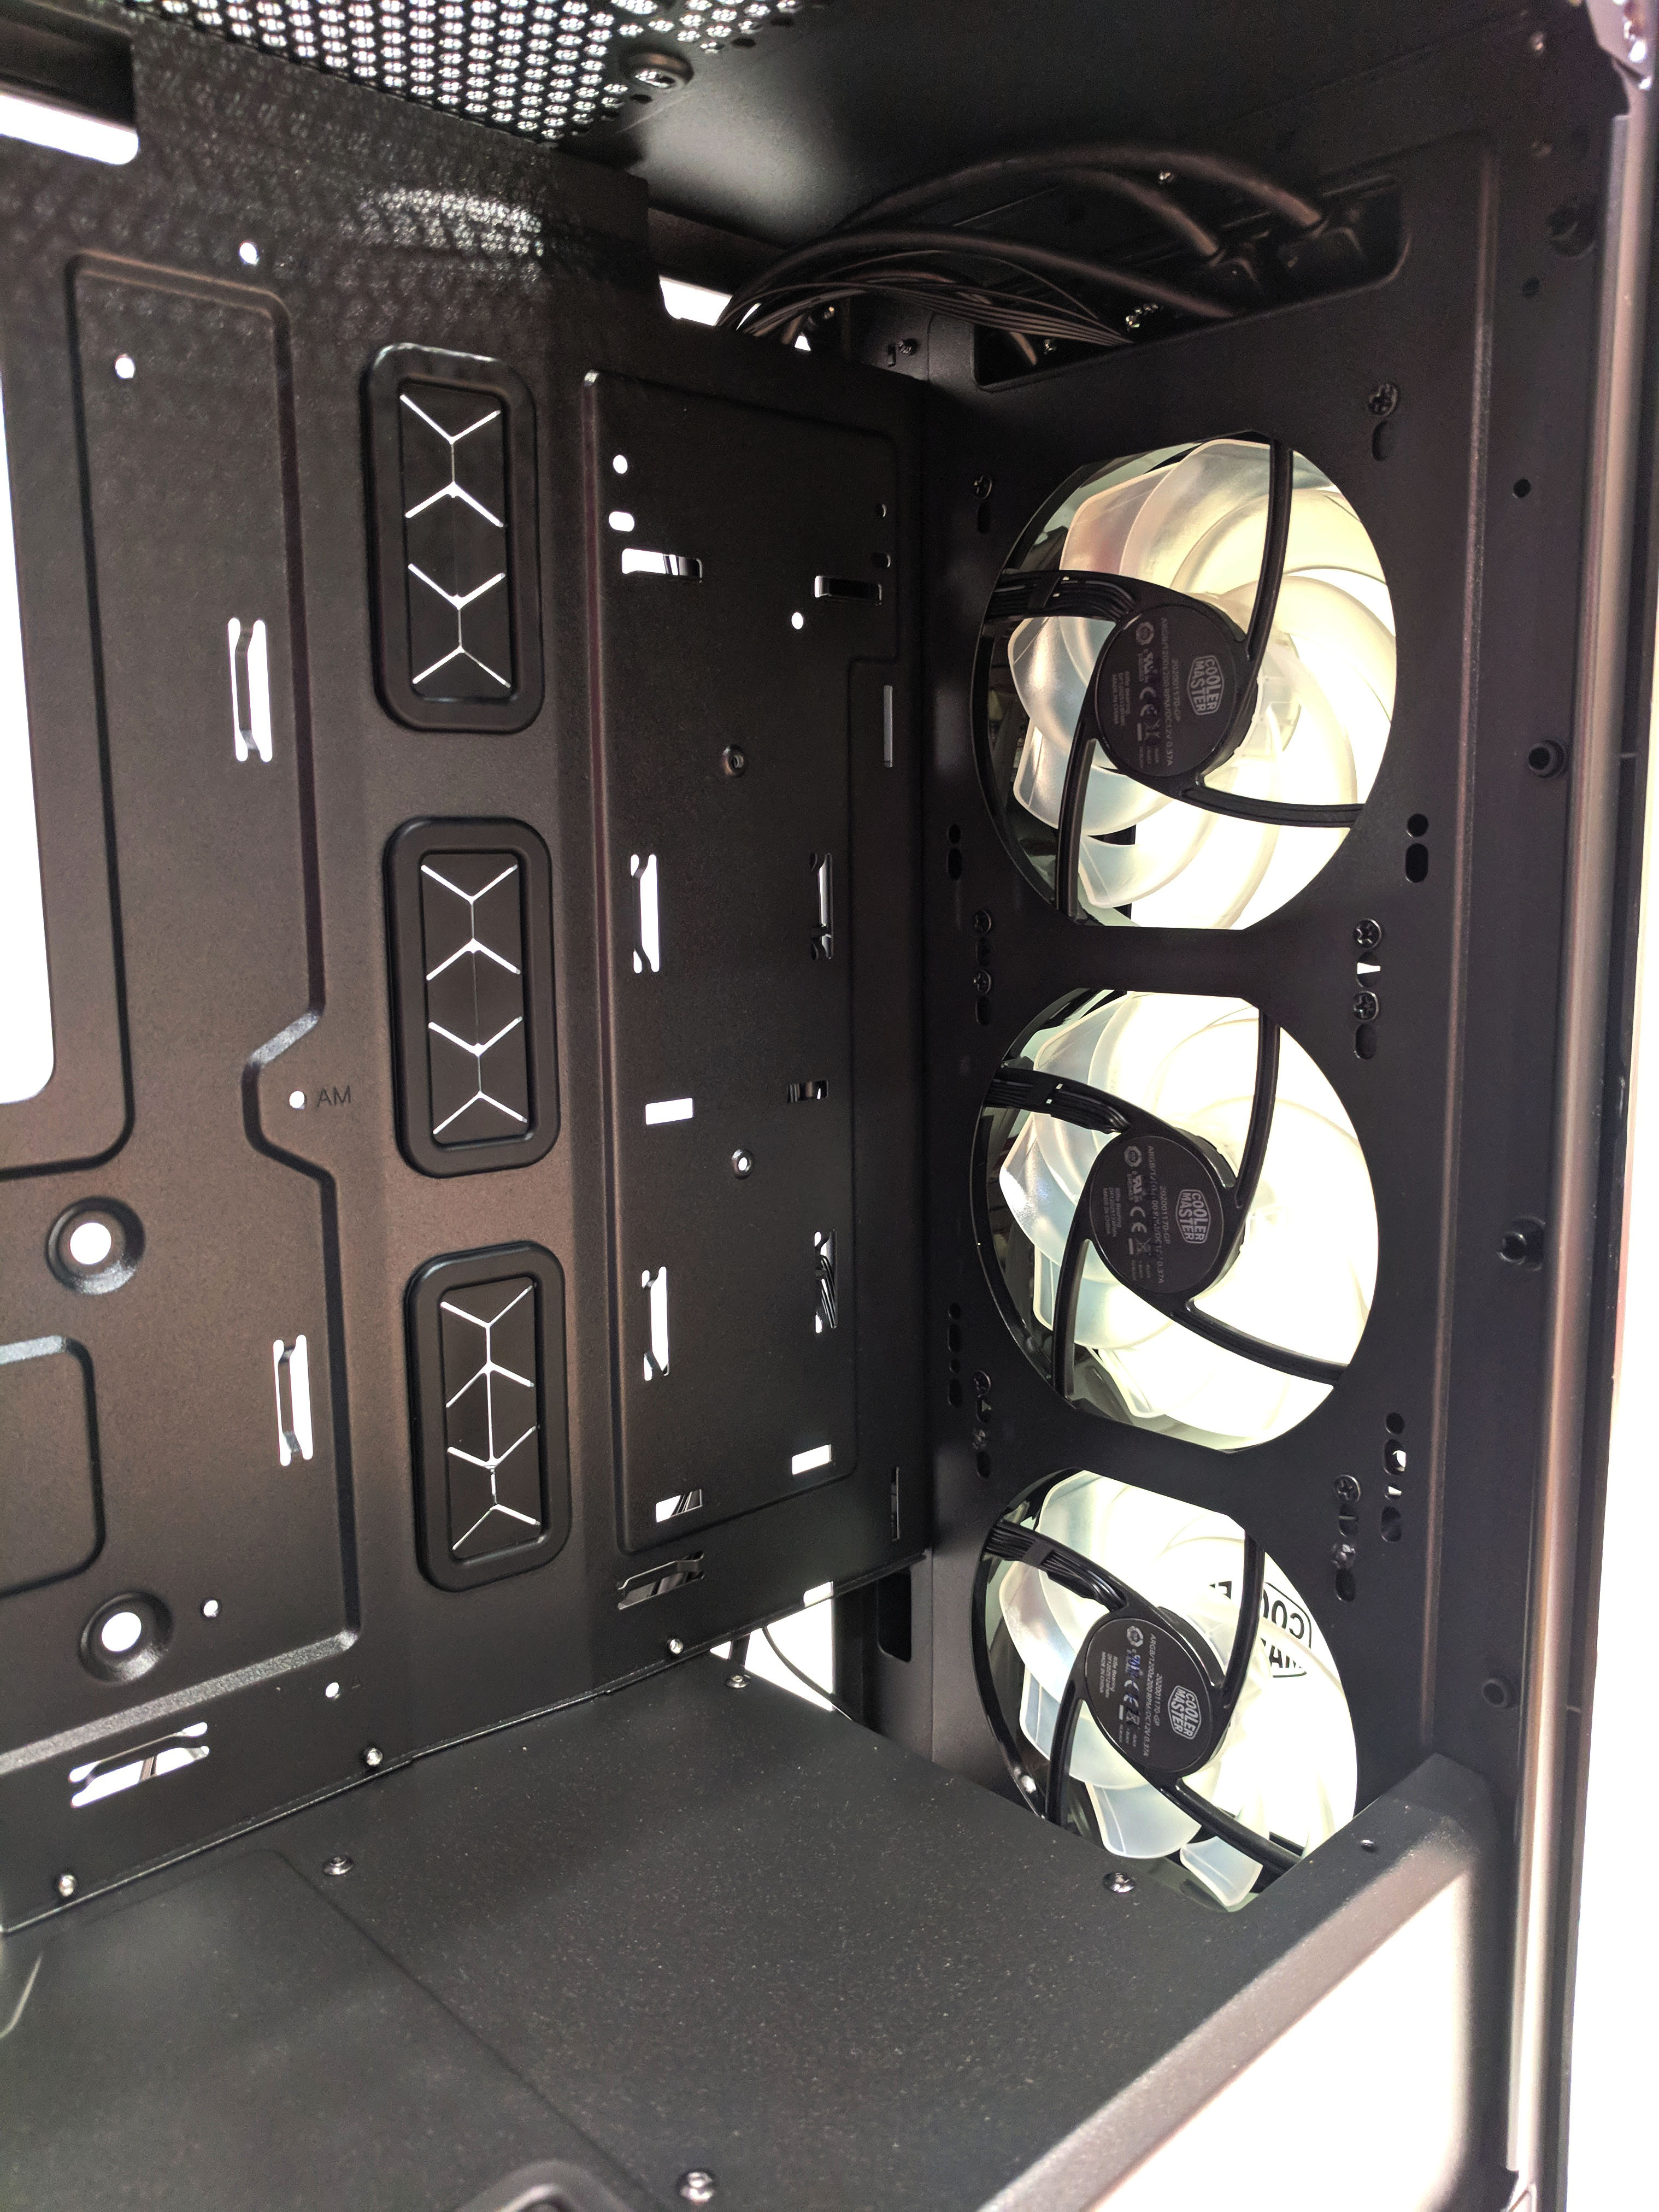
Along the inside of the front of the case, the array of Cooler Master RGB fans can be seen. These are mounted in between the case and font bezel to allow for even more interior space.
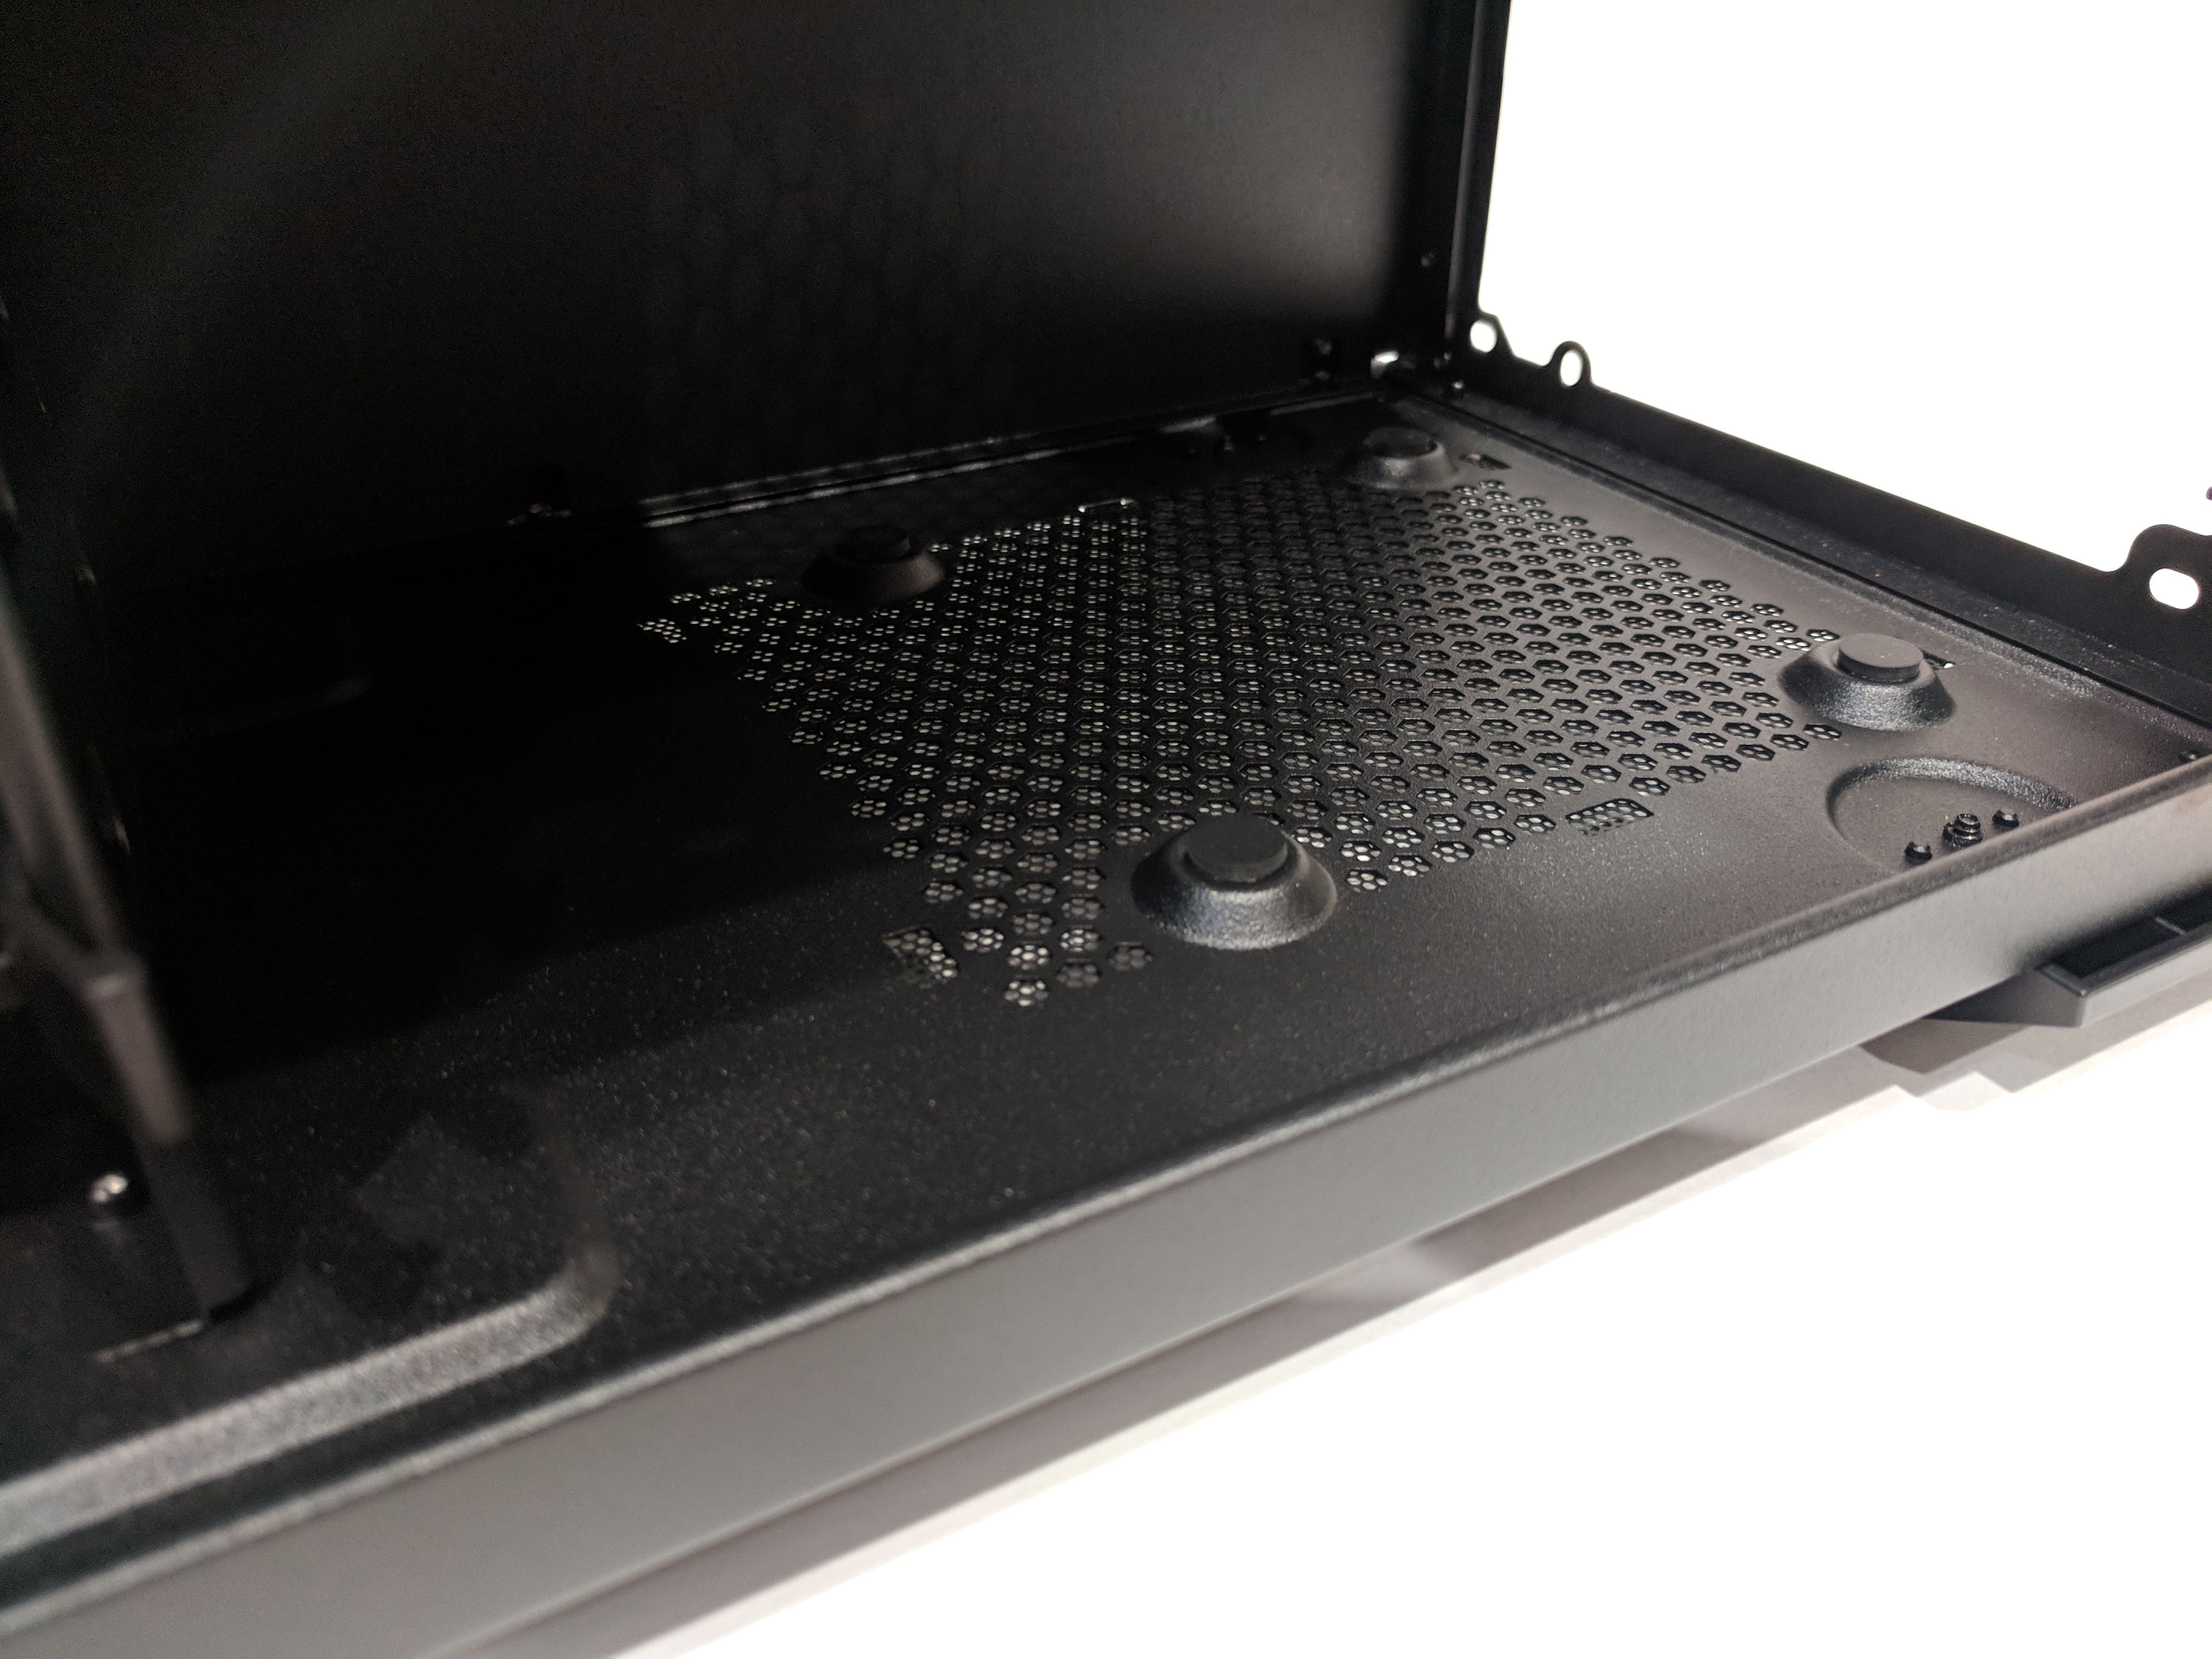
The bottom PSU shroud is vented above where the PSU will sit. There is also a rubber cable access port for cable routing if needed. Might be useful for a very low mounted GPU. There are also two cable access ports located at the very bottom of where the motherboard will sit. You’ll likely want to use these for front panel connectors such as USB, power switch and LED, and Audio connectors.
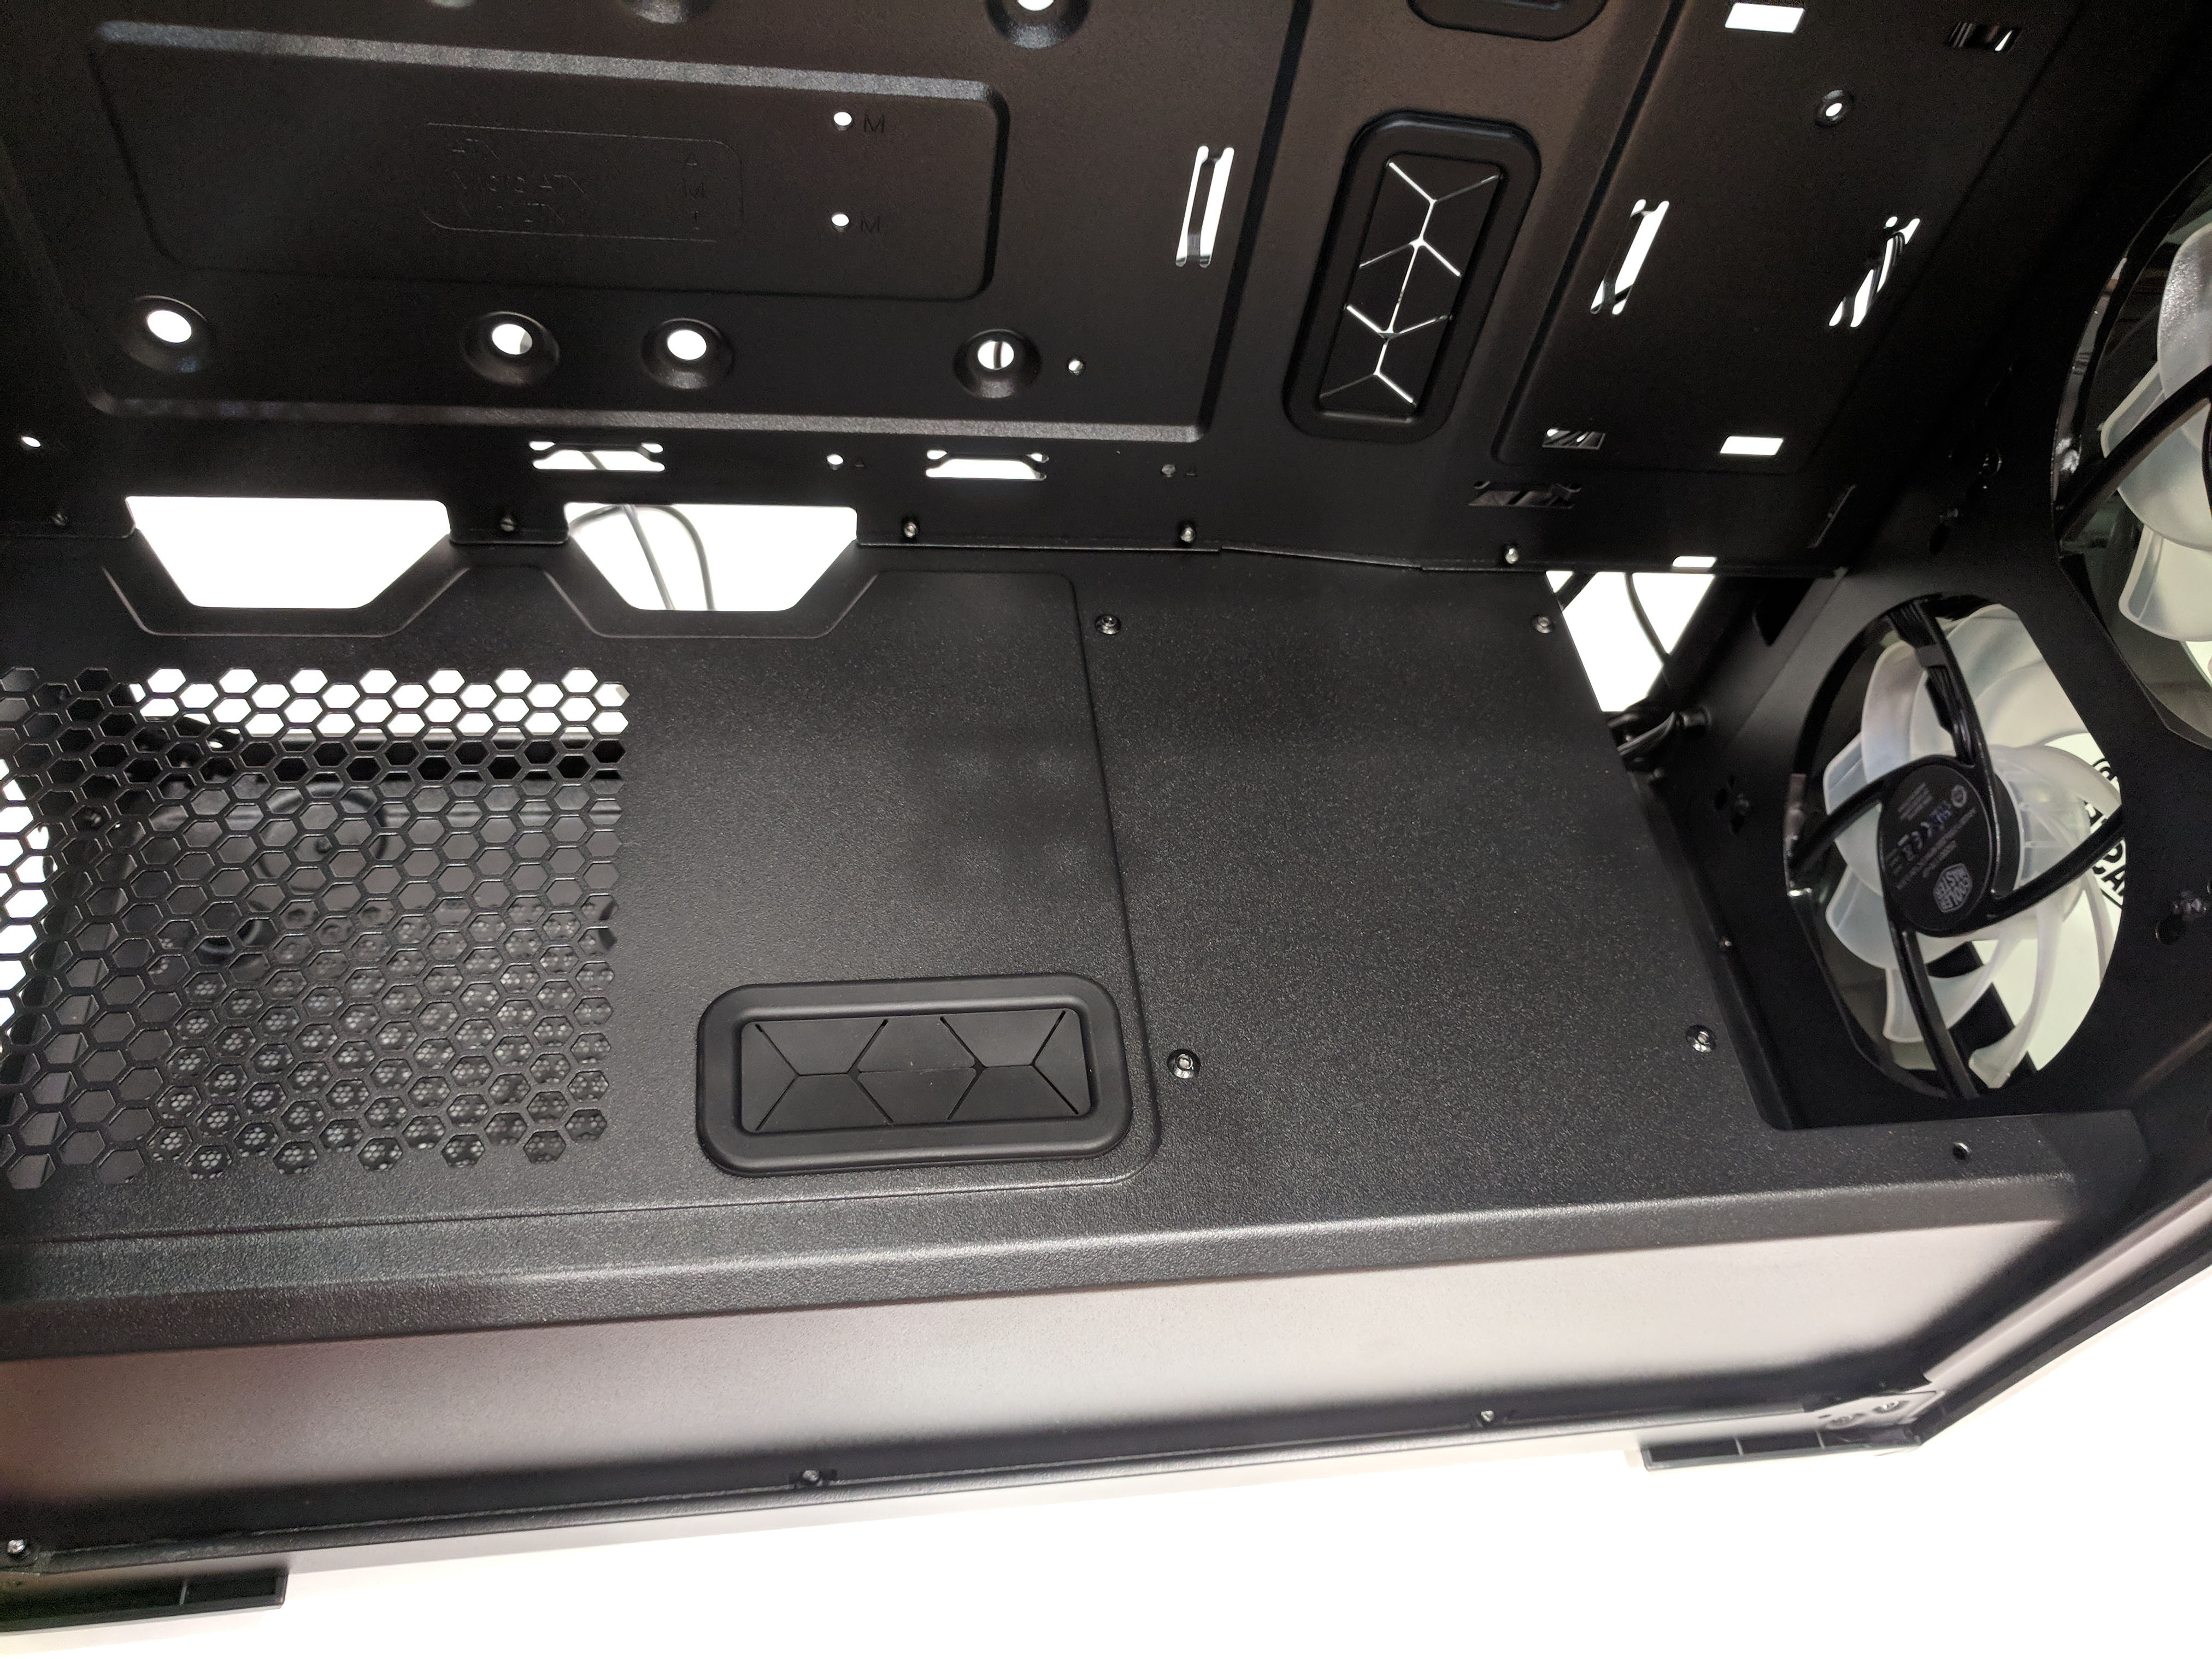
The top inside area is where you’ll mount additional fans if needed, or a 240mm radiator. Double check clearance before mounting a radiator here, however. We attempted a radiator mount in this location and it had clearance issues with tall RAM sticks.
The rear exhaust is mounted on the inside of the rear of the case. This is a standard 120mm case fan and unlike the fans located at the front of the case, no LEDs are present.
Next, let’s dive into the LED fans located at the front. We mentioned earlier that we believe the cans are indeed CoolerMaster MasterFan Pro 120mm RGB Fans. The addressable fans can be configured to work with a 3-pin addressable RGB header on the motherboard, or from a built in controller located behind the IO panel. By default the fans are configured to work in the latter configuration. Simply provide power by a standard SATA HDD power connector to the power connector found in the bundle of wires.
If using the MB530P’s built in controller, the patterns and effects can be changed by pressing the LED toggle button on the IO panel at the front of the case.
In addition to the RGB fans, the Cooler Master logo is also RGB enabled and will sync itself with the fans to the desired lighting effect.

Hardware Installation
In this section we’ll take a look at the ease of hardware installation and perhaps include a bit more features, and tips regarding the MasterBox MB530P.
Overall, hardware install is pretty straight forward. If cable management is a top priority for you, then you will absolutely love this particular case. It is so easy to put together a clean system from both left and right side perspectives. The power supply was probably the most difficult bit as in our case, we installed a larger fully modular unit. Access to the modular ports on the PSU after the unit has been screwed into the case is very limited and awkward to get to. We recommend installing modular cables first before attempting to screw it into the case.
As mentioned earlier, cable management is a no brainer with the MB530P. The metal shroud on the left side of the case makes hiding wires easy, no zip ties required. With all the storage located on either the back or behind the PSU isolation shroud, there is really no reason for messy cables to be seen from the motherboard-side.
The hardware we chose was for this particular build was an AMD Ryzen build with an ASUS motherboard with RGB headers. The MasterBox MB530P had no issues handling this motherboard. RGB setup with our motherboard was not possible due to RGB interface limitations. Because of this, be sure to double check the RGB connector type. The ASUS motherboard I used used a 4-pin RGB header (analog) which is not compatible with the 3-pin addressable RGB header (digital) used by the MasterBox MB530. In this case, the built in RGB controller works just fine.
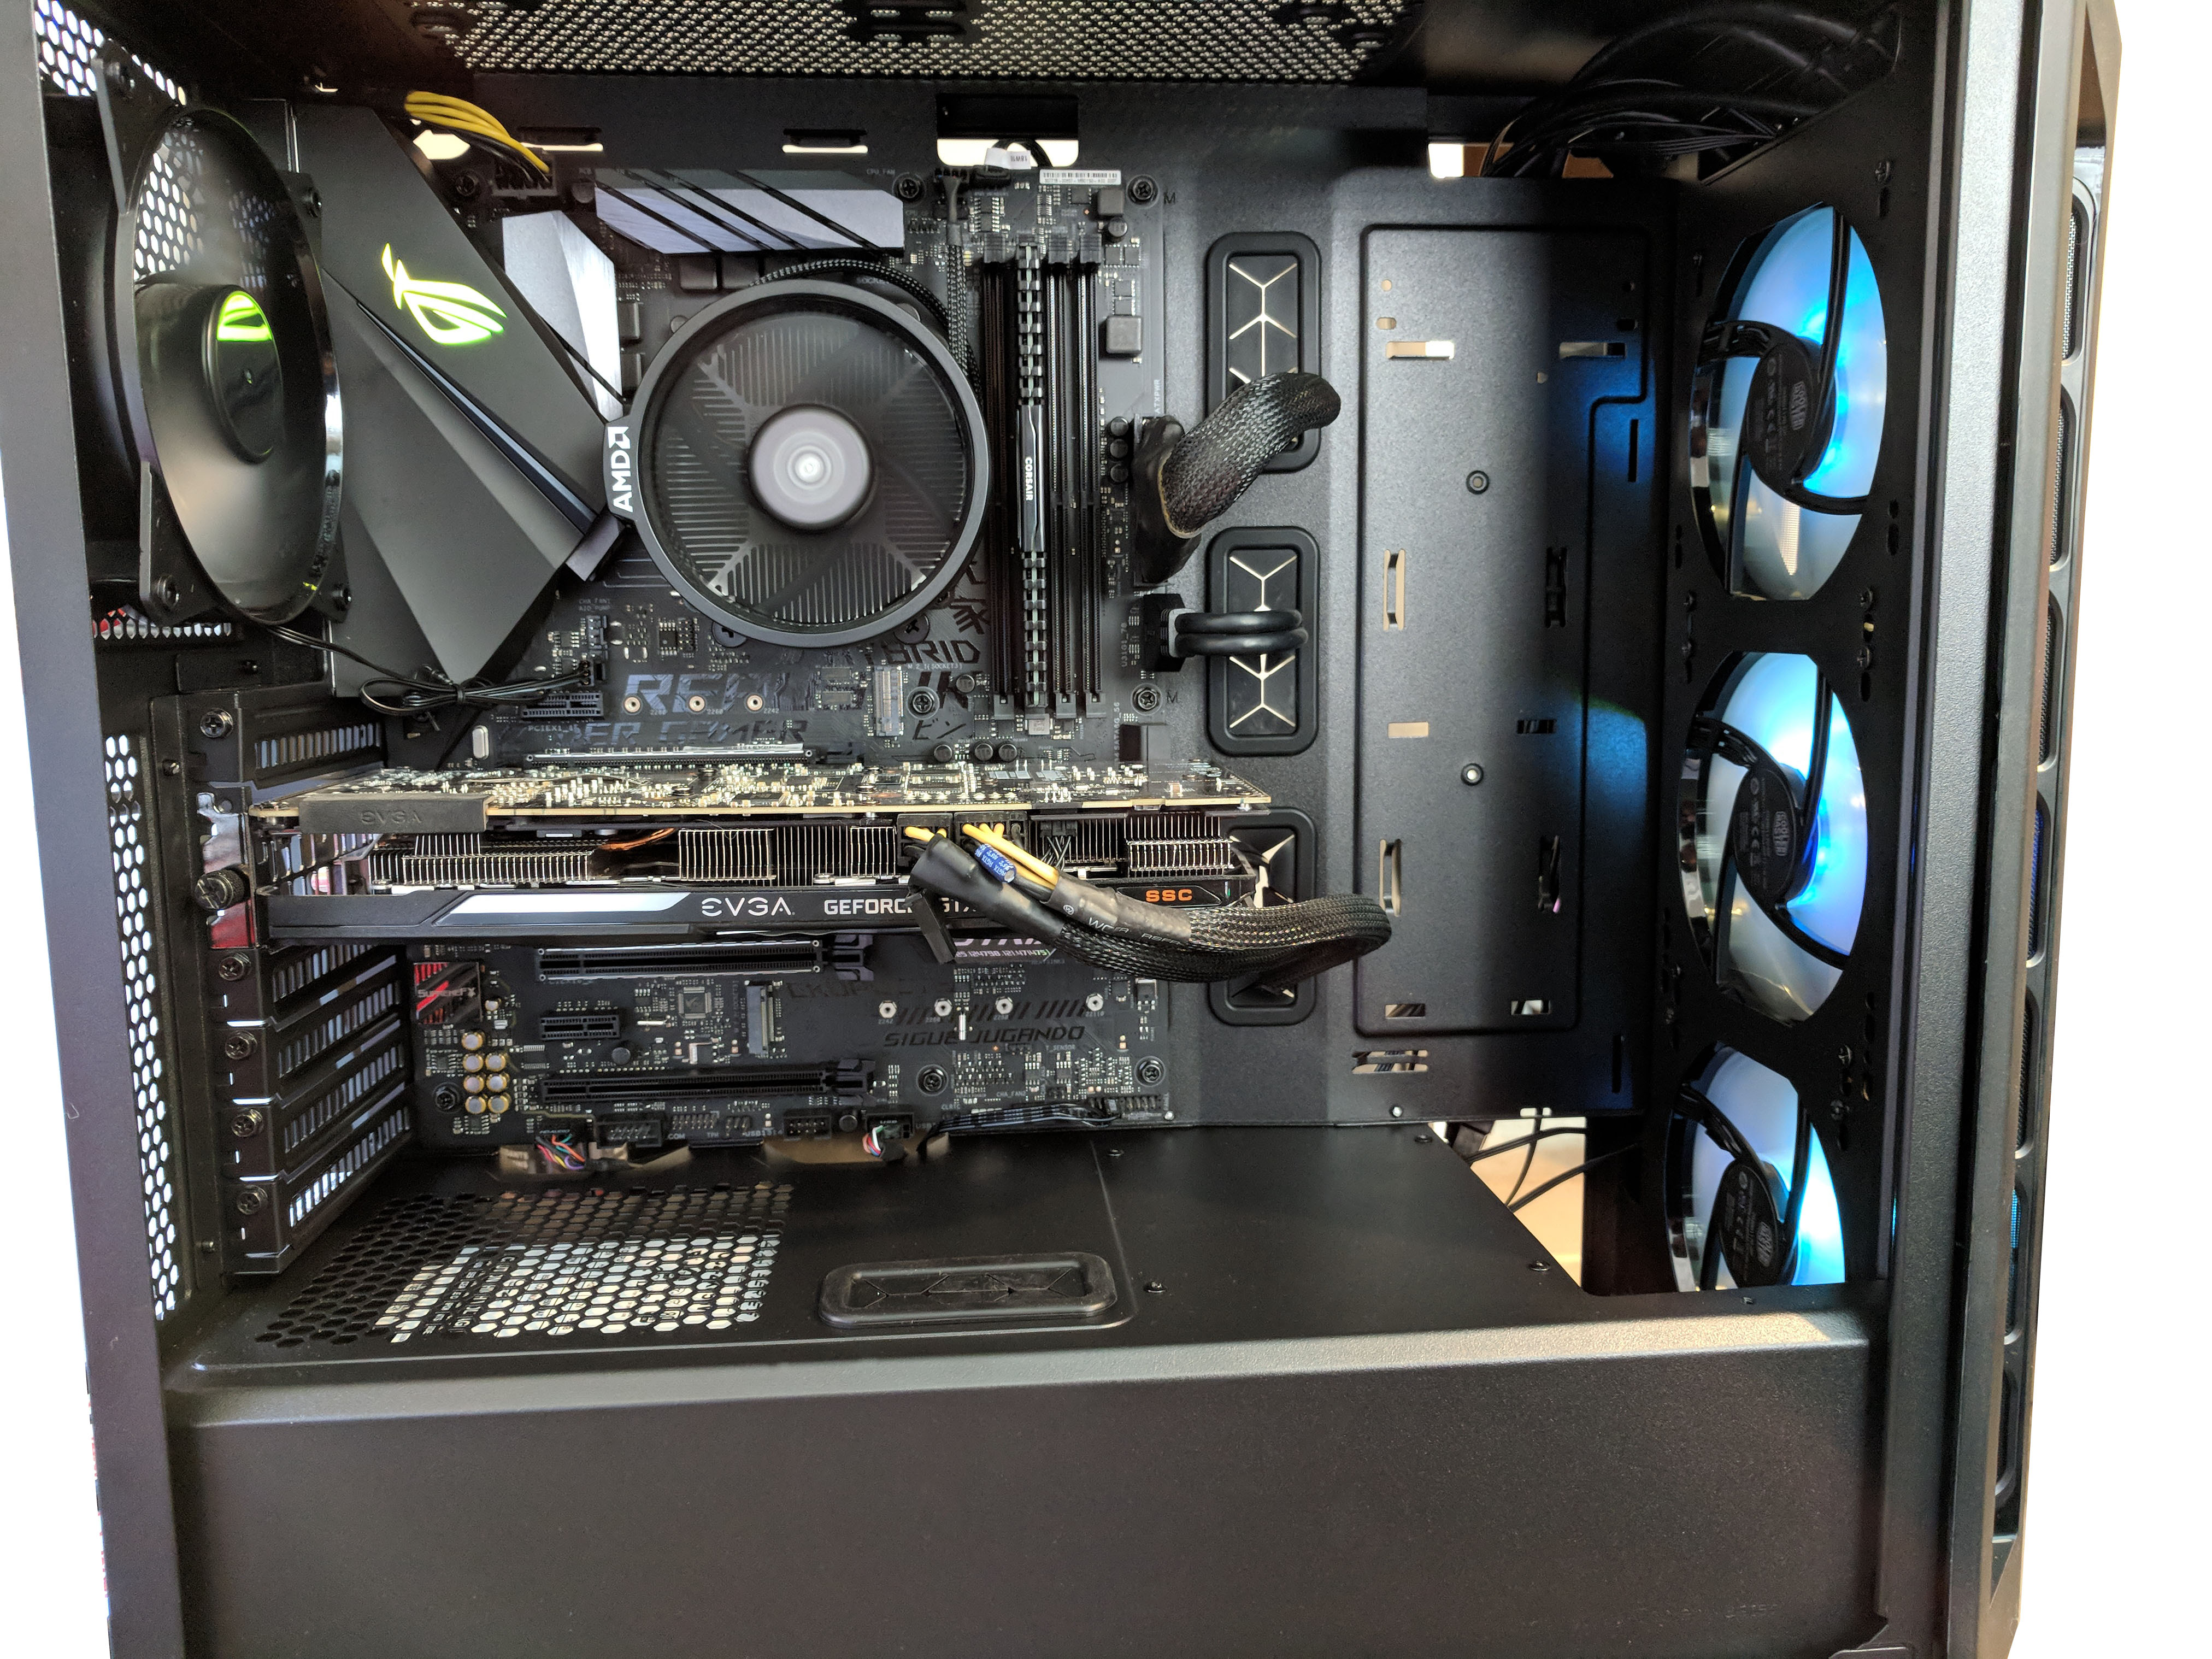
While the motherboard side looks good and clean, I REALLY liked how the reverse side turned out. I’ve personally never built a system where the left-inside of the case turned out so clean, especially with the tempered glass side panel installed. Major props to Cooler Master for this particular design.
Final Thoughts and Awards
The Cooler Master MasterBox MB530P was bursting with features, similar to that of the MB520 we reviewed earlier, But with a MUCH more premium feel. While the overall design was similar, the addition of the tempered glass as well as RGB fans is what really set this case apart. With the MB530P’s price point being targeted towards mid range builds as far as budgets go, I was impressed with some of the subtle features that added to its overall value in addition to some of the more obvious premium features. Some of these features included adjustable fan mounts and vertical SSD mounting behind the motherboard tray. Often times, these small features are overlooked and not highlighted by the manufacturer due to their simplicity. To me, discovering features such as these that you might not be expecting is what really adds value to your purchase.
This case will be targeted towards those who want a “showroom ready” case but don’t want to spend a large portion of their budget on the case alone.
As we mentioned early on in the review, MSRP for the MB530P is $109.99. The price of the case will have a large impact as to the overall score. The score will be calculated based on build quality, functionality, performance and value.
- Quality: 9.5/10 – When it comes to overall construction and build quality MasterBox MB530P was put together very well. The welds and rivets used to hold the case together were tight and provide more than enough strength to be handled (or even mishandled). The tempered glass panels added to the quality feel, adding additional overall weight and rigidity to the case.
- Functionality: 9.5/10 – I would be very hard pressed to find a build or situation where the MB530P would be inadequate. The case should be able to handle anything you throw at it while looking nice while it’s at it. There is plenty of room inside the case for pretty much anything you need, including versatile storage options. The only negative was the awkward PSU install when it comes to fully modular units.
- Performance: 8.9/10 – Cooling is a main factor when judging the performance scores on a PC case. Considering the fact that this case came with four 120mm fans right out of the box, you shouldn’t have any issue s keeping your high end system cool. Additionally, each intake on the case has some form of dust filter which will prevent dust buildup on internal components, thus reducing temperatures even further.
- Value: 9.7/10 – Considering both premium and non-permium features Cooler Master managed to squeeze into the MB530P, the price point is spot on… even a hell of a deal.
Product Page: http://www.coolermaster.com/case/mid-tower/masterbox-mb530p/
I would be very hard pressed to find a build or situation where the MB530P would be inadequate."bursting with features"


Amazing price considering all the glass, the fact that it comes with all of those fans, and the fact that this case can do it all in terms of functionality essentially.
Exactly. Mid tower cases in the $100 price target can handle almost anything you throw at it. With the removal of the drive bays in these newer cases, a full tower system isn’t really necessary anymore imo. The only limitation I can think of is if you need tons of HDD storage.
You are incorrect on the front aRGB fans. They are 3x 120mm 650~1800RPM SickleFlow PWM ARGB.
[…] everything installed on the motherboard, and the board safely mounted in our Cooler Master MB530P case, we’re ready to turn it on and start tweaking the […]
Wow, excellent article, very well put together and very thorough! And complete with all the pics to make everything so understandable! I commend your writing skills …. I don’t think you missed a thing. I’m considering doing my first build, came across this case, and wanted to know everything I could about it. I think you touched all the bases. Thanks!
Extremely good review of the Cooler Master MB530P Case! I appreciate it! Just bought one! Thank you.
Hello,
How did you remove the front panel?
pull out from bottom just un clips then its easy to clean
hi i heard that this case has been discontinued? so many places out of stock. im from malaysia.
any idea is there a new case coming out to replace this mb530p? if yes maybe i should wait for a while before geting this