In this review, we’re going to dive deep into InWin’s latest offerings which is more on the sleek, stealthy side of the fence, the InWin 216. This particular case is geared towards low to mid tier builds and at a glance, features pretty much everything most system builders are looking for for their next modern build.
At a high level, the InWin 216 features tempered glass side paneling, slots for up to six 120mm fans, dust filtration on the bottom and front intake, and vertical GPU mounting. There’s enough room inside the case to stuff pretty much anything and everything including multiple full-sized graphics cards, custom loop liquid cooling setups, and 360/240mm radiators on the top and front.
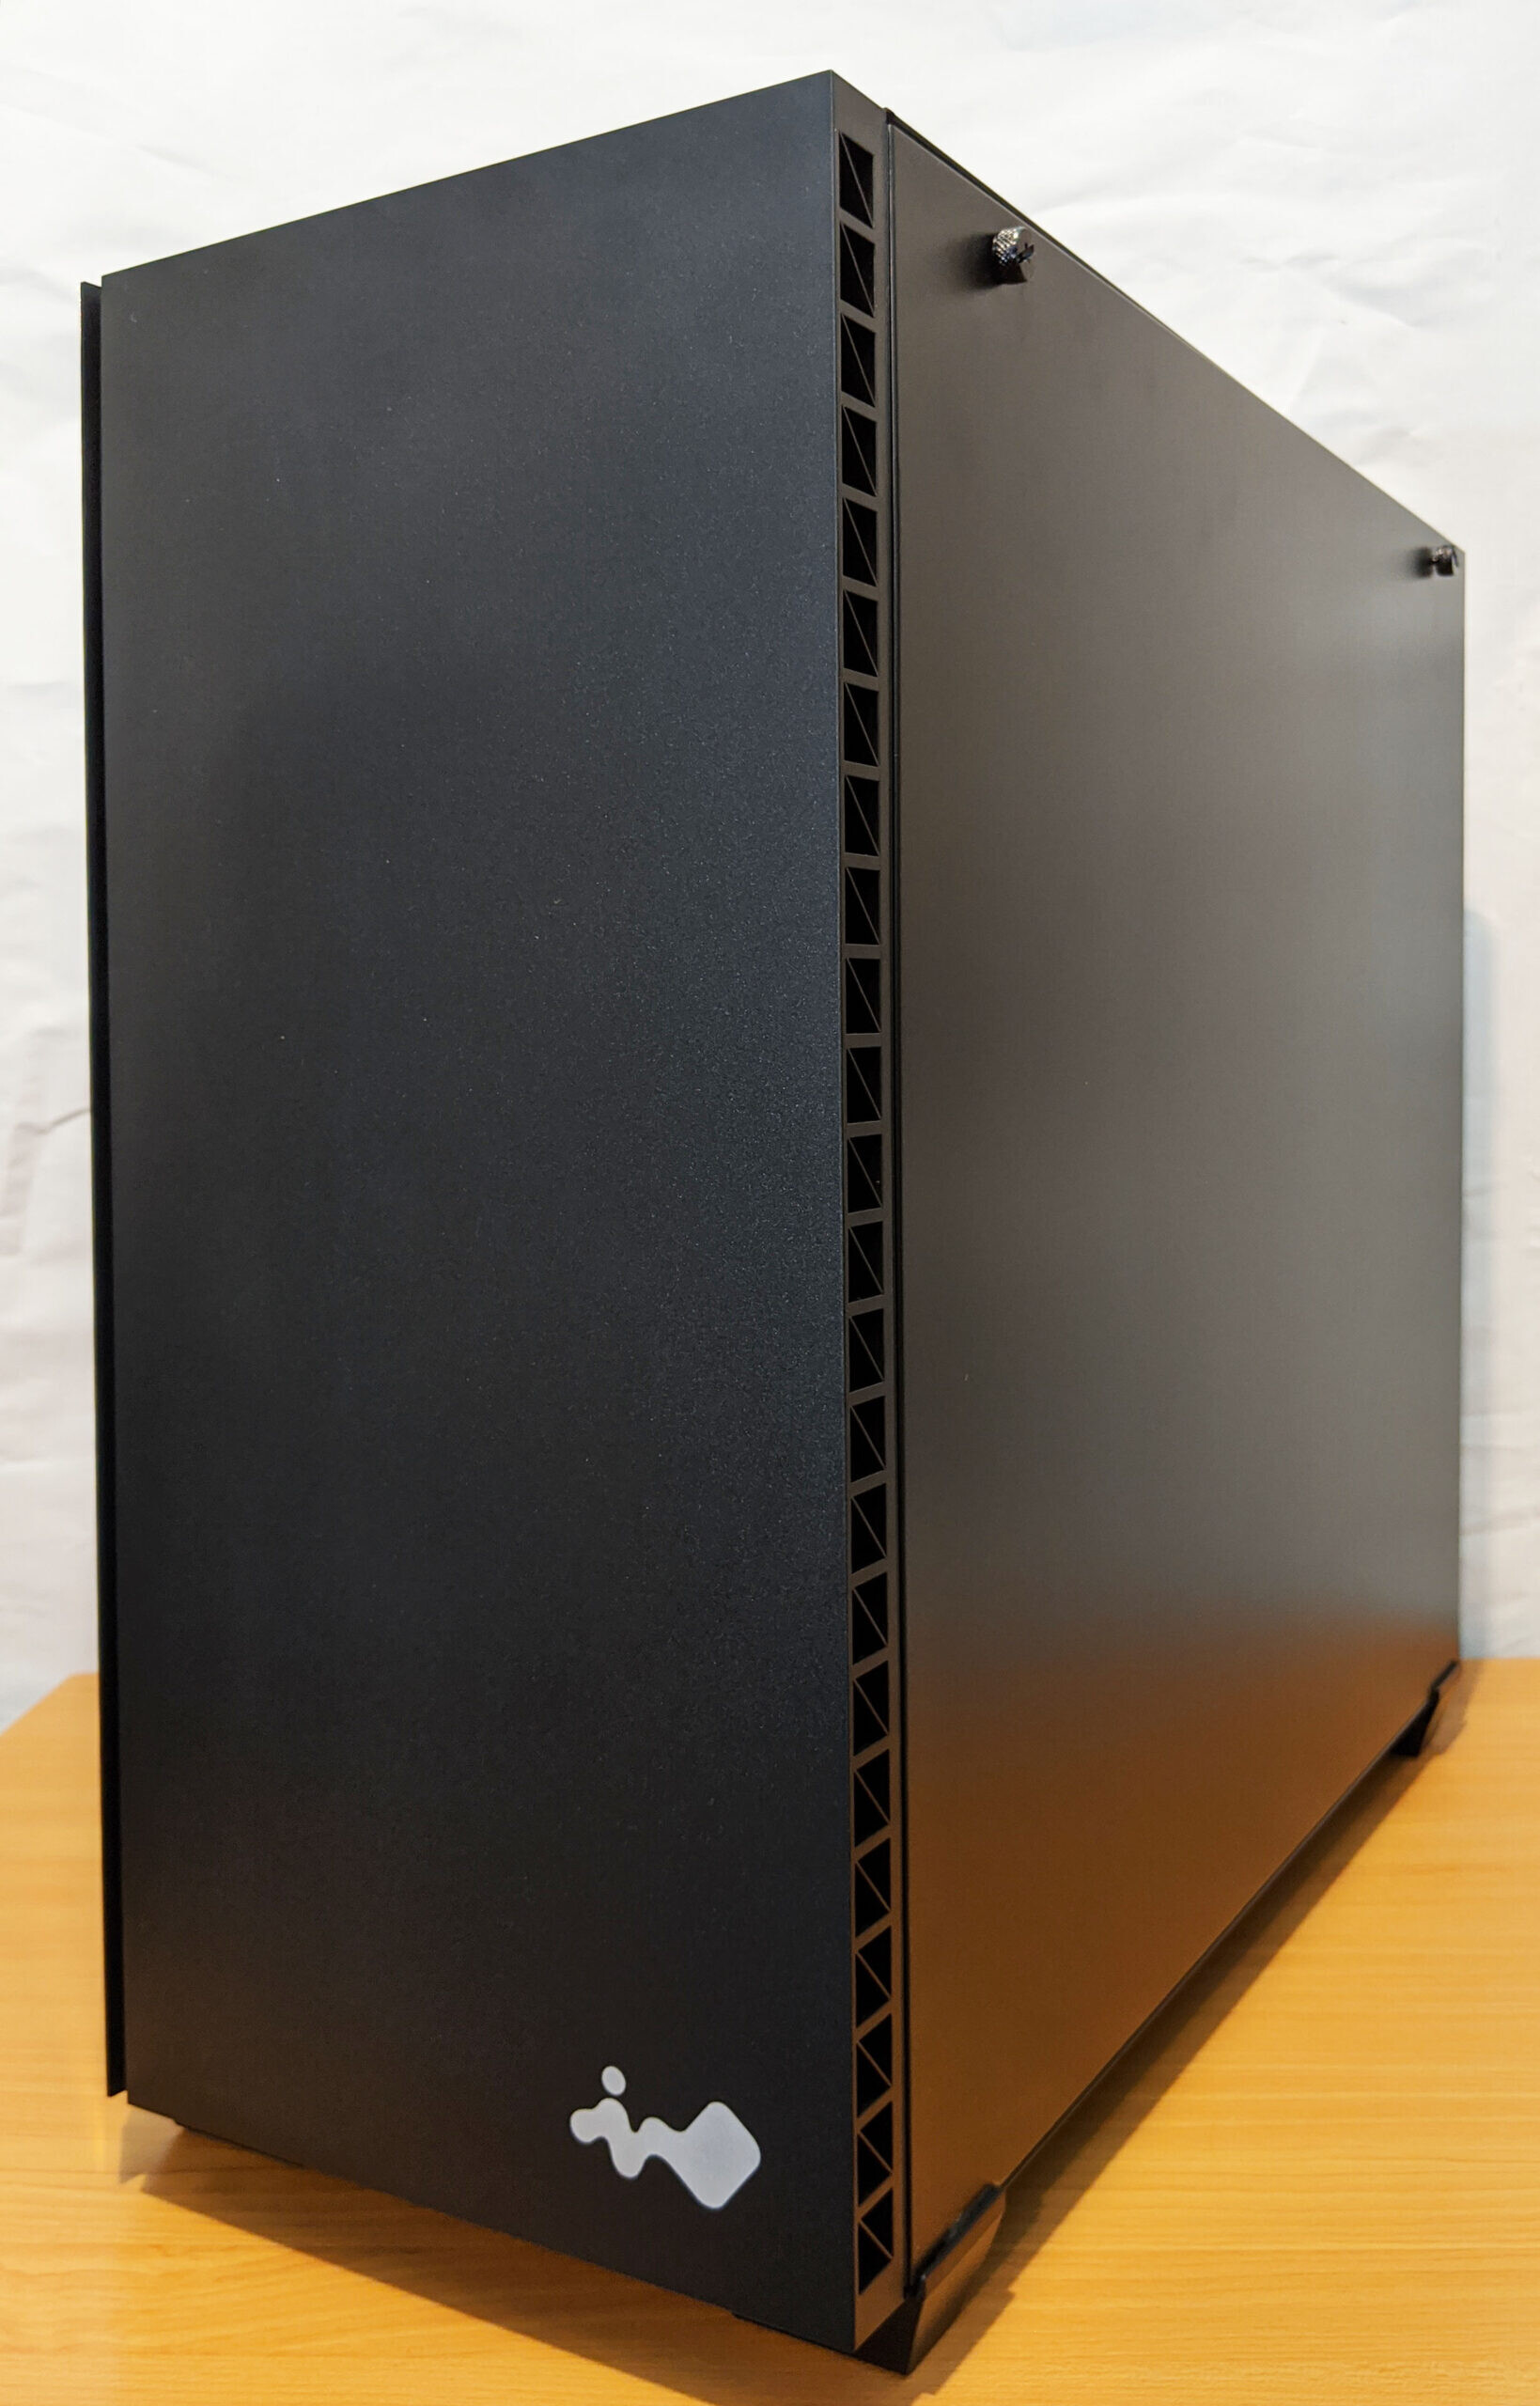
The case is definitely targeted towards system builders who prefer a cleaner, stealthy build. The 216 features blacked out interior and exterior paneling with a single slightly tinted tempered glass side panel which adds to the overall stealthiness factor. Its frame consists of solid steel inside and out which should make the case overall quite sturdy.
MSRP for the case is currently set at $79.99 which will play a large part in the scoring section towards the end of the review. Alrighty, now let’s get into it!
(top image credit: ©InWin Development, Inc.)
InWin 216 Features & Specifications
As we touched on earlier, the InWin 216 gaming case comes with pretty much anything and everything modern system builders and gamers demand. It’s minimalistic design is will likely be a huge selling point towards those who prefer a sleeker design.
As far as compatibility is concerned, I’m glad to see support for E-ATX motherboards (which we will be testing with later on) which should turn some heads of the HEDT system builder crowd. The leftover space to the right of the motherboard will also allow for plenty of room for those wanting to run a custom loop liquid cooling setup as well.
Here are the official specifications of the 216 according to InWin:
| Model | 216 |
|---|---|
| Model Number | IW-CS-216BLK |
| Color | Black |
| Case Type | Mid Tower |
| Materials | SECC, Tempered Glass |
| M/B Compatibility | 12” x 13” E-ATX , ATX , Micro-ATX , Mini-ITX |
| Expansion Slots | PCI-E Slots x 7 Vertical PCI-E Slots x 2 (Riser Card Optional; Not Included in Package) |
| Maximum Compatibility | VGA Card Length: 380mm (Maximum) VGA Card Width: 170mm (Maximum) Vertical Display VGA Card Thickness: 58mm (Maximum) CPU Heatsink Height: 166mm (Maximum) |
| I/O Ports | 2 x USB 3.0 HD Audio |
| Internal Drive Bays | 2 x 3.5” 2 x 2.5” (2 pre-installed, max. up to 3) |
| Thermal Solution Compatibility | 1 x 120mm Rear Fan/120mm Radiator 3 x 120mm Front Fans / 360mm Radiator 2 x 120mm Top Fans (Optional) |
| Power Supply Compatibility | PSII: ATX12V – Length up to 220mm |
| Product Dimensions (H x W x D) |
465 x 220 x 460mm 18.3” x 8.7” x 18.1” |
| Package Dimensions (H x W x D) |
570 x 320 x 545mm 22.4” x 12.6” x 21.5” |
| Net Weight | 7.3kg / 16.09lb |
| Gross Weight | 8.6kg / 18.96lb |
For a mid tower case, the 216 should be able to handle pretty much everything you’d be able to throw at it including large radiators, oversized power supplies and multi GPU setups. Now that we’re all certified experts, let’s dive into the review and get this thing unboxed!
A Closer Look: Packaging
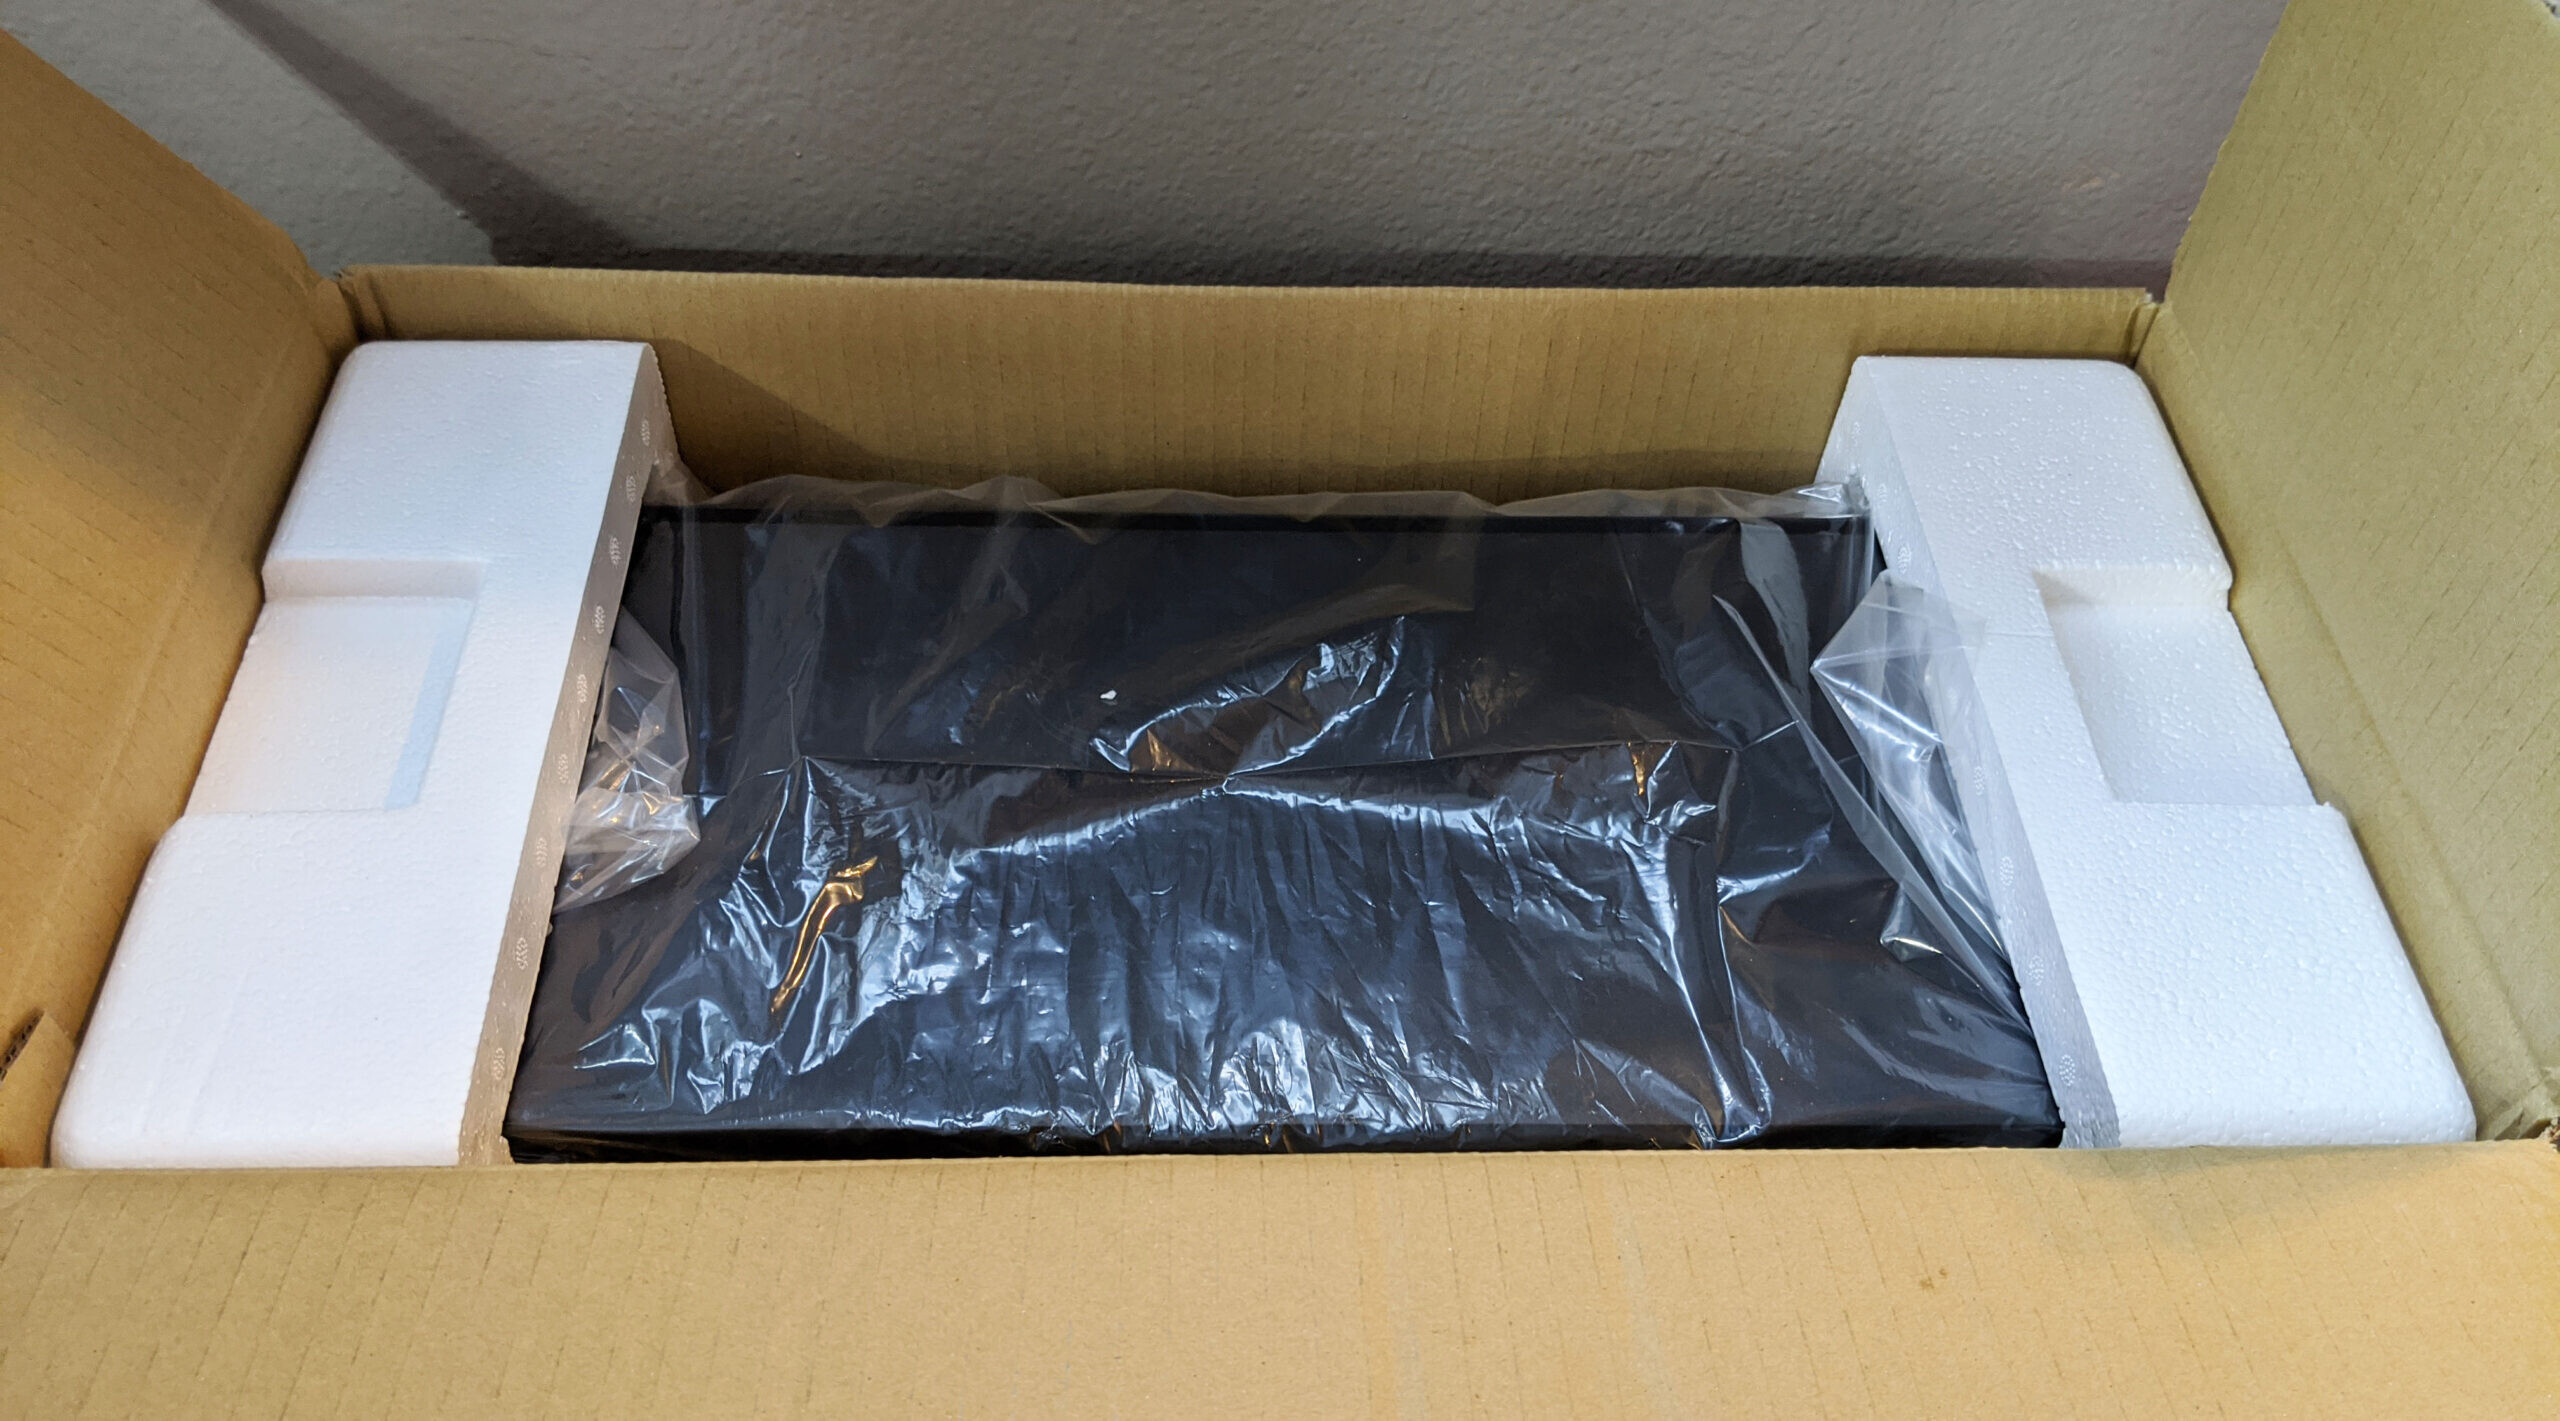
The InWin 216 arrived safely with no damage to the unit aside from a mysterious hole punched into the side of the case by the package courier (most likely). The box features a large “216” logo and InWin logos scattered throughout.
The case was packaged pretty much like any other with the unit placed inside a plastic bag and sandwiched in between two custom Styrofoam molds on either side. Pretty standard packaging which typically works out pretty well.

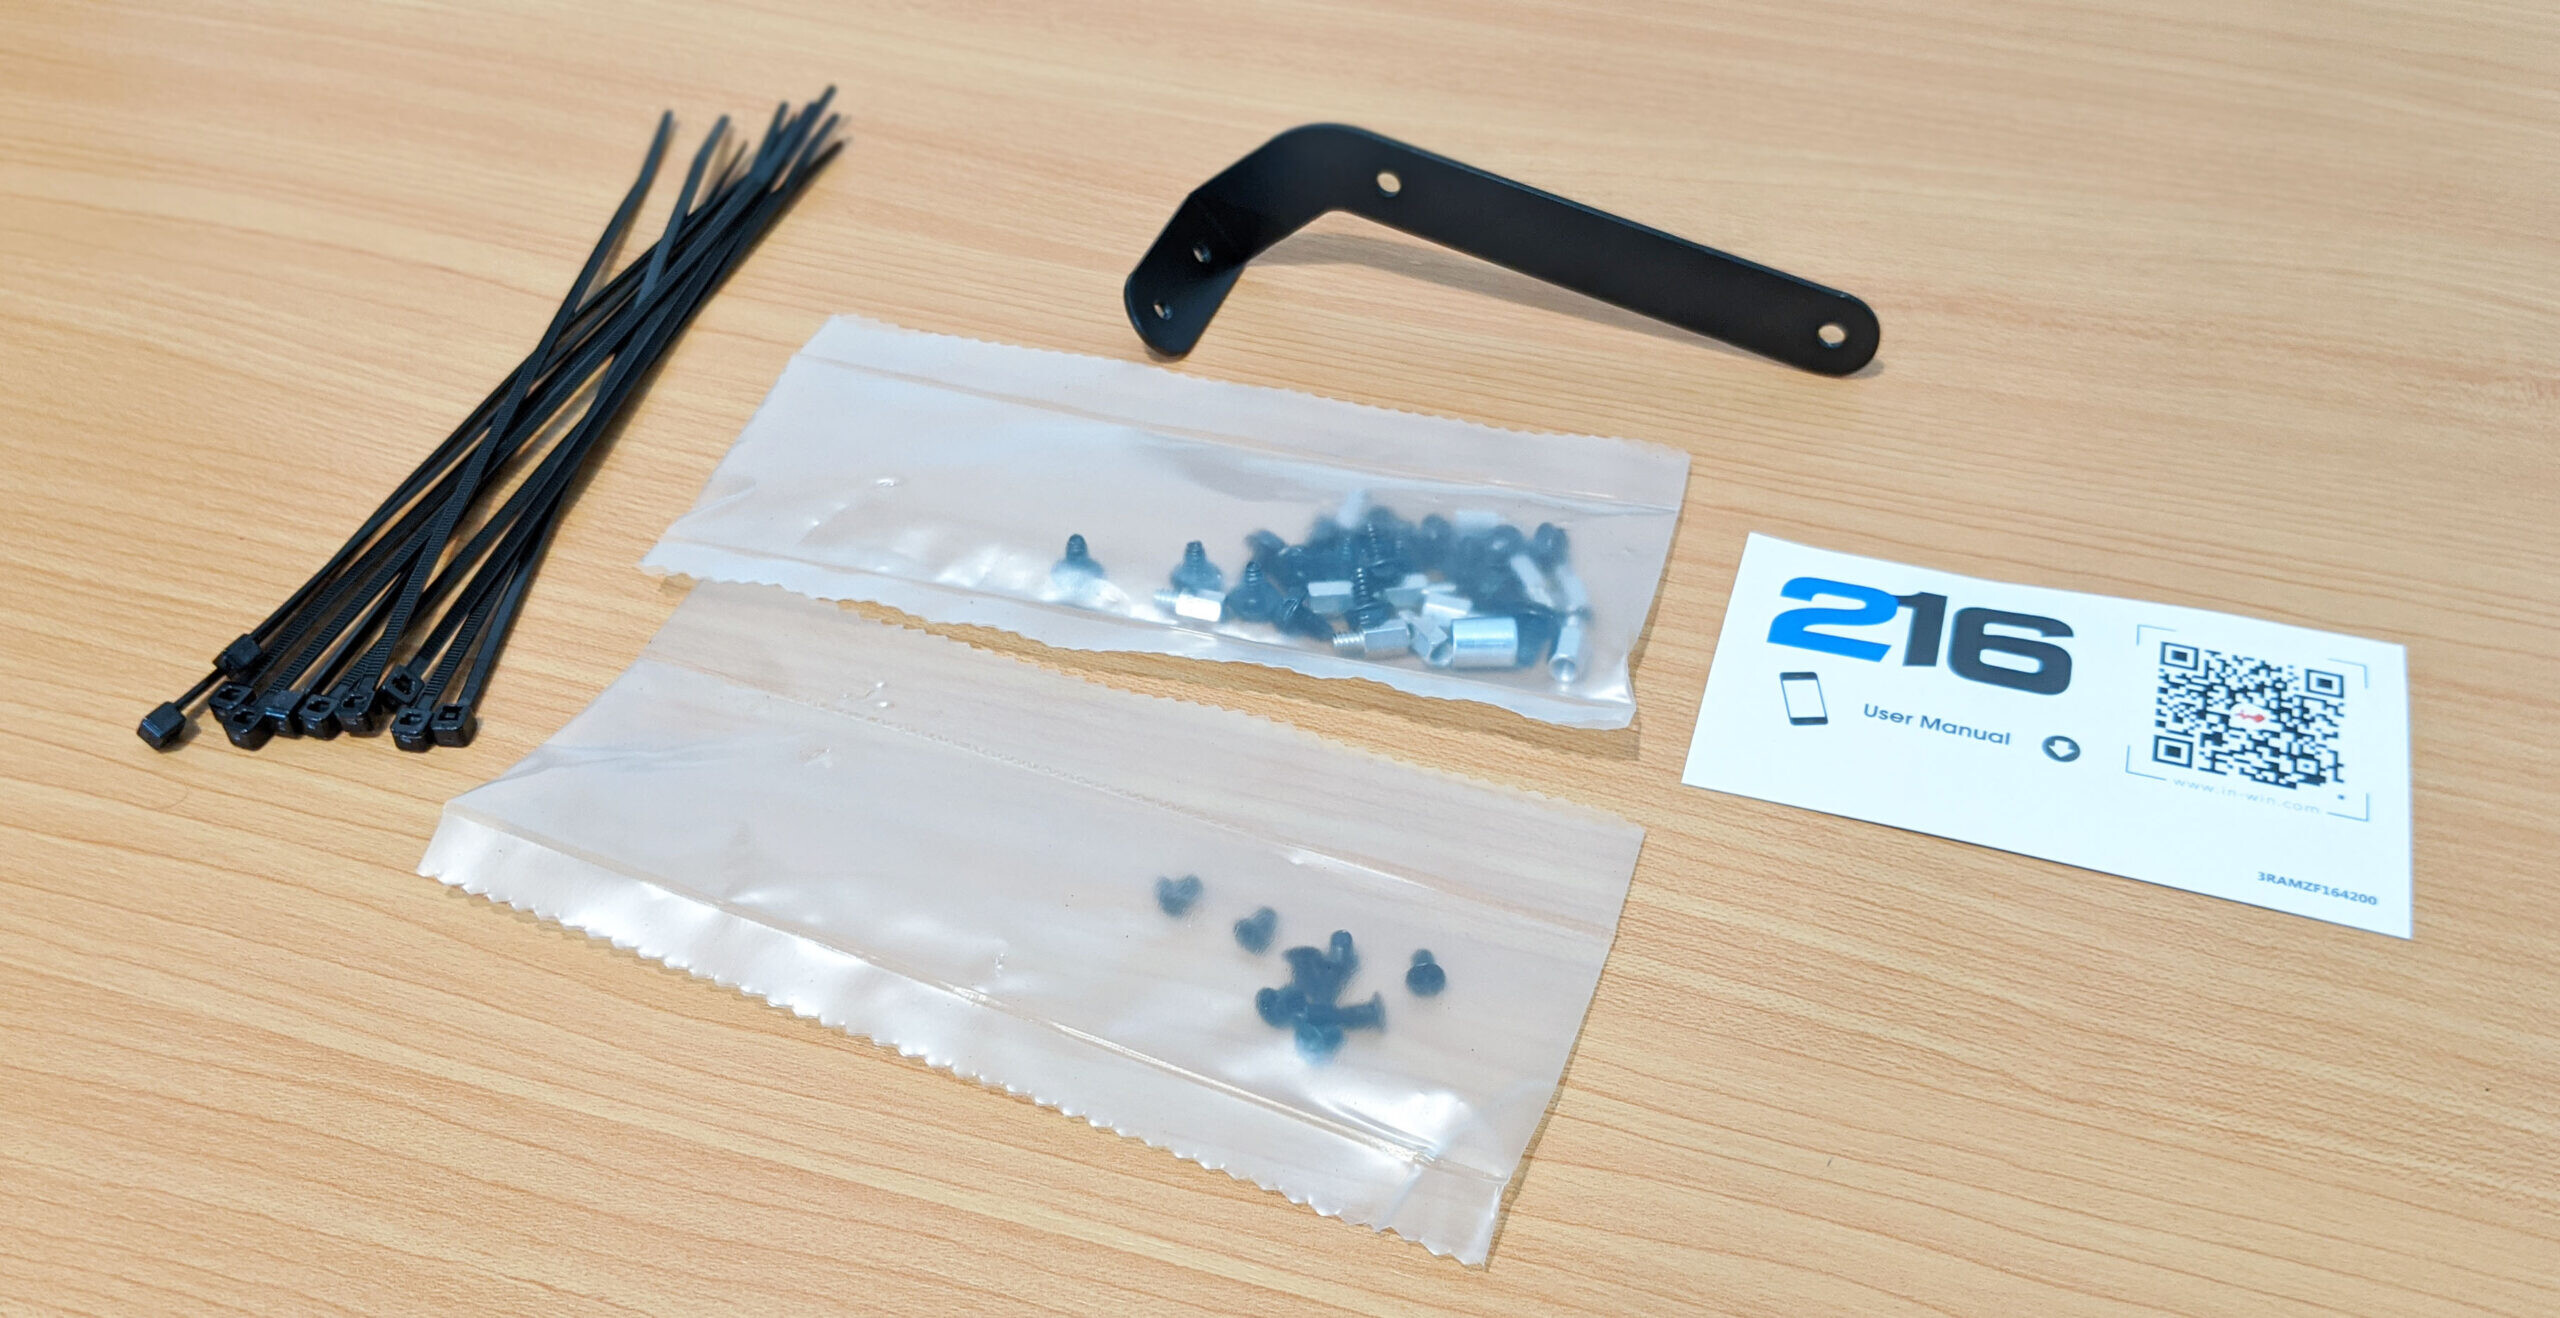
What’s all included you ask? For one, you get the case. Additionally, InWin has provided every screw you might possibly need including SSD/HDD mounts, motherboard standoffs and more. A GPU support bracket is also included for vertical mounting. Unfortunately, if you do decide to vertically mount your GPU, you’ll need to purchase a 16x PCI-E extension cable separately.

A Closer Look: Exterior
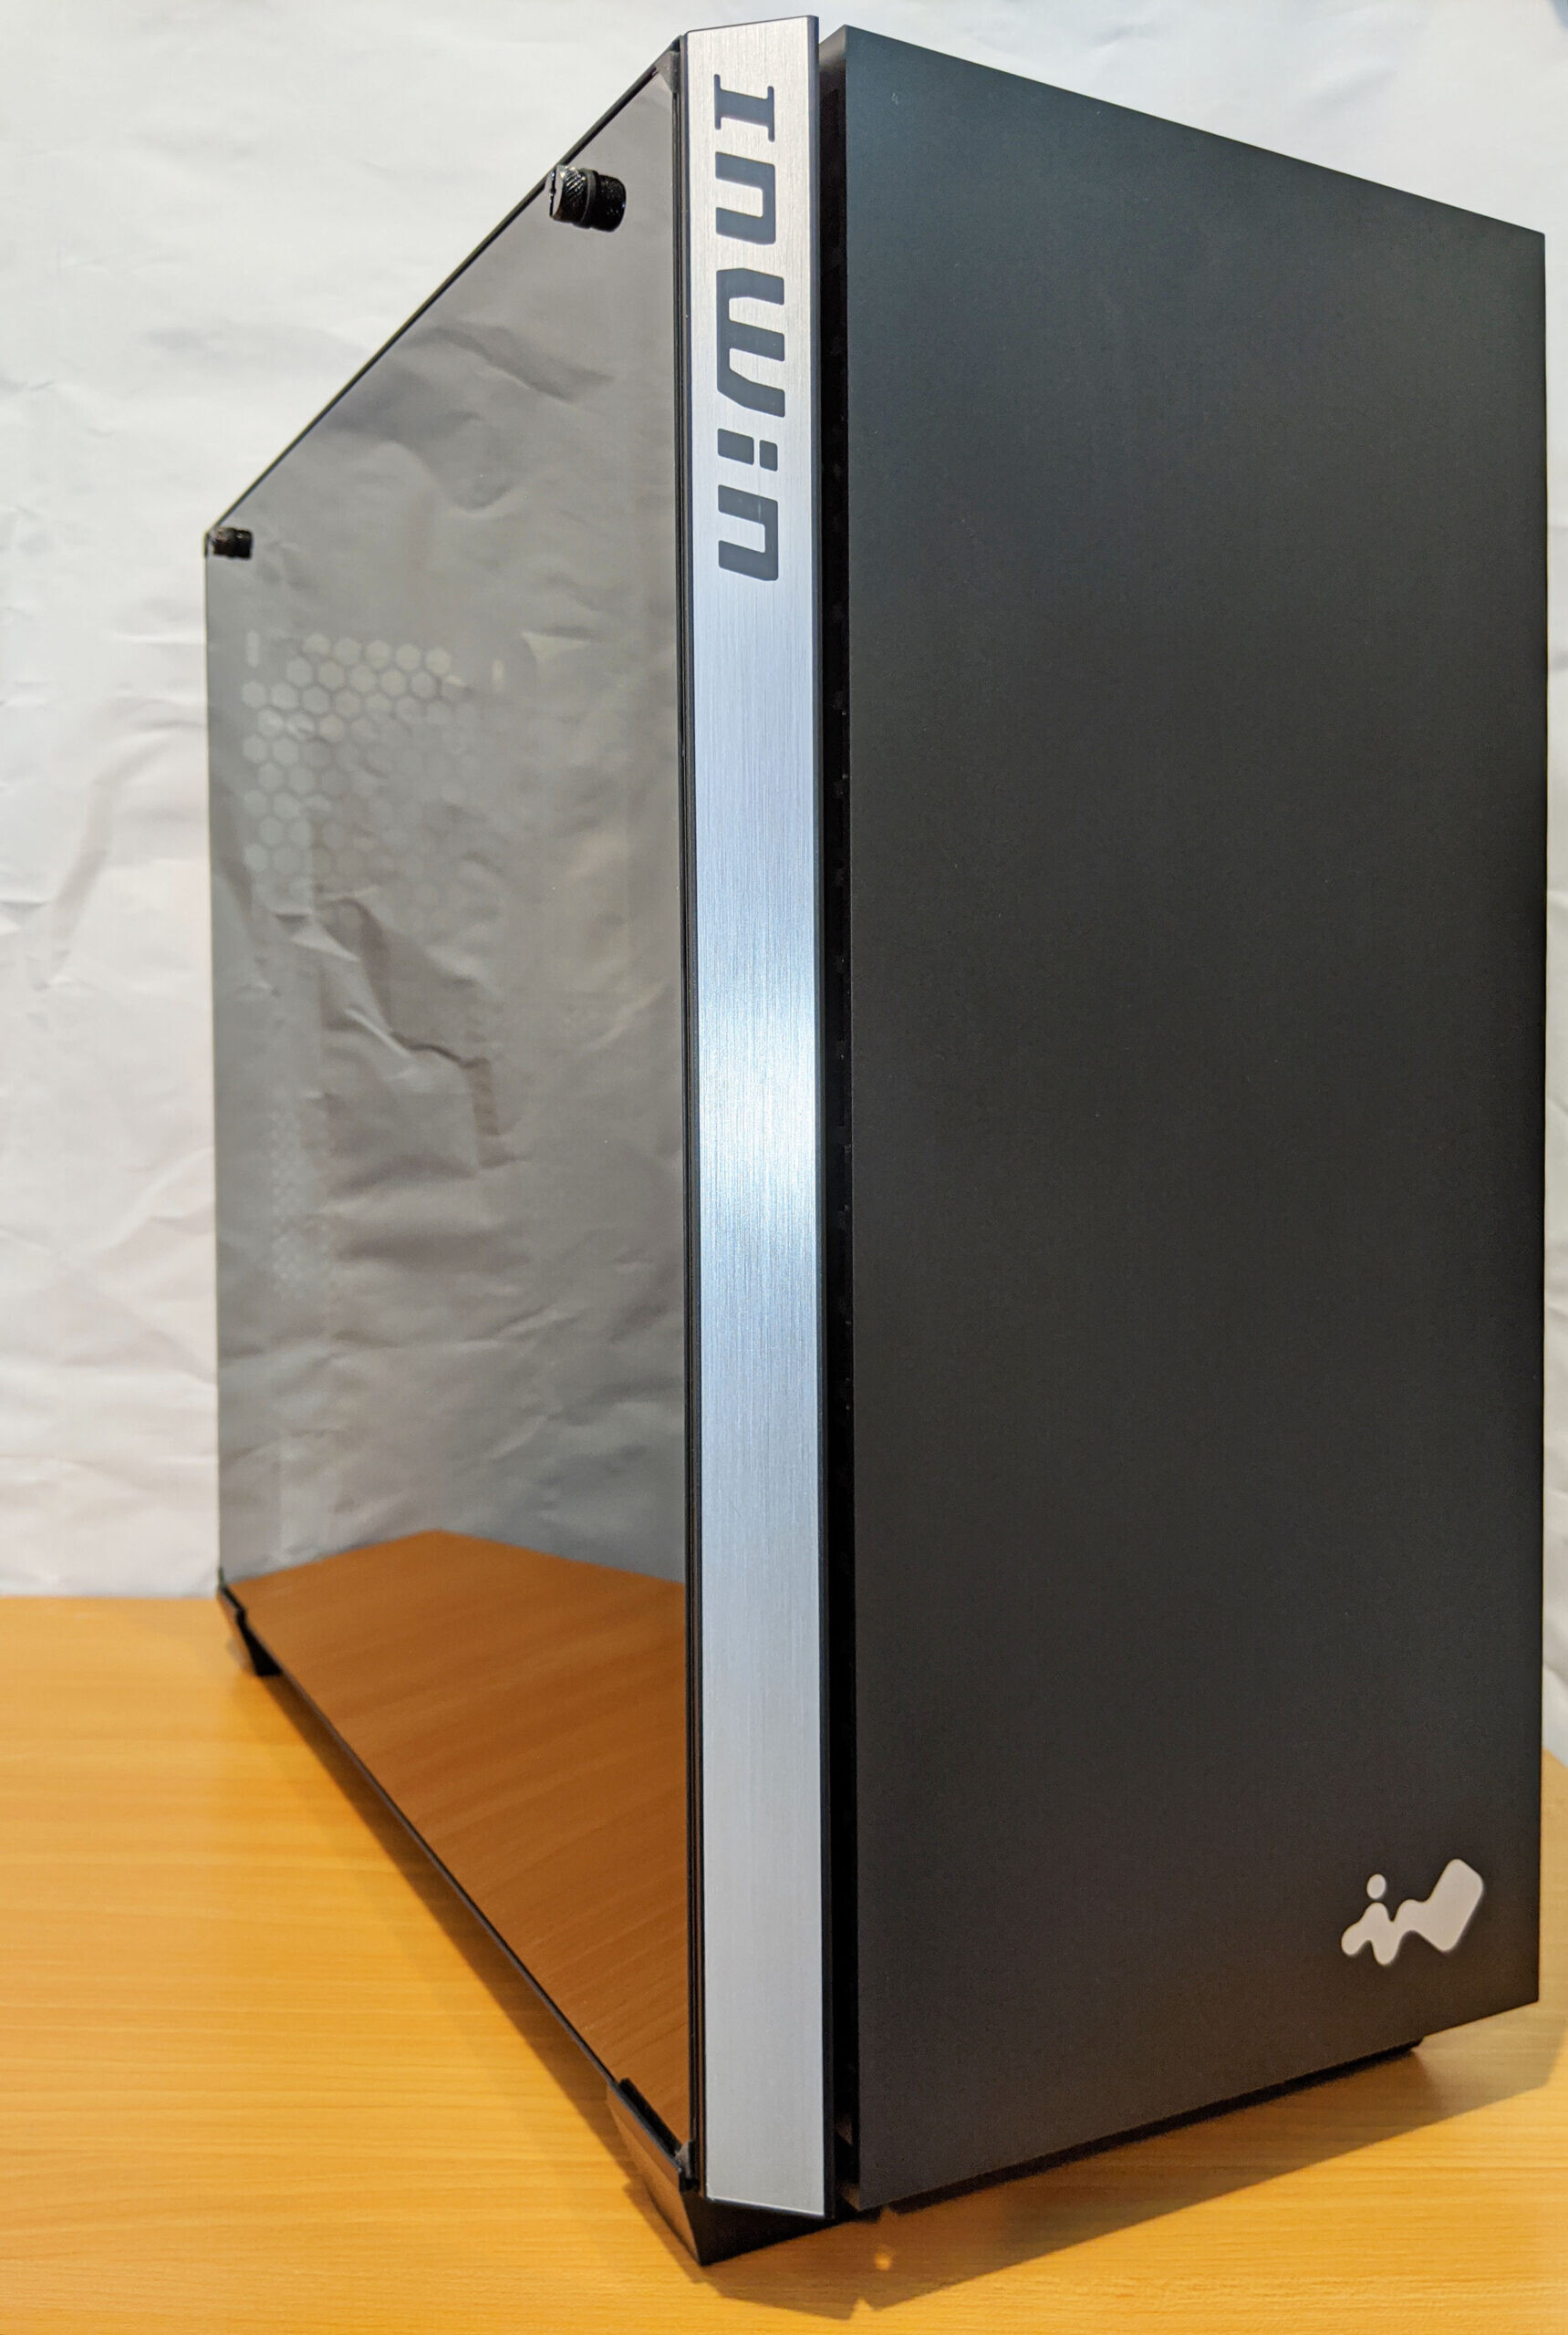
With the case out of the bag (hehe), that’s pretty much it as far as packaging disassembly goes. Now that we’ve got a better look at the 216 and it’s clear to see that stealth and an overall minimalist design were a top priority. Personally, I love the design as this is the kind of style I normally gravitate towards with each of my builds.
One of the first things that stood out to me was the unique airflow path. Kind of the opposite of the InWin 103 that we reviewed last year. Air is forced in through the right and bottom side of the case and then dispersed out the back and top. The intake is definitely large enough to prevent airflow restriction, especially if you opt for lower airflow or quiet fans.
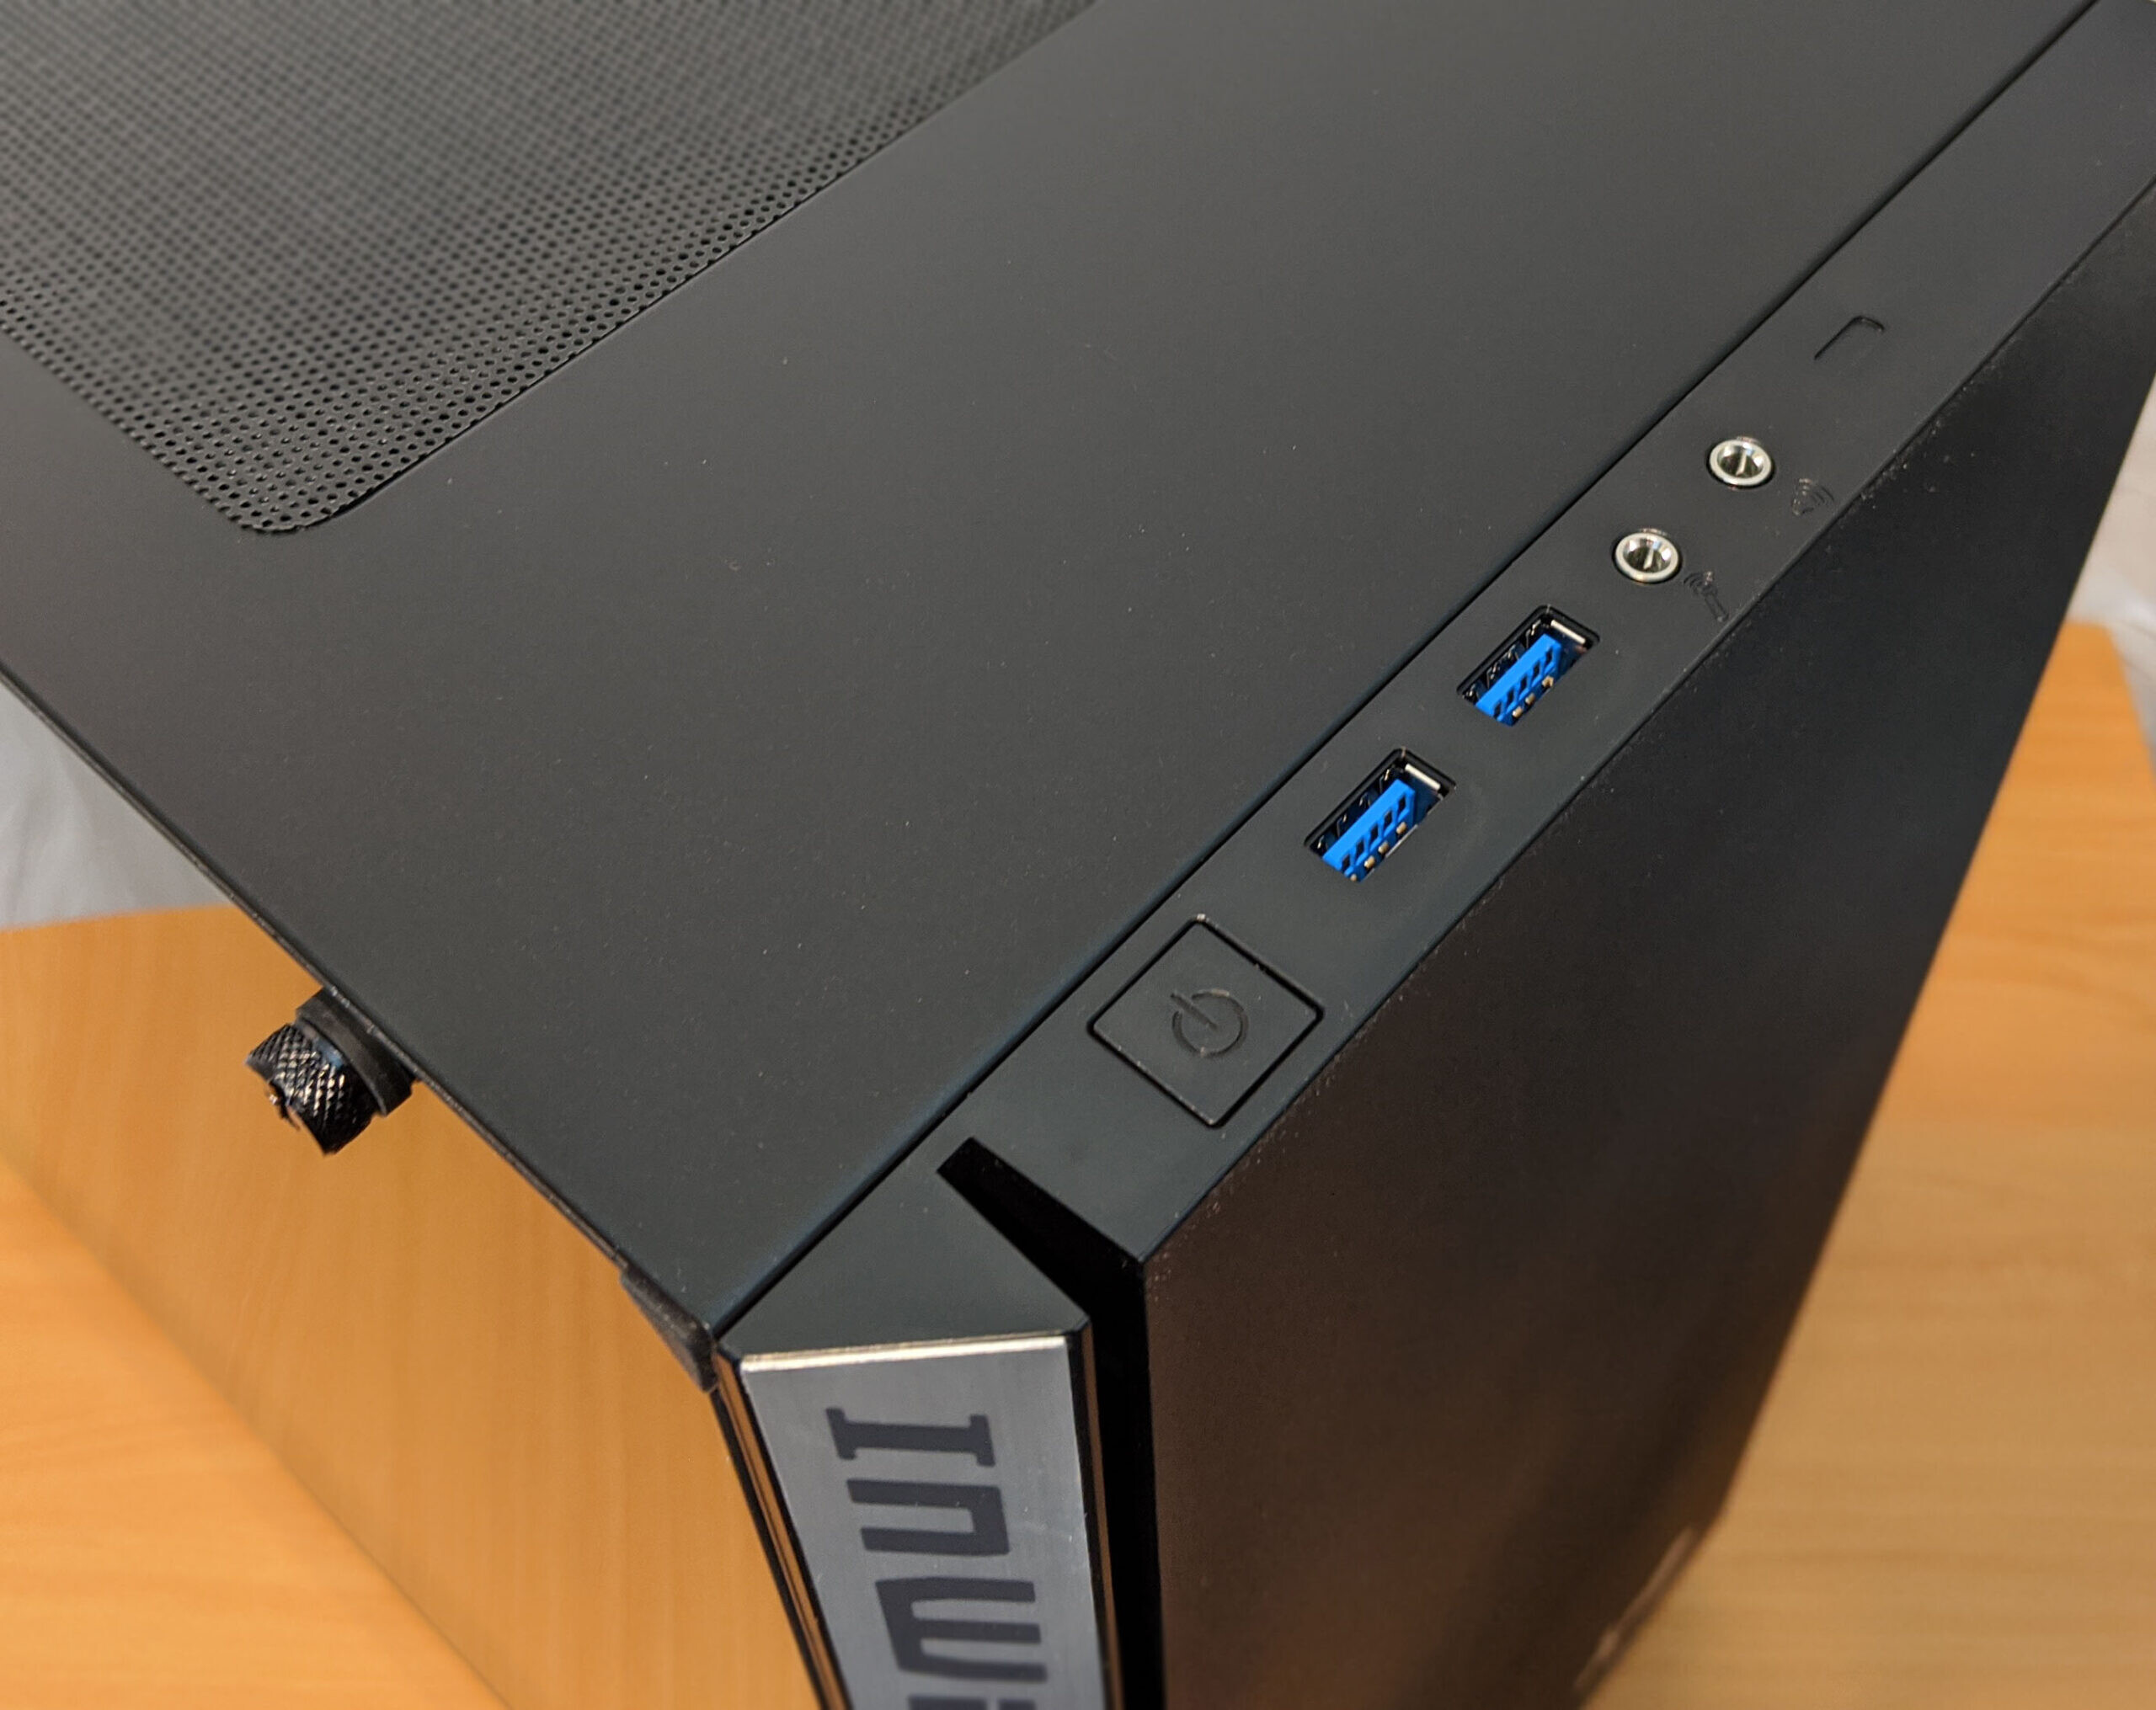
Your IO hookups and power buttons are located at the top of the case. As an avid overclocker, I was a bit disappointed at the lack of a reset button. Also there seems to be a cutout for a USB 3.0 Type C connector, however it’s been blocked off. Perhaps a future version with Type C support will be coming soon?
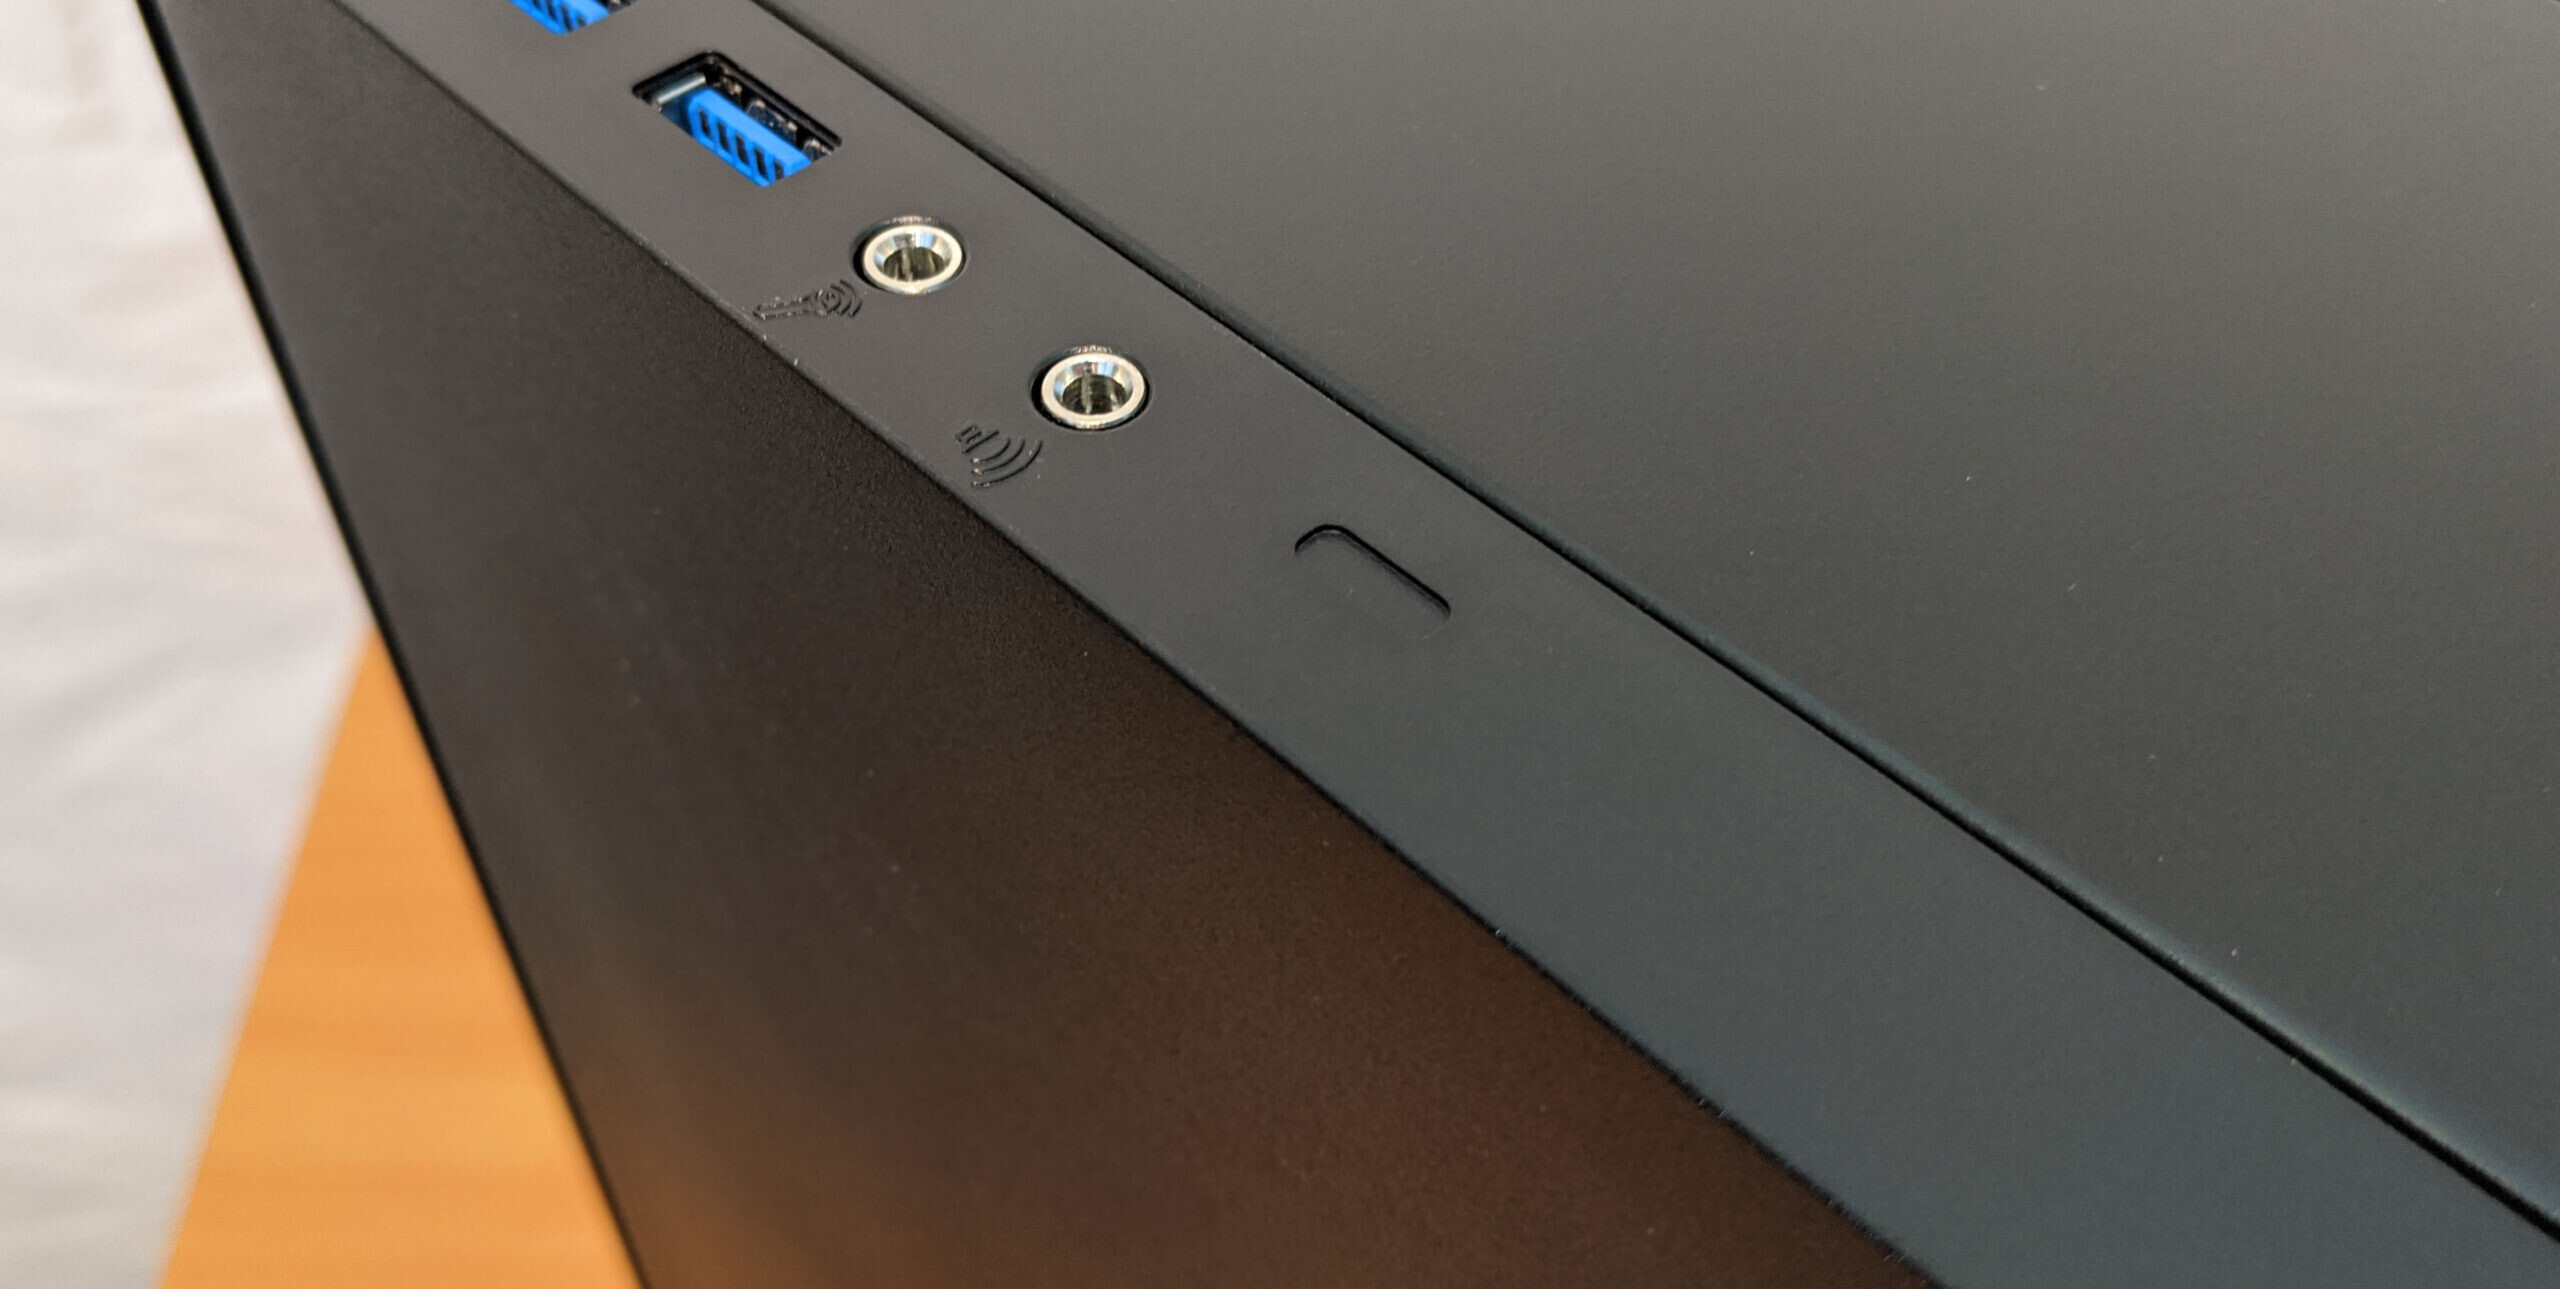
Also located up top is a removable dust cover which is held in by a magnetic strip around the perimeter. Be sure to remove this if your top fans are exhausting air as this will only impede airflow.

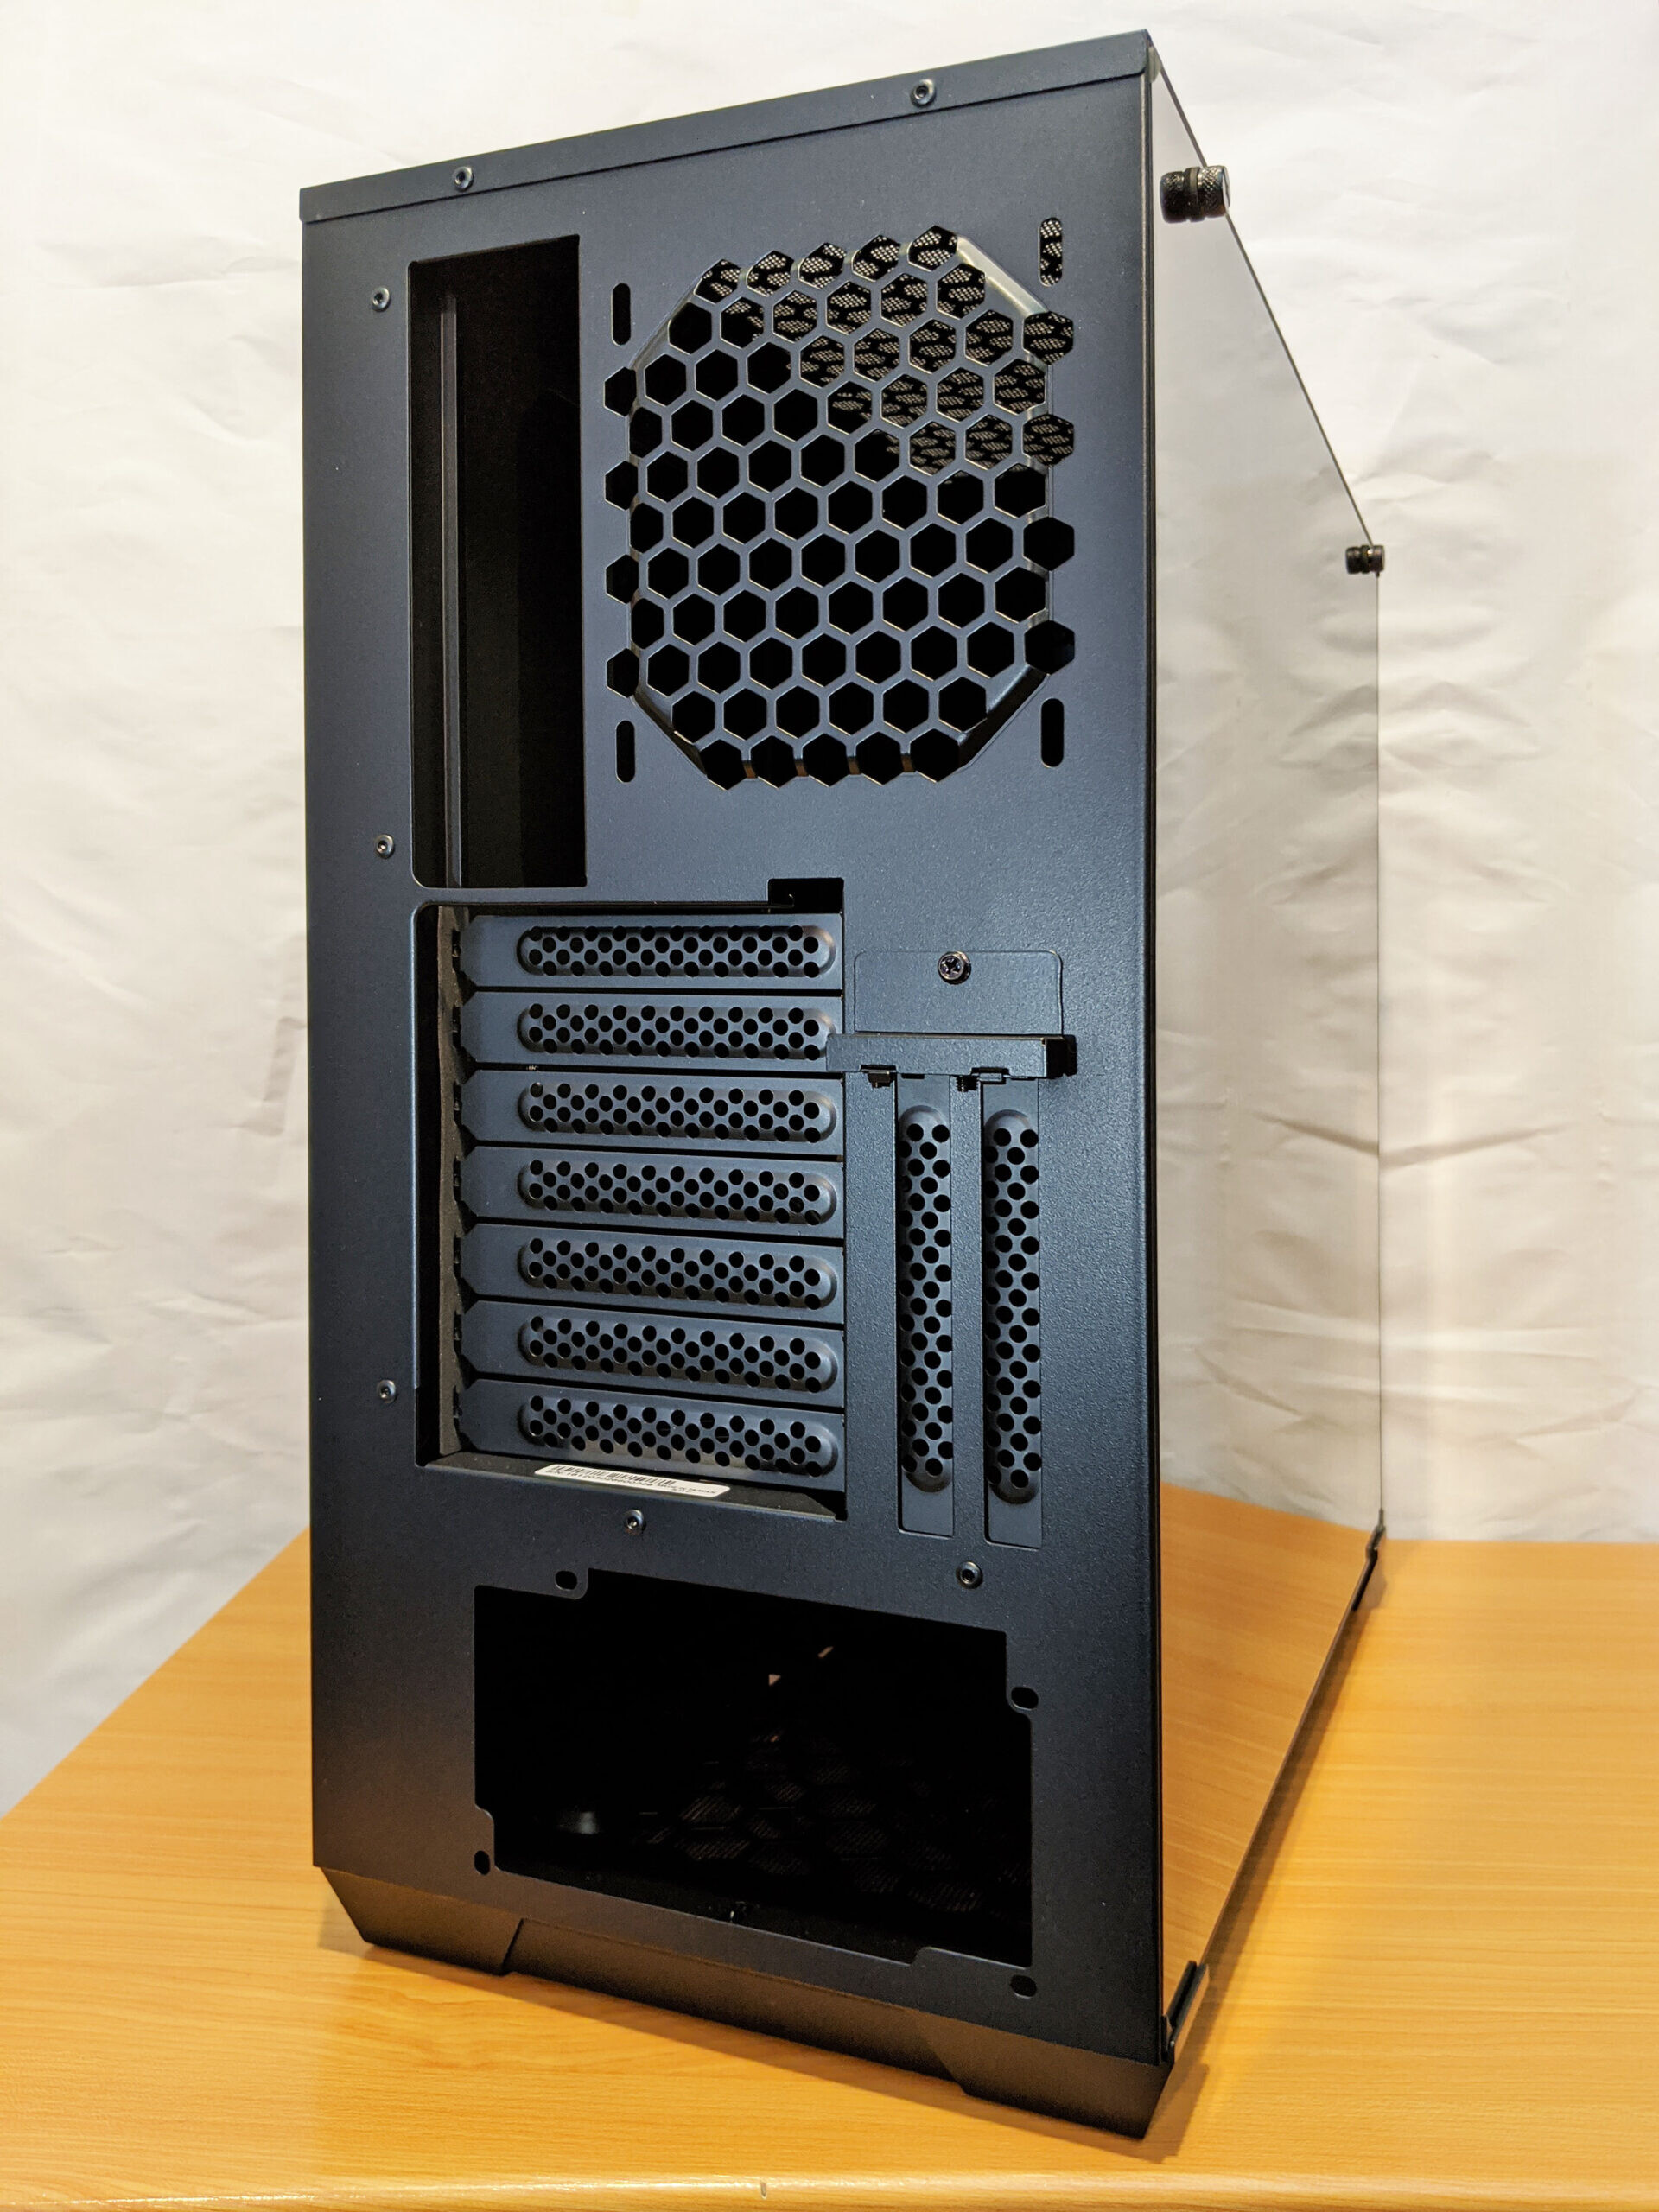
Moving all the around to the back of the case, there’s nothing too special going on here. The only note-worthy item would be the vertical GPU mount located to the right of the standard PCI-E slots.
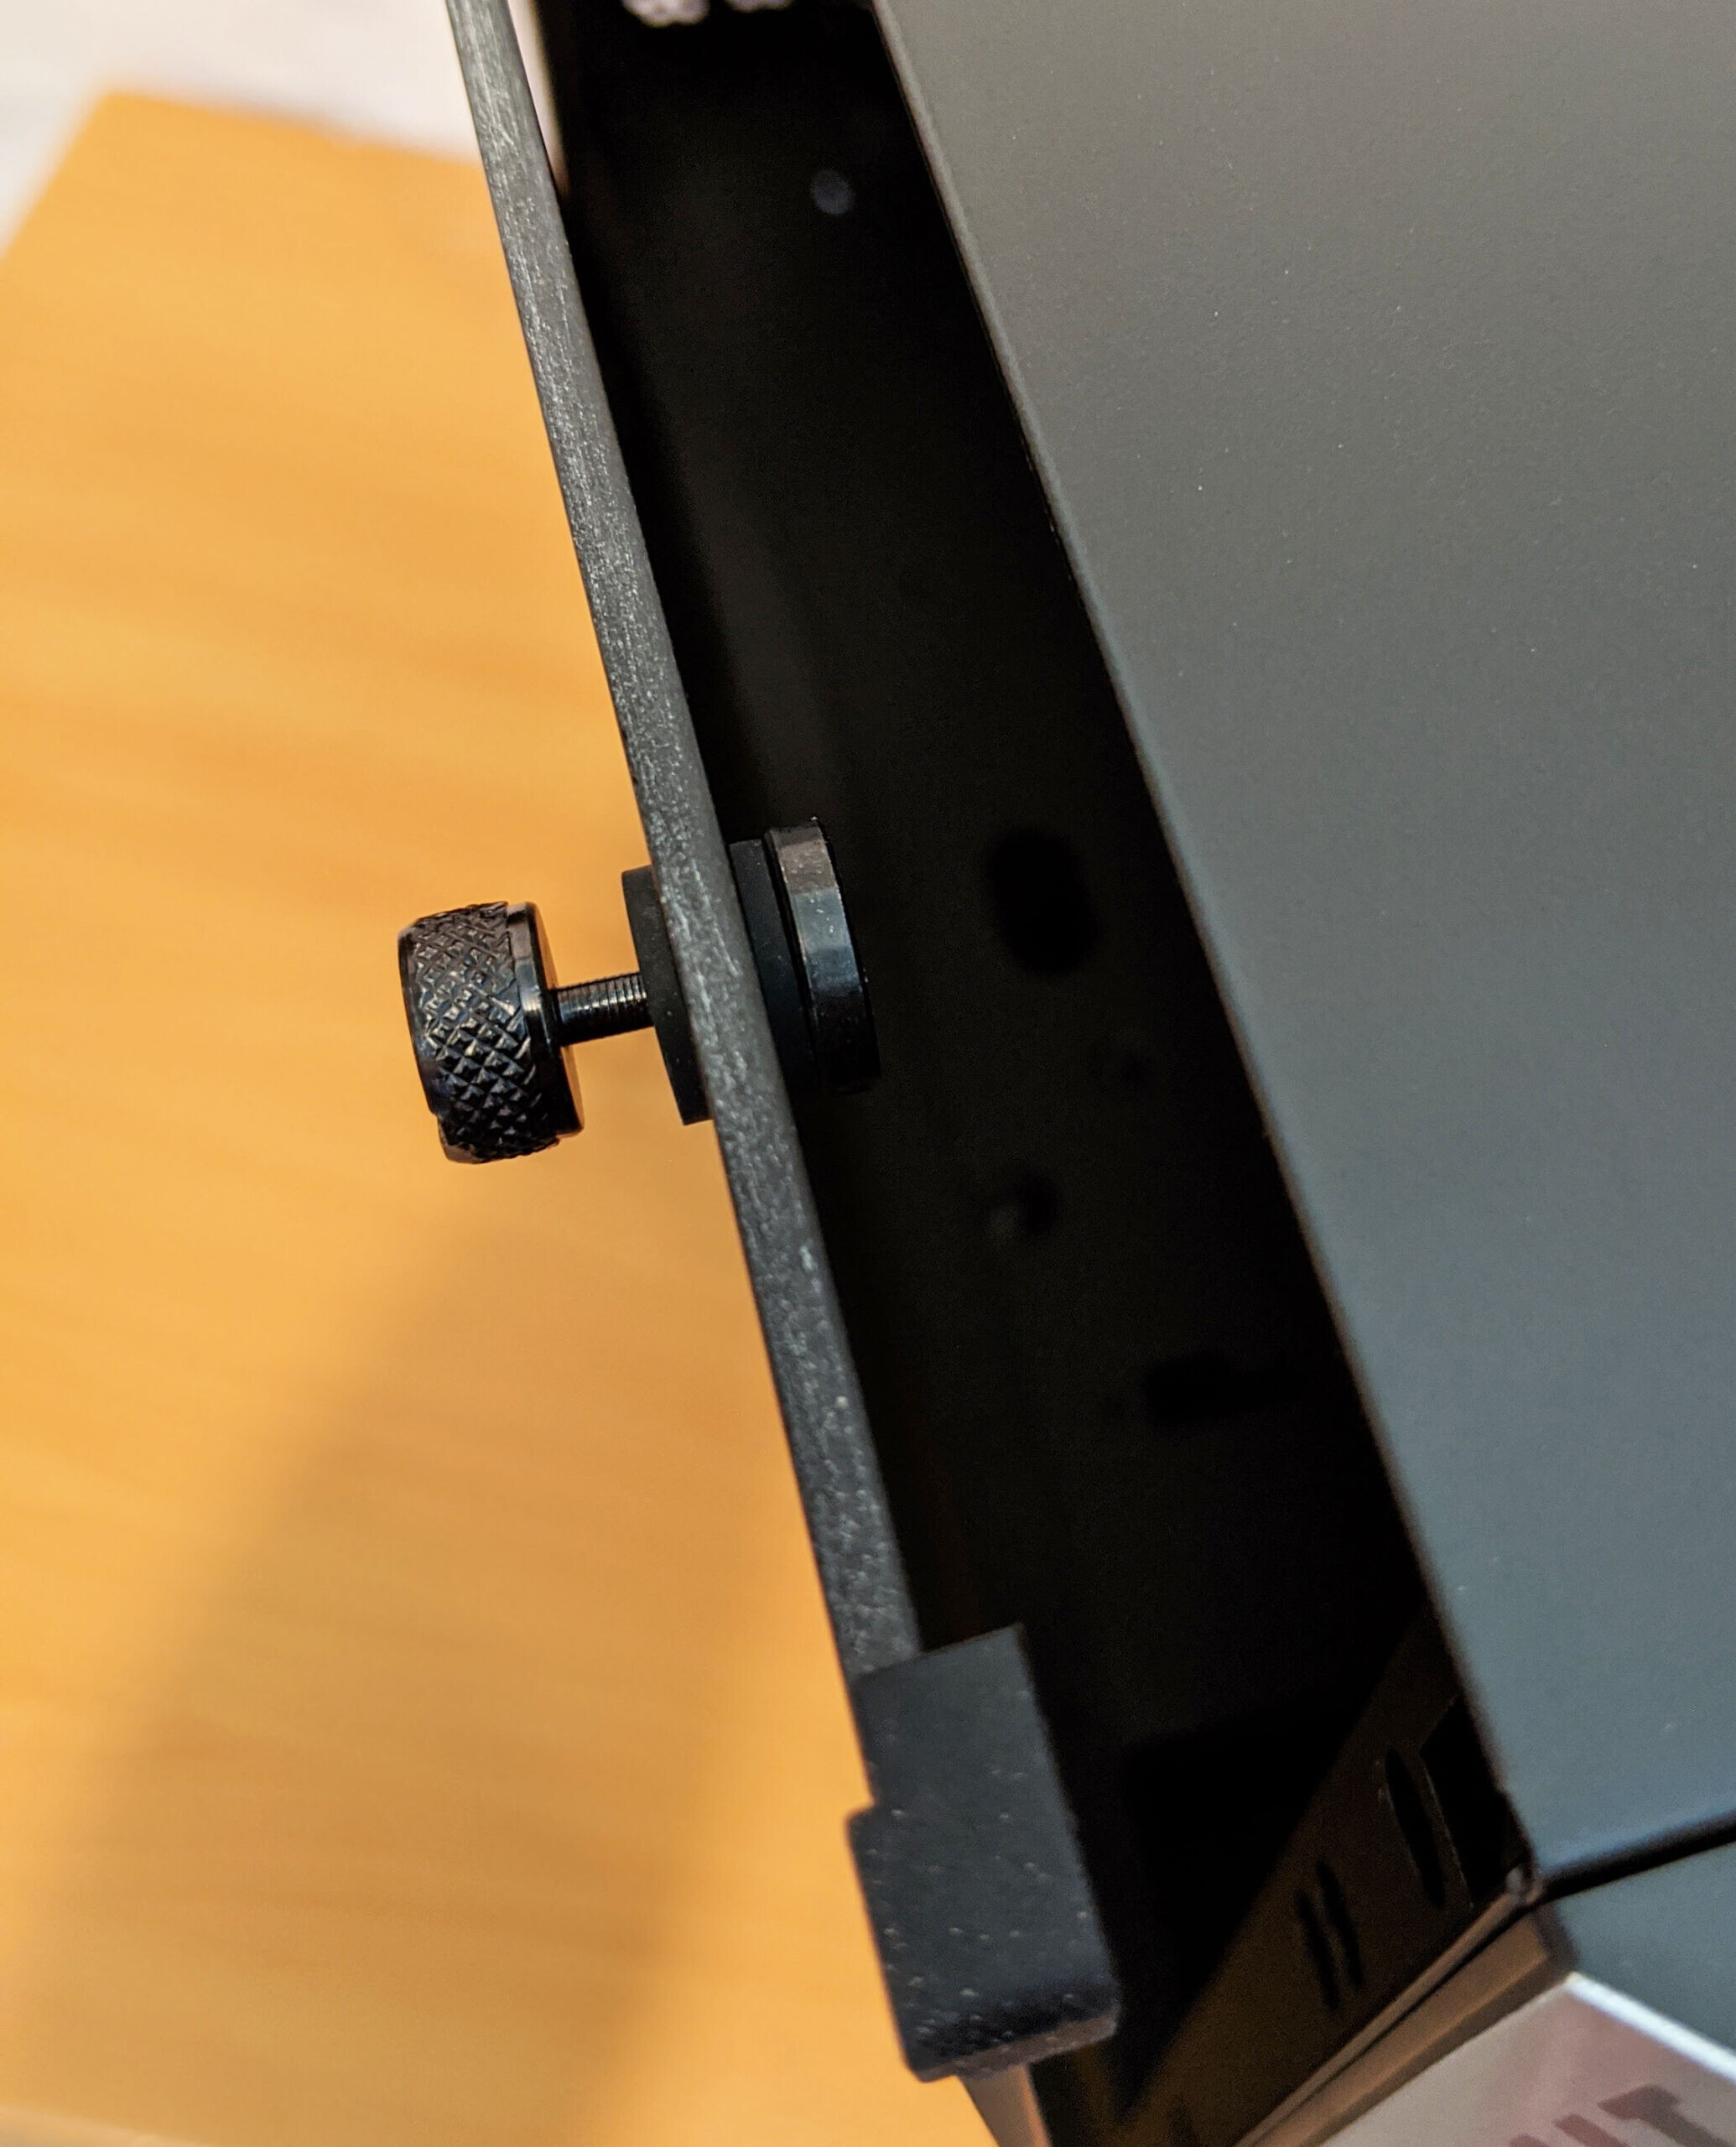
Both left and right side panels are held in place by two thumb screws located at the top. The panel is removed by unscrewing each which will allow the panel to tilt downwards to be then lifted out. The thumb screws on the tempered glass side come with a preinstalled rubber gasket to protect the glass.

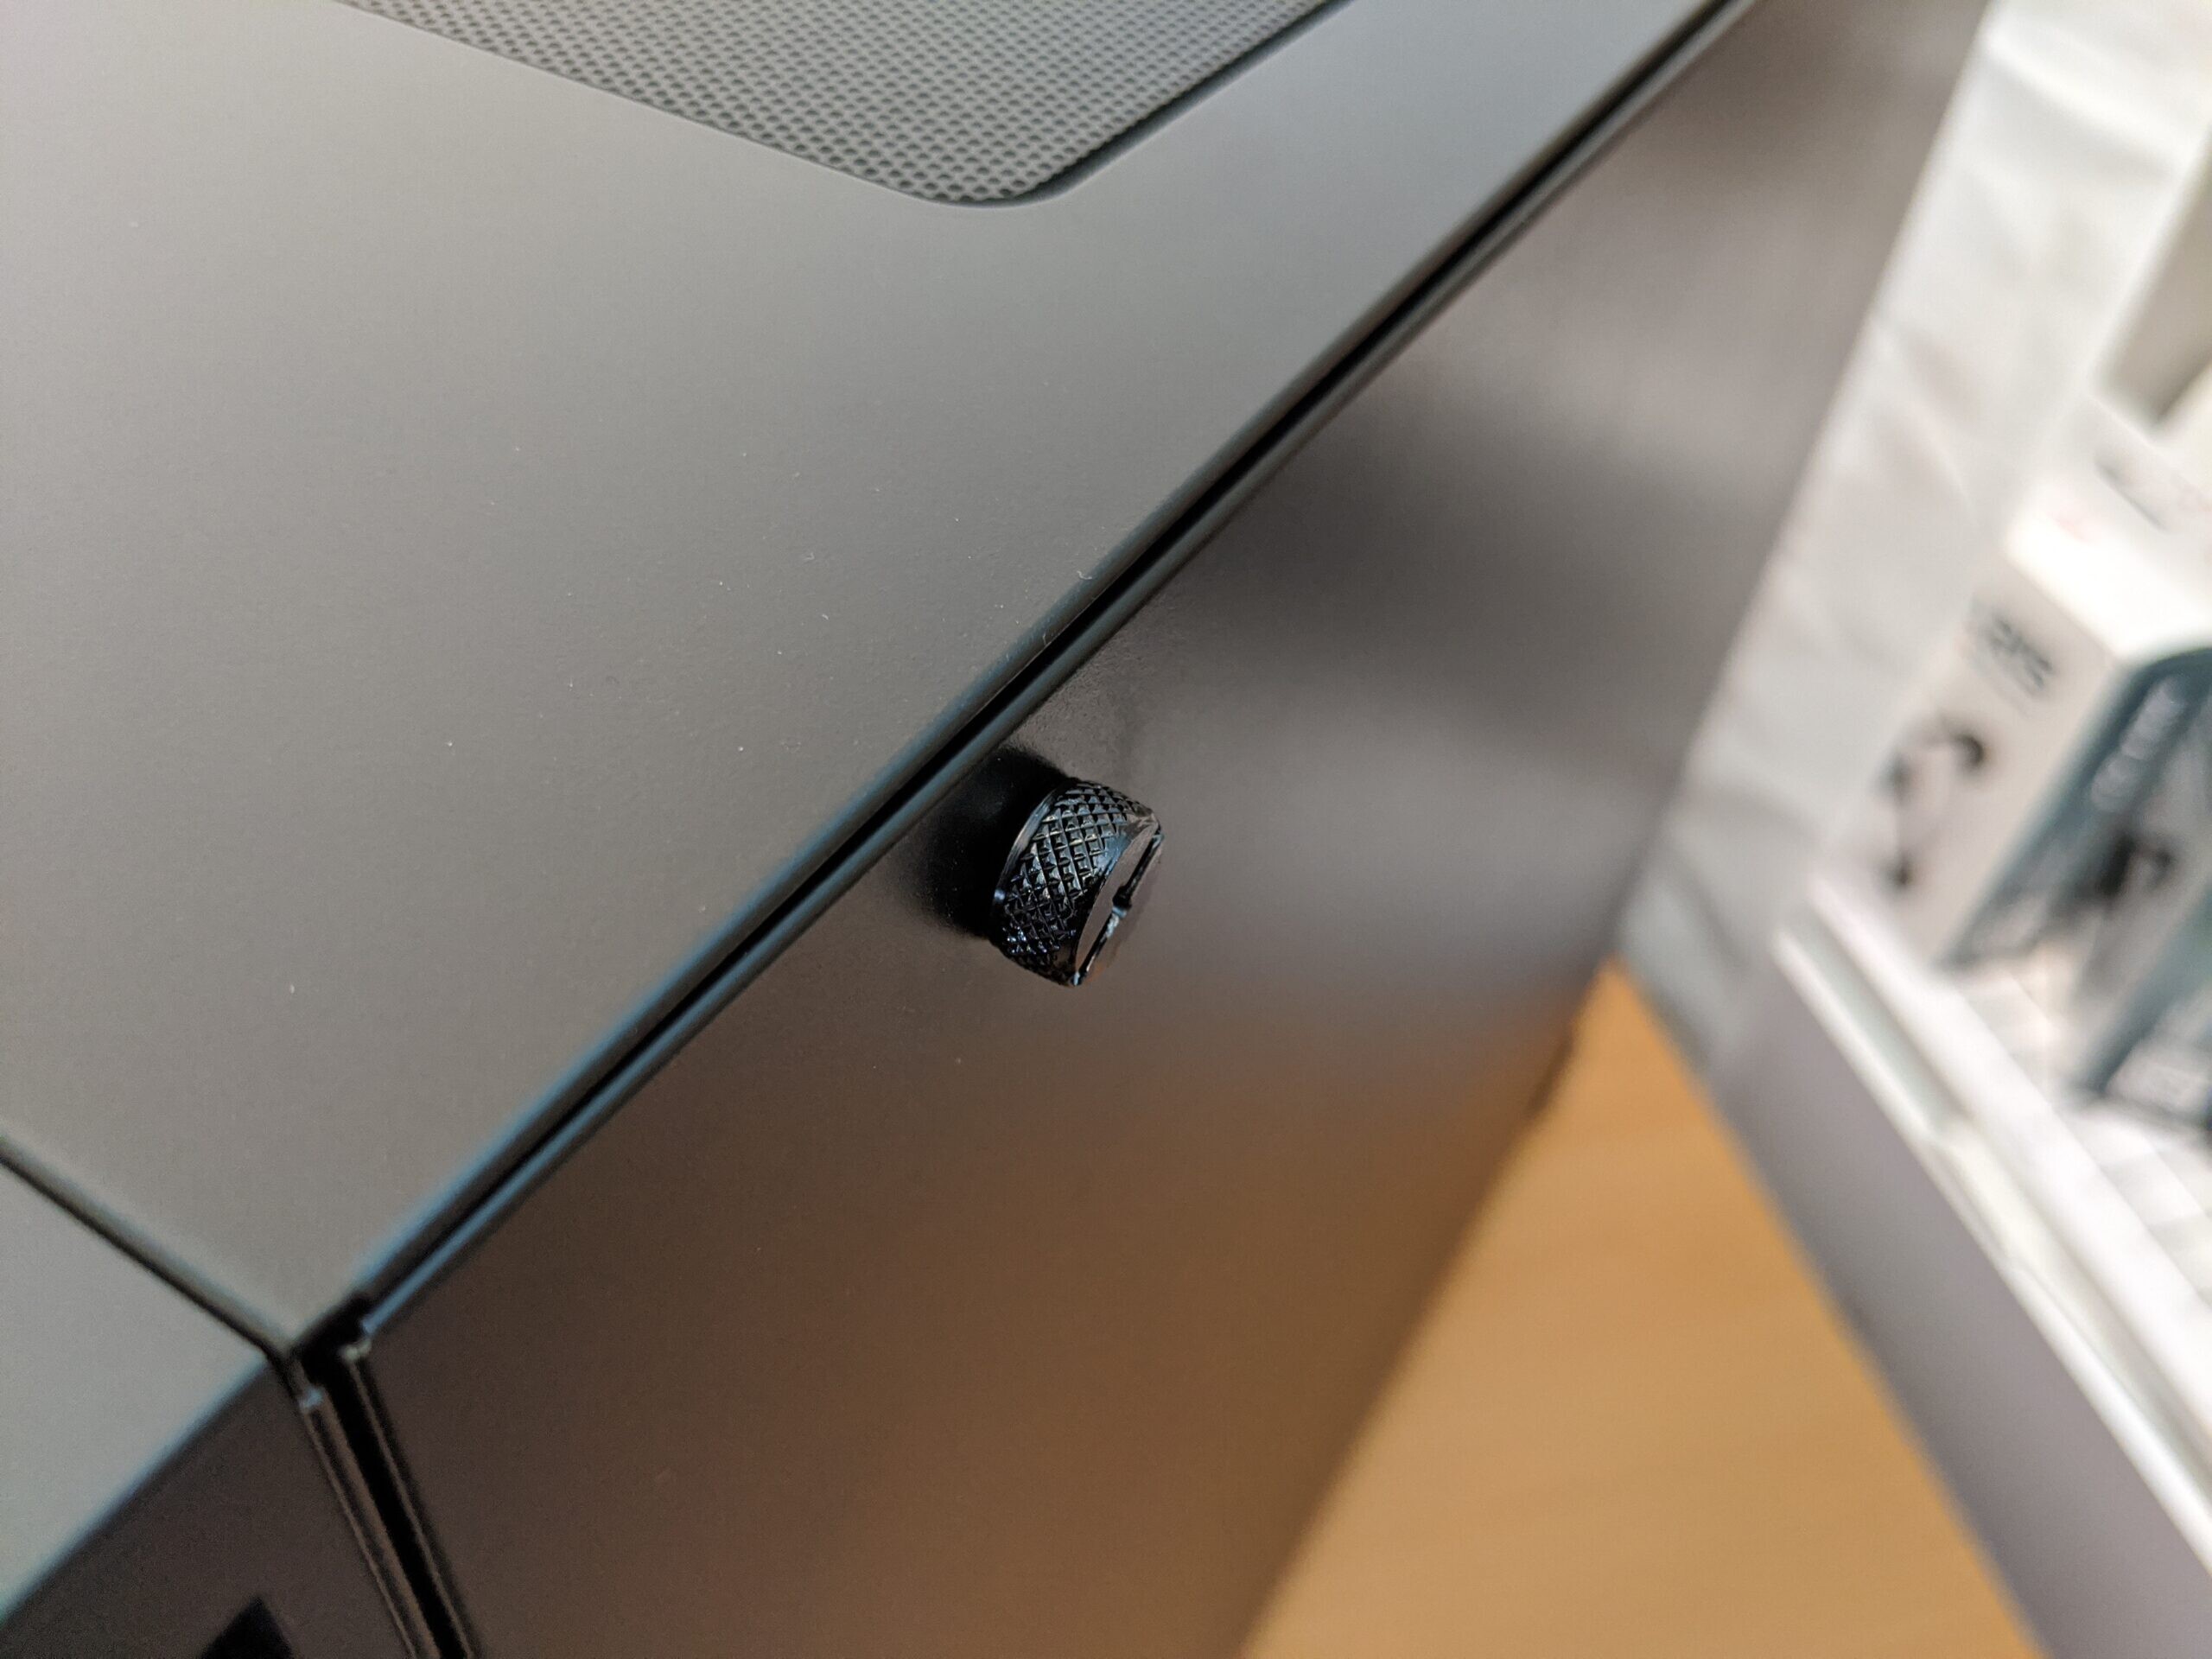
After unscrewing the tempered glass side panel you’ll notice that the panel is still held in place by a magnet attached to the end of each screw mount which should help prevent accidental mishaps. Very good move InWin! All four corners of the tempered glass panel are also protected by plastic covers. As with any tempered glass panel, the corners are considered weak points which if banged or dinged could cause the entire panel to shatter.
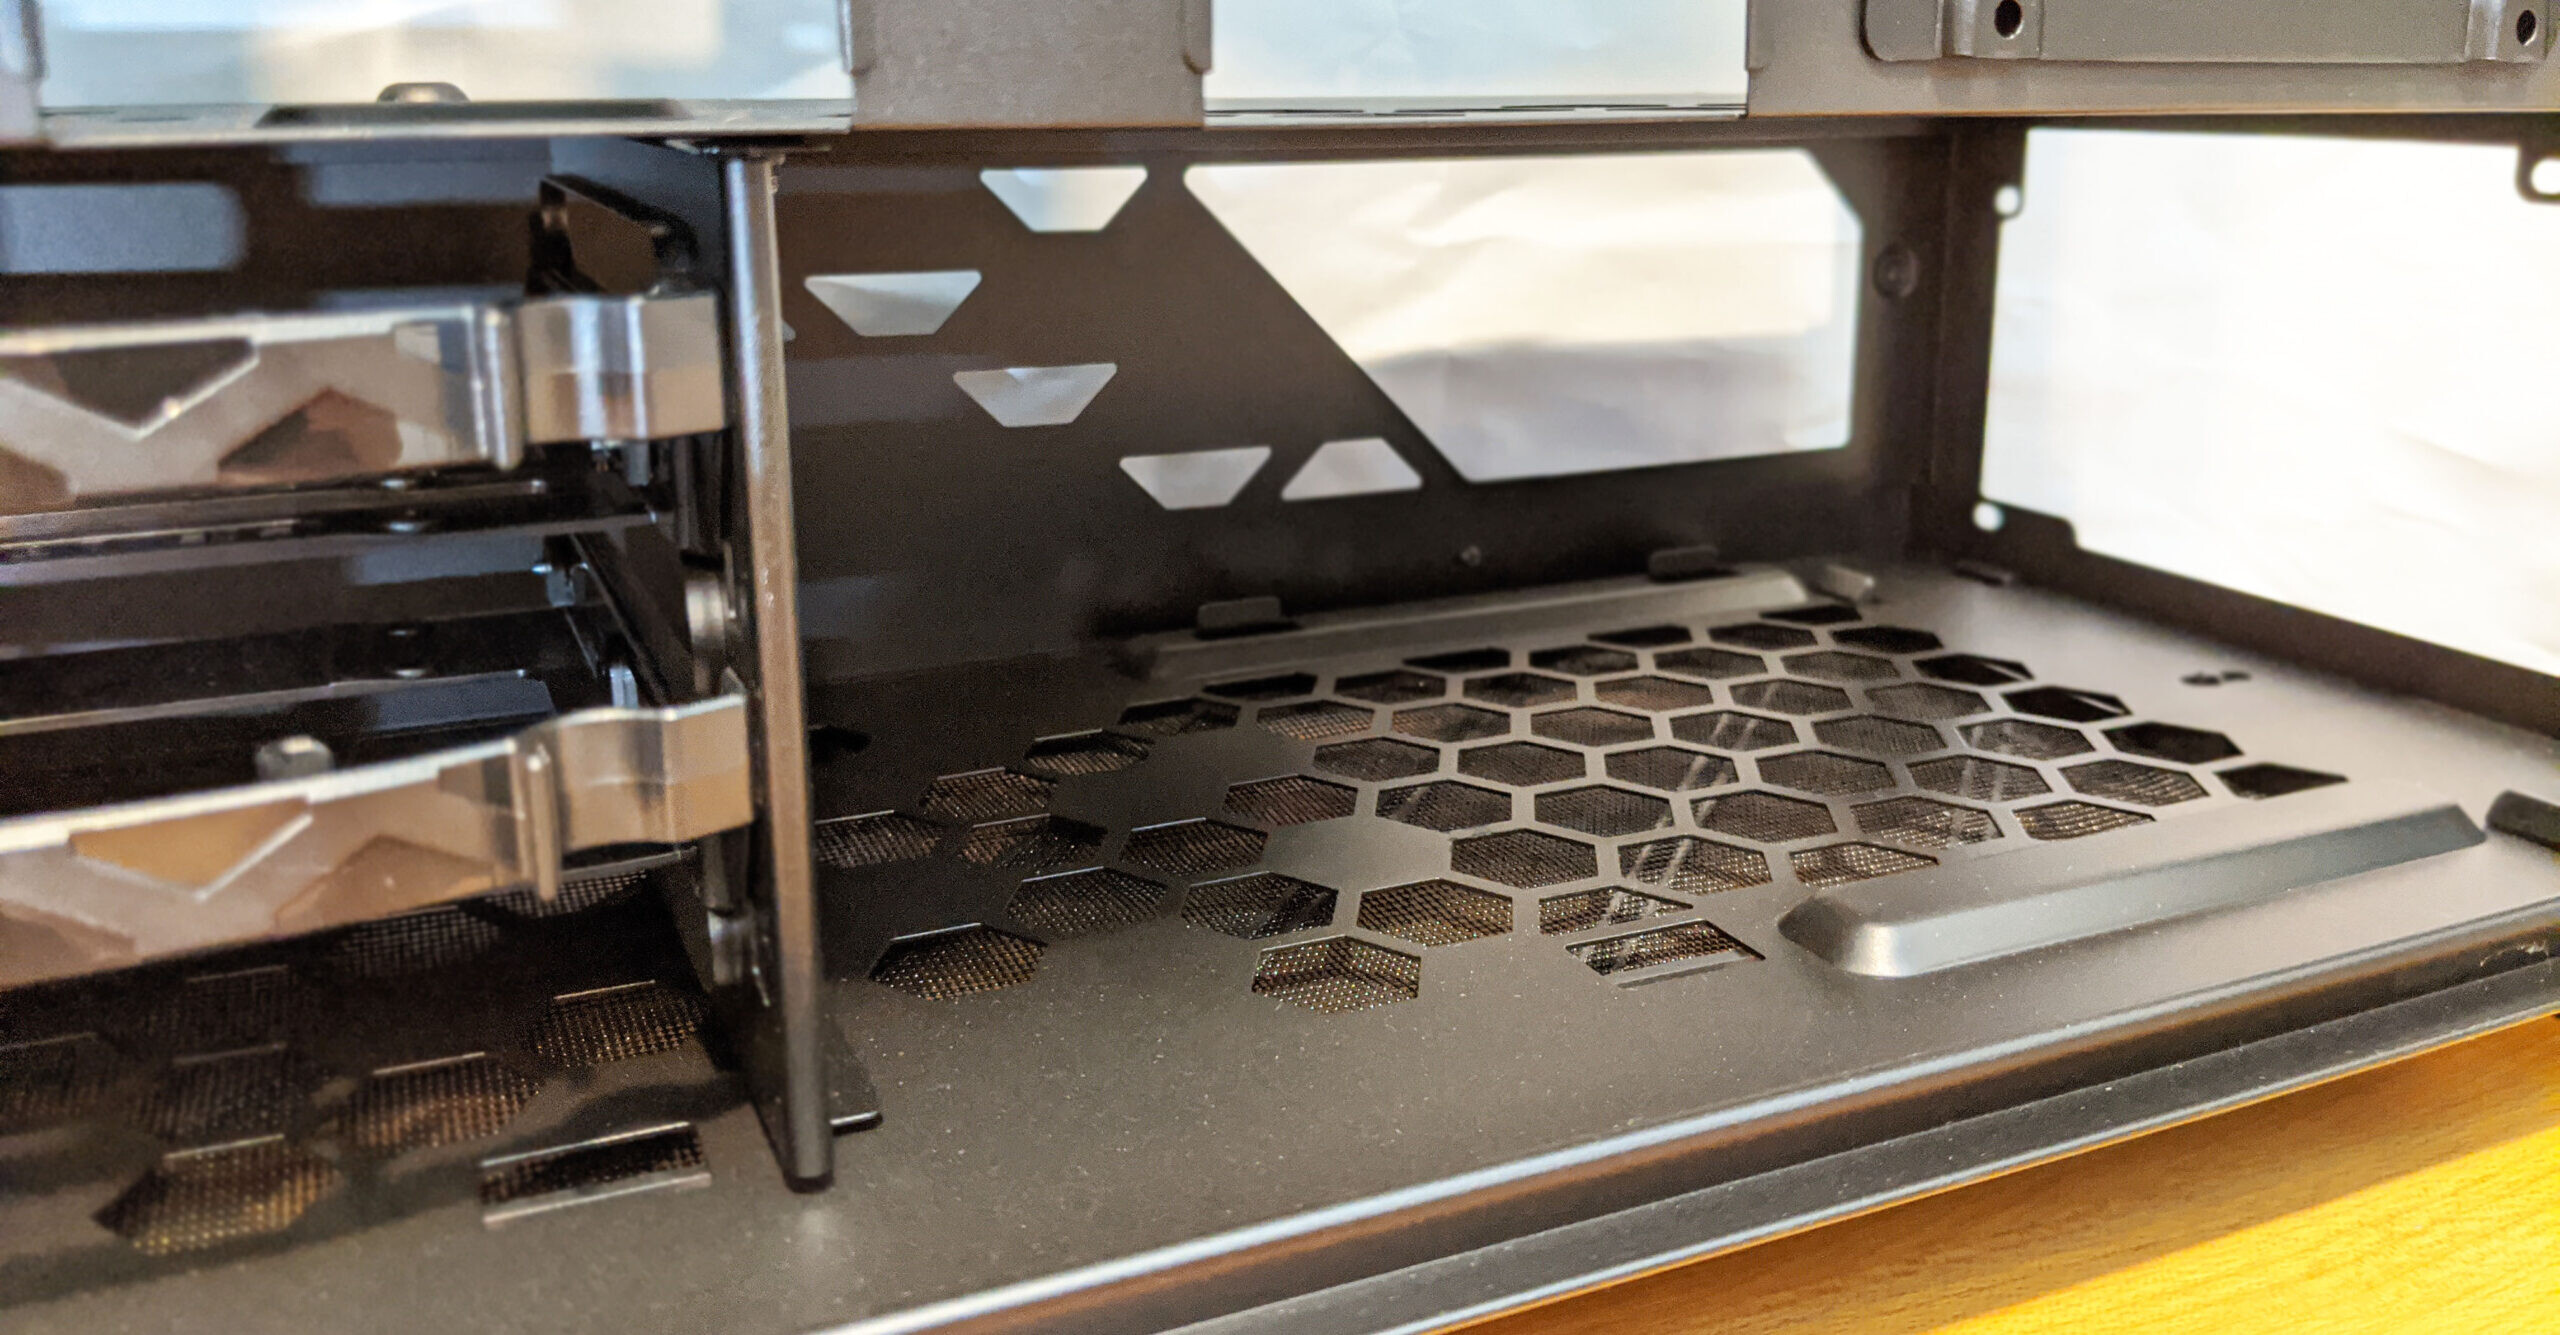
Underneath the chassis is where you’ll find a bottom removable dust filter. The bottom ports are passive and don’t have any direct fan mounts and are designed to draw in cool air from underneath the case. This leads me to think that this case might work better with a bit of negative pressure in order to utilize the under-mounted filters correctly as most PSU fans probably won’t bring in enough air from the bottom on its own.
A Closer Look: Interior
With the side panel removed we get a better view of the InWin 216’s interior configuration. The chassis features the typical split level design we see on most modern cases with the PSU and HDD trays positioned at the bottom, partitioned off from the rest of the internals.

Here’s a better look at how the dust filter is easily removed. Simply reach under from the left side of the chassis and slide it out. Open ports pretty much span the entire underside which should aid in cooling the PSU and the two HDDs.

Here are some shots of the left and right side of the interior. Here you’re able to see the large dust filter on the intake side.


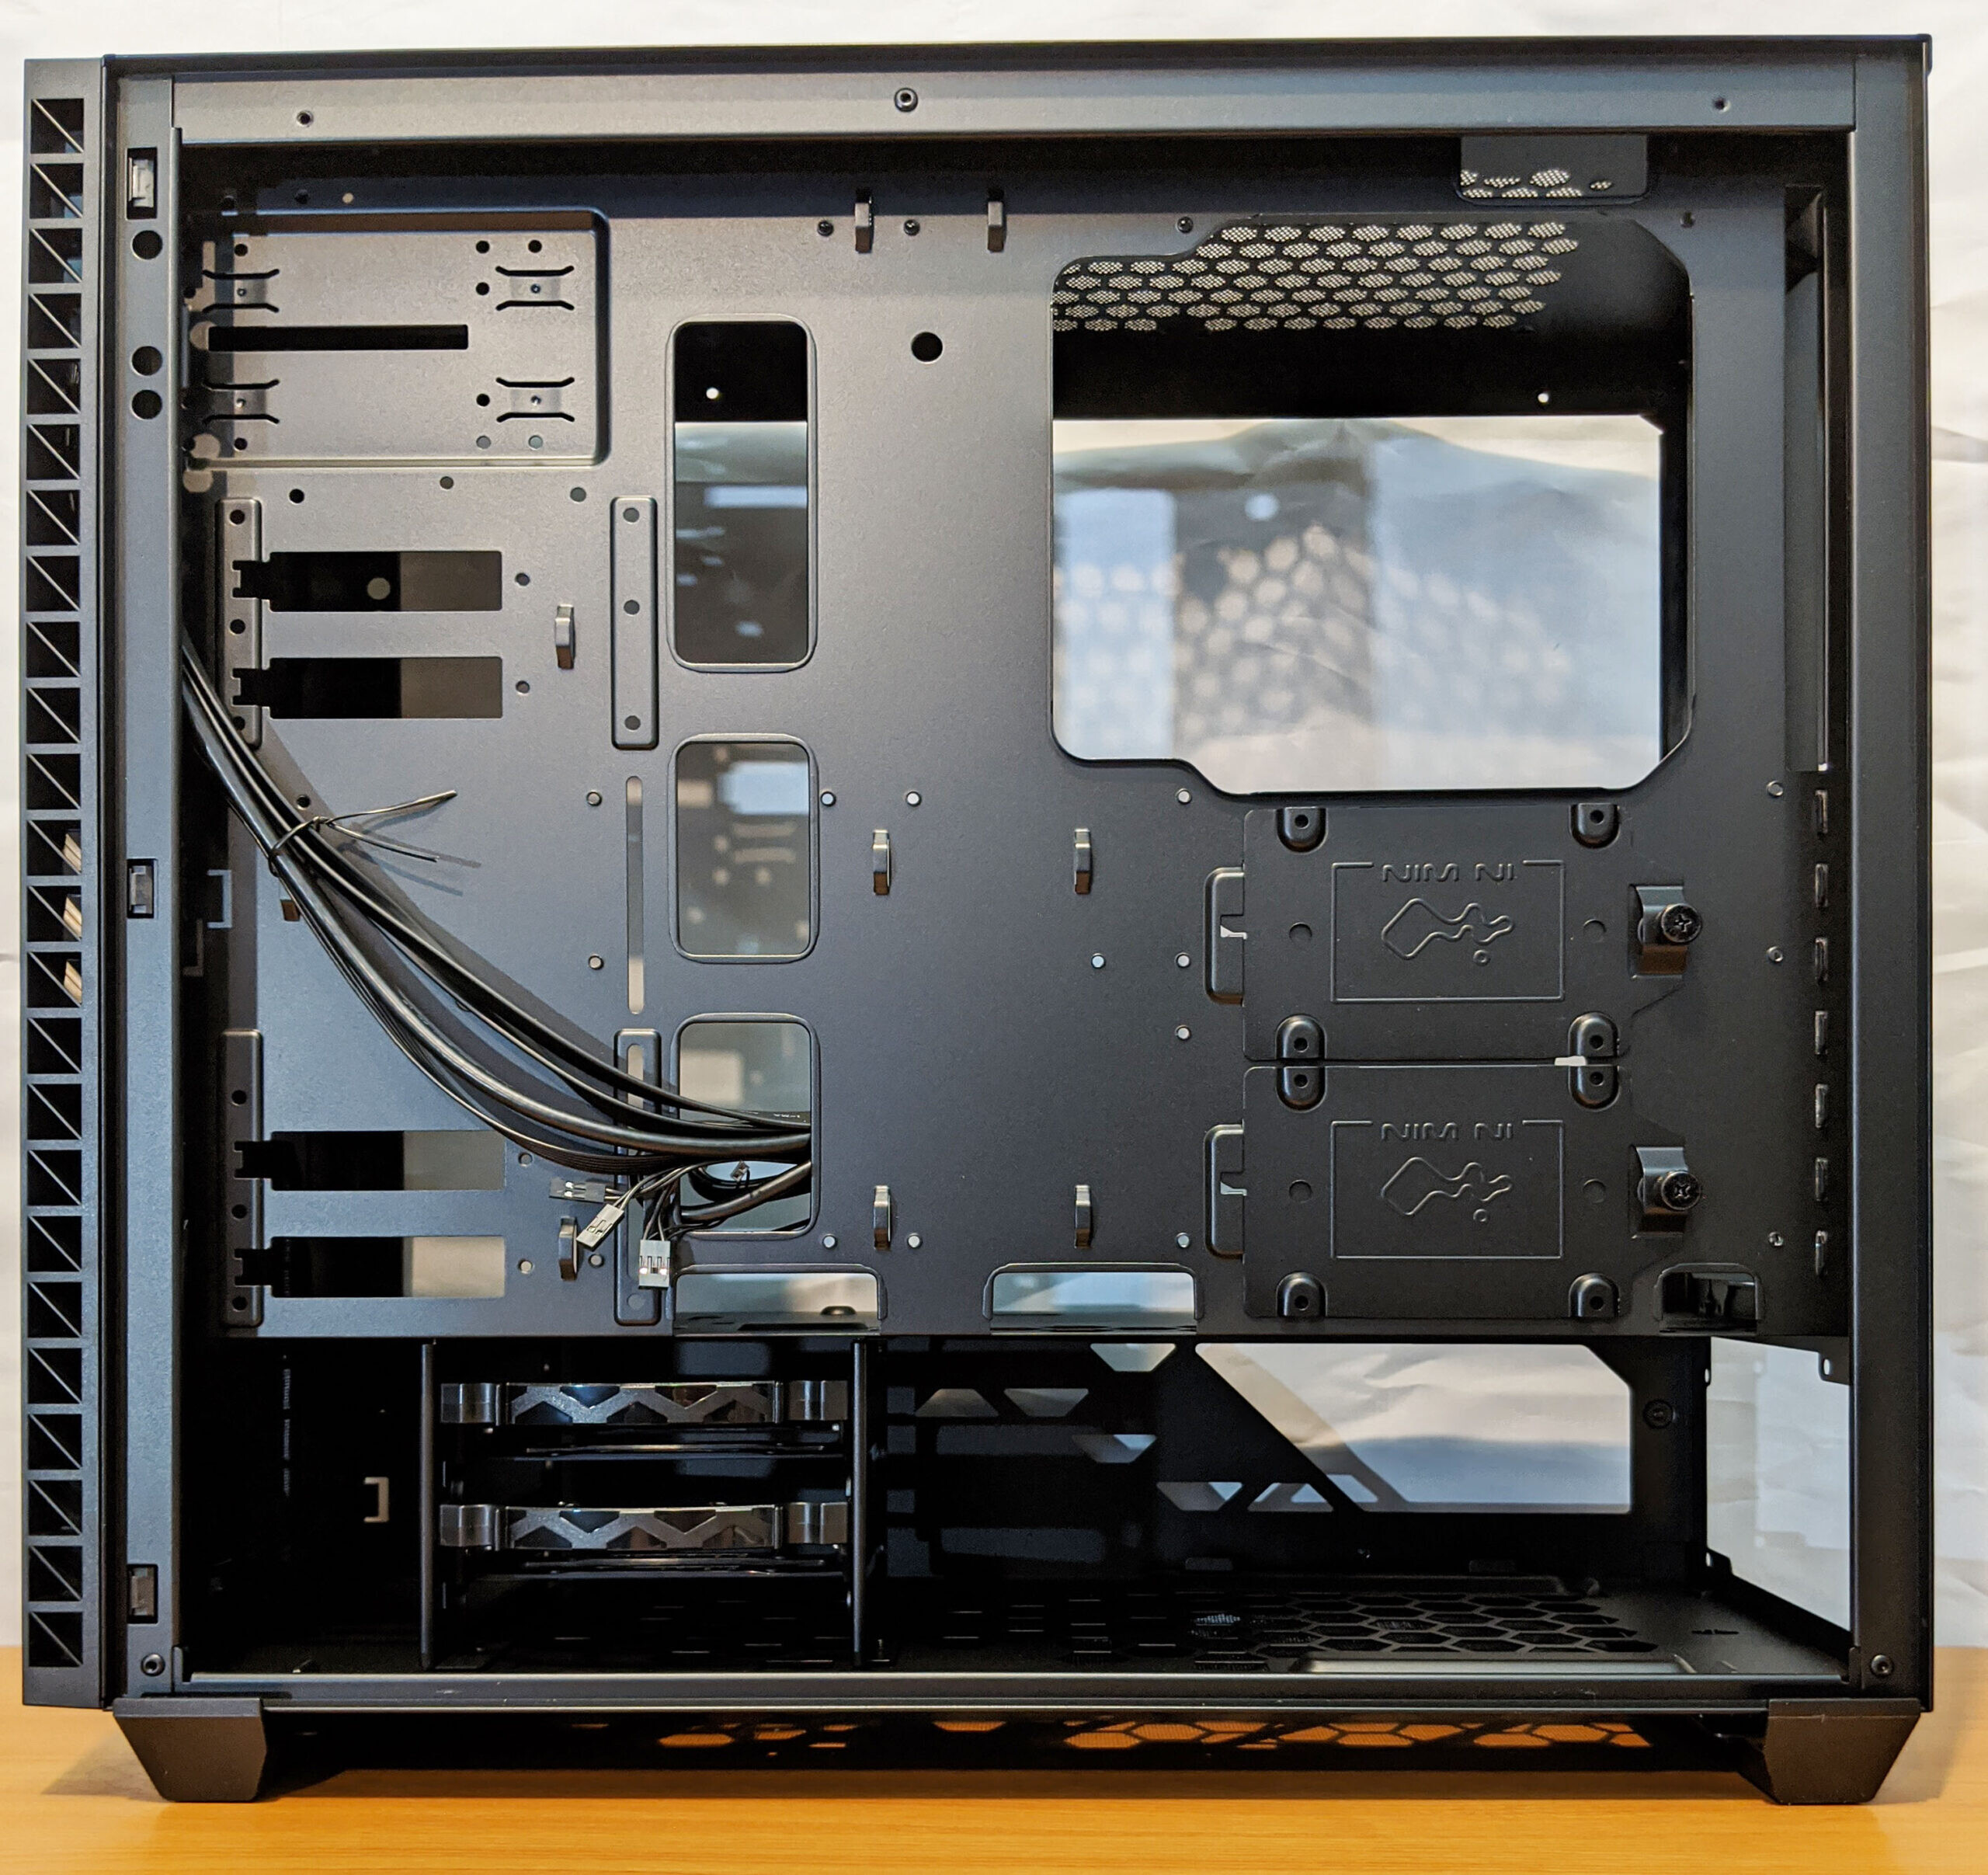
Flipping things around, the back side is pretty standard to other cases we’ve reviewed in the past. InWin did provide plenty of cable management options for routing ports through the right, top and bottom sides of the motherboard as well as zip/cable tie mount points for keeping the rear area tidy. Below the large CPU cooler mount port there are two 2.5″ SSD mount trays that are easily removed and reattached by a single thumb screw.
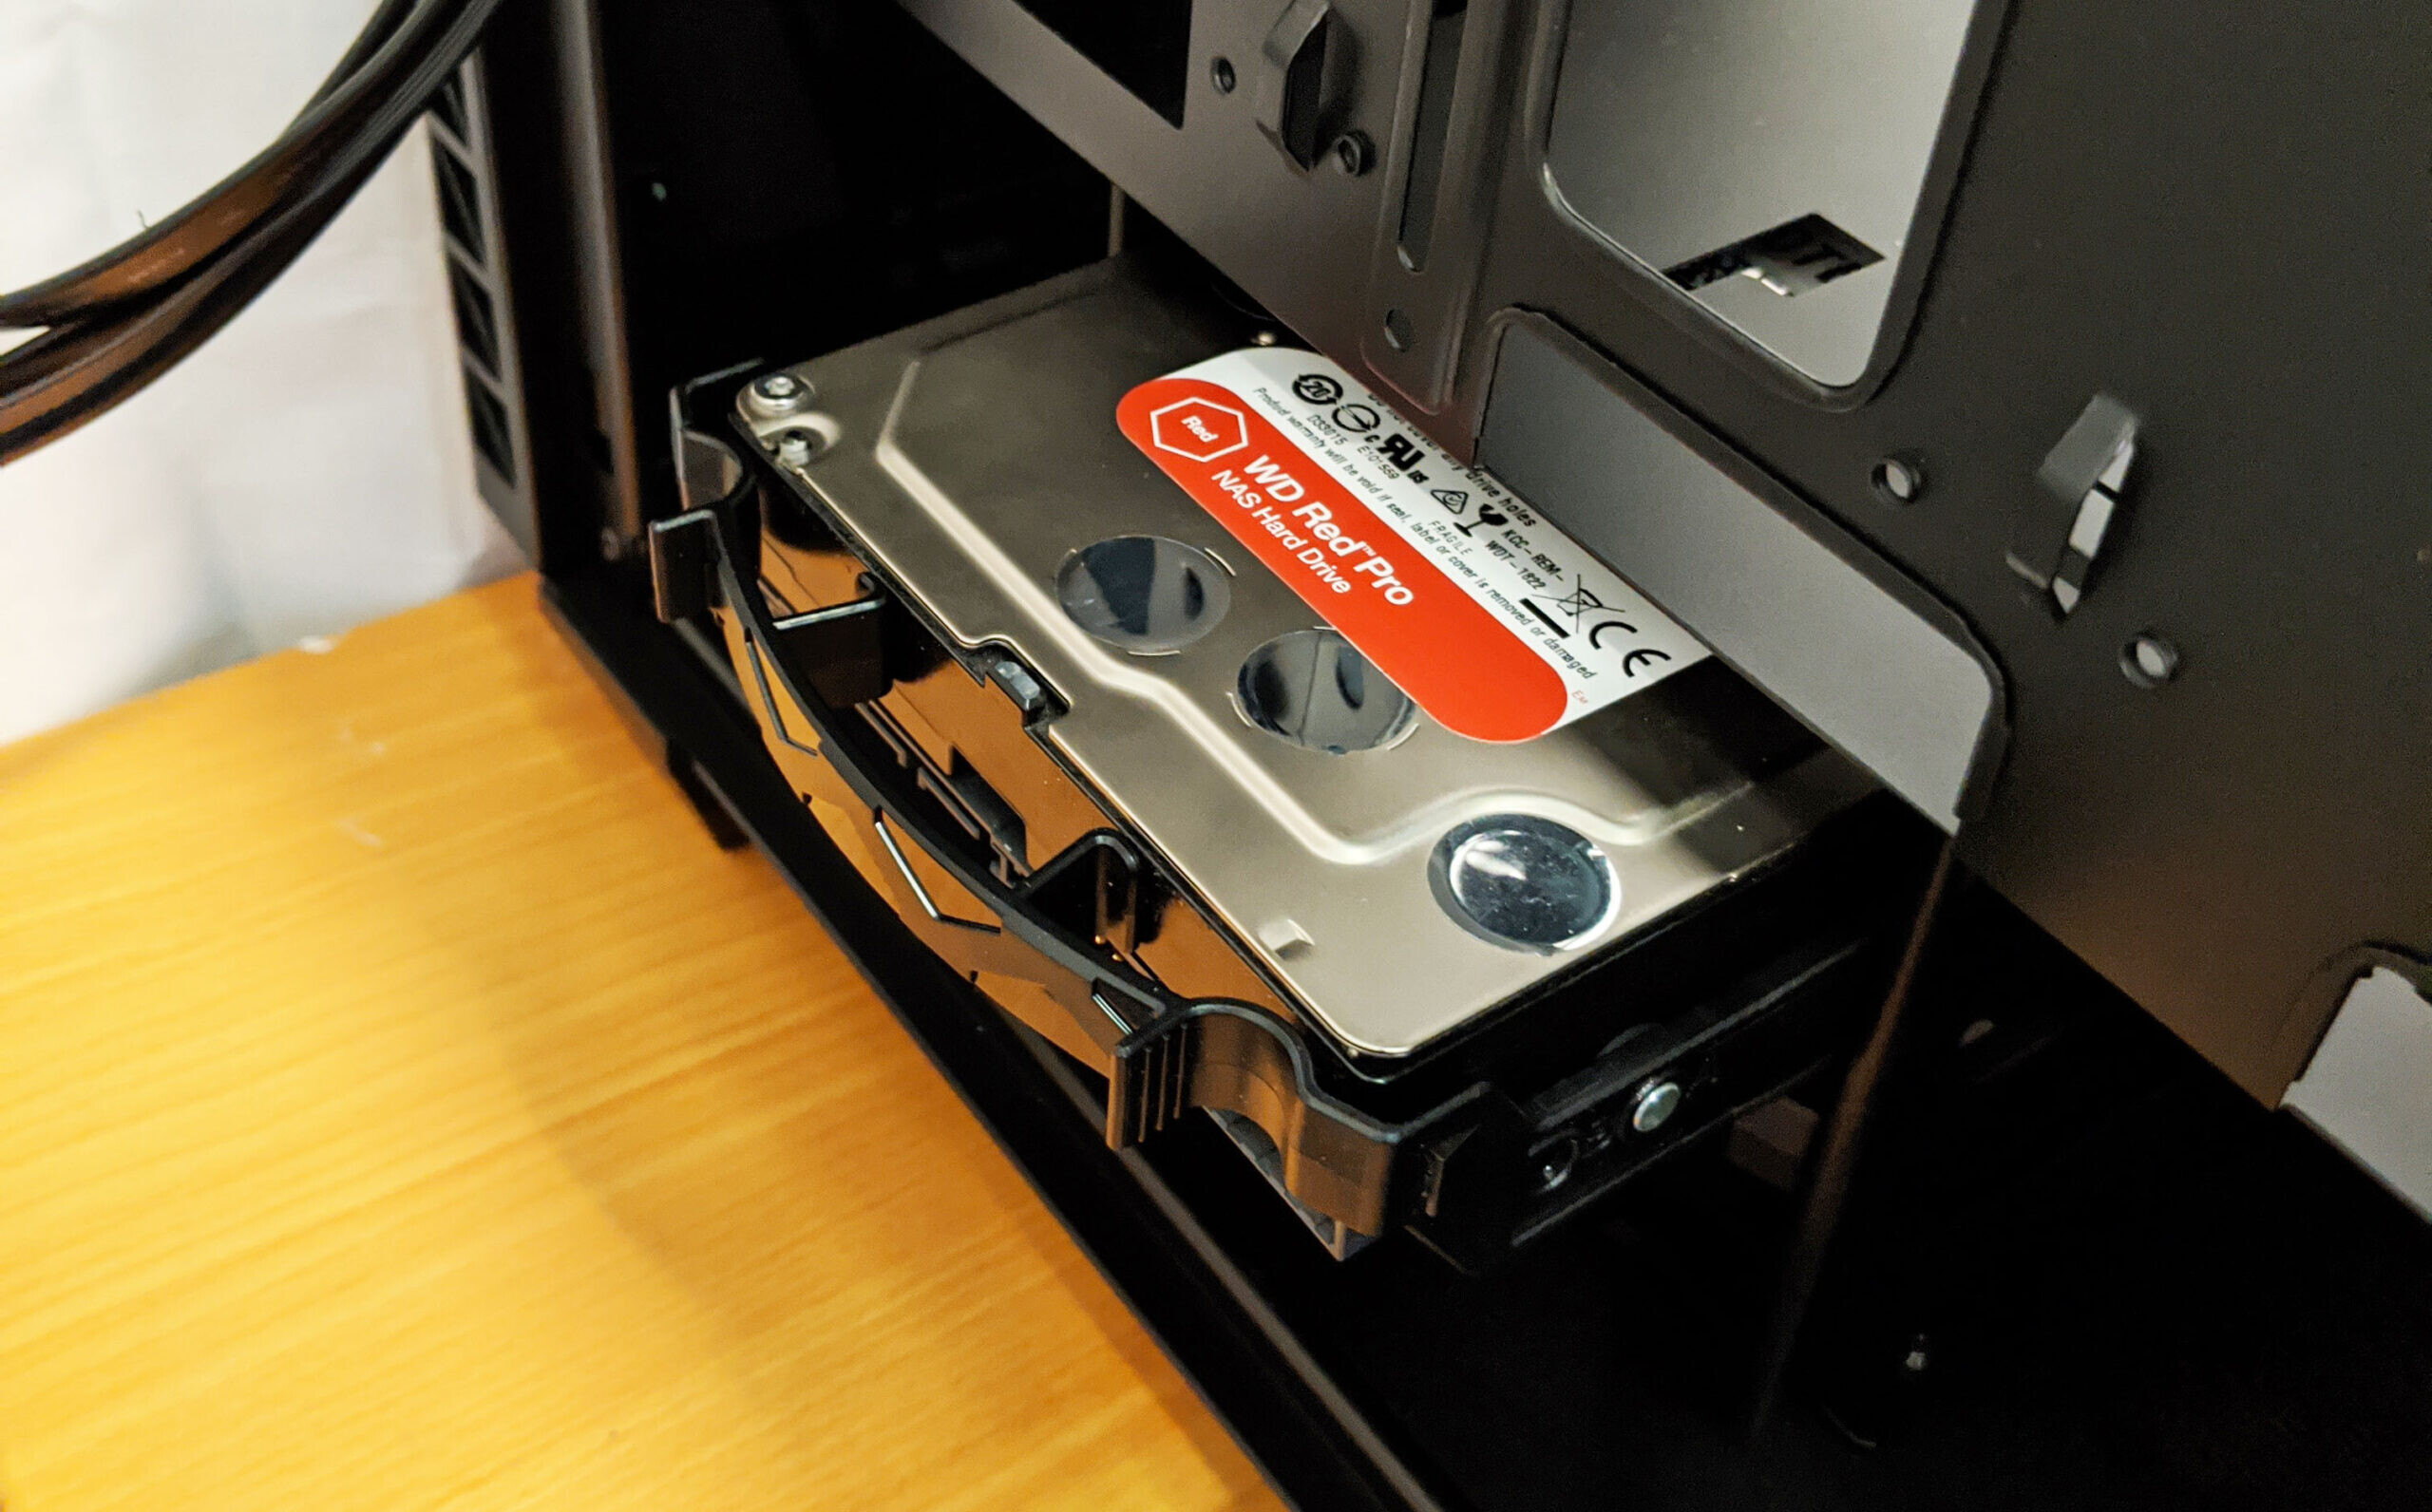
Below that is where you’ll mount your PSU (mount from inside) and to the left of that are two removable 3.5″ HDD trays.
Here’s a better look at the PSU mount. as you can see it should stand off the chassis a bit by the two parallel rails on either side. Be sure to install the PSU fan side down to leverage the cool filtered air from under the chassis.
To mount a 2.5″ SSD, simply remove the single thumb screw, attach the plate to the SSD using the four provided screws, and reattach. Simple enough!

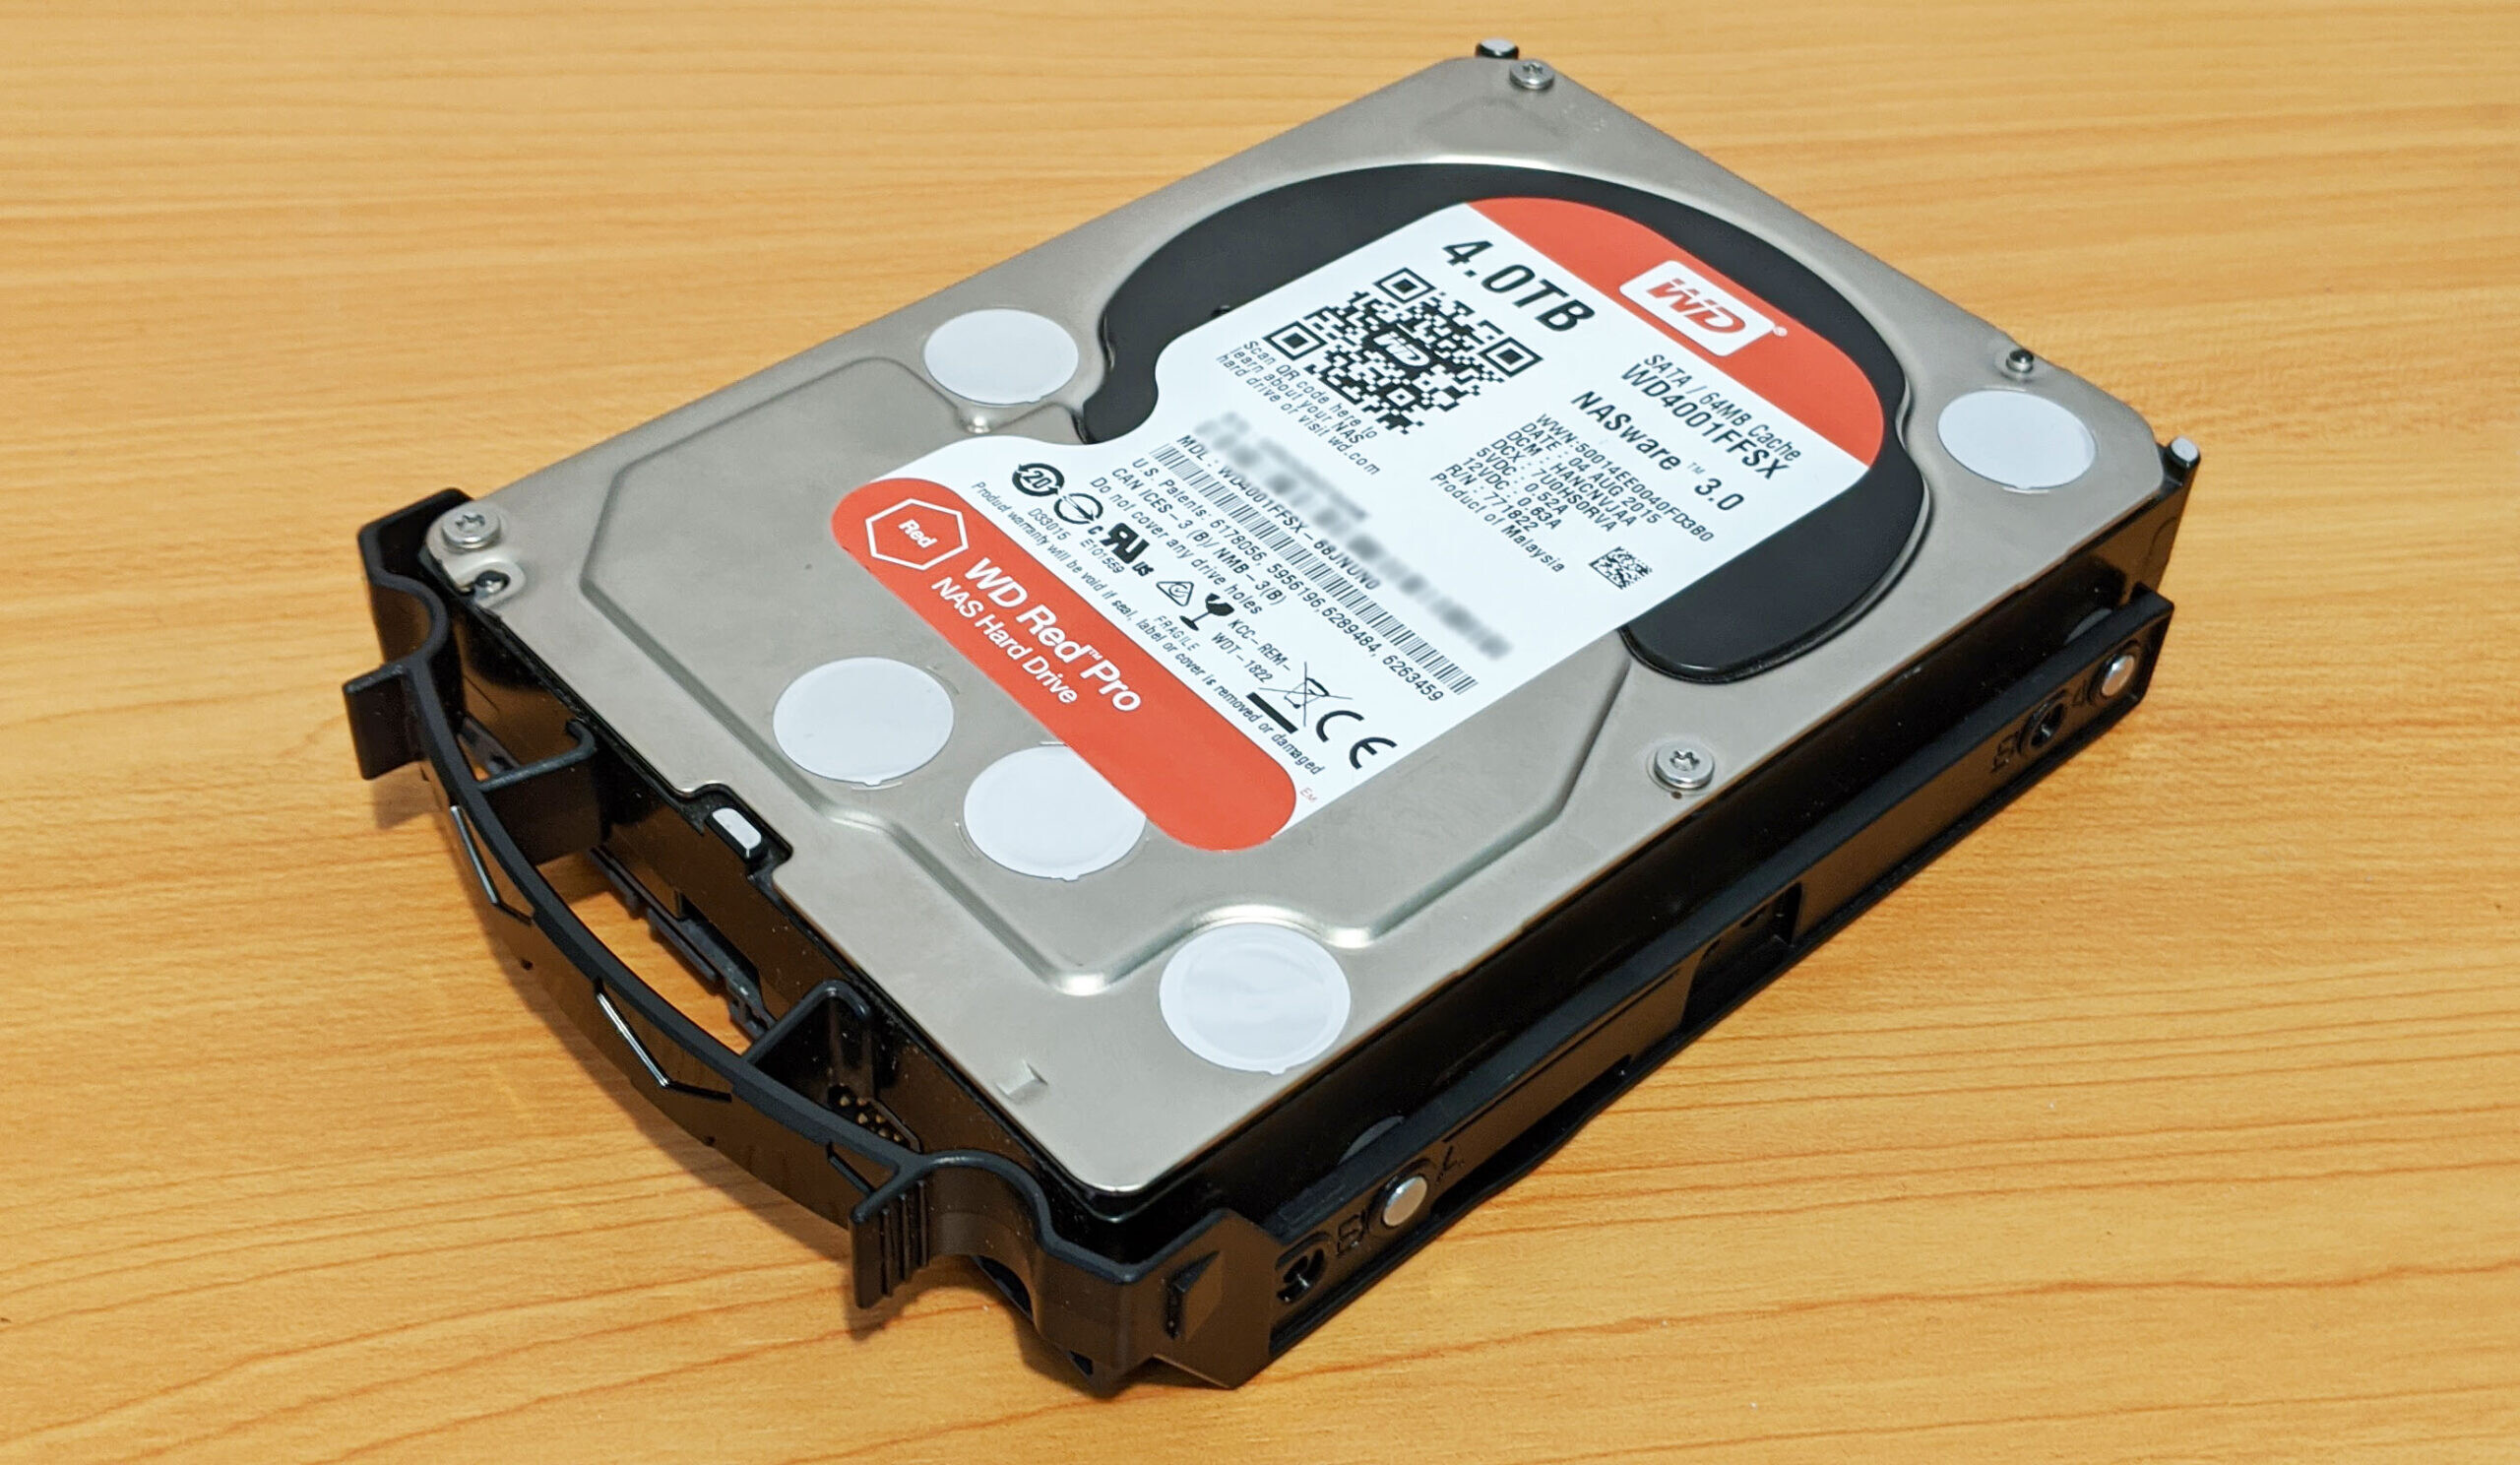
Just to the left of the PSU mount are the two removable 3.5″ HHD trays.

Installation of a HDD into the case is pretty easy as well. The plastic tray is pliable enough to snap around a HDD. Be sure to have your ports facing towards the handle so you’ll have access to them once reinstalled!
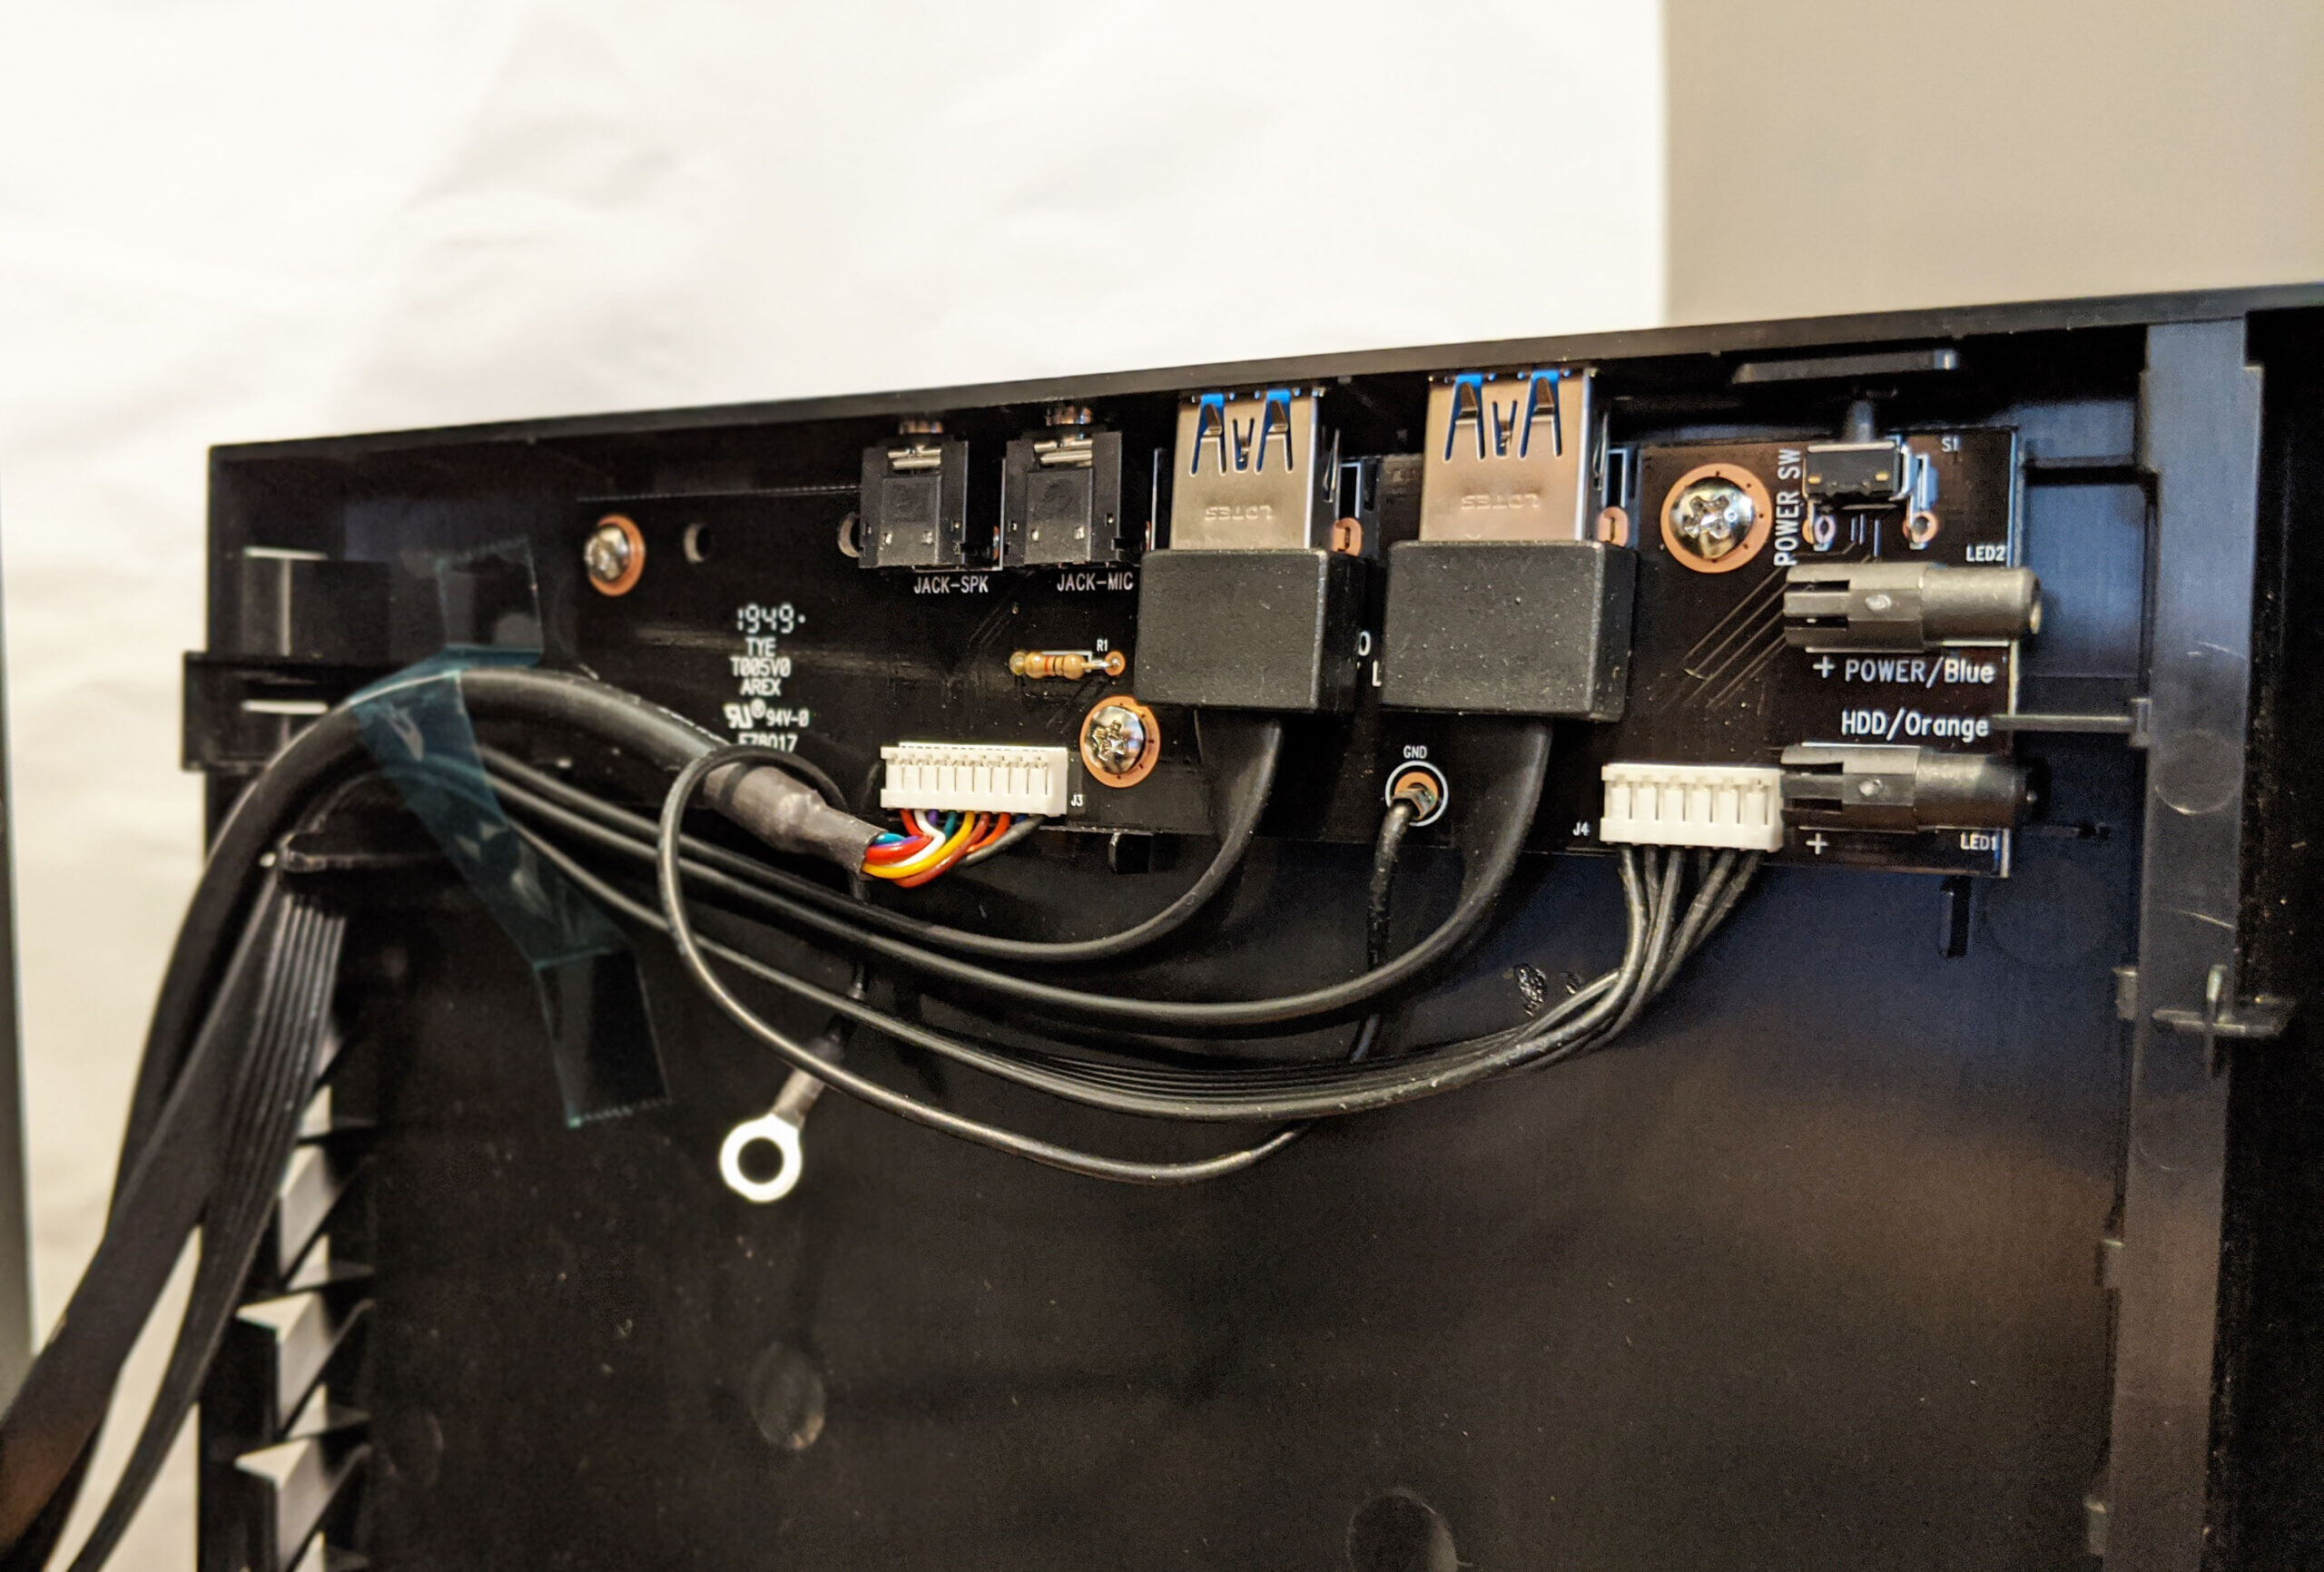
The front I/O hookups are clearly labeled and provide a few compatibility options for different motherboard configurations.

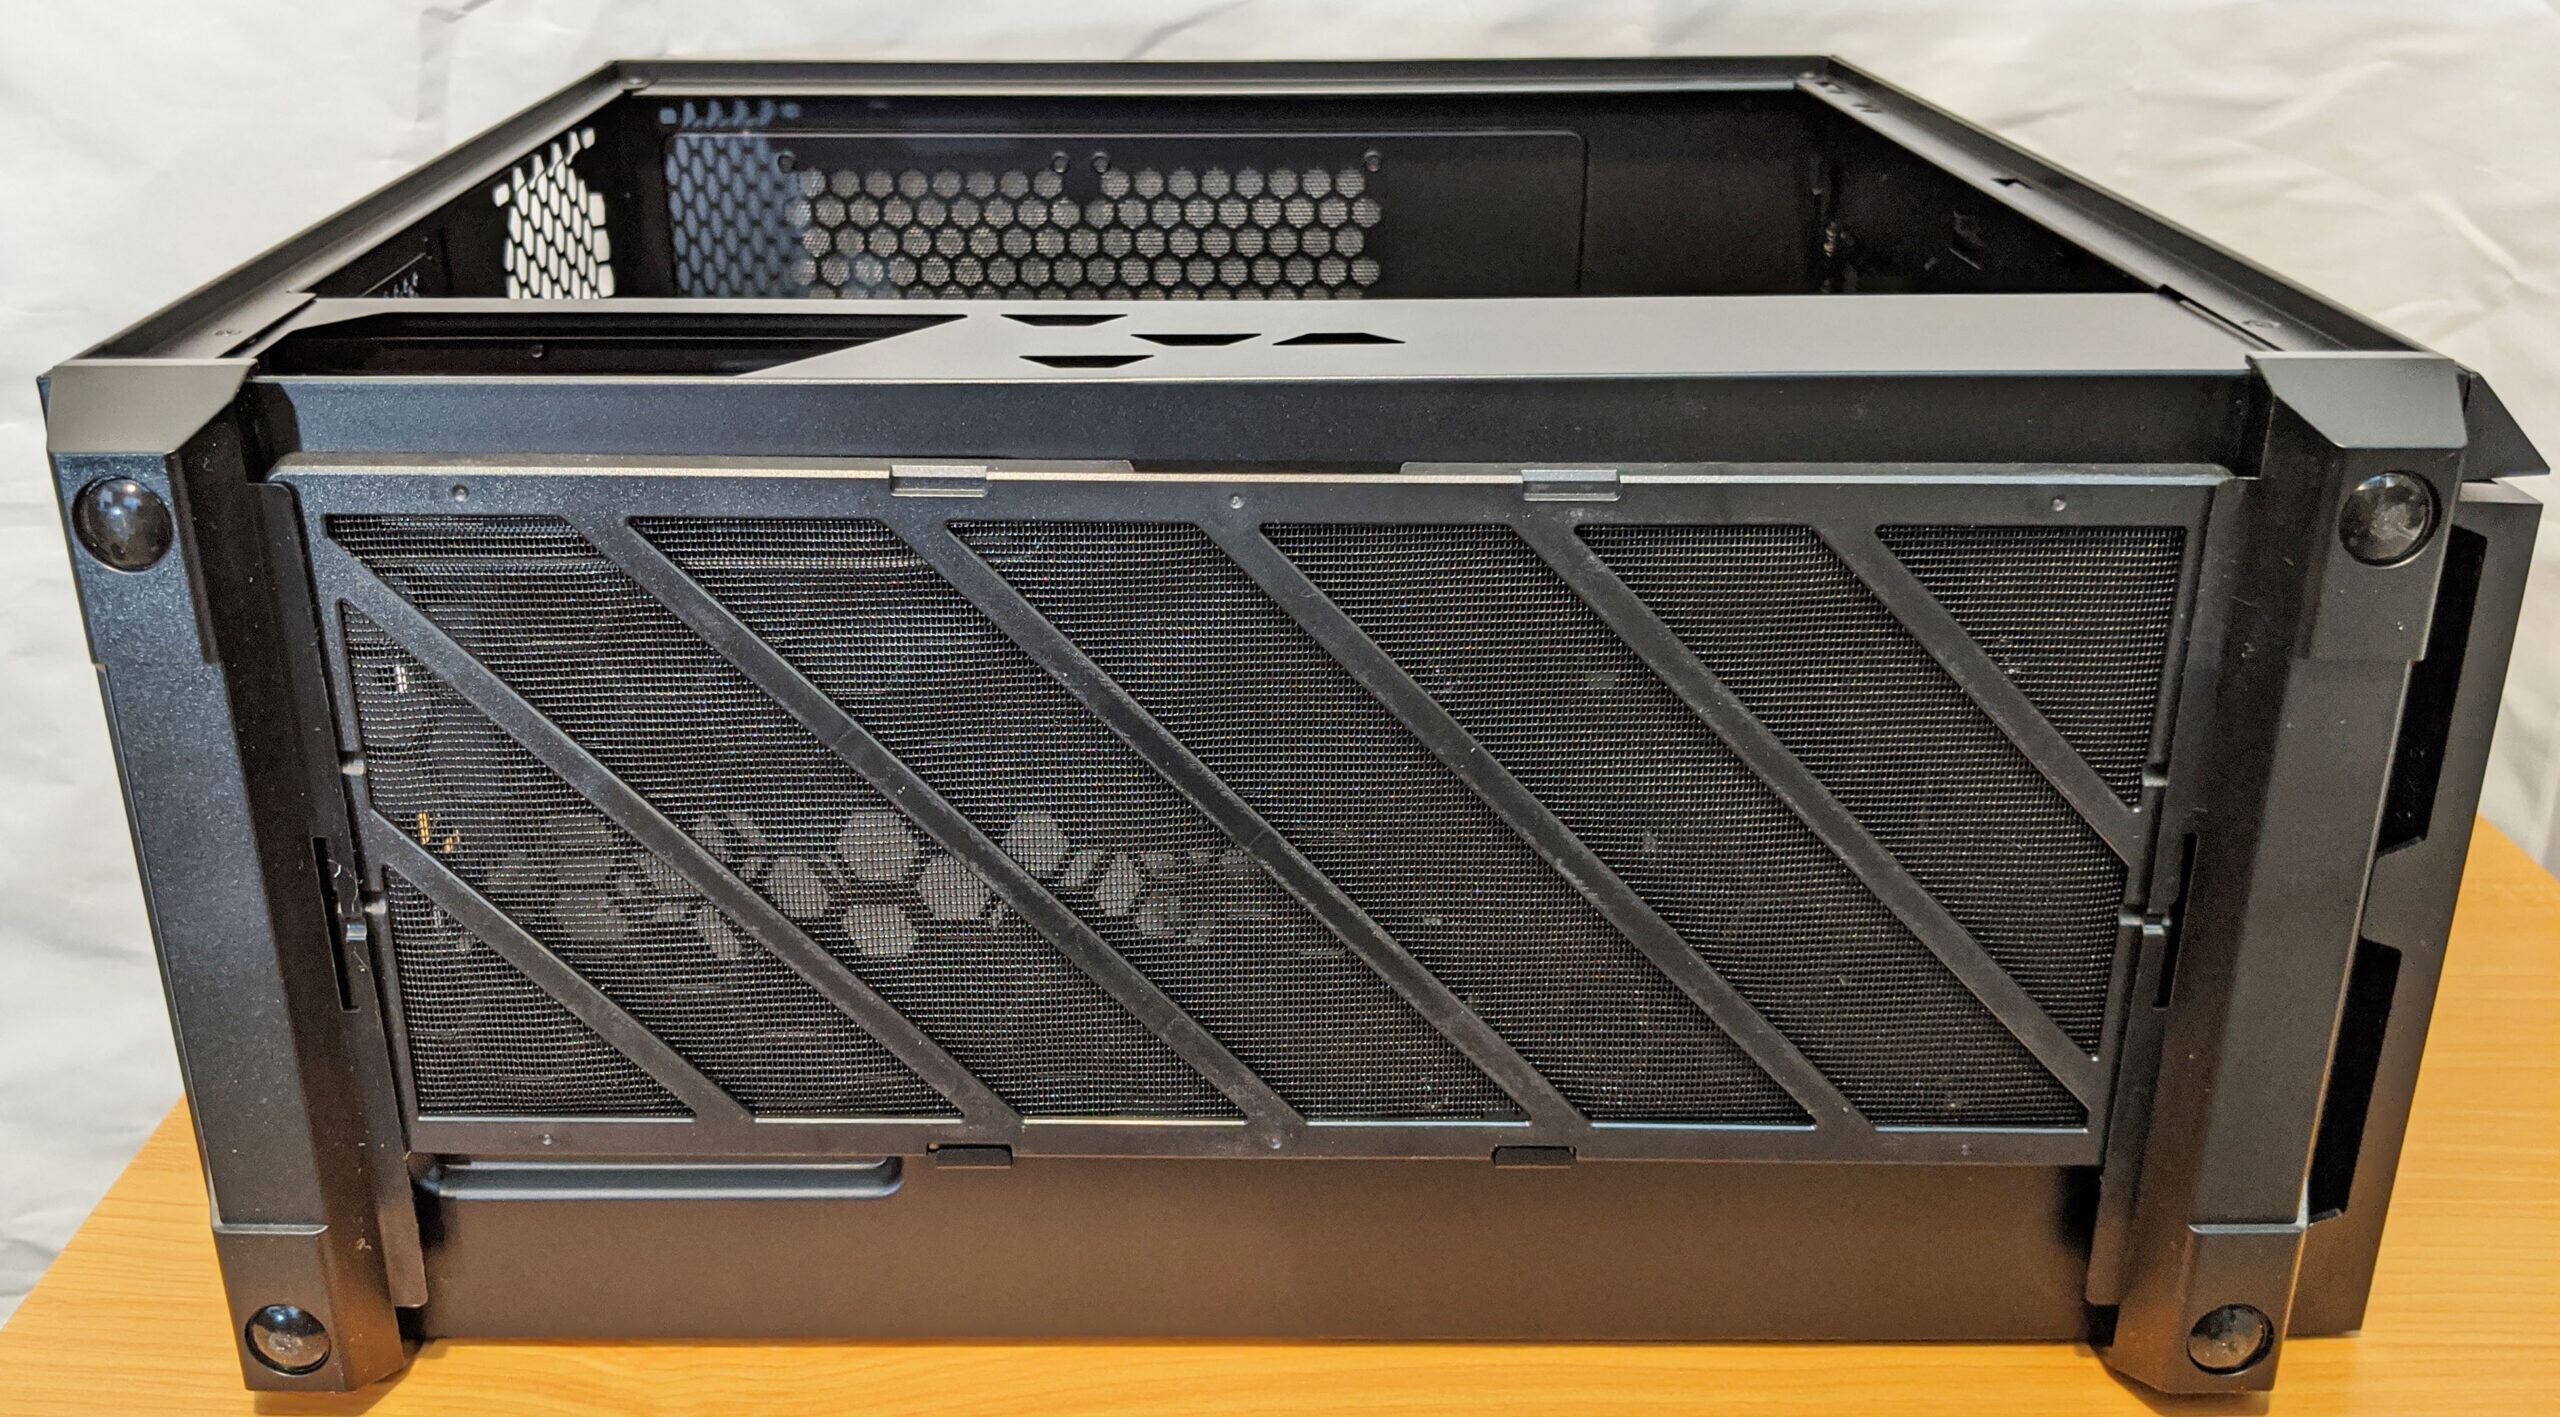
Lastly, lets take a crack at that front filter and see what’s going on behind the front panel. The front panel is held in place by six mounts along the front and back edge. No screws are required, nor does it require pulling the side panels off. The main inake filter is easily removed by unclipping it from the metal chassis.
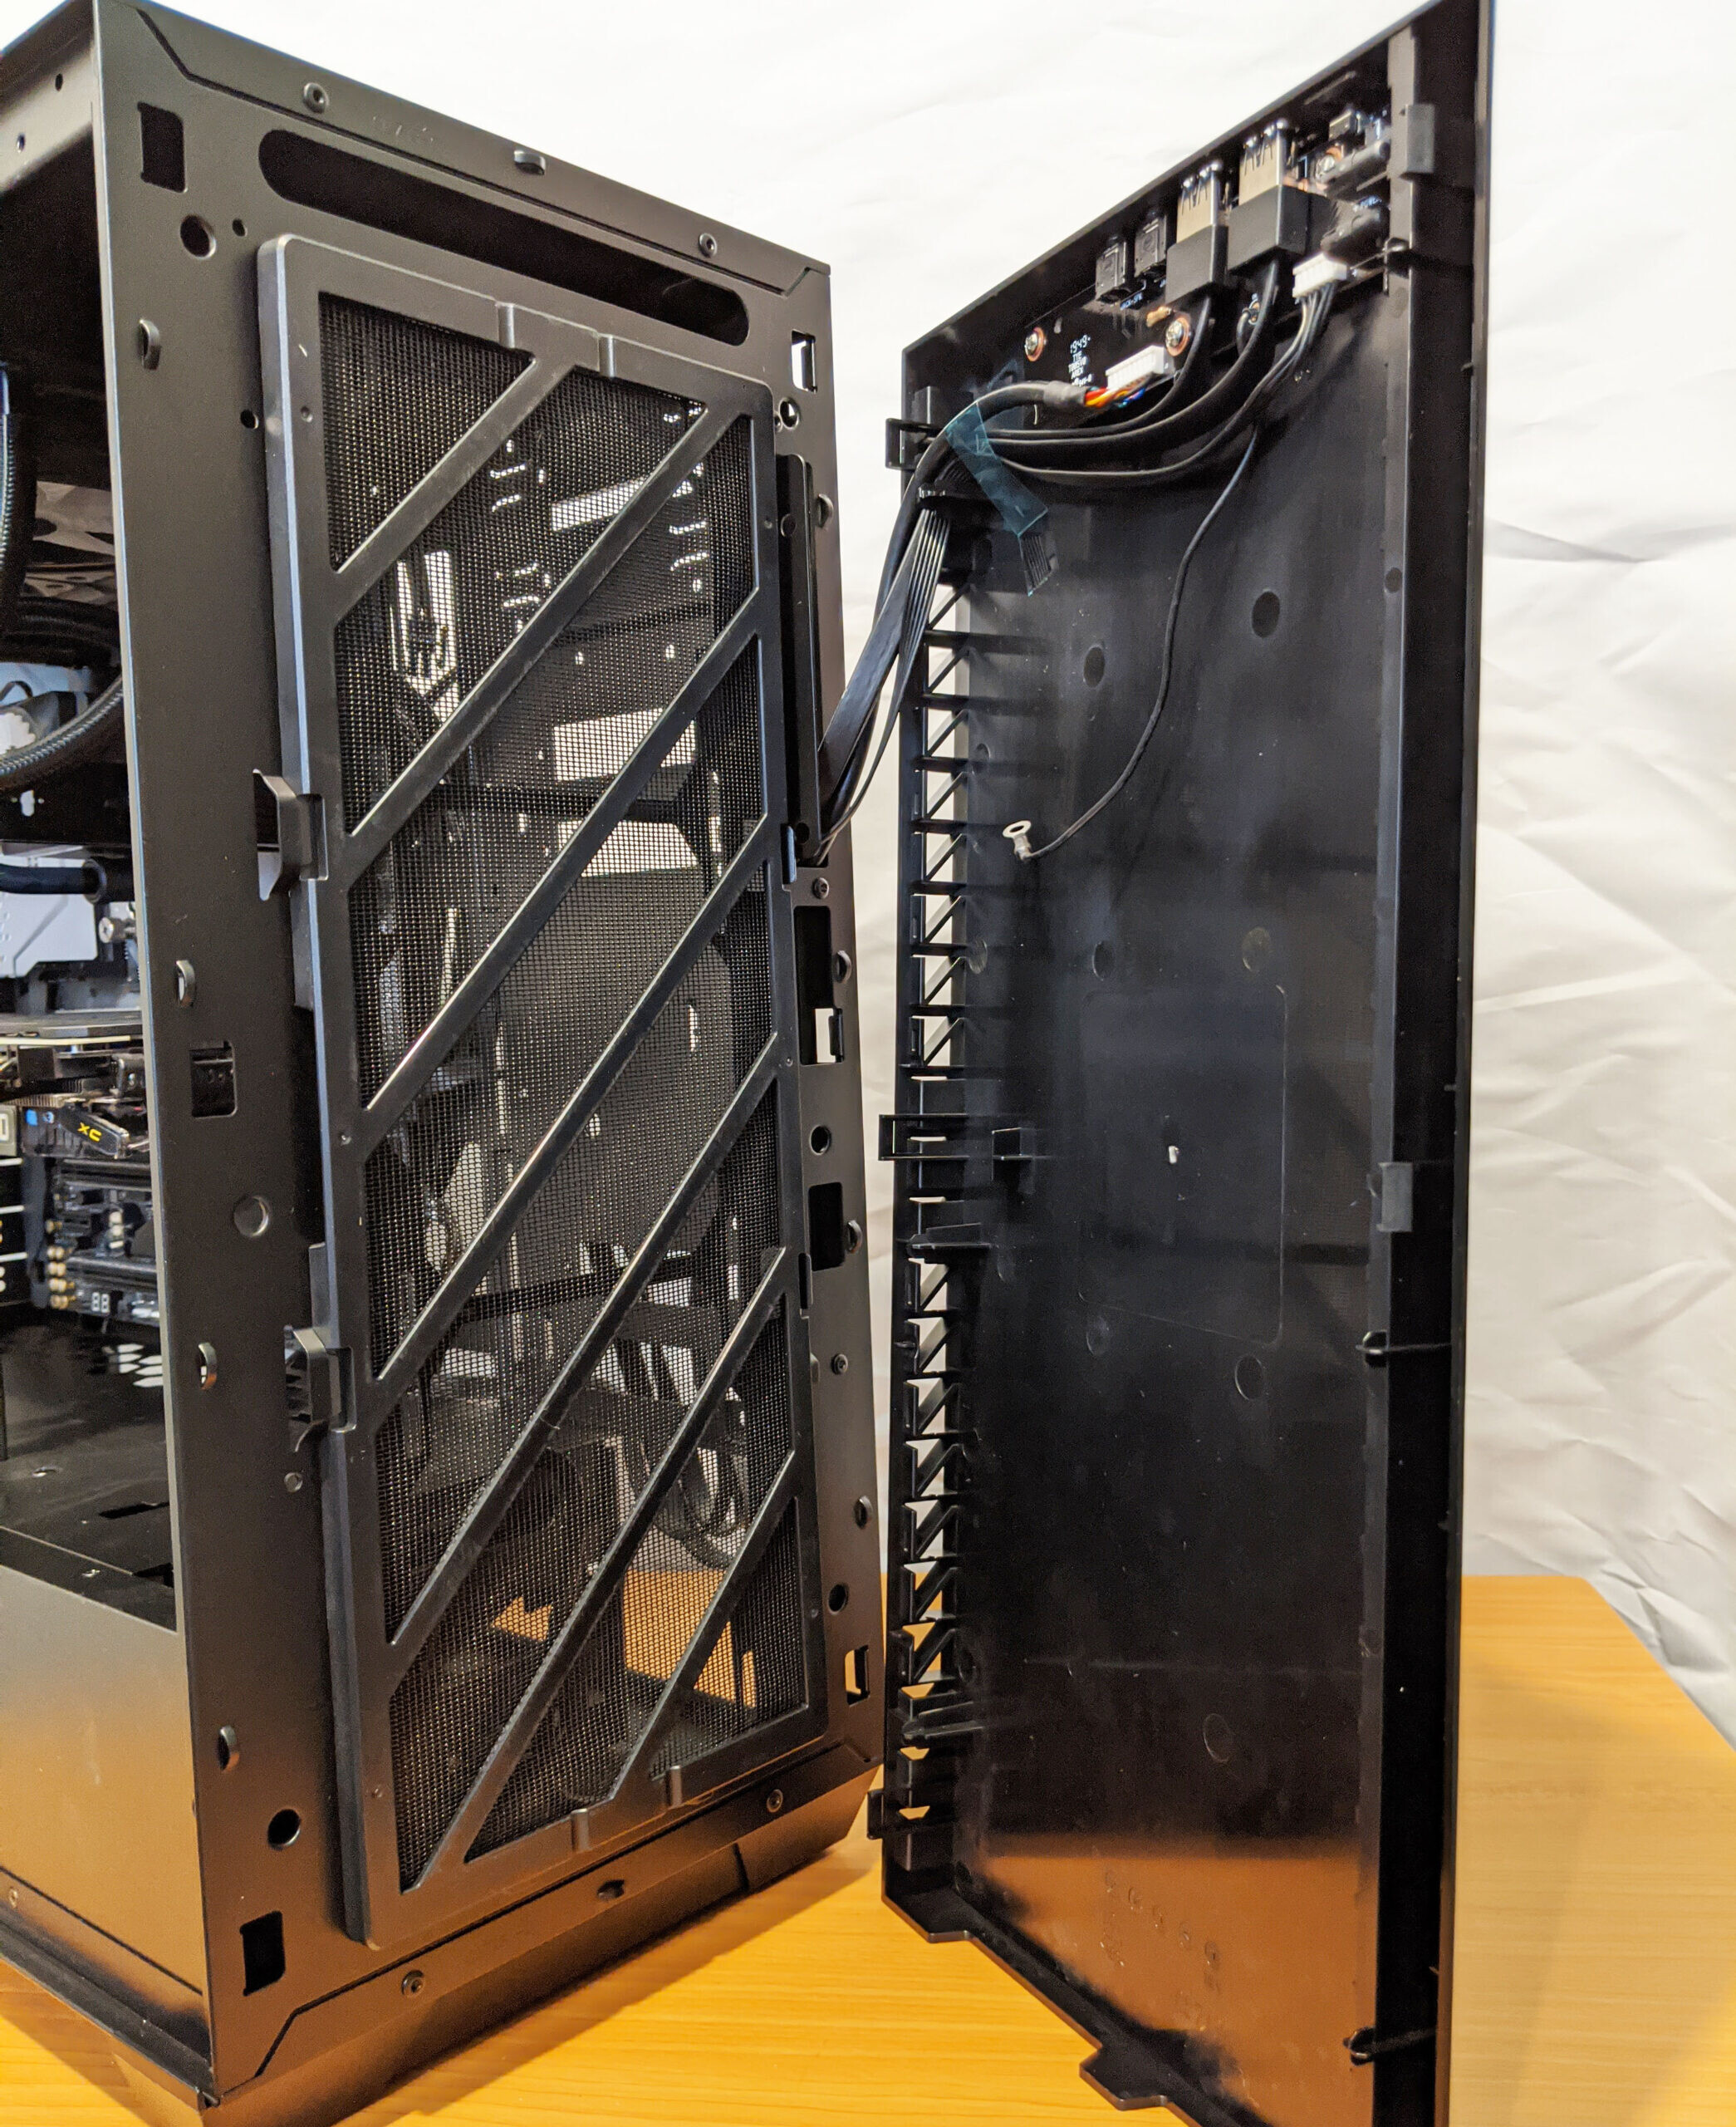
Here’s a better shot of the front I/O circuit board. Not sure what’s going on with that ground wire flopping in the wind, or whether or not this was intentional or not.
Testing: Hardware Installation
Stuffing the InWin 216 with hardware is about as straightforward as it gets. Keep in mind that motherboard standoffs need to be installed first before inserting the motherboard as some manufacturers preinstall these (or several). Another thing to note is that this case comes with no preinstalled fans. If you care about your internal components, you’ll need to pick some up separately.
While building out the test rig, I didn’t have any issues regarding compatibility or quality control areas of concern. My only gripe is that since I tend to go the AIO cooler route, there really isn’t a lot of space between the top edge of the motherboard and the top of the case. Some radiators and fans might not fit well, or collide with the motherboard. An extra inch of space above the motherboard would really have helped out with radiator mounting. In the end, I did get it to work, however my radiator fans were pressed right against my RAM sticks.
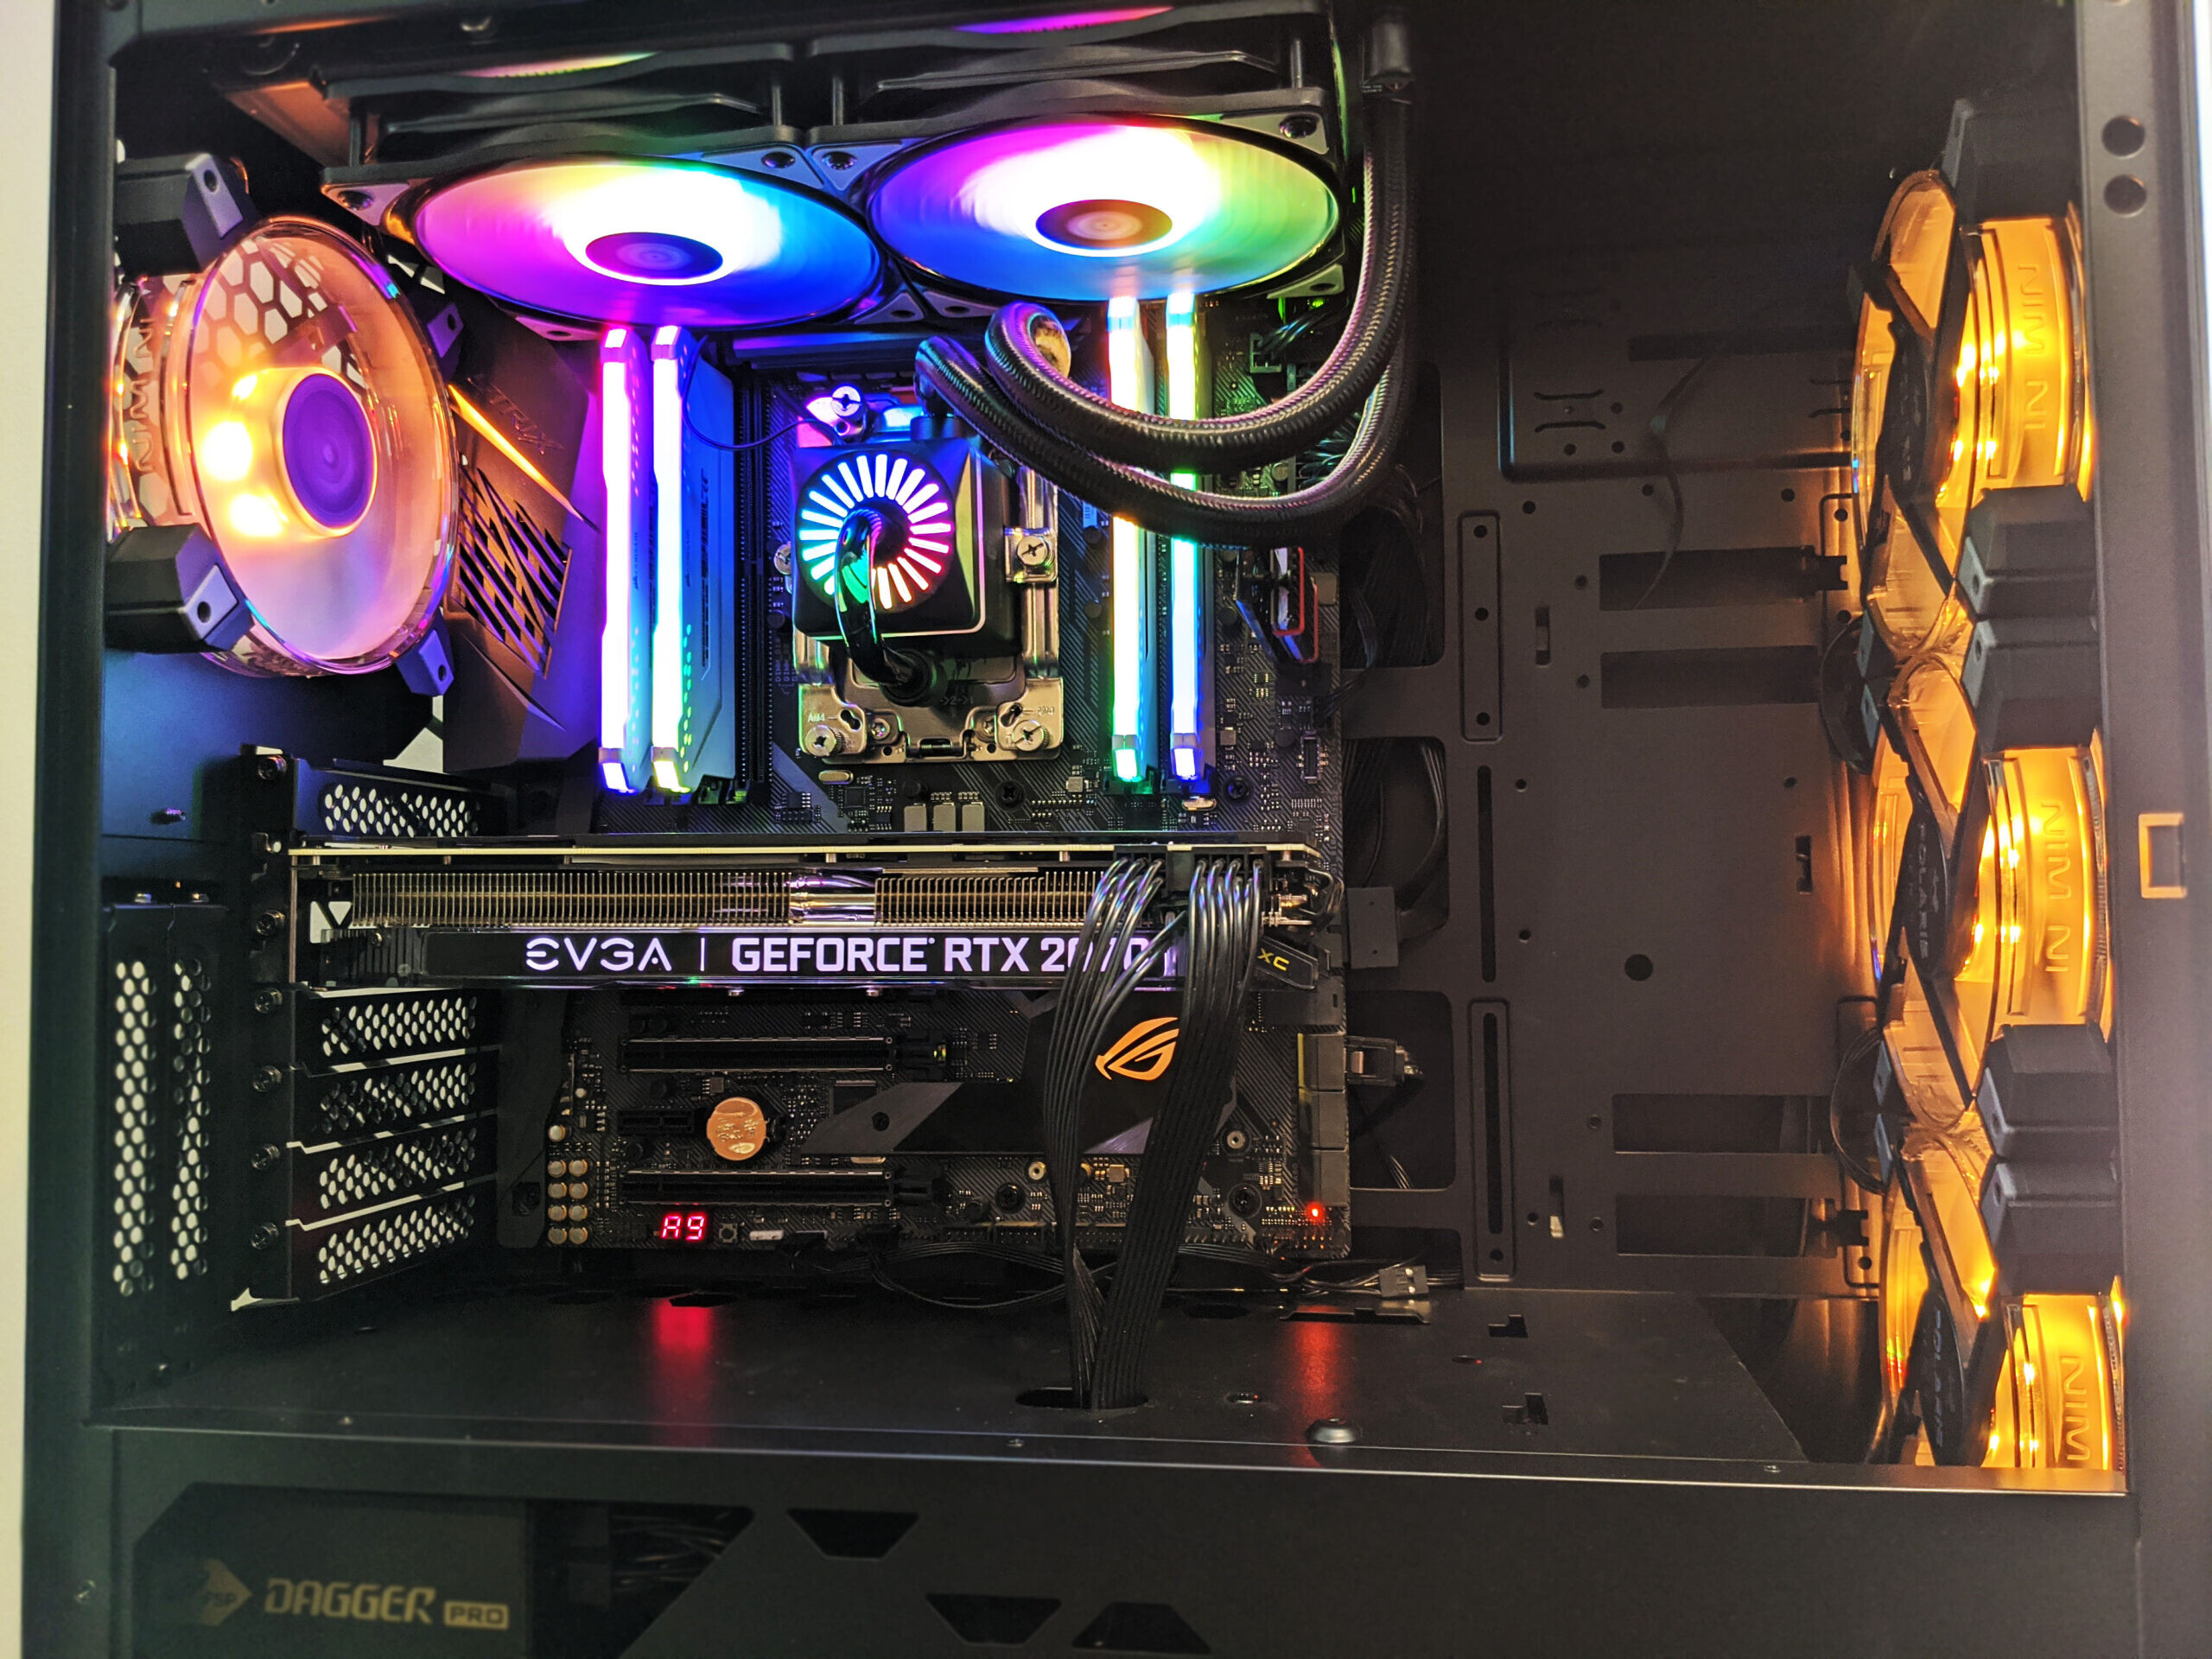
In our build, I threw together our Ryzen Threadripper test system together to see how things went (Hey, it said E-ATX would fit!)
Build Specifications:
- Motherboard: ASUS ROG Strix X399
- CPU: AMD Ryzen Threadripper 1950X
- RAM: 32GB Corsair Vengence
- CPU Cooler: GamerStorm Captain 240 Pro
- GPU: EVGA RTX 2070 SC
- Cooling Fans: InWin Polaris Silent RGB Fans (Mini Review to follow!)
The E-ATX motherboard fit beautifully and left plenty of room for routing cables through the cable management ports.


Final Thoughts & Conclusion
The InWin 216 is a very likable case. The design is subtle enough to make onlookers unsure about whether you’re rocking a budget Intel i3 setup or a Ryzen Threadripper build. The amount of features and compatibility options packed into the 216 put it on par with cases we’ve reviewed in the past for almost double the price. Dollar for dollar you’re going going wrong with the InWin 216… provided a sleek, minimalist build is what you’re after. For a $80 case, I was absolutely impressed with the overall build quality. There was very little flex when trying to bend any of the sheet metal paneling.
On the flip-side, I do wish that InWin would have included at least a single fan. This would greatly help out the budget builders who aren’t running anything too crazy make the push, however there is always an argument either way. Typically, preinstalled fans on mid to lower tier cases aren’t anything special and would likely get replaced anyways, especially if you’re running higher end components that would benefit from the added cooling.
Now let’s give this case a score based on several categories. Again, MSRP for the InWin 216 is $79.99 which will play an important role for each category as well as final score.
- Build Quality: 9.7/10 – The case is about as sturdy as it gets. There’s no doubt in my mind that it would hold up to years of hardware swaps.
- Appearance: 8/10 – This area is always subjective, however I really like the overall approach InWin put into the 2016’s design and minimalistic styling.
- Functionality/Performance: 8.2/10 – I really enjoyed all the little hidden gems found throughout the case and I think that’s what bumped the score up a few points for me. These include things like magnets behind the side panels so they “click” into place and stay held in. Other options such as dust filters on pretty much all surfaces but the back was also another nice touch. Vertical GPU mounting on a sub $100 case is also pretty rare.
- Value: 9.0/10 – If a stealthy, low-key case is what you’re planning for your build, and if budget allows, get this case. Really, if you like the style, you can’t go wrong with $79.99 considering what you get in return
Final Score: 8.7/10
Product Page: https://www.in-win.com/en/gaming-chassis/216/

InWin 216 Gaming Case Review
"The amount of features and compatibility options packed into the 216 put it on par with cases we've reviewed in the past for almost double the price."


Thank you for your sharing. I am worried that I lack creative ideas. It is your article that makes me full of hope. Thank you. But, I have a question, can you help me? https://accounts.binance.info/es/register-person?ref=RQUR4BEO
I believe this could be a great addition to your article and help provide even more value to your readers. It aligns well with your topic and offers extra insights that your audience might appreciate. Let me know what you think—I’d really love to hear your thoughts! For more information visit jili.