You gotta love it when things, especially when it comes to PC components, have short, easy to remember names… Yes, I’m looking at you Thermaltake. In this review we’ll be taking a close look at the InWin 103. While the name of the case is short, its list of features is certainly not. The case features a ton of cooling options which includes mounts for up to six 120mm fans, very impressive for a mid tower case. For liquid cooled builds, you’ll easily get away with a 240mm radiator, a 360mm radiator and still have room for a rear exhaust fan.
As most case manufactures are removing the traditional front drive bays, mid tower cases stood to benefit the most as now there’s a massive amount of room for additional cooling options. As a result mid tower case popularity has spiked. Years ago, if you wanted to do any kind of liquid cooling, a full-tower case was the only option. Not so much anymore. In the case of the InWin 103, there is more than enough room for even the most extreme liquid cooling system.
In addition to the case’s many cooling features, the 103 features a full coverage tempered glass side panel and addressable RGB lighting options on the front of the case. As far as internal PC parts are concerned, the case can support graphics cards up to 421mm (which I would love to see!), and a CPU cooler with a maximum height of 160mm. This means that you won’t have any issue (barely) fitting the Cooler Master Wraith Ripper, the largest heatsink we know of into the InWin 103.
At the time of writing this review, you can pick up the InWin for $79.99 USD which puts it in the mid-tier bracket making it ideal for budget builds.
InWin 103 Specifications
On paper, the InWin 103 looks like it will have no issue keeping up with higher priced cases. I’m really liking the fan support, tempered glass and RGB controls as RGB anything is all the rage these days. Here’s a quick look at the case’s detailed specifications.
| Model | InWin 103 |
|---|---|
| Part Number | IW-103-Black / IW-103-White |
| Color | Black, White |
| Case Type | Mid Tower |
| Materials | SECC, ABS, PC, Tempered Glass |
| M/B Compatibility | 12″ x 10.5″ ATX, Micro-ATX, Mini-ITX |
| Expansion Slots | PCI-E x 7 |
| Maximum Compatibility | VGA Card Length: 421mm (Maximum) VGA Card Length: 305mm (With Side Radiator) CPU Heatsink Height: 160mm |
| Front Ports | 2 x USB 3.0 HD Audio |
| Internal Drive Bays | 2 x 3.5″ 2 x 2.5″ (Max. up to 4 bays) |
| Thermal Solution Compatibility | 1 x 120mm Rear Fan / 120 mm Radiator 2 x 120mm Side Fan / 240mm Radiator 3 x 120mm Bottom Fan / 360mm Radiator |
| Power Supply Compatibility | PSII: ATX12V – Length up to 200mm |
| Product Dimensions (H x W x D) |
425 x 210 x 473 mm 16.7″ x 8.3″ x 18.6″ |
| Product Dimensions (H x W x D) with screw & handle height |
446 x 227 x 480 mm 17.6″ x 8.9″ x 18.9″ |
| Package Dimensions (H x W x D) |
506 x 282 x 532mm 19.9″ x 11.1″ x 20.9″ |
Now that we’ve got a better idea of what we’re working with, let’s crack open the box and get a closer look.
Unboxing
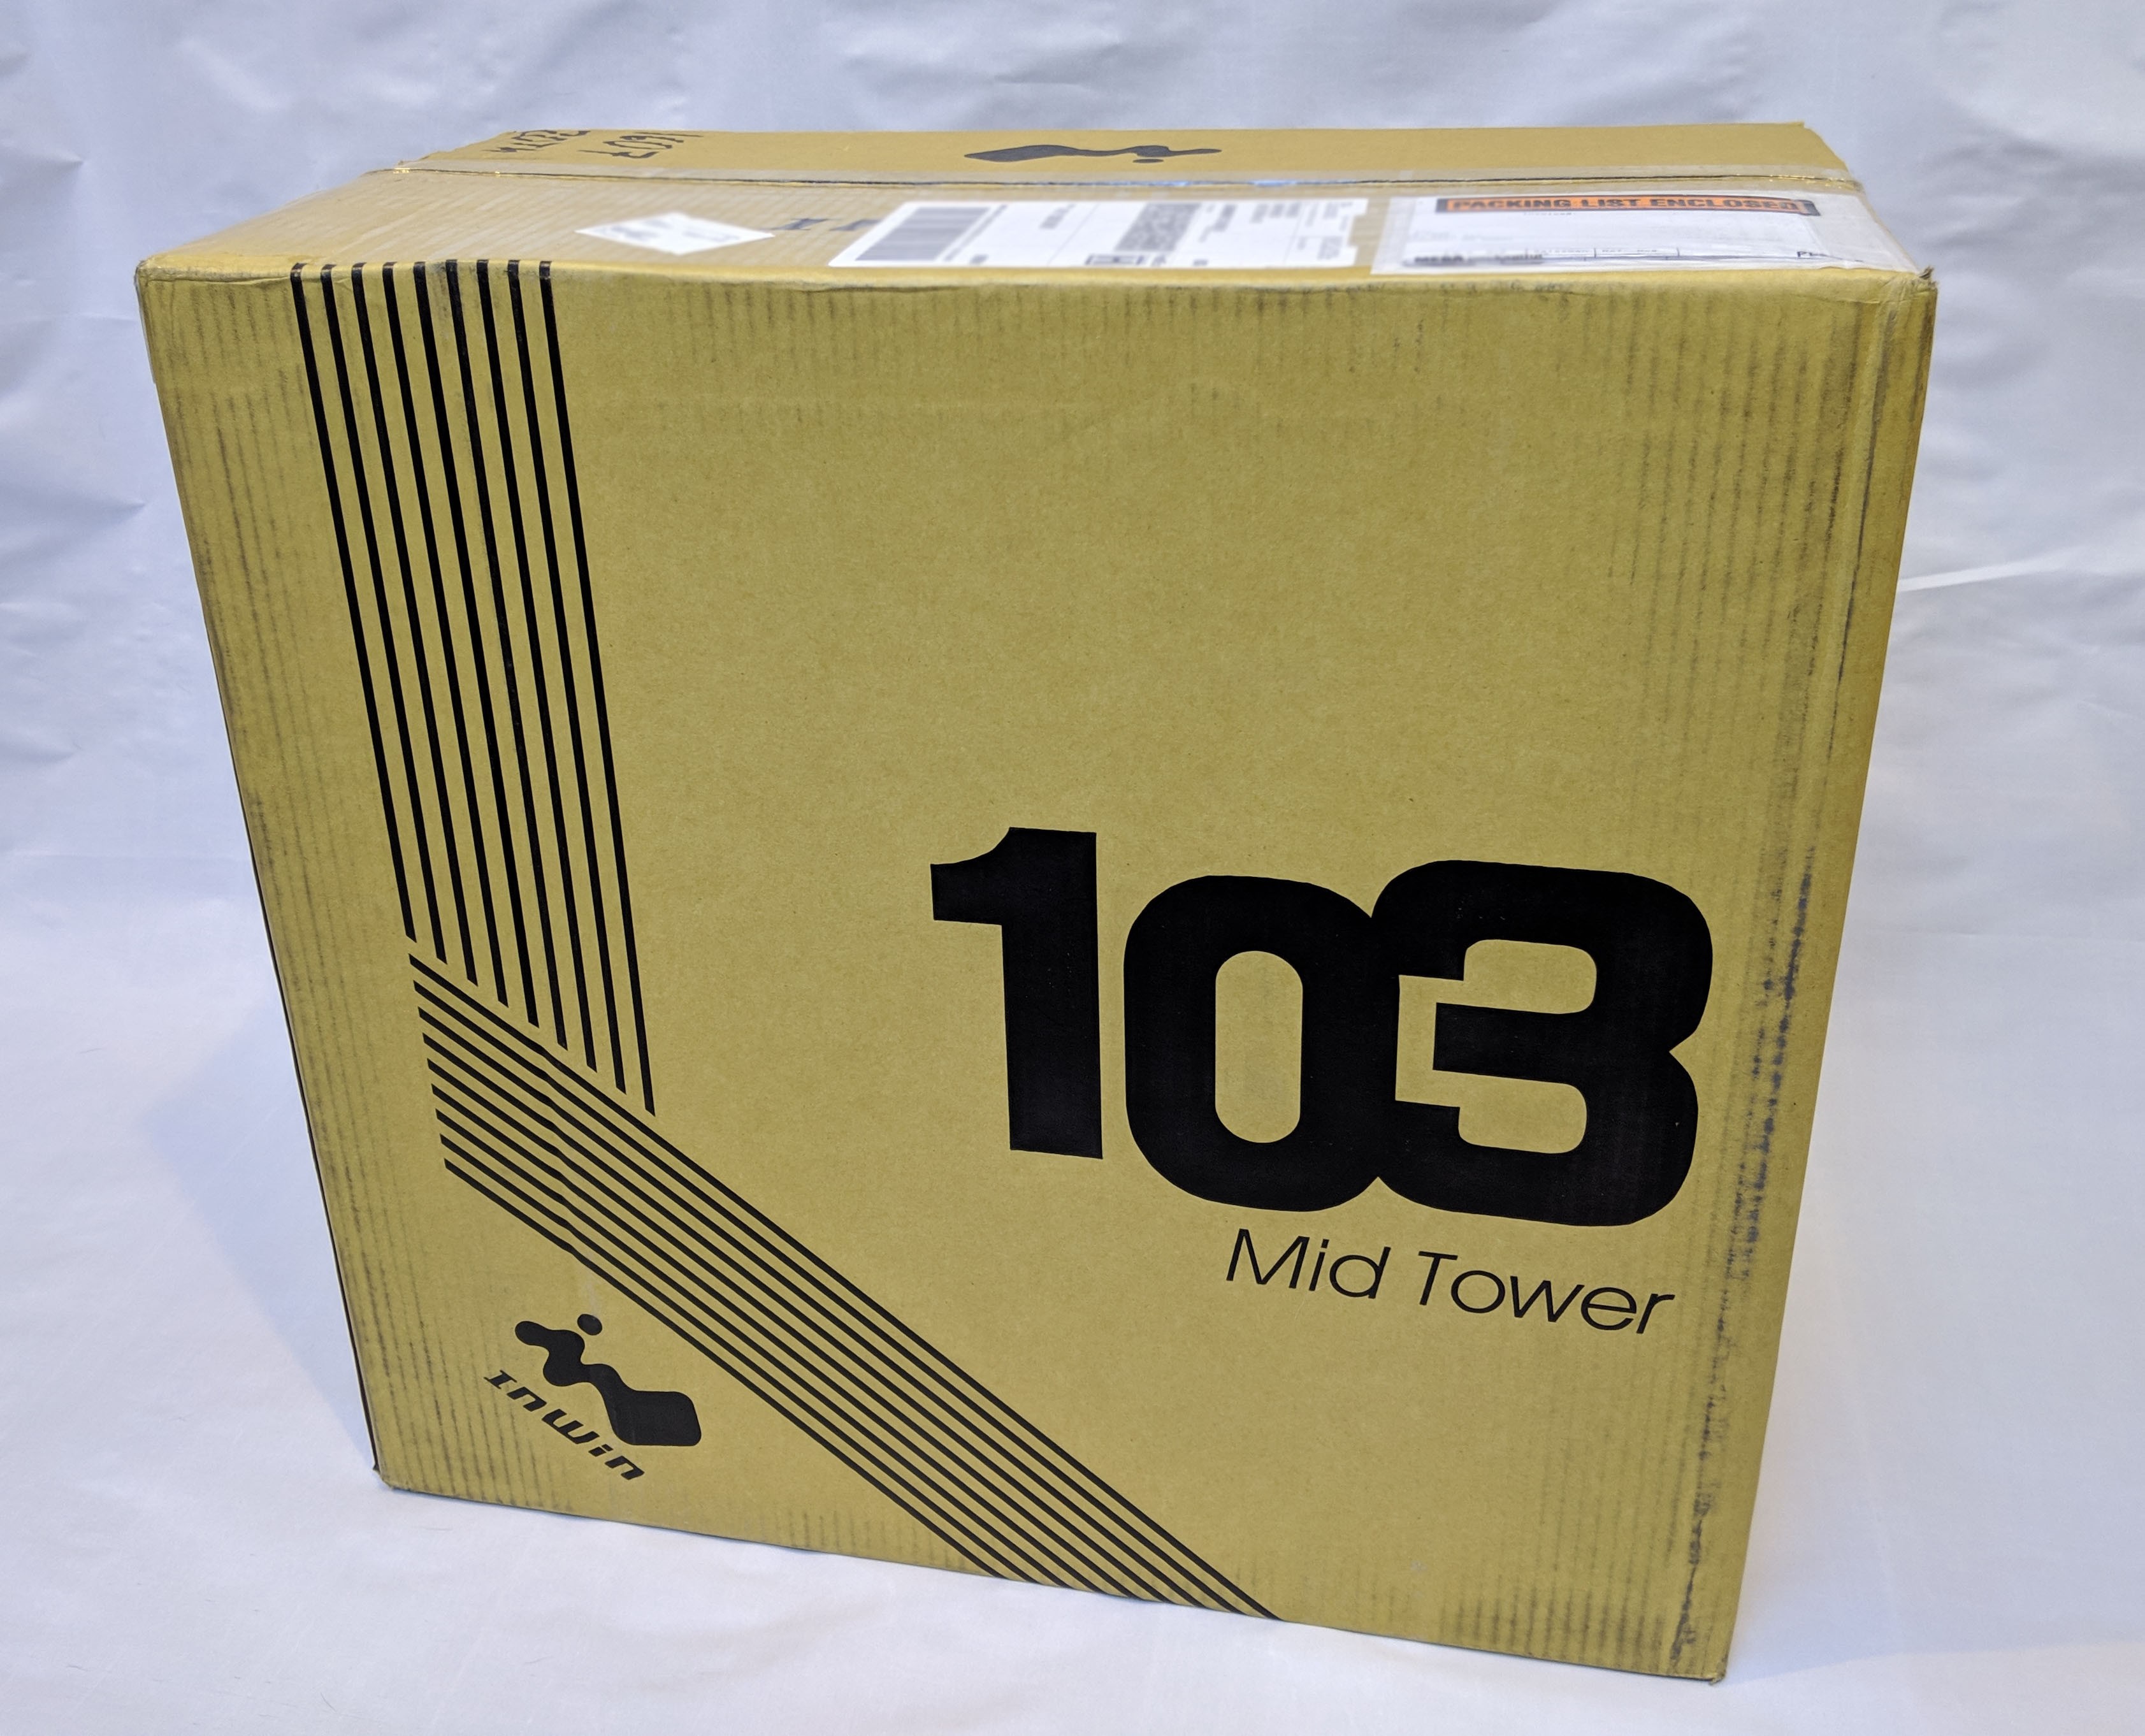
The InWin 103 arrived at our top secret GND-Tech headquarters unscathed by our local mail courier. The box is pretty standard and what you might expect when ordering a case from pretty much anywhere. The box itself is thick cardboard which features the InWin logos and “103 Mid Tower” printed on each side.
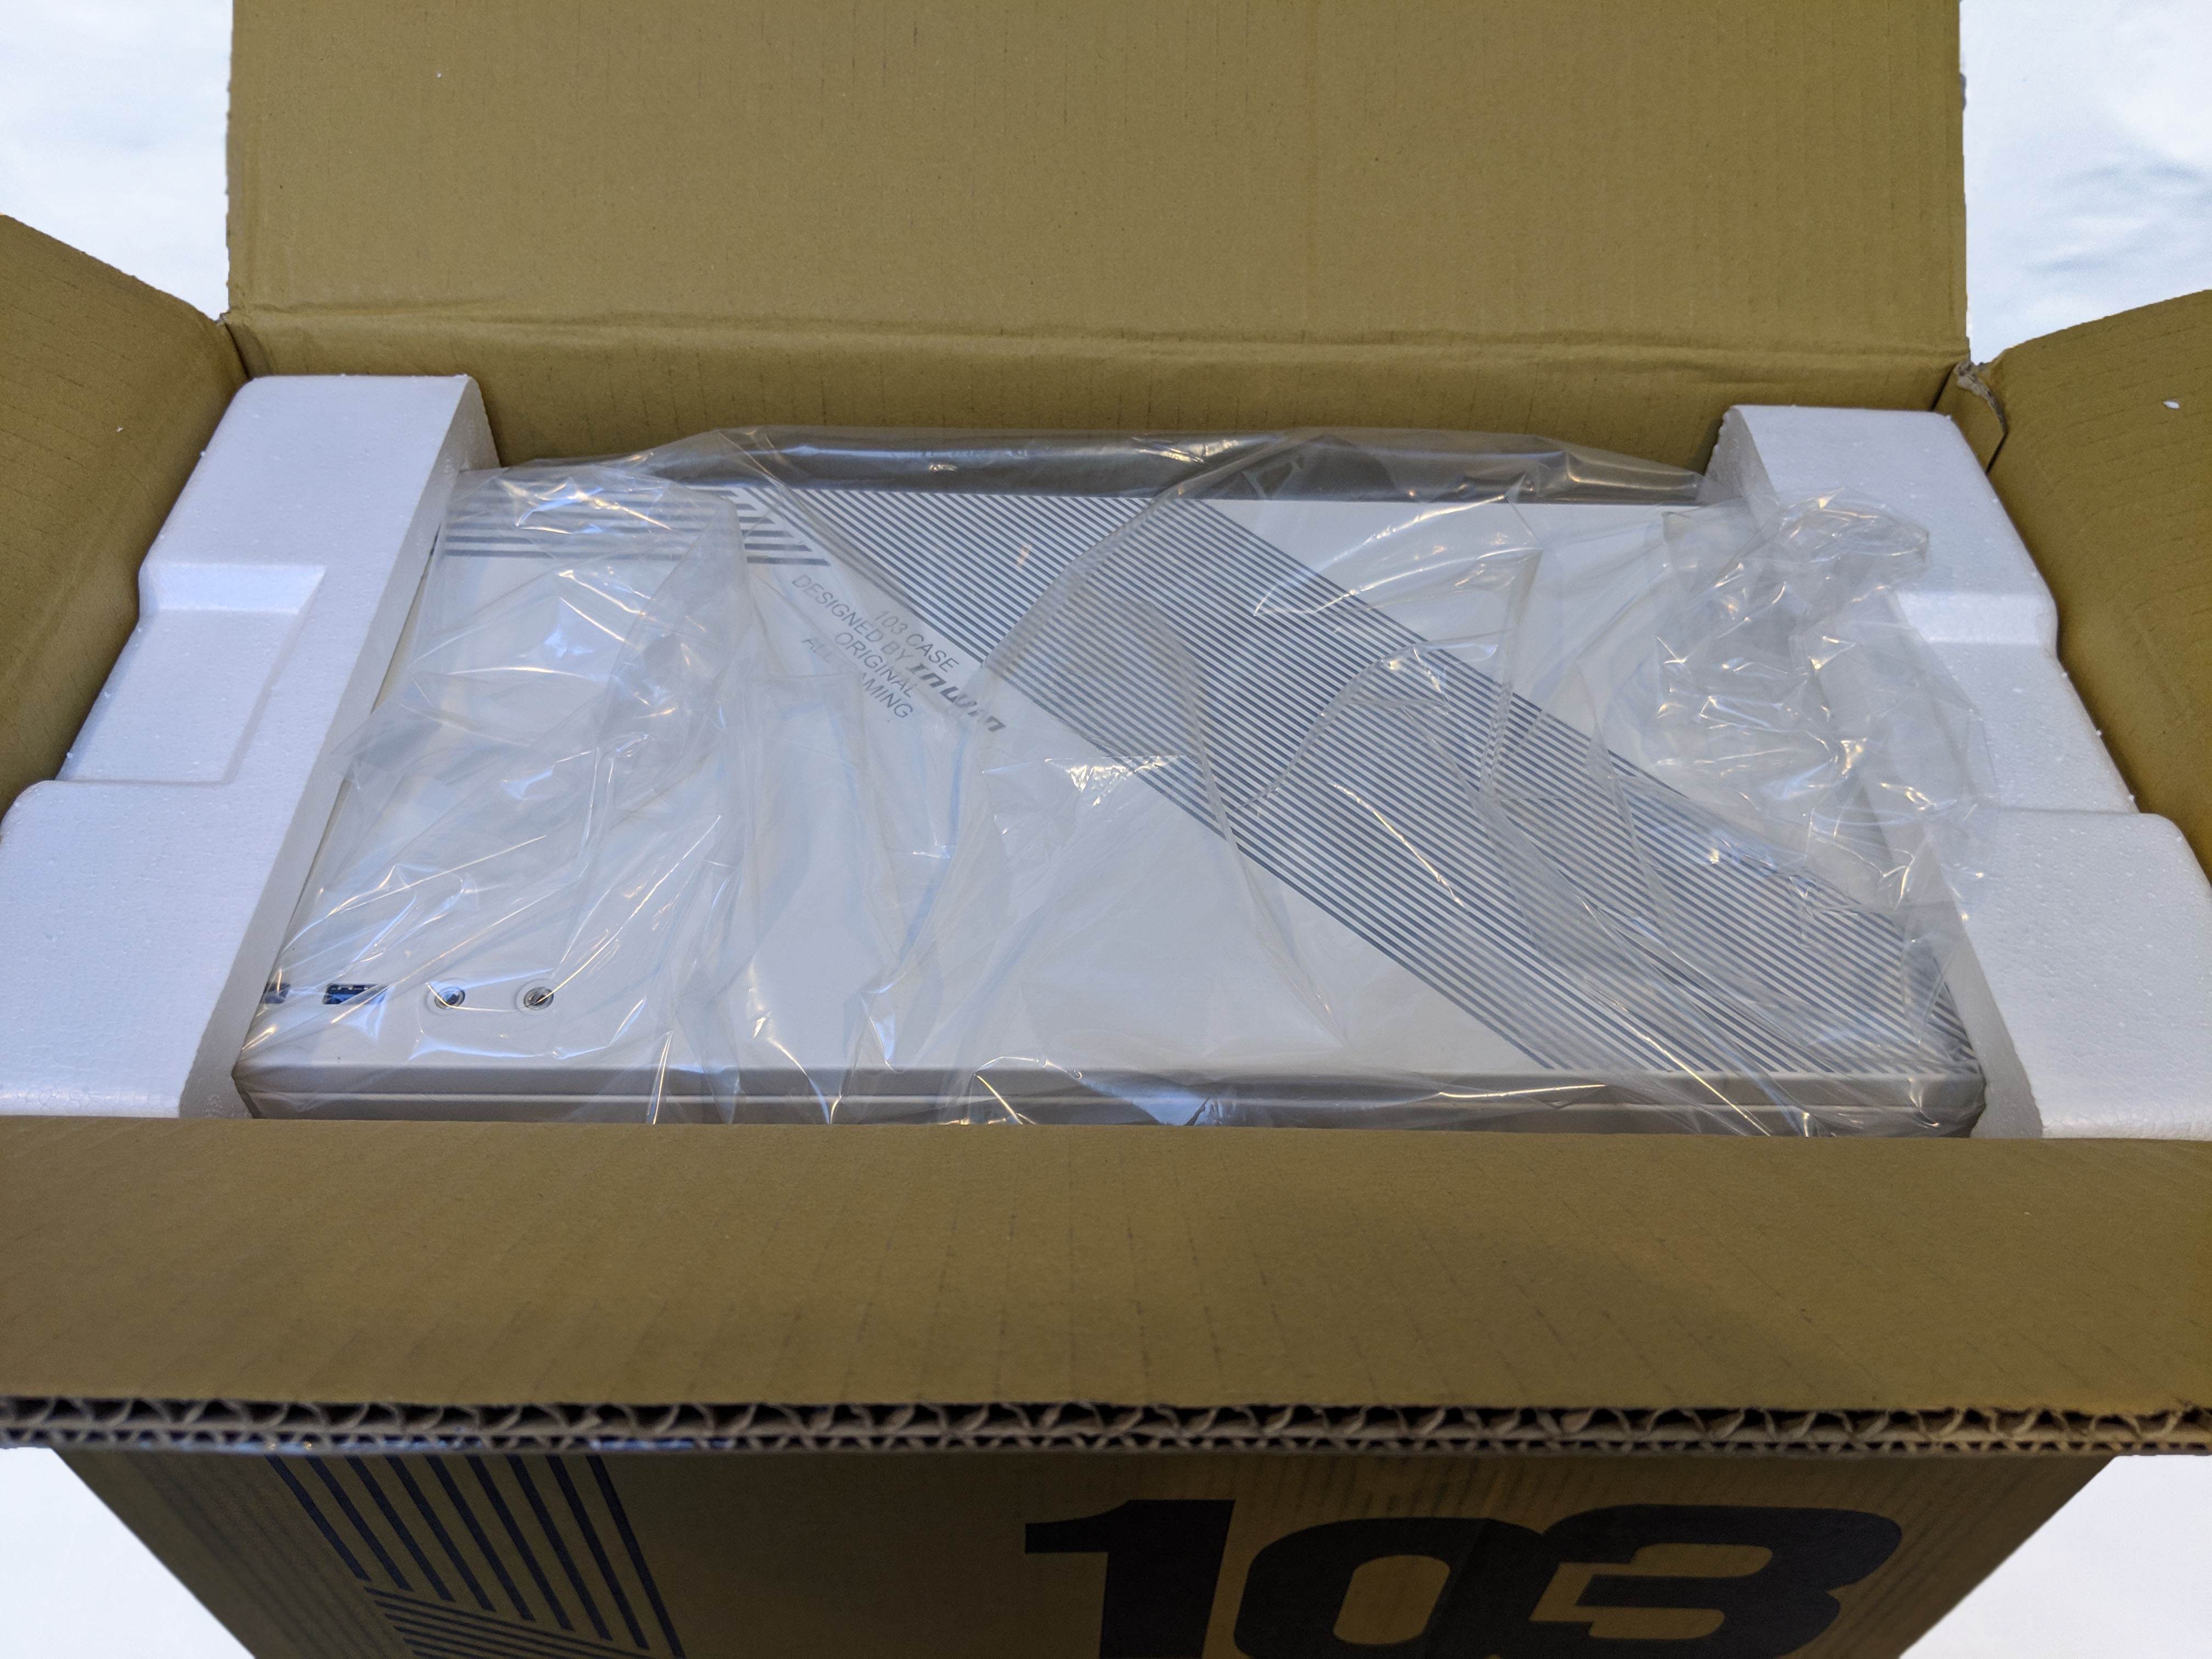
Upon cracking open the seal and taking a look inside, we’re able to see the case inside a plastic bag sandwiched in between two custom Styrofoam molds. Again, this is about what we expected and a very common and effective way of packaging a case.
With the case out of the bag, we can get a better look at the packaging. One thing to take note of is that the accessories bag is located inside the box, not inside the case like we see with most case manufactures. Be sure to double check before throwing it out!

A Closer Look…
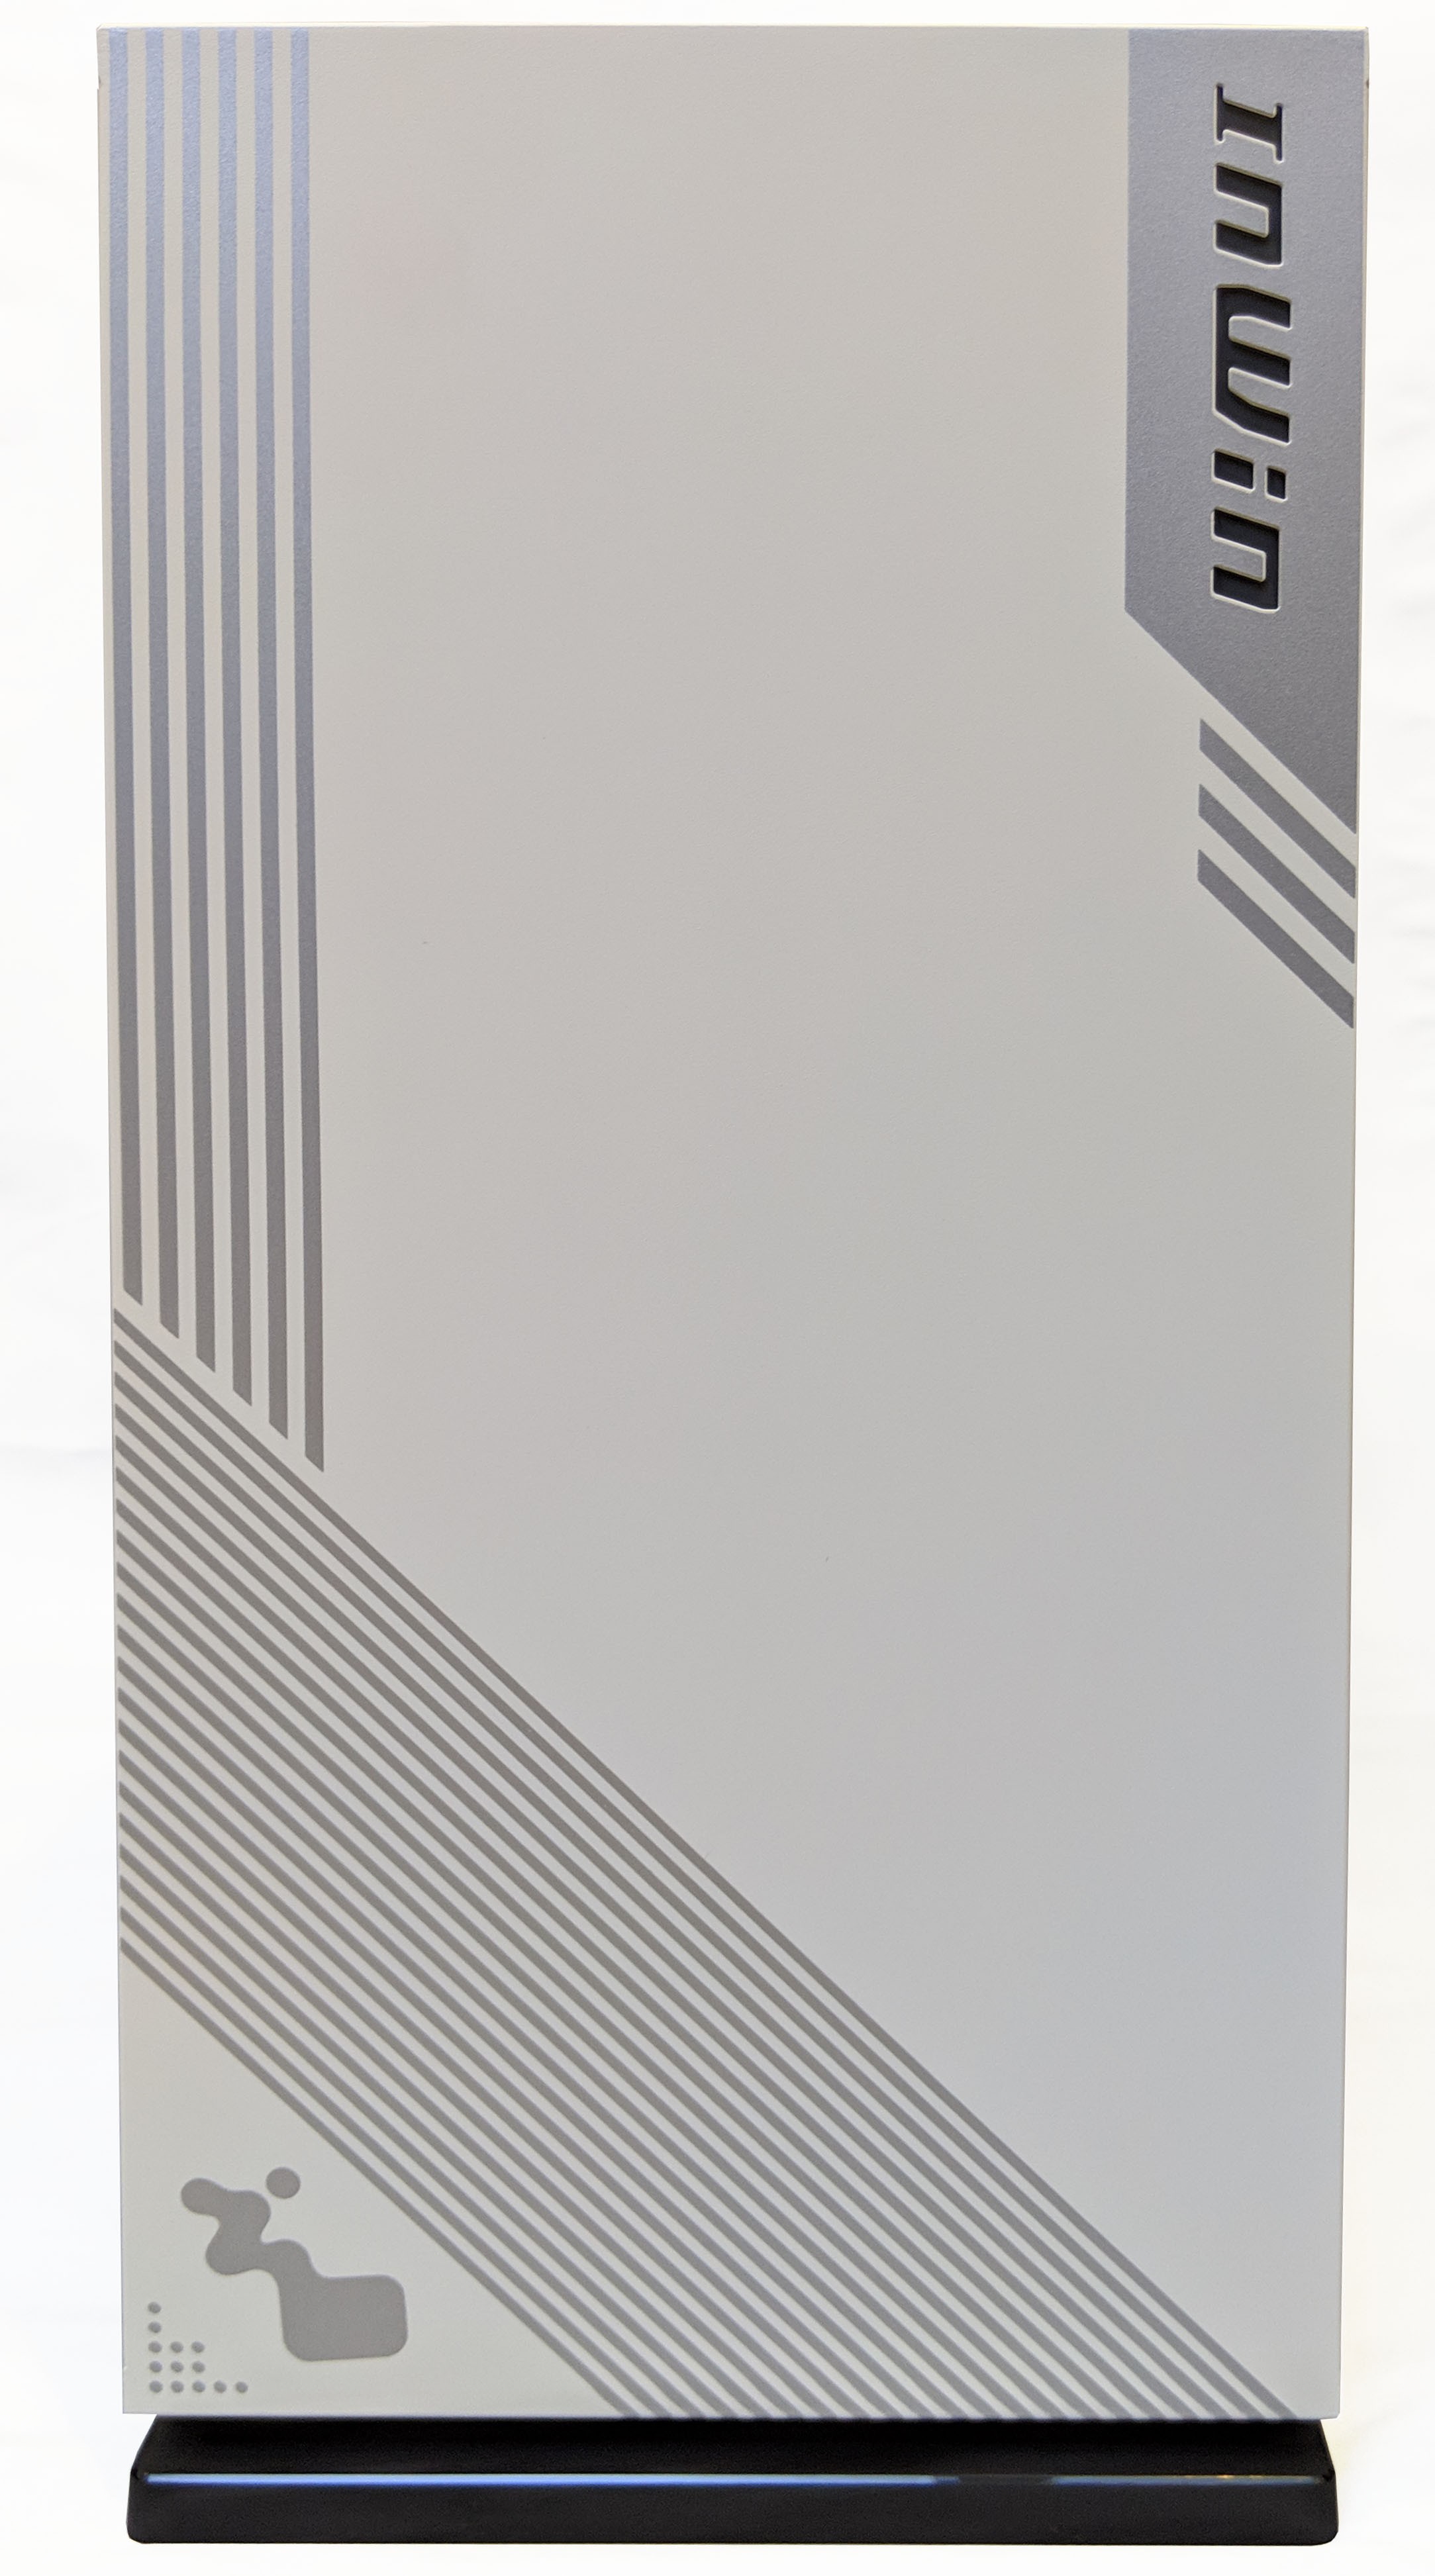
With the case out of the bag, we get a better look at the design! Overall, the case offers a clean overall look with sharp angles. The case is begging to be noticed due to the unique design, but although the case is white, somehow tends to blend. This subtle stealthiness is what I personally look for in a case. There are no crazy geometric angles or blocky fan intakes on the InWin 103. Is it crazy to say it stands out because of how simple it is?
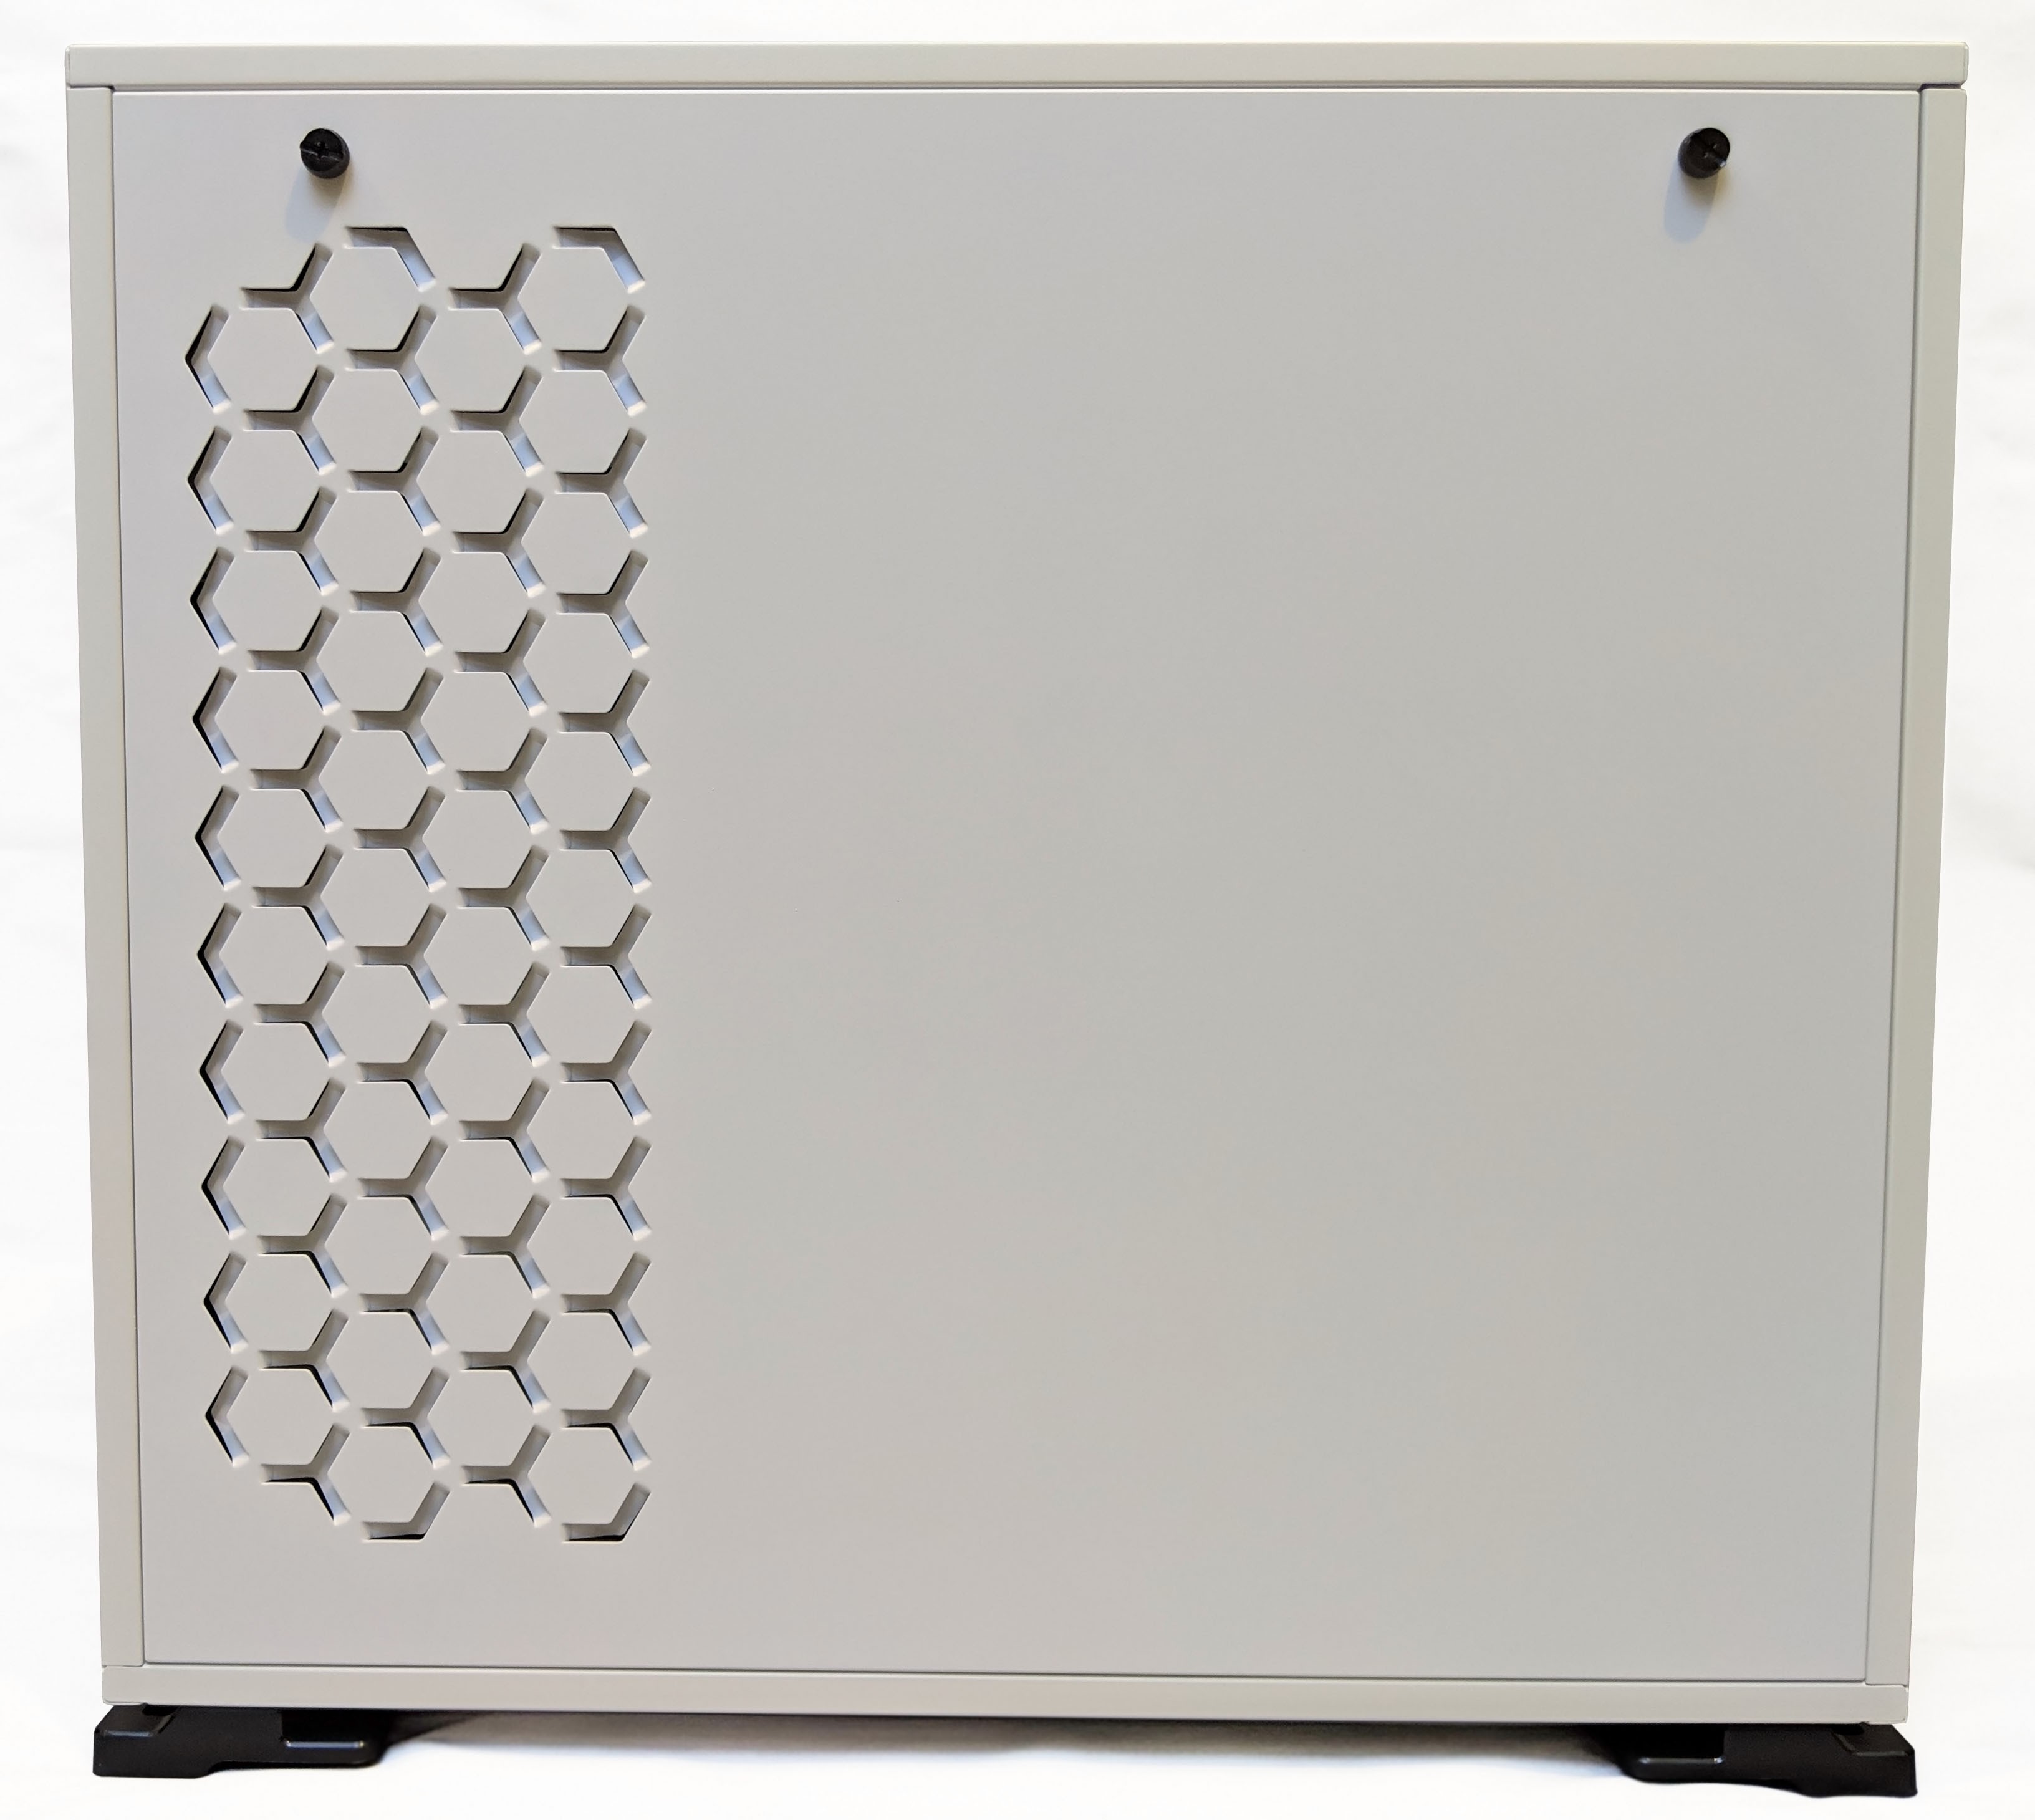
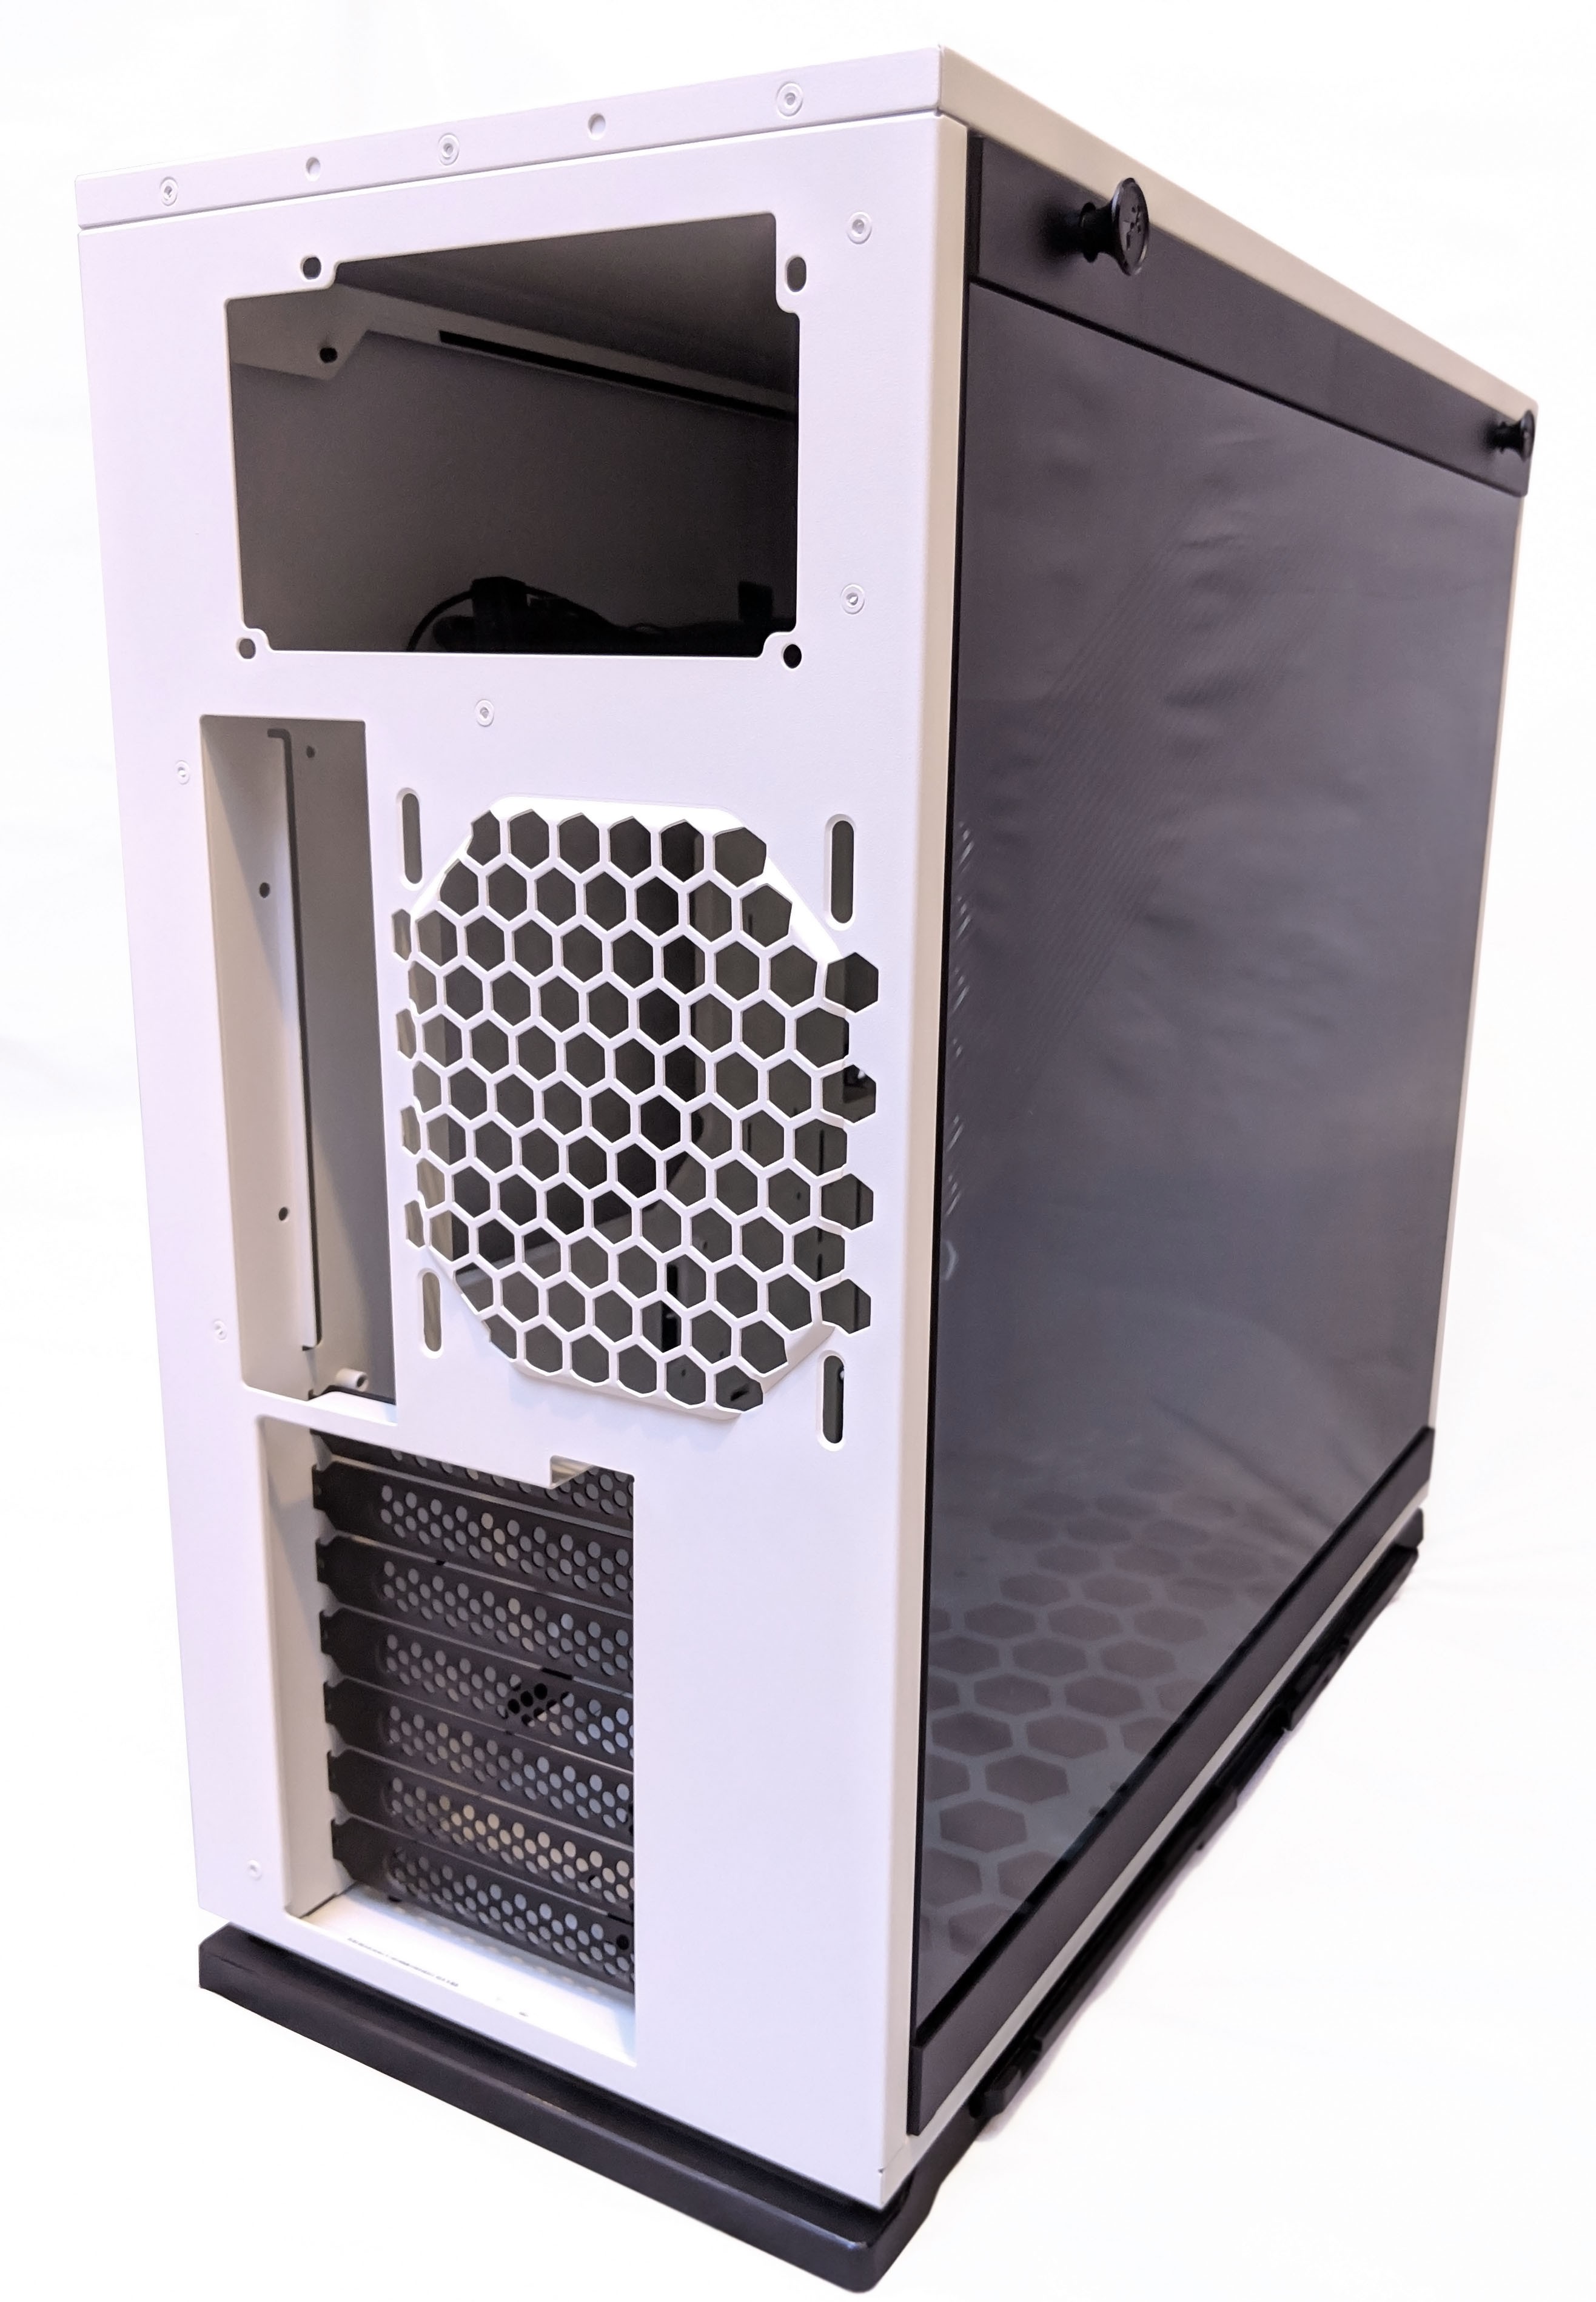
The left side of the case features the thick full coverage tempered glass side panel. Non-traditionally, the right side boats a metal side panel which also acts as a fan exhaust (or intake). Most cases we’ve reviewed in the past sport these grills on the front making this one even a bit more unique.

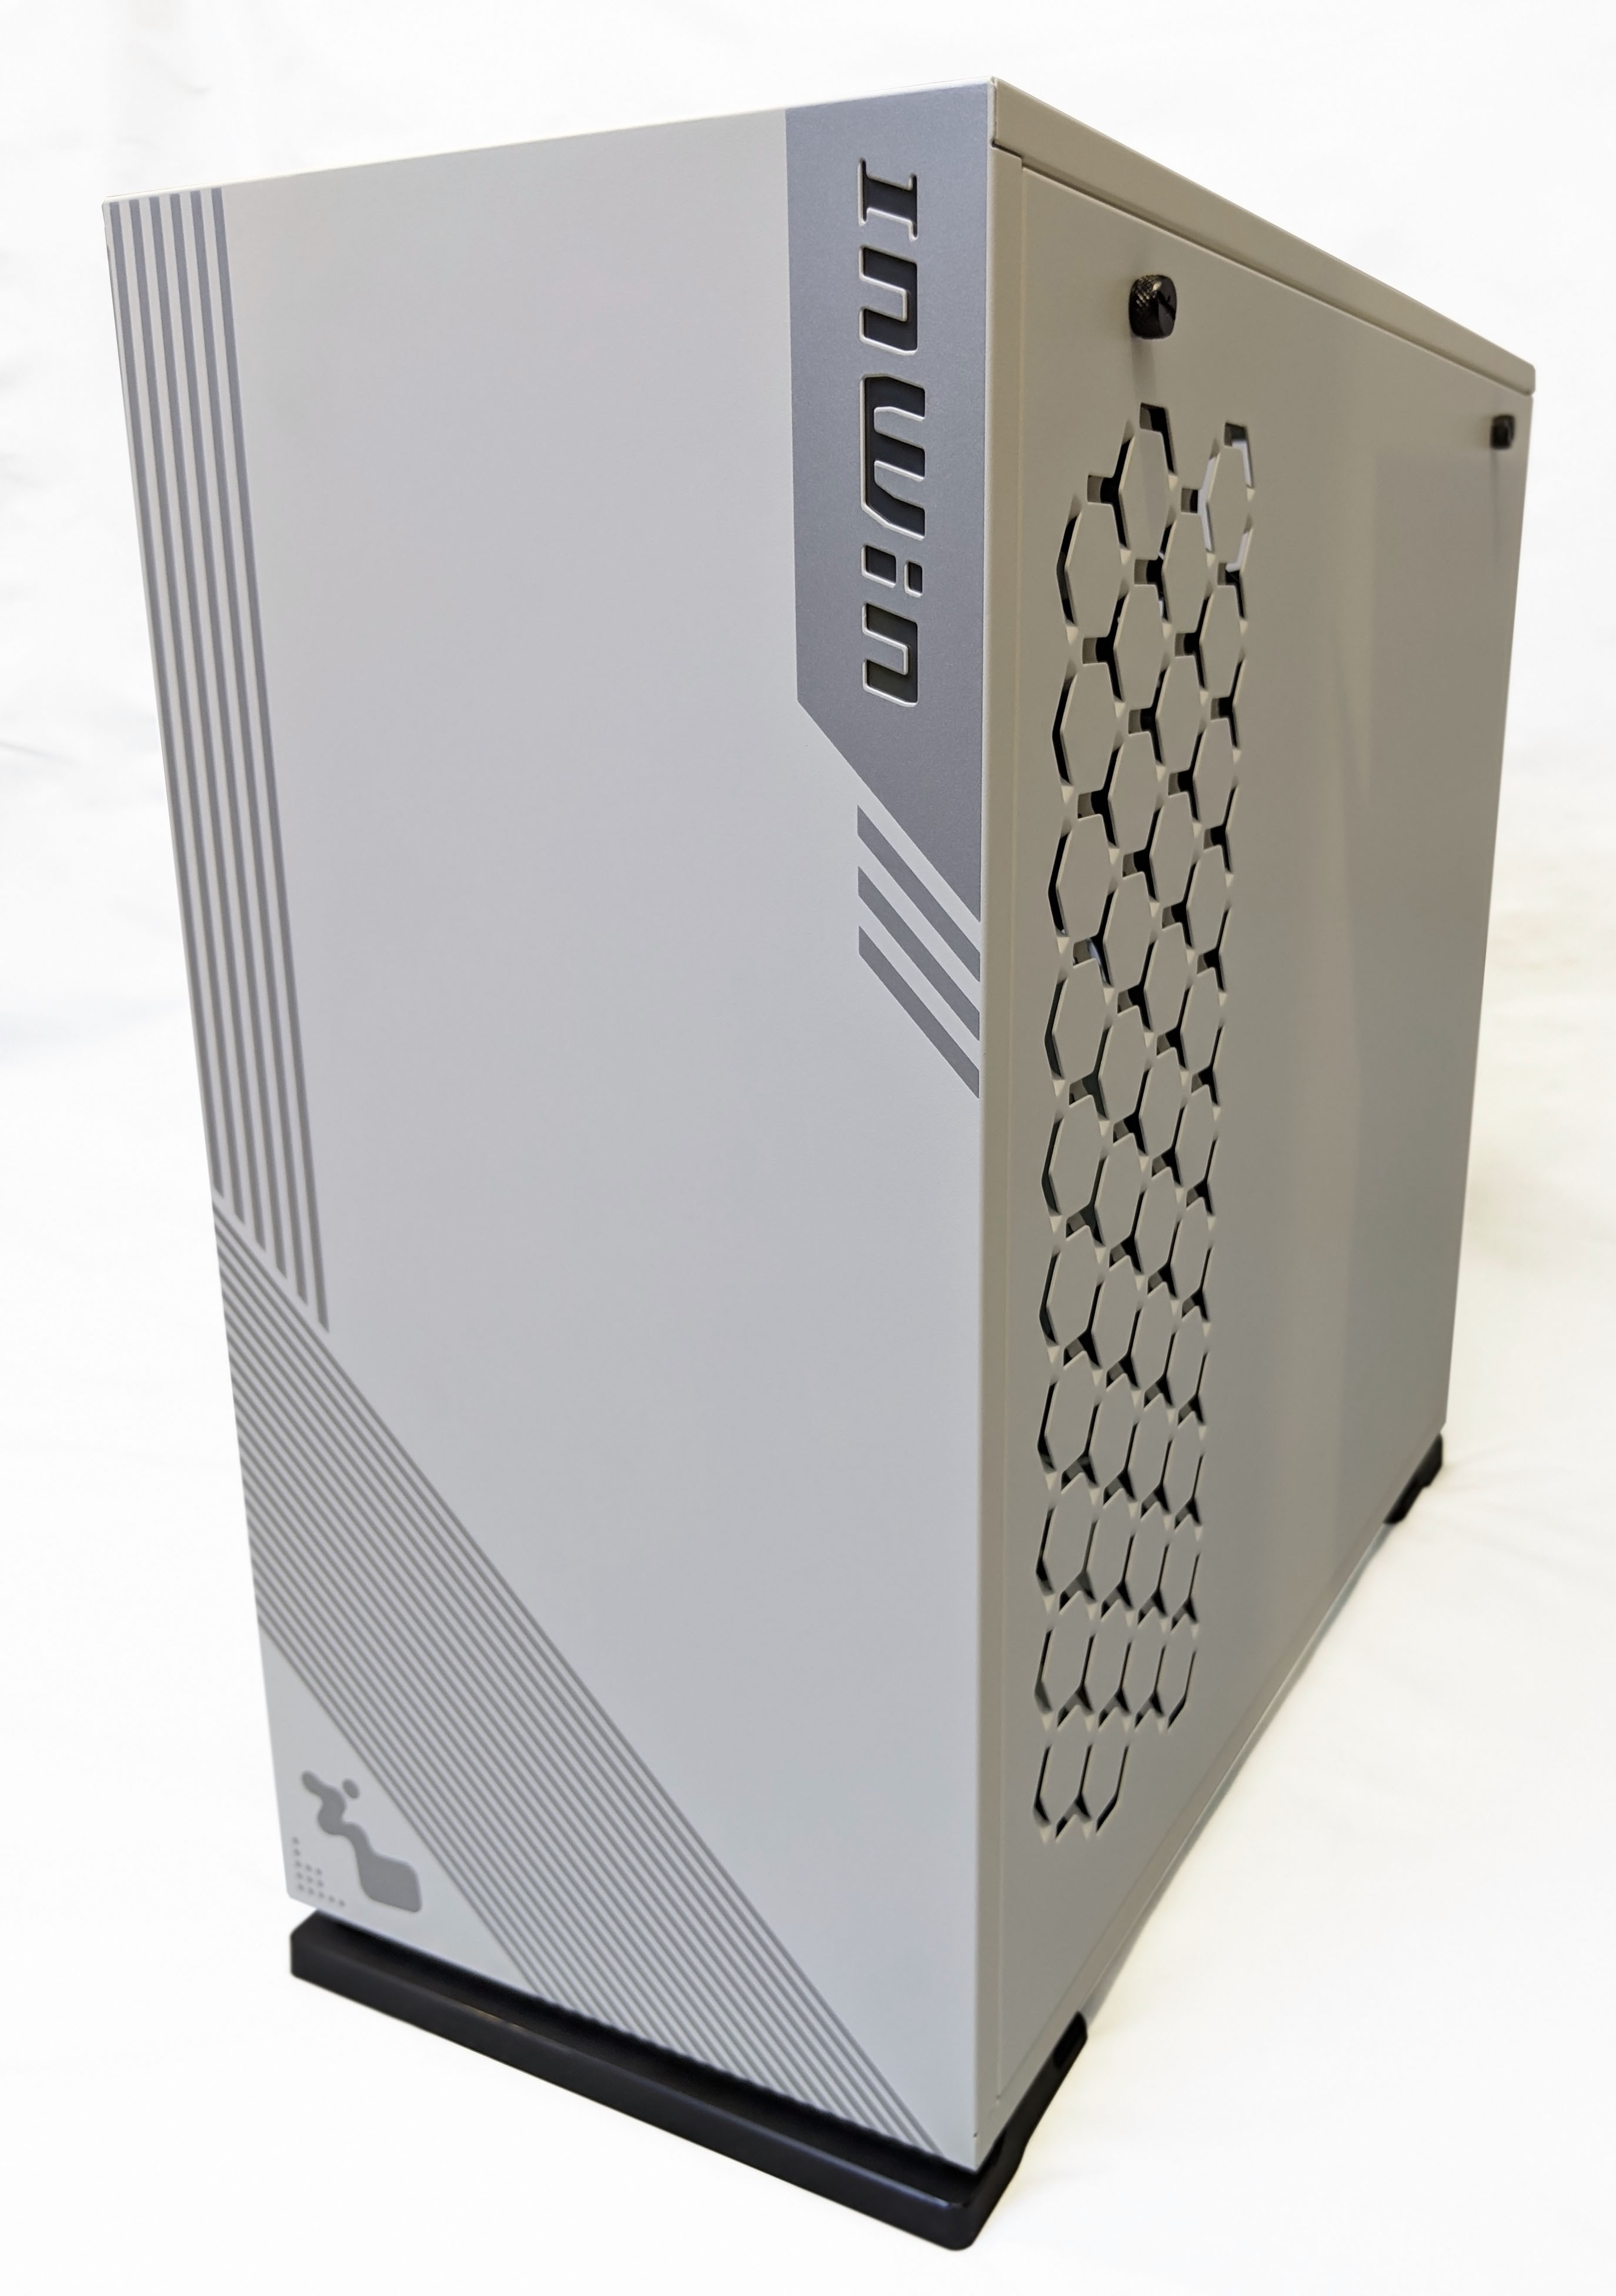
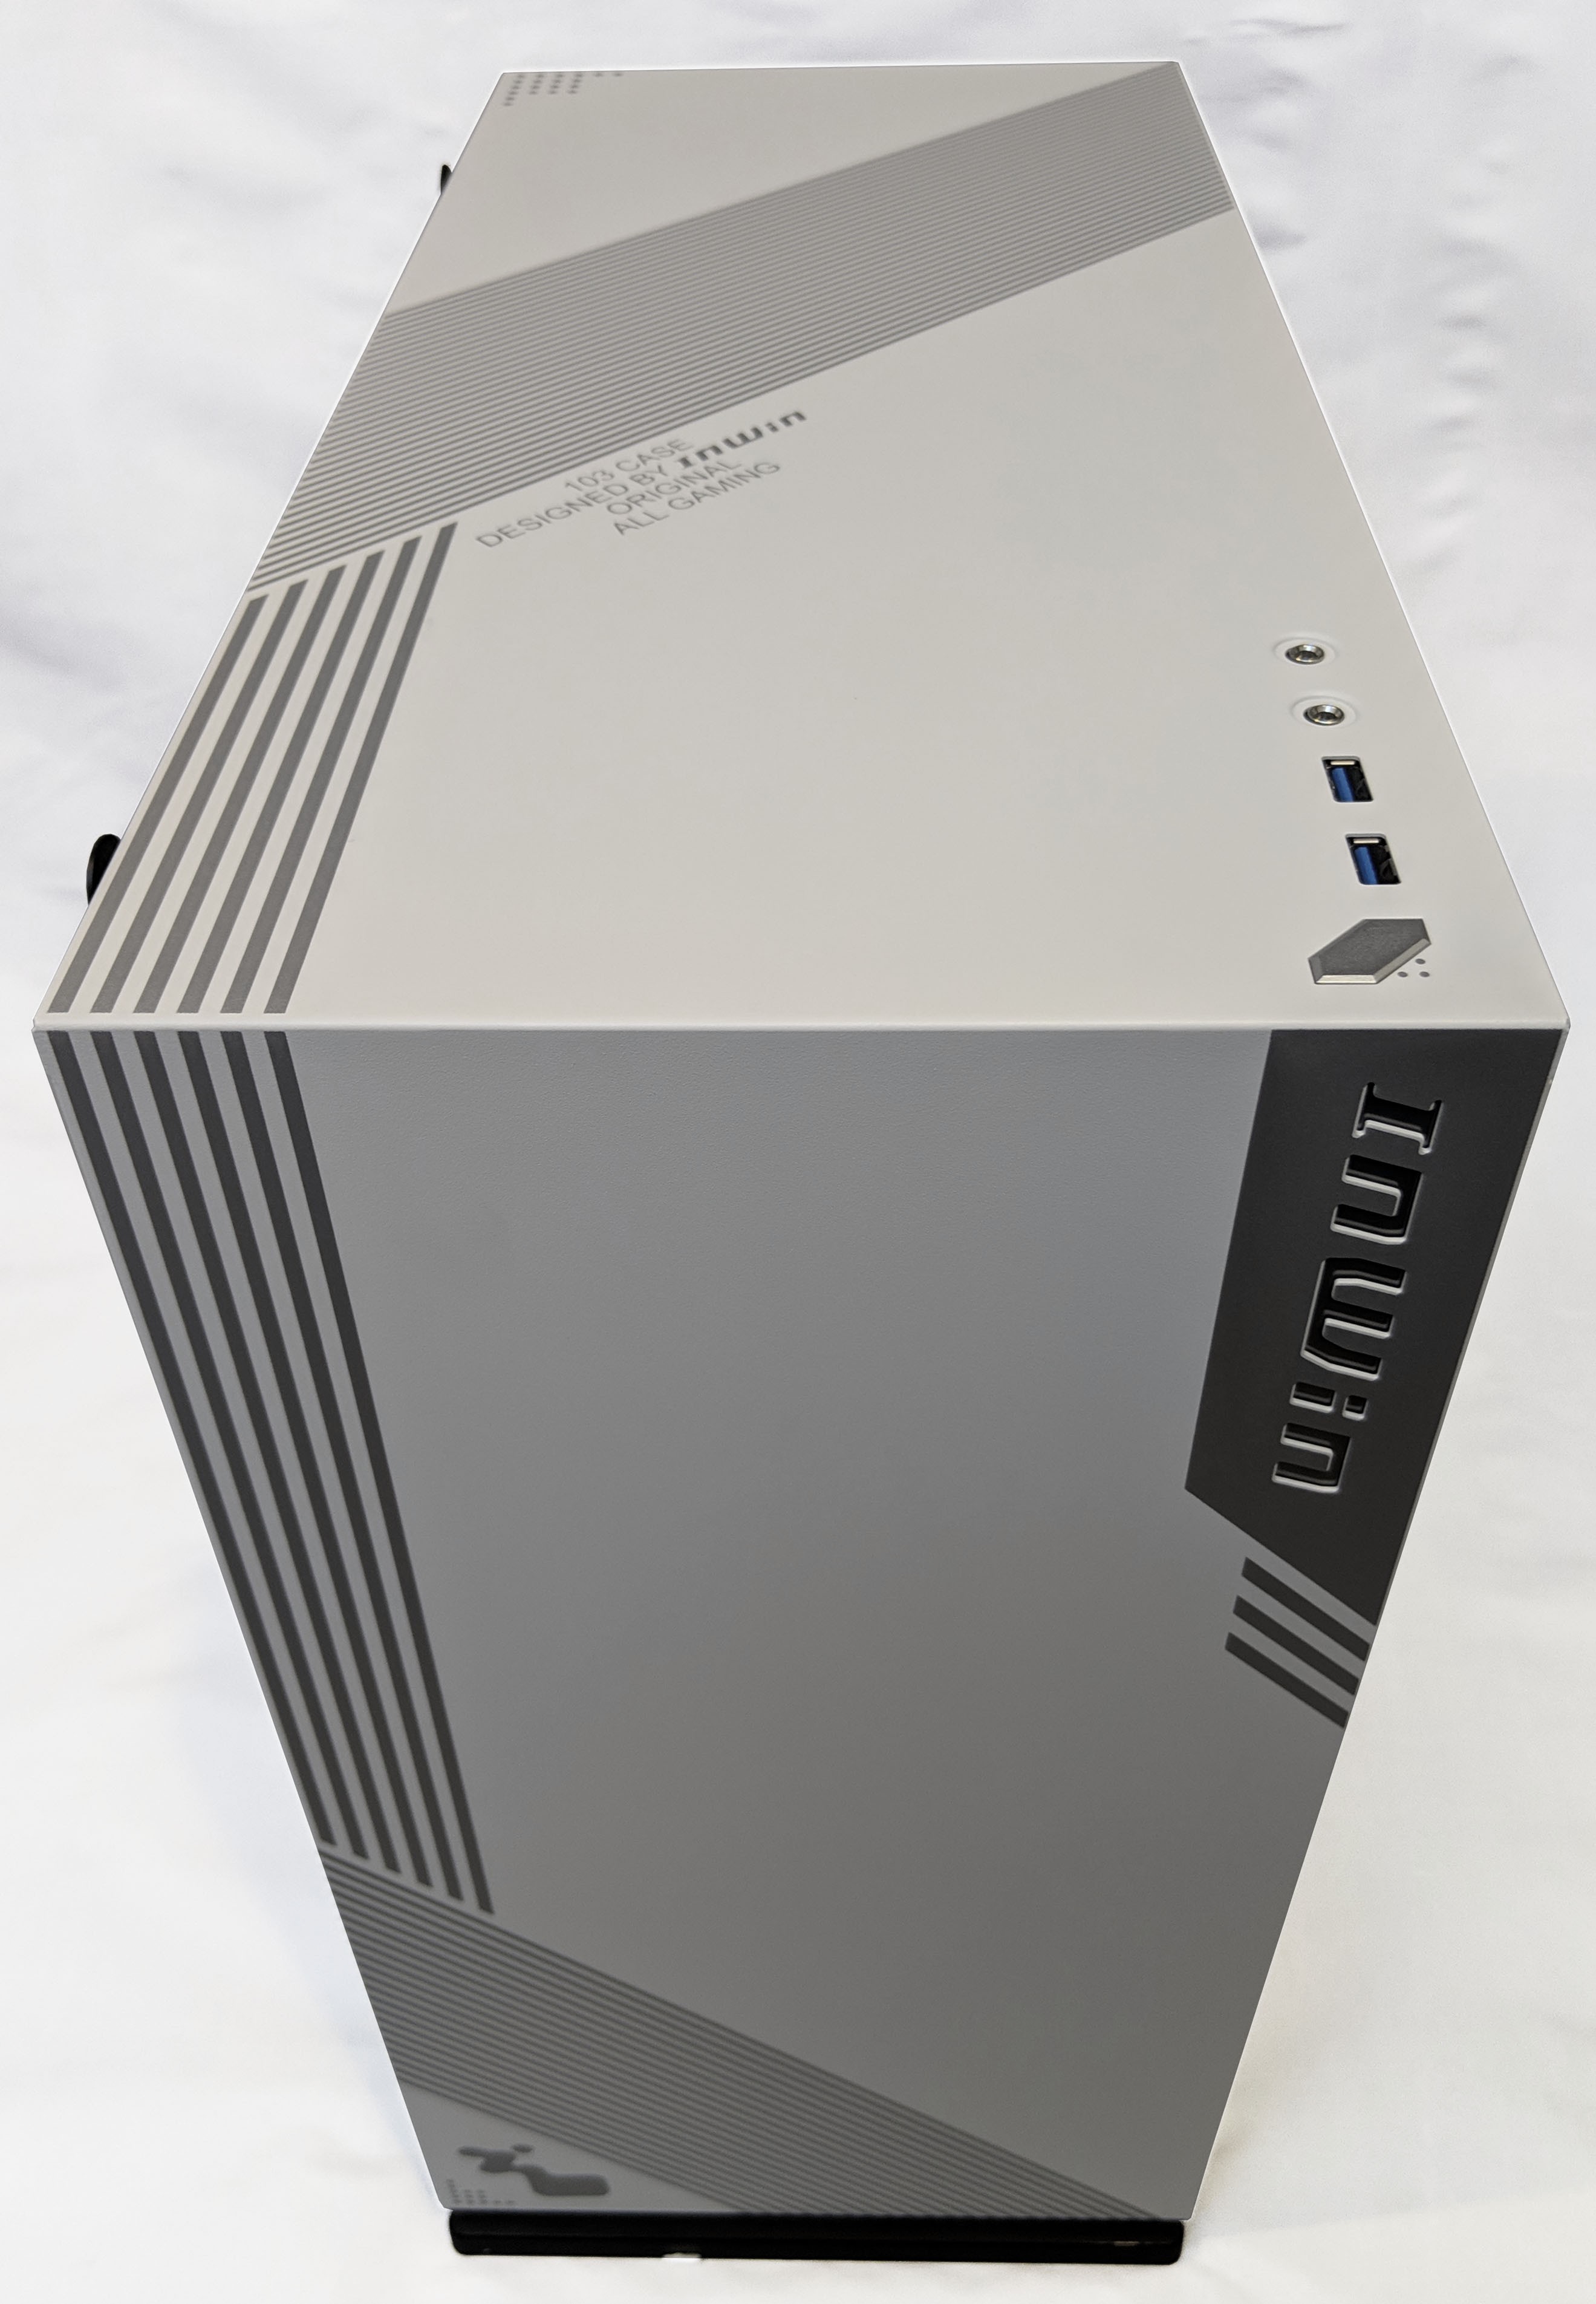
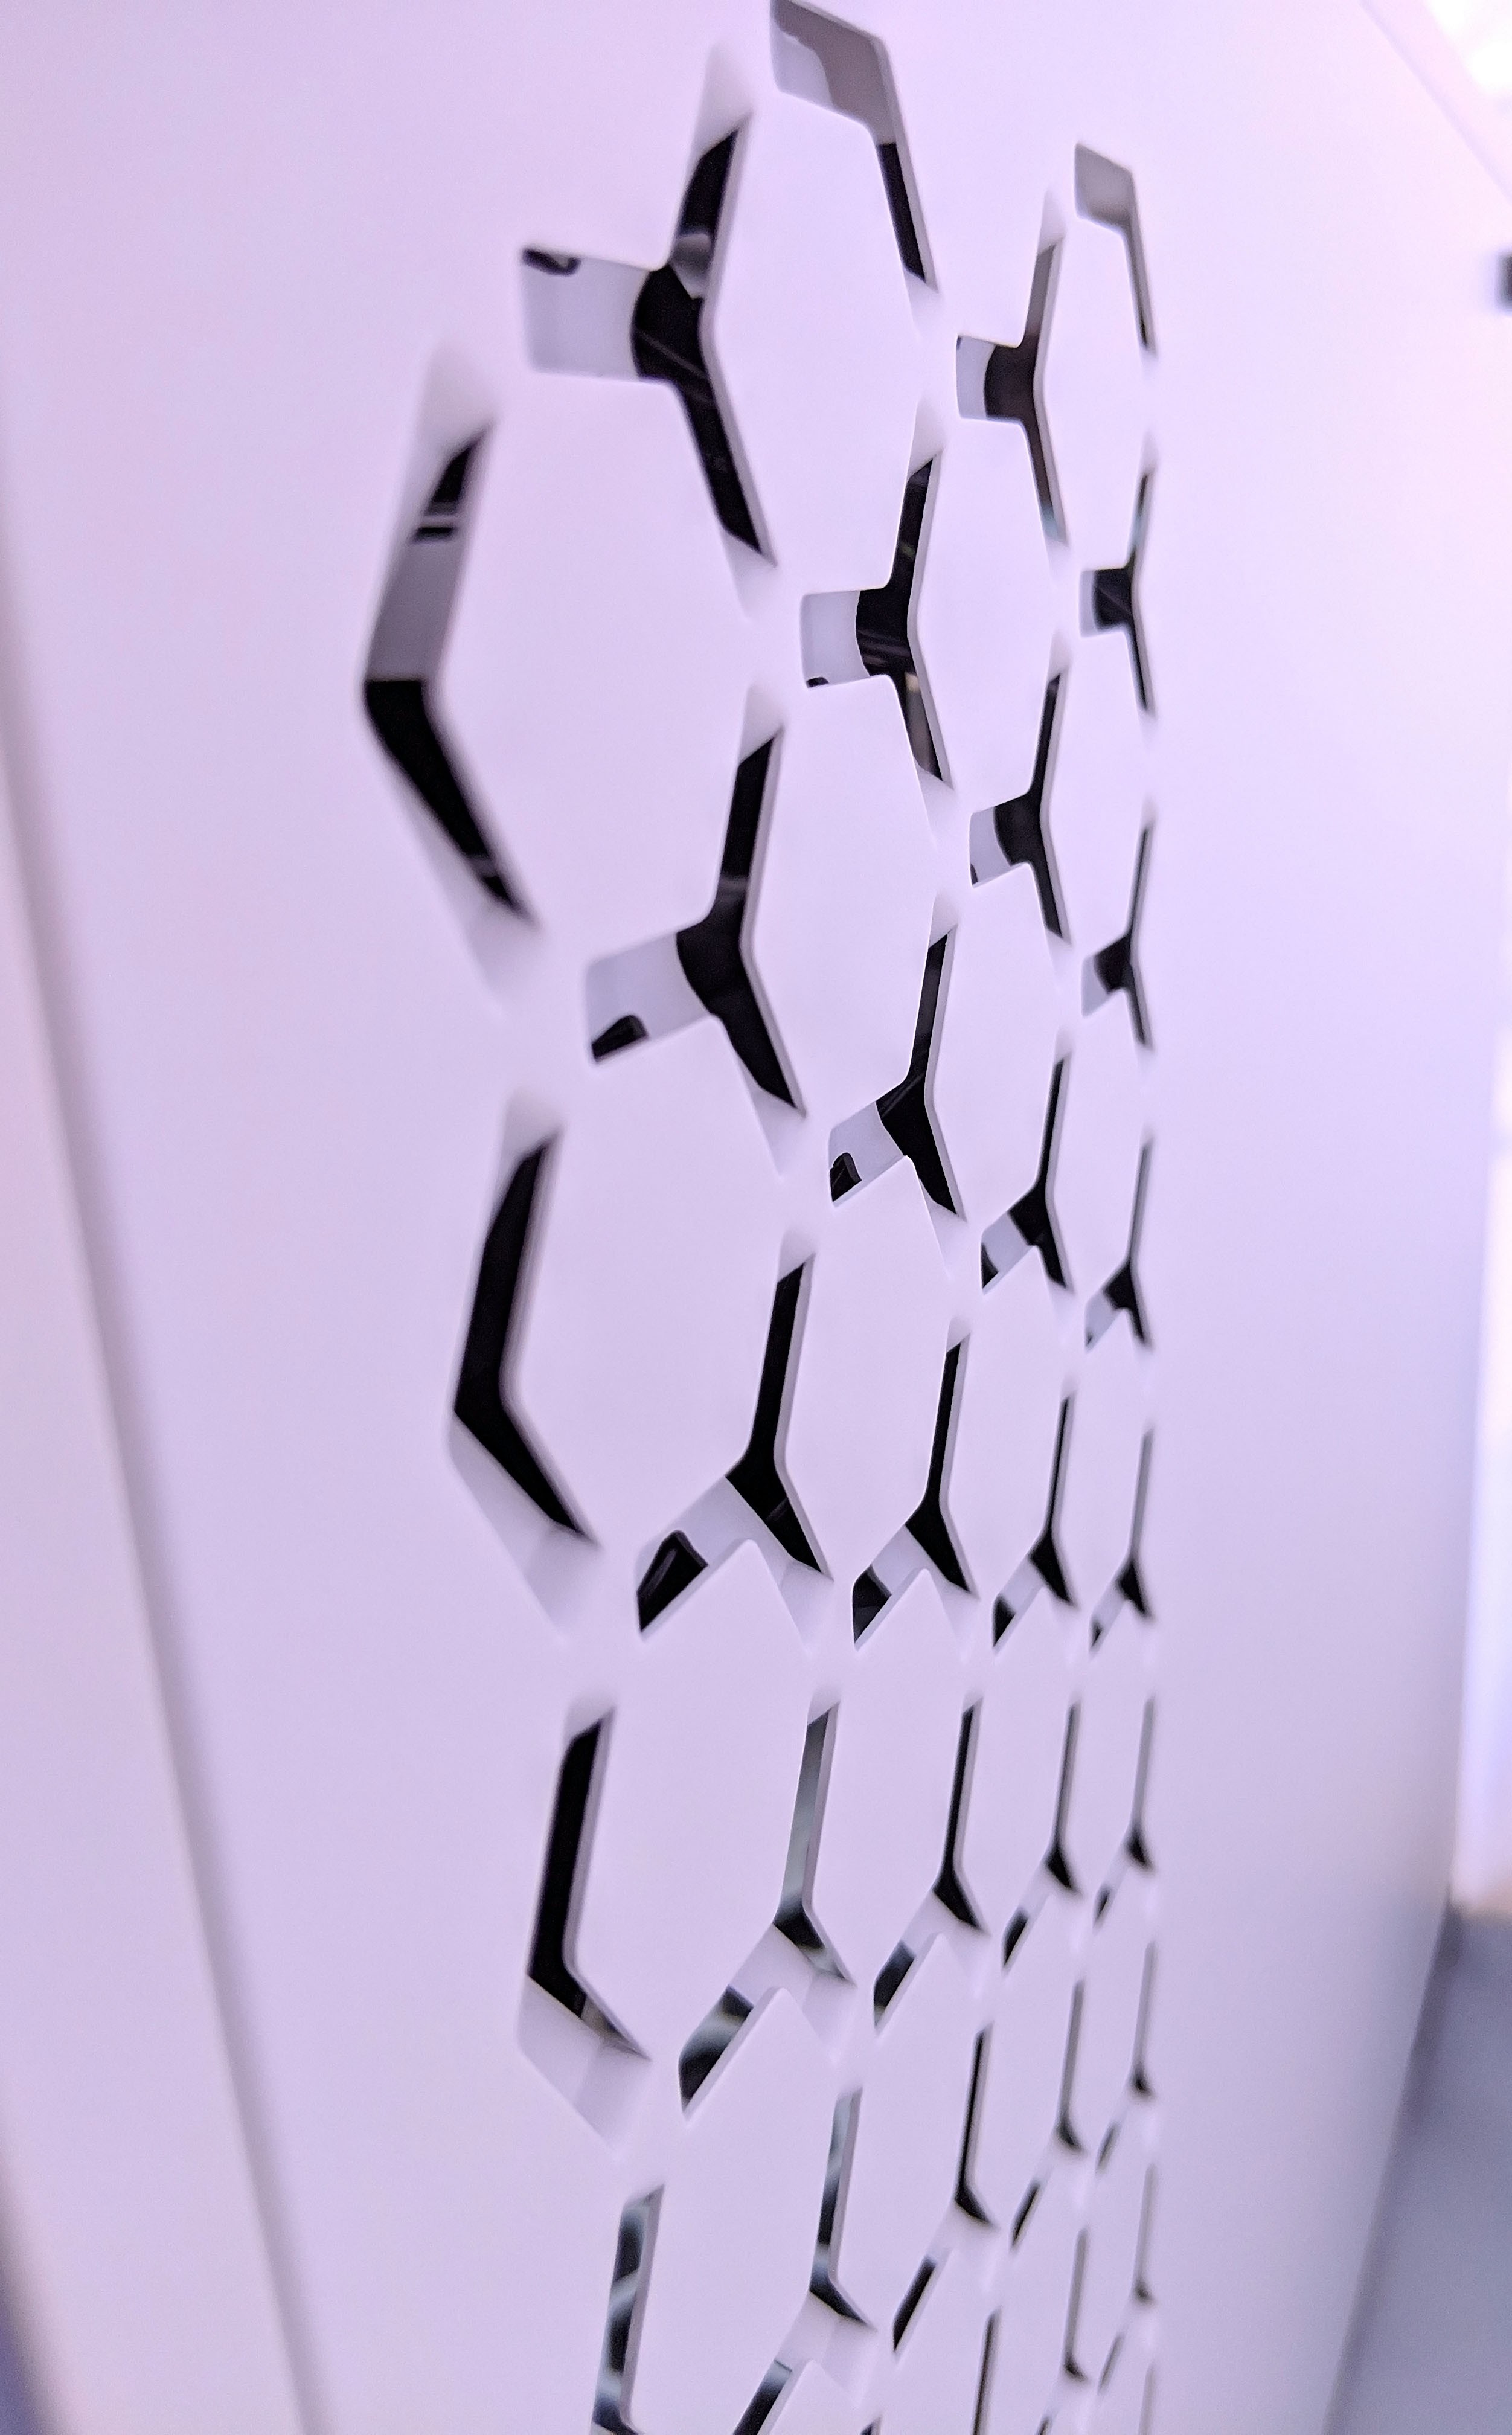
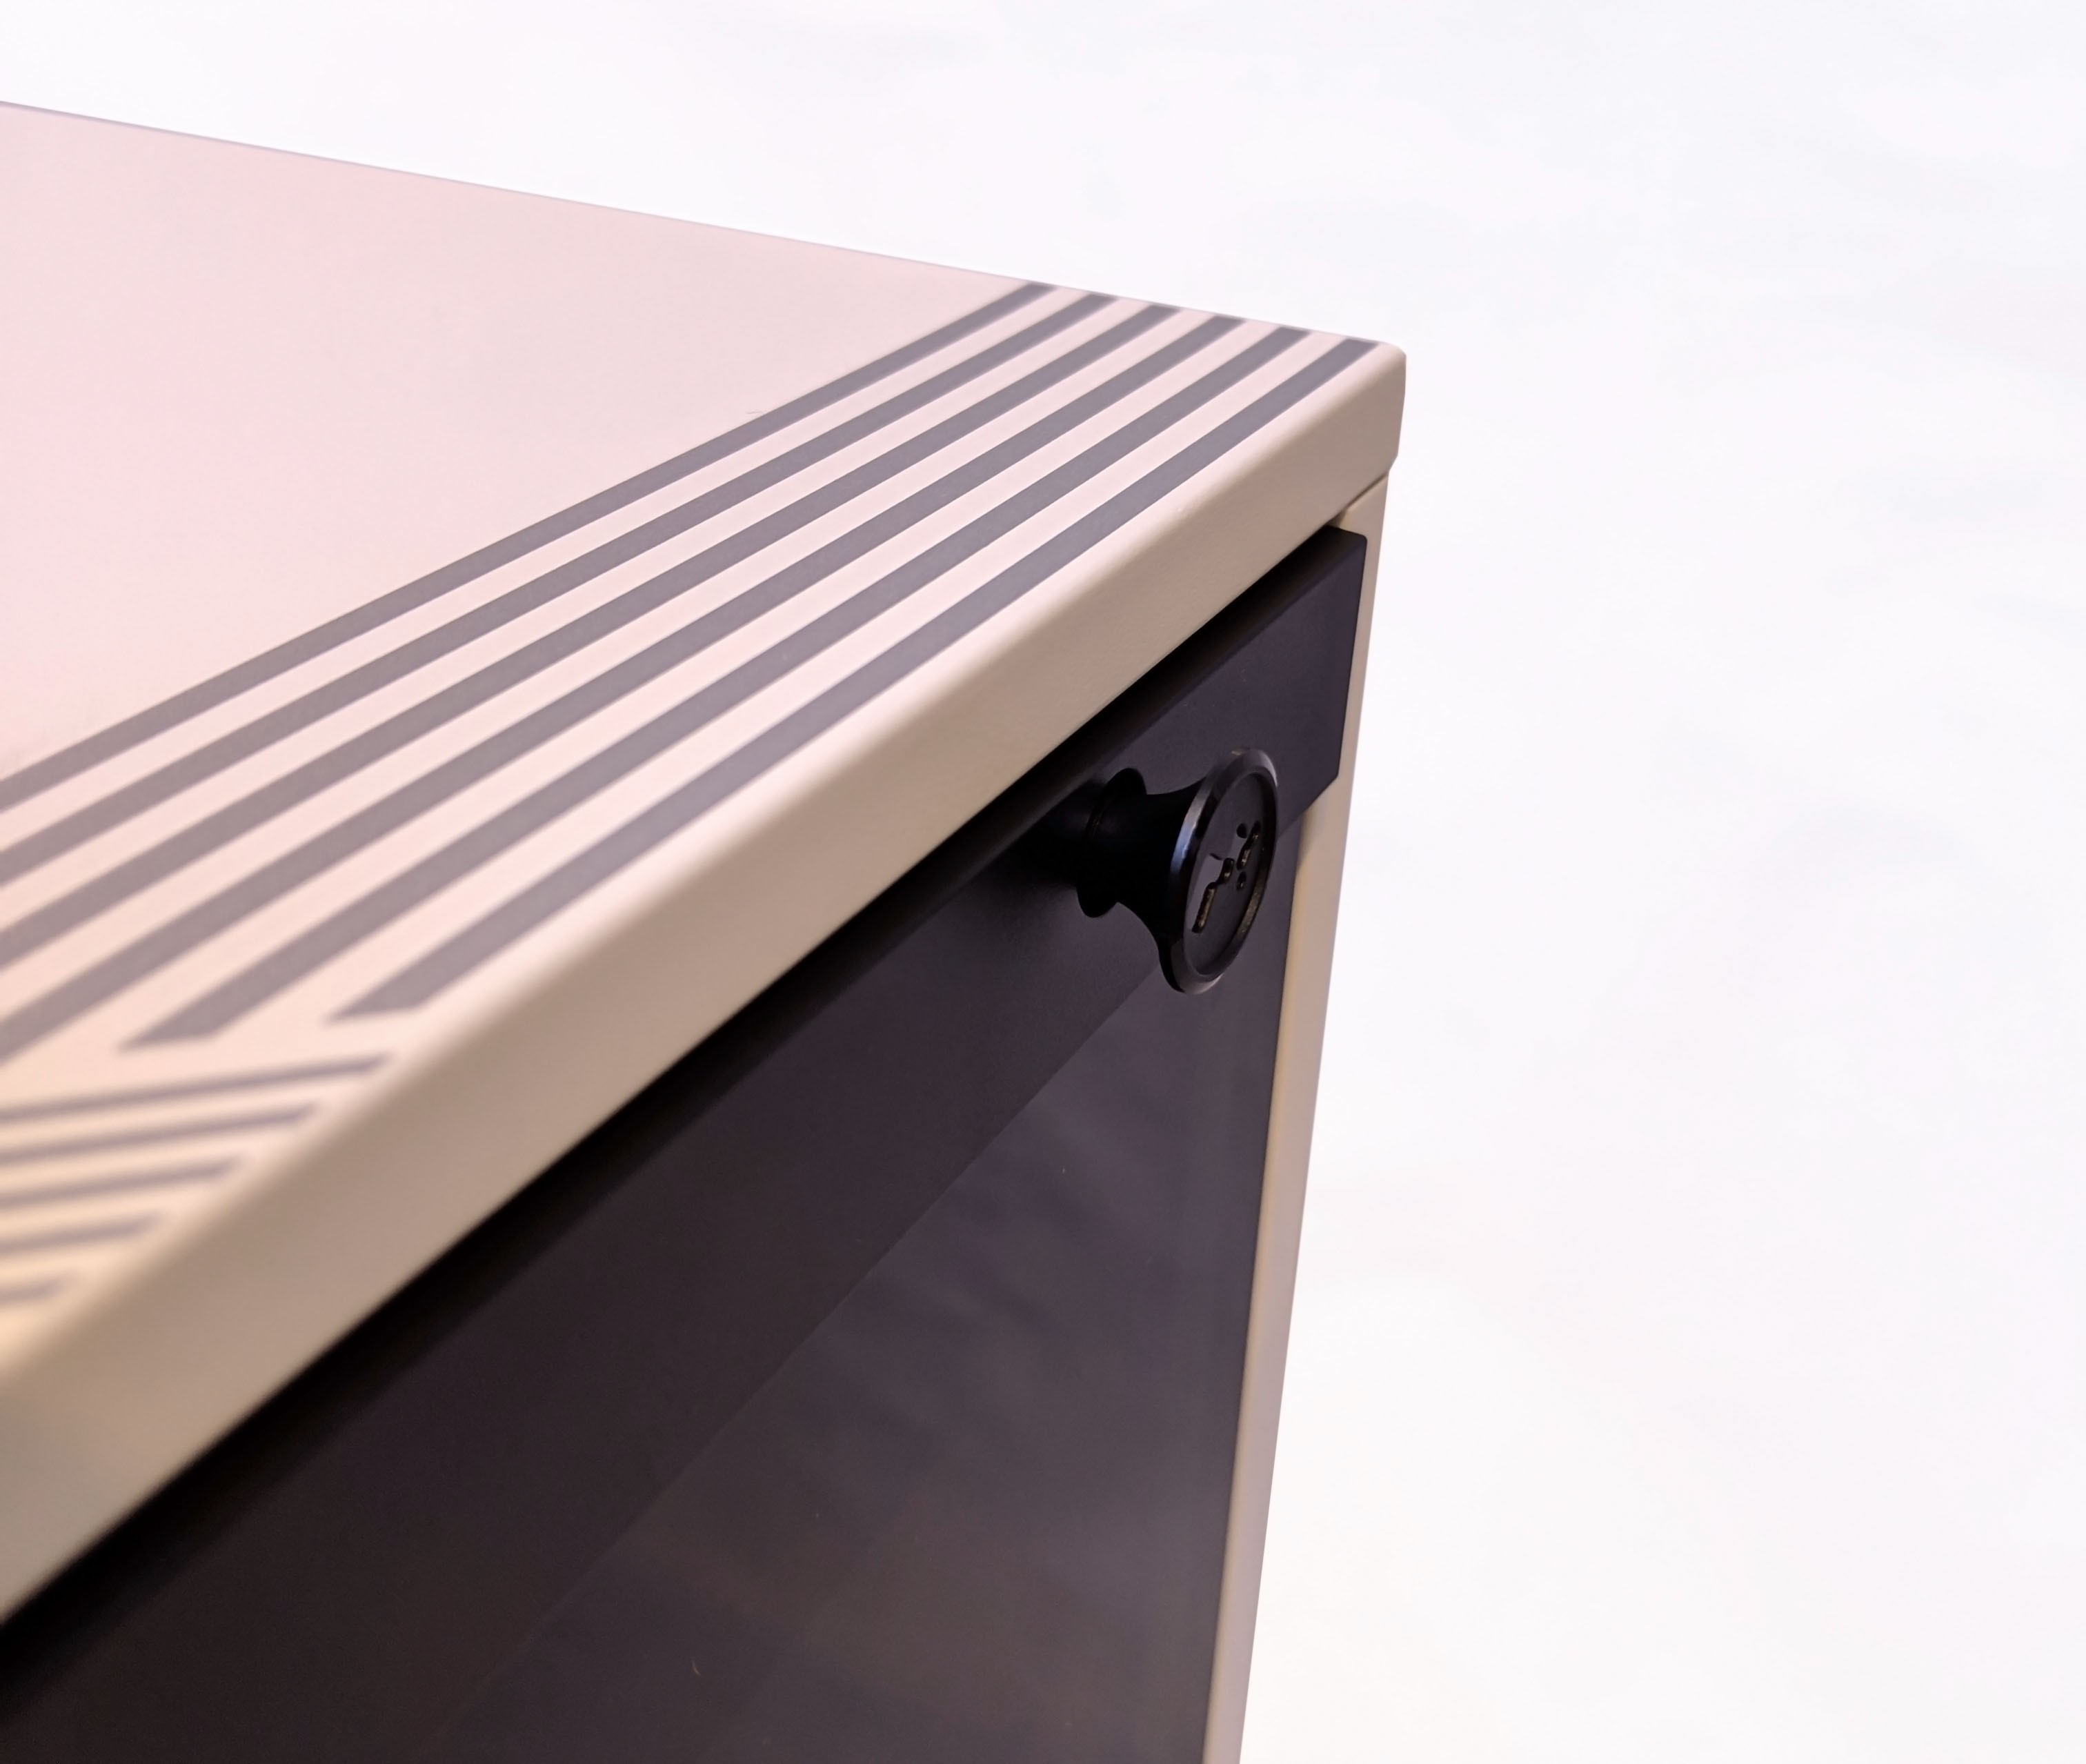
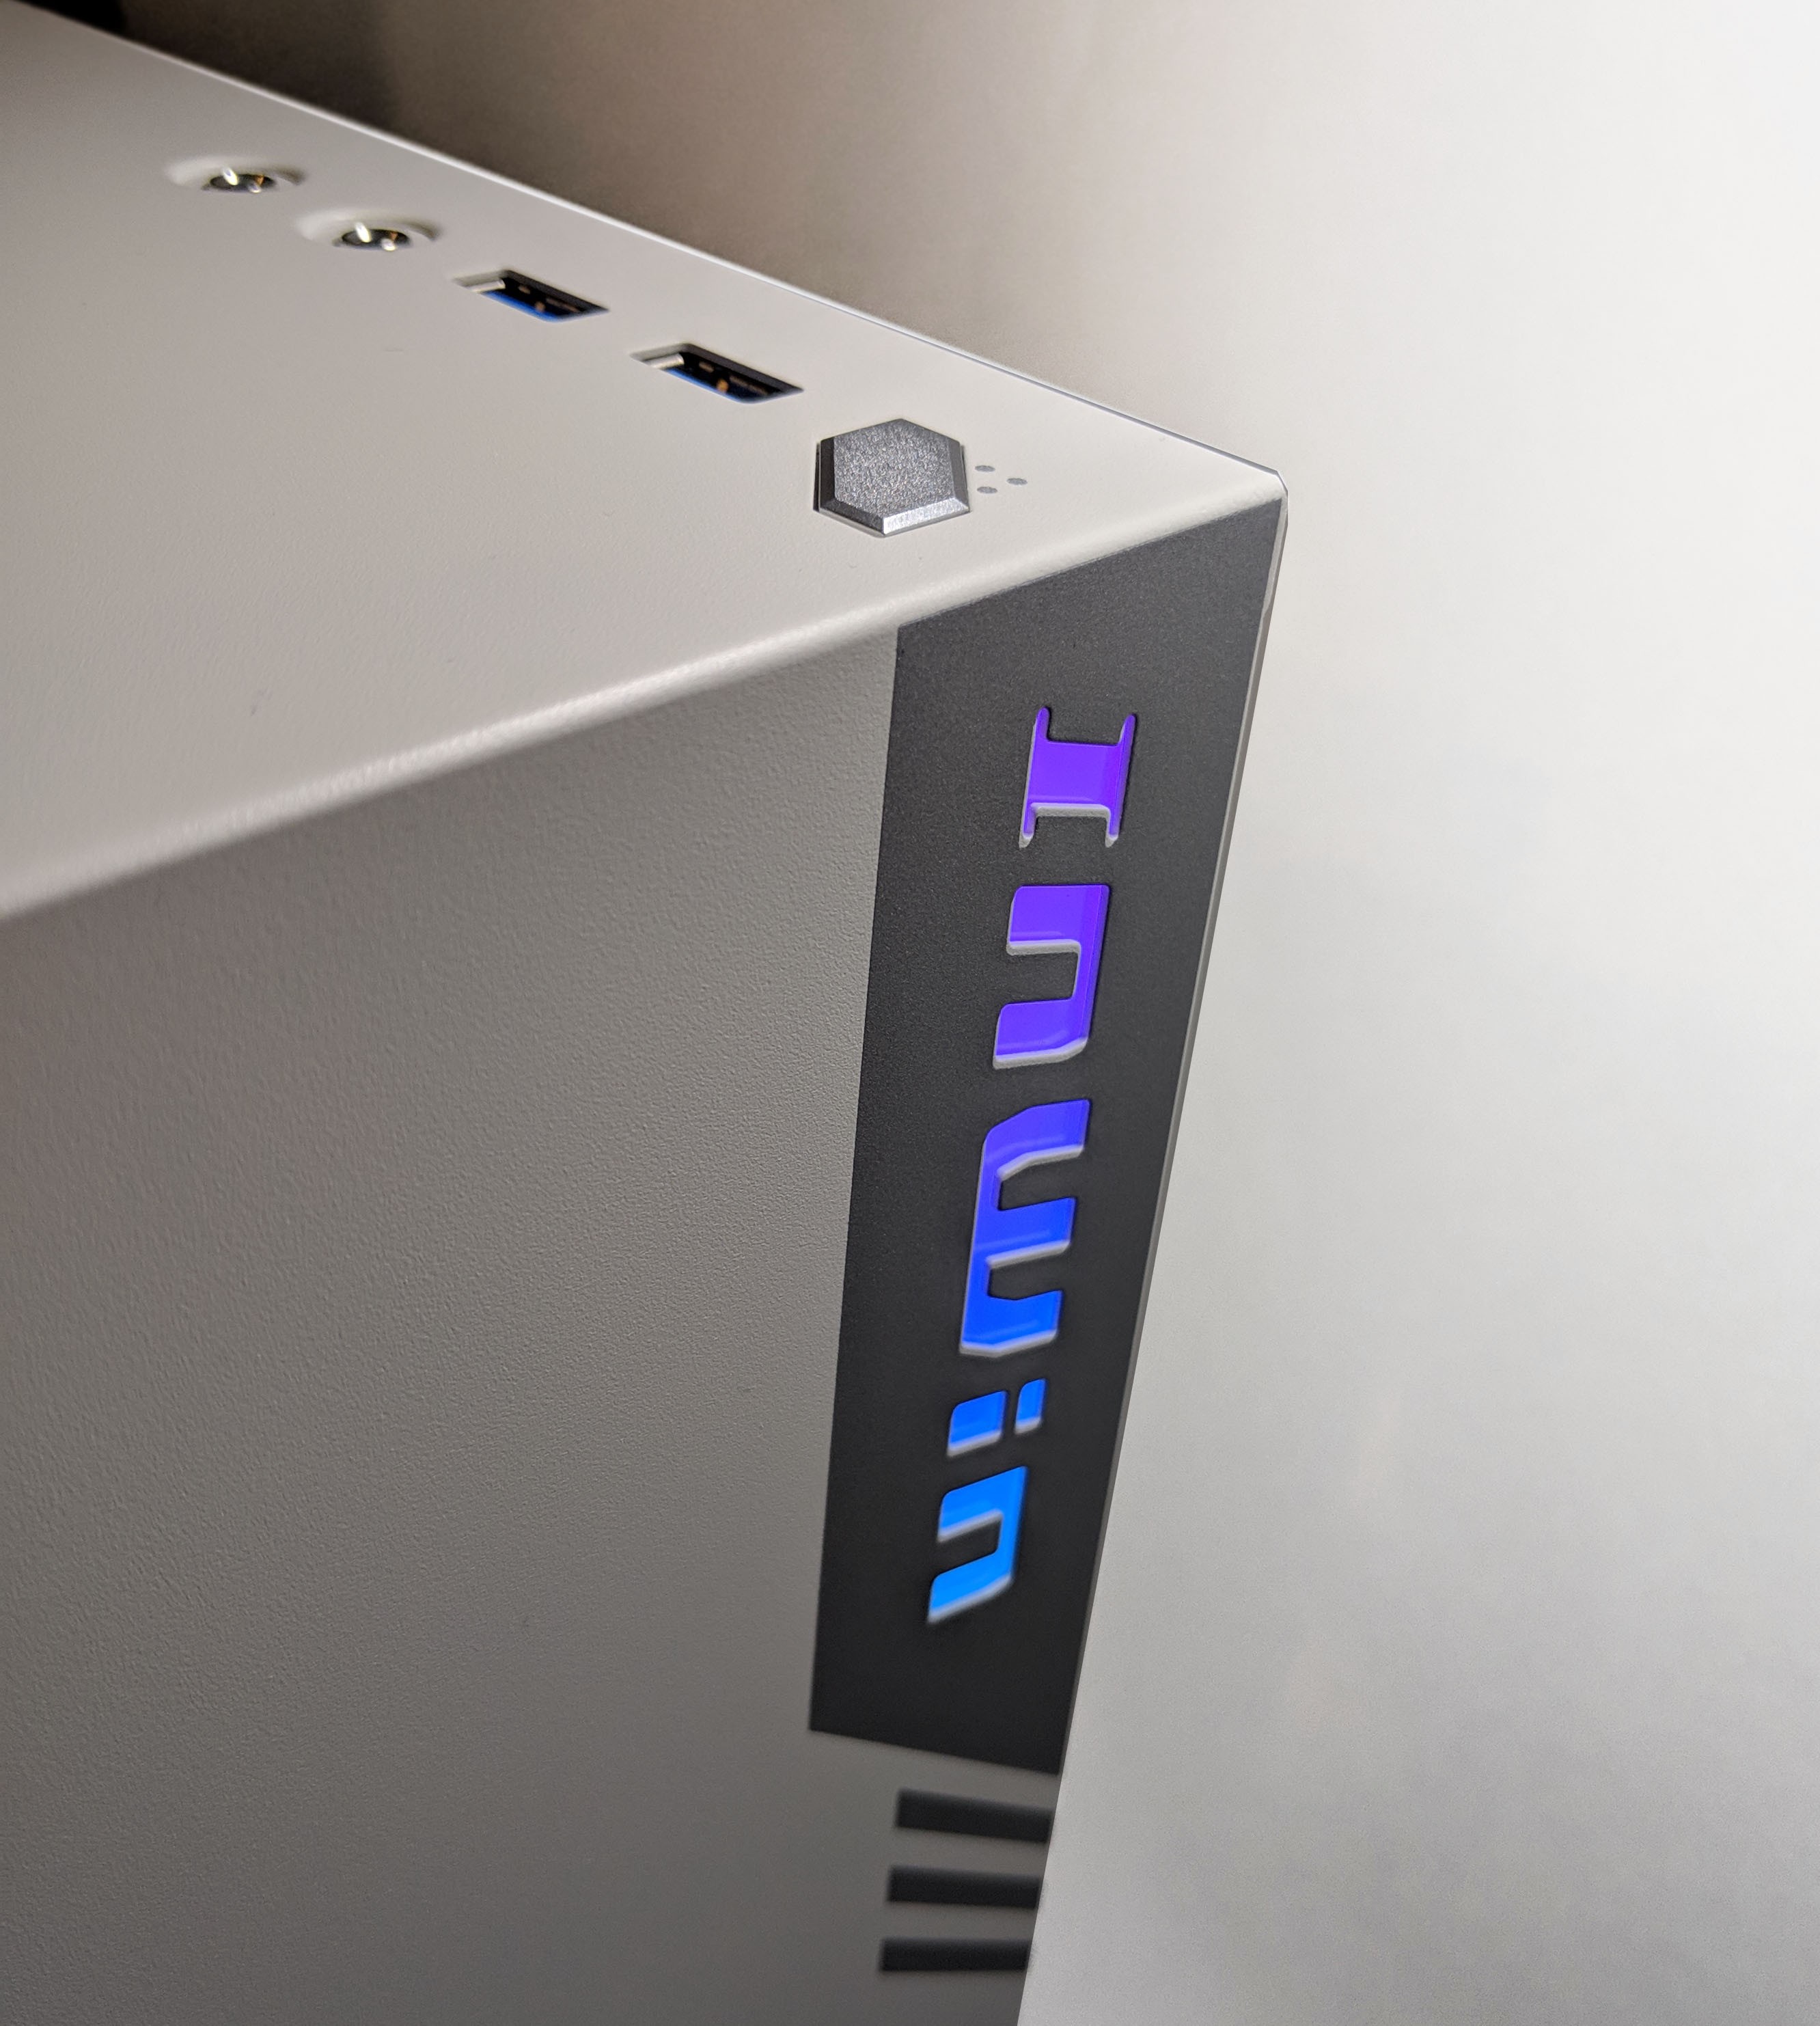
The front is also simple which features grey accents over its white paint. The RGB InWin logo is found on the top right side.
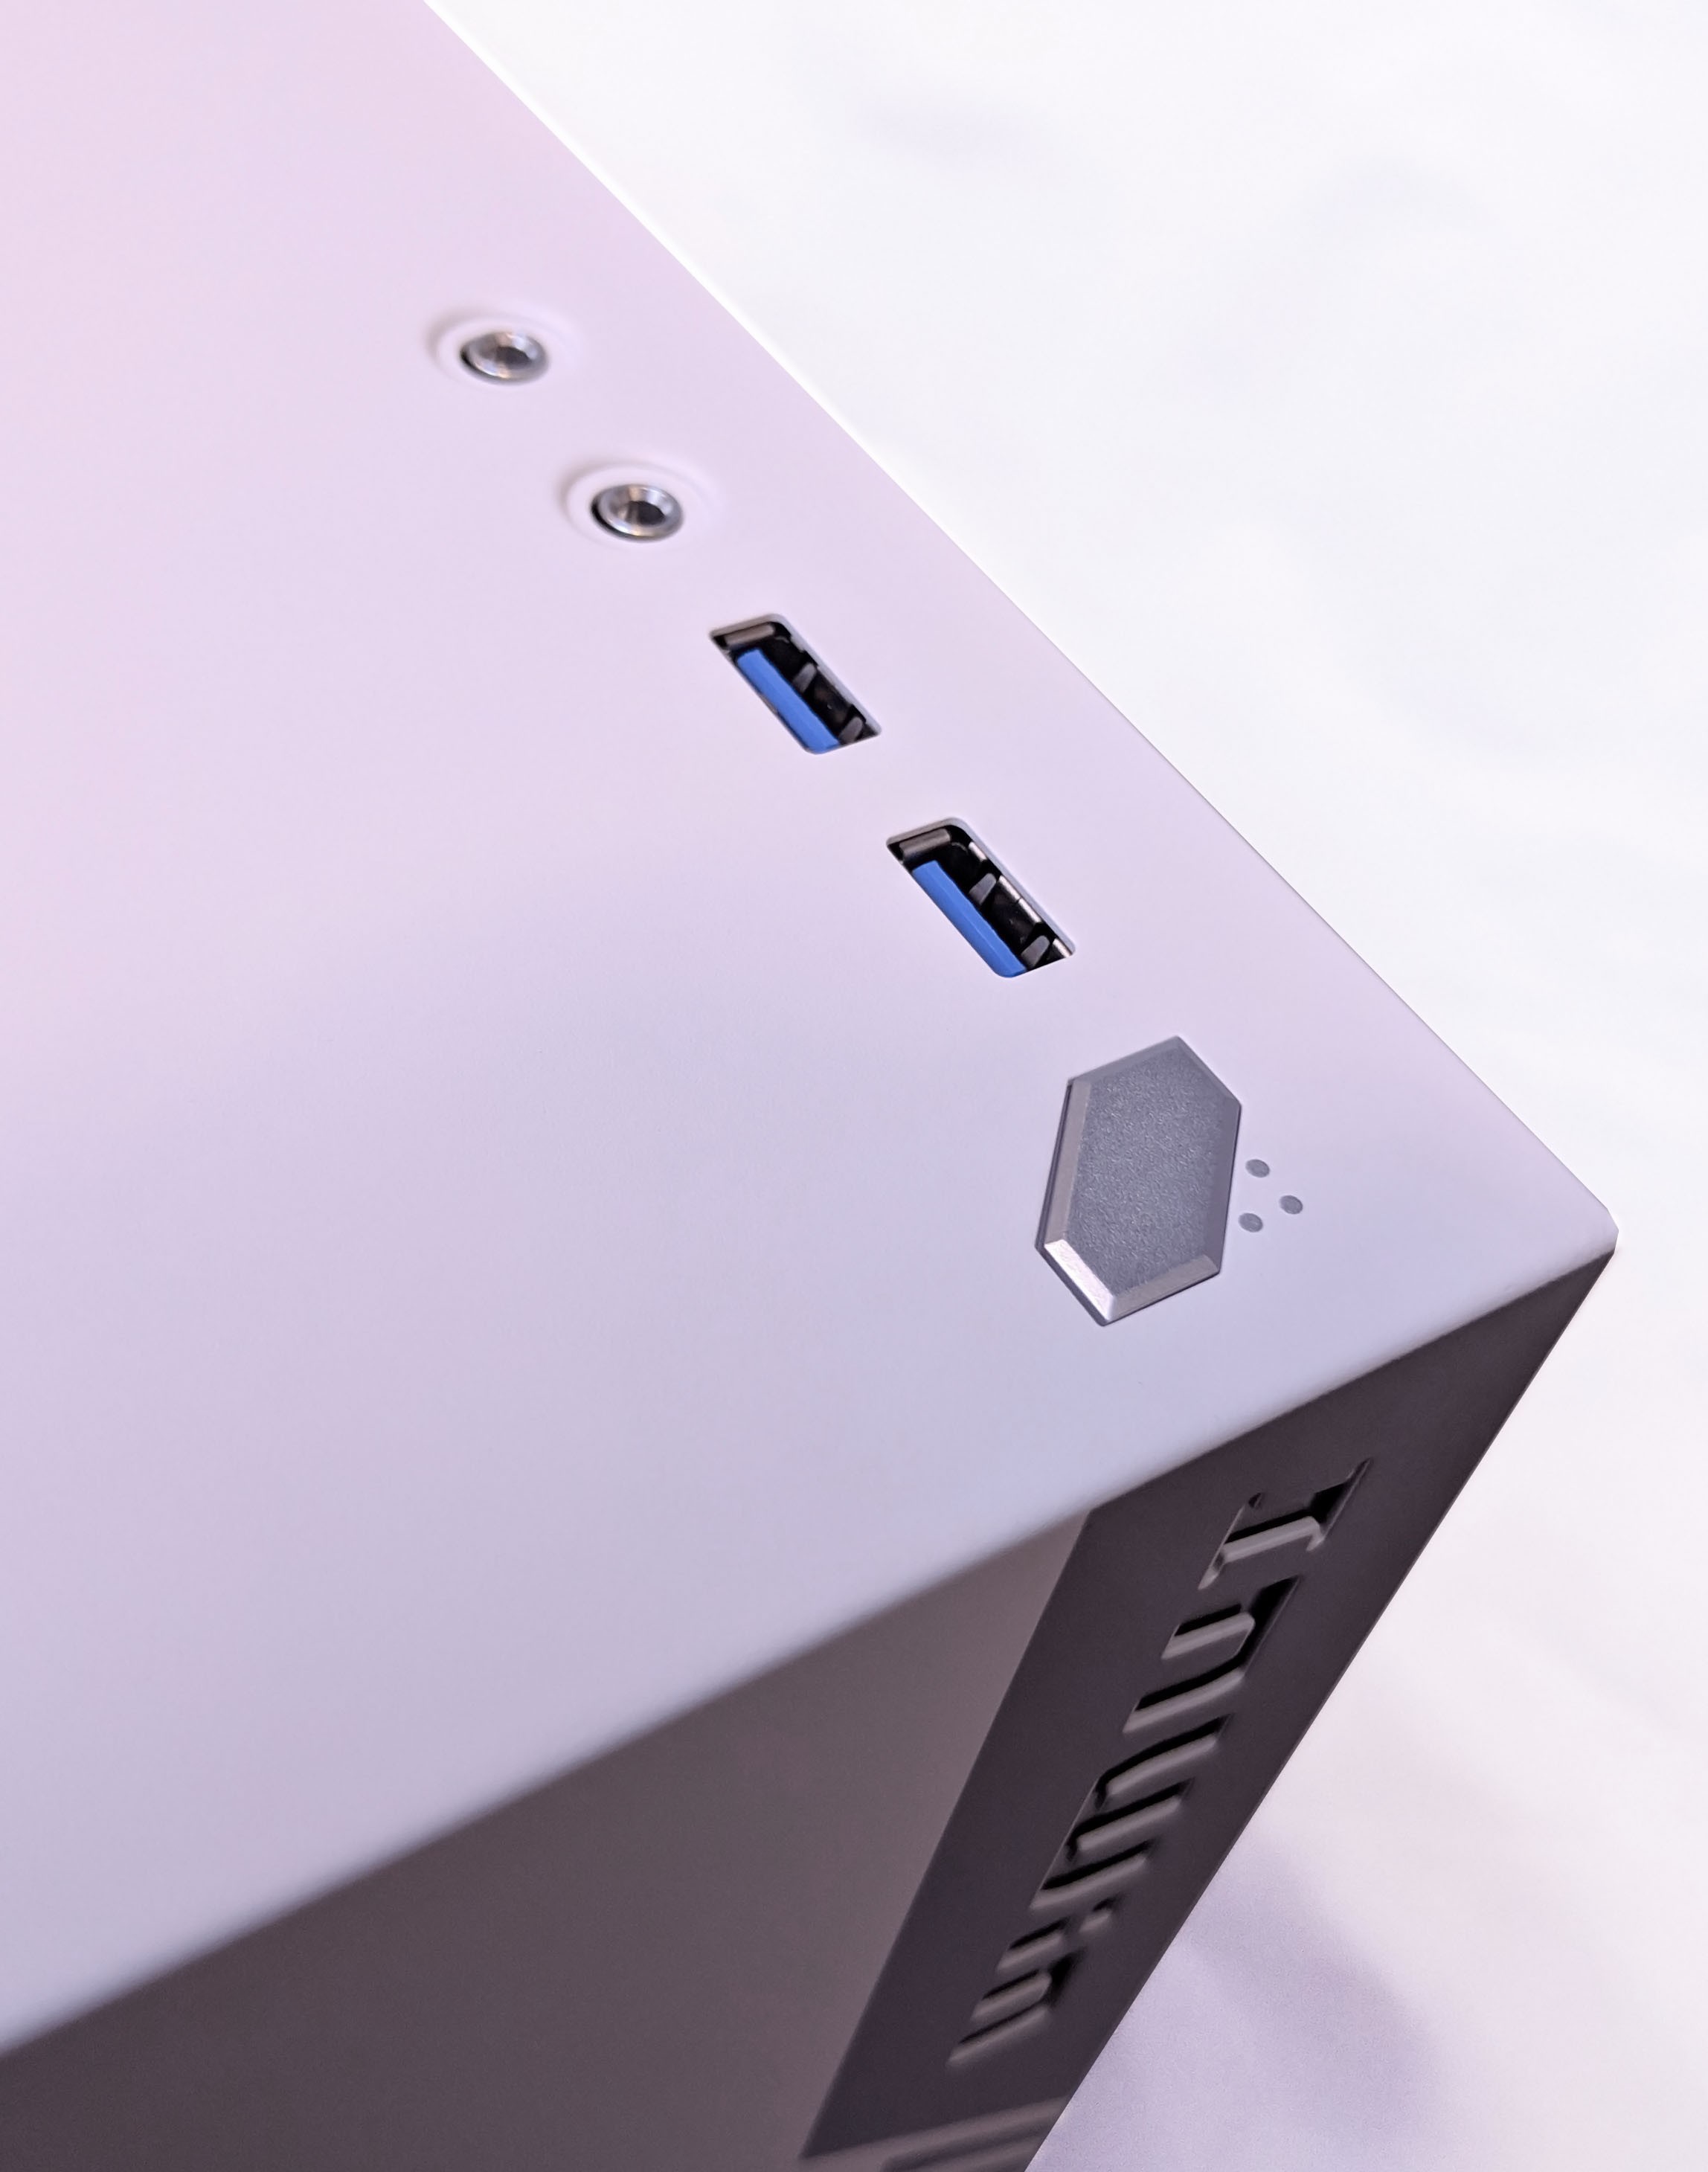
These same designs fan be found on the top of the case which is where you’ll find the front I/O panel. The panel contains two USB 3.0 ports a 3.5mm headphone and mic jack, and a power button. I’ve noticed more and more cases eliminating the reset button which I personally find as a deterrent. The reset button is almost a requirement if you plan on doing any overclock testing which unfortunately this case does not have.
That being said, I actually really like the look, feel and placement of the power button. The click is crisp and clean, almost fun to press.

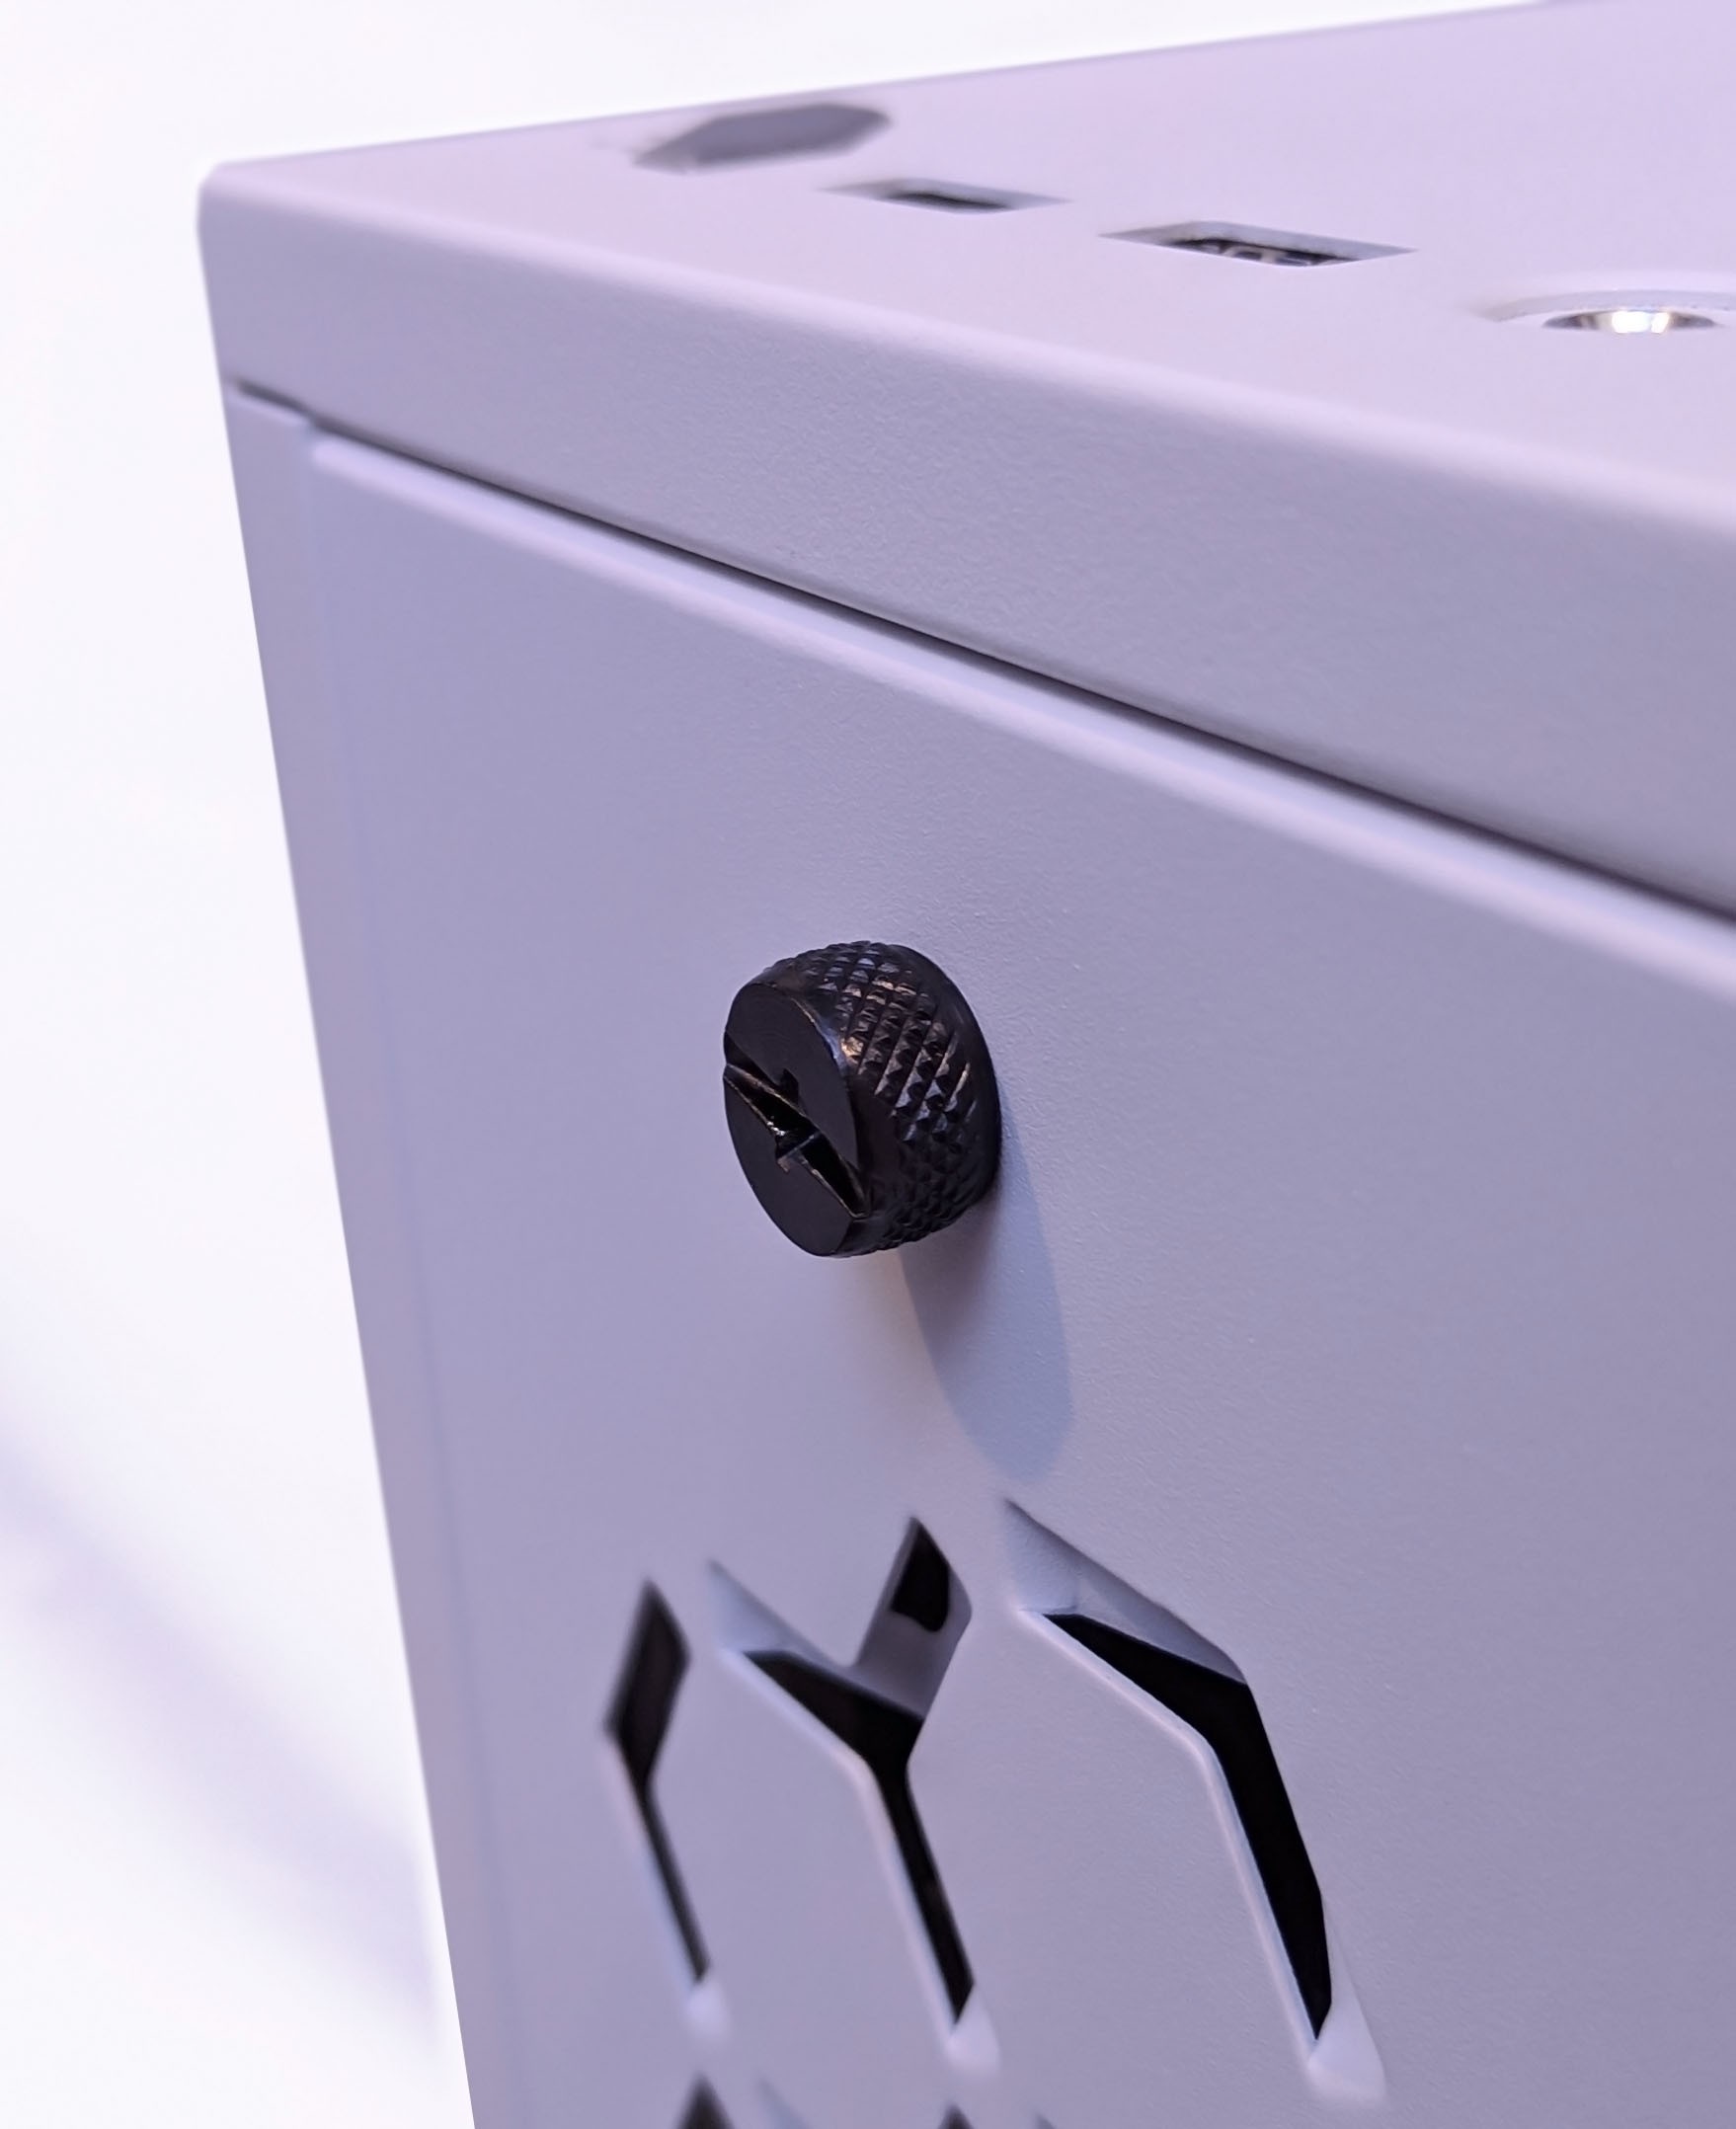
Moving back to the right side of the case, the fan exhaust consists of depressed areas which leaves a raised honeycomb pattern as a result. The depressed areas are quite deep so there should be plenty of space for two 120mm fans to blow air through.
The two side panels are removed in a similar fashion. The back panel is removed by unscrewing the two thumb screws until the panel tilts down which can then be lifted out. The front panel lifts out the same way however it is held in by two press-in press-out knobs.
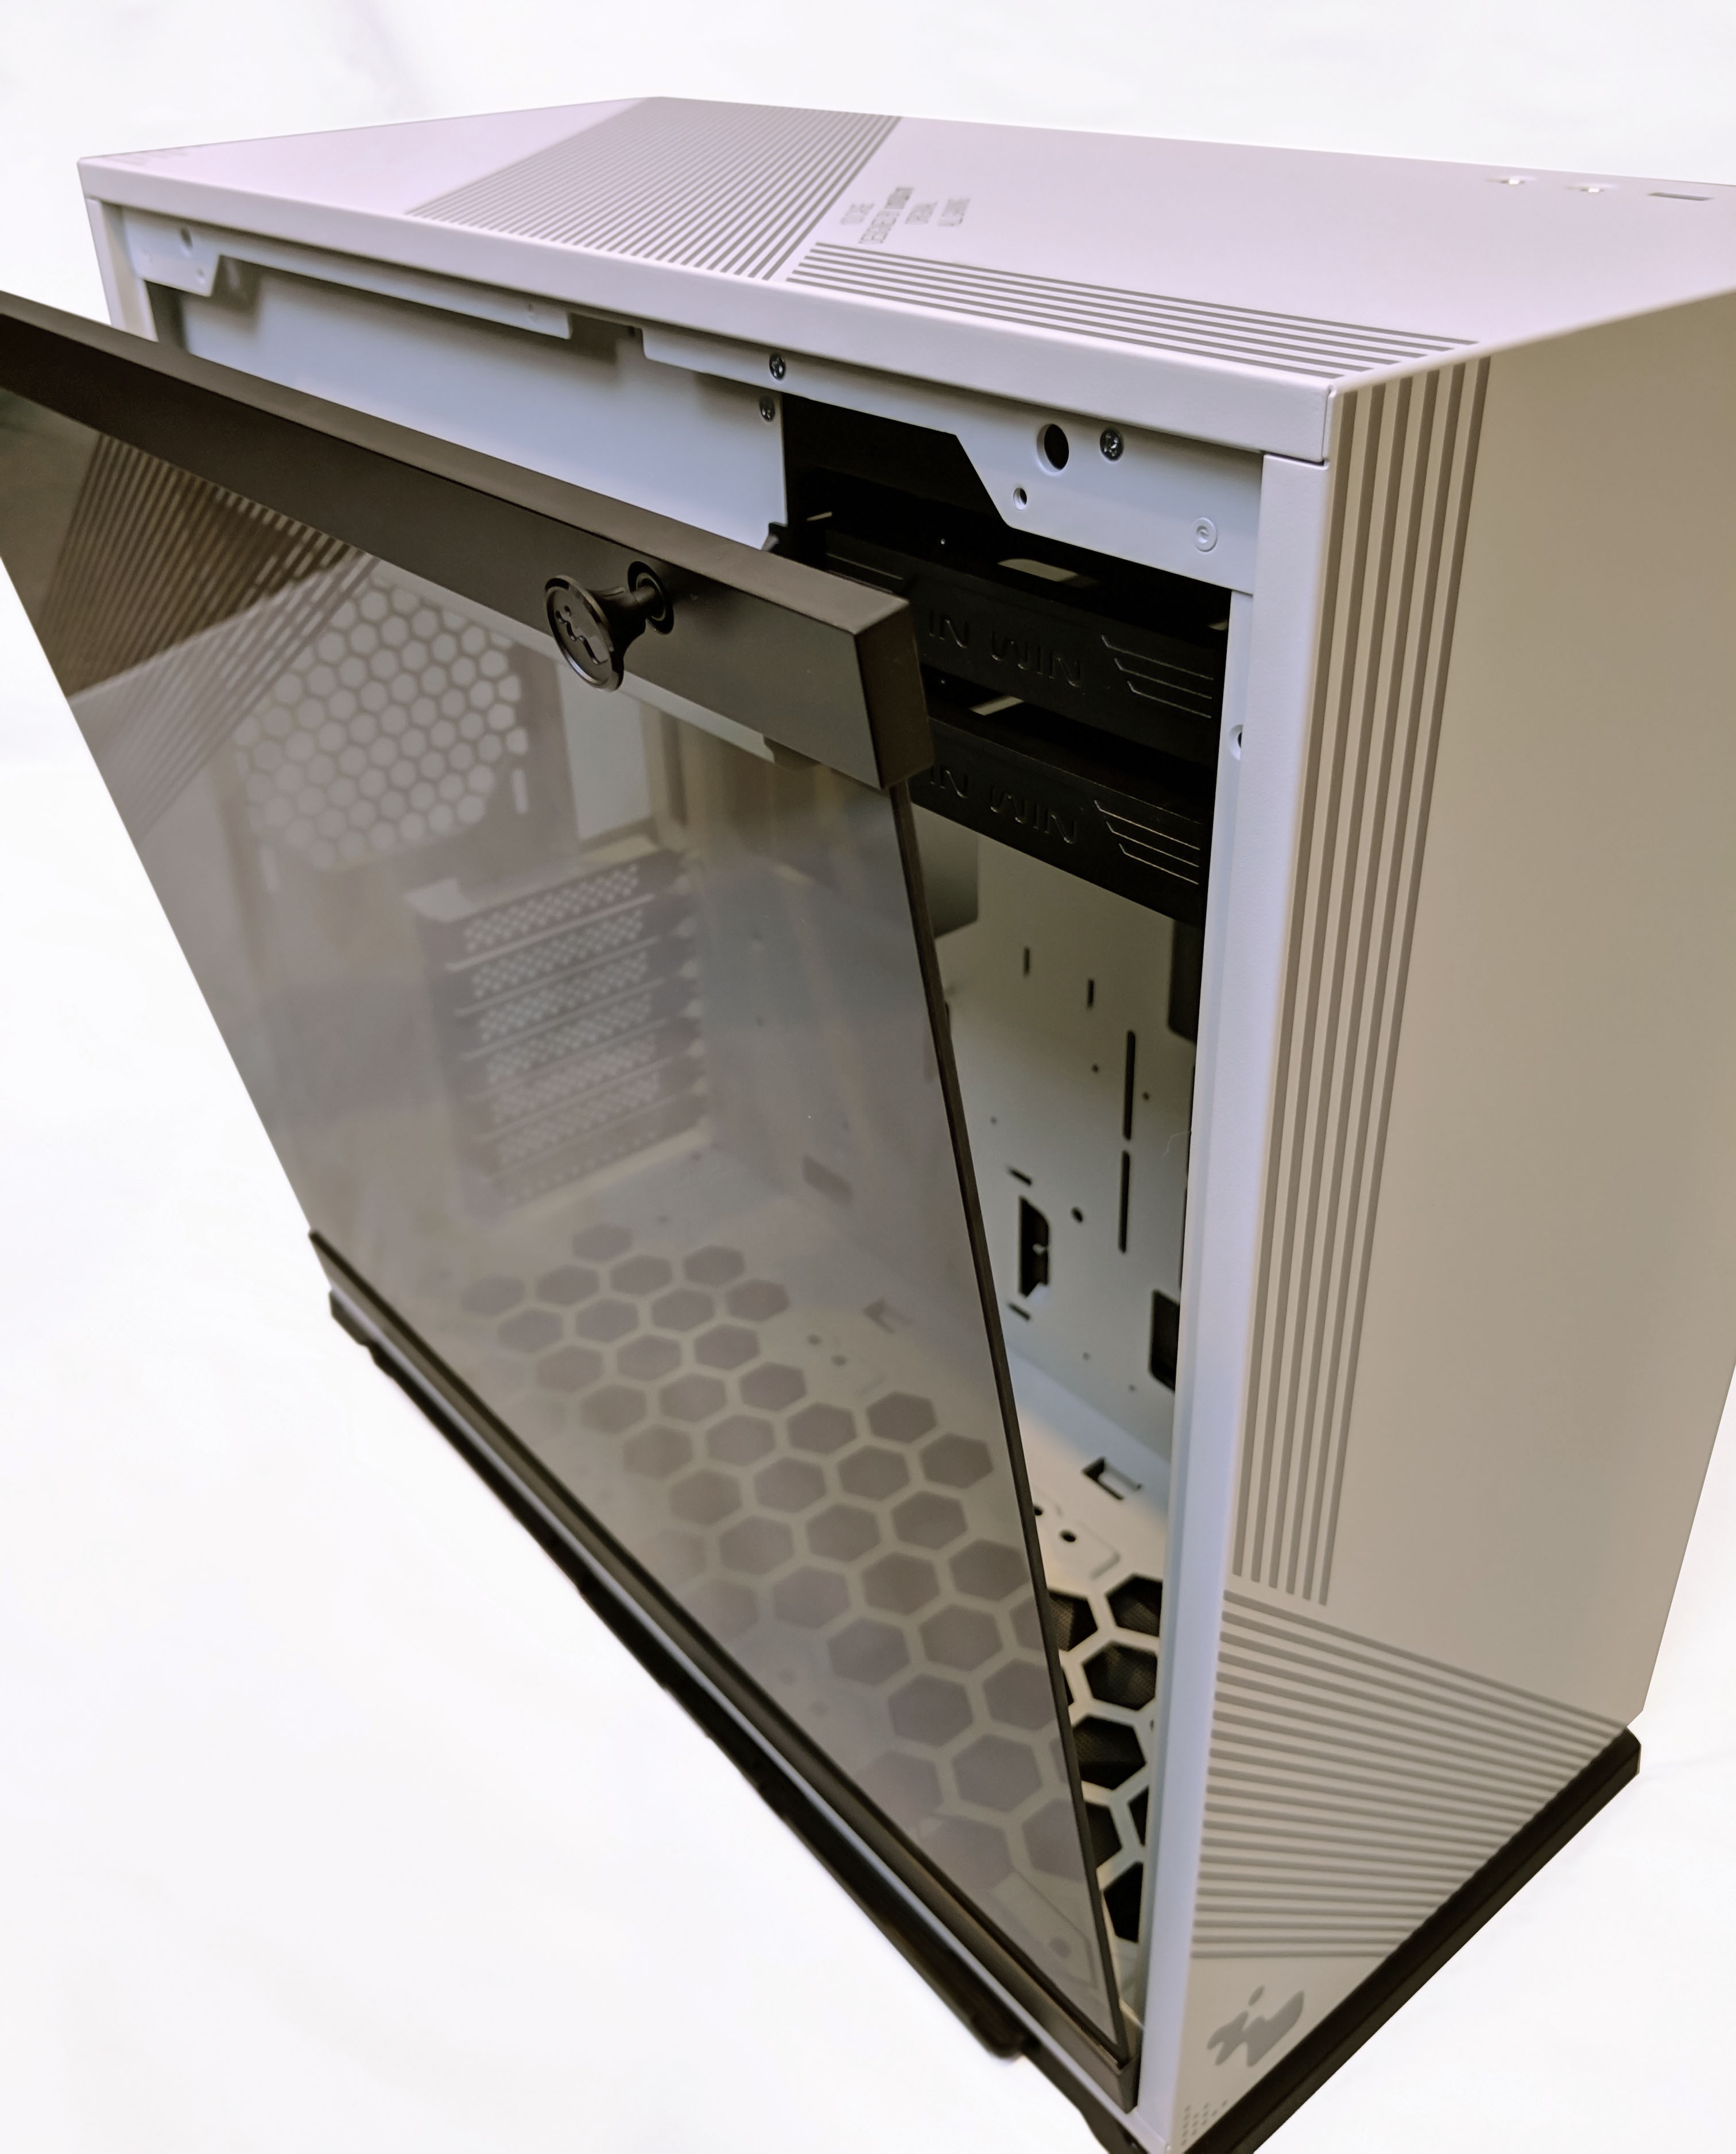
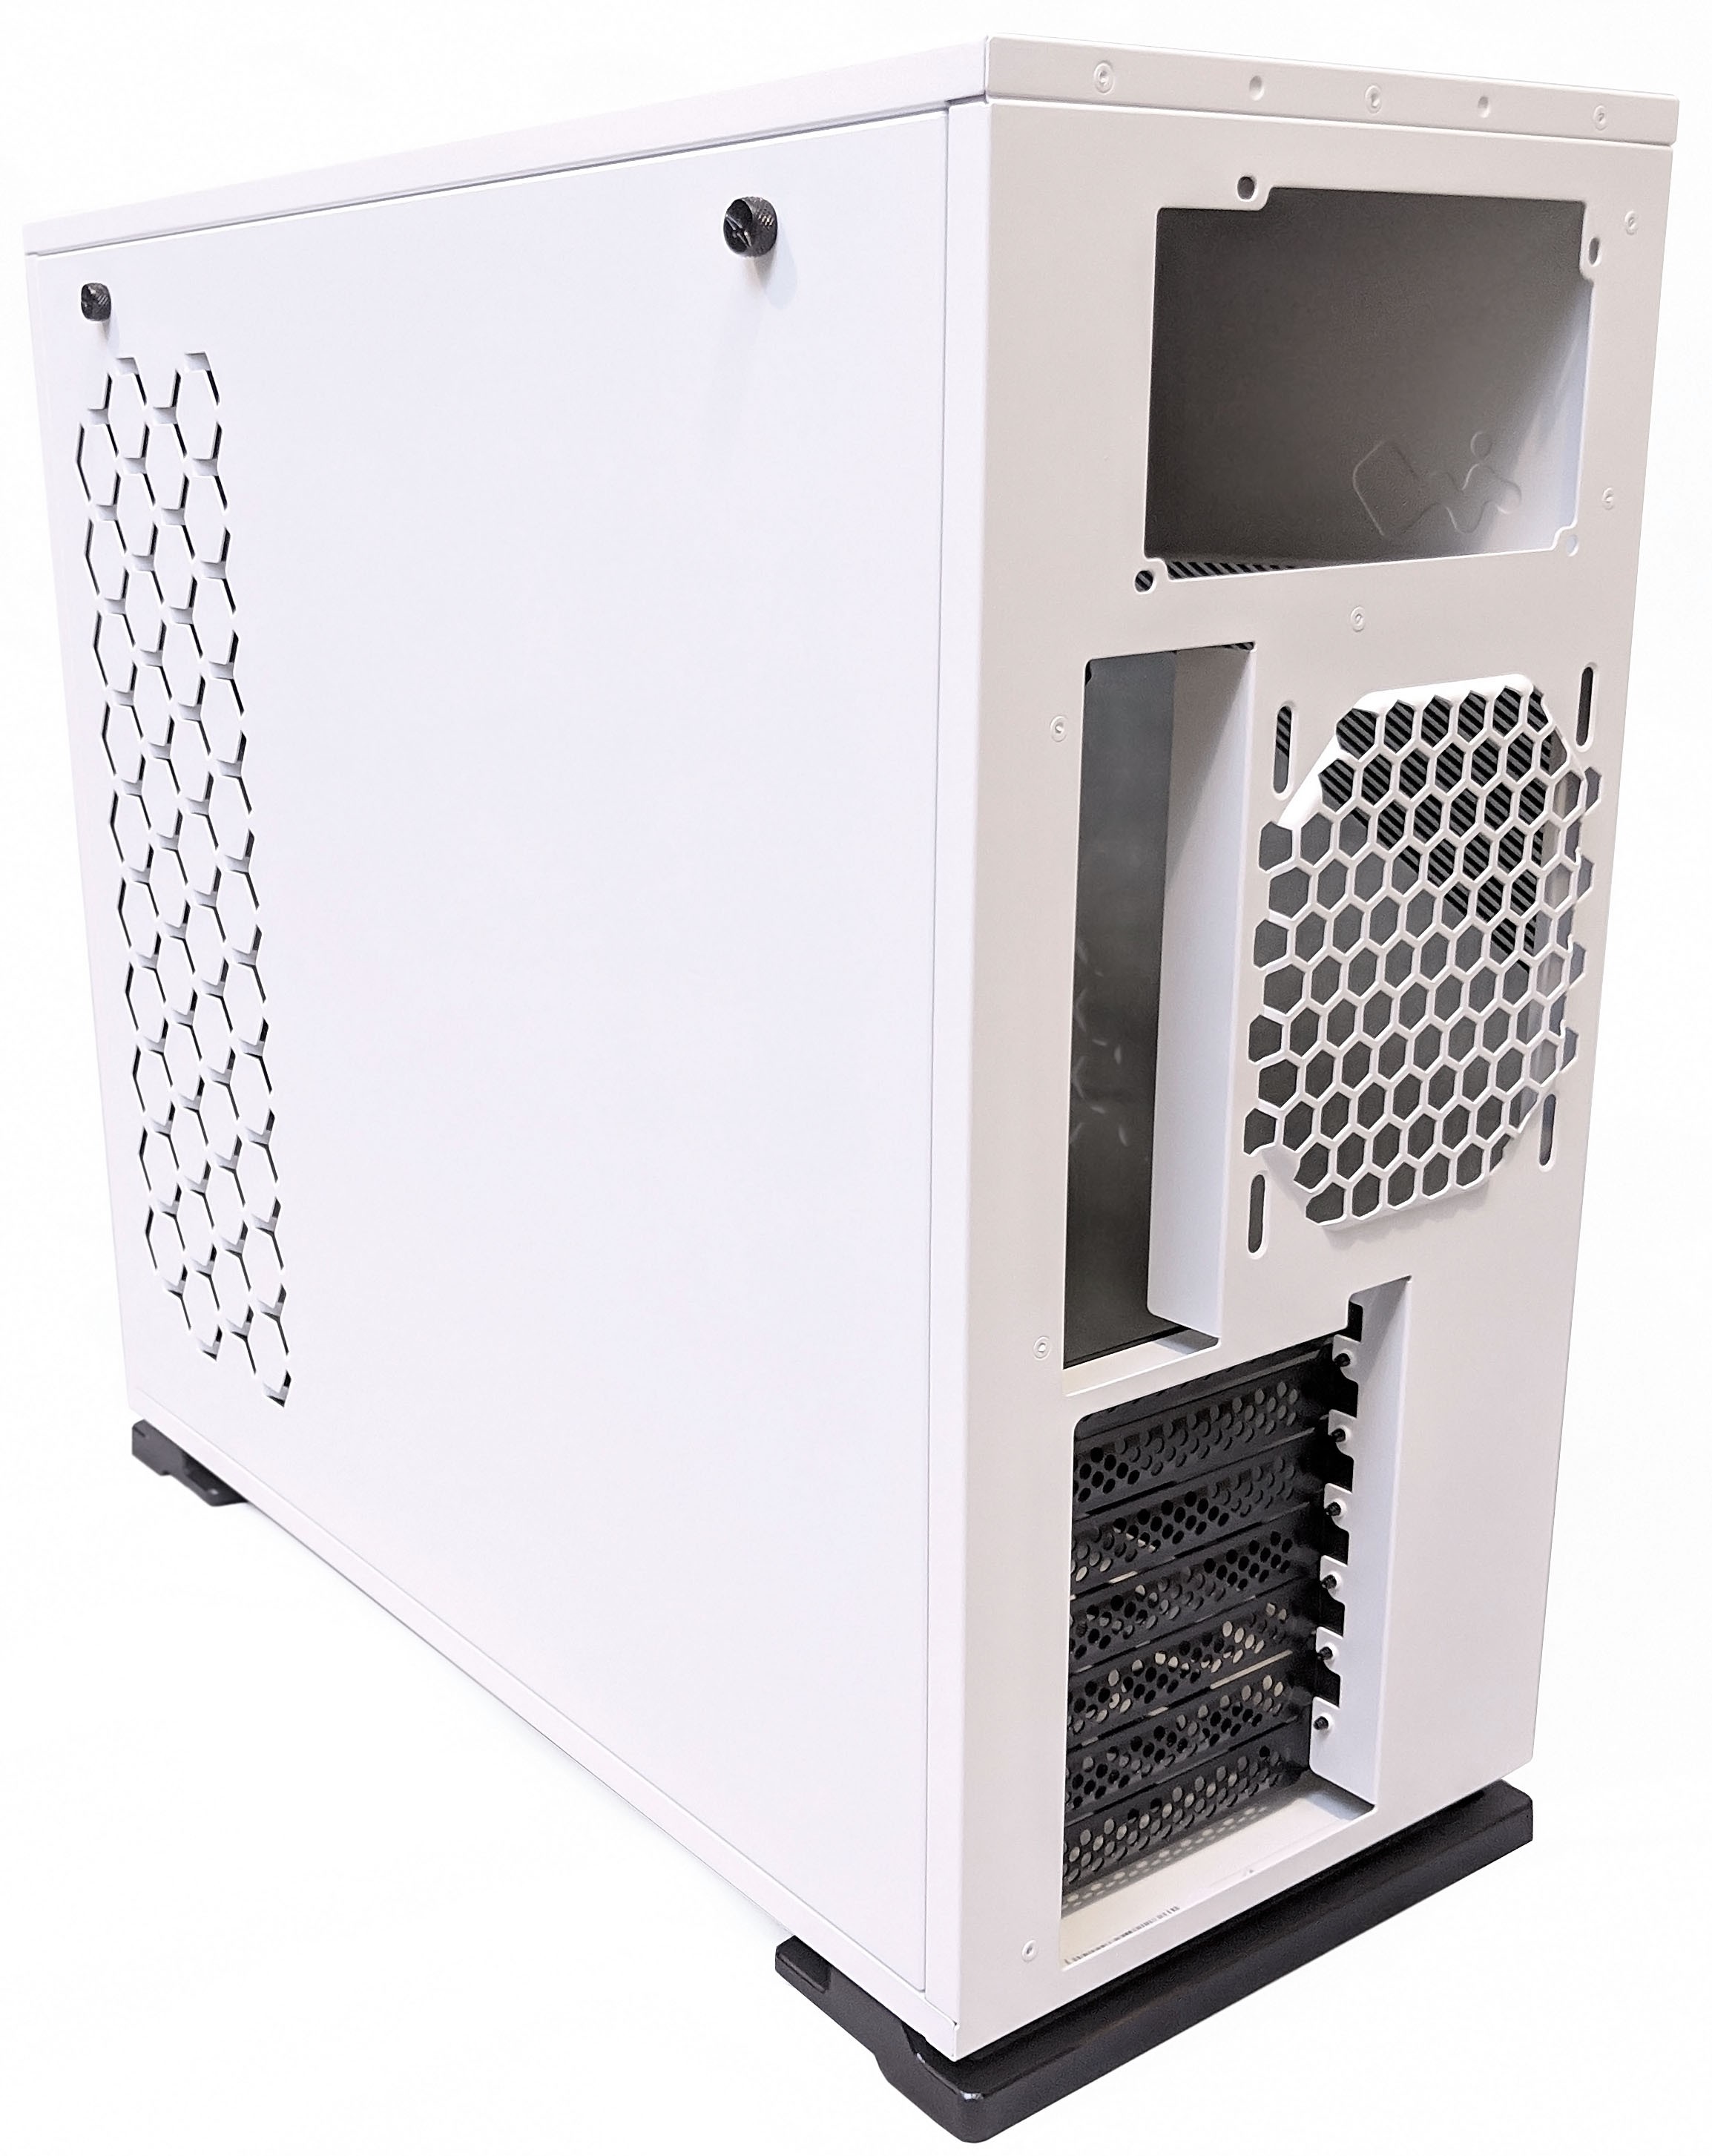
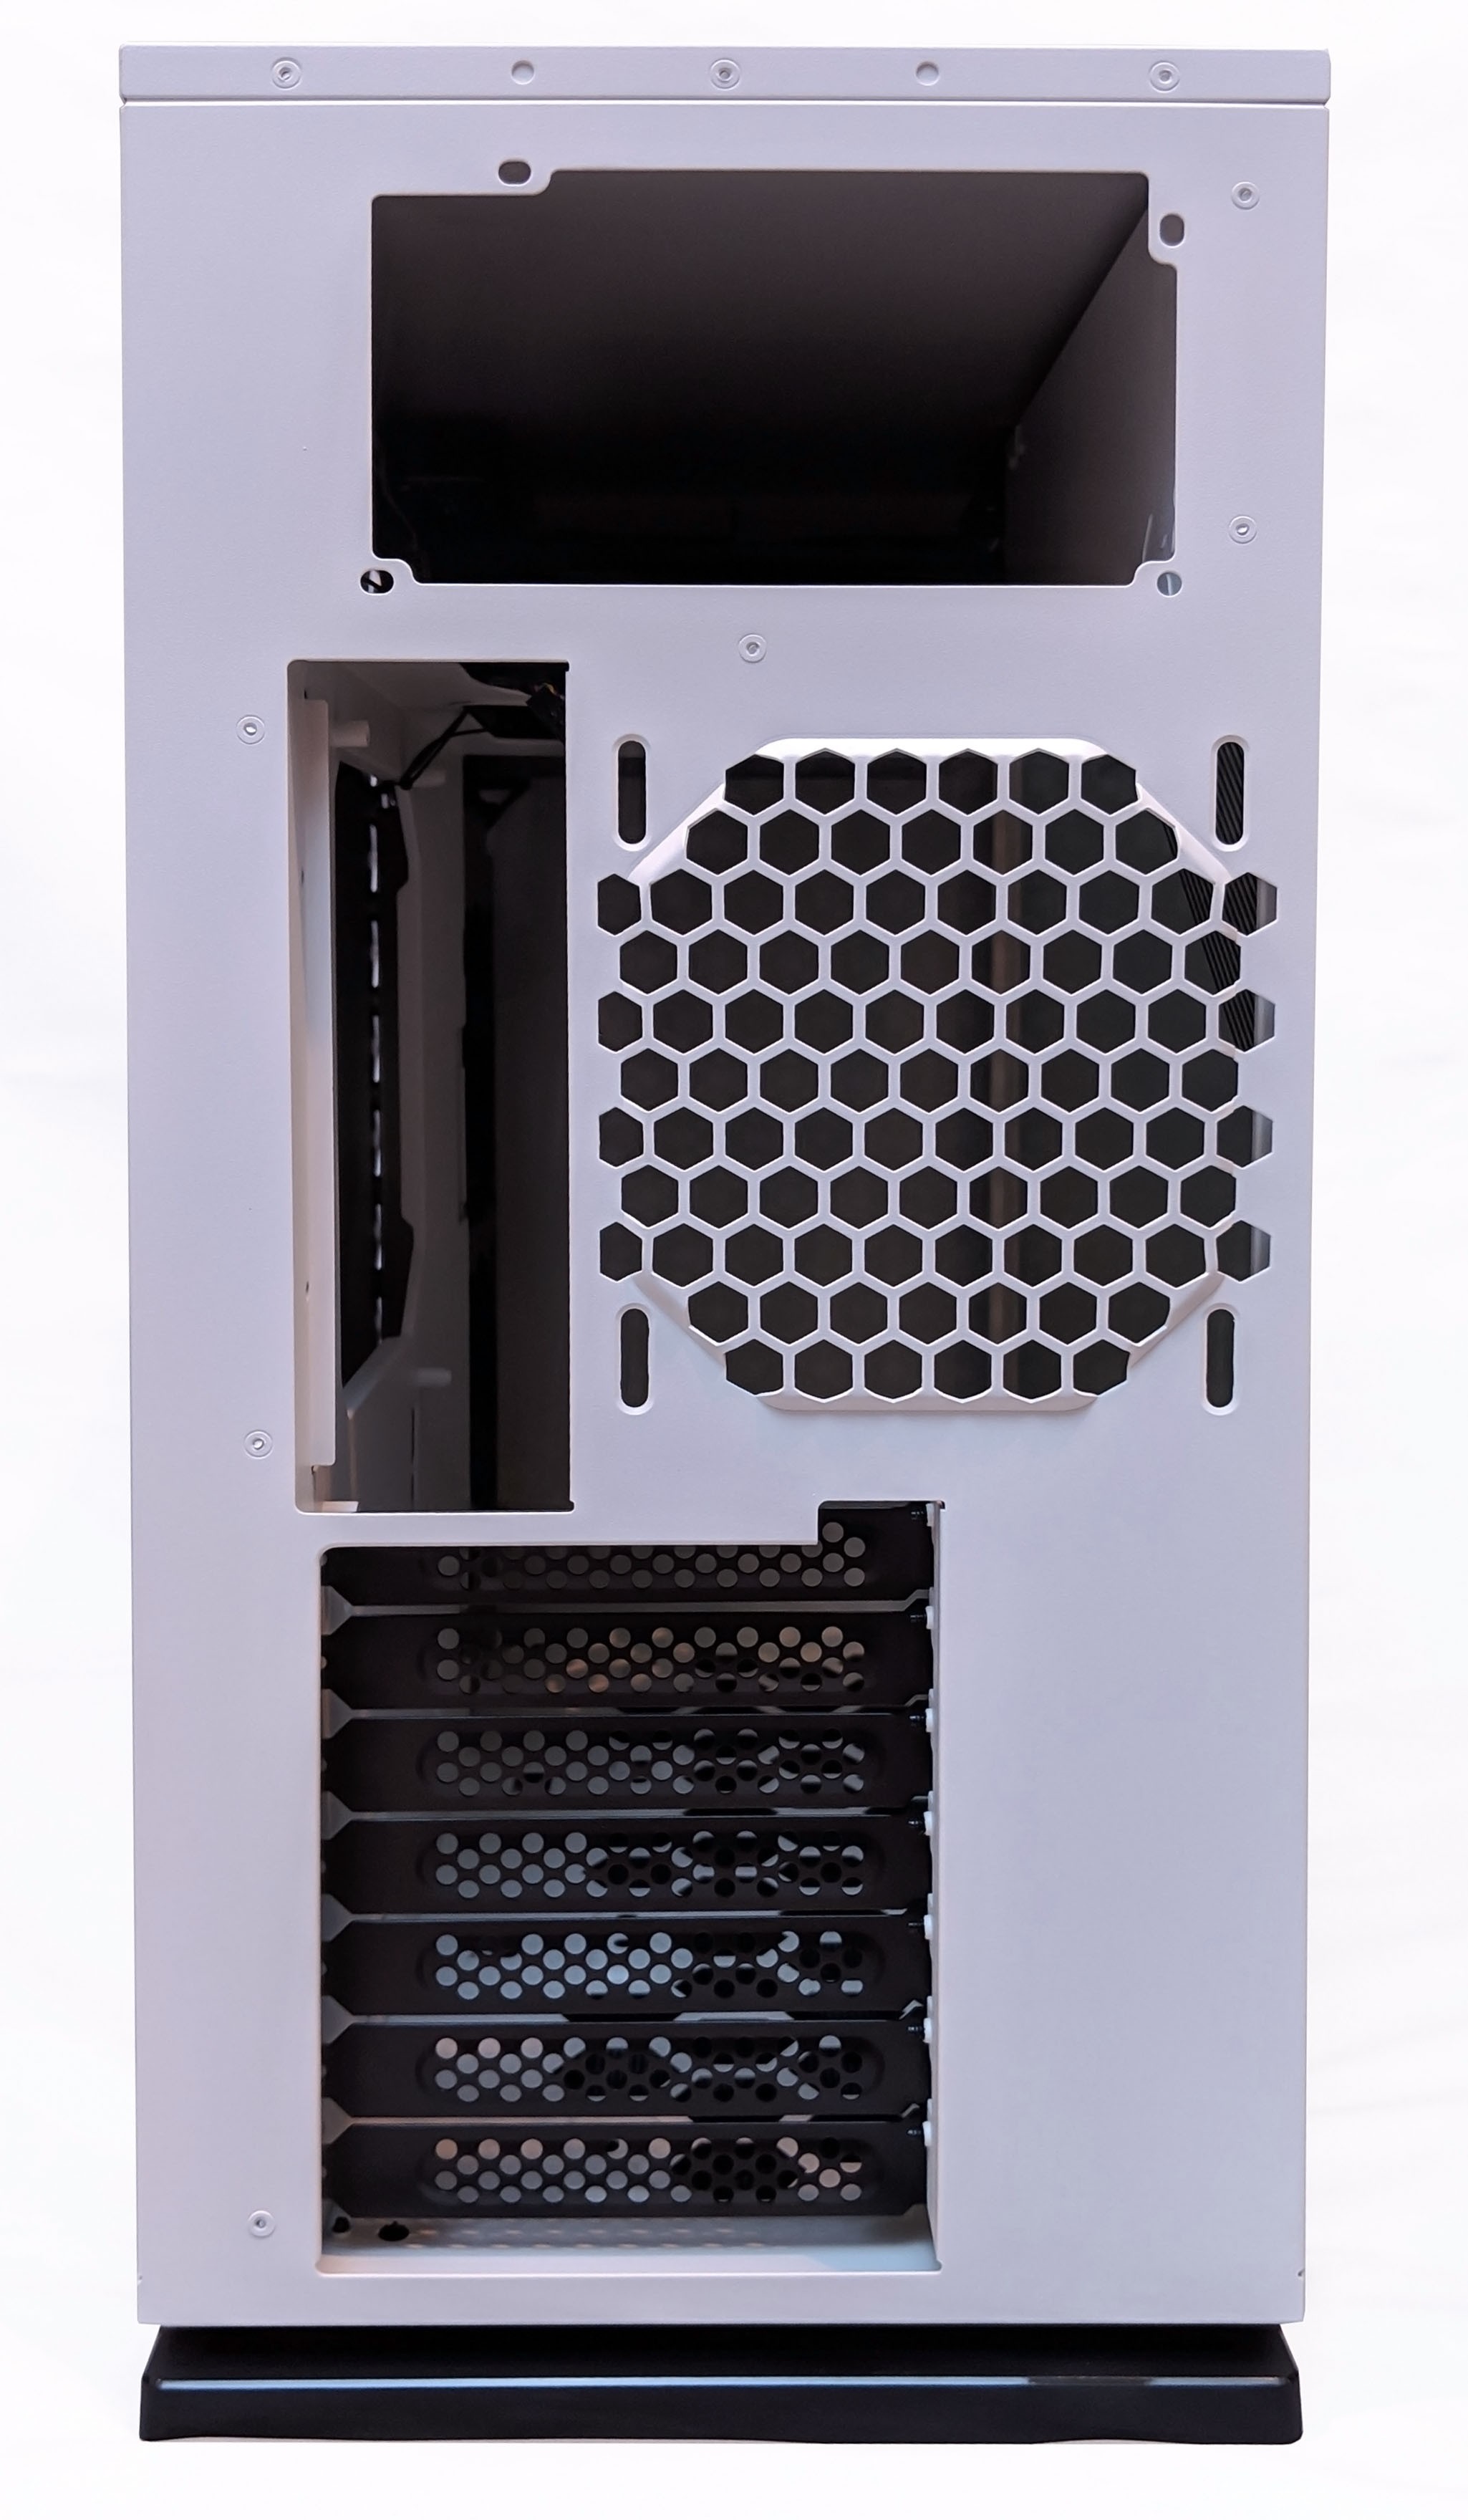
The back of the case is pretty standard. We’re able to see the seven PCIe expansion slot covers on the bottom with a height adjustable 120mm fan mount on top. I was kind of sad to see no included exhaust fan with this particular case as we do with pretty much any other case on the market. Be sure to pick up some fans if you don’t have any extra laying around.
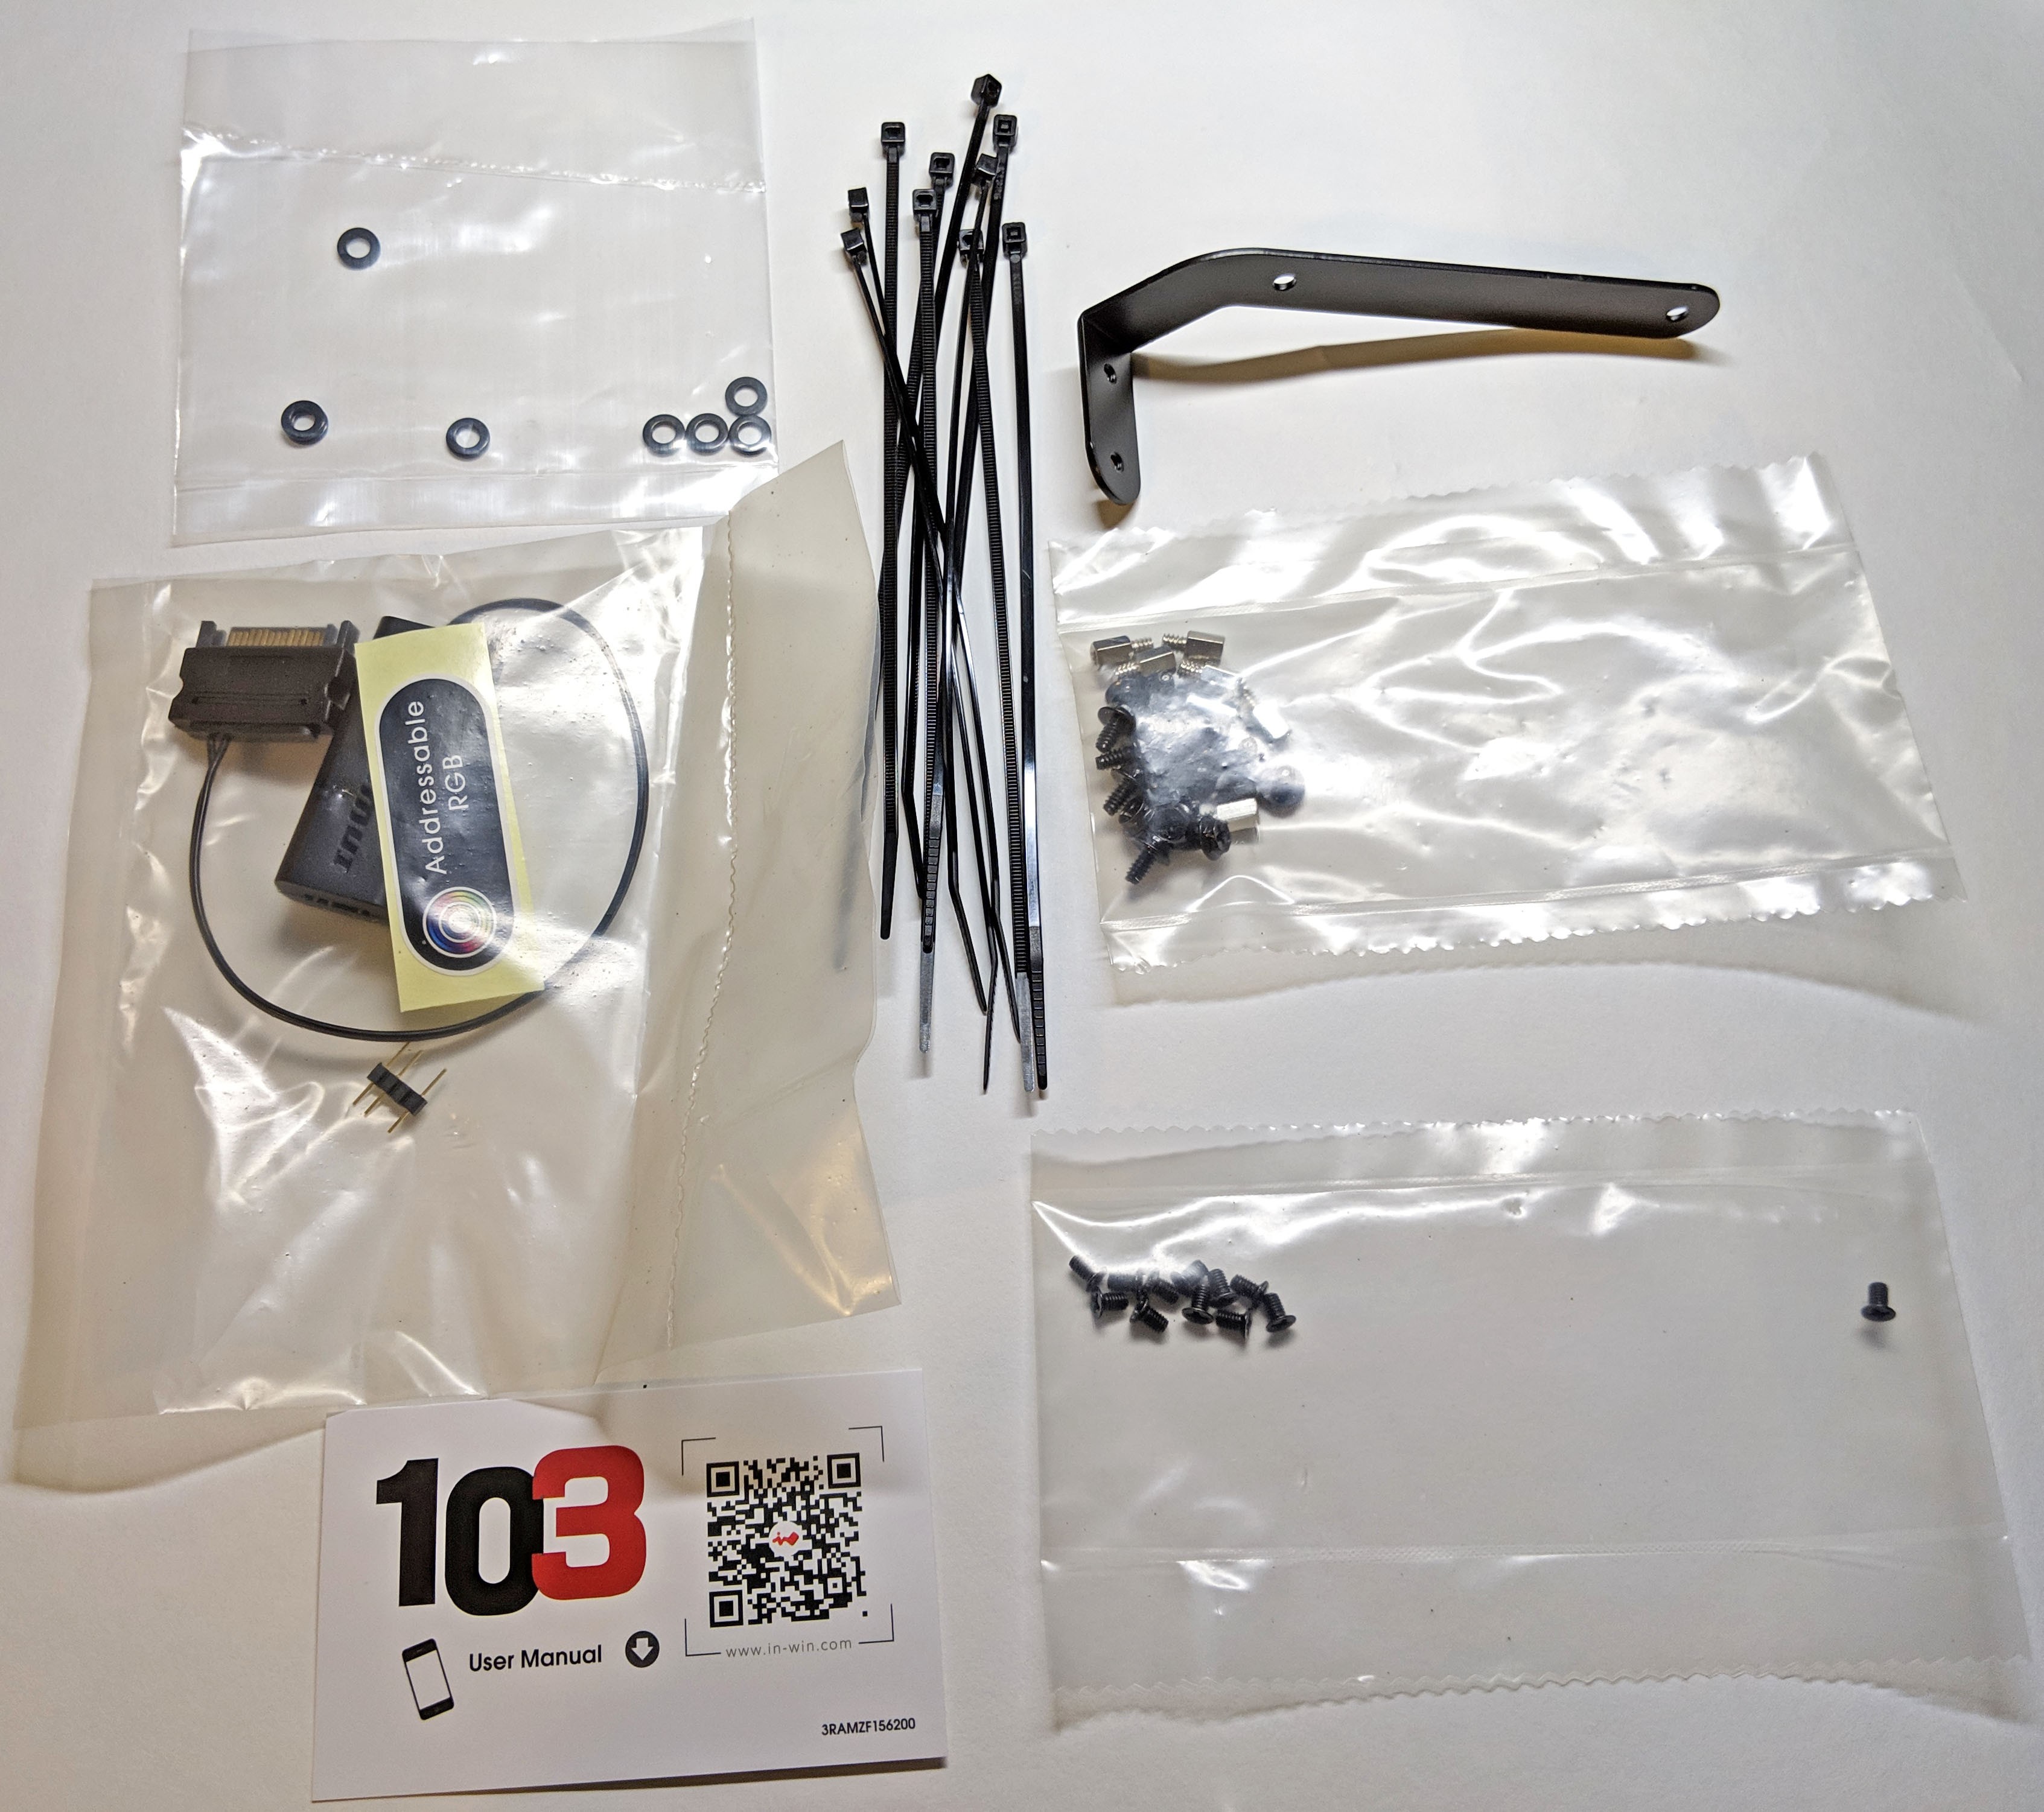
In addition to the case itself, the accessories bag contains a few extra bits of hardware you’ll need to properly install the motherboard and/or activate the RGB lighting on the front of the case. These items include rubber grommets, zip ties for cable management, a video card brace, the addressable RGB controller, a bag of motherboard mounting hardware, and small screws for mounting an SSD to the SSD mounting plate (which we’ll get into later).
The user manual is found by scanning the QR code on the included card and is available online. Way to save paper InWin! For the lazy, here’s a direct link to the user manual.
A Closer Look (Inside)…
With the side panel removed, let’s first take a closer look at the panel itself. The heavy tempered glass panel has a pretty dark tint which will add a bit more stealth points to your built. We get a good look at how dark the tint is based on the image below:

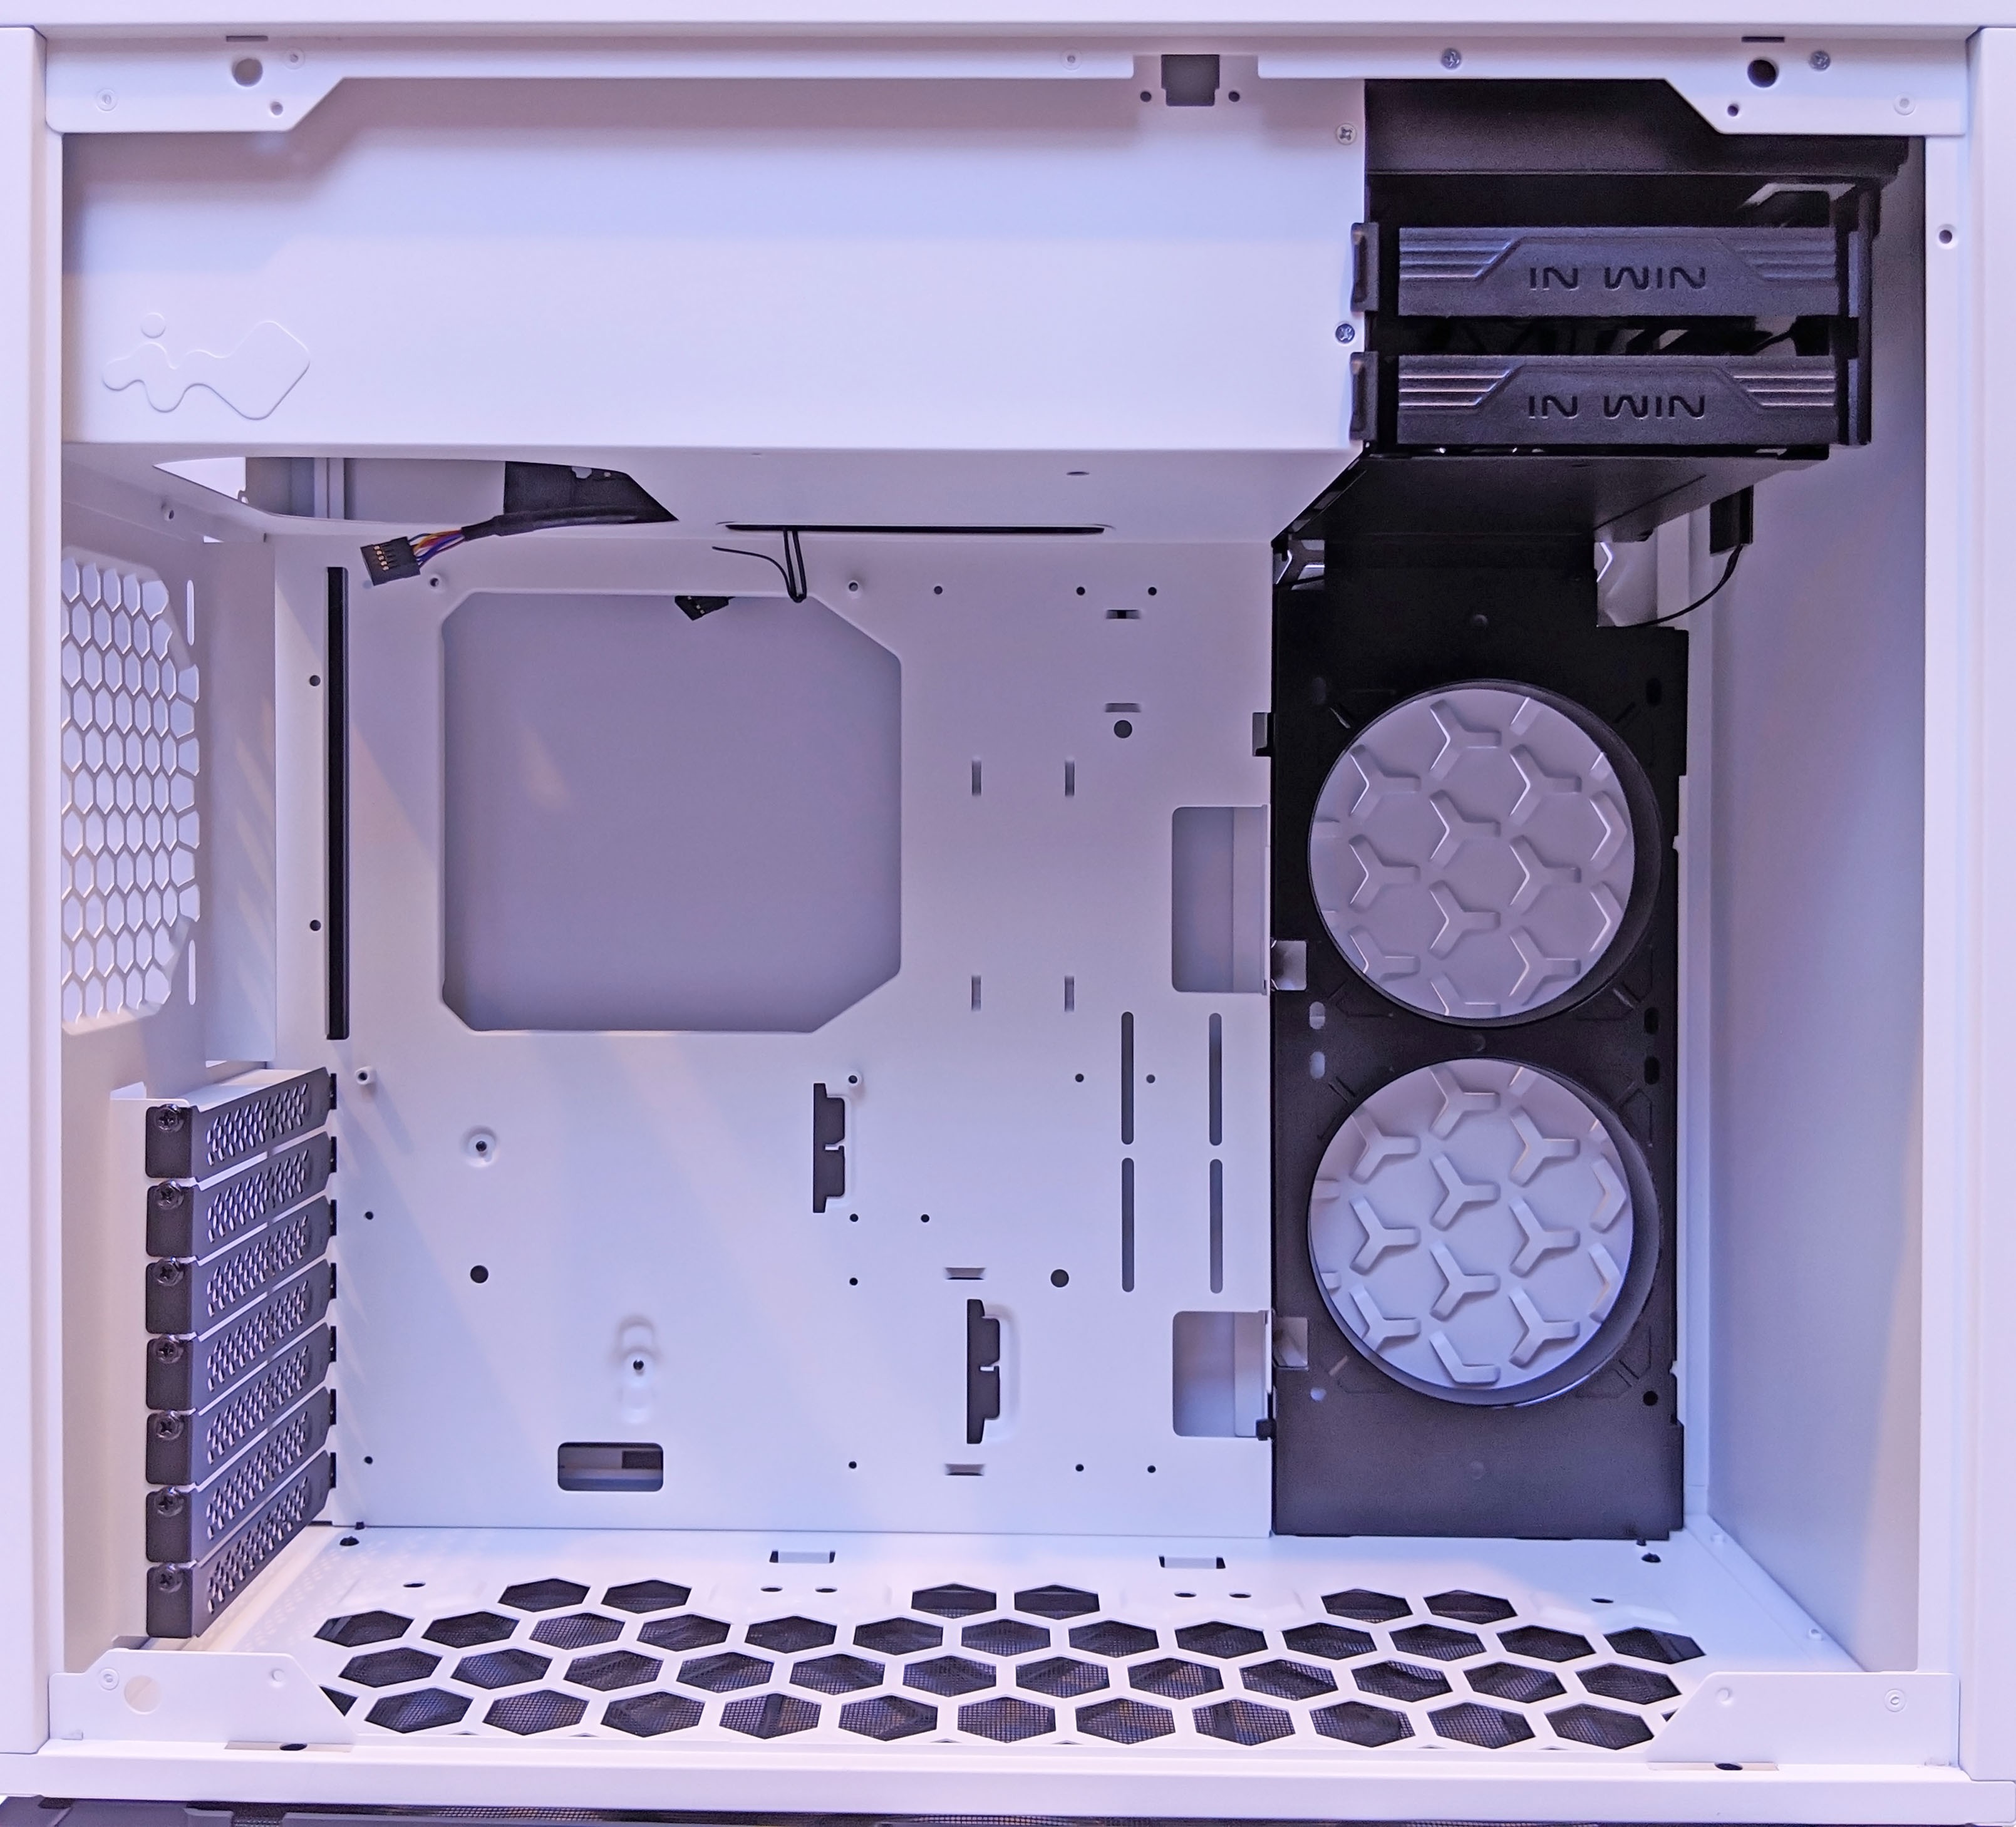
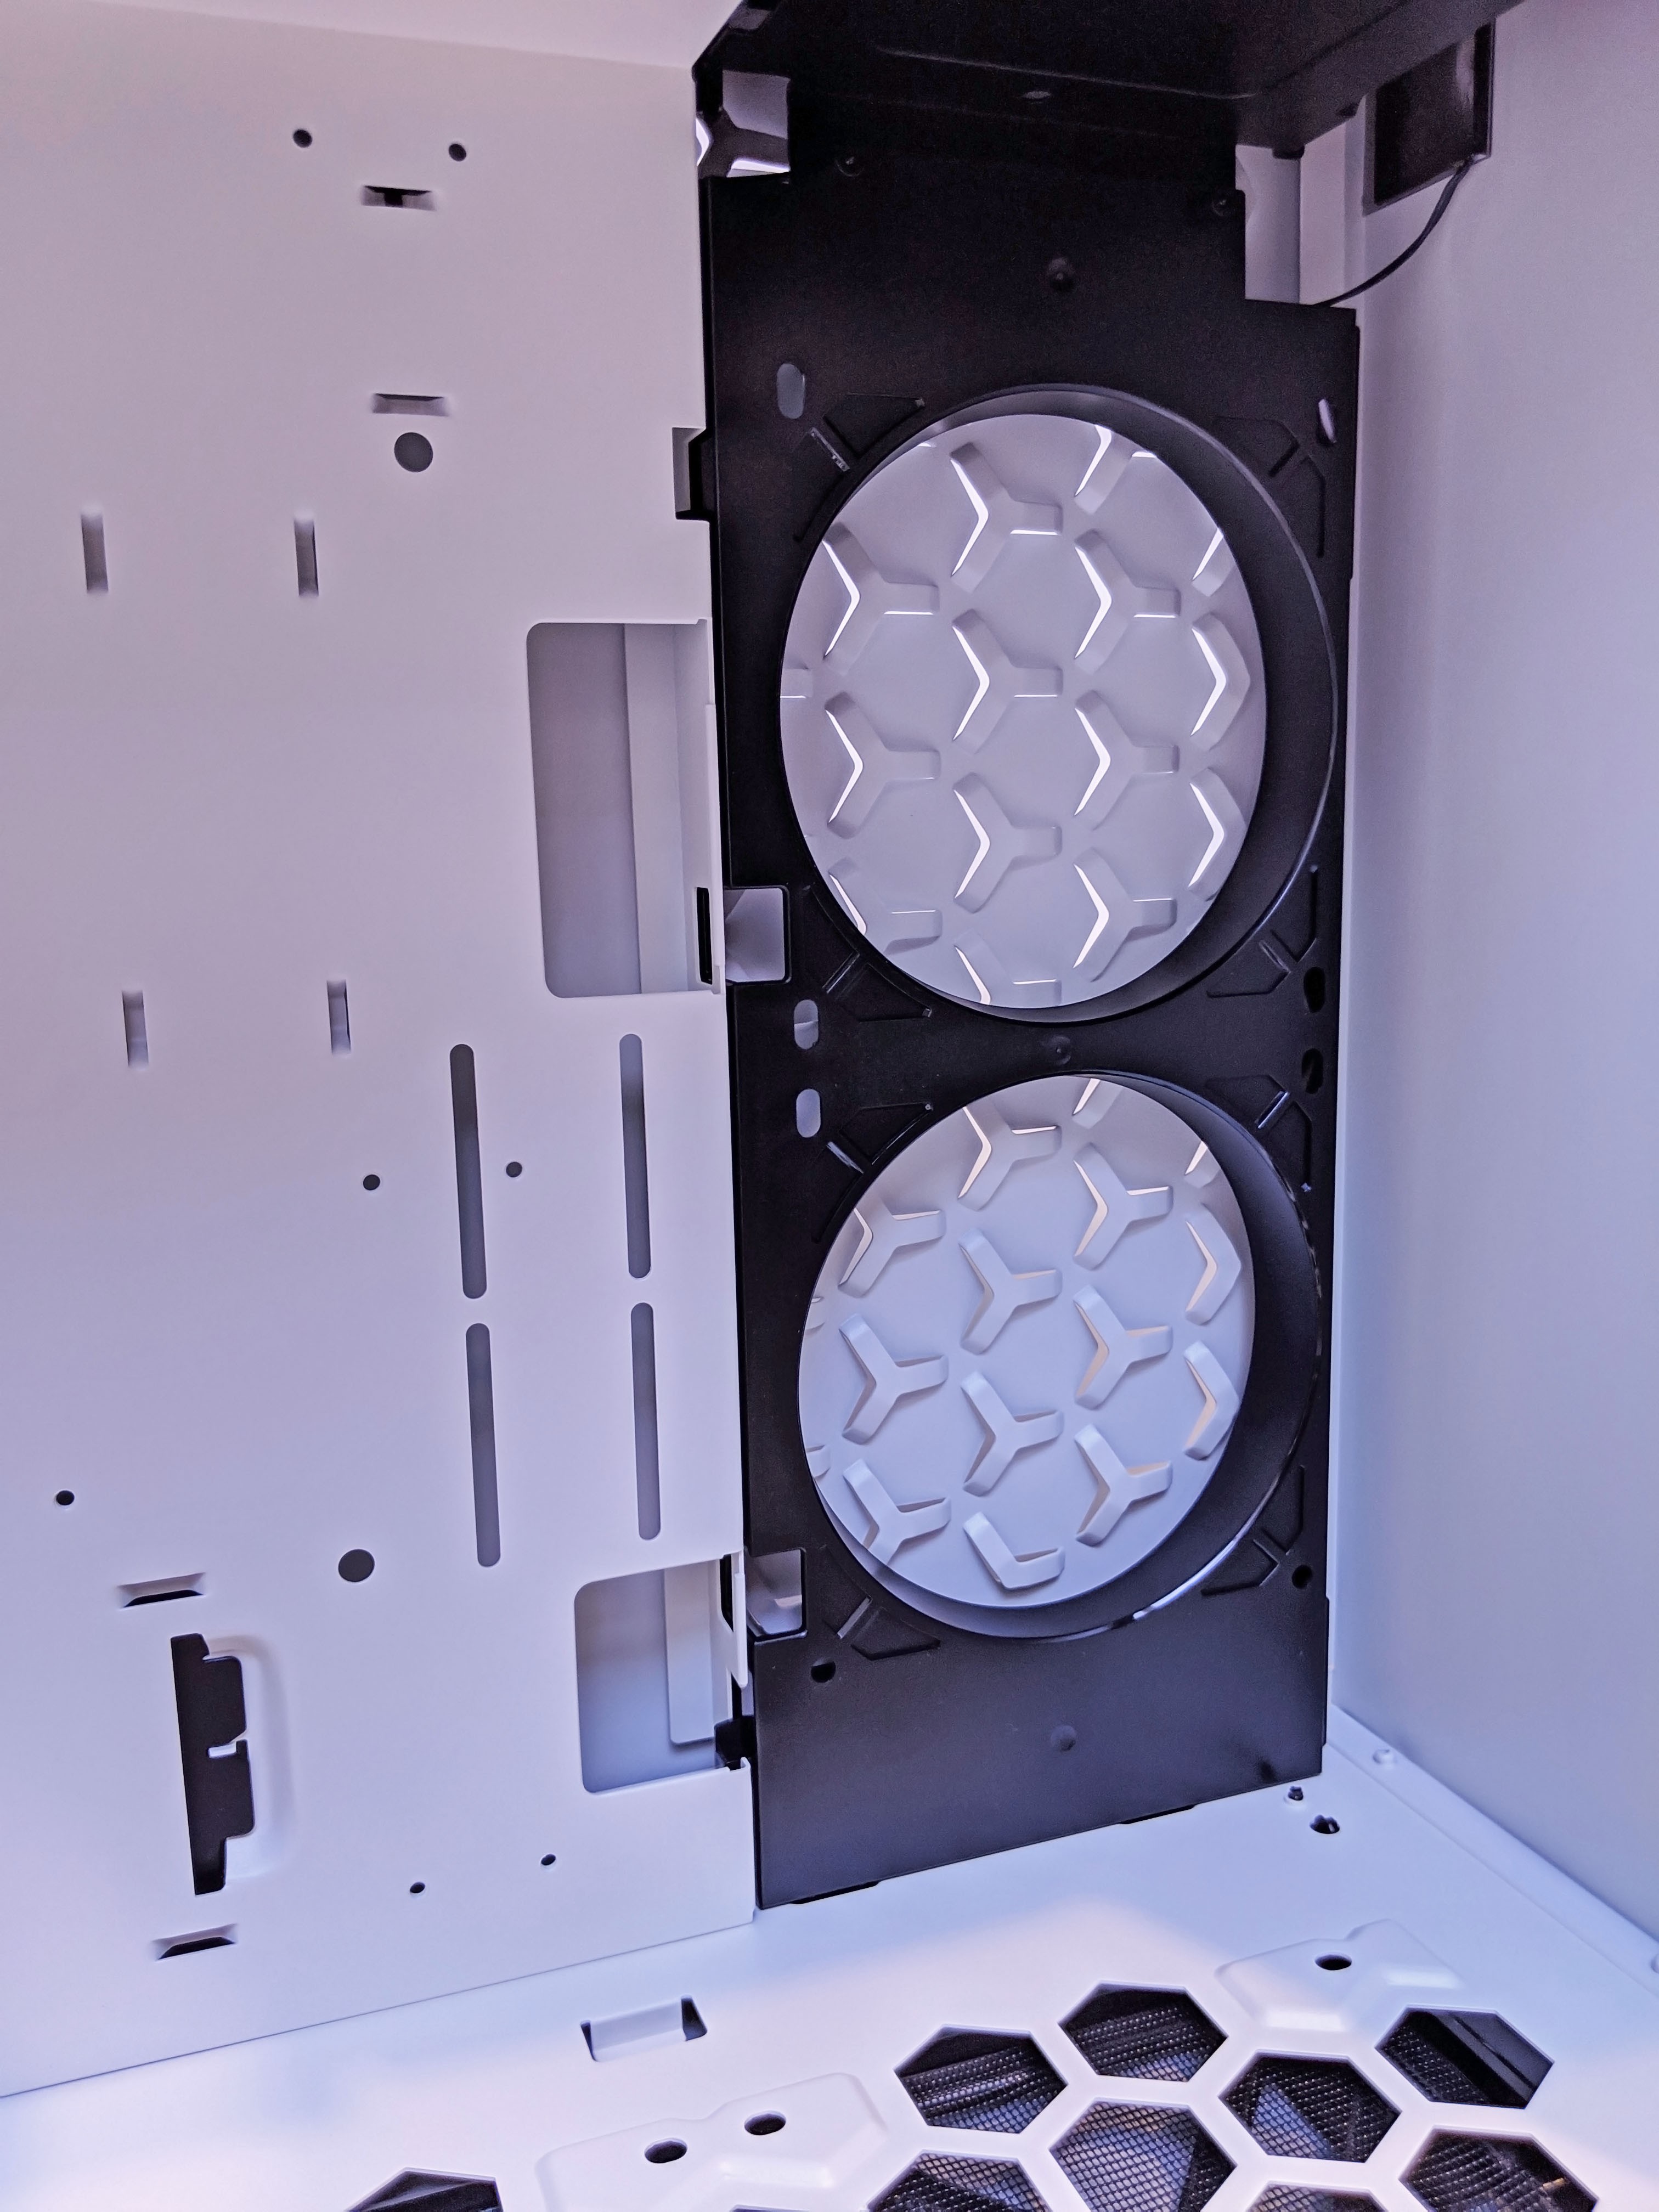
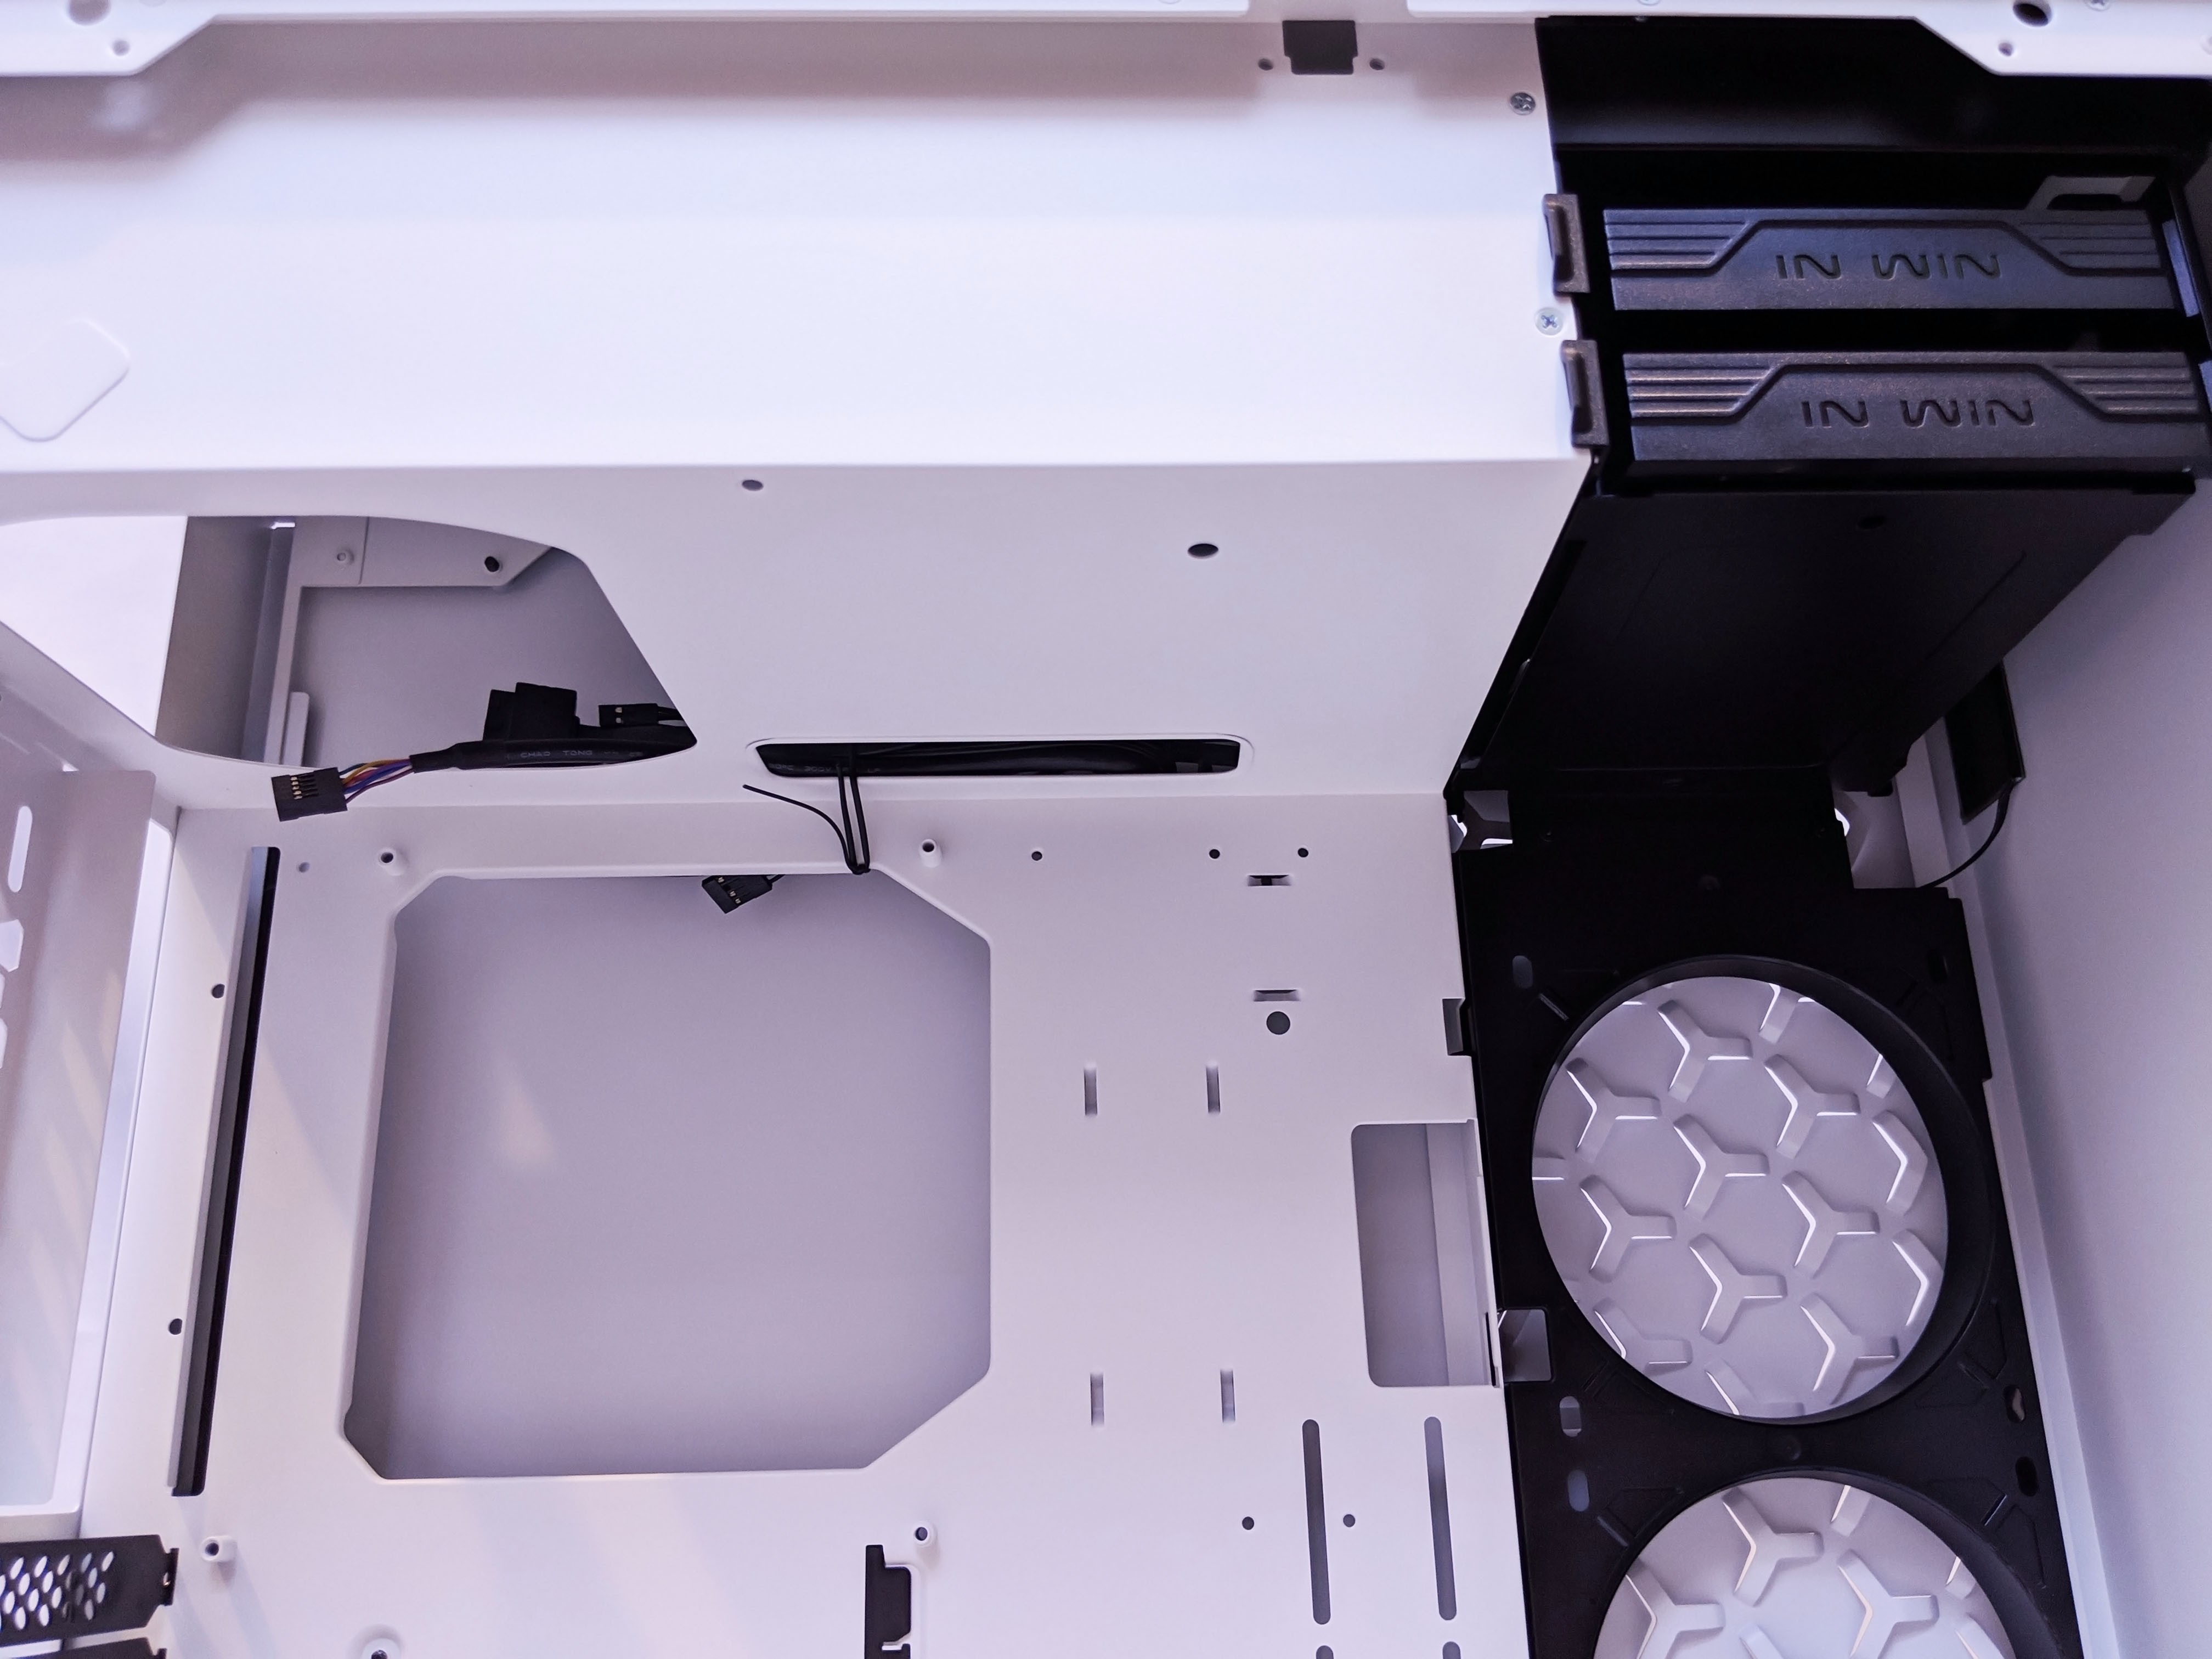
Overall, pretty standard internals with a few obvious exceptions. The first and most obvious are the two 120mm fan mounts located on the right side. These are designed to be used as exhaust fans as there is no filtration if used in the reverse.
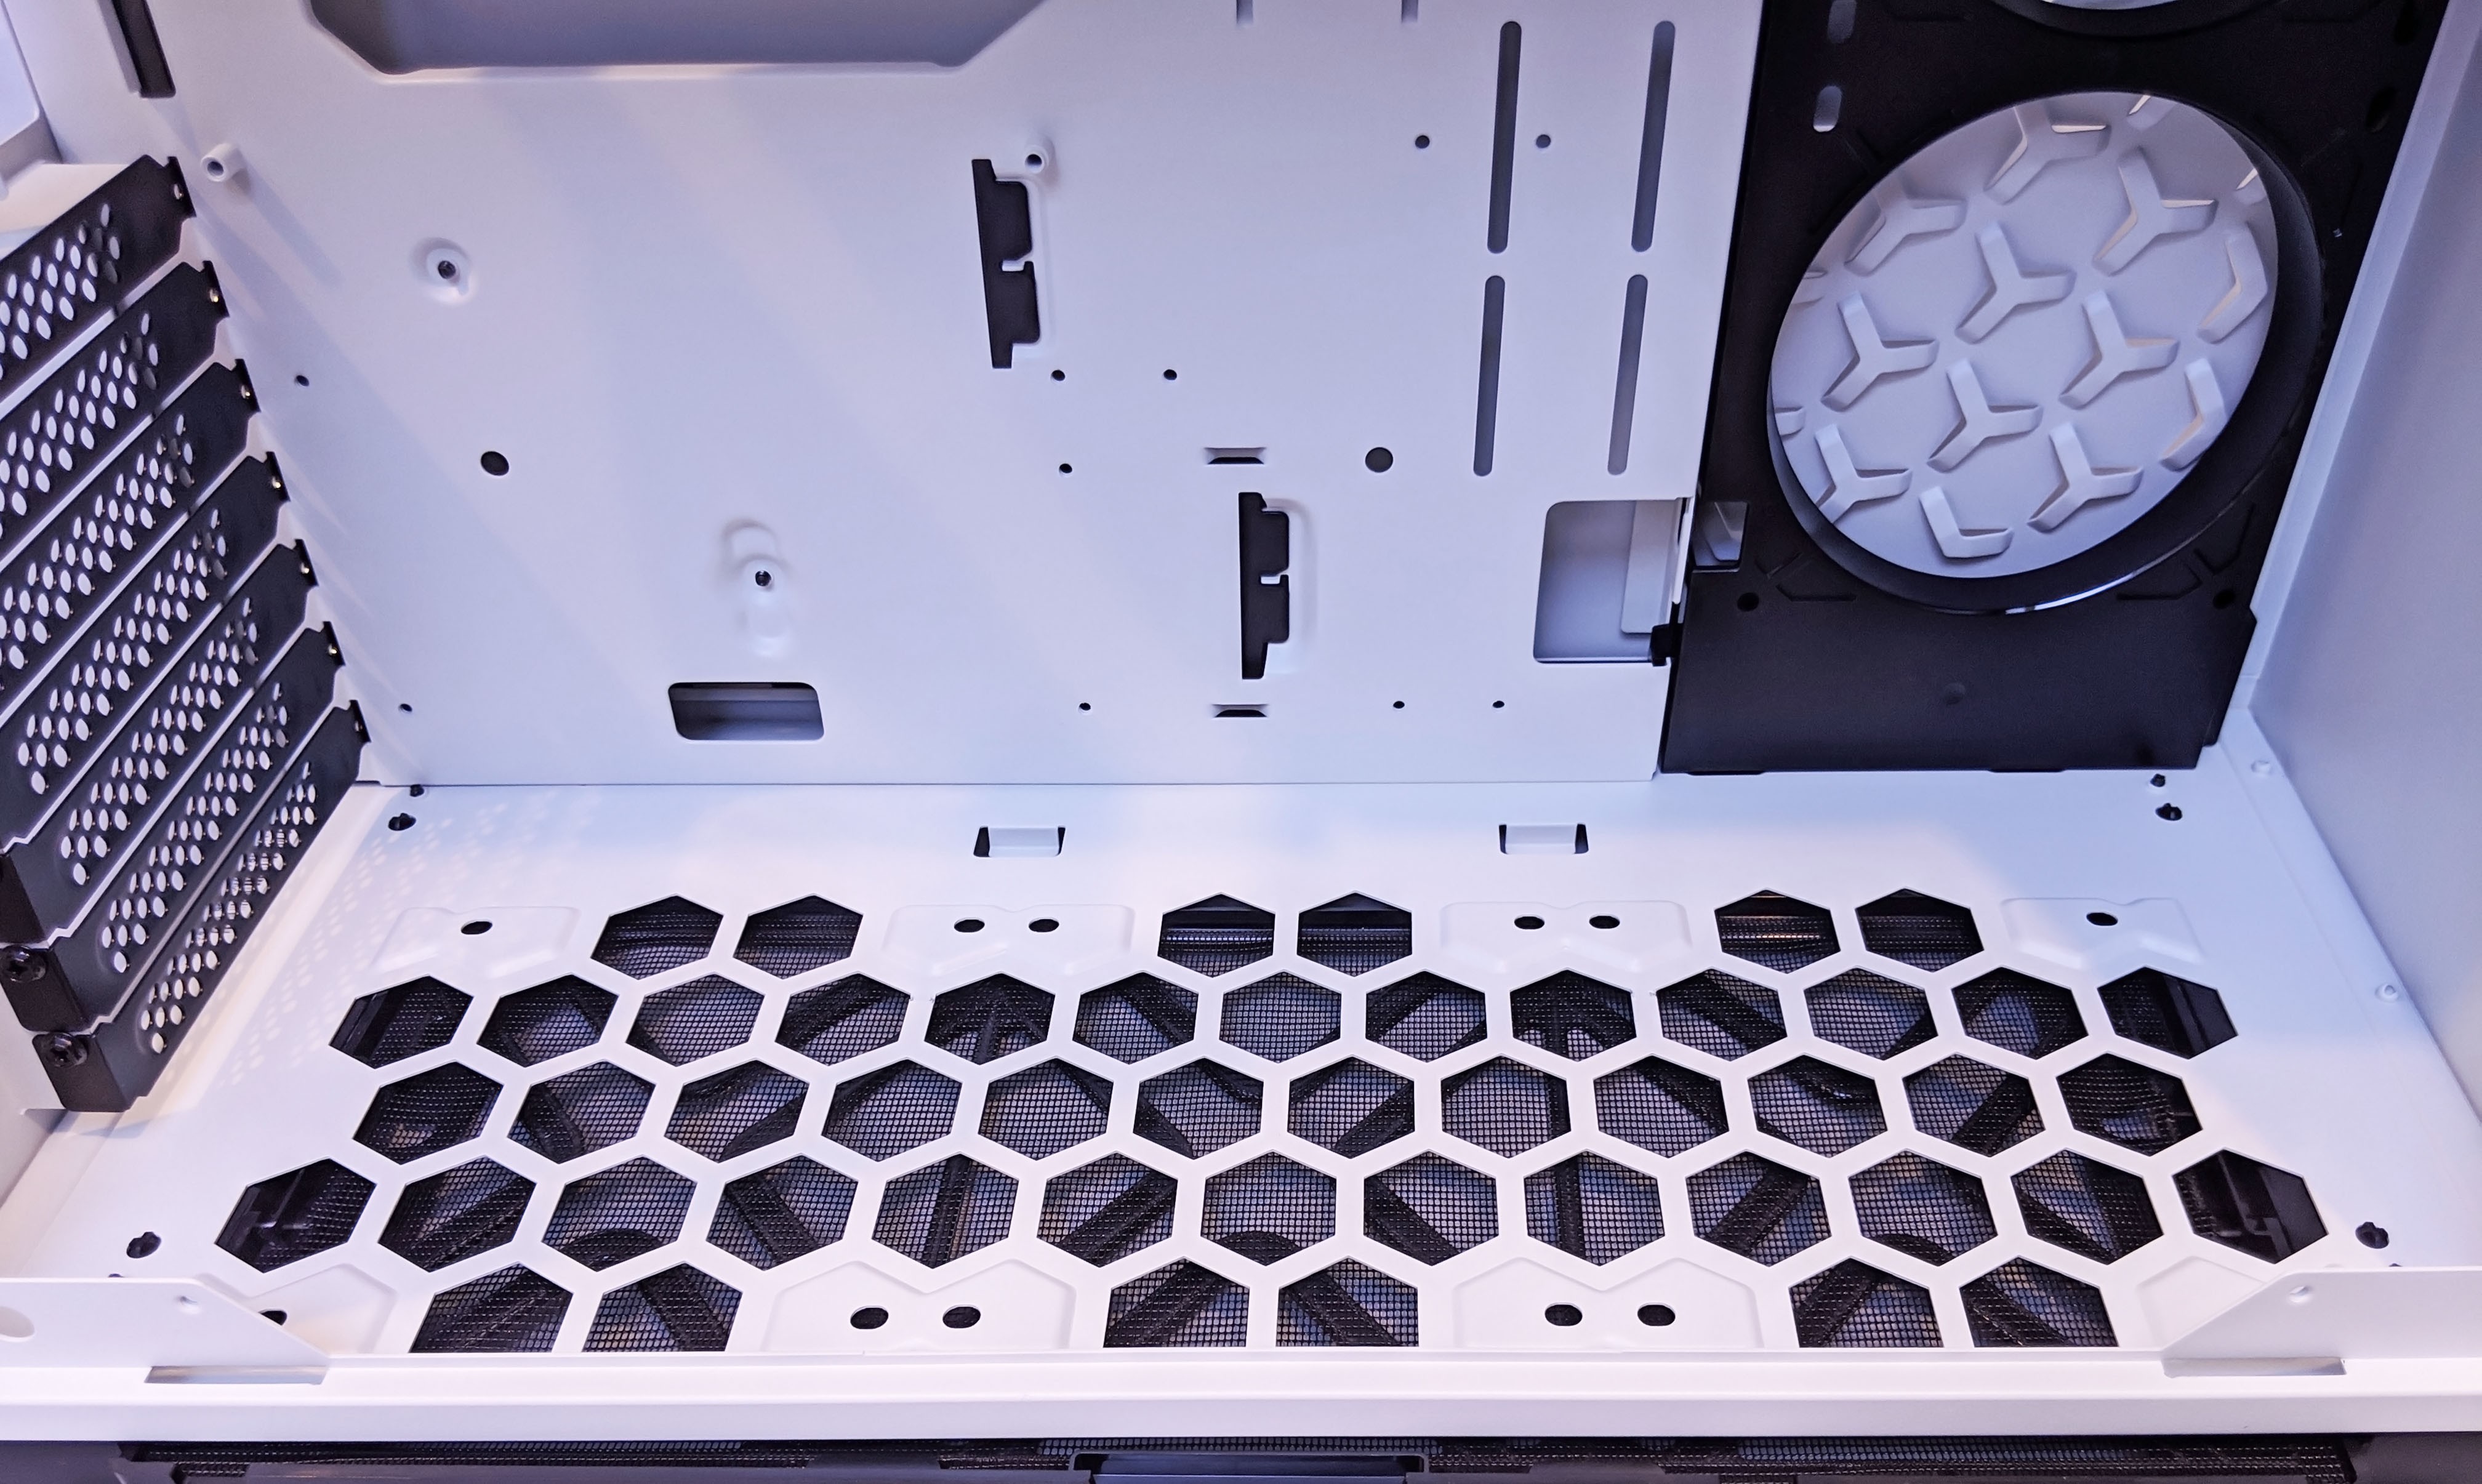
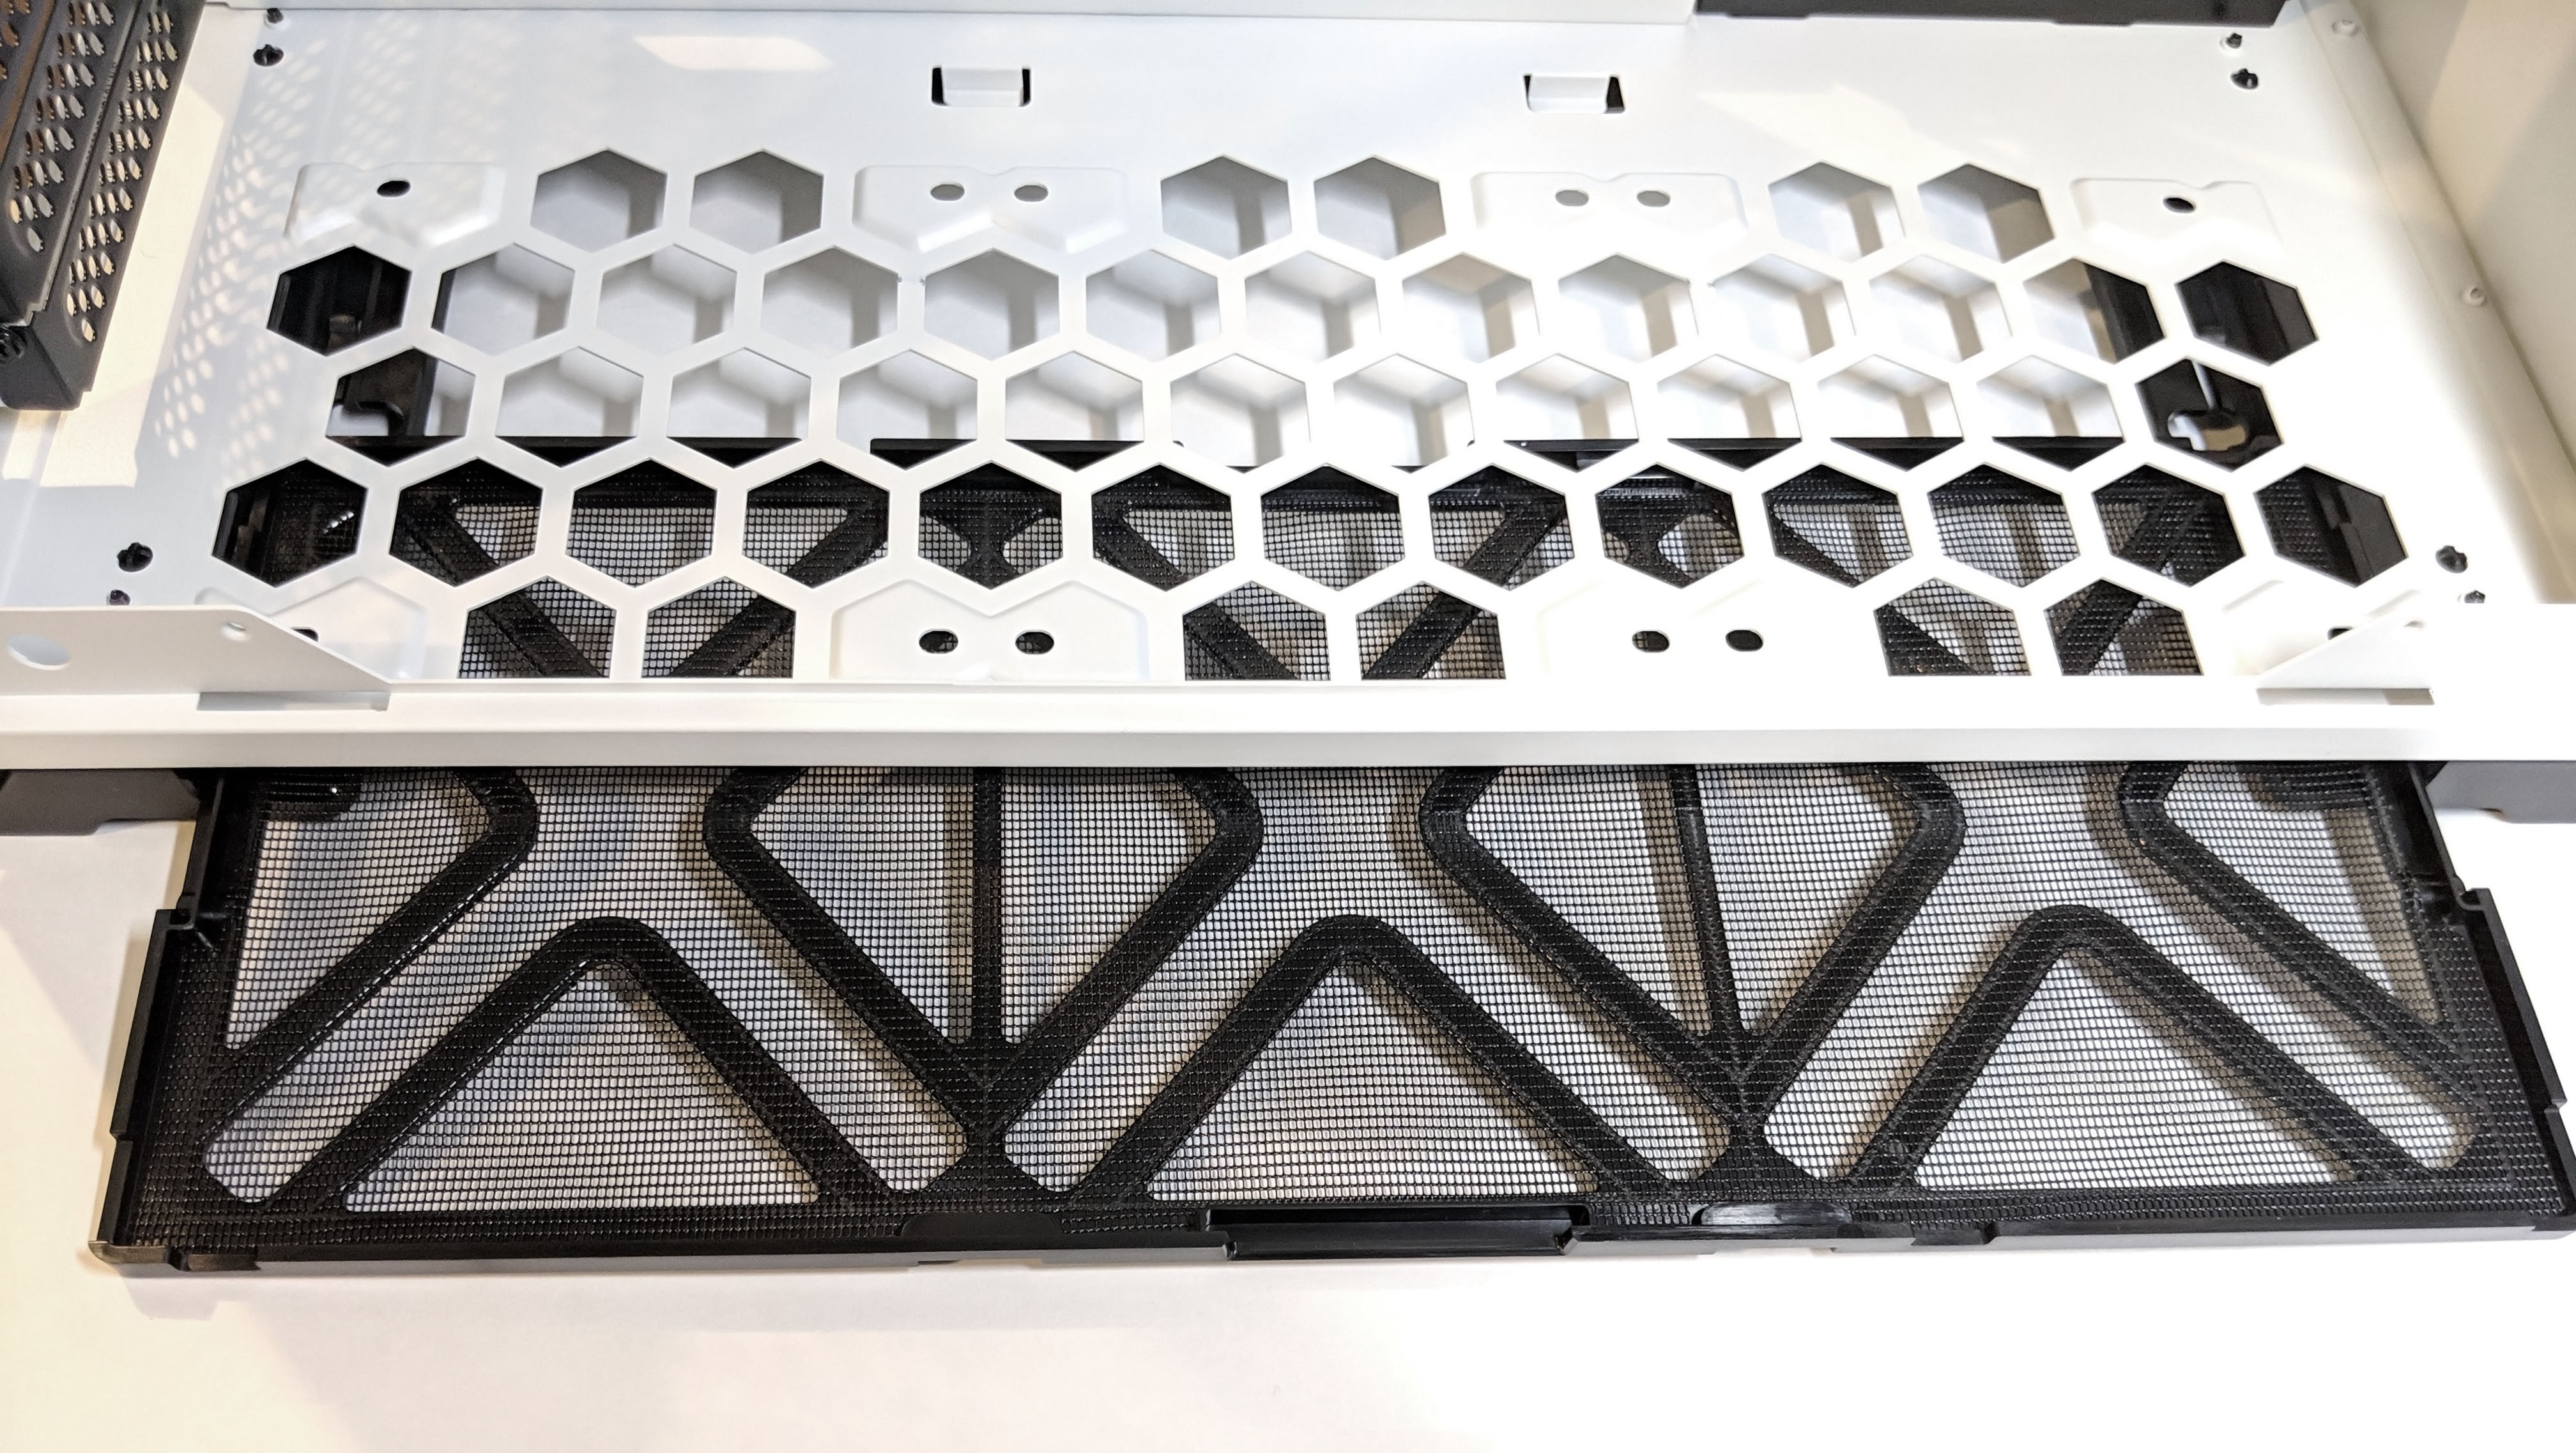
The bottom of the InWin 103 is where you’ll want to install the intake fans. The cold air will be drawn up and into the case which is filtered by a large filter which spans the length of all three fans. The filter can be easily slid out even with the side panel closed for easy cleaning.
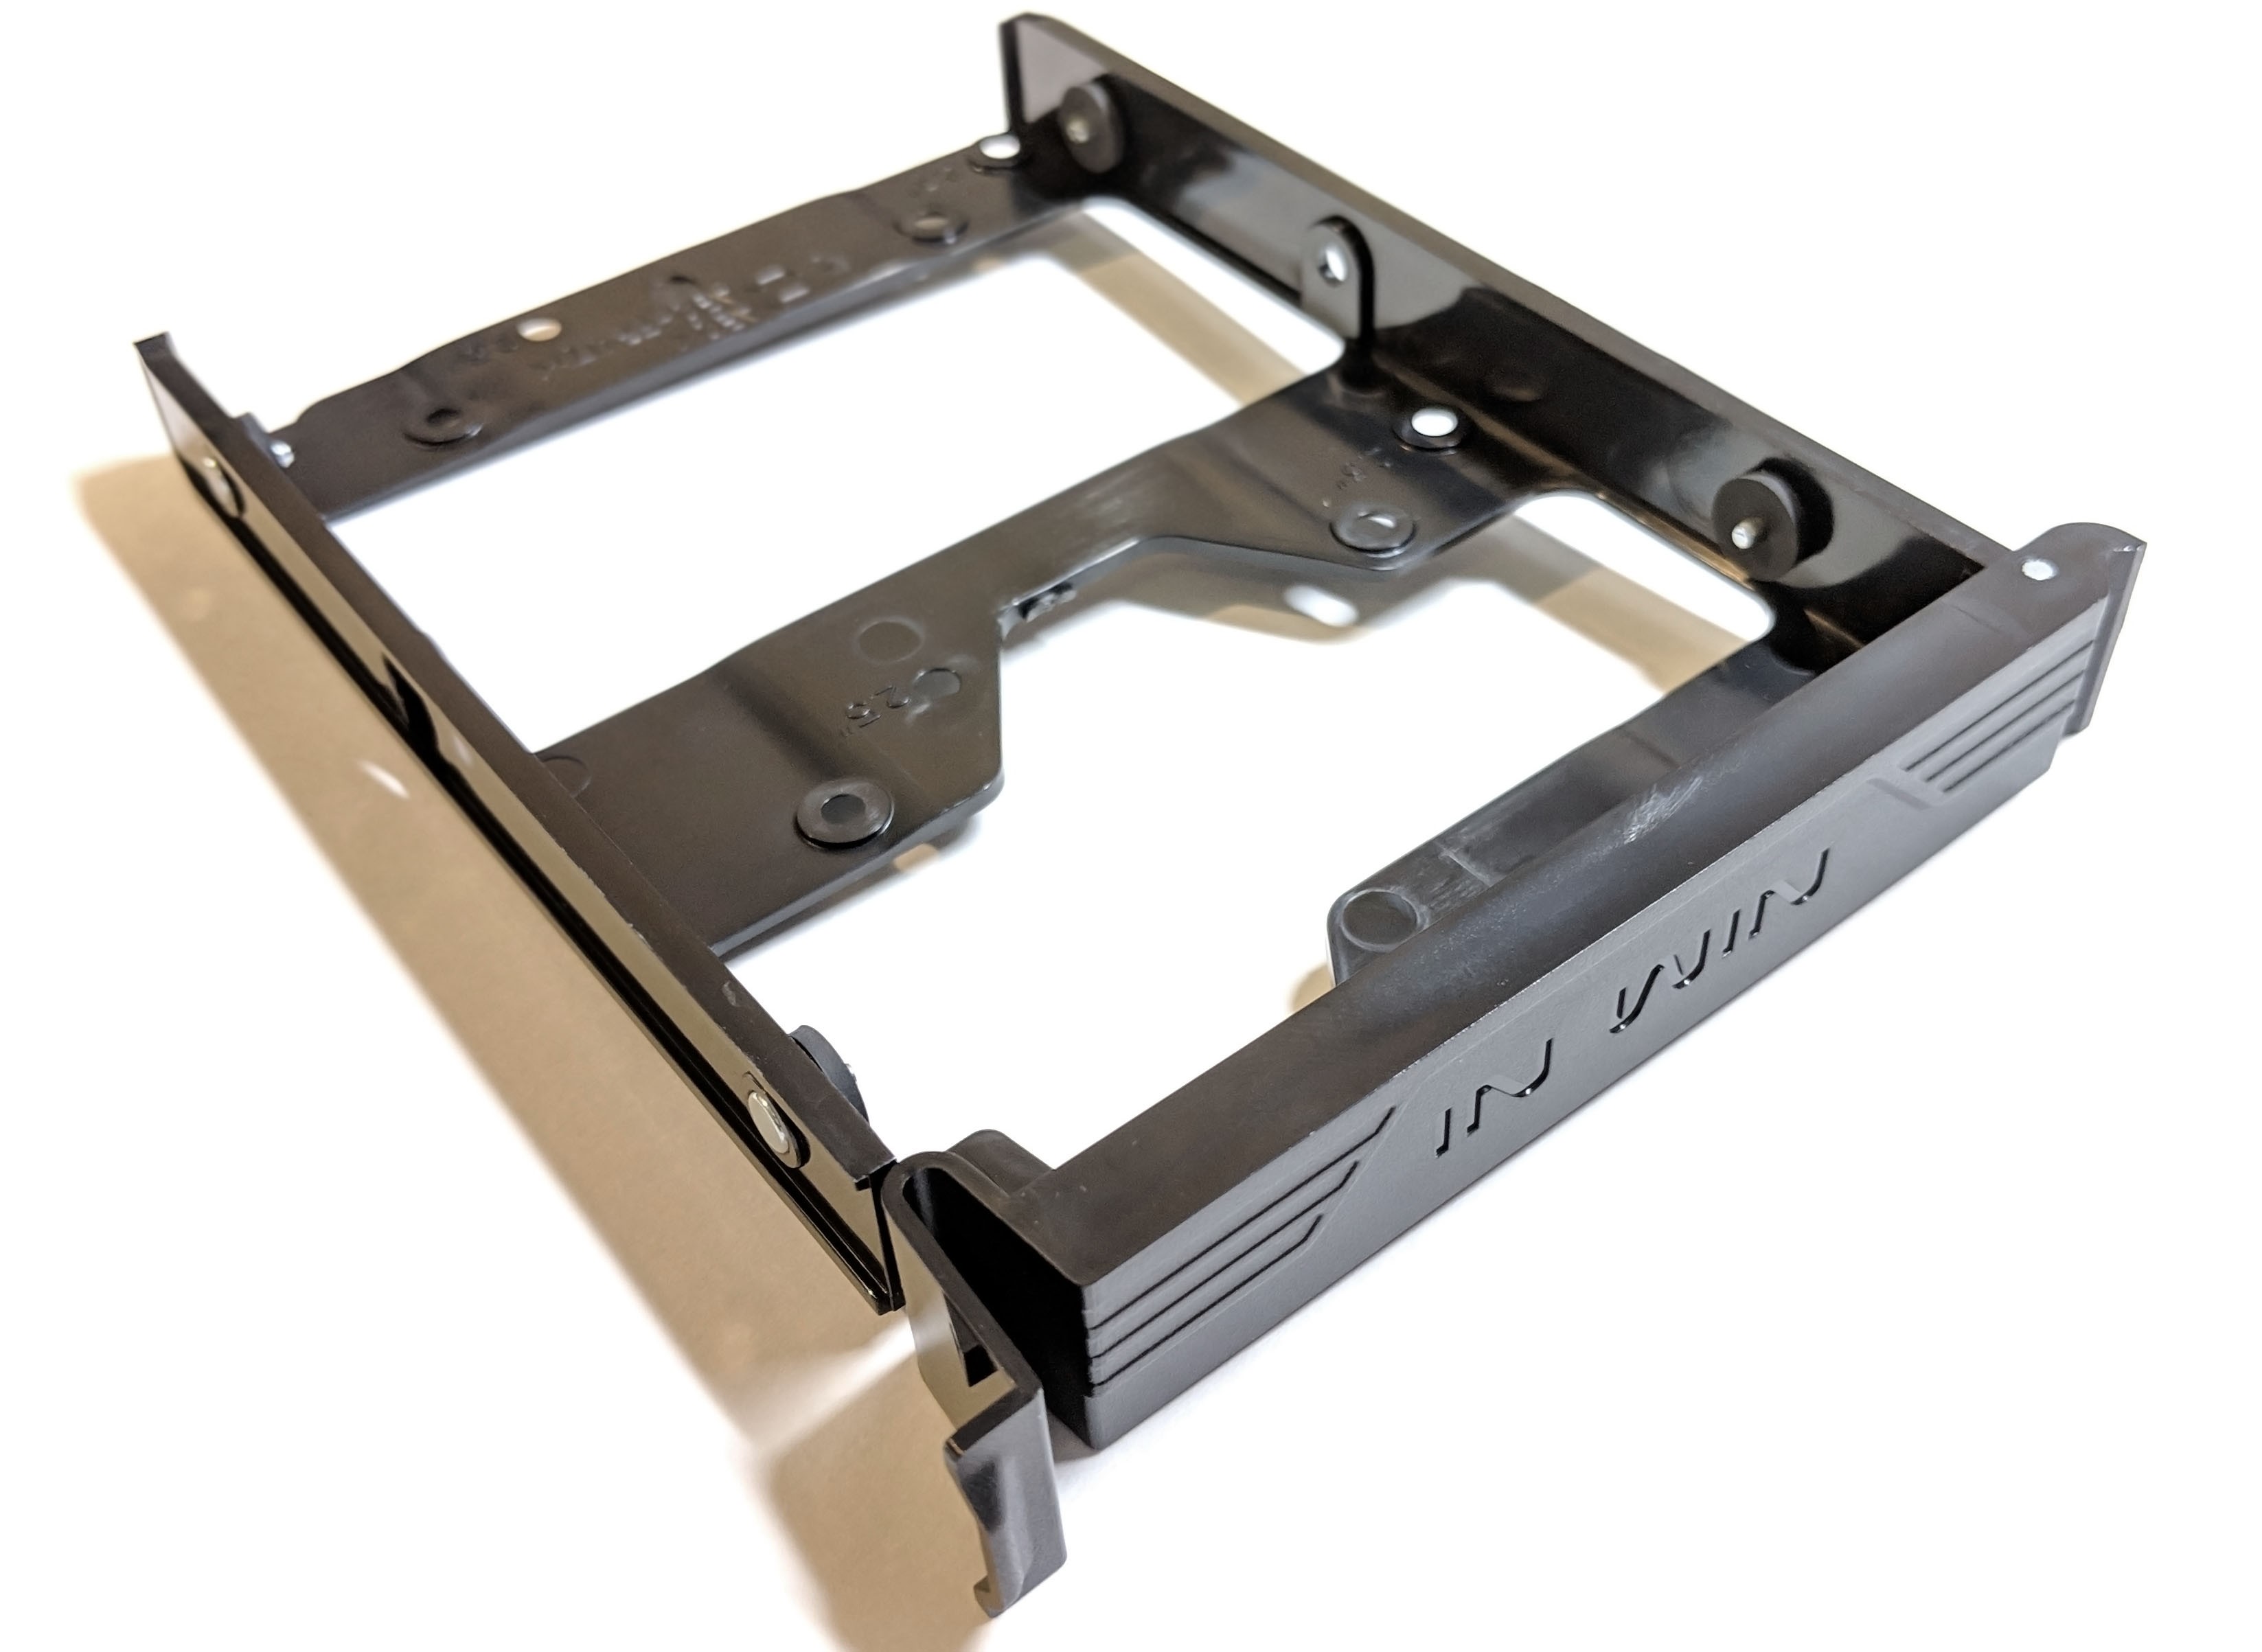
Moving on to the top of the case is where you’ll find the two 3.5 inch HDD trays. The trays can be easily installed and removed with the hard drive’s ports facing the rear. Definitely ideal for easy and clean cabling.
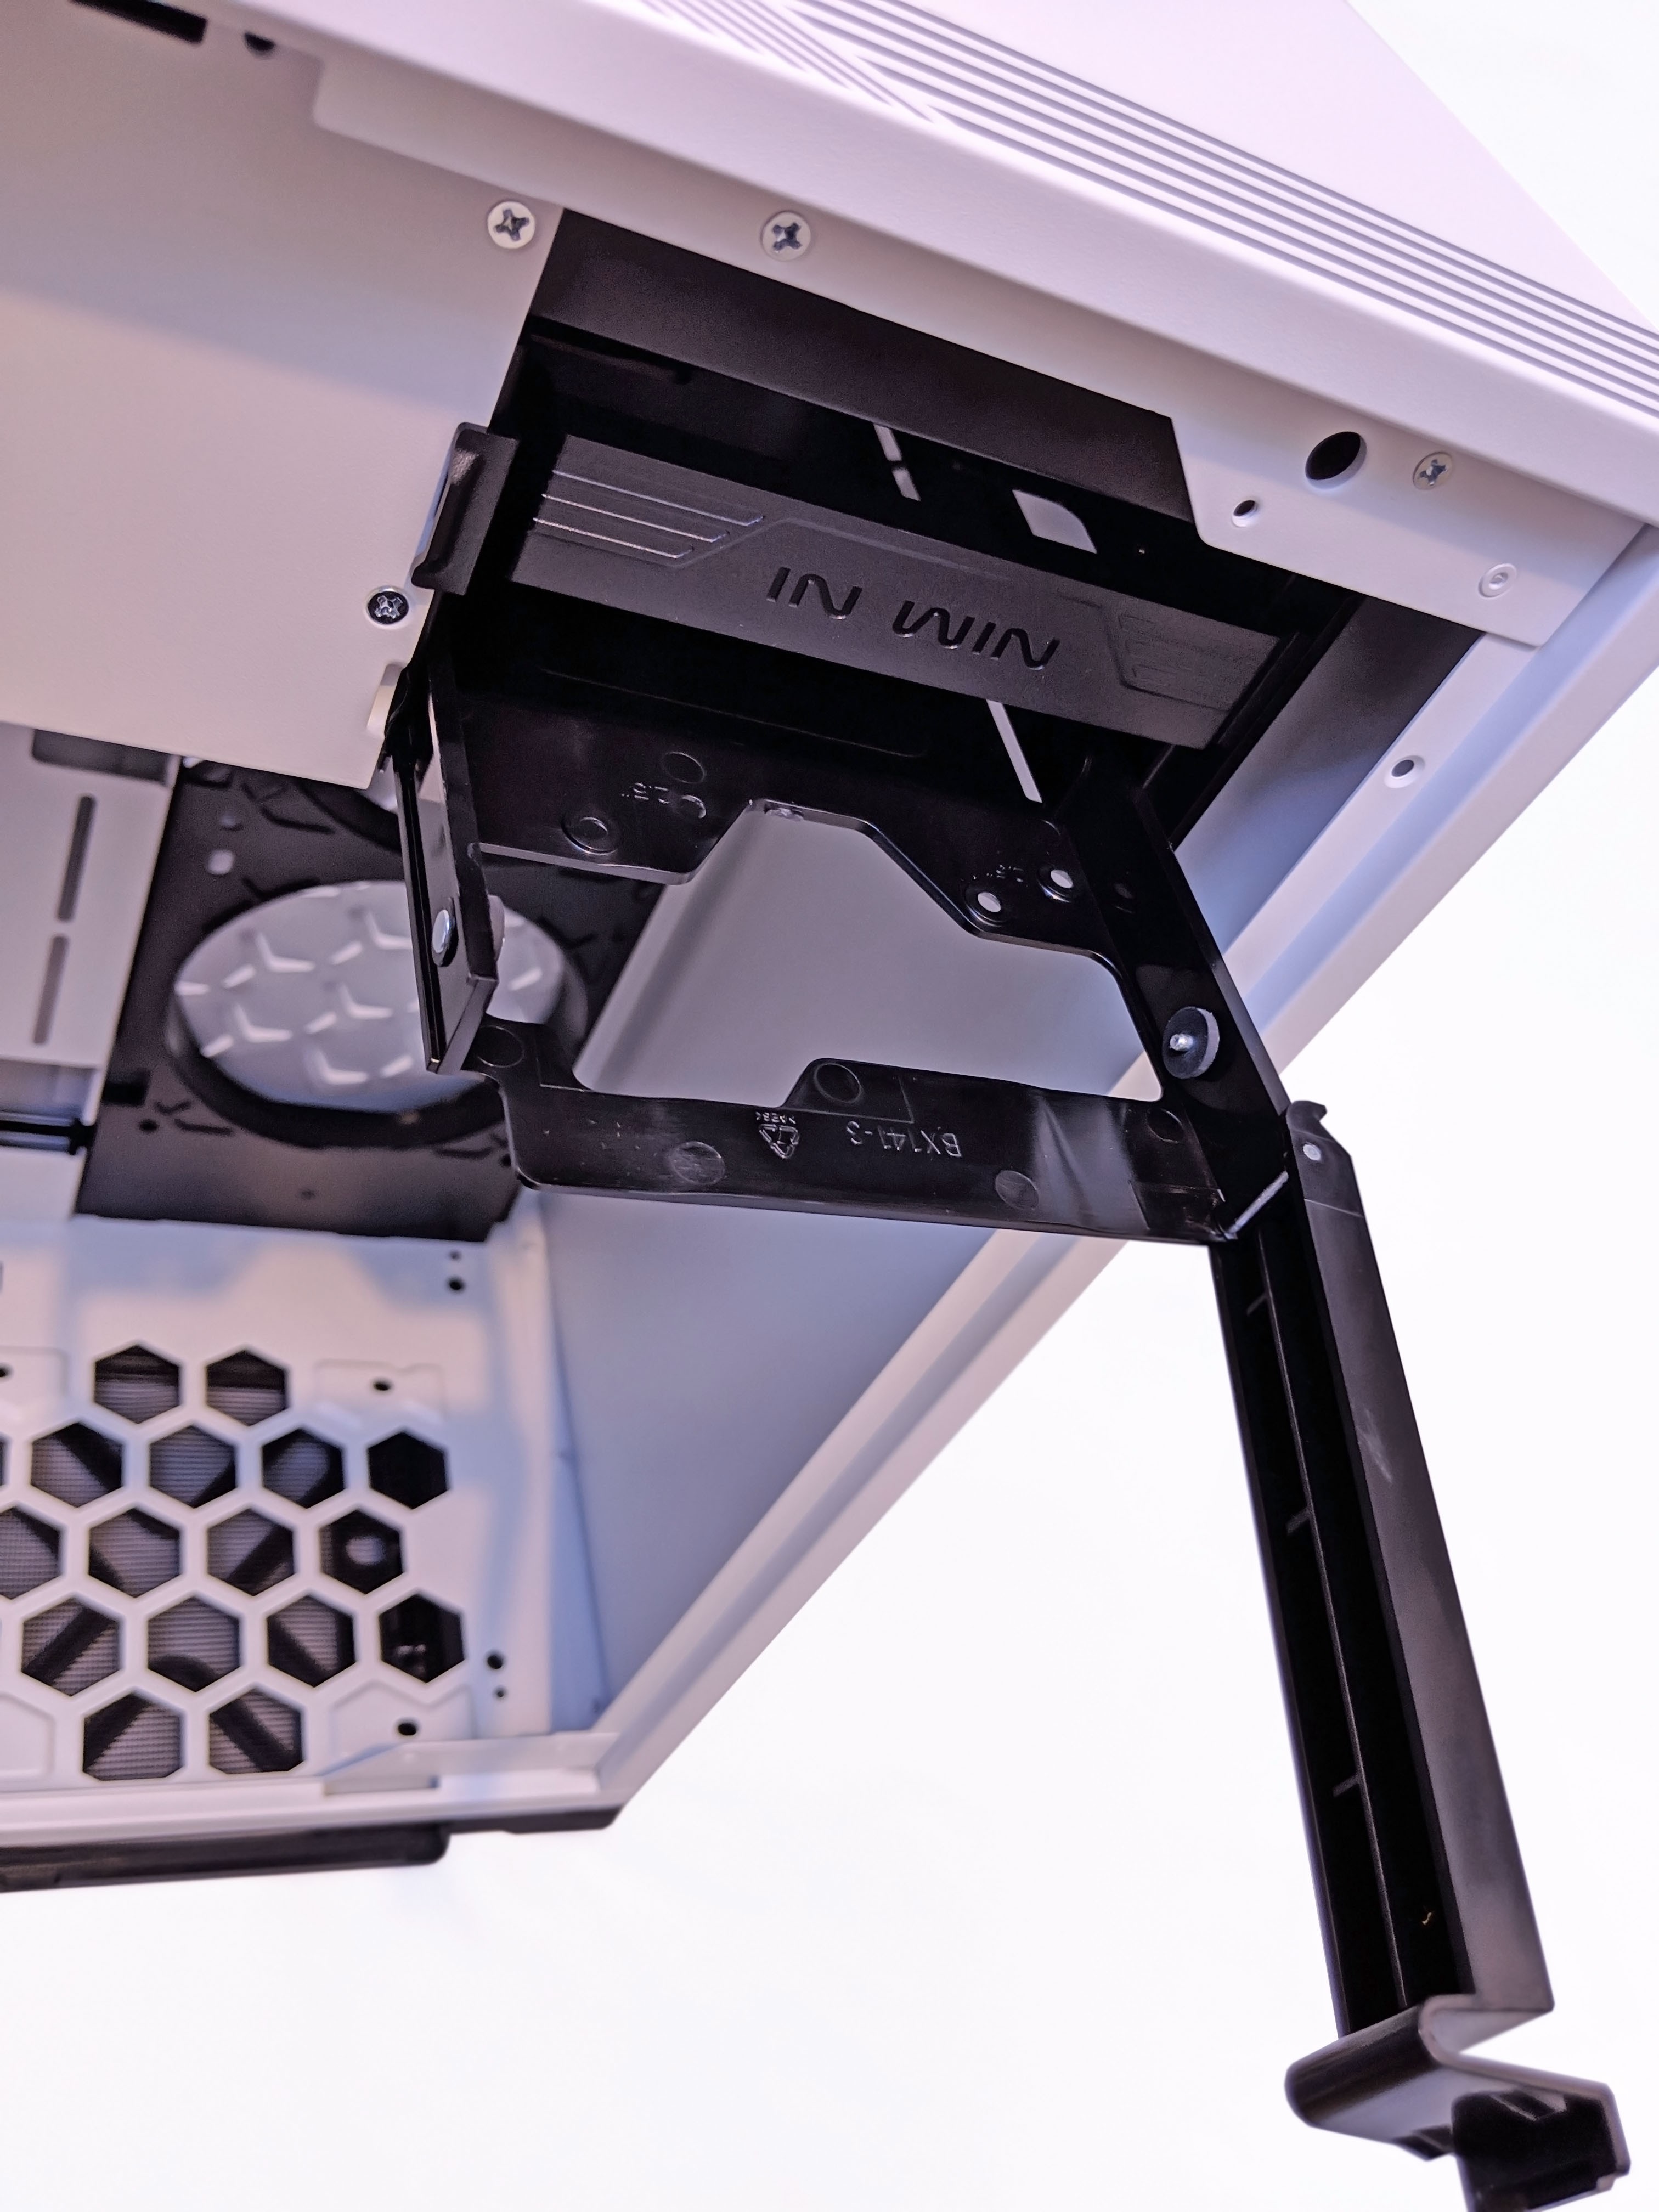
The HDD trays are plastic and feature rubber mounts for the drive. This should help in vibration reduction.
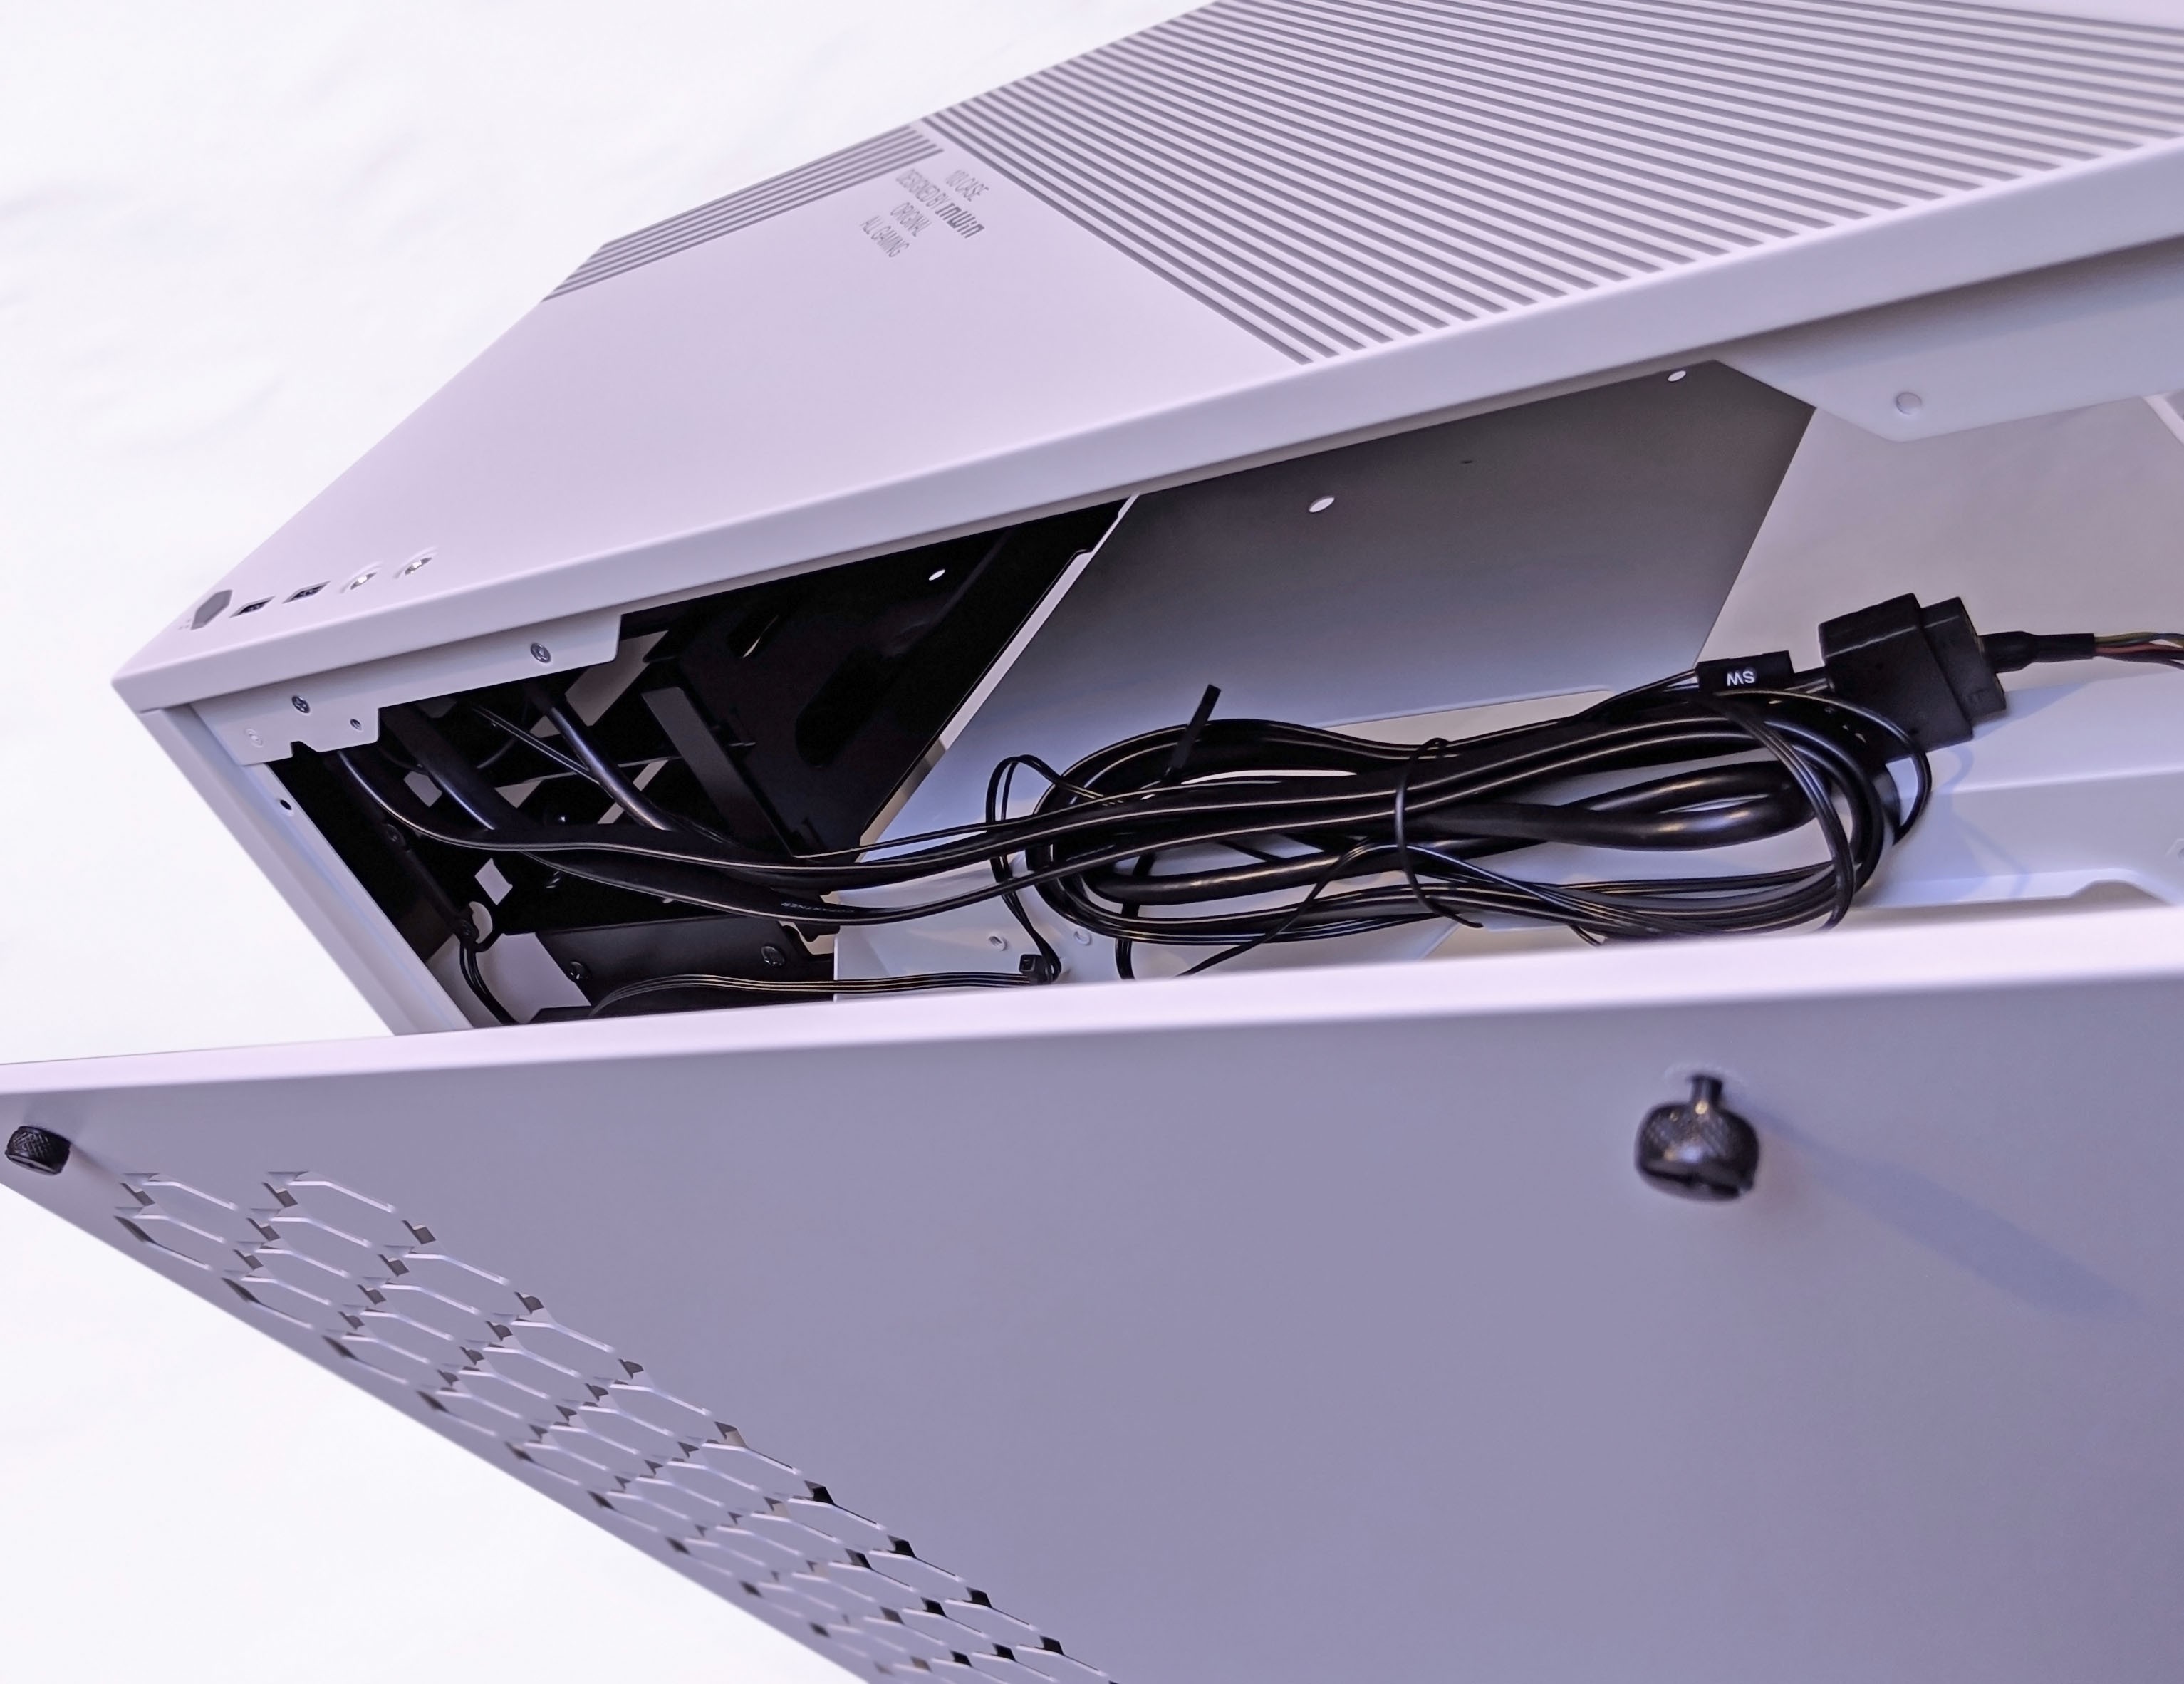
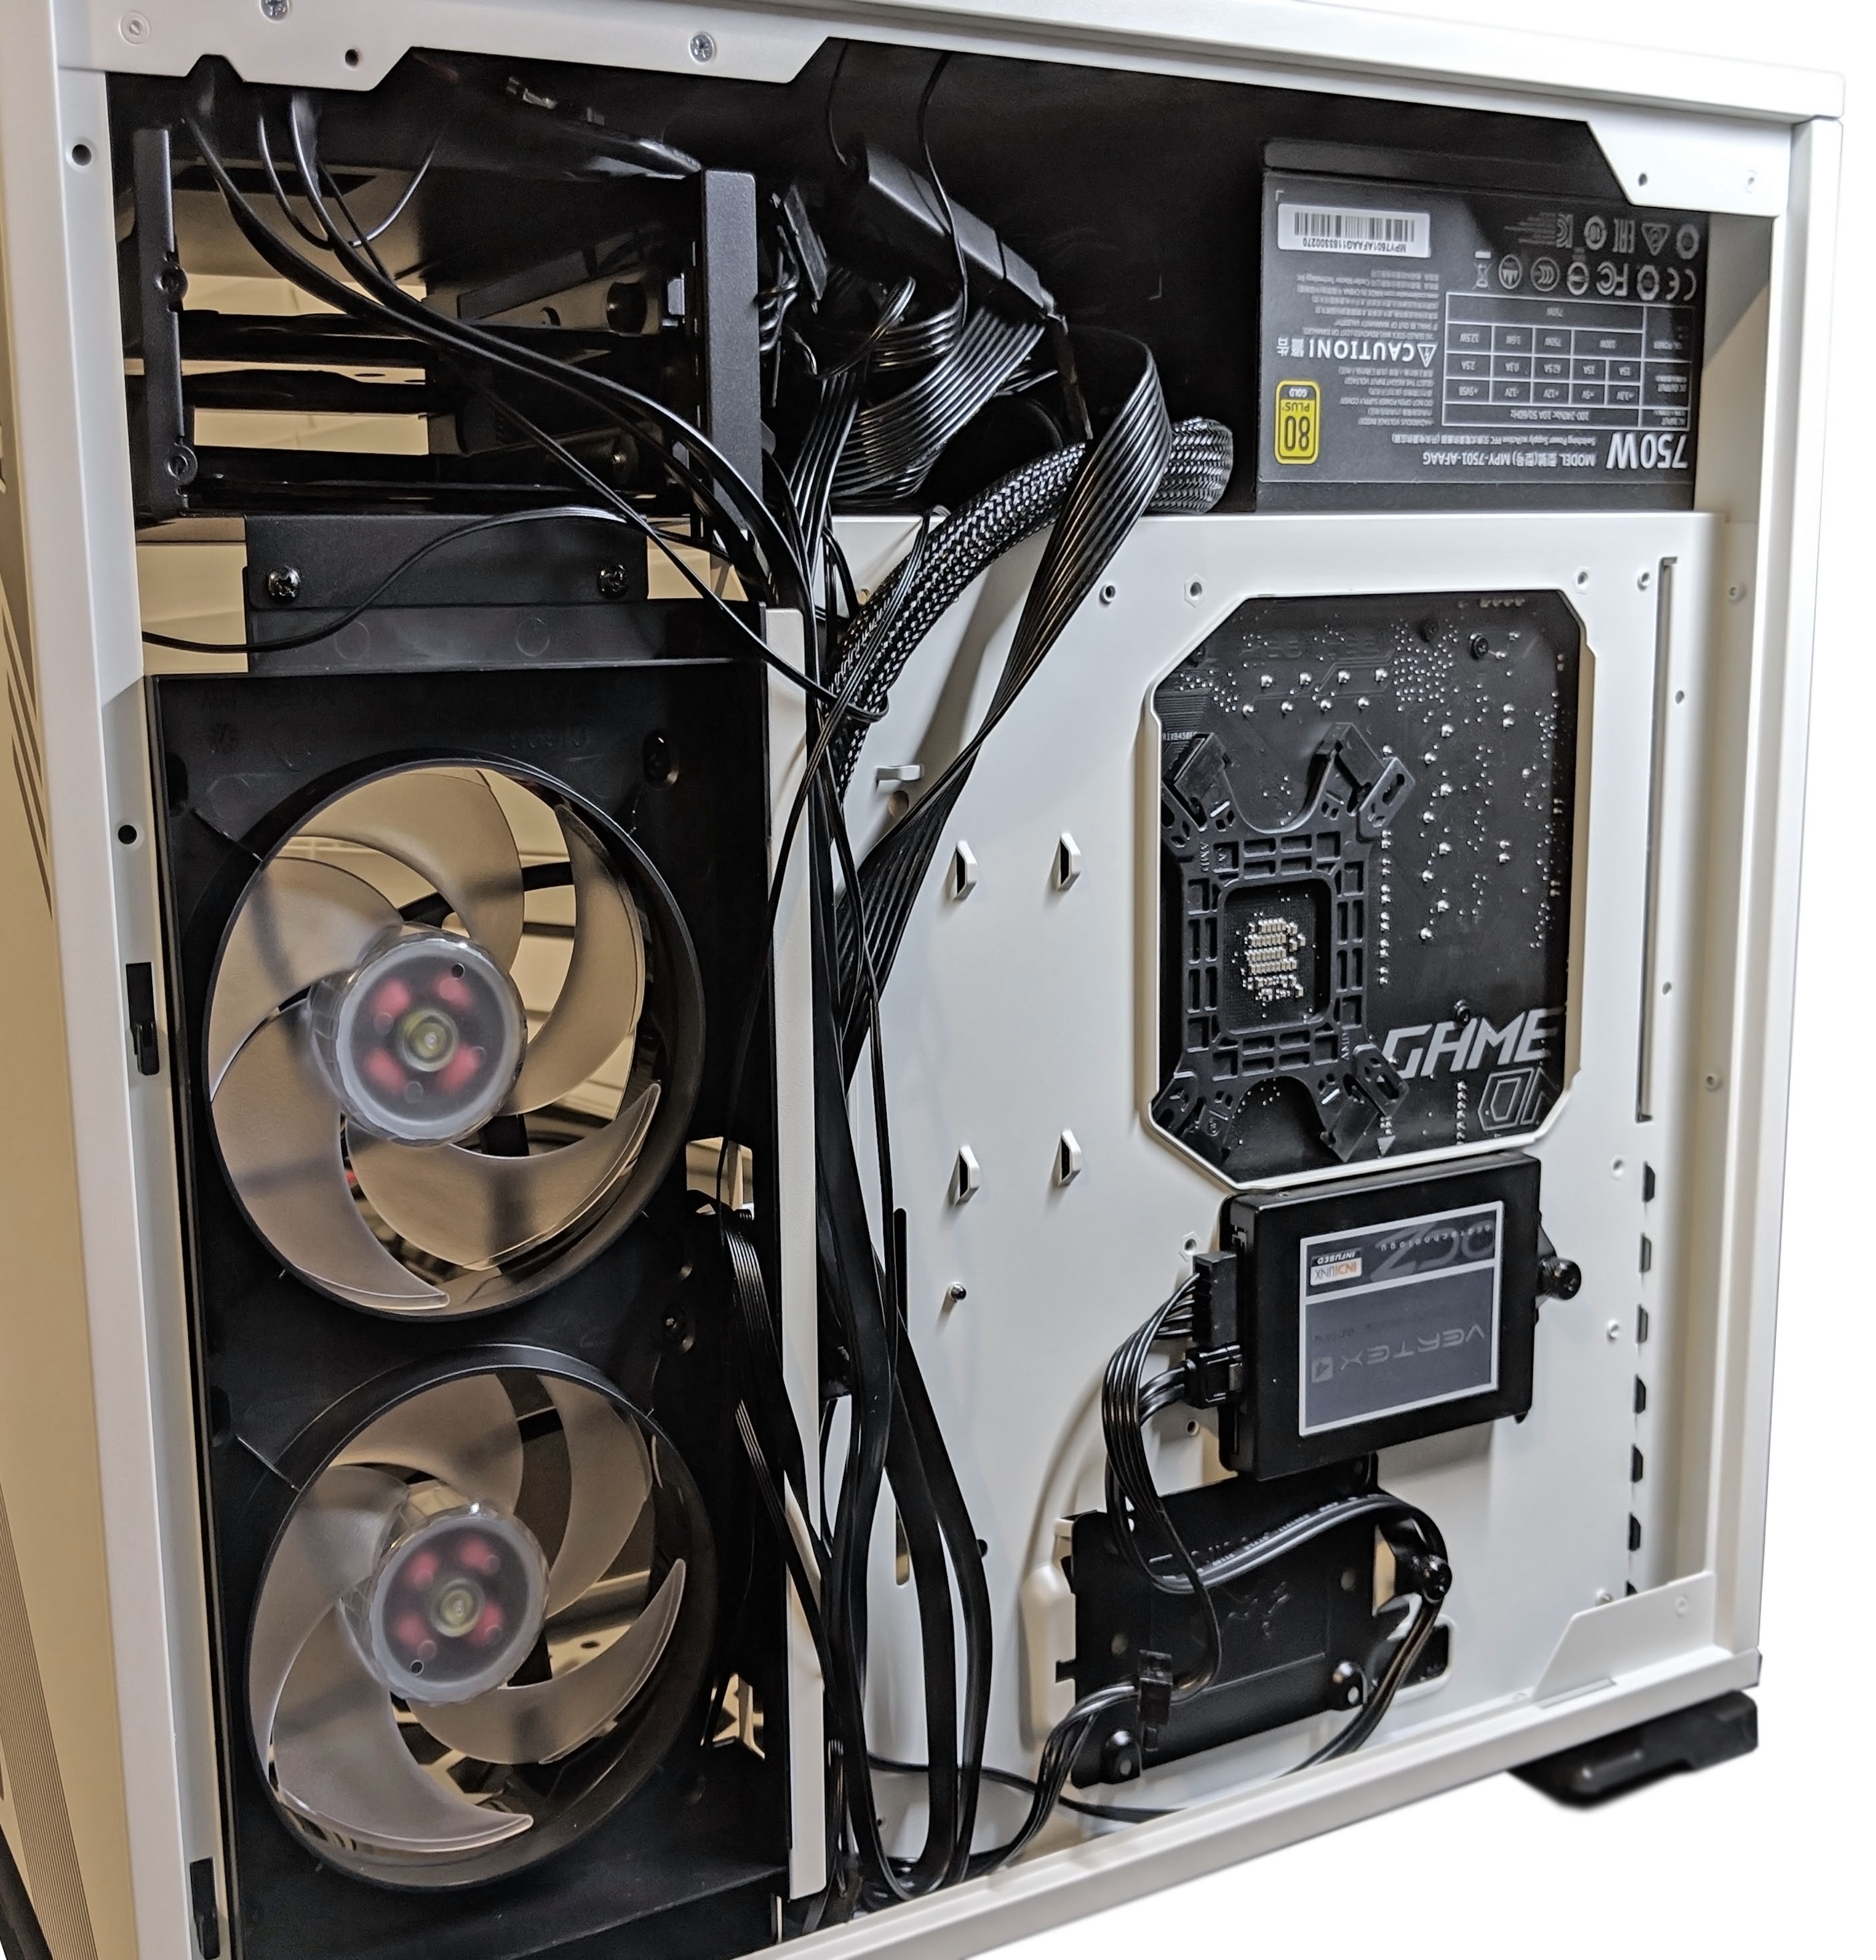
Next, with the back panel removed, let’s see what’s going on behind the scenes there. Nothing two out of the ordinary but definitely some points to mention. First are the two 2.5″ SSD trays located just behind the motherboard tray. At the top is where you’ll slide in and mount the power supply. Access is a bit limited once the PSU is installed, so I definitely recommend pugging in any modular cables first before mounting the unit onto the case.
There are also plenty of places to secure cables with zip ties for keeping cables nice and tidy.
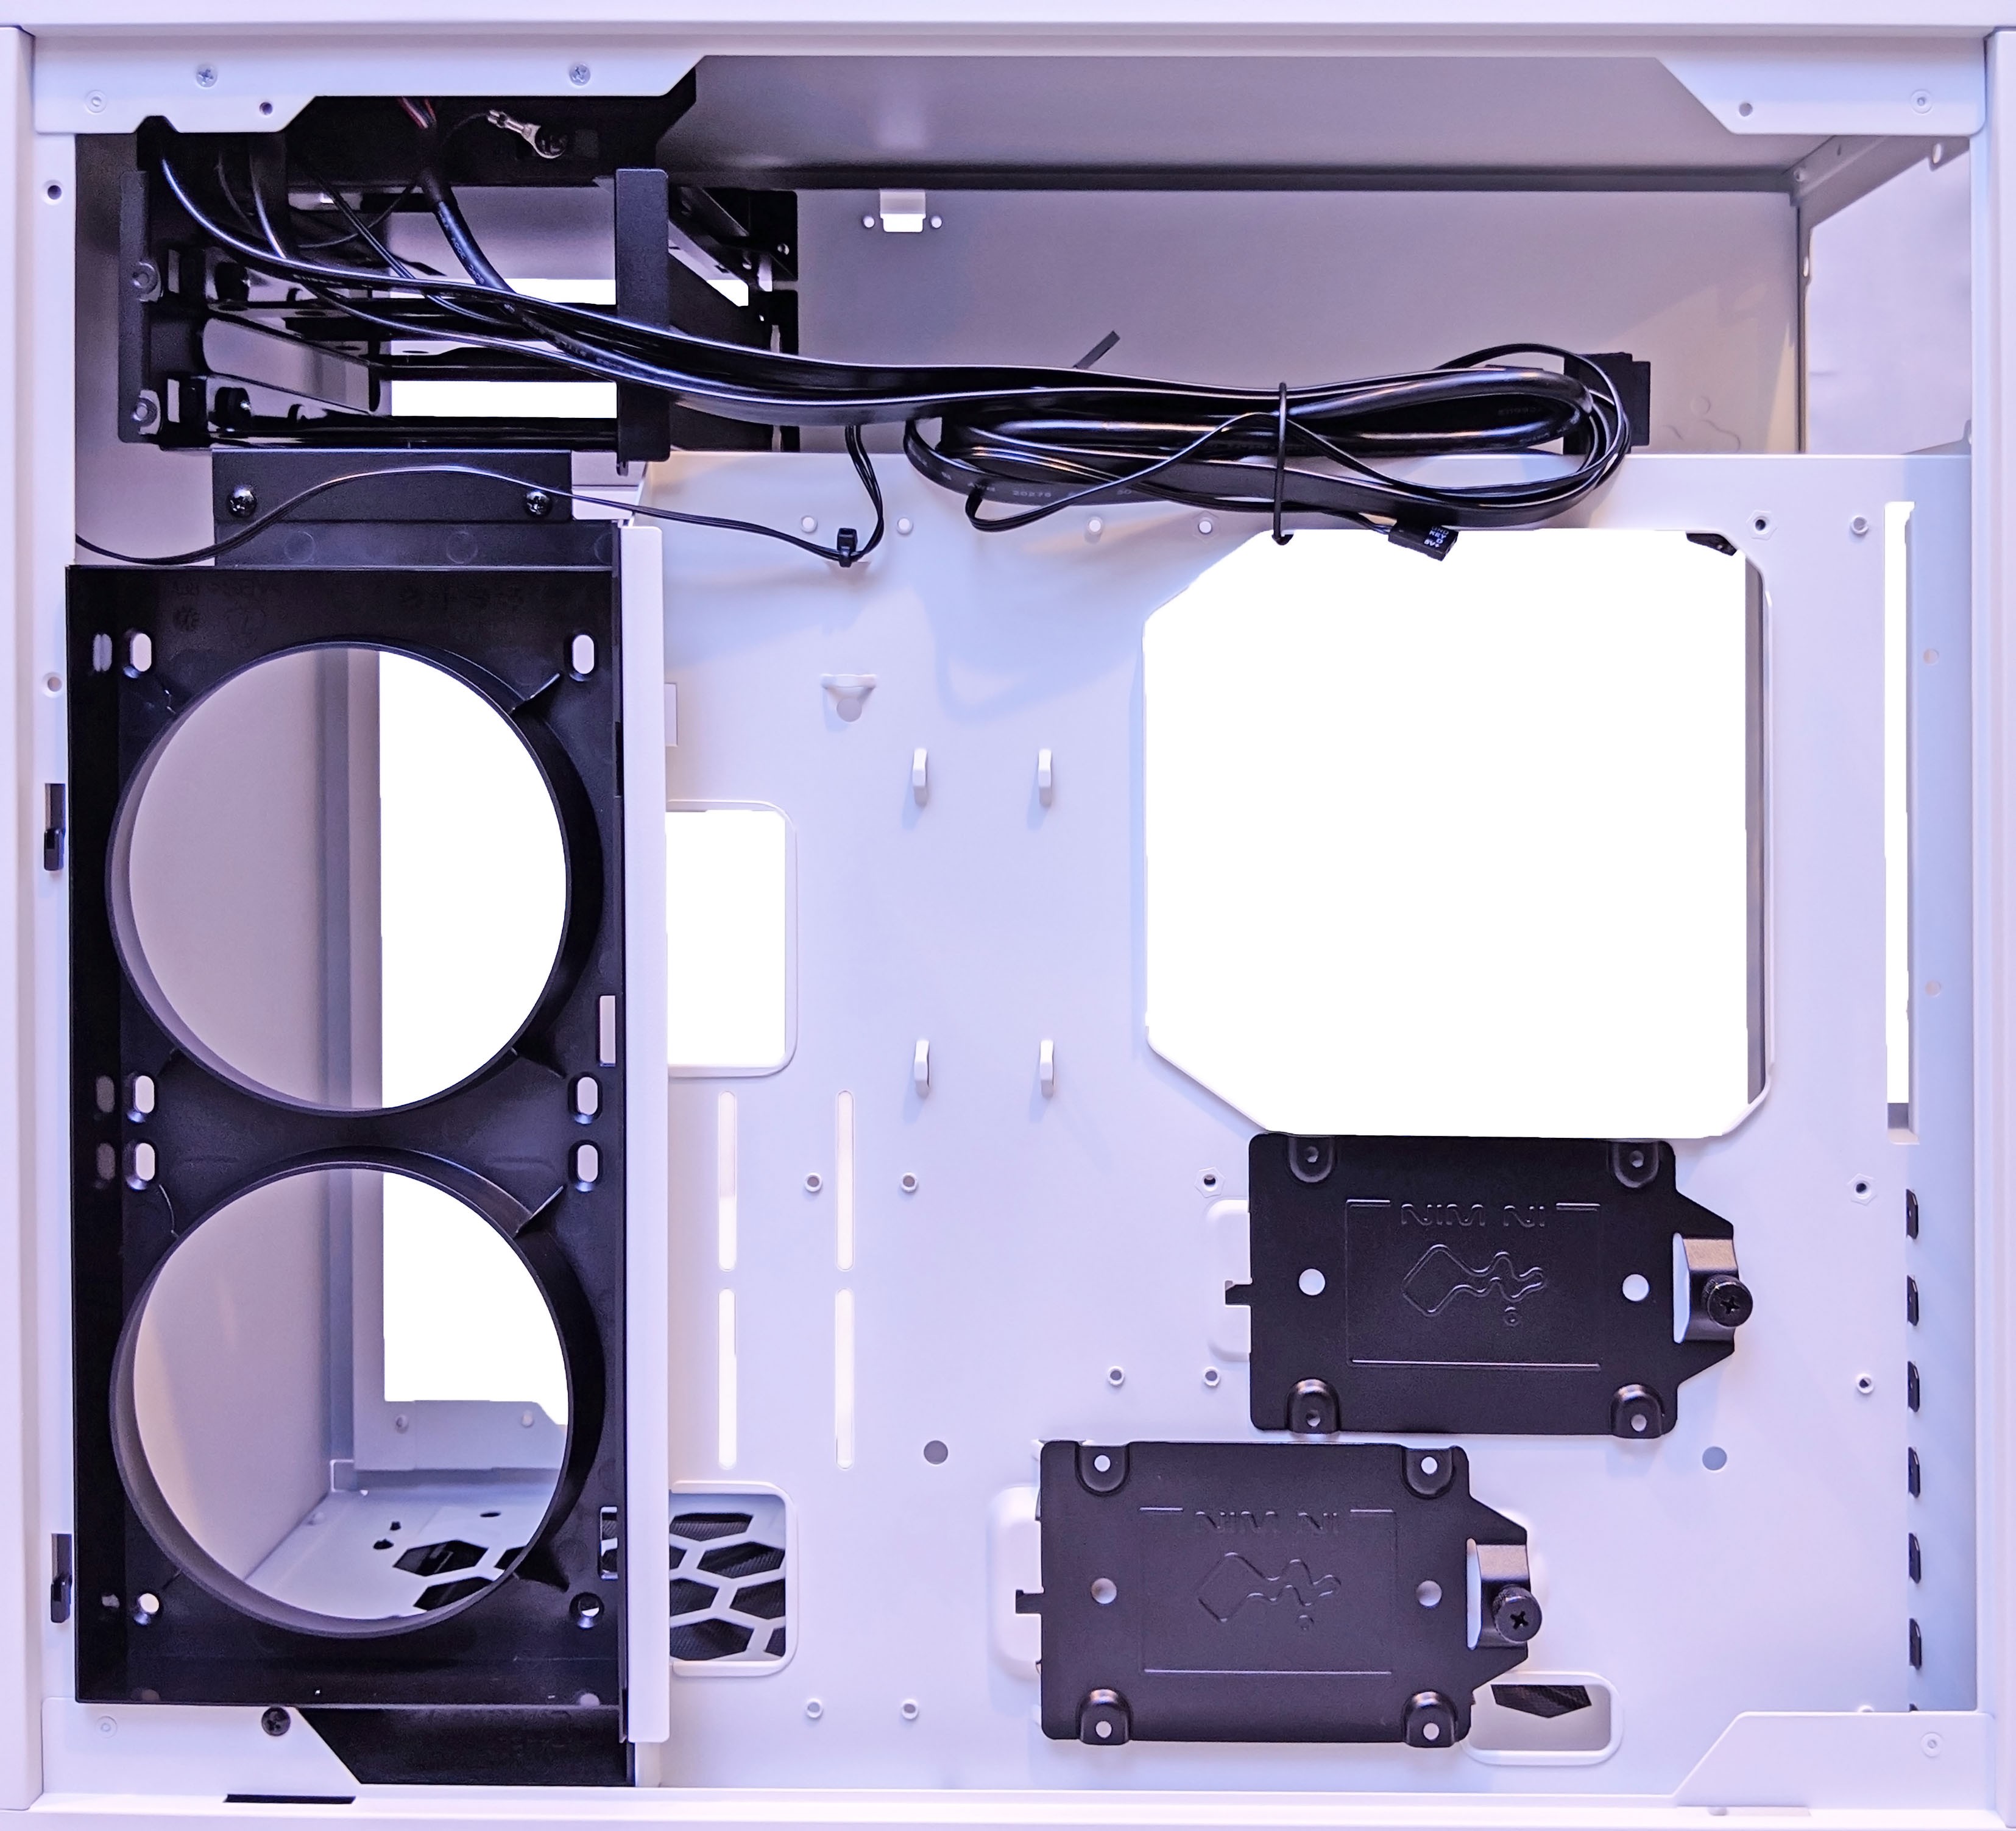
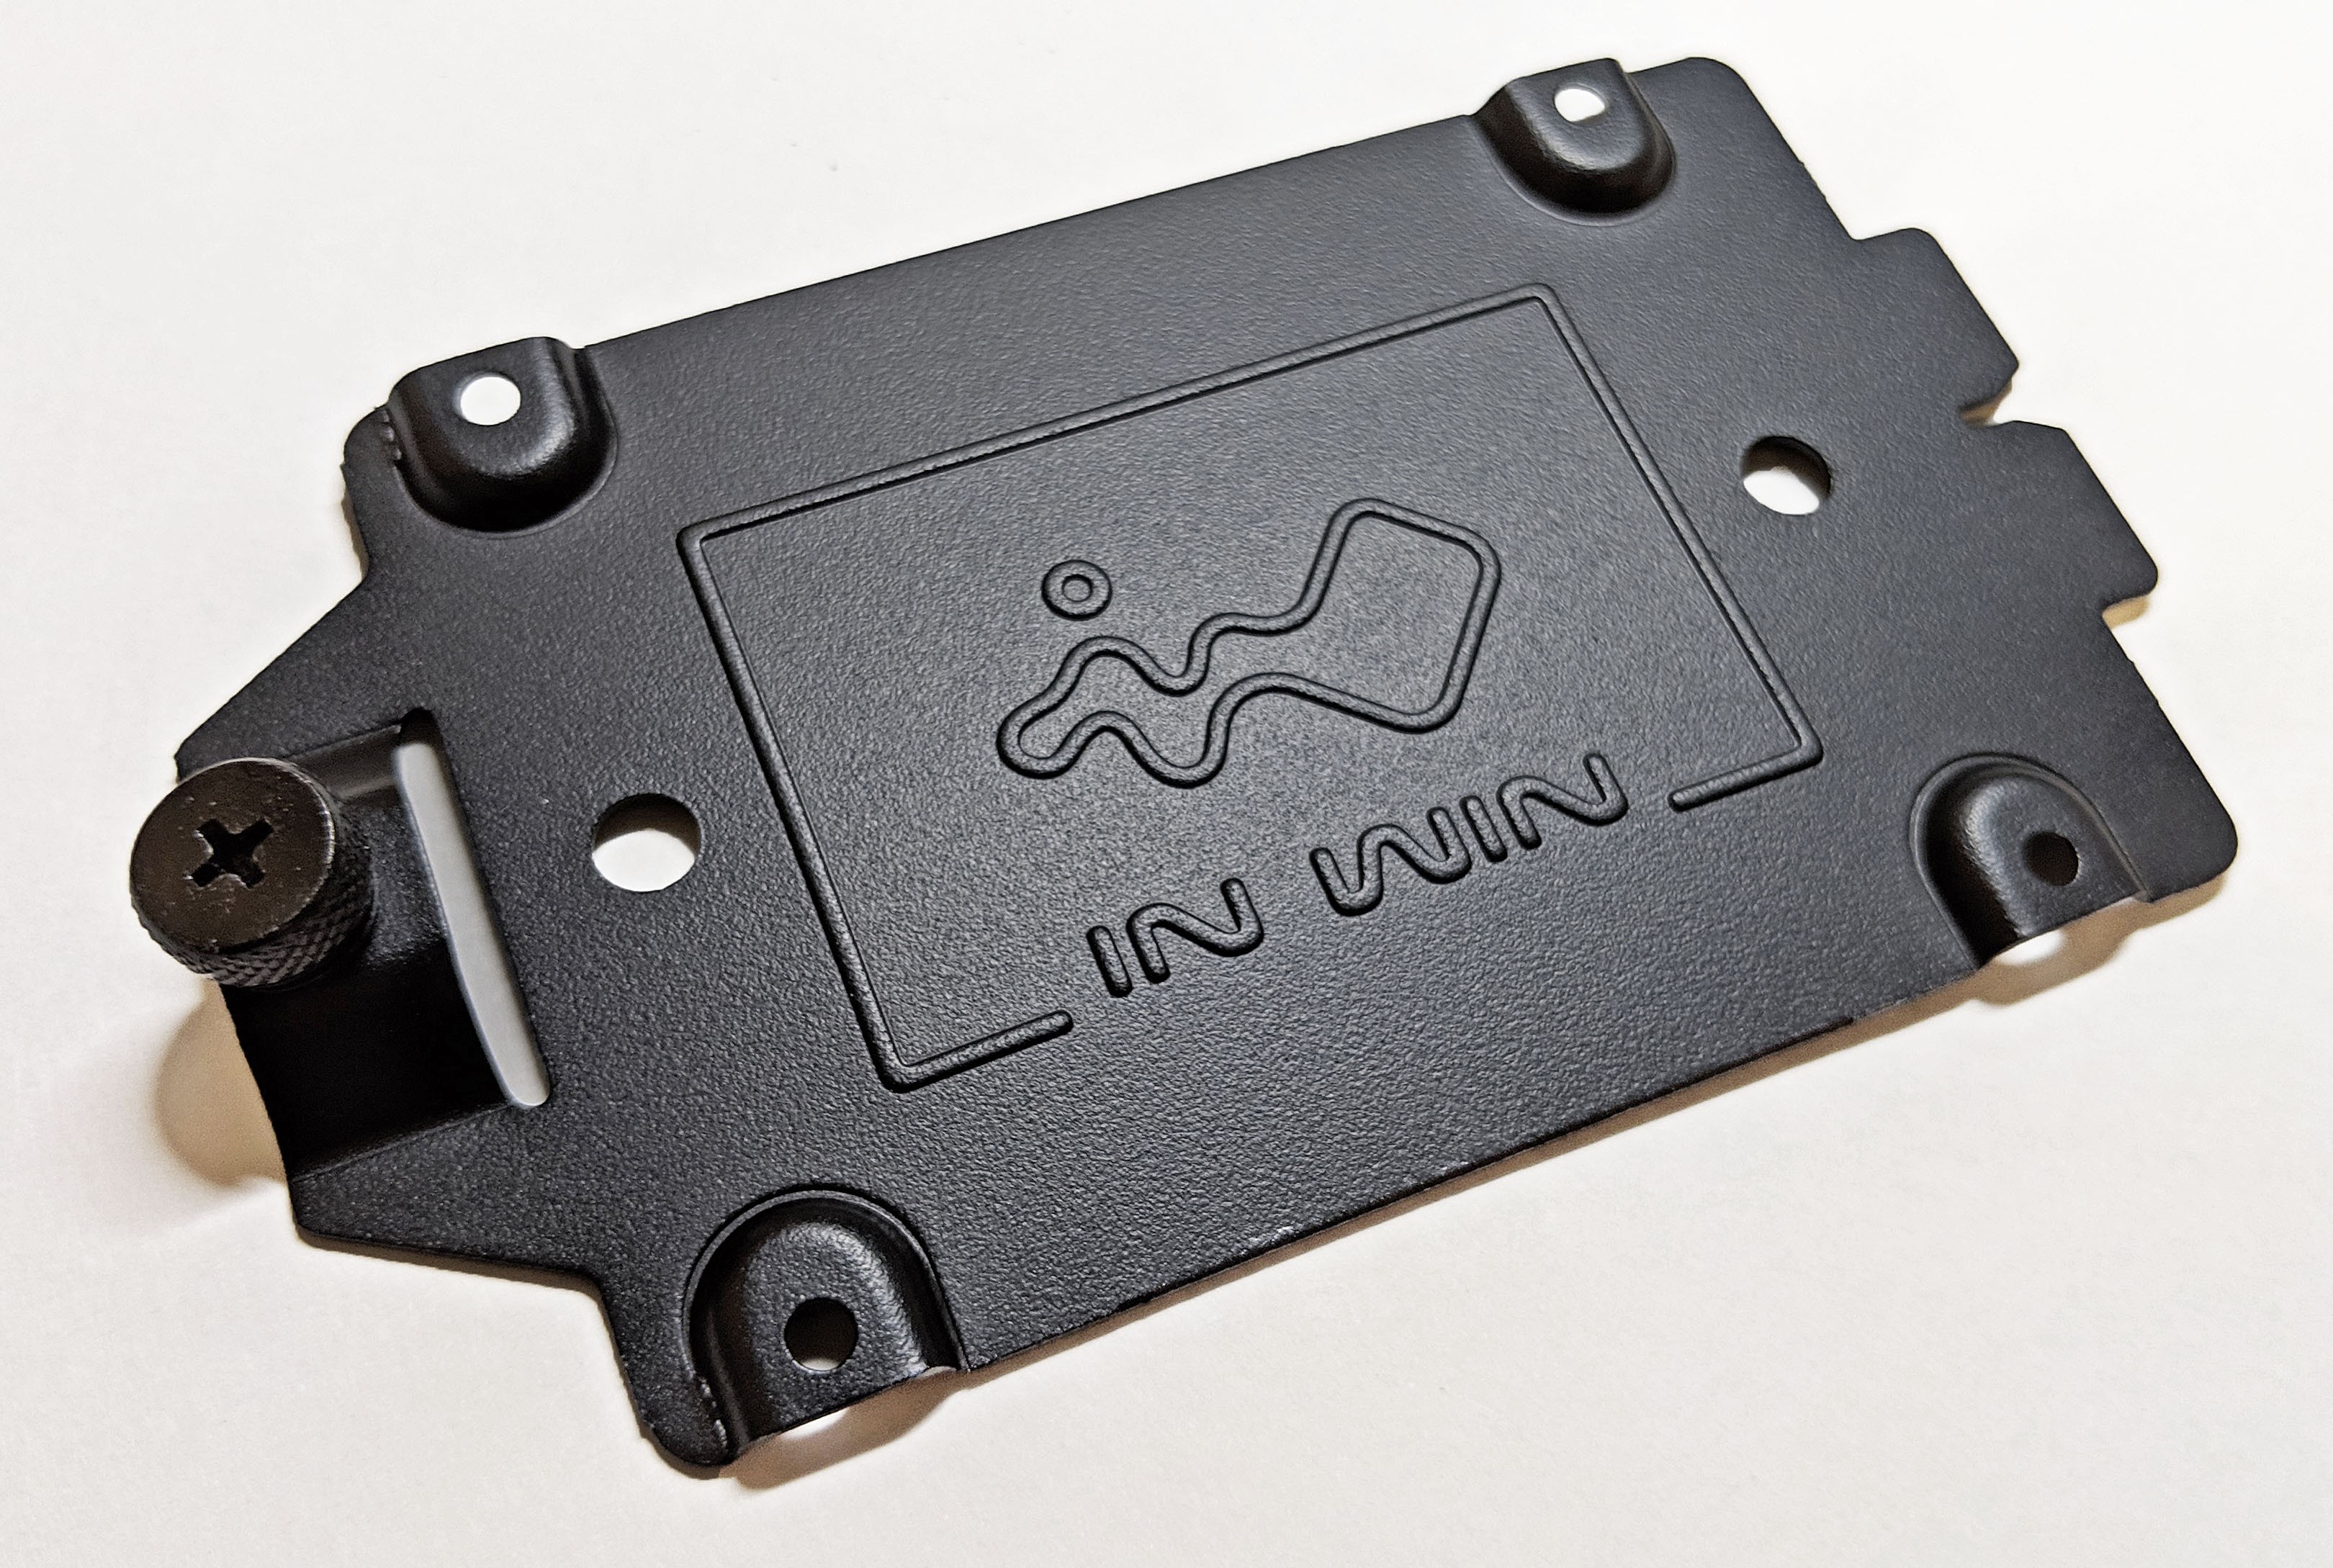
The SSD mounts are secured by a single thumb screw. Simply remove the mounts by removing the screw. Once removed, simply install the SSD using the provided screws with its ports aimed away from the thumb screw. Then simply reinsert the SSD tray with the attached SSD back into place.


Here’s a shot of the cables that will need to be attached to the motherboard fro the front IO panel. This includes (from left to right) the USB 3.0 header, RGB header, the HD Audio and power switch connectors. The RGB connector can either be plugged directly into a 5V 3-pin addressable RGB header on the motherboard, or into the provided RGB controller switch.
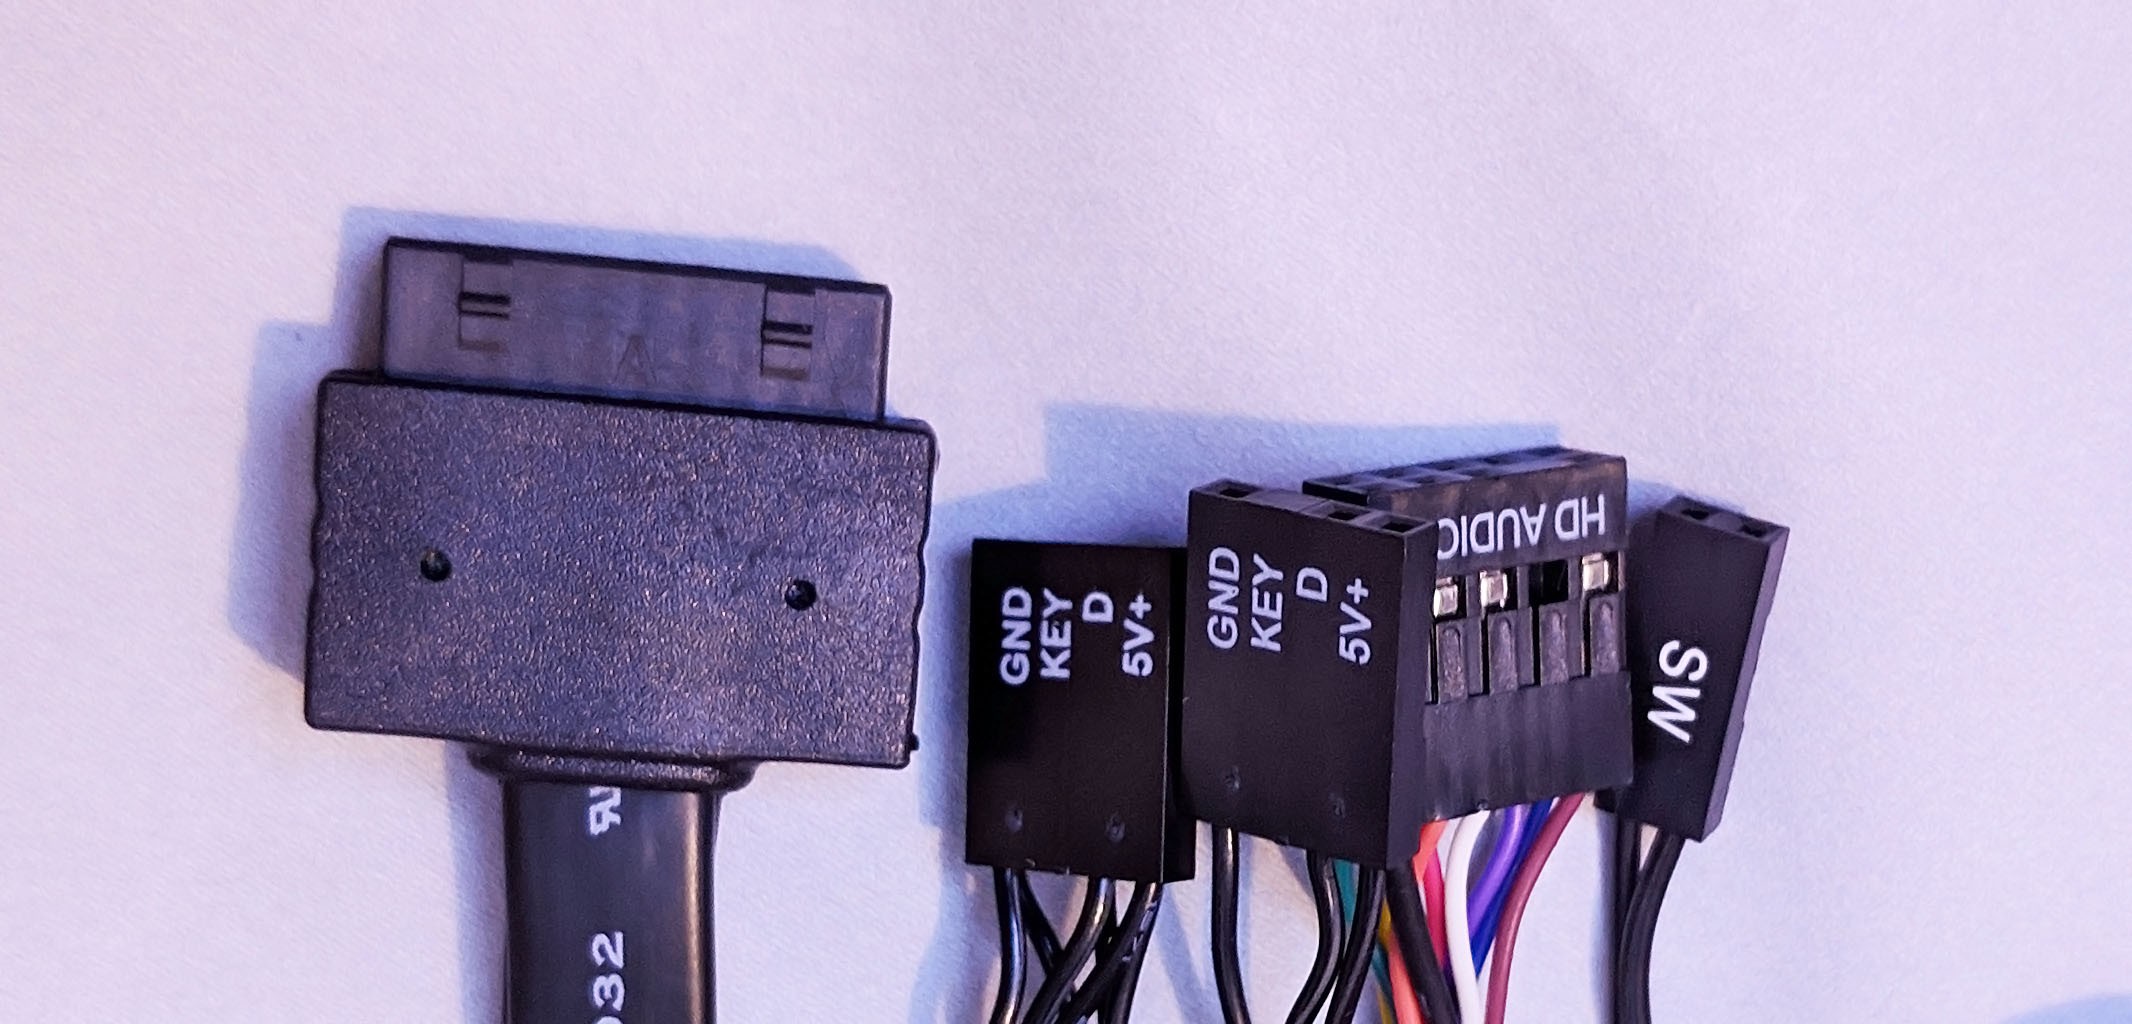
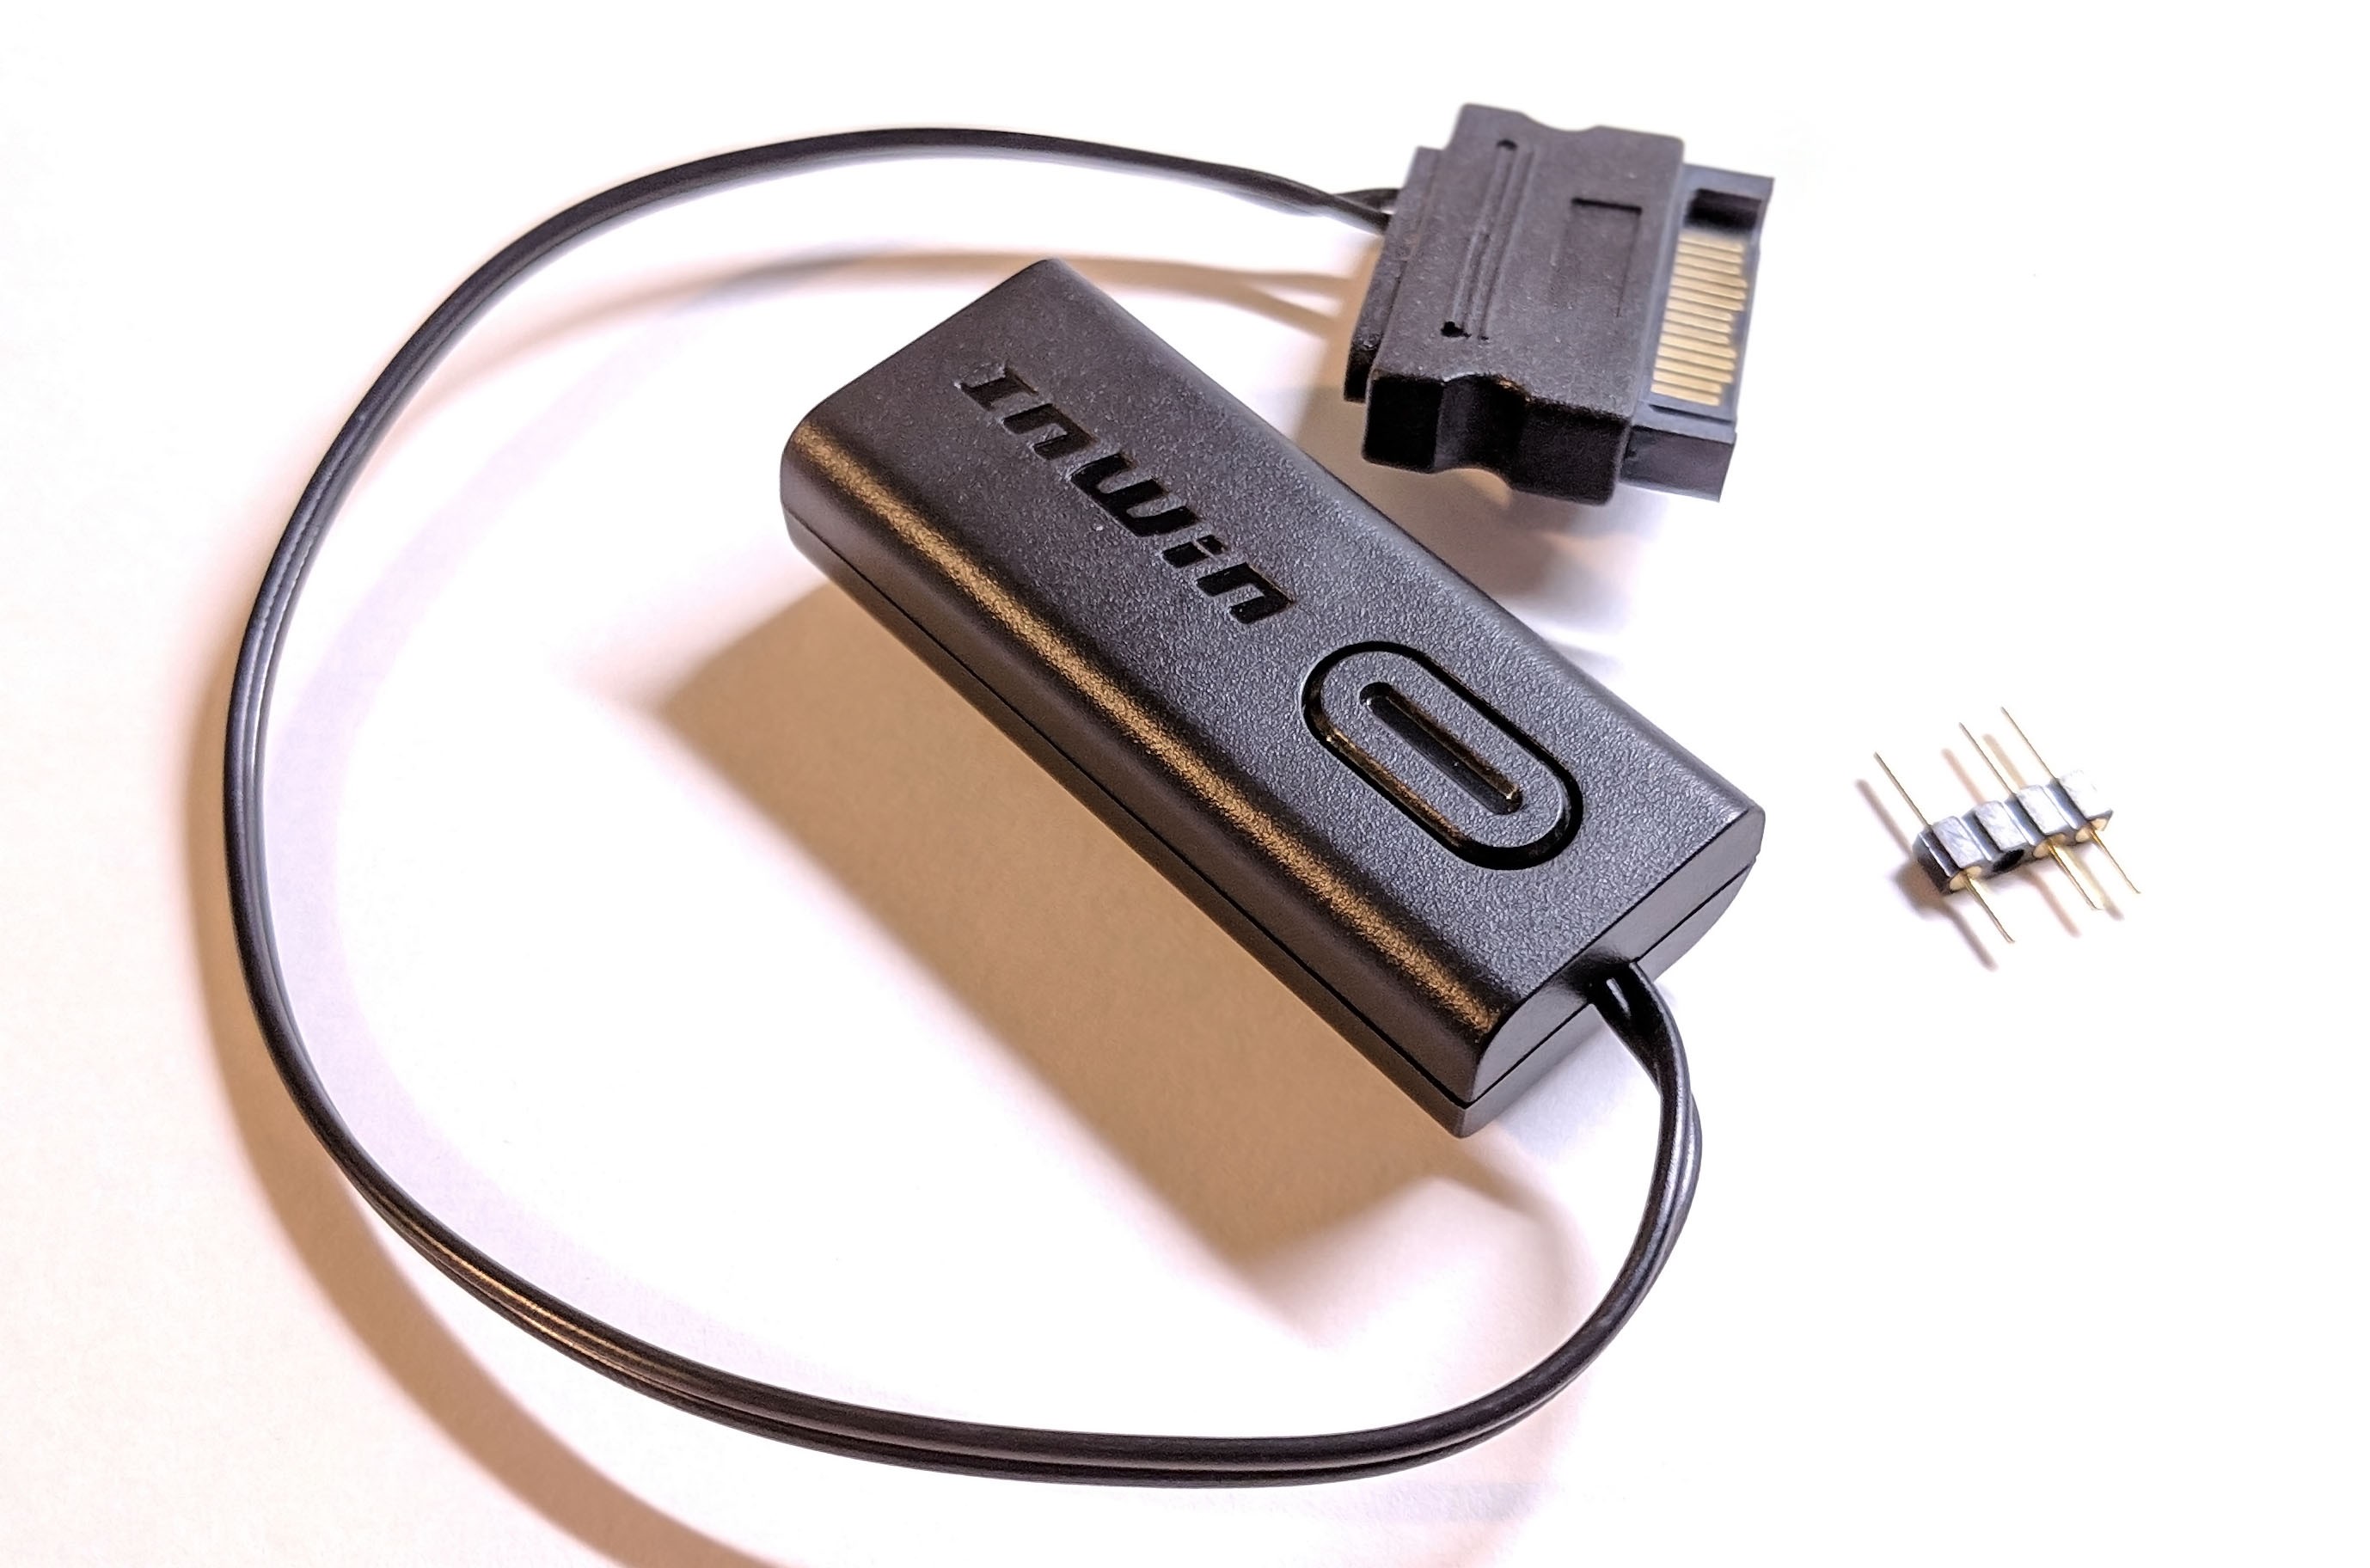
The RGB controller is powered by a single SATA drive power connector from the power supply. There are plenty of lighting options which can be toggled by simply pressing the button.
Hardware Installation
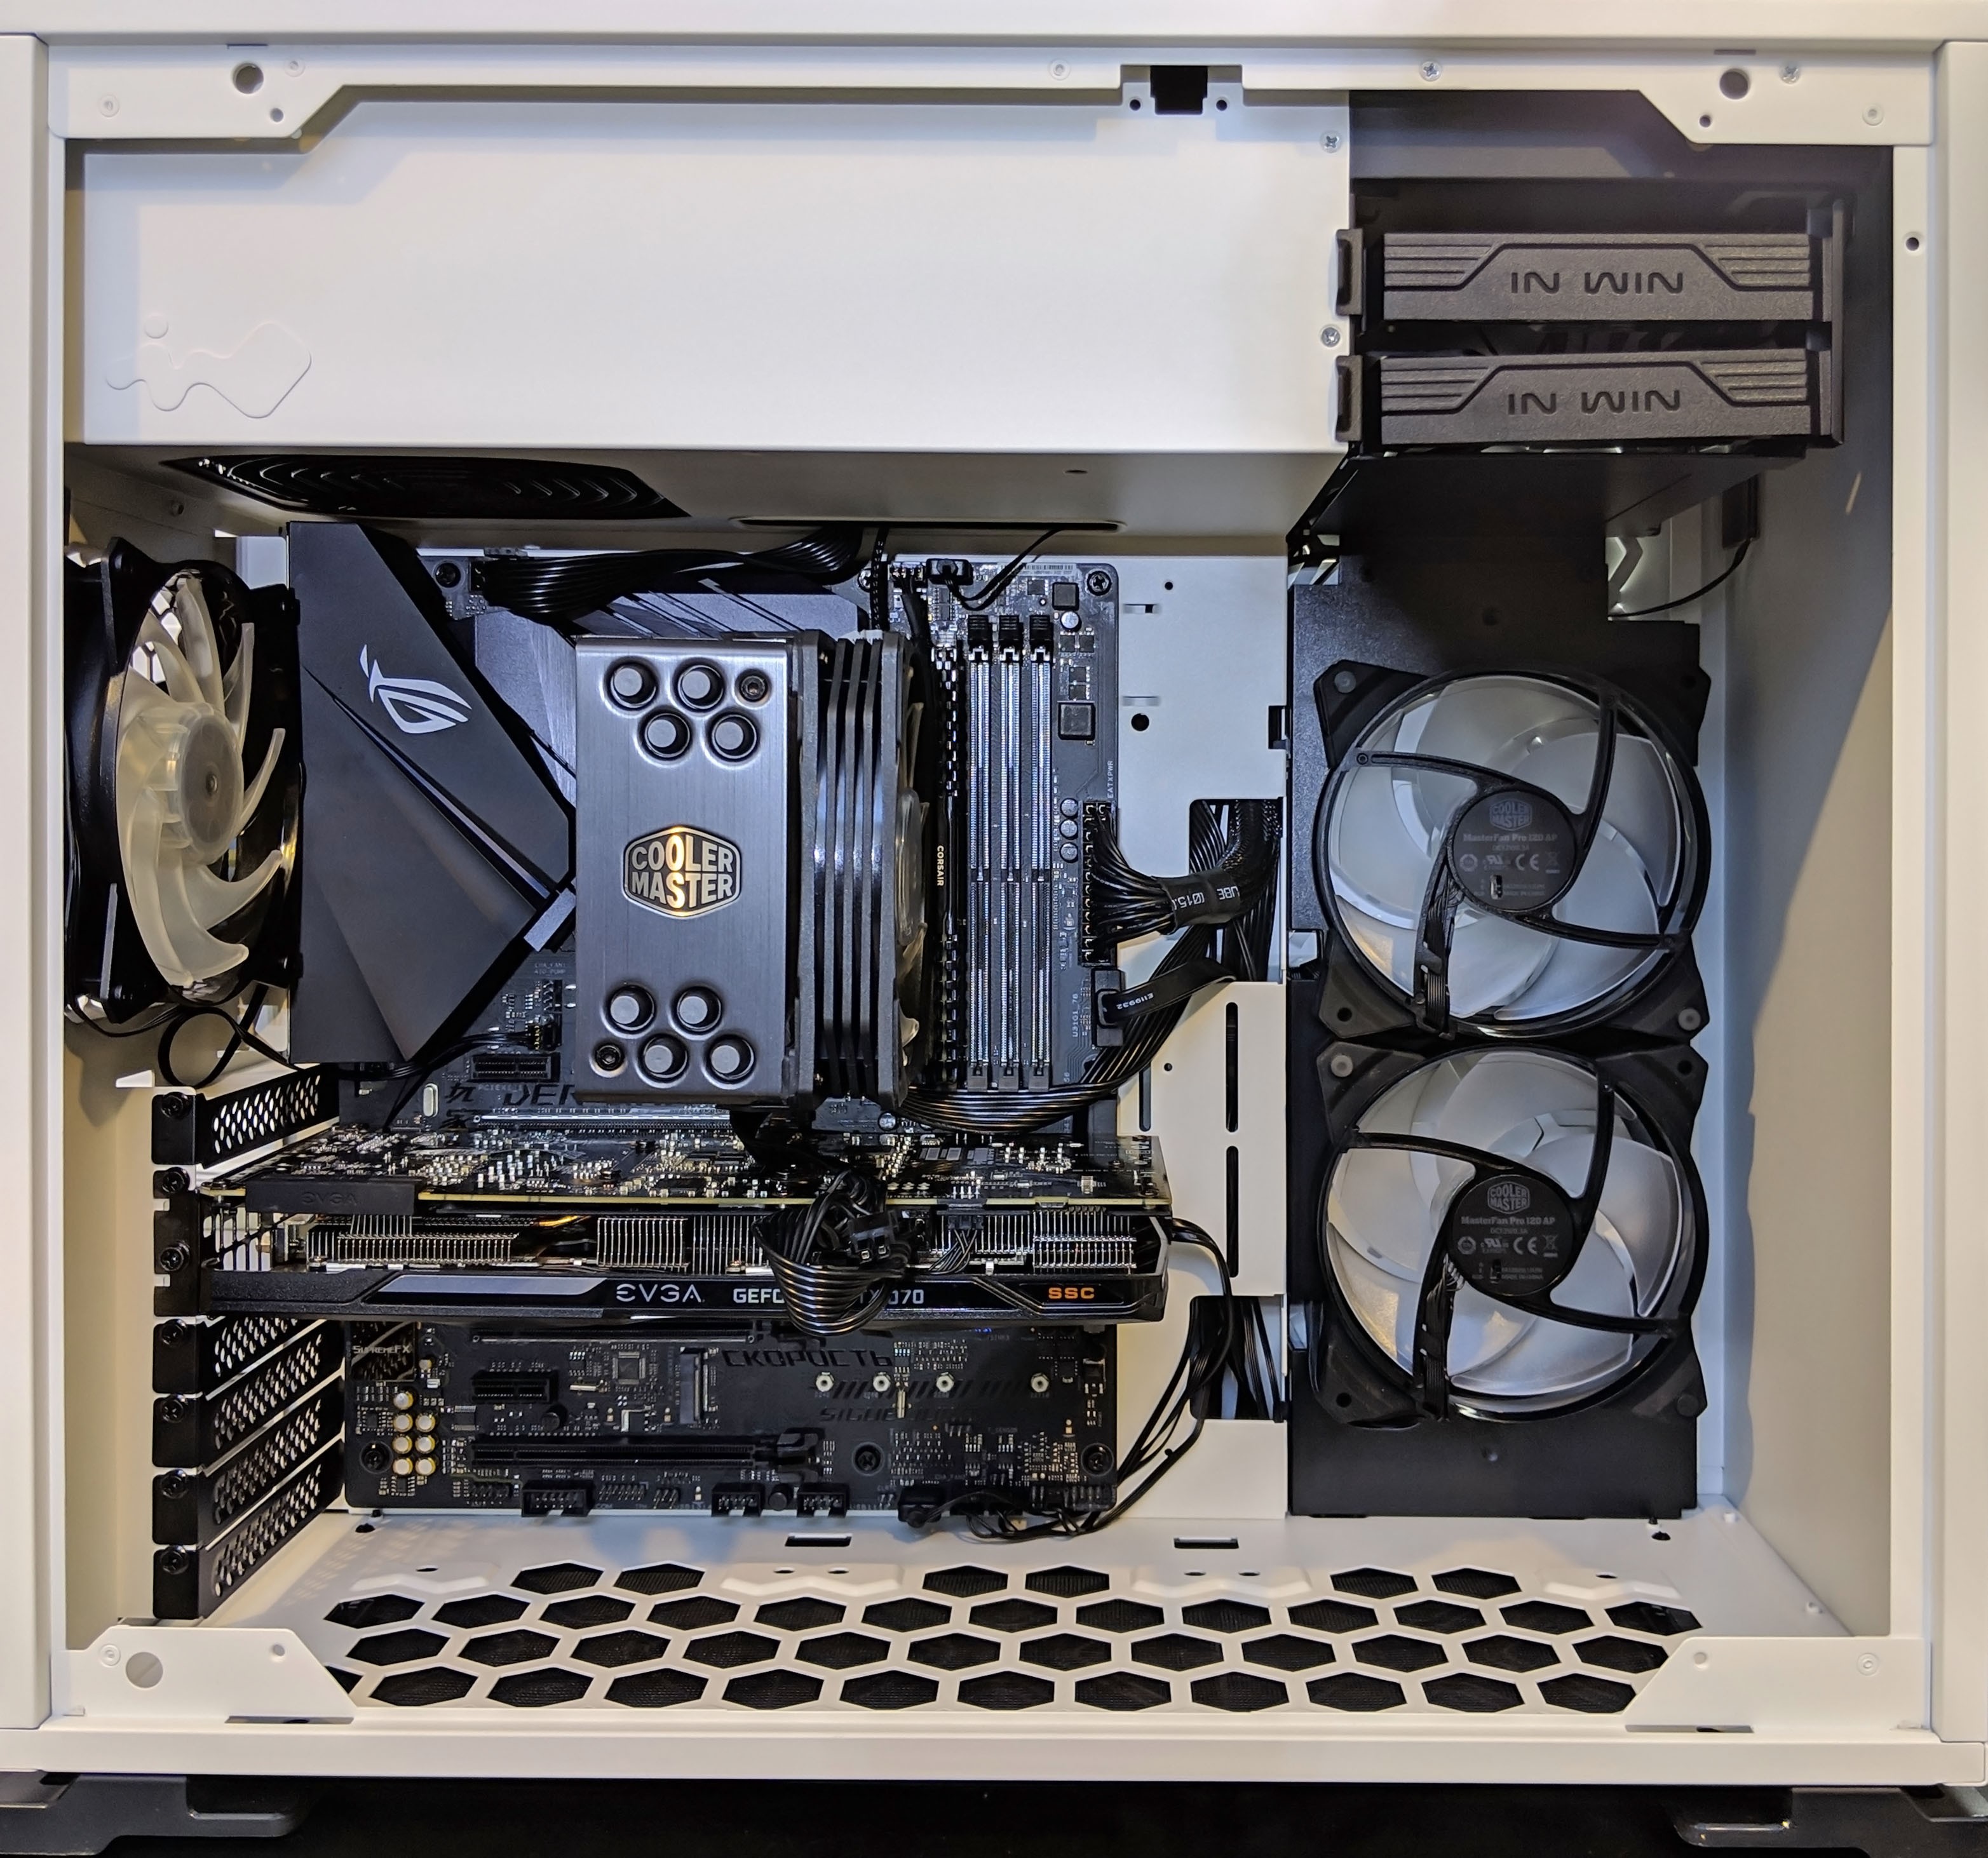
Installing hardware into the InWin 103 is simple, and with its big open internal layout, I didn’t feel like I was limited or fighting for space. For an ATX motherboard which we’ll be using, be sure to install the motherboard standoffs which is included in the hardware bag in order for it to mount properly.
Once the hardware was in, routing cables I found especially easy. There’s plenty of room to hide extra cable lengths behind the PSU shroud area as well as along the motherboard tray. Cables seeed to have a way of naturally wanting to stay in place, so I honestly didn’t even need any of the included zip ties.
For those wondering, the system specs I used are as follows:
- Processor: AMD Ryzen 2600X
- Memory: 8GB Corsair Dominator Pro
- Motherboard: ASUS ROG Strix B450-F Gaming
- Power Supply: Cooler Master MWE 750W
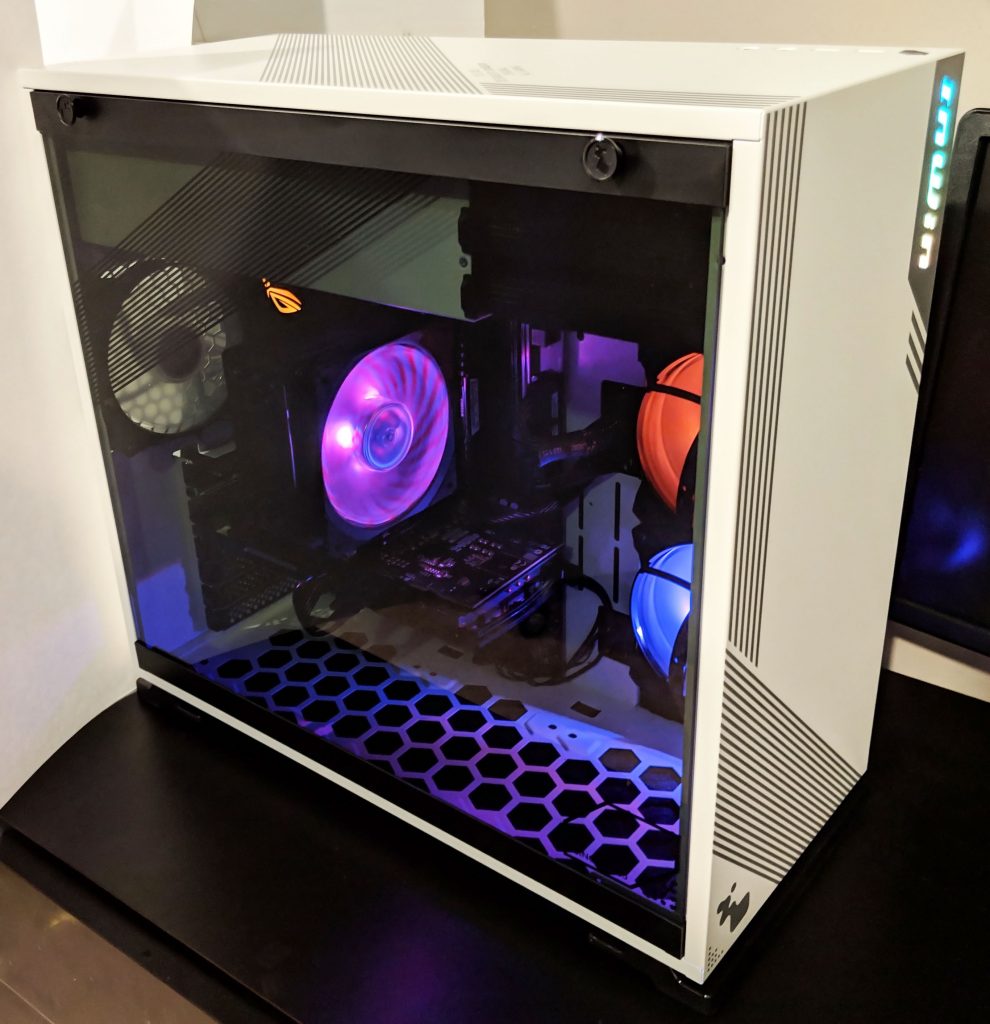
In the end, the system turned out very clean! I especially liked the dark themed components against the white background. It really made everything pop and mesh with with the existing black accents such as HDD trays and PCIe slot covers.
And here we go with some RGB goodness!
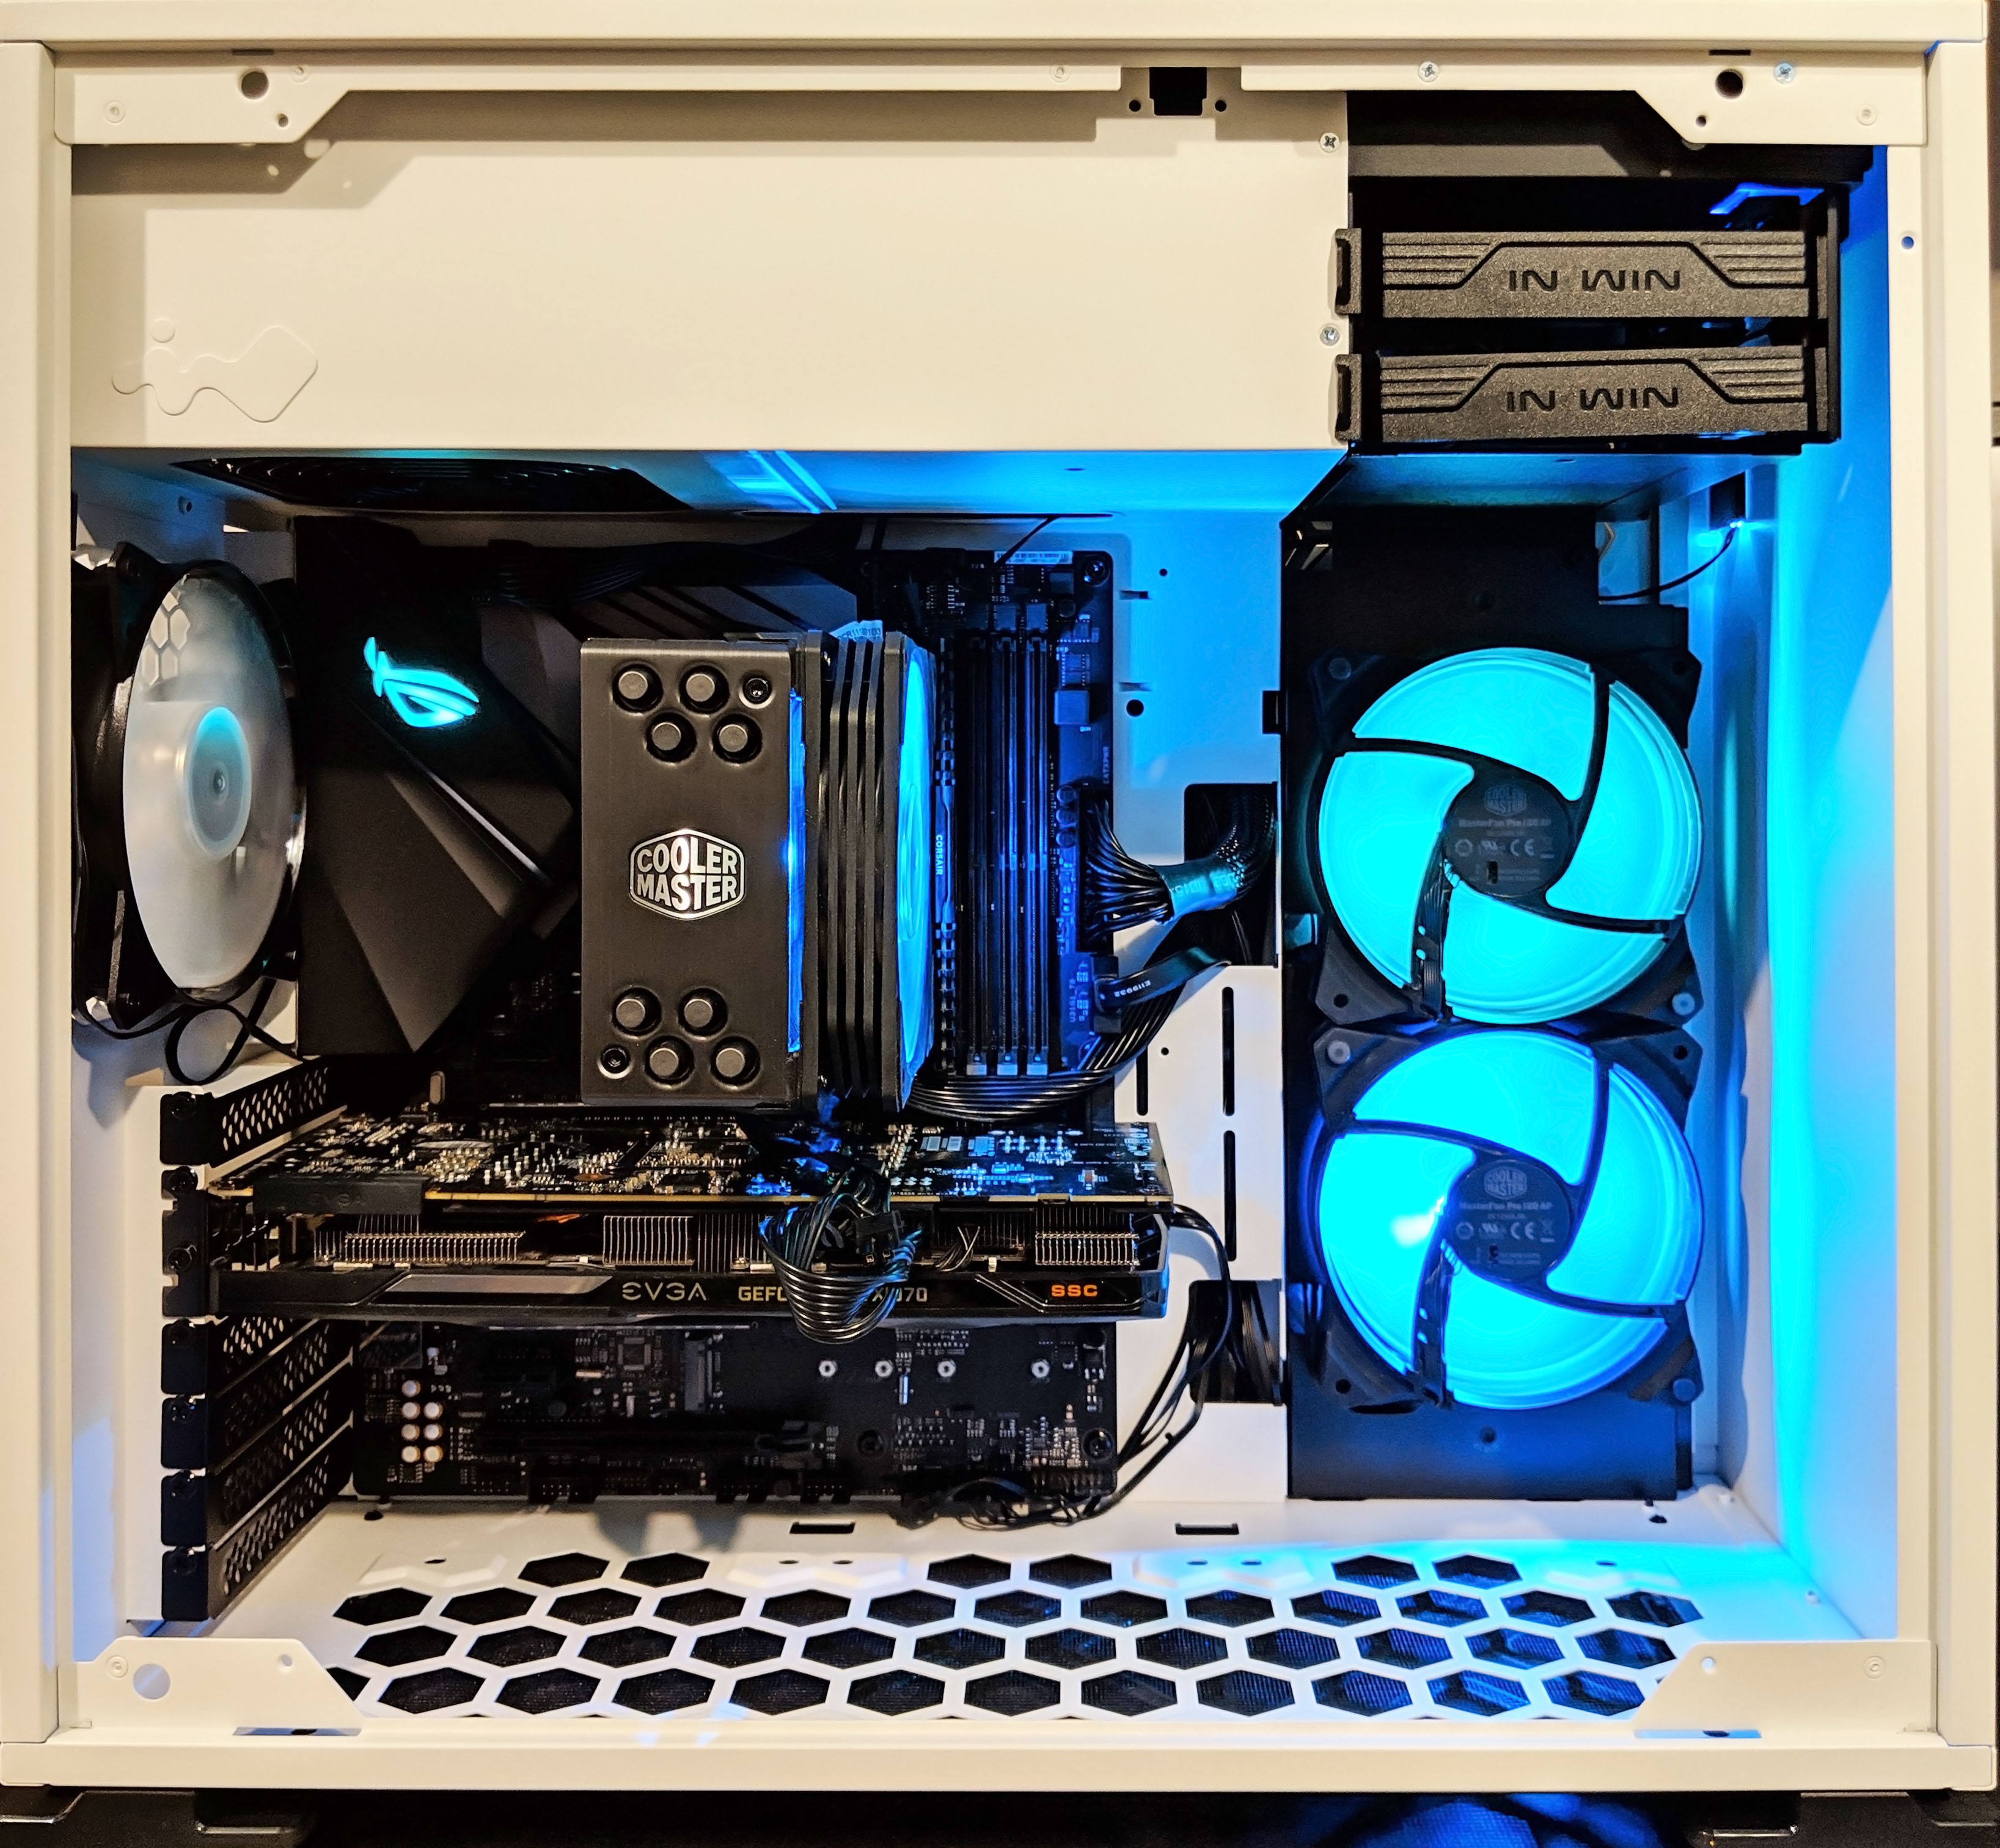
This system was built more for show than anything. With the few fans I used, I would definitely mount intake fans on the bottom, and exhaust fans on the side next to the motherboard. However for presentaion purposes, I thought this “looked” better.
With the system powered on, we can see the RGB enabled InWin logo light up in all its glory! Be sure to play round with the RGB options on the controller at this point.
One last shot of everything all together:

Final thoughts and Scoring
InWin definitely managed to produce an eye-catching case that is just barely different from the norm to grab the attention of gamers and system builders. At a price of just $79.99 there’s really not a lot I felt that I was missing from this case that could be found in higher end cases. I really liked the sleek boxy look which would definitely look good in whichever color you end up choosing.
The only negatives that I could conclude had nothing to do with the case itself, but rather what the case lacked. I was disappointed that InWin did not include a single fan with the case. Other small included items such as thumb screws over standard Philips screws on the drive bays would have also added some appeal.
Again, MSRP for the InWin 103 at the time of writing this review is $79.99 USD putting it in the mid-tier category as far as cases go. The MSRP will have a huge impact on the final score.
- Quality: 9.5/10 – The InWin 103 is constructed quite well. There was certainly no cheap or low quality vibe emitting from the unit. When handling the case it felt sturdy and didn’t flex awkwardly when applying some natural force to the unit. Its finish appears to be a very hard power coated surface which will certainly stand up to years of abuse.
- Functionality: 8.5/10 – There are not many scenarios I could imagine where the InWin 103 would be inadequate. It’s got plenty of room for even the most religious system modder to have his or her fun. Since I’m reviewing the case as is, the lack of an included fan is where I had to take points away.
- Performance: 9.8/10 – Six fans in a mid tower! Need I say more? Fully loaded, this case should deliver some pretty awesome cooling performance. Included dust filters is always a requirement of mine, so glad to see them included. Normally at this price range they can be hit or miss.
- Value: 9.2/10 – Overall, I believe the InWin 103 to be a good buy. It’s unique looks definitely set it apart and it’s absolutely bursting with features that system builders desire. This combined with its rigid construction make it a product I would definitely recommend.
Product Page: https://www.inwin-style.com/en/gaming-chassis/103/
Buy on Amazon: InWin 103
It's unique looks definitely set it apart and it's absolutely bursting with features that system builders desire.InWin 103 Review Scoring: GND-Tech


Thanks for sharing. I read many of your blog posts, cool, your blog is very good.