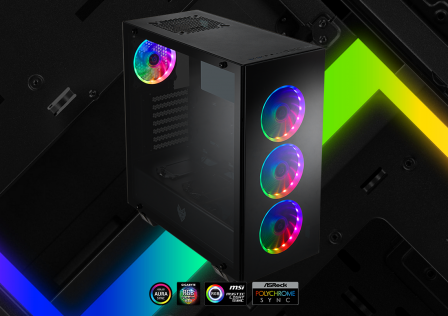
Back in January FSP Group broke news by releasing a brand new RGB-Equipped, Tempered Glass case, the CMT340. Now that we’ve got our grubby hands on this shiny spectacle, we’ll be highlighting during today’s review! The FSP CMT340 is a mid-tower case which comes with pretty much all the bells and whistles the modern system builder could hope for. Its frame consists of high strength SPCC steel power coated matte black. Attached to the frame are two tempered glass panels, one on the front and another as a removable panel on the left side.
Cooling is provided by four included 120mm RGB fans, three on the front to act as an intake and another at the rear of the case acting as an exhaust. The RGB functions are controlled by a built in RGB controller which can either utilize the case’s reset button to toggle RGB effects, or can be controlled using a standard ARGB connector on the motherboard. The advantage of this is that synchronizing RGB lighting effects between components becomes a whole lot easier.
FSP Group is a North American company currently located in California, USA probably known most famously for its high end power supplies. With that being said, let’s dig into one if its latest PC case offerings to see how it does!
FSP CMT340 Features & Specifications
The CMT340 according to FSP is a mid-tower ATX case, however you’ll notice that it is definitely a bit smaller than your average mid-tower when it comes to overall length (front to back). While the case will definitely have zero issue fitting all your high end gear, I wonder if midi-tower would have been a better classification.
Despite its small frame, its list of compatibility options are not. Feel free to pack in as many full size graphics cards your motherboard can handle. Additionally, the case supports liquid cooling options with radiators up to 360mm. As far as storage goes, the CMT340 can support up to two standard 2.5″ SSDs as well as two 3.5″ HDDs.
Here are the detailed specifications of the case provided by FSP:
| Product Name | CMT340 |
|---|---|
| Type | ATX Mid Tower |
| Color | Black |
| Dimension DxLxH | 368 x 206 x 471mm (14.49×8.11×18.54 inches) |
| Weight | 6.2kg/ 13.66 lbs |
| Materials | SPCC, Plastic, Glasses x 2 |
| 3.5″ HDD | 2 |
| 2.5″ SSD | 2 |
| External I/O Panel | USB3.0 x 2, HD Audio |
| Expansion Slots | 7 |
| Power Supply Type | ATX |
| MotherBoard Support | ATX, Micro ATX, ITX |
| Maximum CPU Cooler Height | 160mm (6.29″) |
| VGA Card Length | 350 mm (13.77″) |
| Fan Including(pre-install) | Front: Addressable RGB x 3 Rear: Addressable RGB x 1 |
| Fan & Water Cooler Support | Front: 120mmx3 or 360mm Radiator Top: 120/140mmx2 or 240mm Radiator Rear: 120mm x 1 |
Now that we’ll all experts, let’s dive into the review by first taking a look at the case’s packaging.
A Closer Look: Packaging
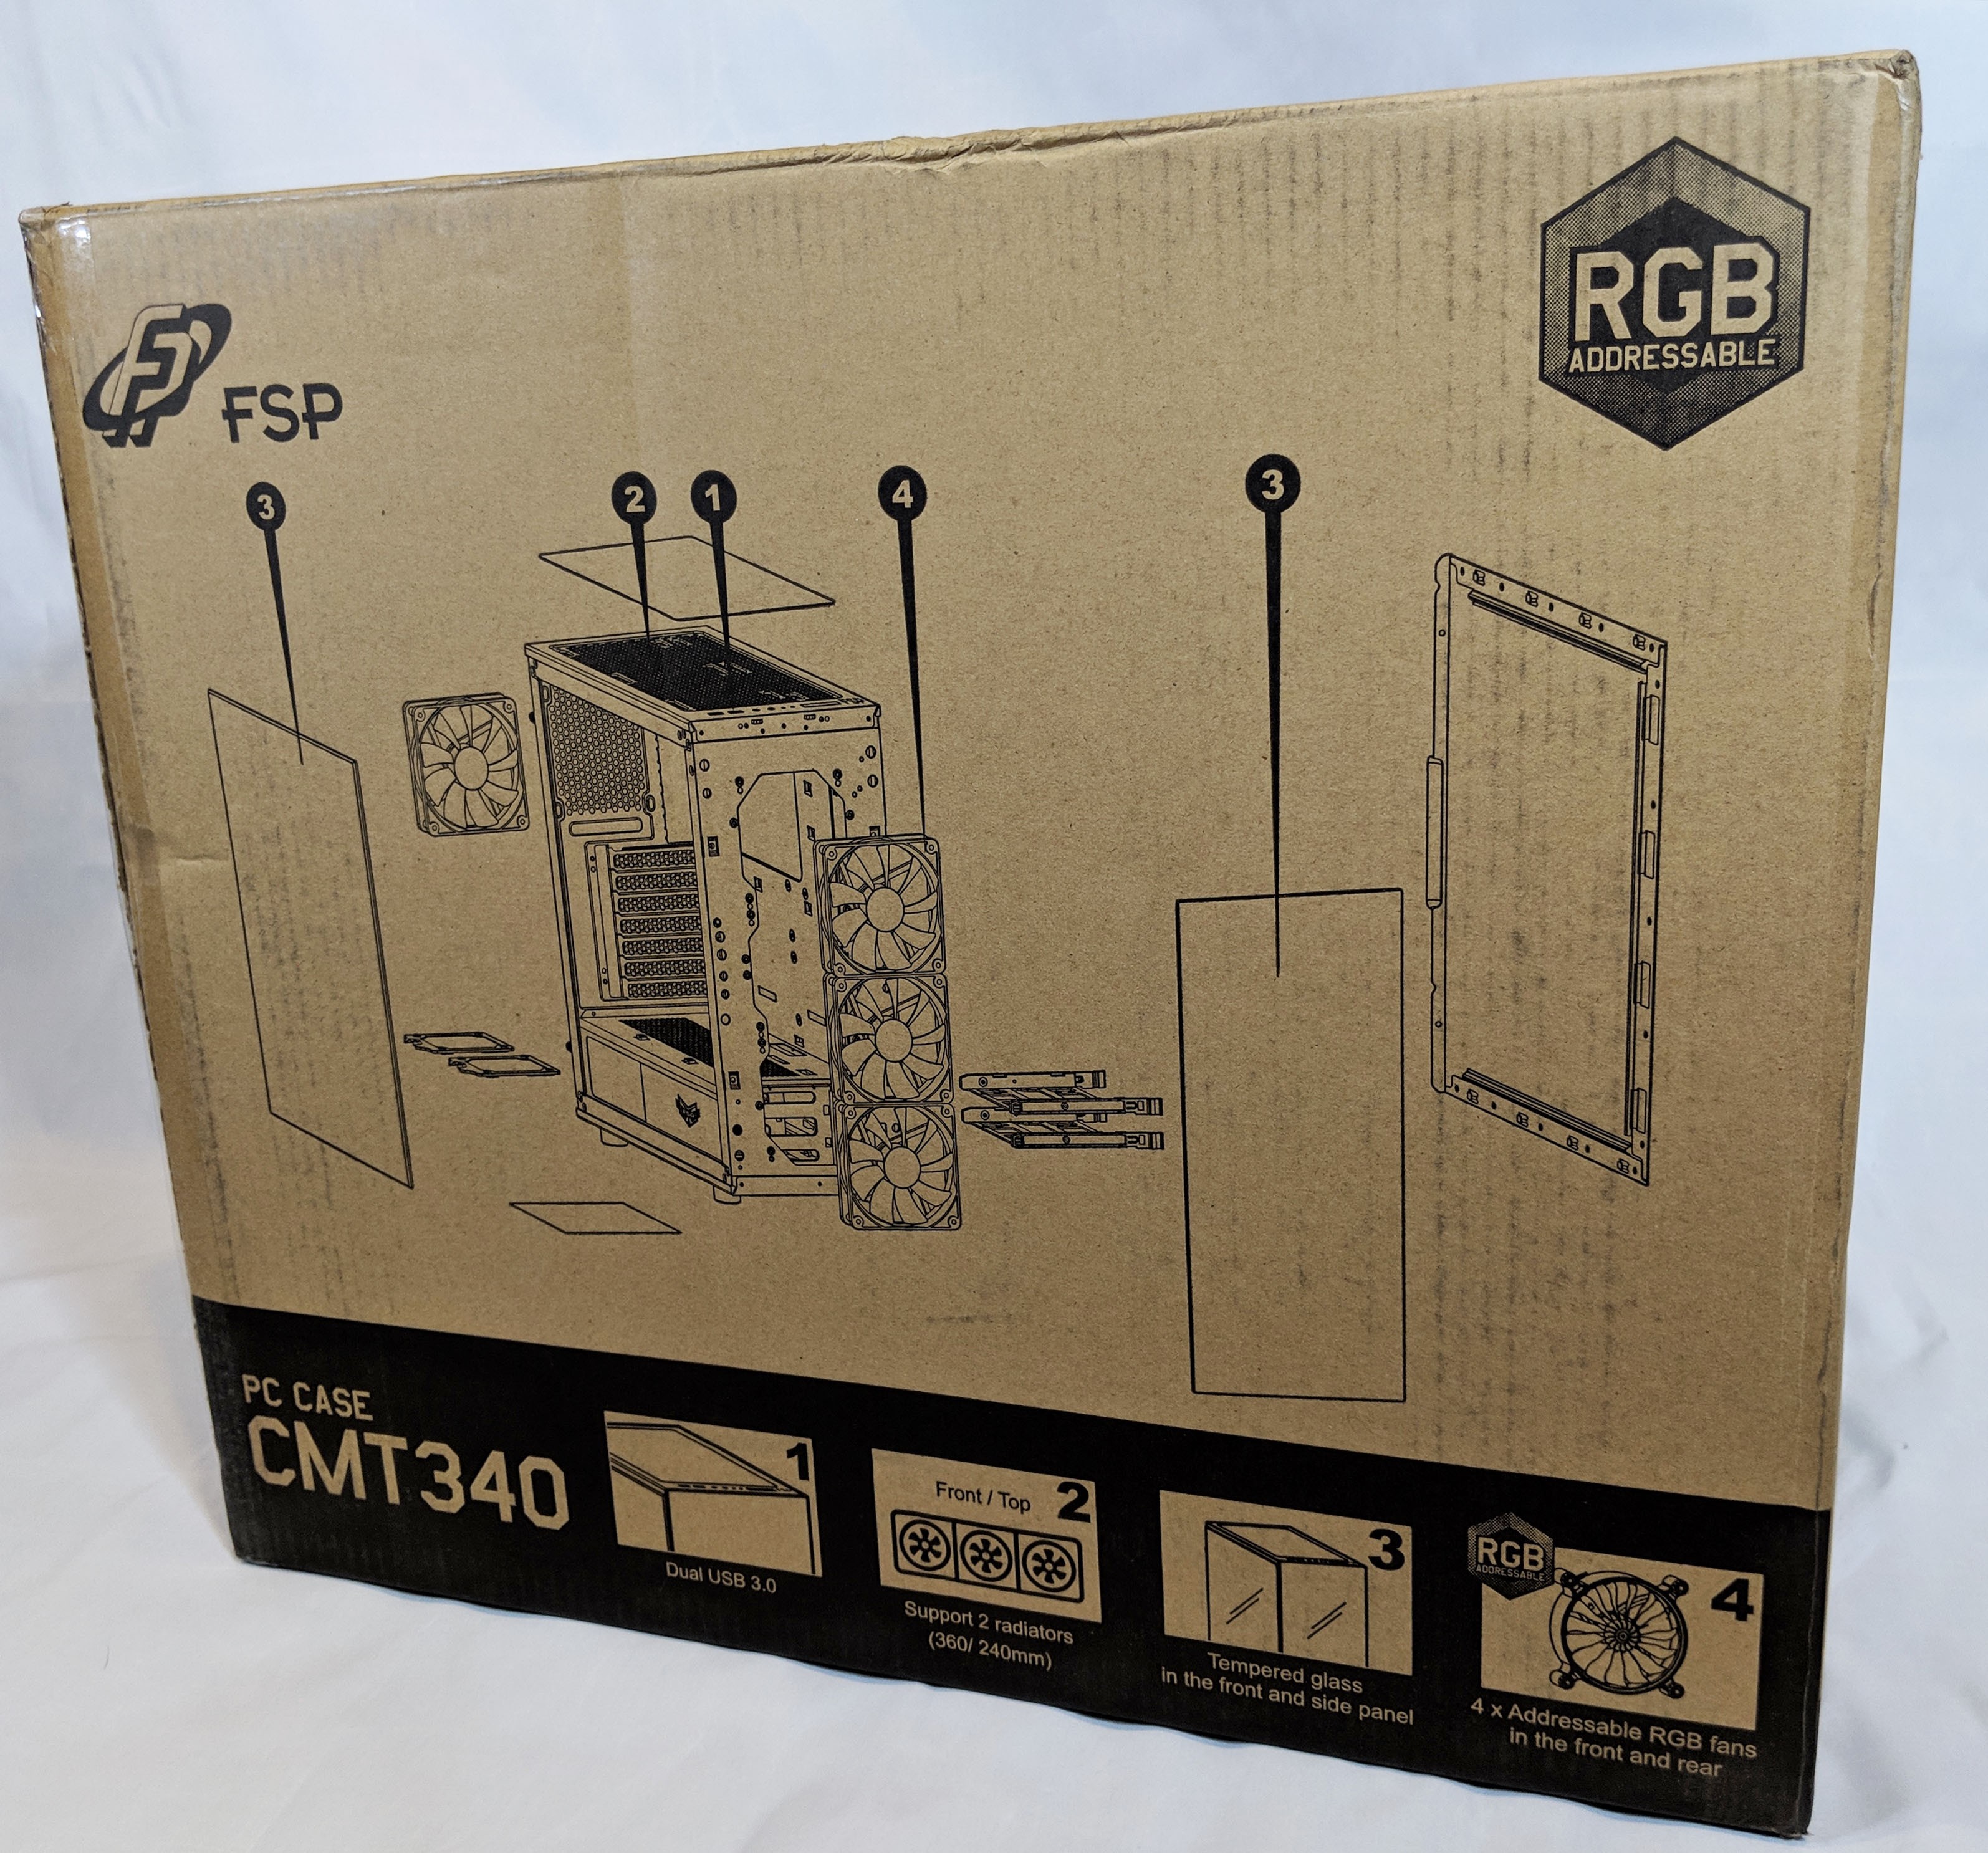
The case arrived safely at the GND-Tech lab with a perfect bill of health. The box features cool graphics on the front and a nifty break away guide on the reverse side. Other features such as tempered glass panels, RGB options, and other features are also highlighted on the reverse side.

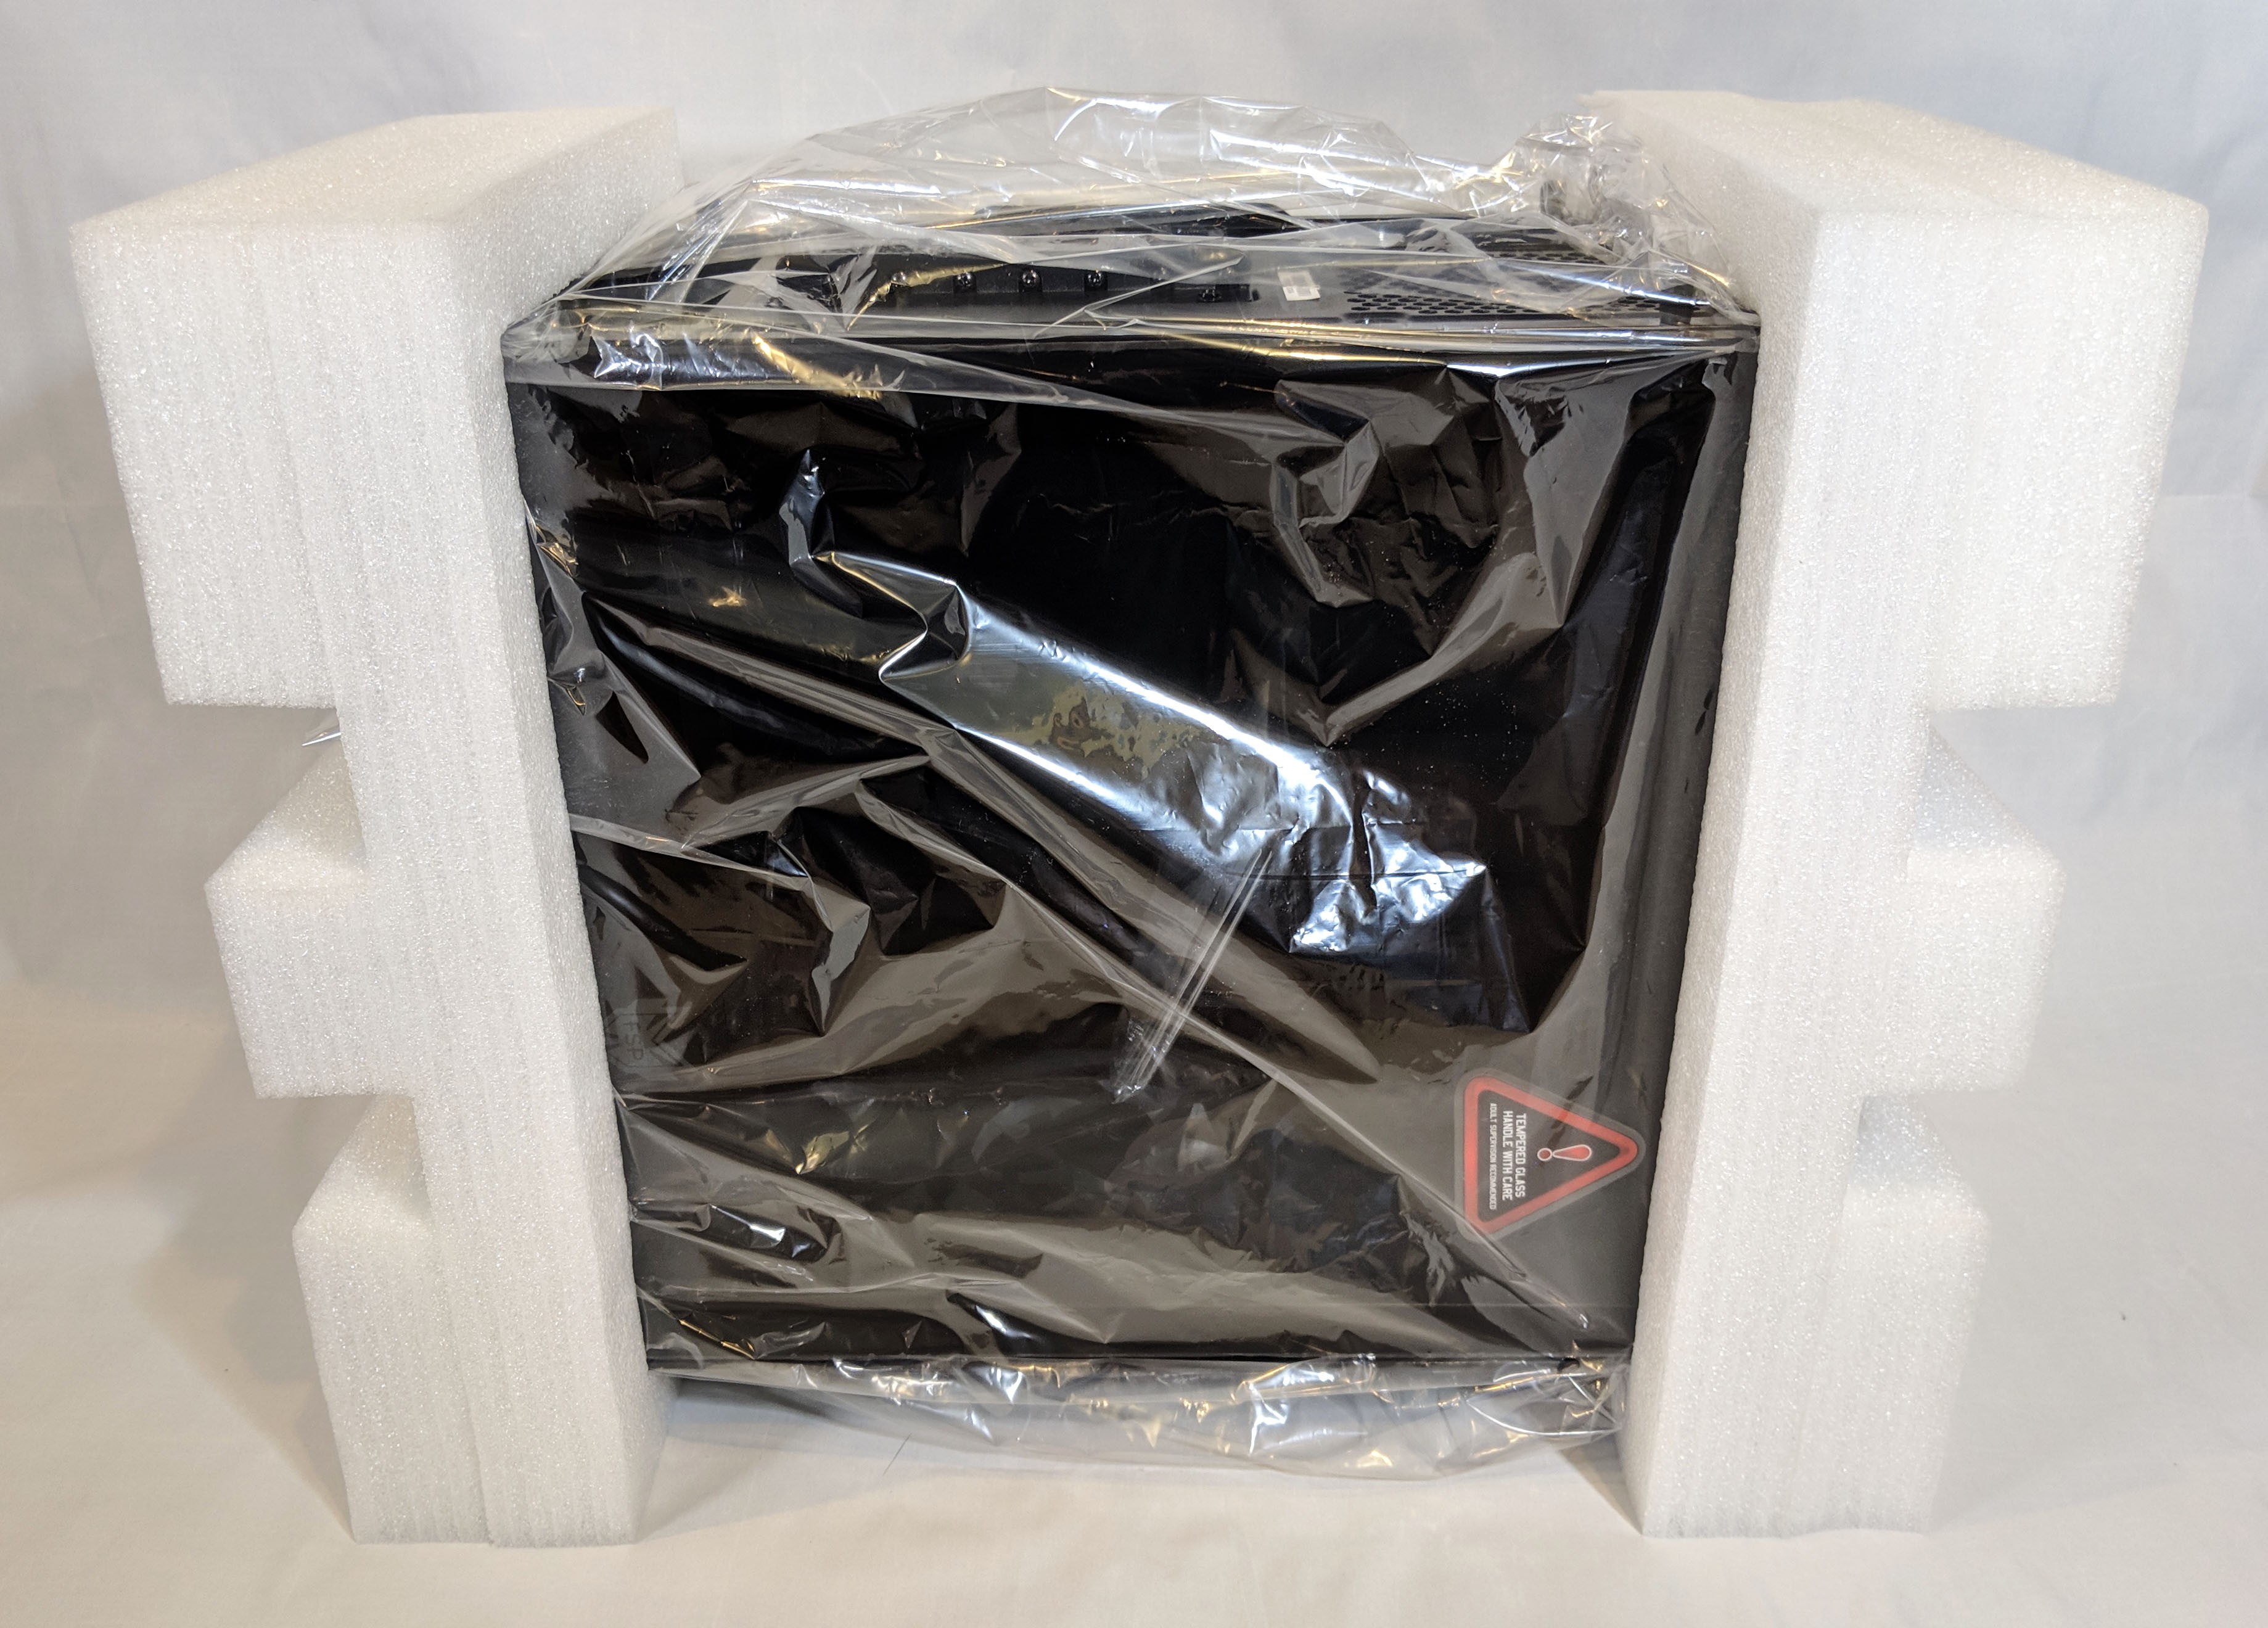
With the outer seal broken and the flaps ajar, we’re able to get a better idea as to how this case is packaged. Much to our amazement, this is probably the first case in a very long time packaged without using molded Styrofoam blocks. Instead, FSP opted to use a much softer and squishy foam mold. I’m not an expert in packaging material, so I’m not sure exactly what it’s called, but there’s no doubt it would be a much better protective barrier during shipping mishaps rather than the standard Styrofoam blocks we typically see. As far as first impressions go, FSP is nailing it on the packaging side which I personally really like to see.

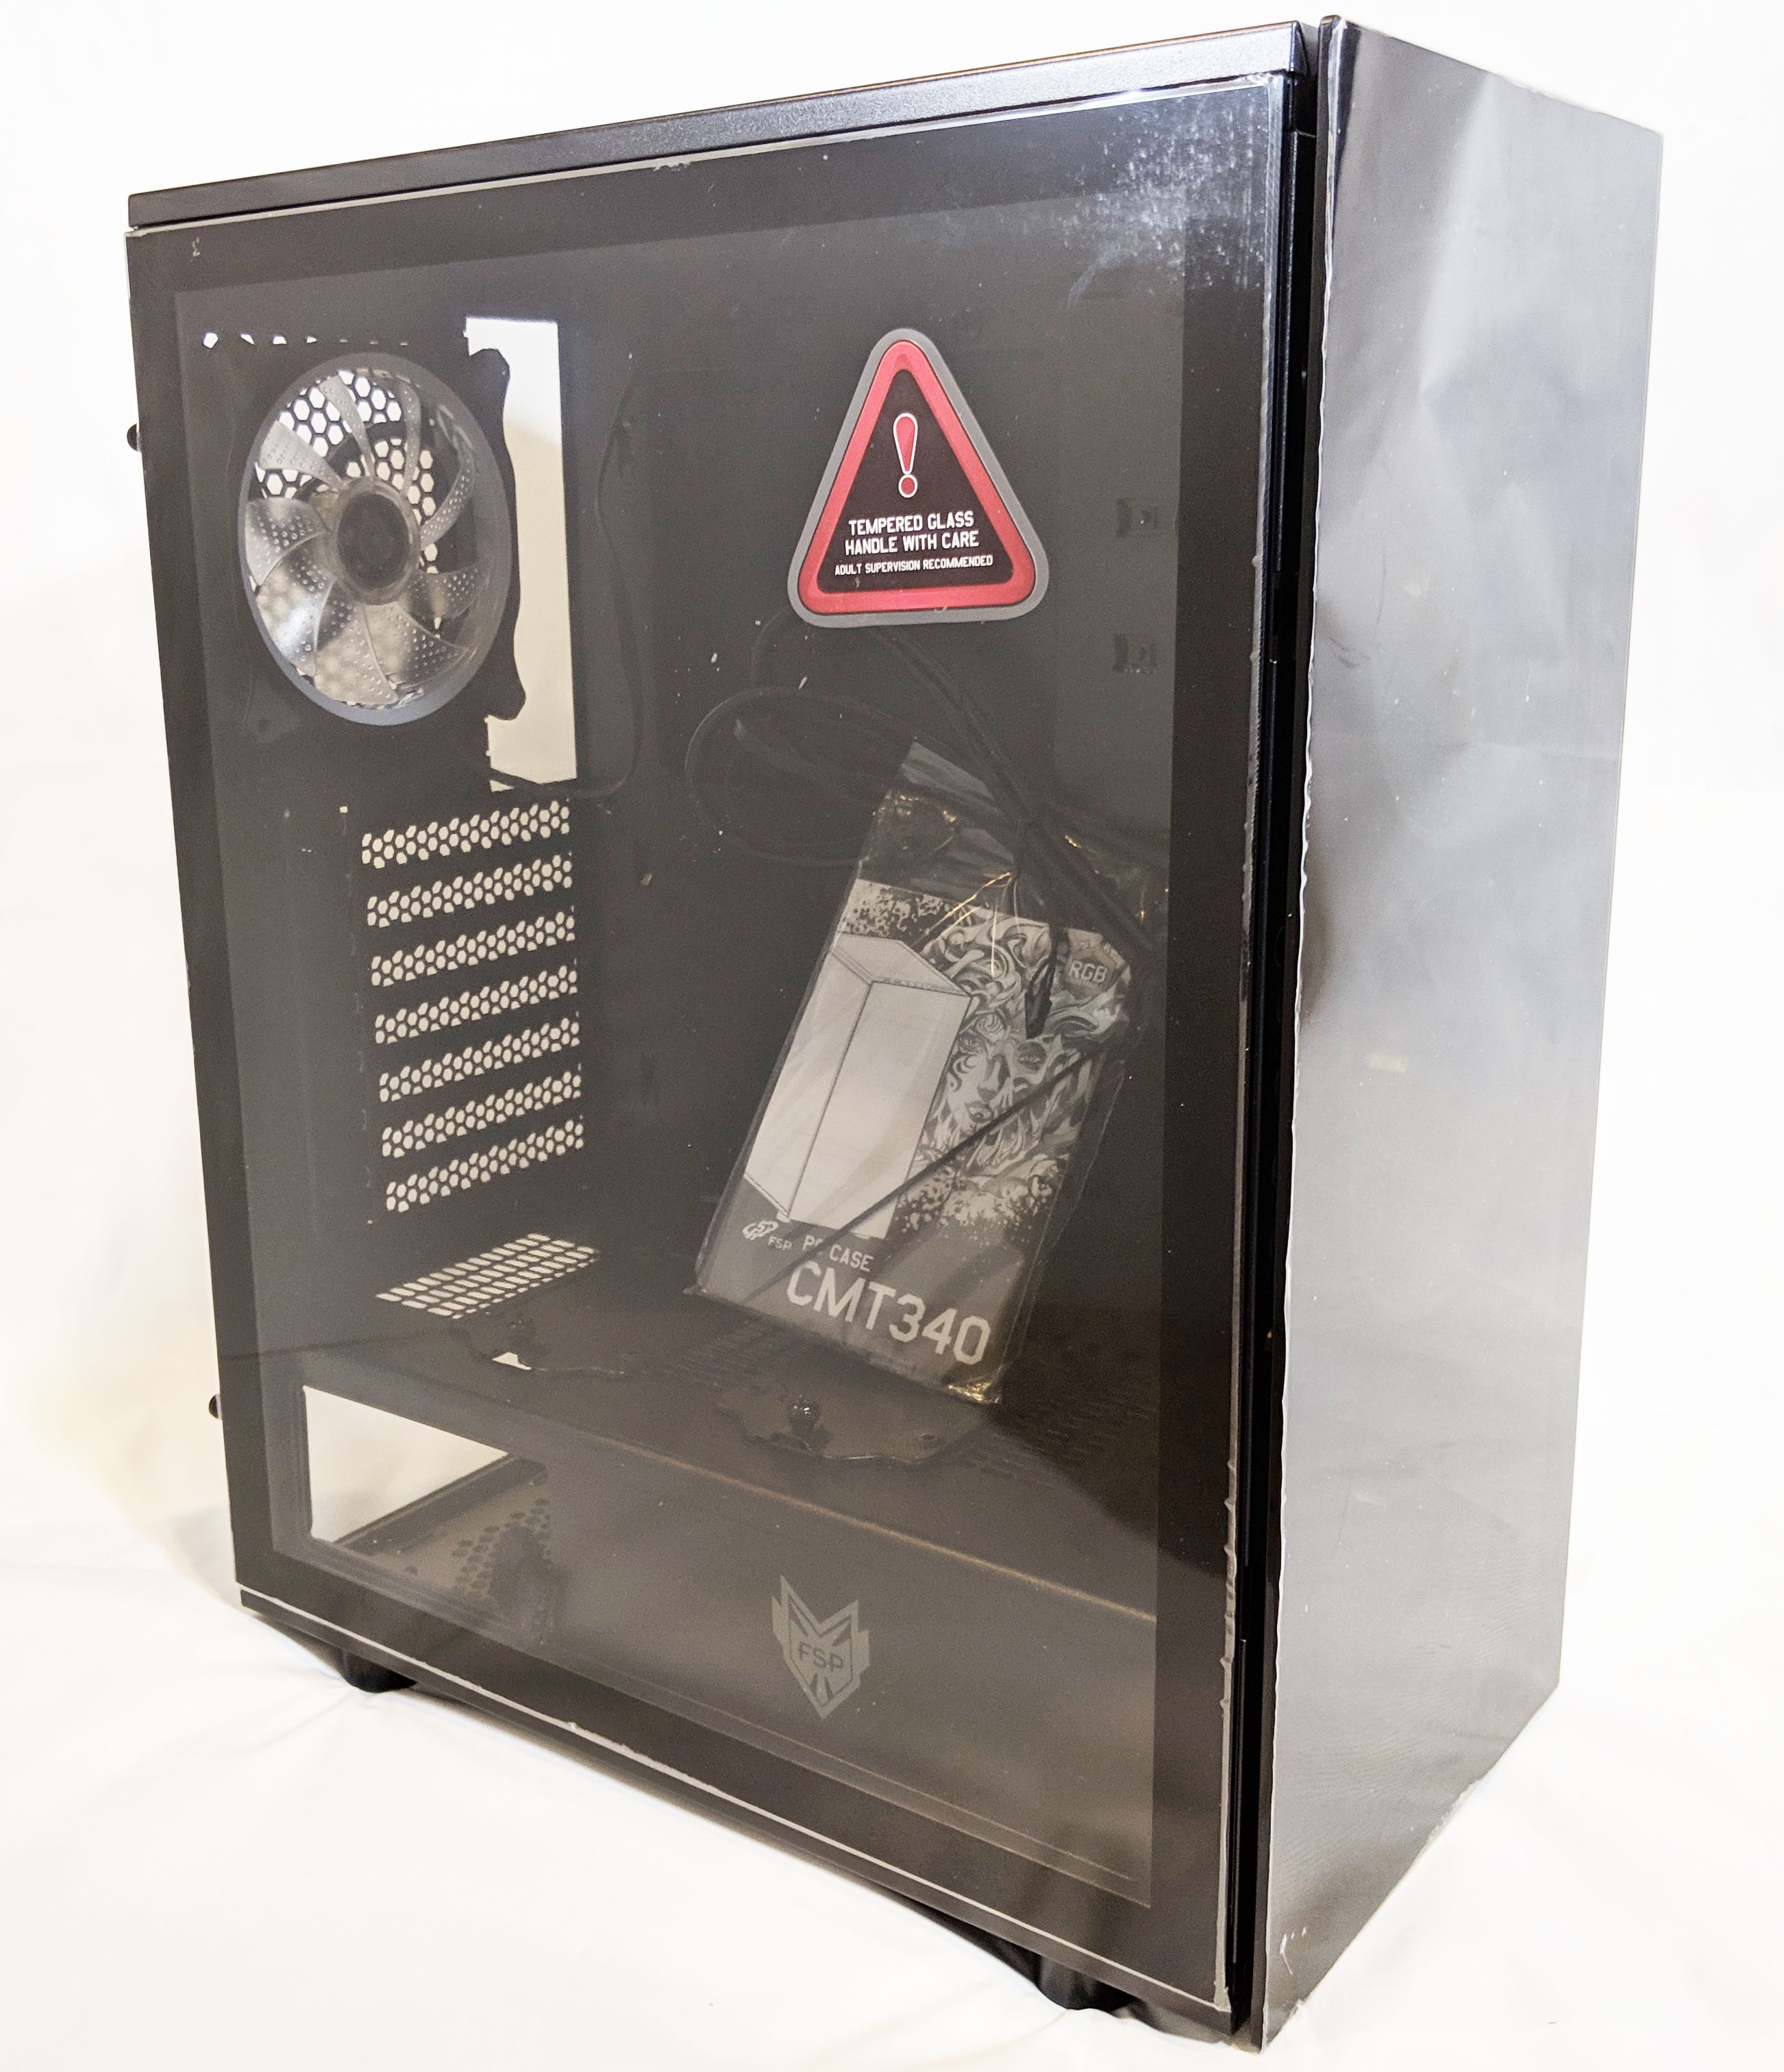
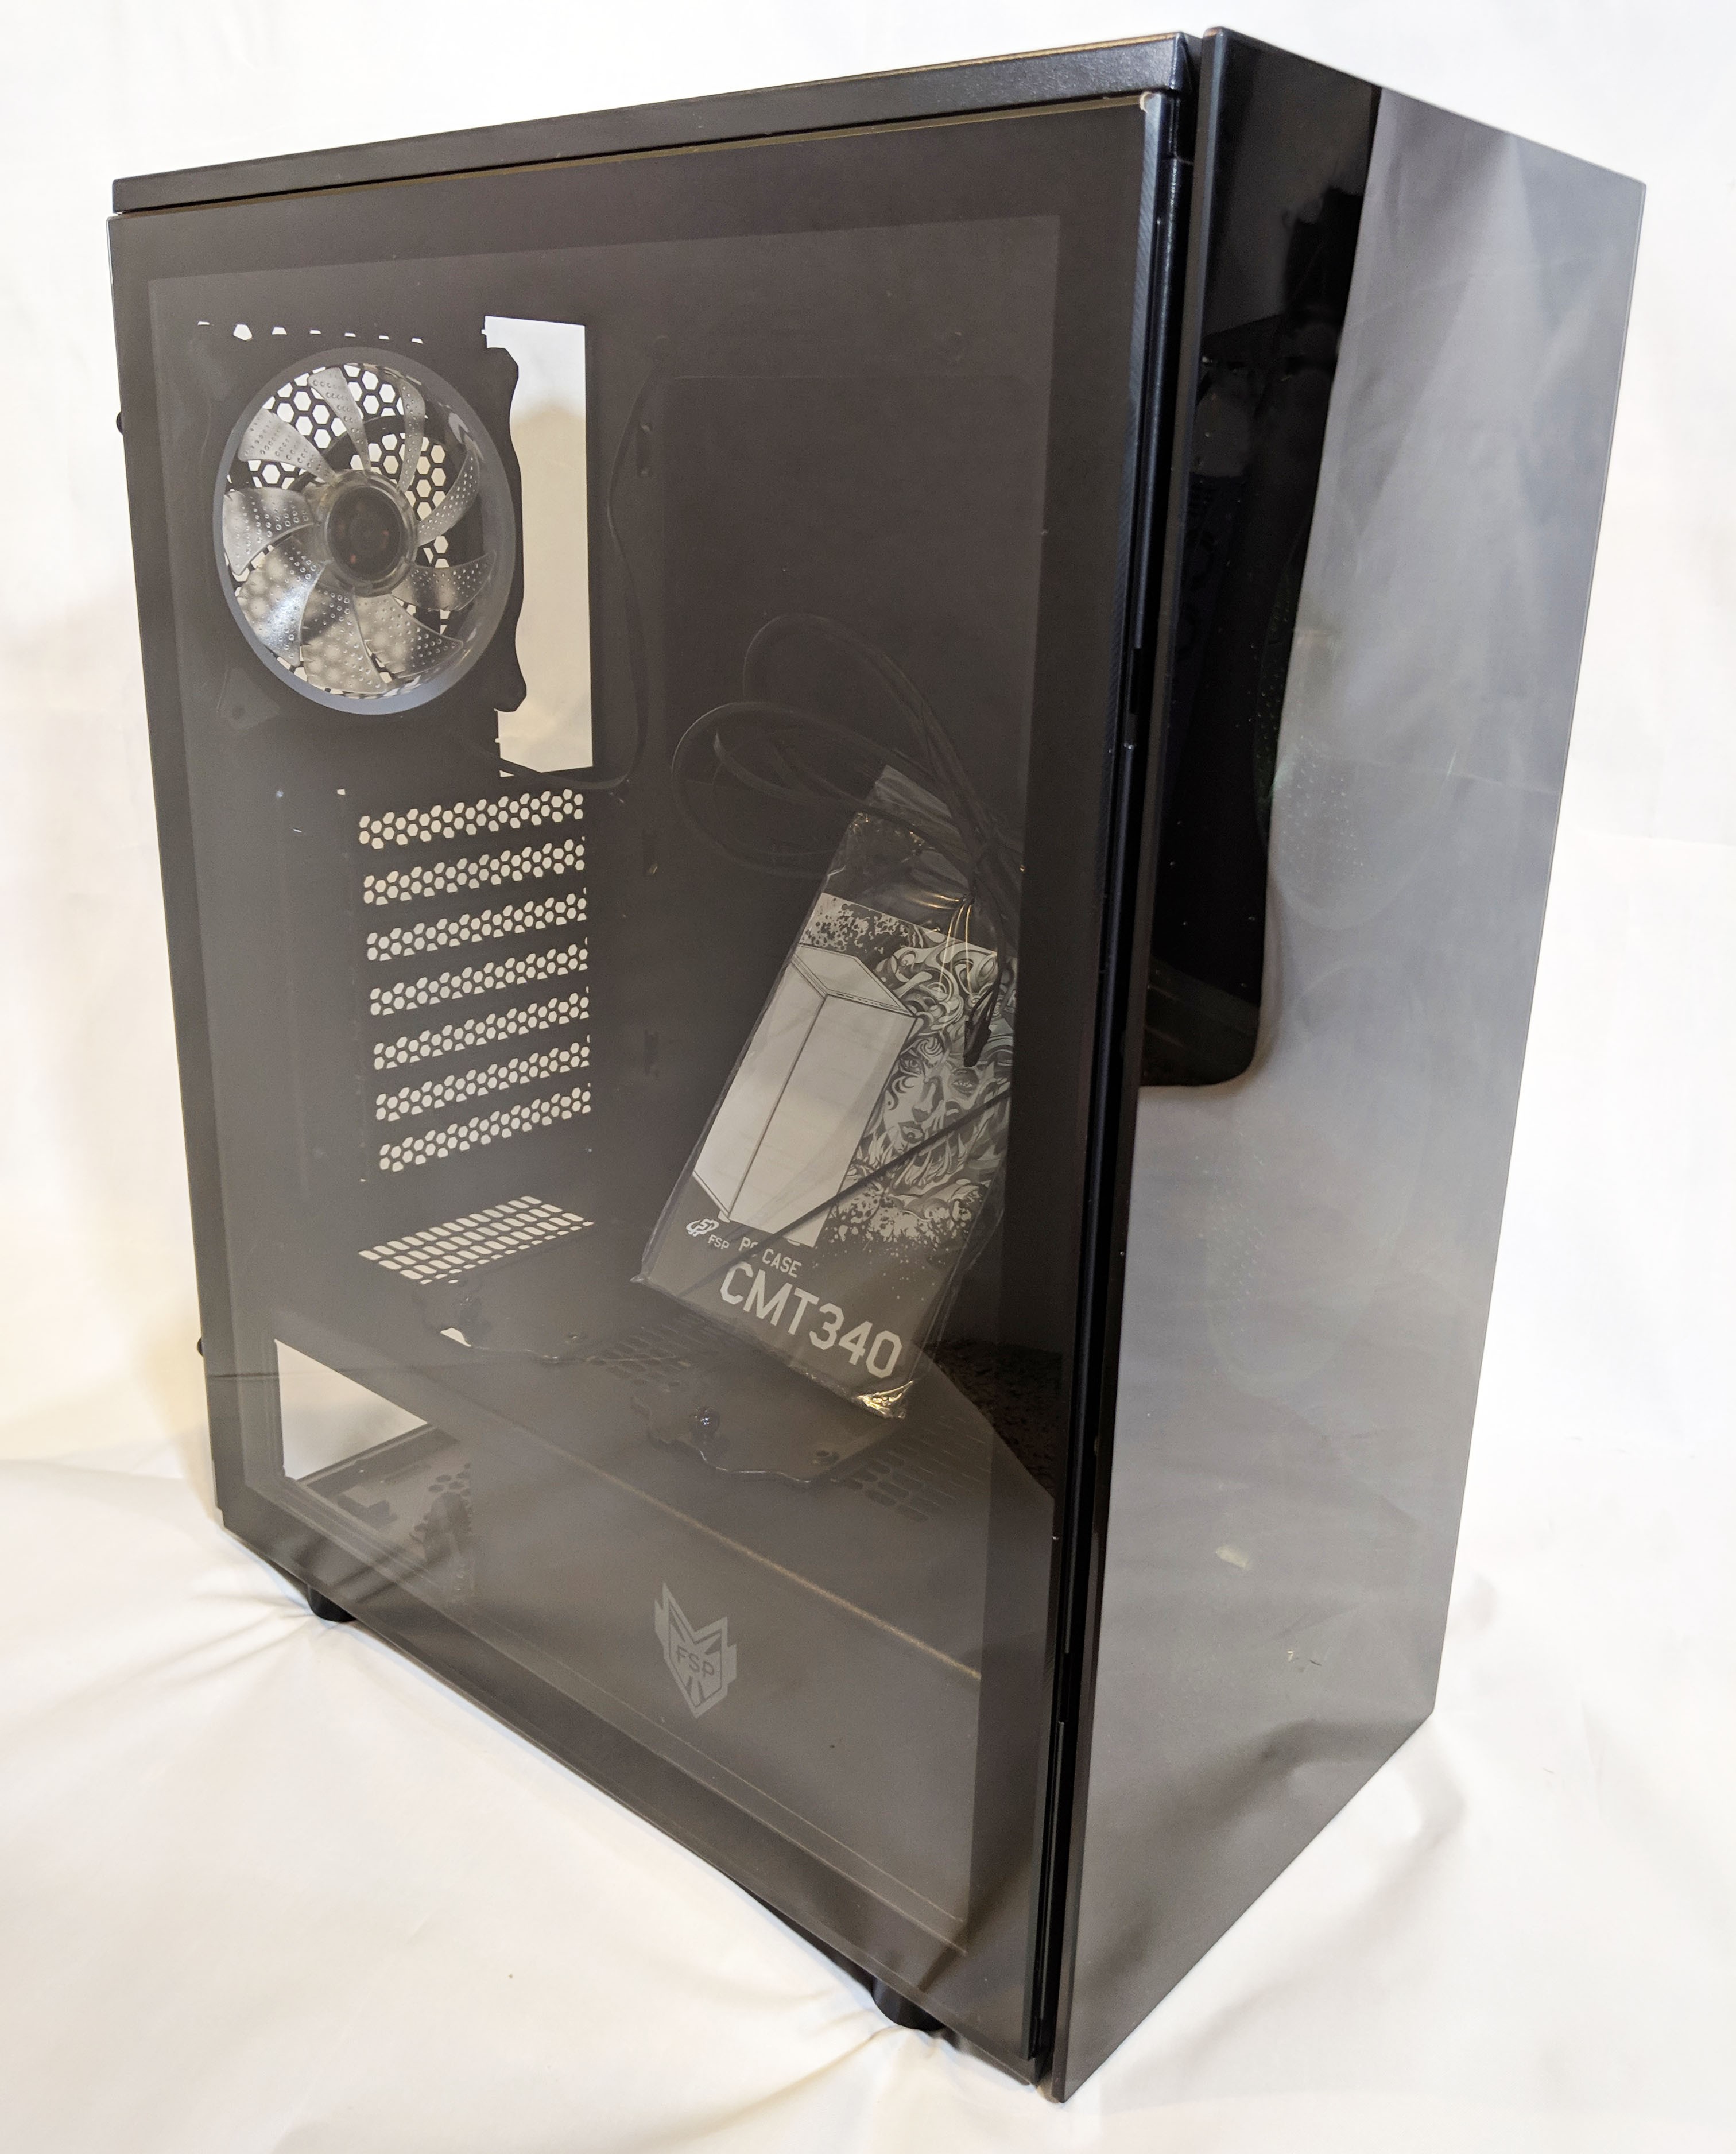
With the case separated from its packaging we can get a better look as to what we’re dealing with. My first impression was how small the case is length-wise. After peeking through the tempered glass to get a better look at the motherboard tray, despite its size, there shouldn’t be any issues fitting a standard ATX, or even some E-ATX motherboards.
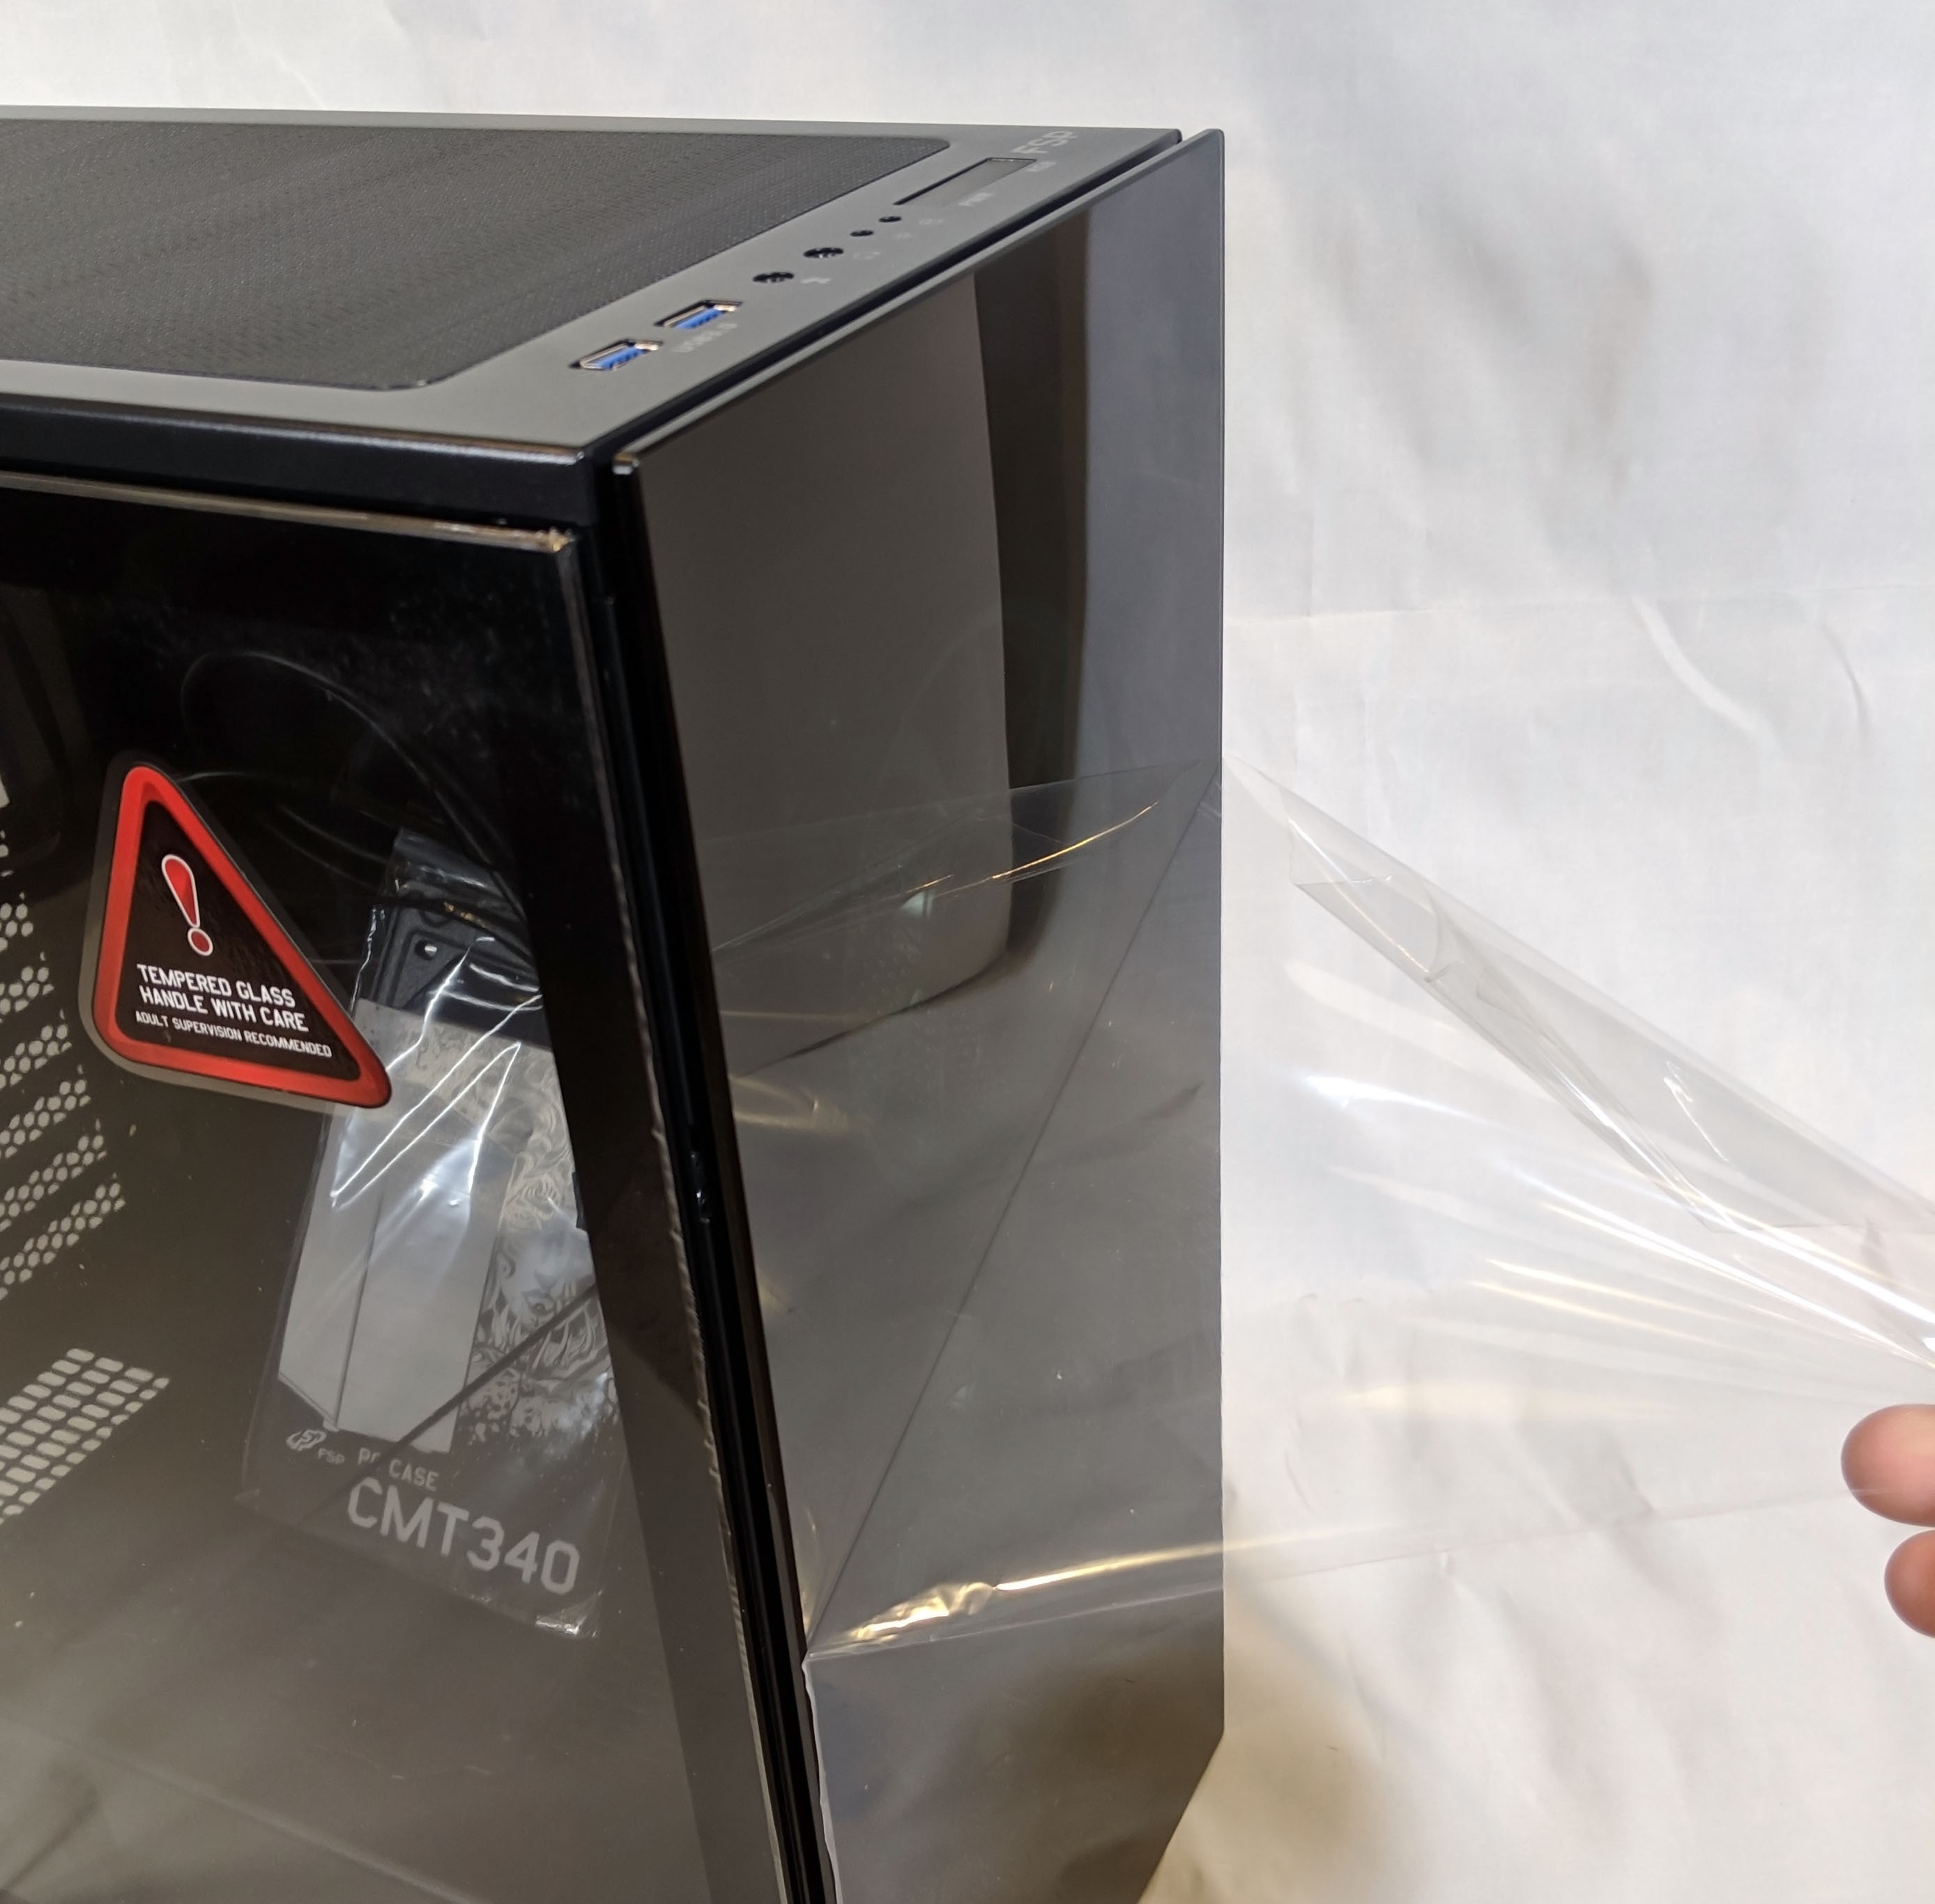
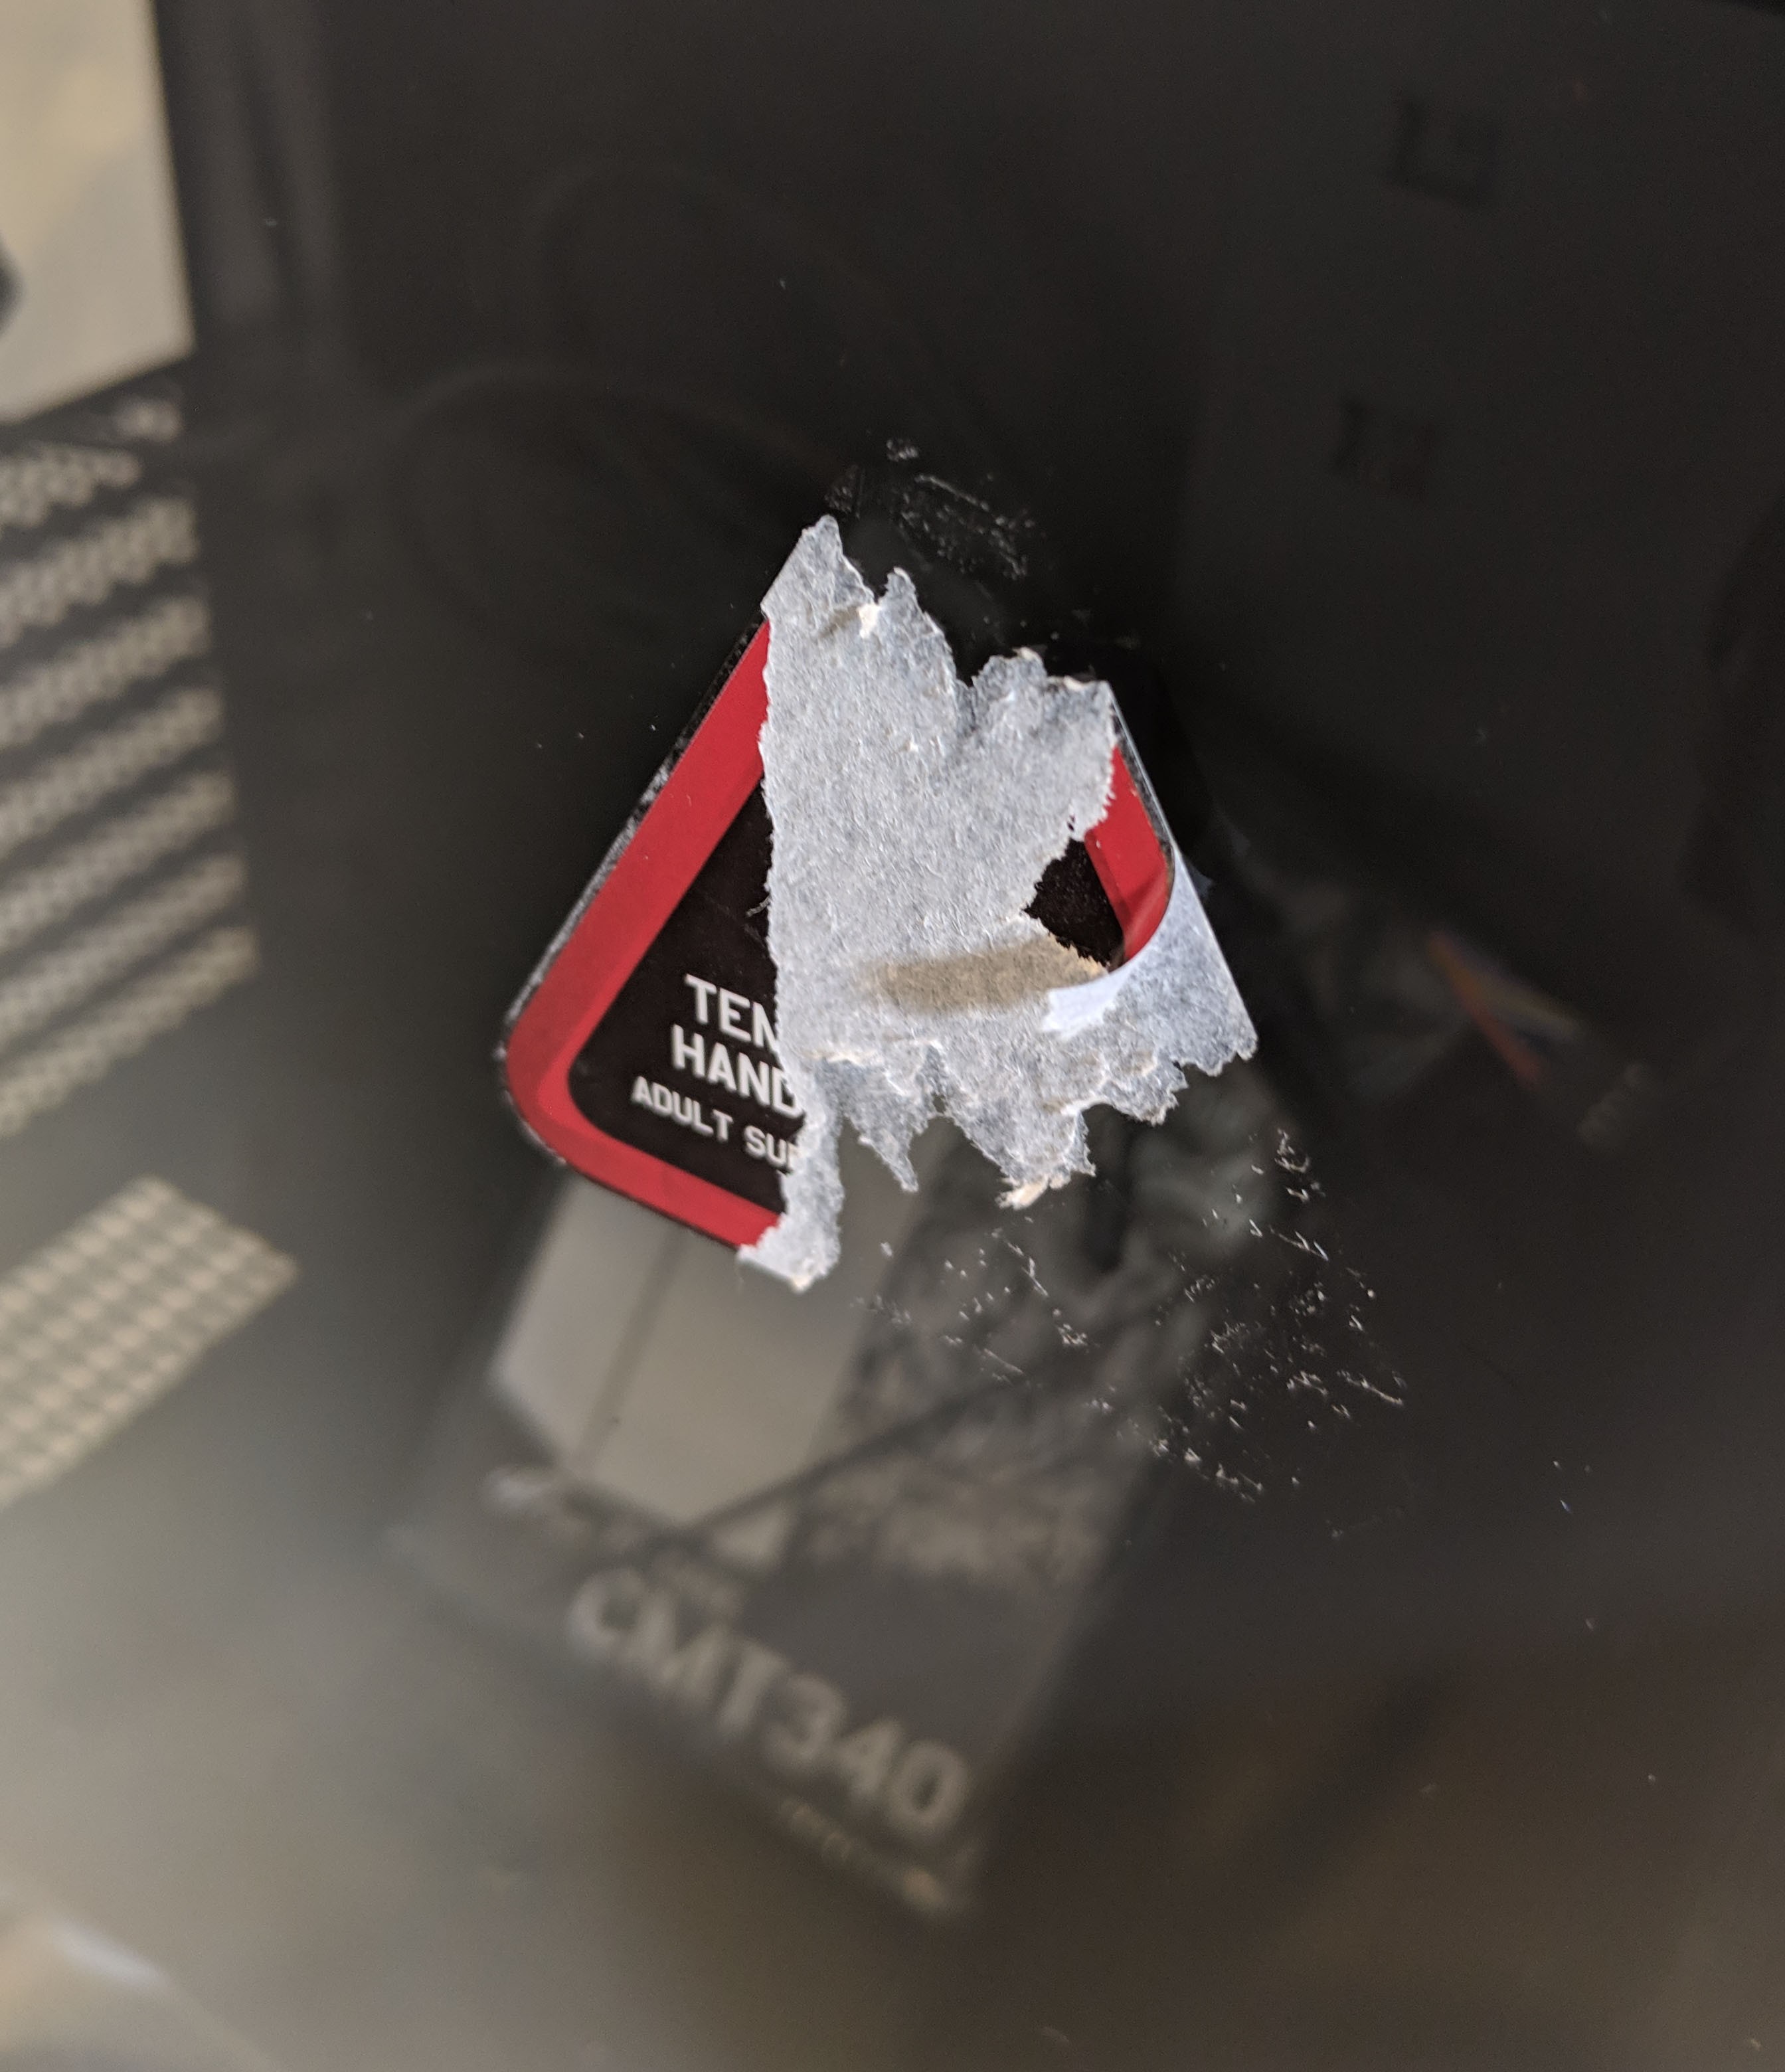
The outside of the tempered glass surface is coated in plastic film. Removing that stuff is definitely one of our favorite (and most satisfying) parts of any review. The good vibes were quickly killed off as we attempted to remove the tempered glass warning sticker! A few rubbing alcohol sessions later, sticker removed.
A Closer Look: Exterior
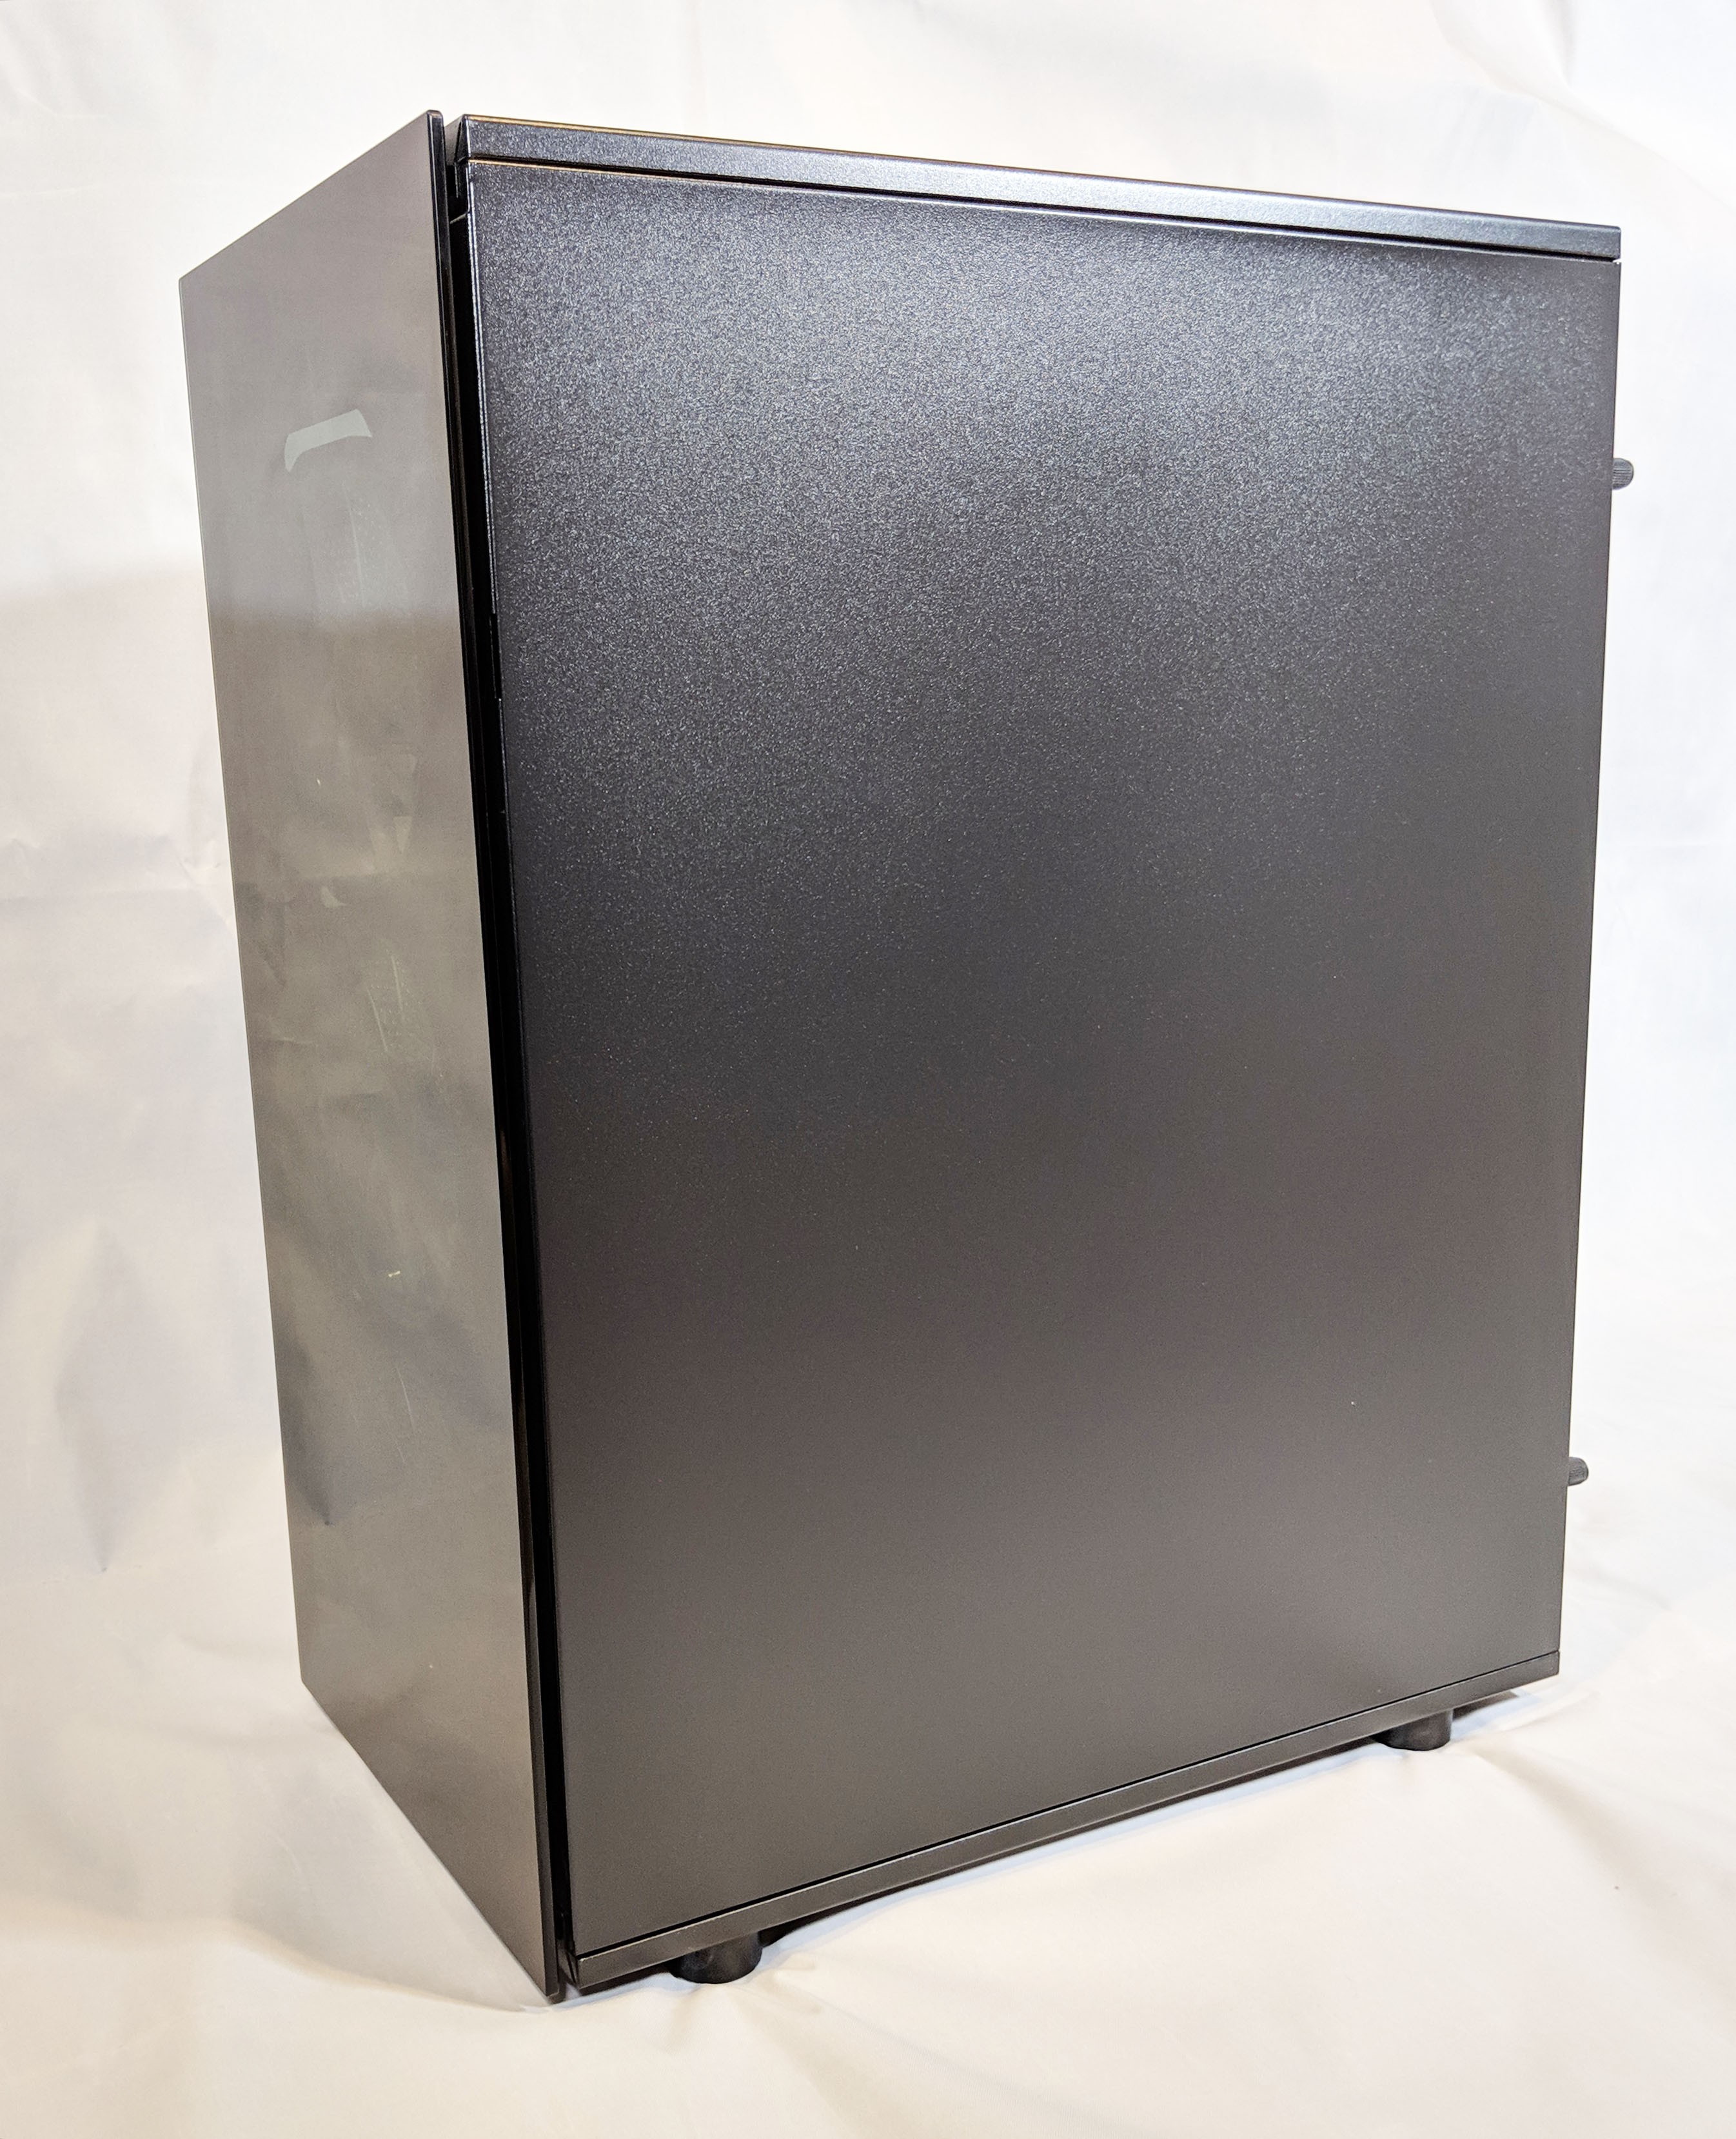
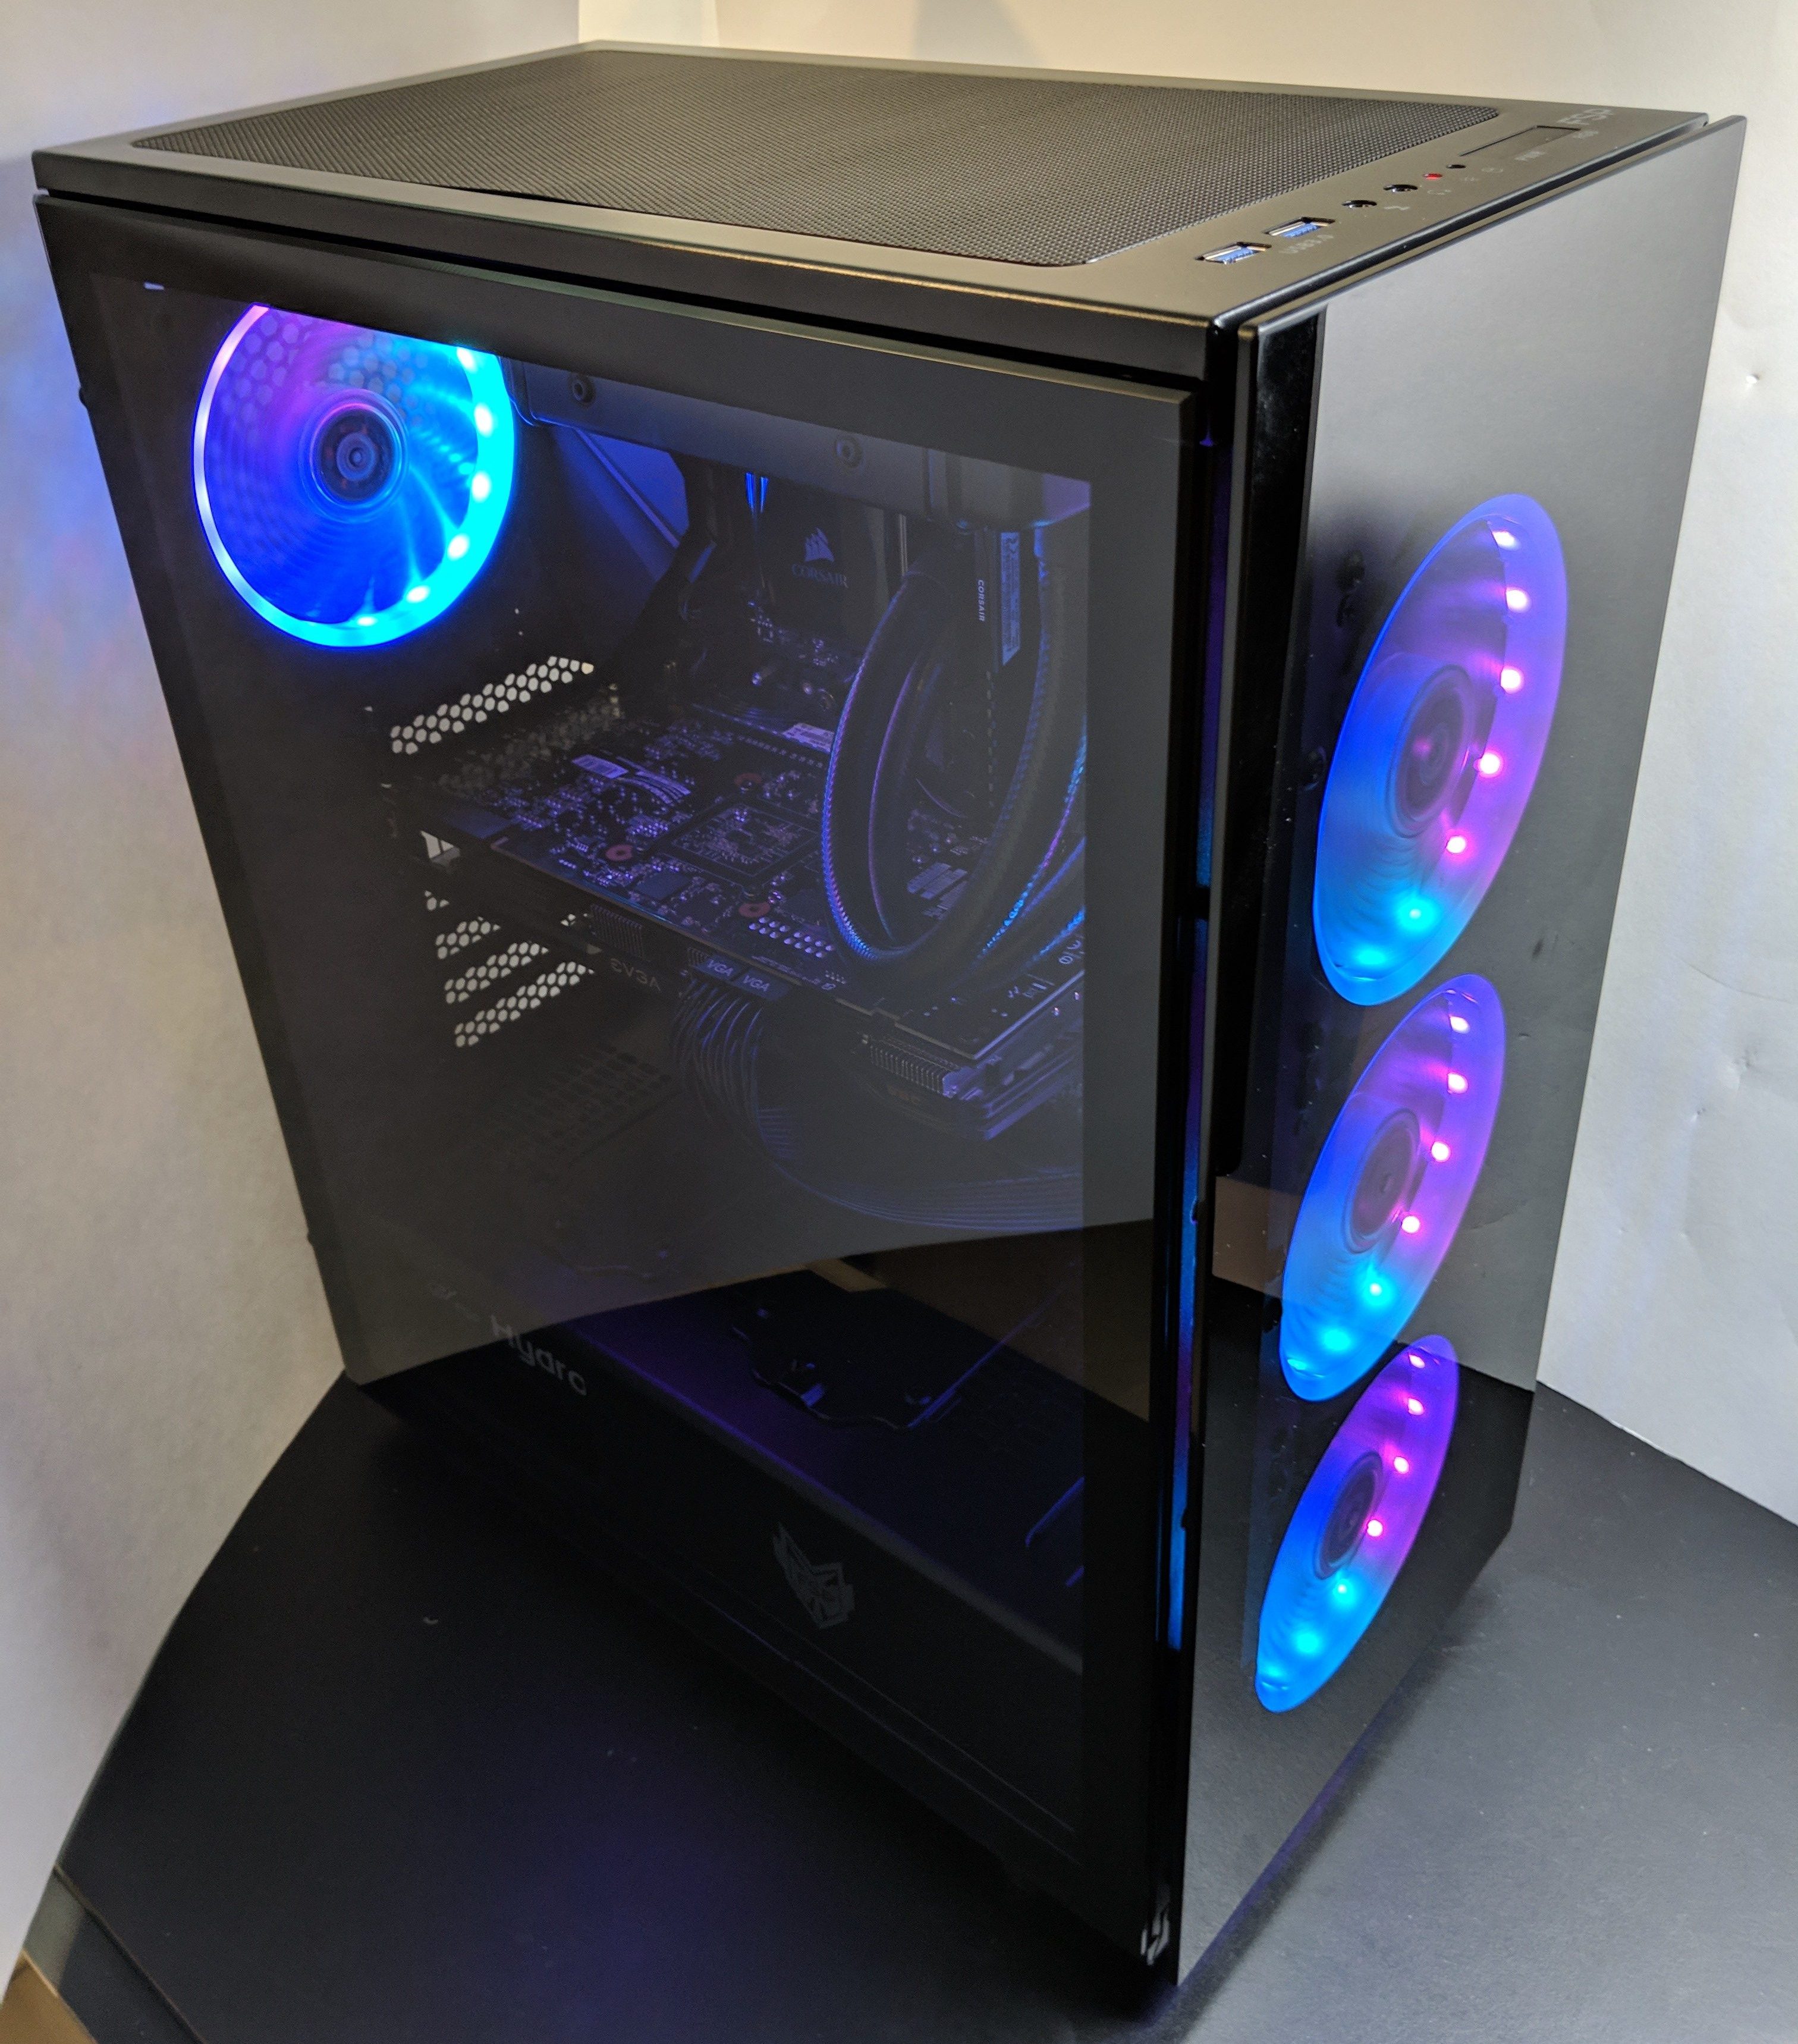
Now that we’ve got the FSP CMT340 completely unpackaged, let’s walk around the outside of the case to get a better feel as to what we’re working with. As far as first impressions go, the case’s shine is probably one of the first. The two full coverage tempered glass panels on the front and left size really add a premium vibe to the case. Paired with the dark black paint over the frame the case is very stealthy all on its own although, I have a feeling the stealthiness will soon vanish once we fire up the RGBs.
The tempered glass is slightly tinted (or smoked) to reduce visibility to the inside of the case while still allowing the RGB goodness to easily shine through.
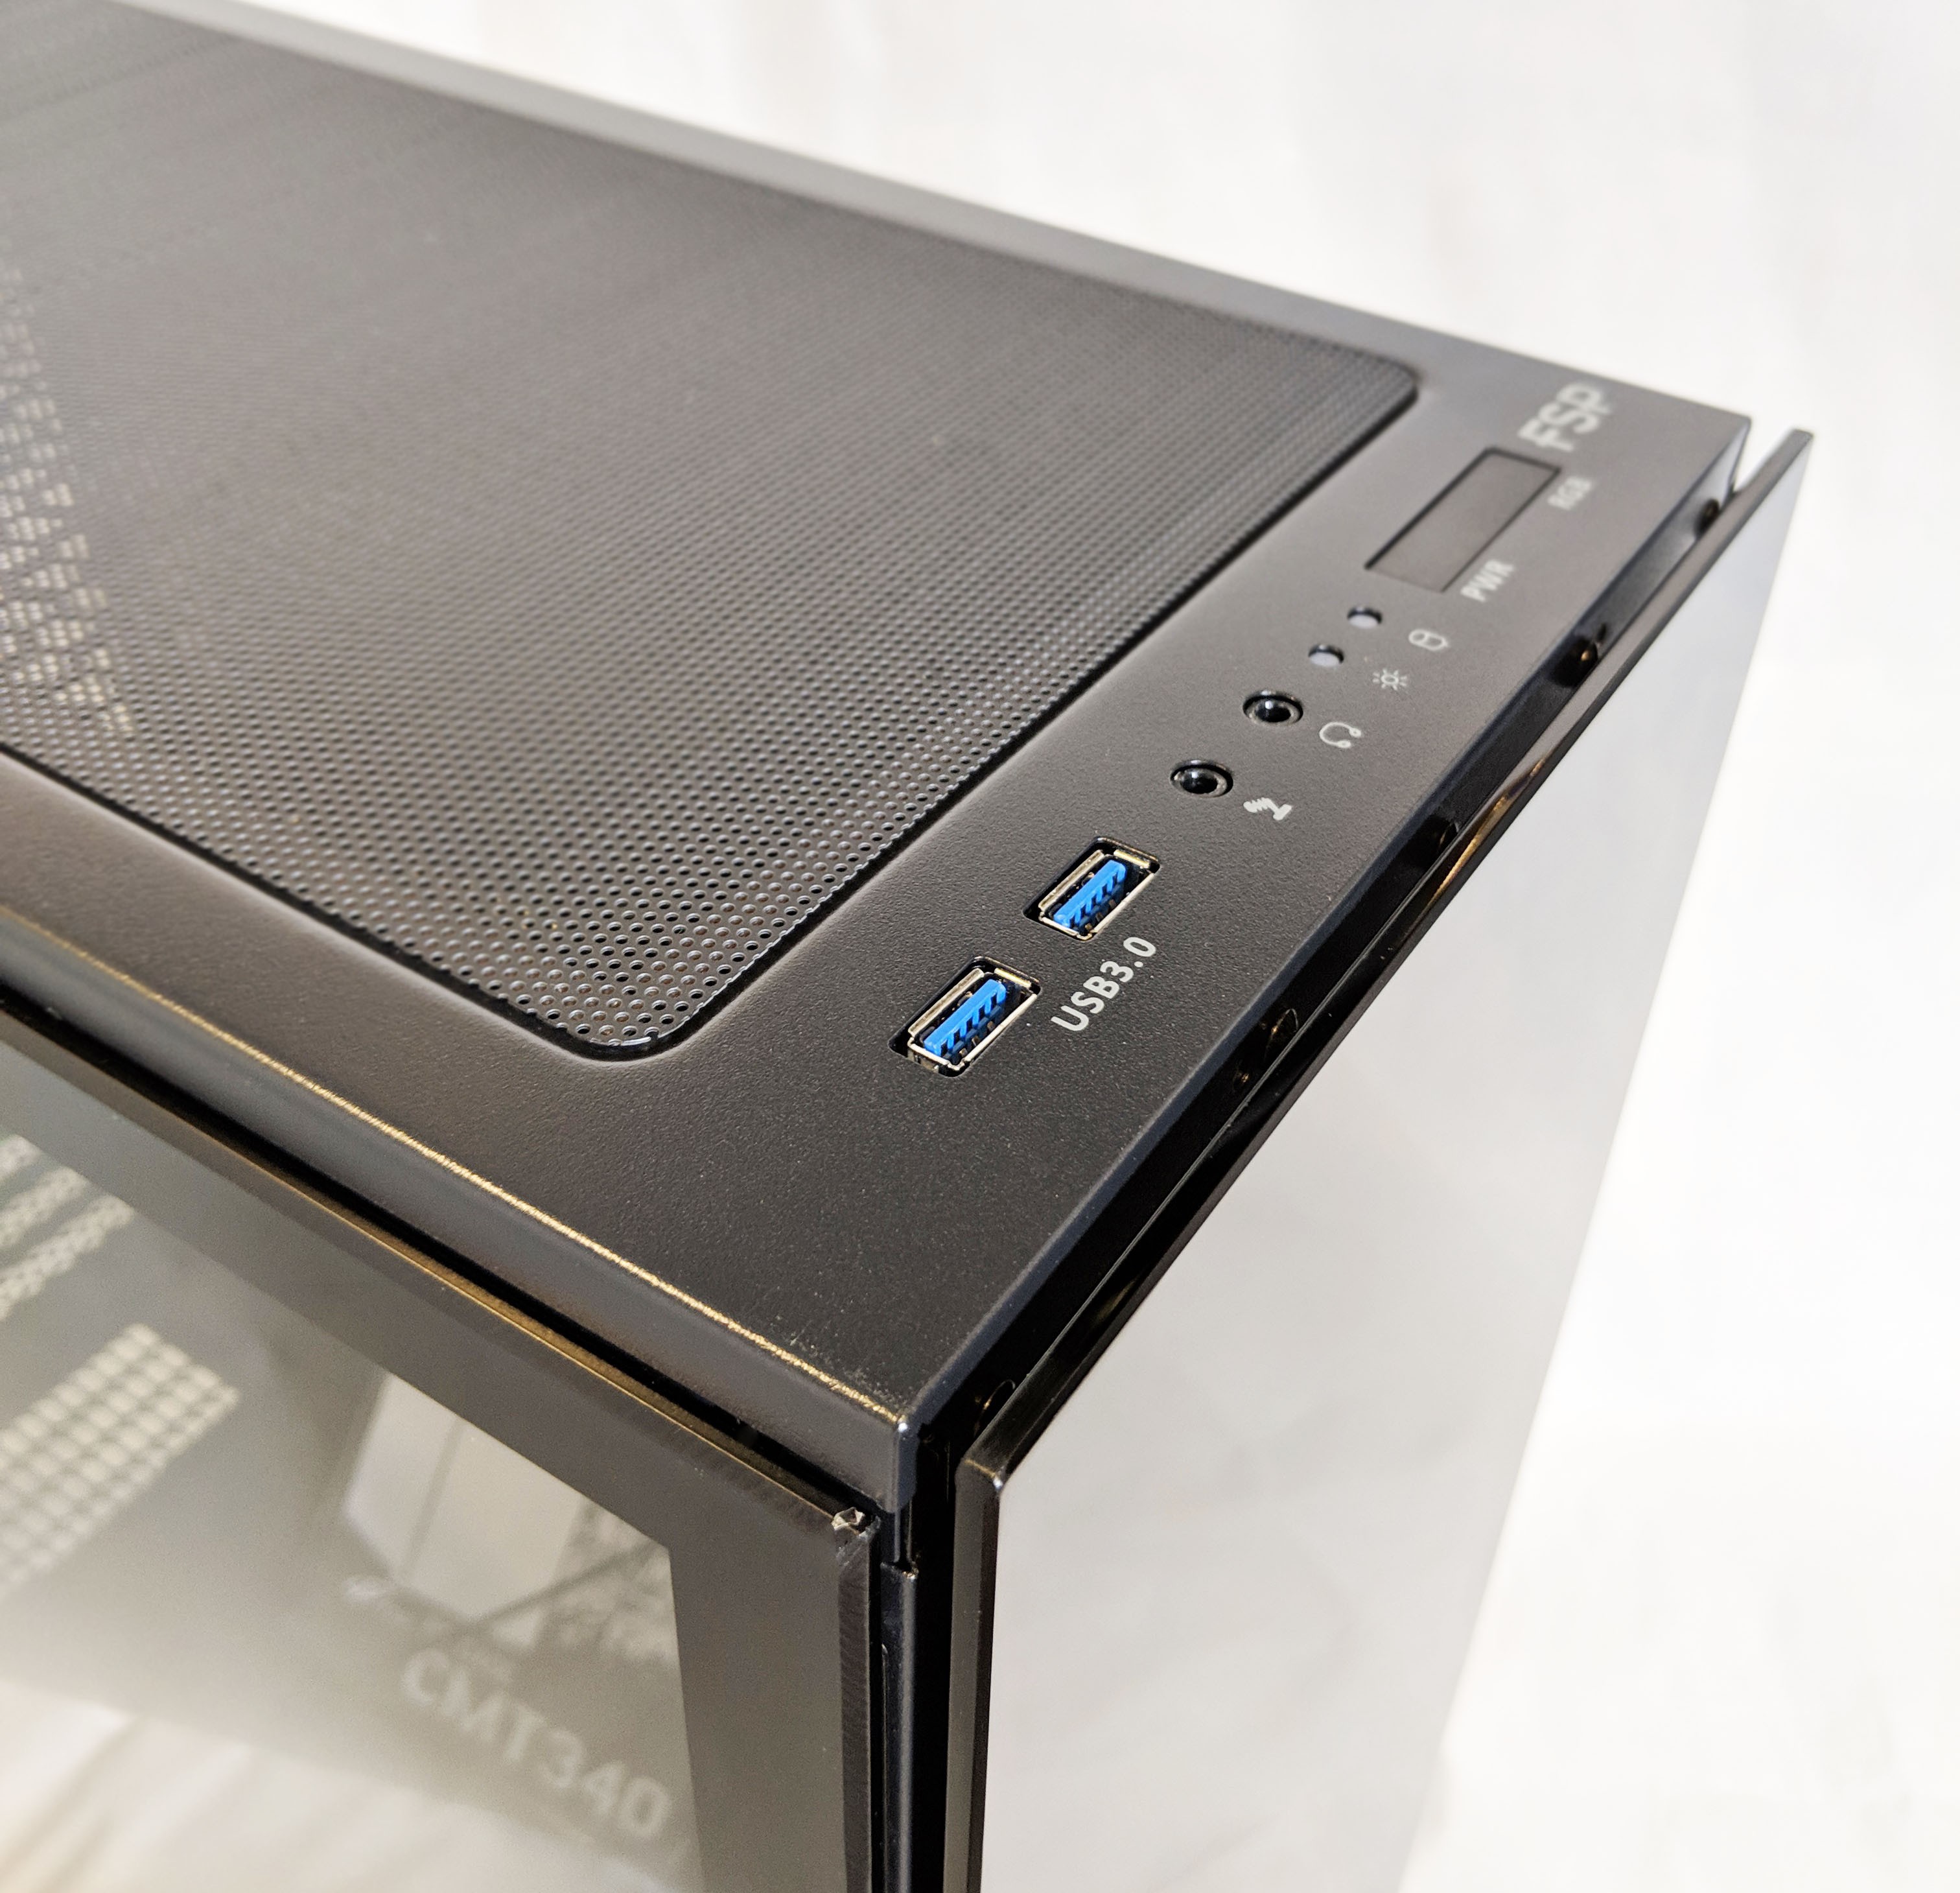
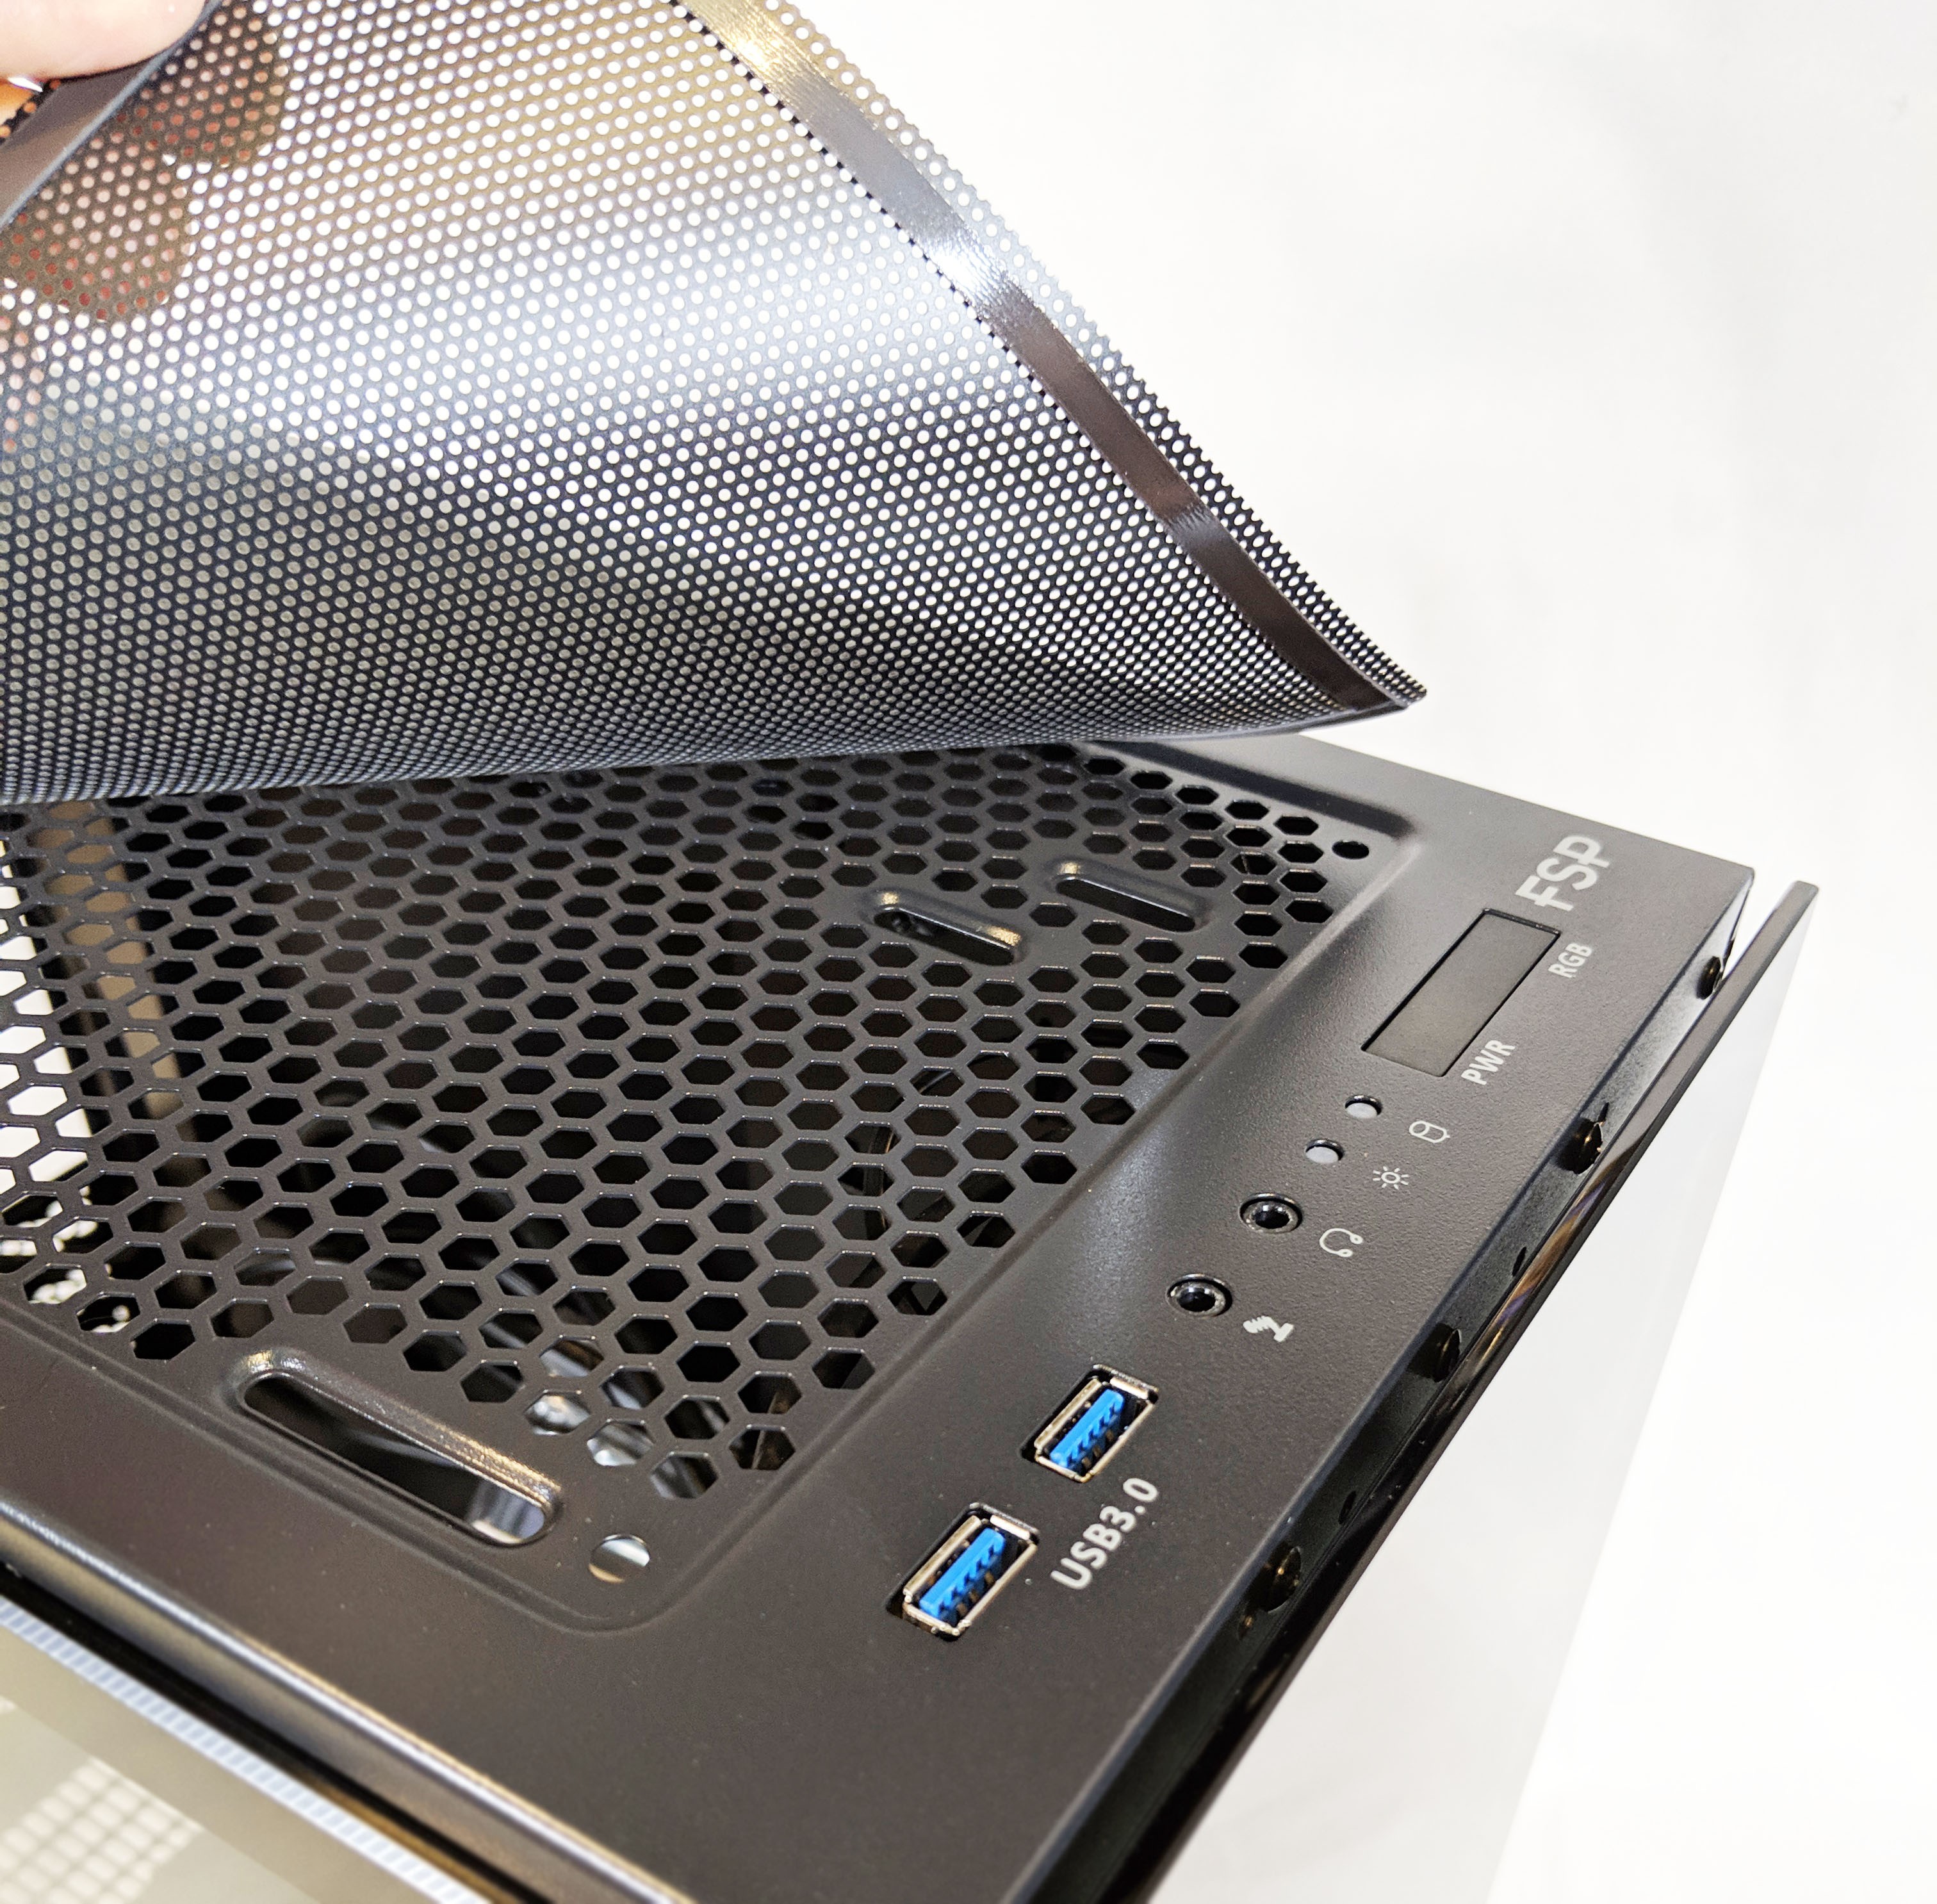
At the top of the case is where you’ll find your front I/O panel. From left to right, there are two USB 3.0 ports, a 3.5mm mic and headphone jack, and lastly a power and RGB button. The RGB button connects directly to the included RGB controller which we’ll talk about later. If you plan on using your motherboard’s built in RGB control functions, this button can double as as reset button.
Also along the top is a removable dust filter held in place by a magnetic perimeter. The grooved design of the case should prevent the filter from sliding around while handling.

The right side of the case features a simple solid metal slide panel when when removed reveals the reverse side of the motherboard tray, HDD mounts and PSU mounts.
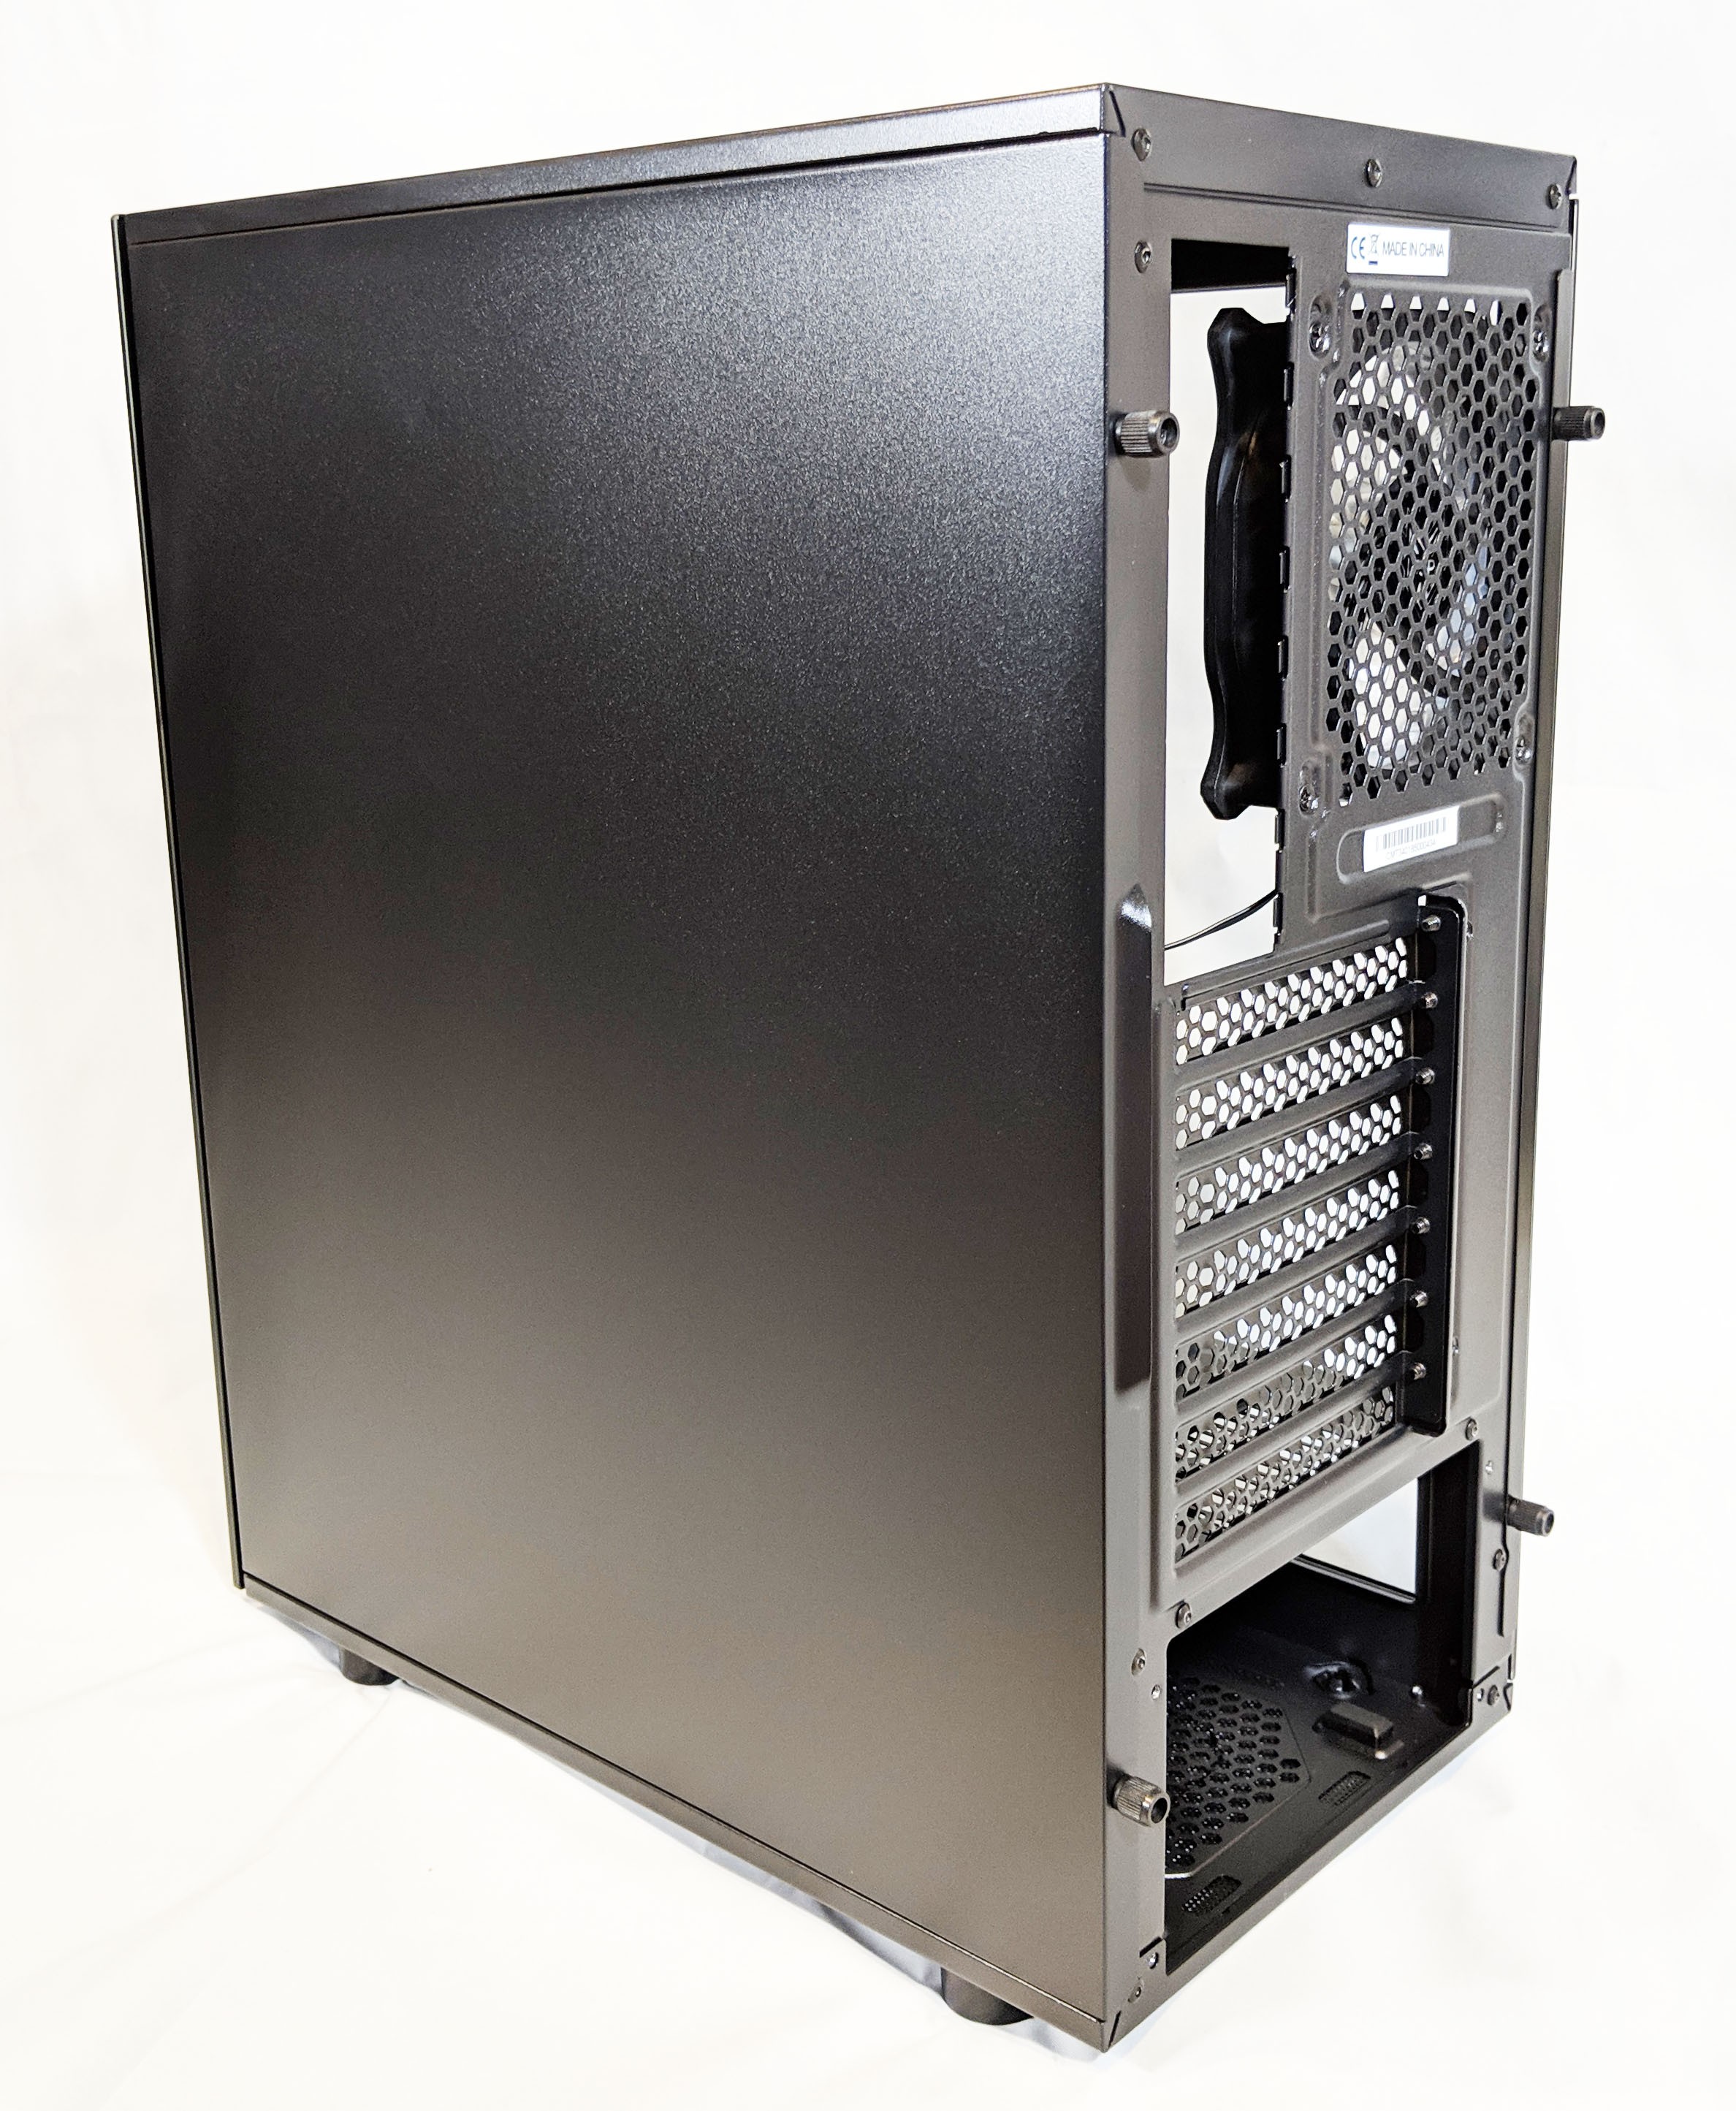
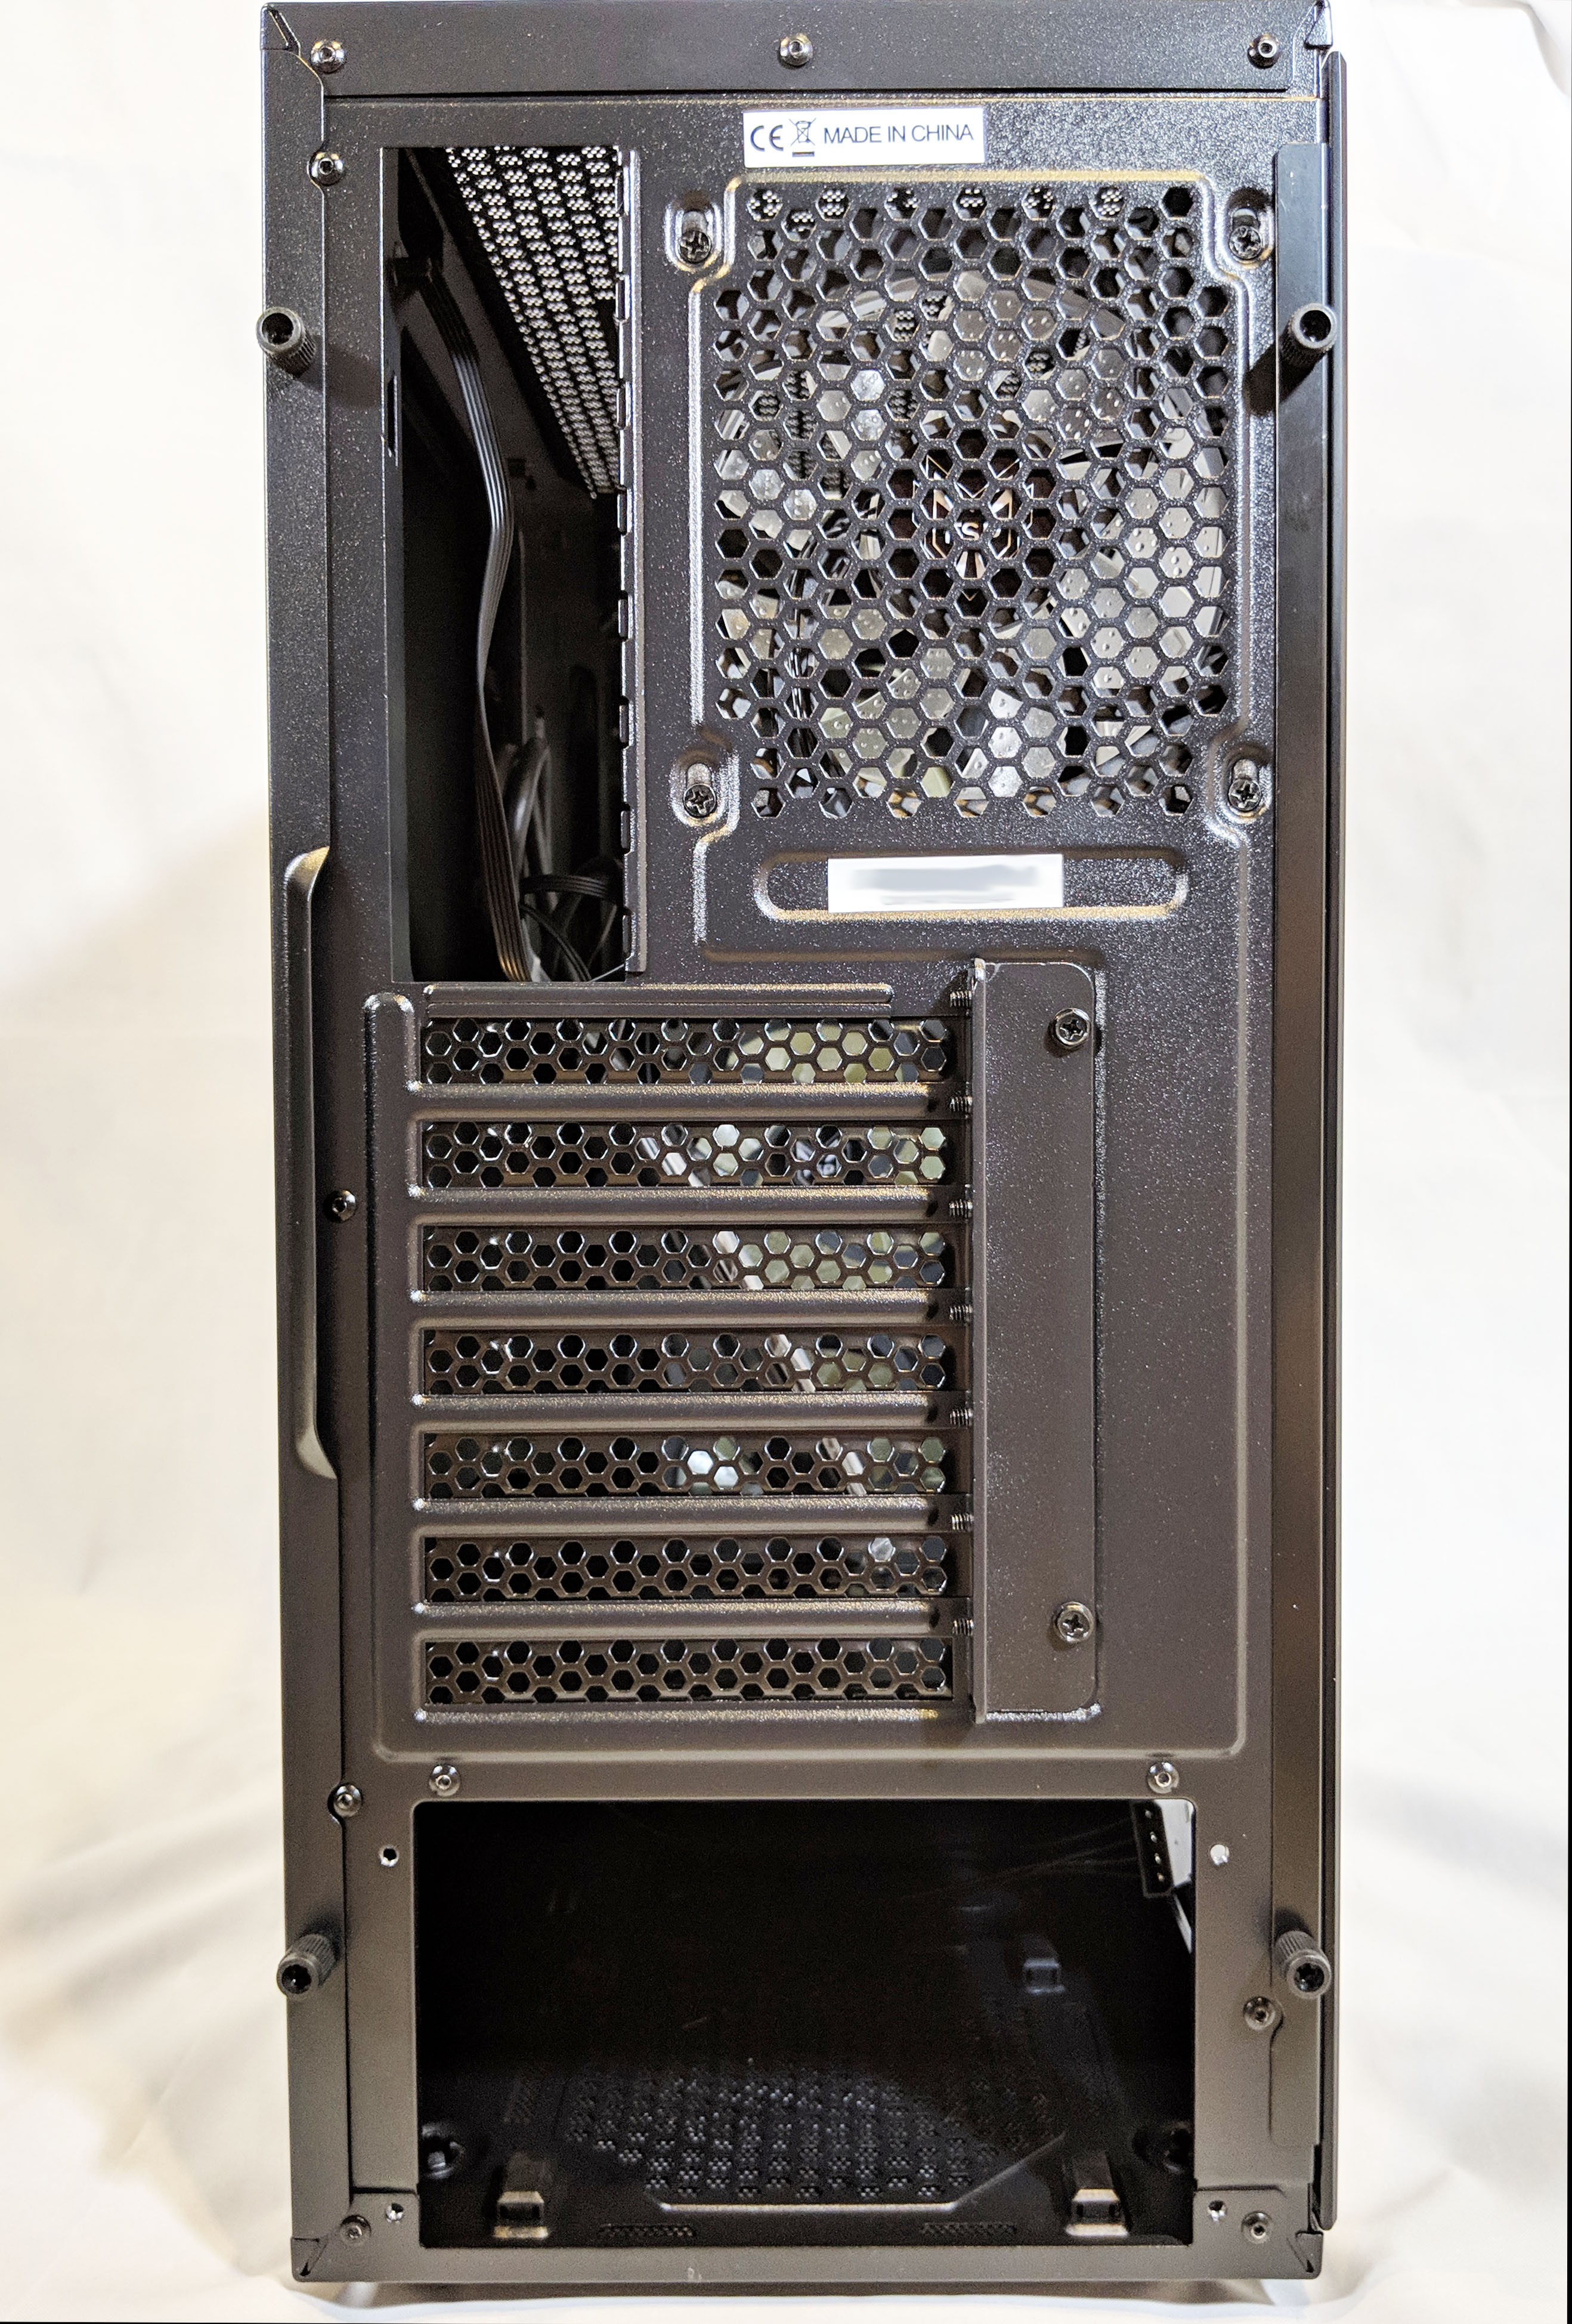
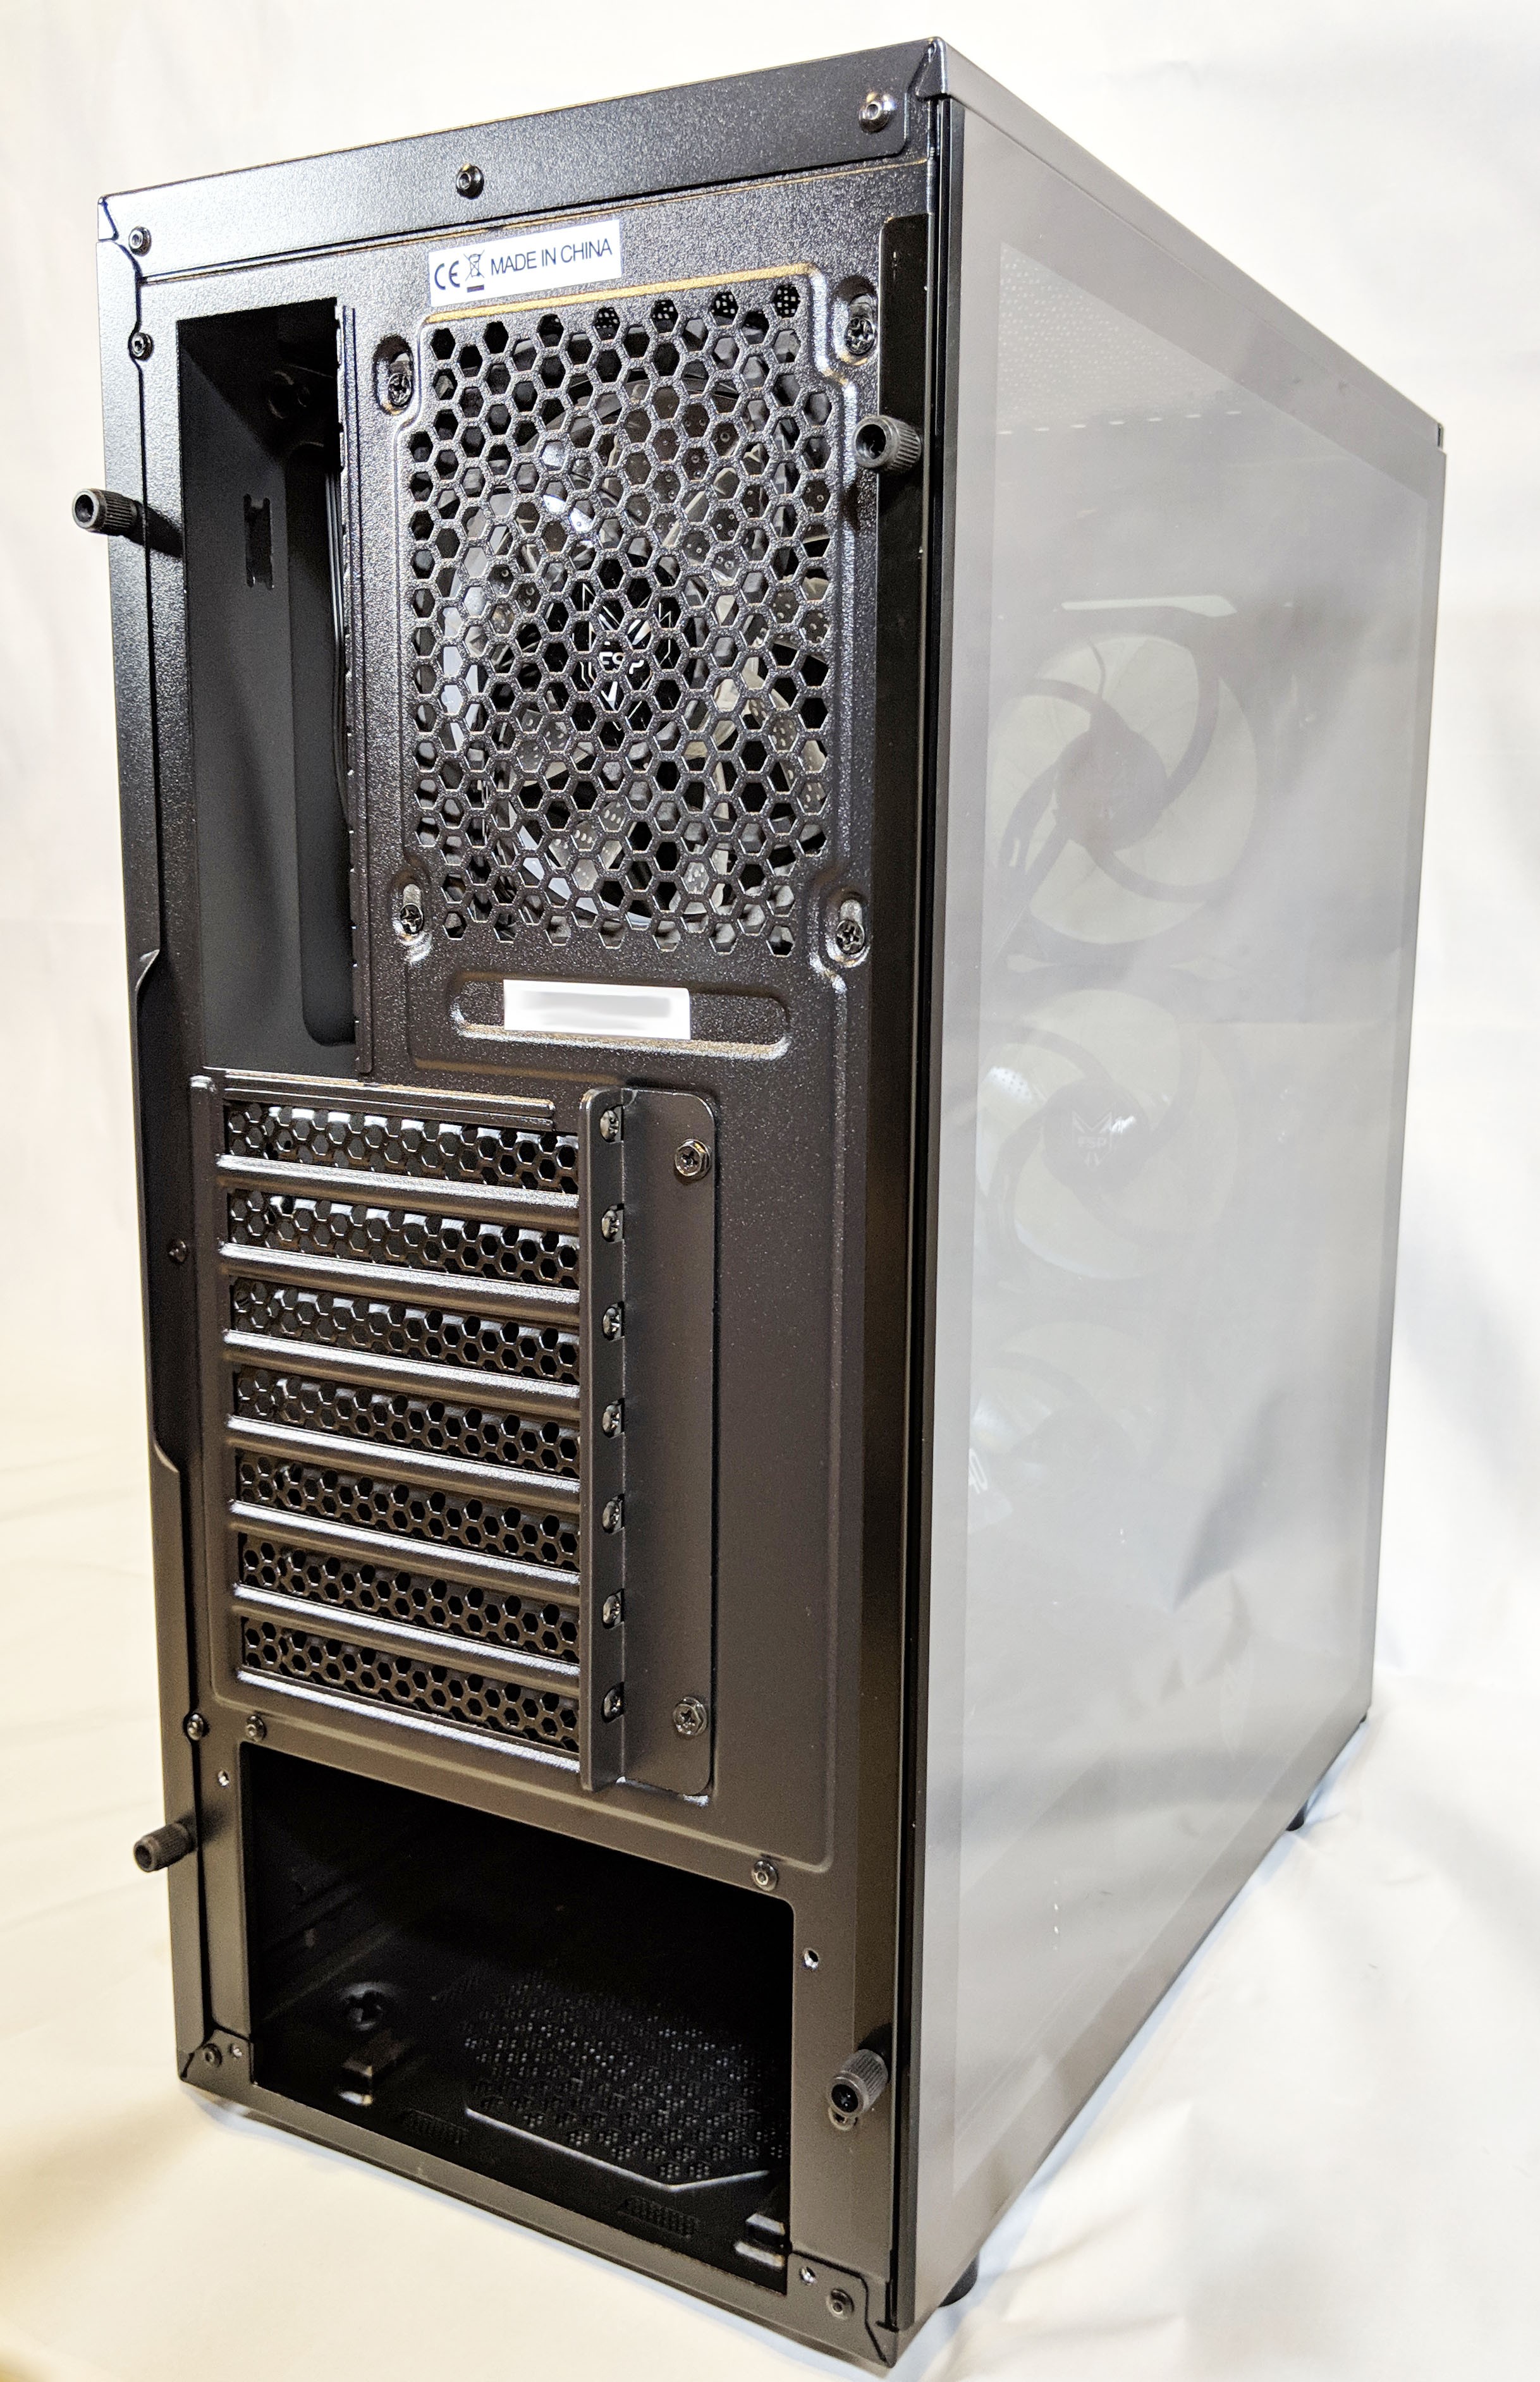
The rear of the case is pretty typical with a few notable exceptions. First is the rear expansion card mount points and screws are located under a removable shroud. This is common in smaller cases which in turn help keep its overall size down.
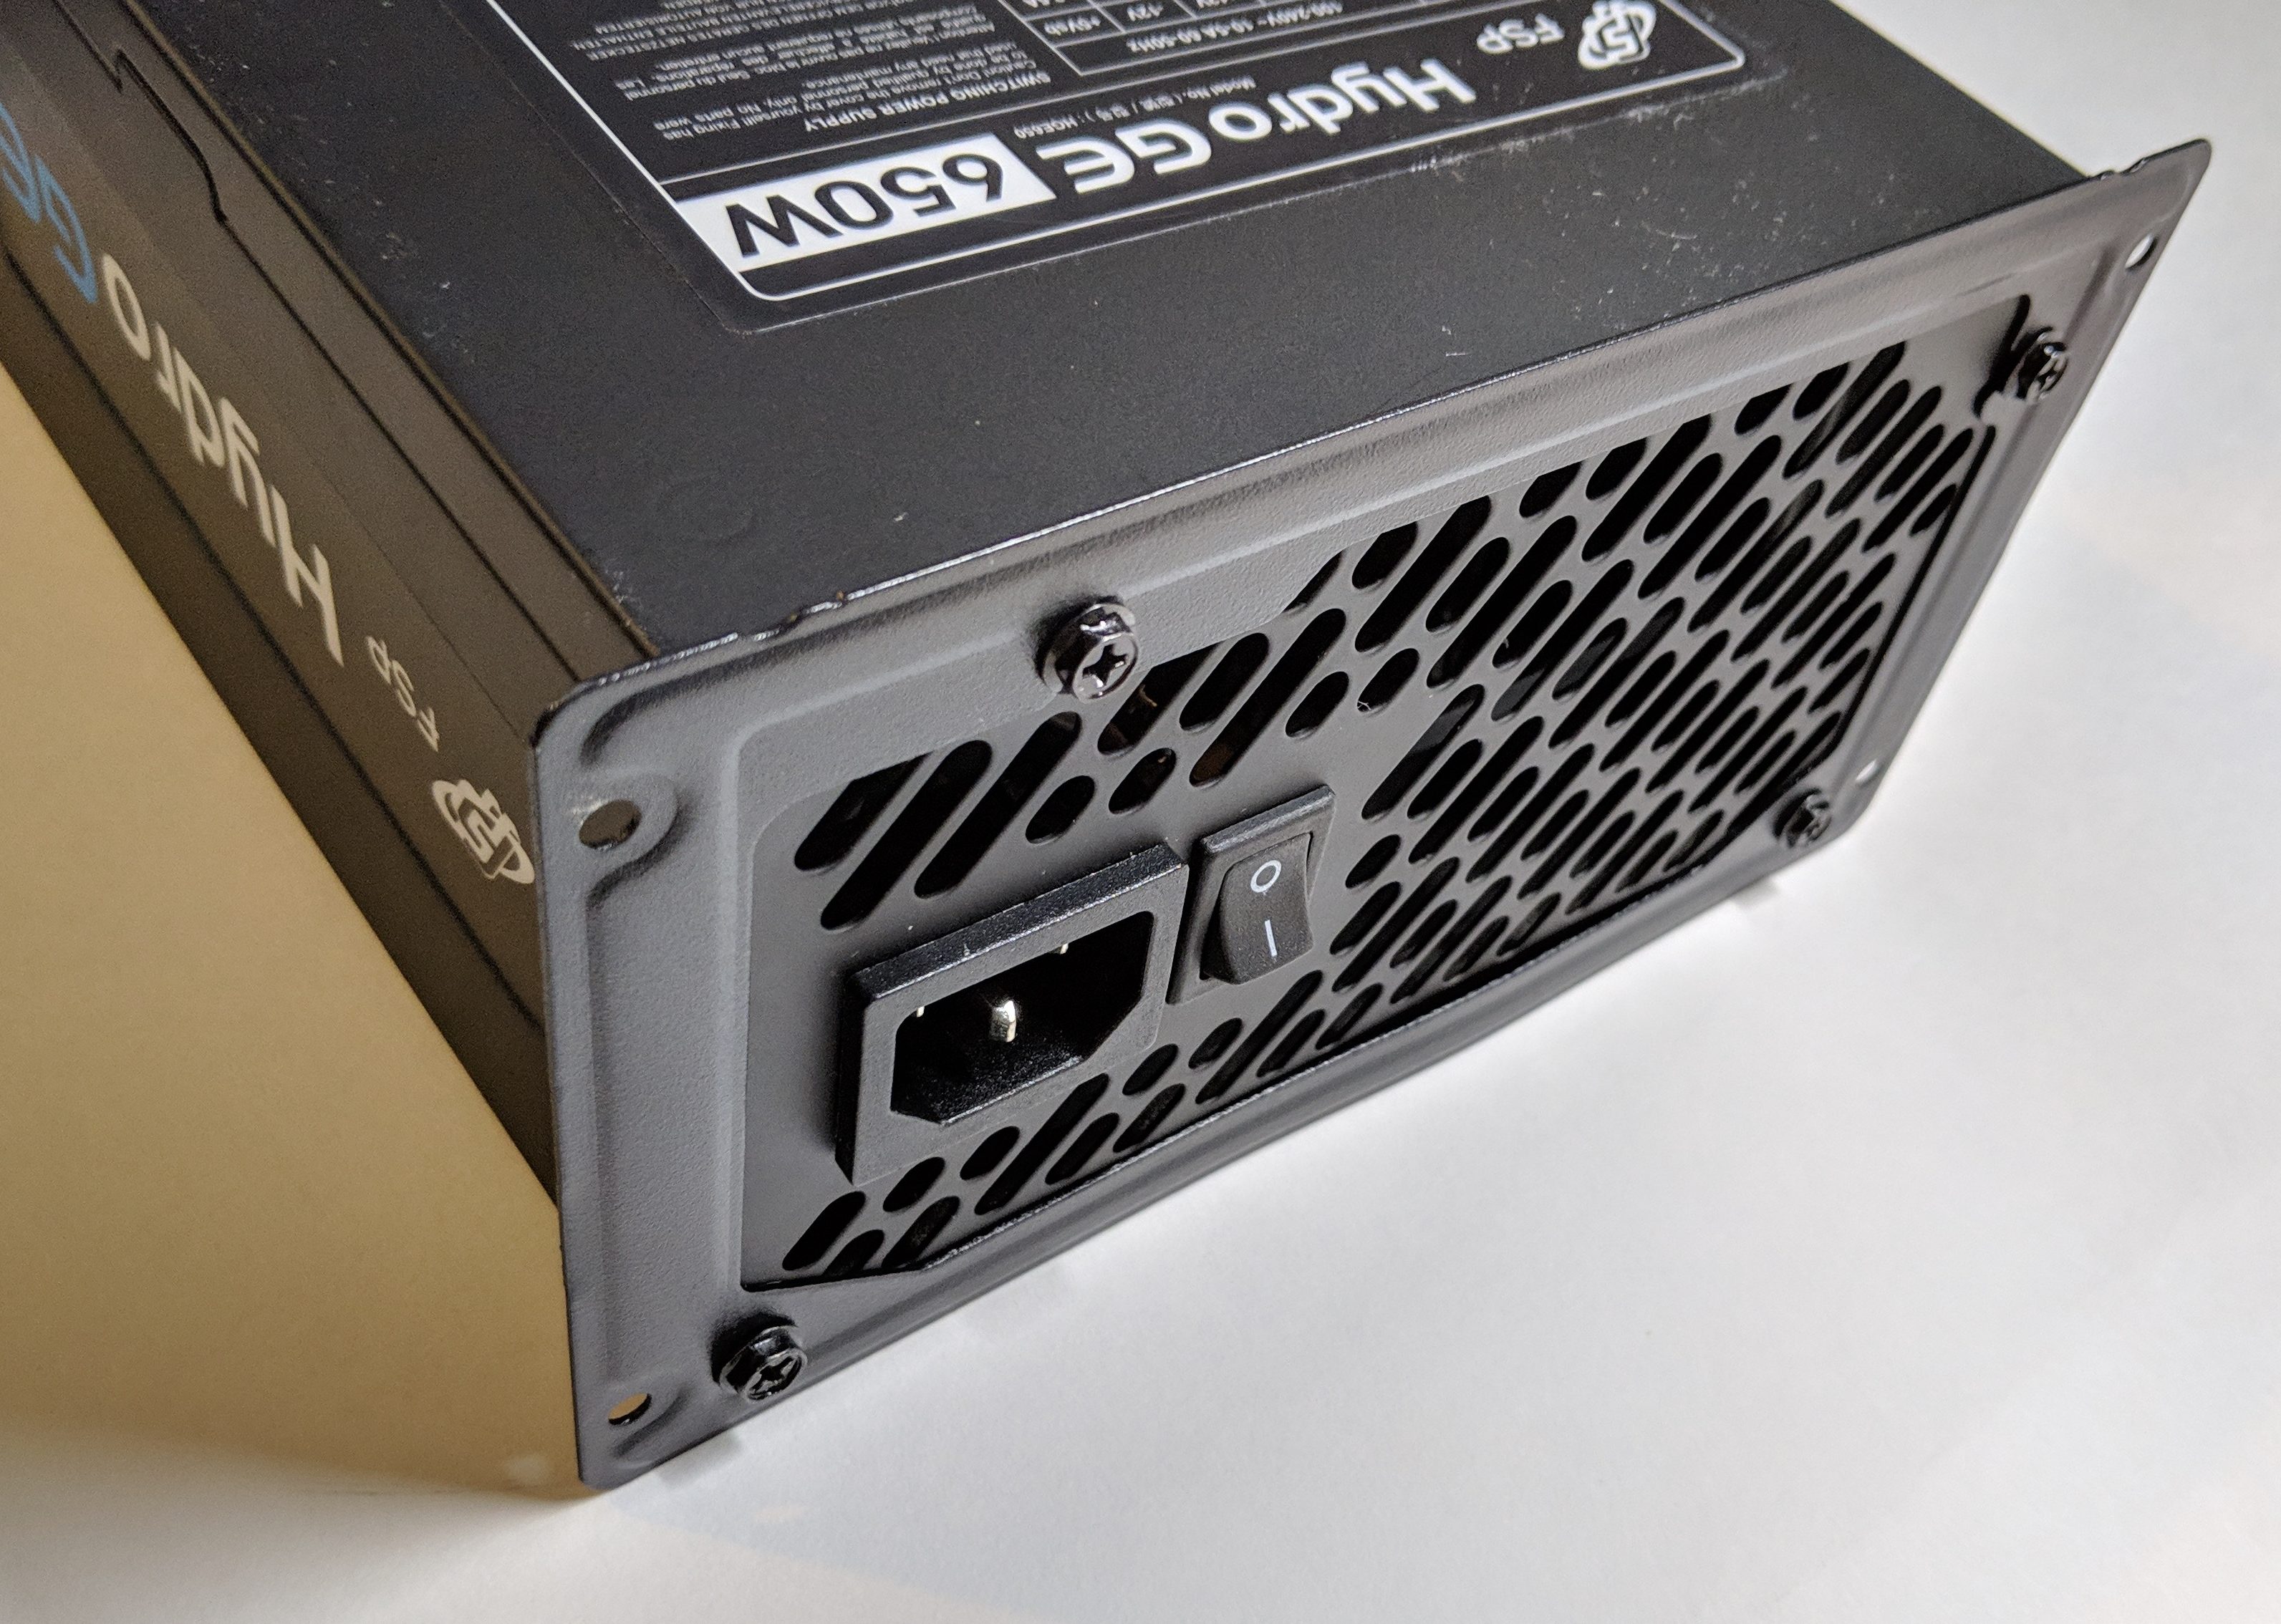
The PSU mounts at the bottom which is inserted through the large hole. FSP has included a mount which first needs to be attached to the PSU itself before sliding it in. The mount connects directly to the case in kind of a two-step install process.
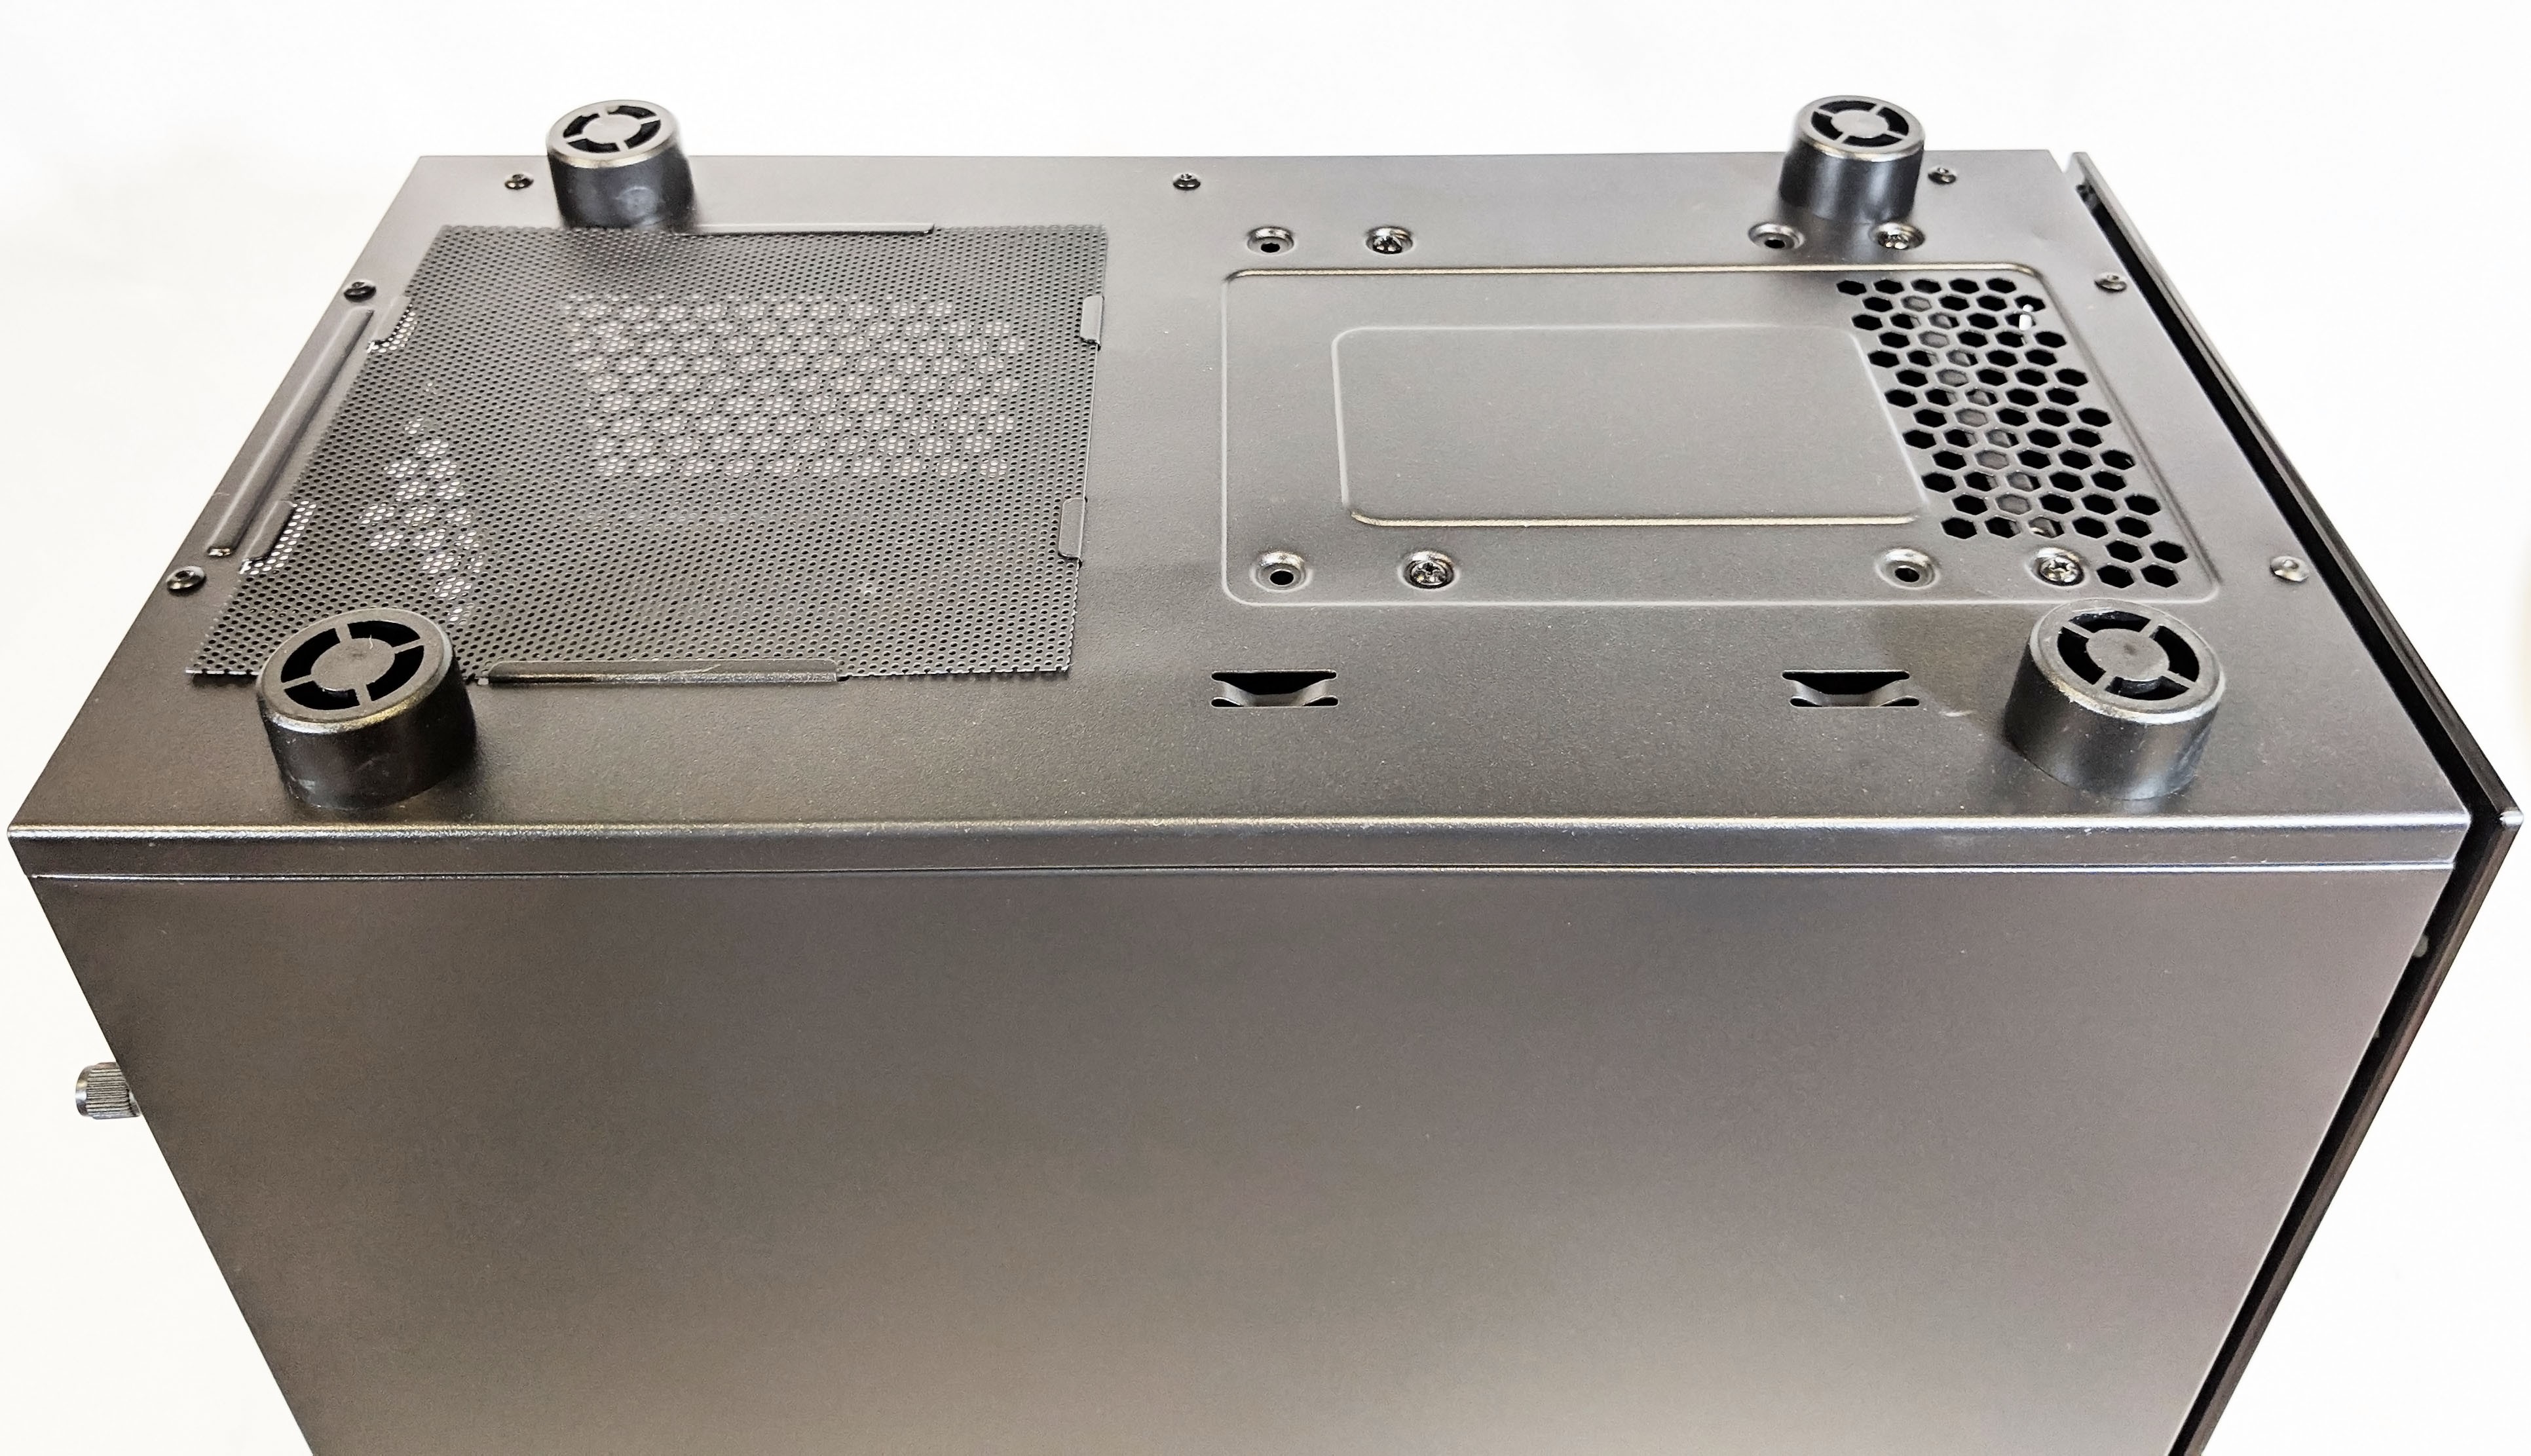
Flipping the case upside down reveals the bottom side of the case. Glad to see FSP included a dust filter where the PSU would normally draw its air. The case is supported by four plastic standoffs as can be seen below:
A Closer Look: Inside
The left side tempered glass side panel can be removed simply by unscrewing the two thumb screws keeping it from sliding out at the rear of the case. The glass panel has three retaining brackets, two on each side and one on the bottom as you can see in the image below which allow for easy and secure mounting.

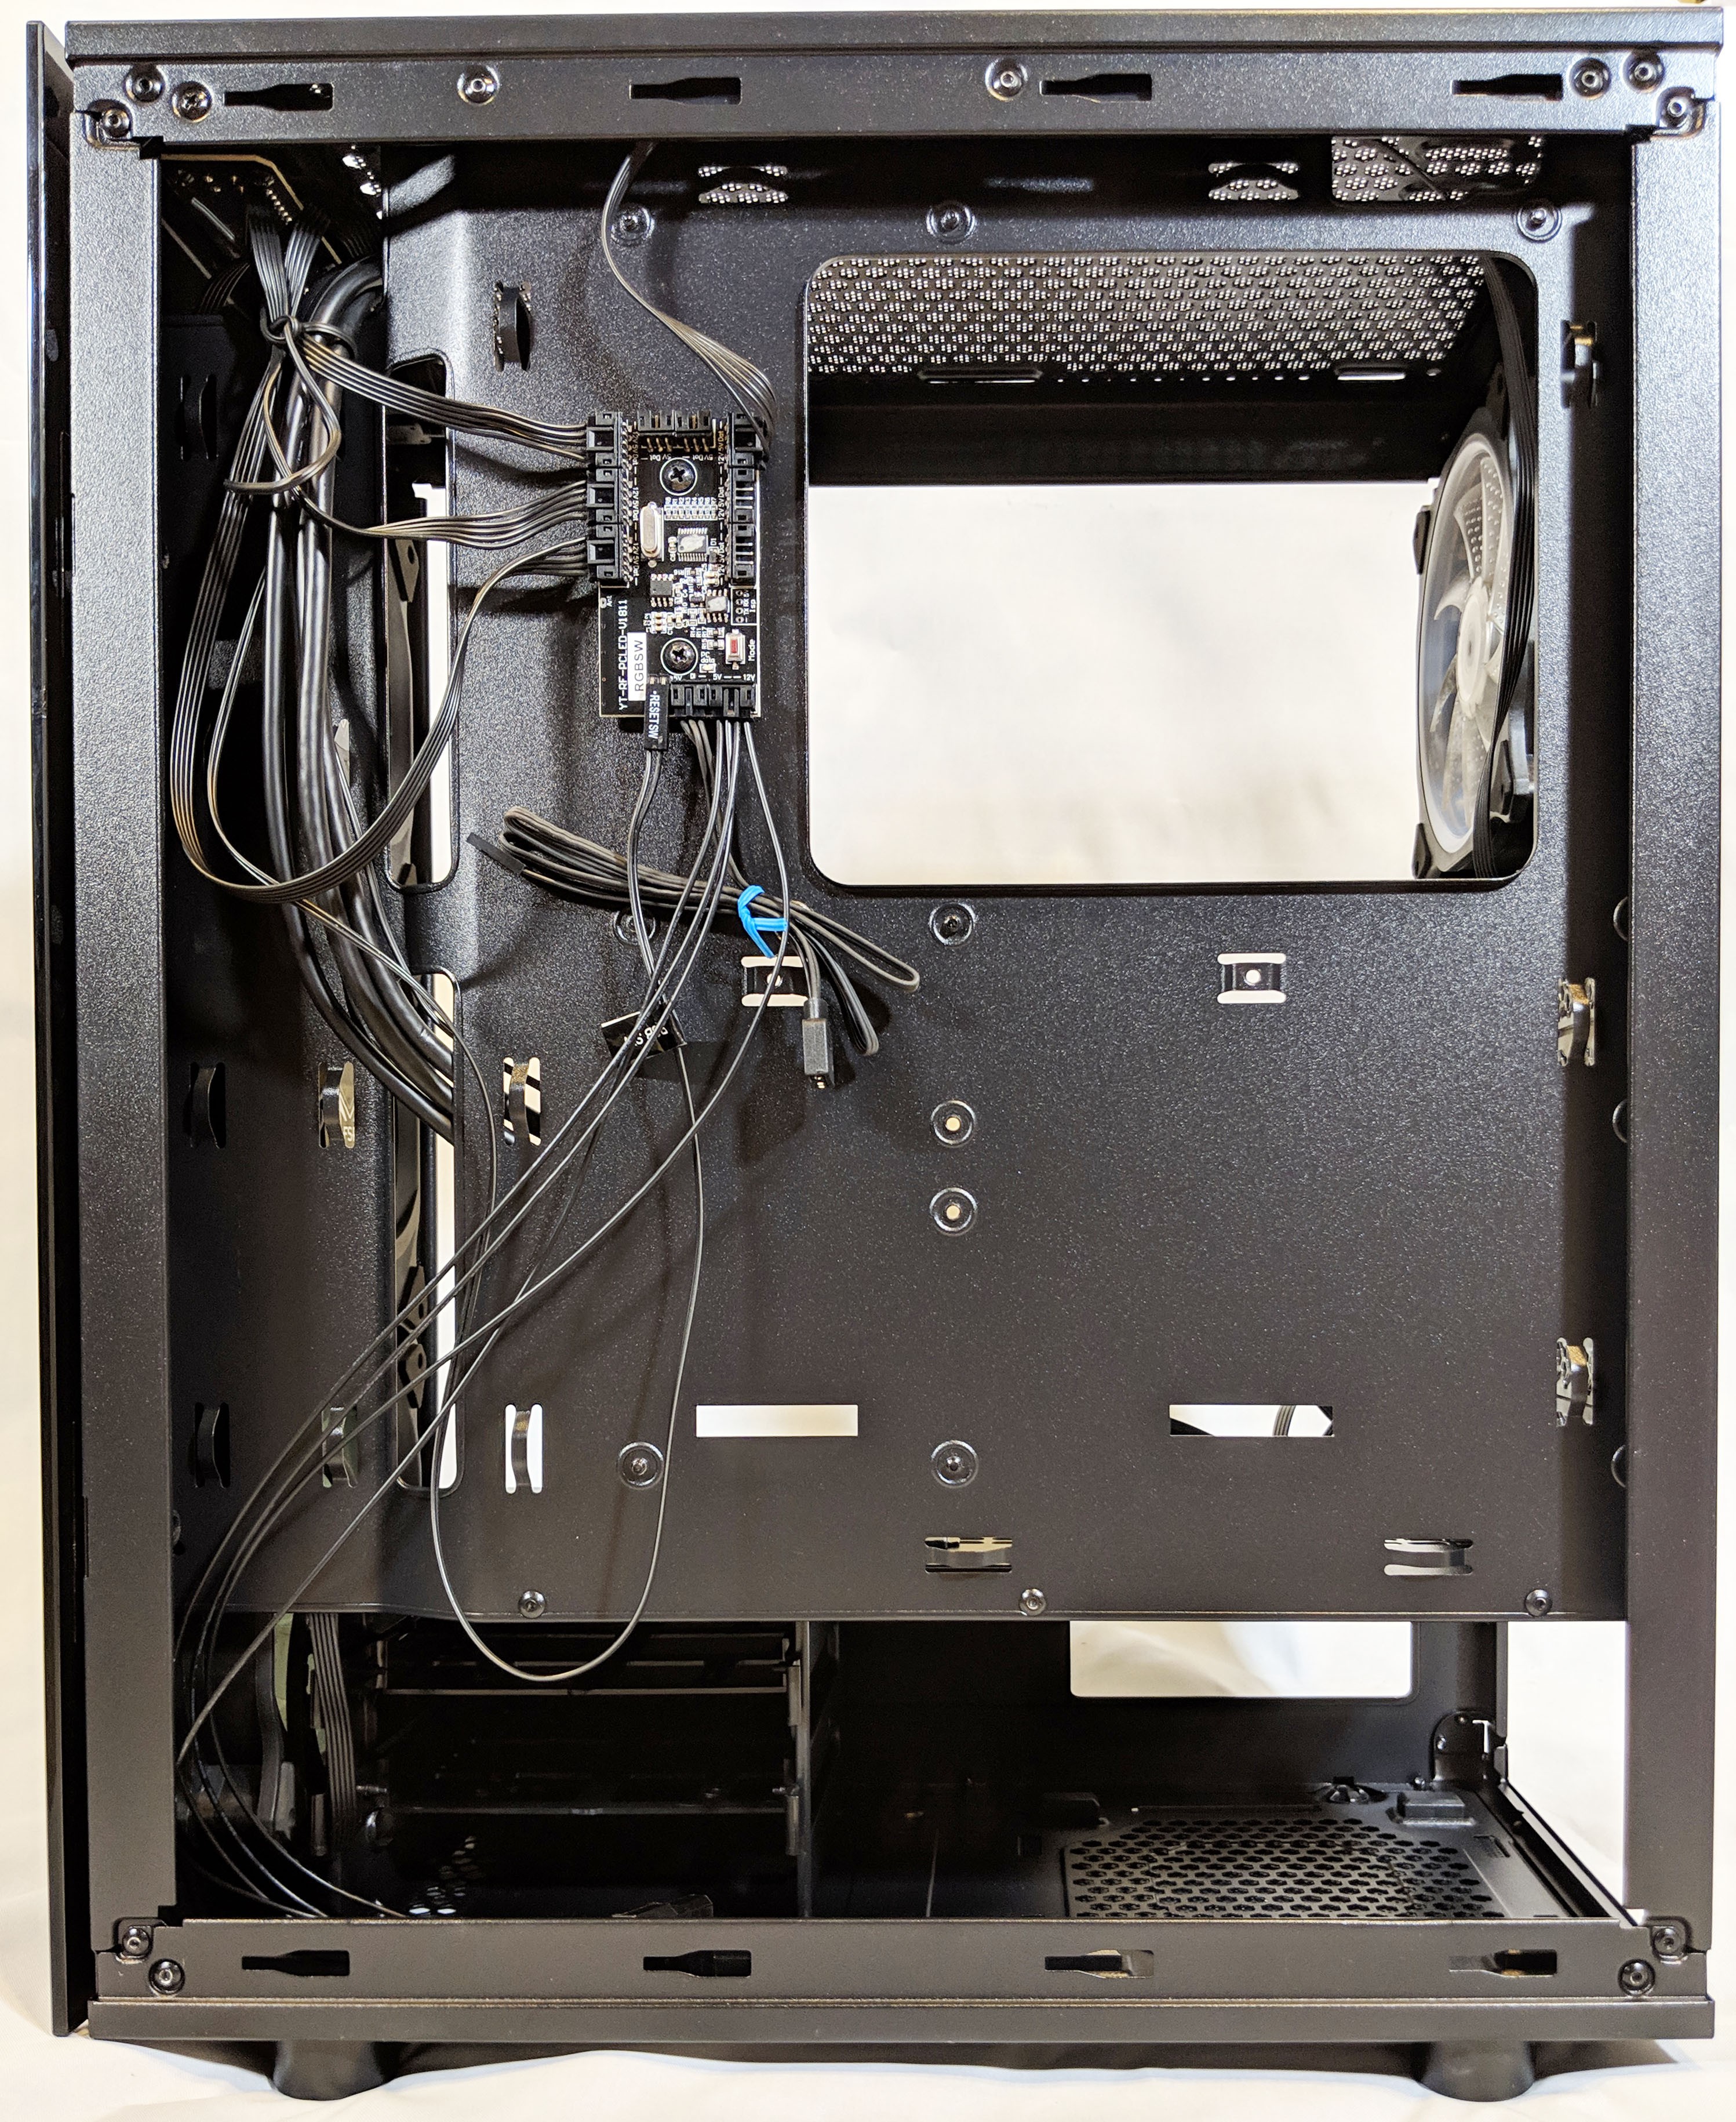
Be sure to remove the bag of goodies before attempting to mount any hardware! With the bag removed we get a cleaner view of the CMT340’s interior. The layout should be pretty familiar. We can see right away some good cable management features such as rear-side ports for cable routing as well as little cut outs for using cable ties.

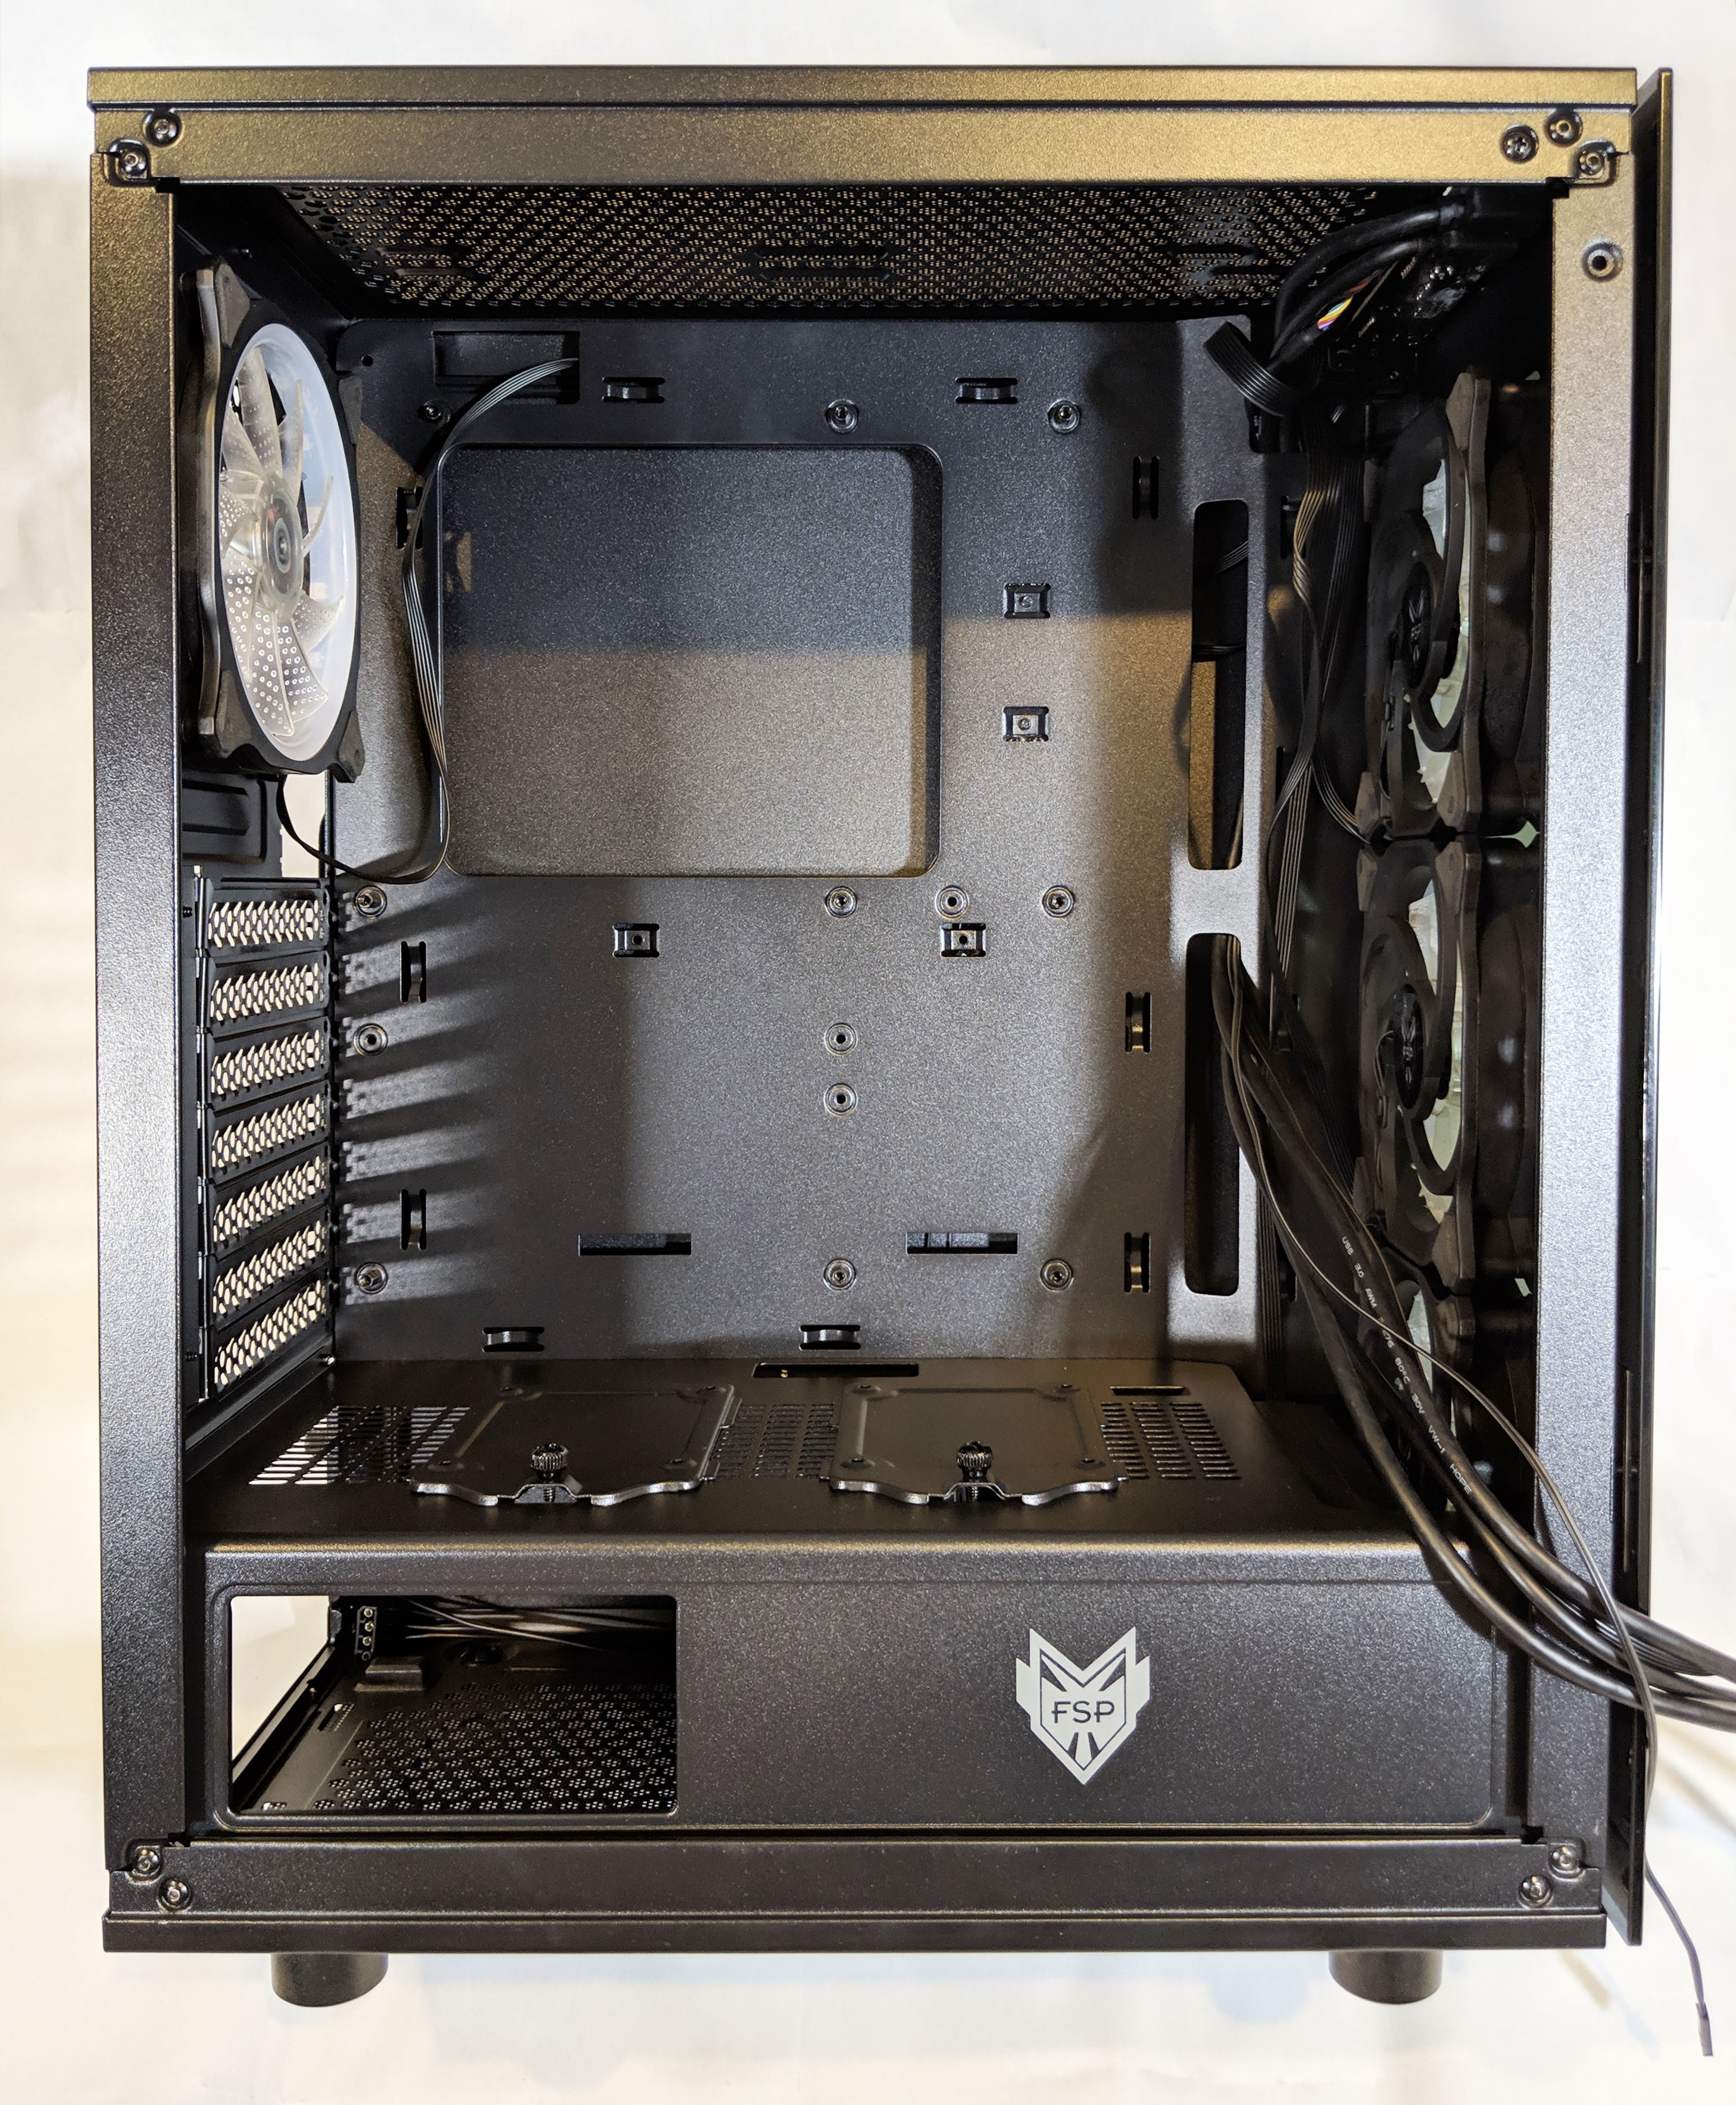
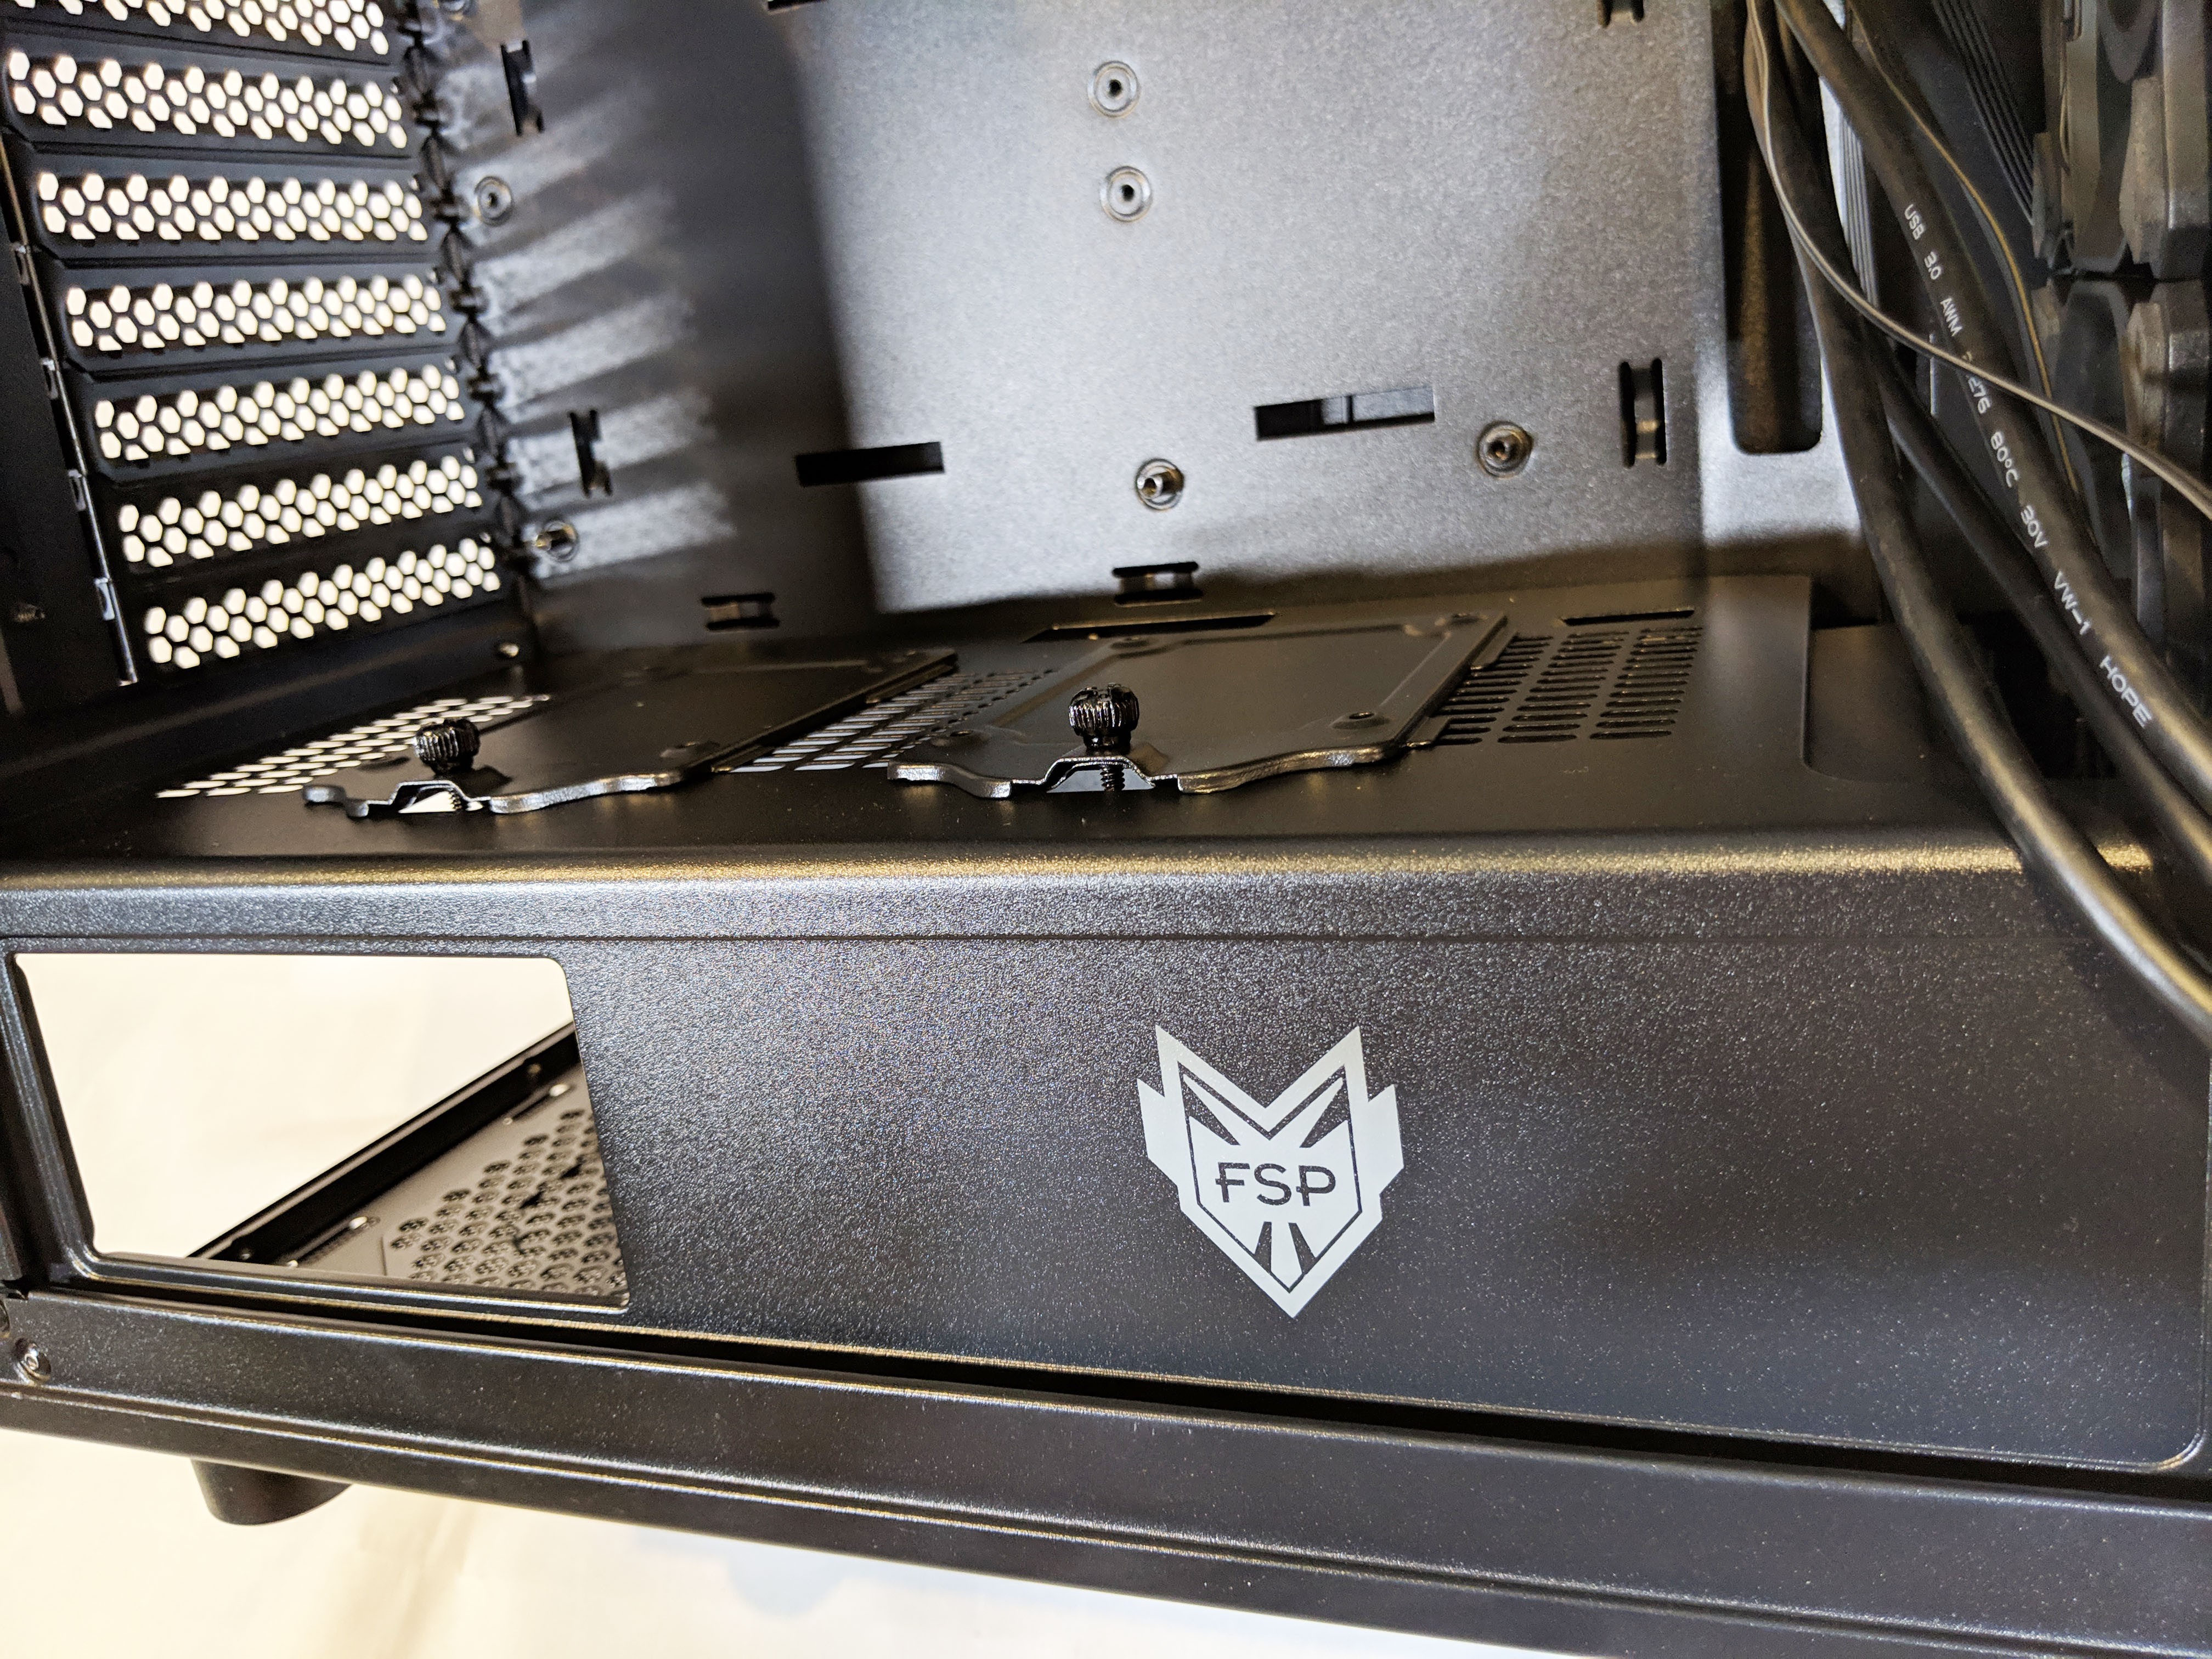
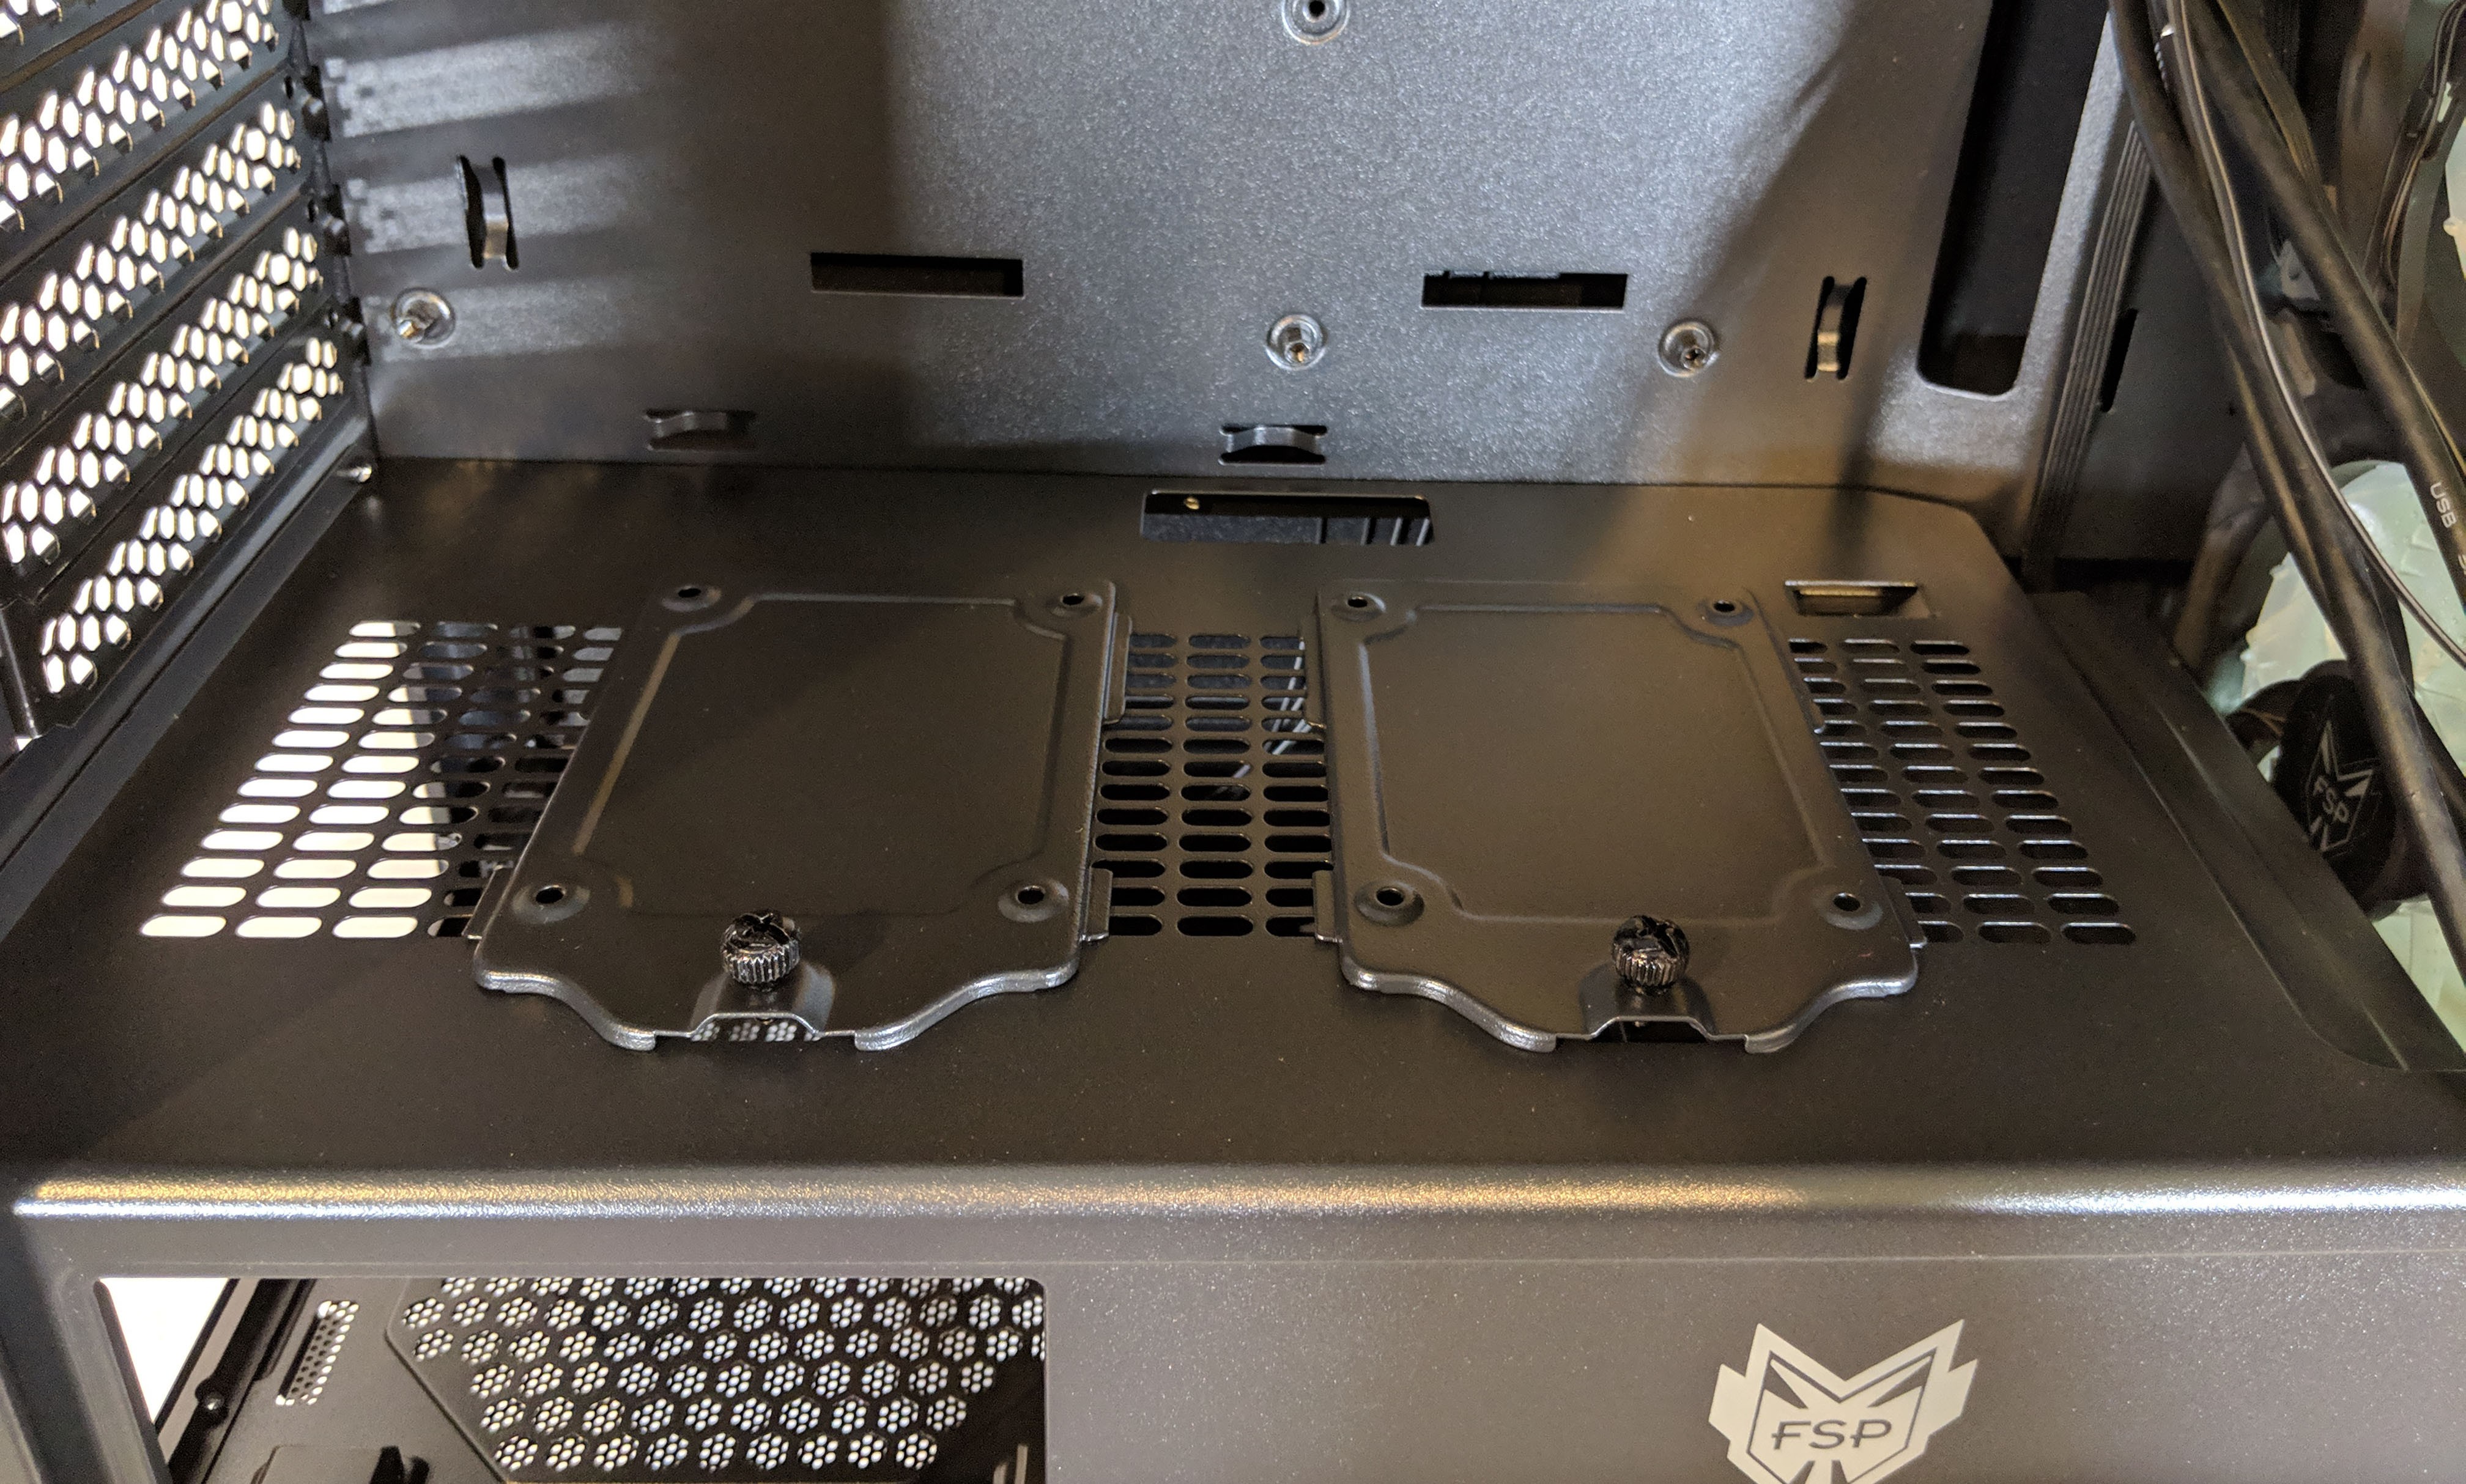
The PSU shroud has a nice little view port for the PSU which is something we’ve never encountered before. Personally, I think it’s a nice touch. There are some cool looking power supplies out there and almost any modern case completely 100% hides them.
On top of the PSU shroud is where you’ll find your mounts for securing a 2.5″ SSD. To mount, simply remove the thumb screw, screw on the SSD on the top using the provided hardware, and fasten it back into place using the same thumb screw.
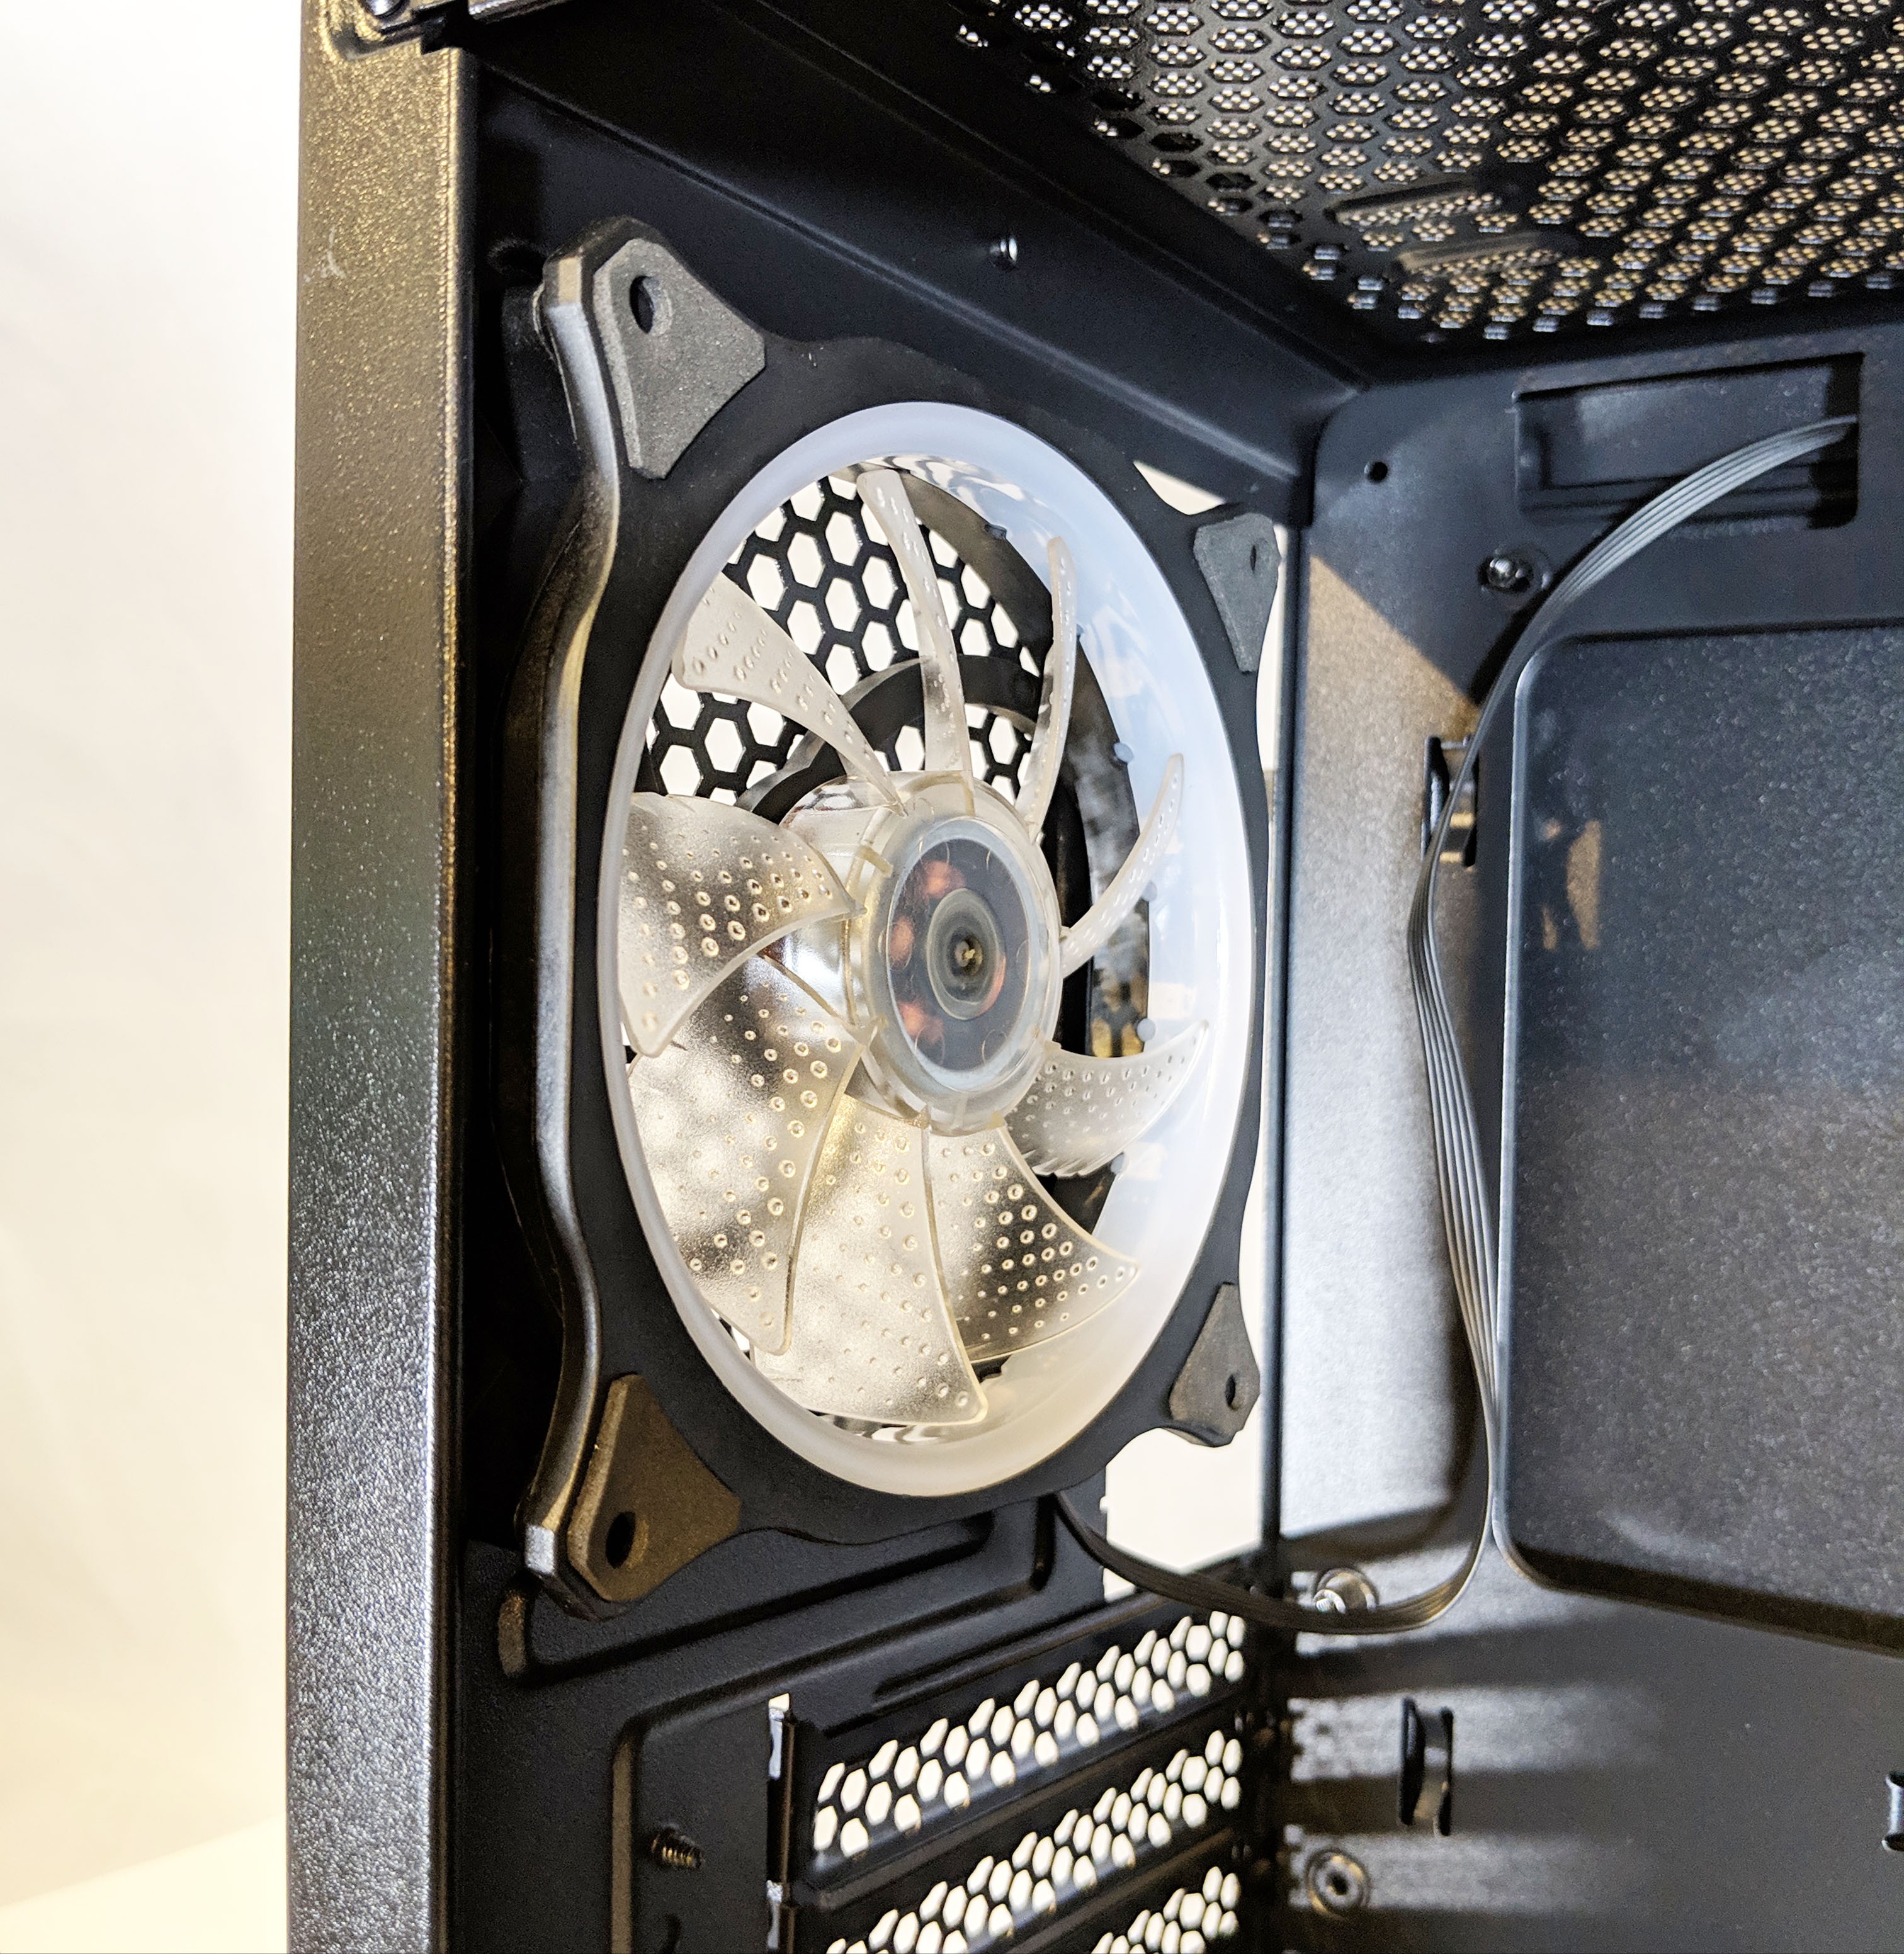
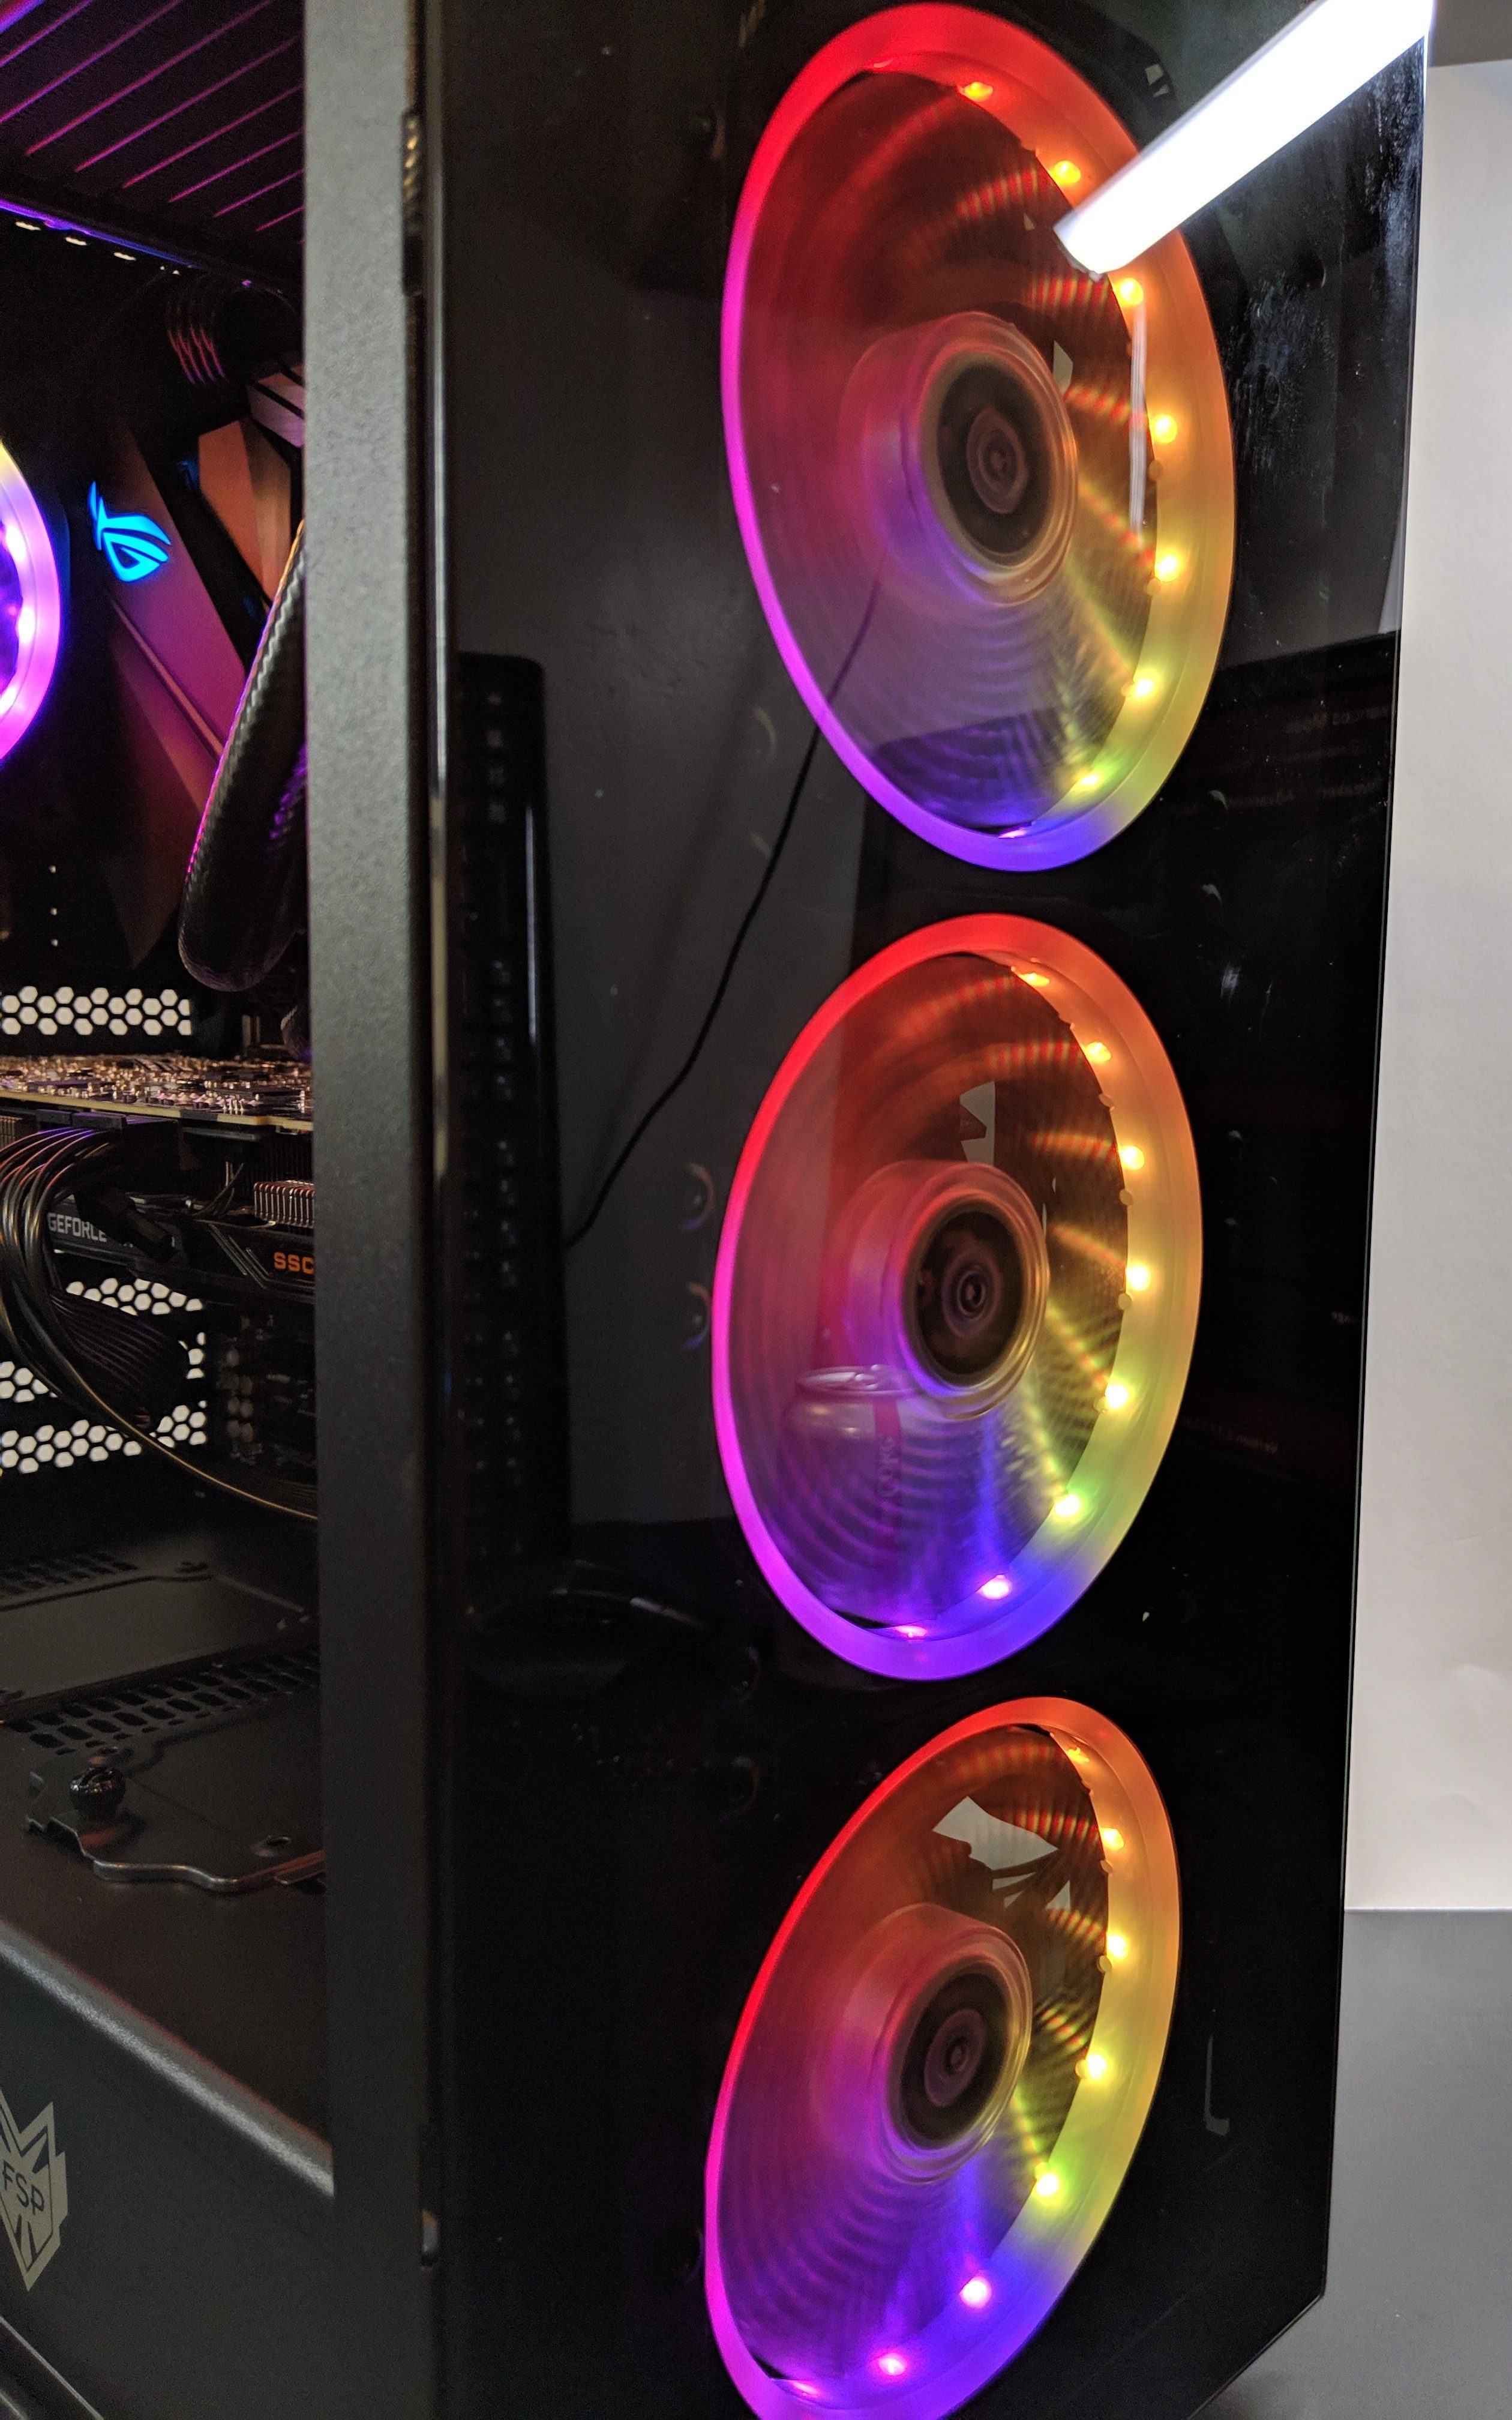
The four included RGB fans come preinstalled at the front and rear of the case. There are no reasons to remove them unless you have specific cooling requirements.
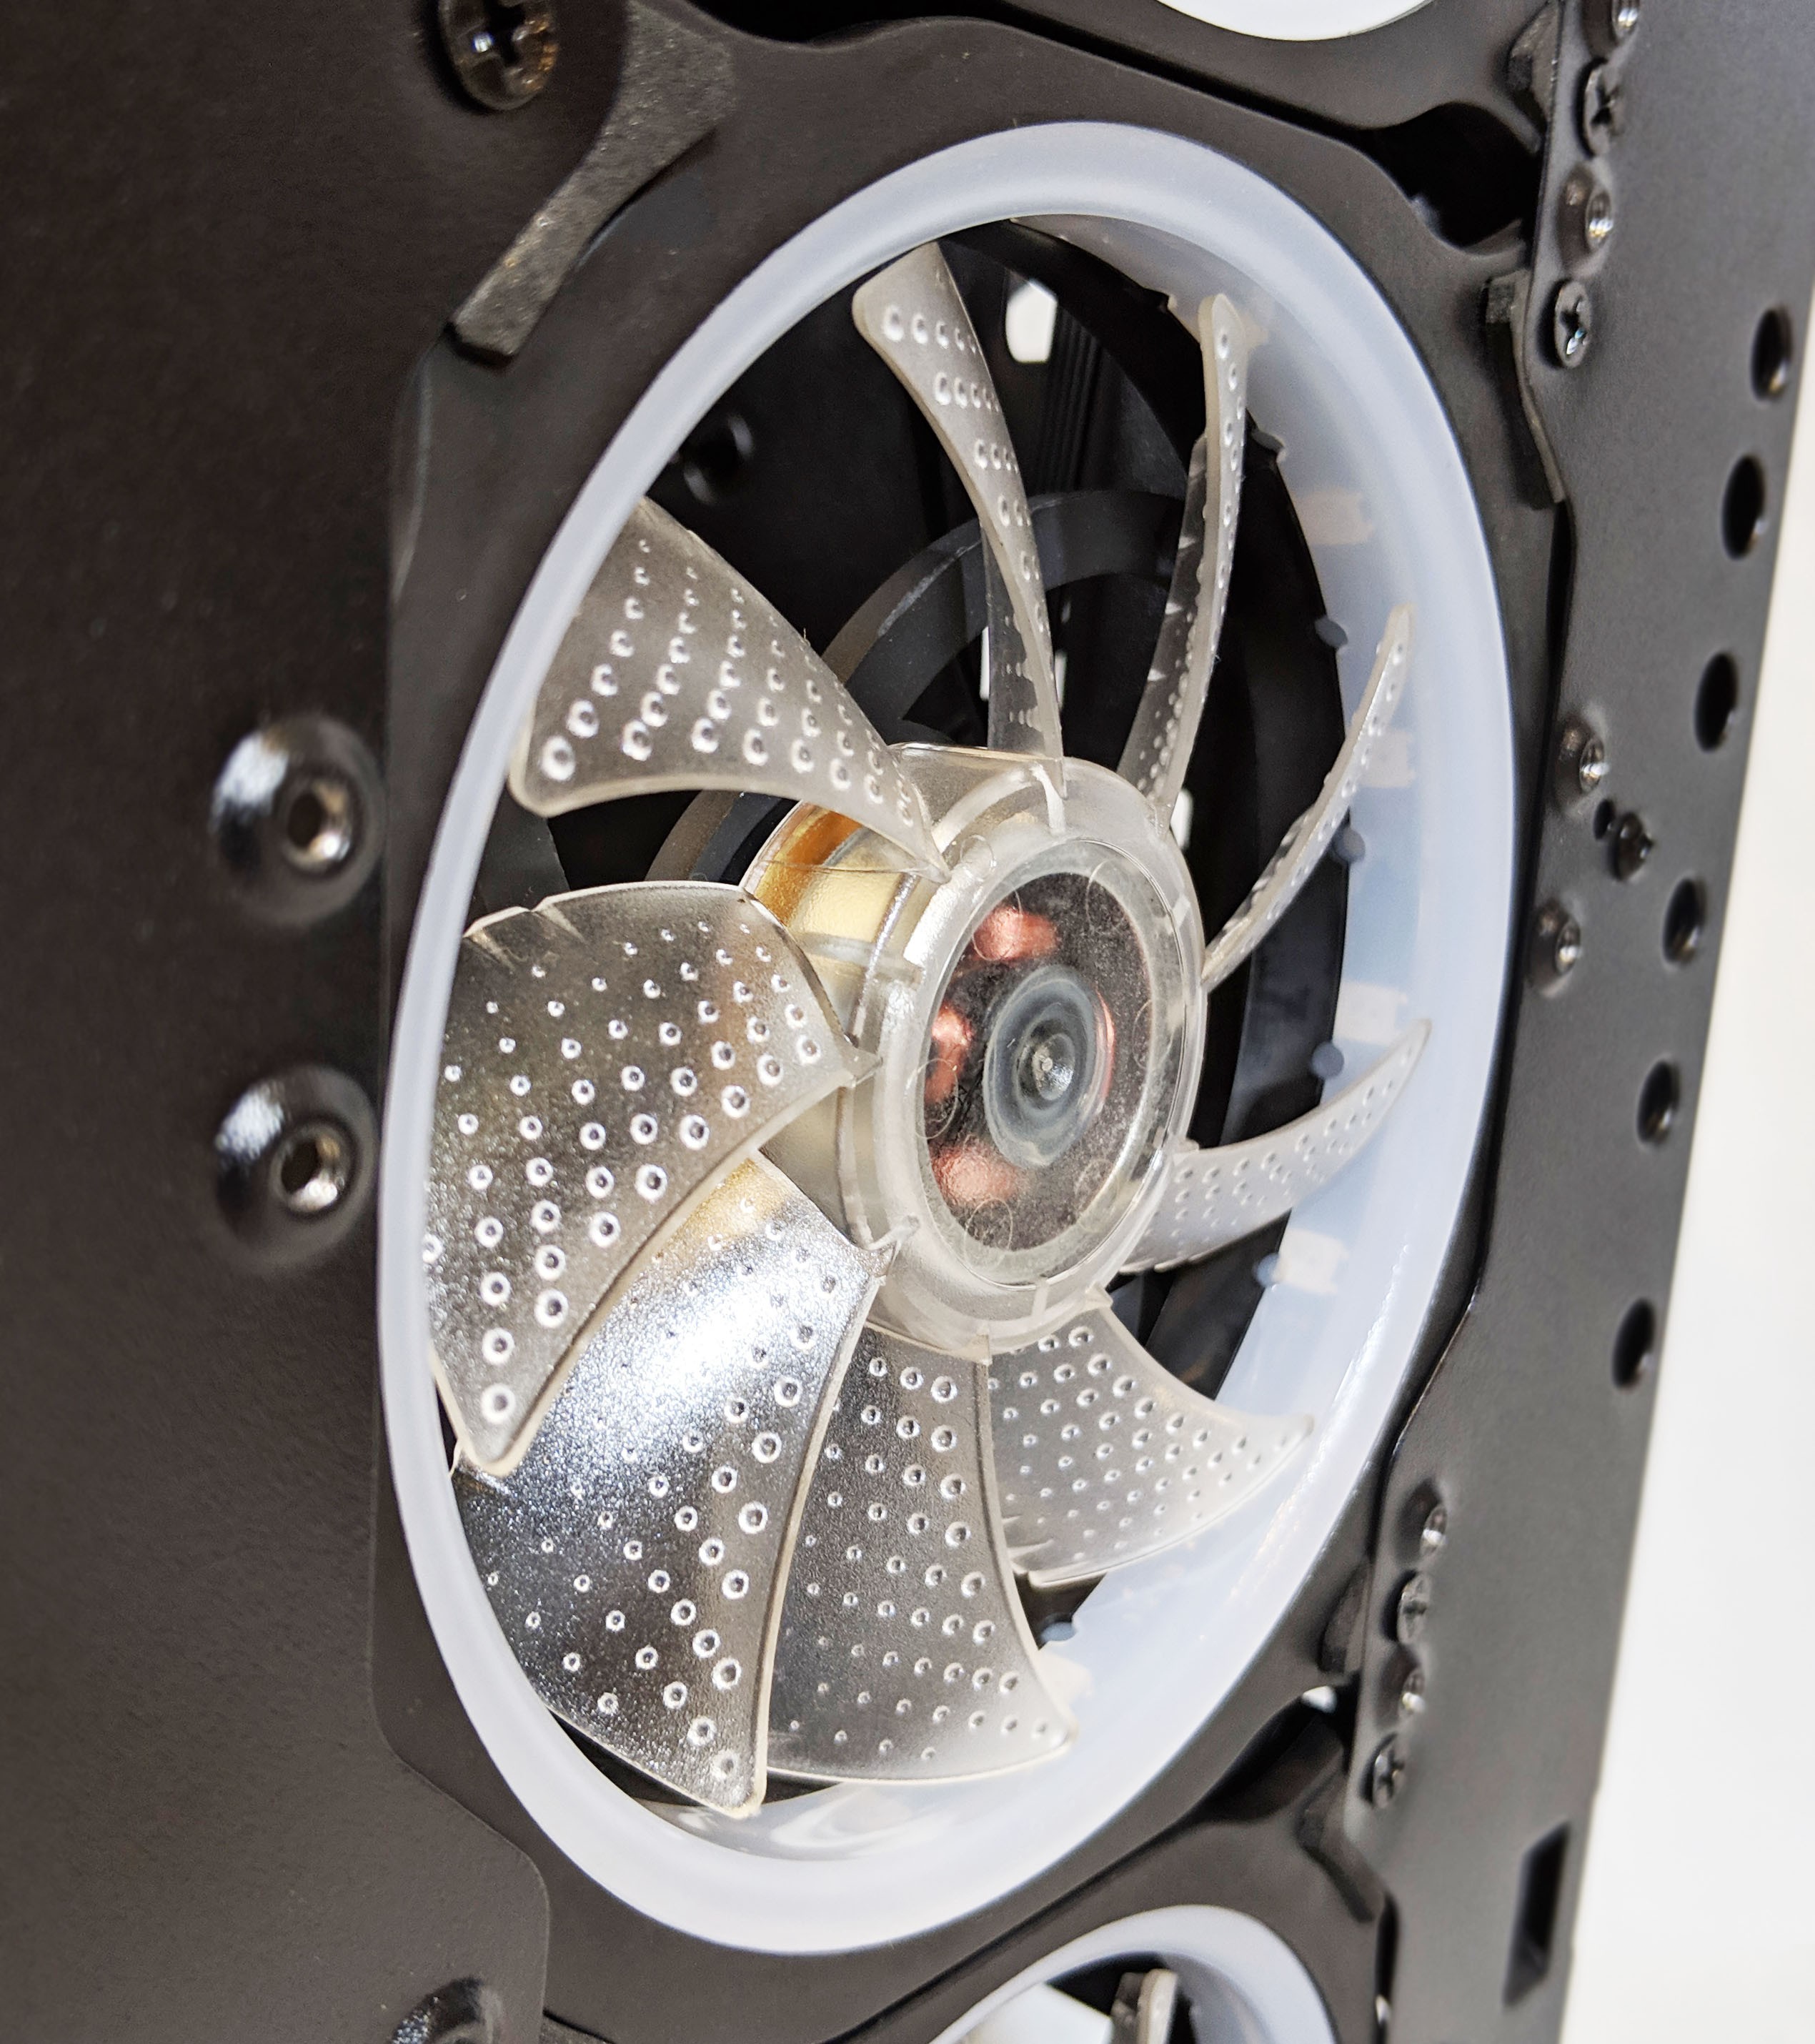
The fans appear to be pretty high quality overall, however, we were unable to determine an exact model number or specifications. From what we can tell, the 120mm fans feature addressable RGB lighting which is emitted from the outer ring into the center of the fan through the semi-transparent blades. Each fan is equipped with rubber mounts which isolate the fan from the case cutting down in vibration and resonate noise.
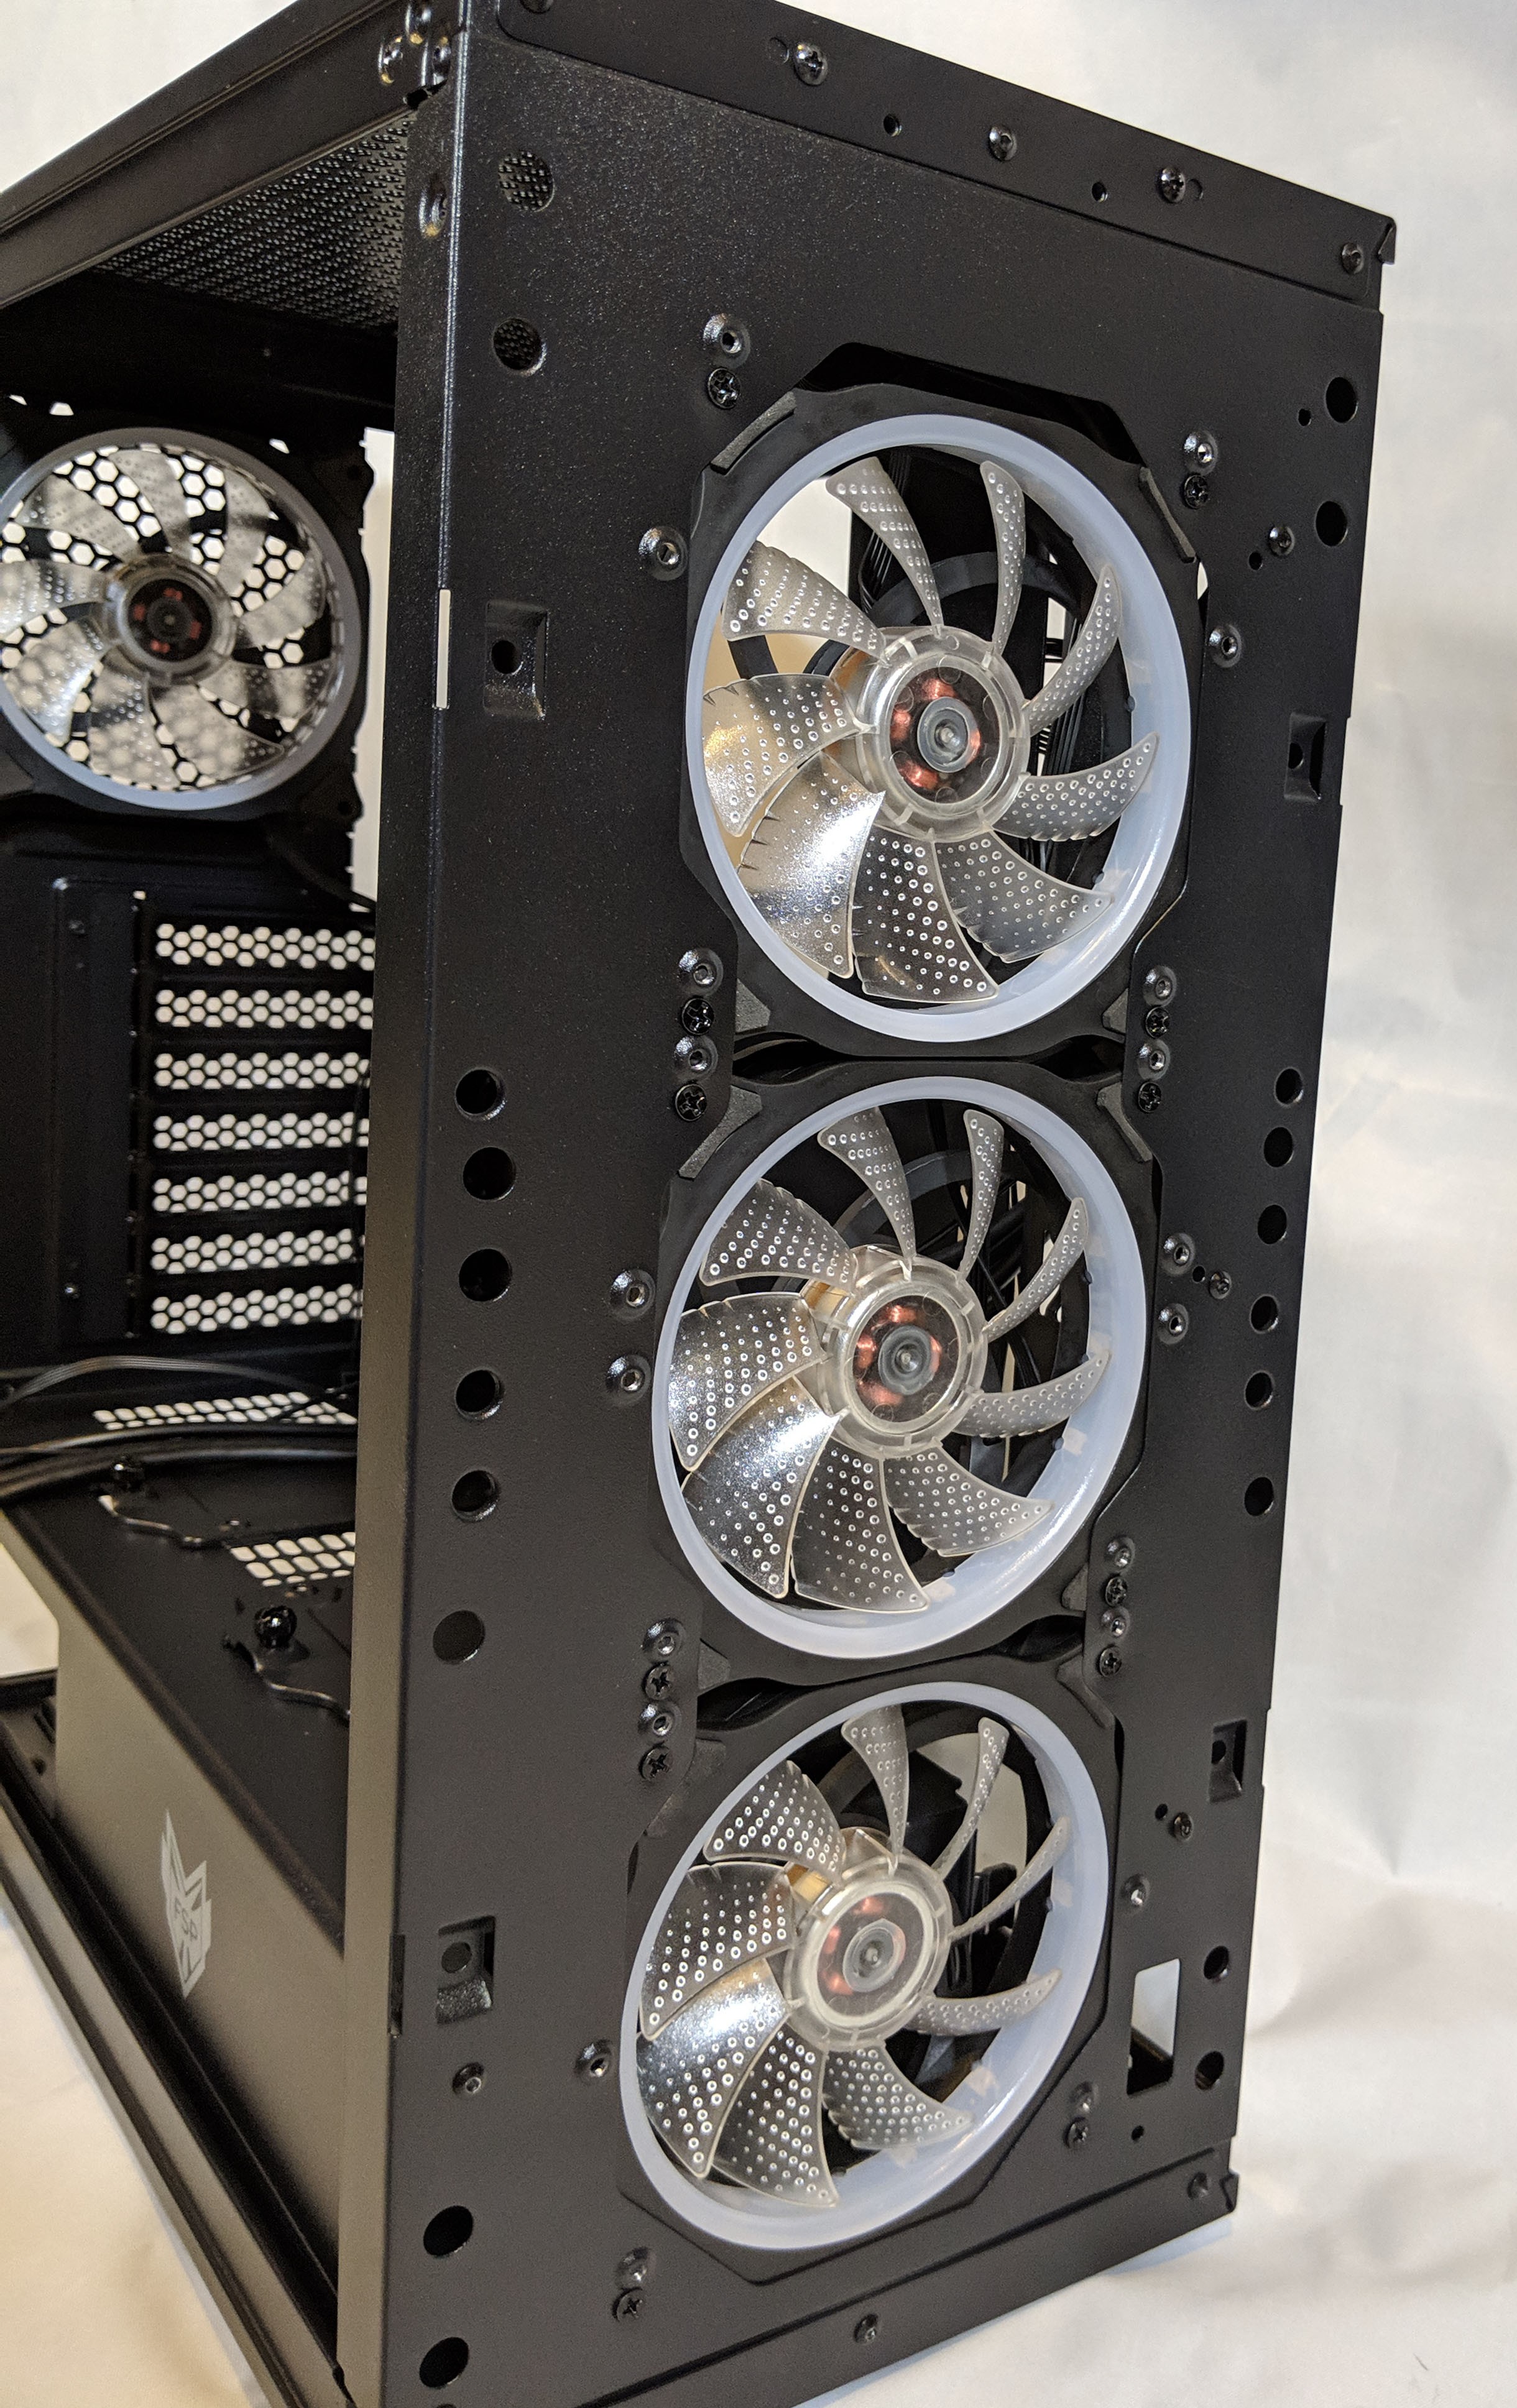
The four fans come out of the box already connected to the RGB controller on the back of the motherboard tray. We removed the glass front panel to get a better look at the three fans. The front panel removes simply by removing three thumb screws on the reverse side. Take caution with the panel that you don’t bang its corners against anything once its removed… it is tempered glass after all and can shatter pretty easily if mistreated.

The top of the inside of the case has the option to mount two 120mm or 140mm fans. Or an AIO cooler which is probably what we’ll end up doing as to not cover up the rear exhaust RGB fan.

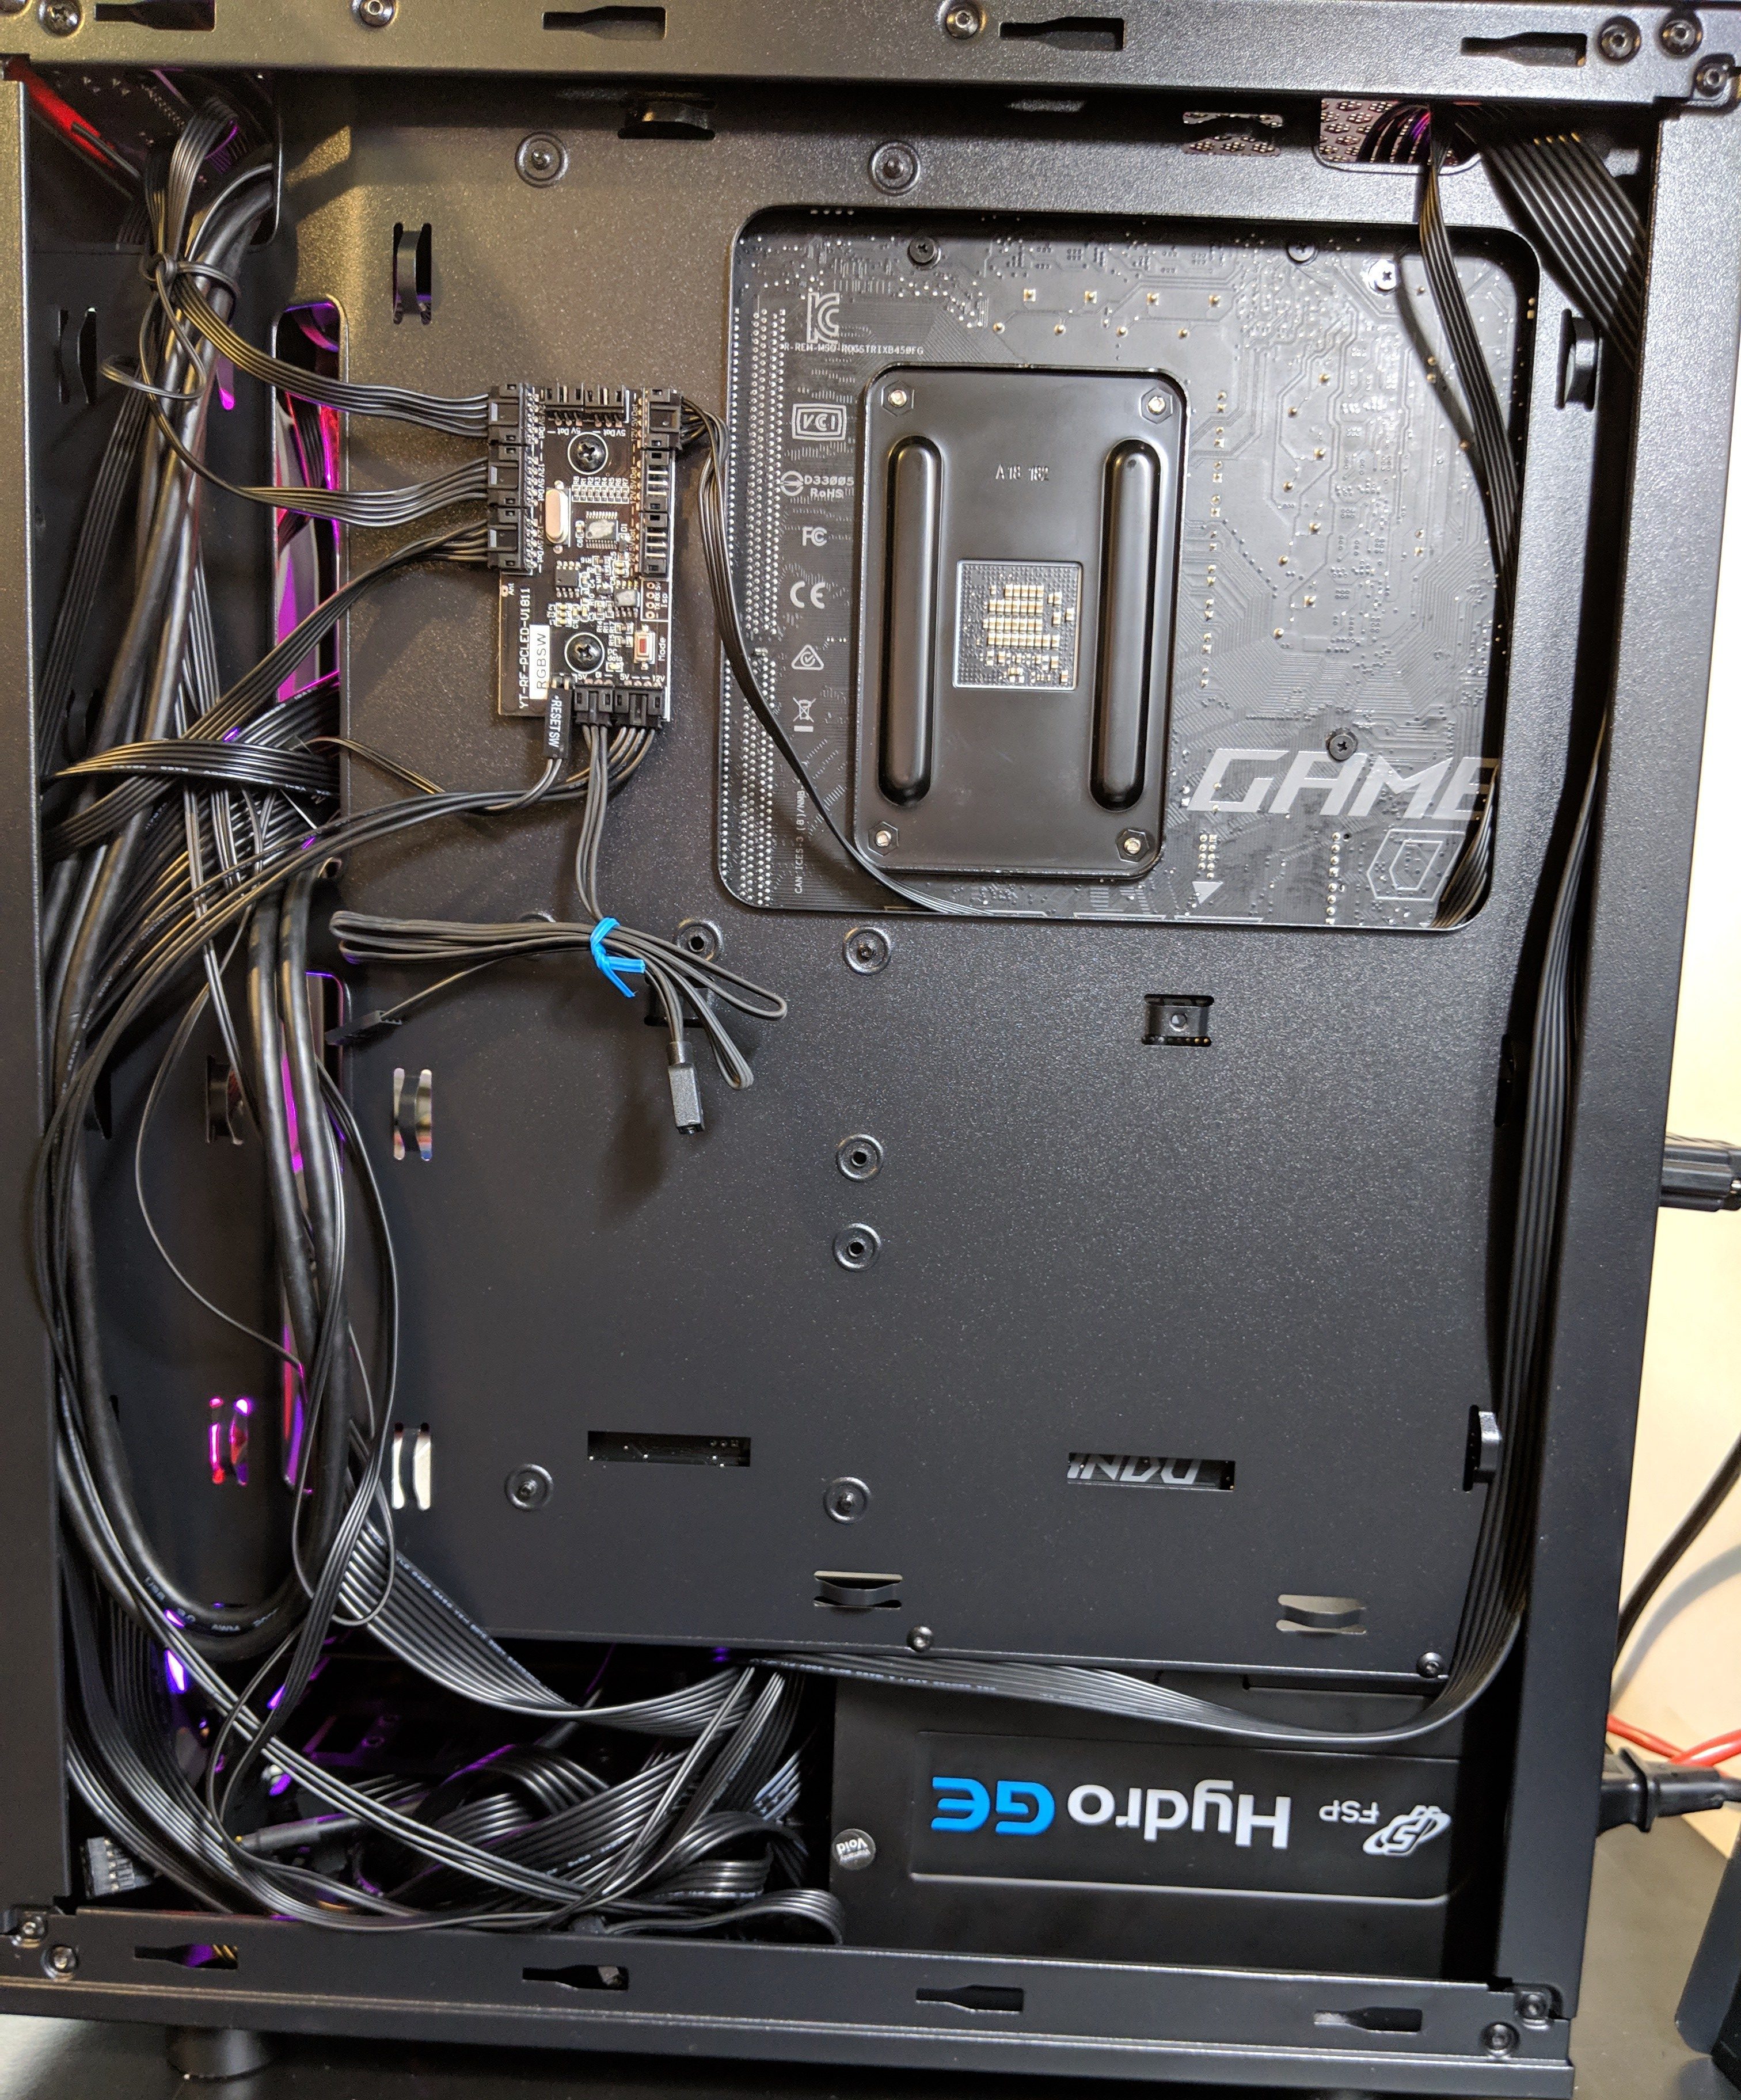
Next, let’s remove the back panel and take a look see. Similar to the front panel, (or almost any case for that matter) the back side panel comes off by removing the two rear thumb screws and sliding it back.
The first thing you’ll likely notice is the RGB controller located to the right of the reverse-side CPU access port. The RGB controller supplies both power and the RGBs to each fan. I like this method for the sake of cutting down in wiring, however the connectors are proprietary so you won’t be able to use it with any extra universal RGB fans you might have laying around.
Located at the bottom left is where you’ll mount your 3.5″ hard drives, and to the left of that is where your PSU will go.


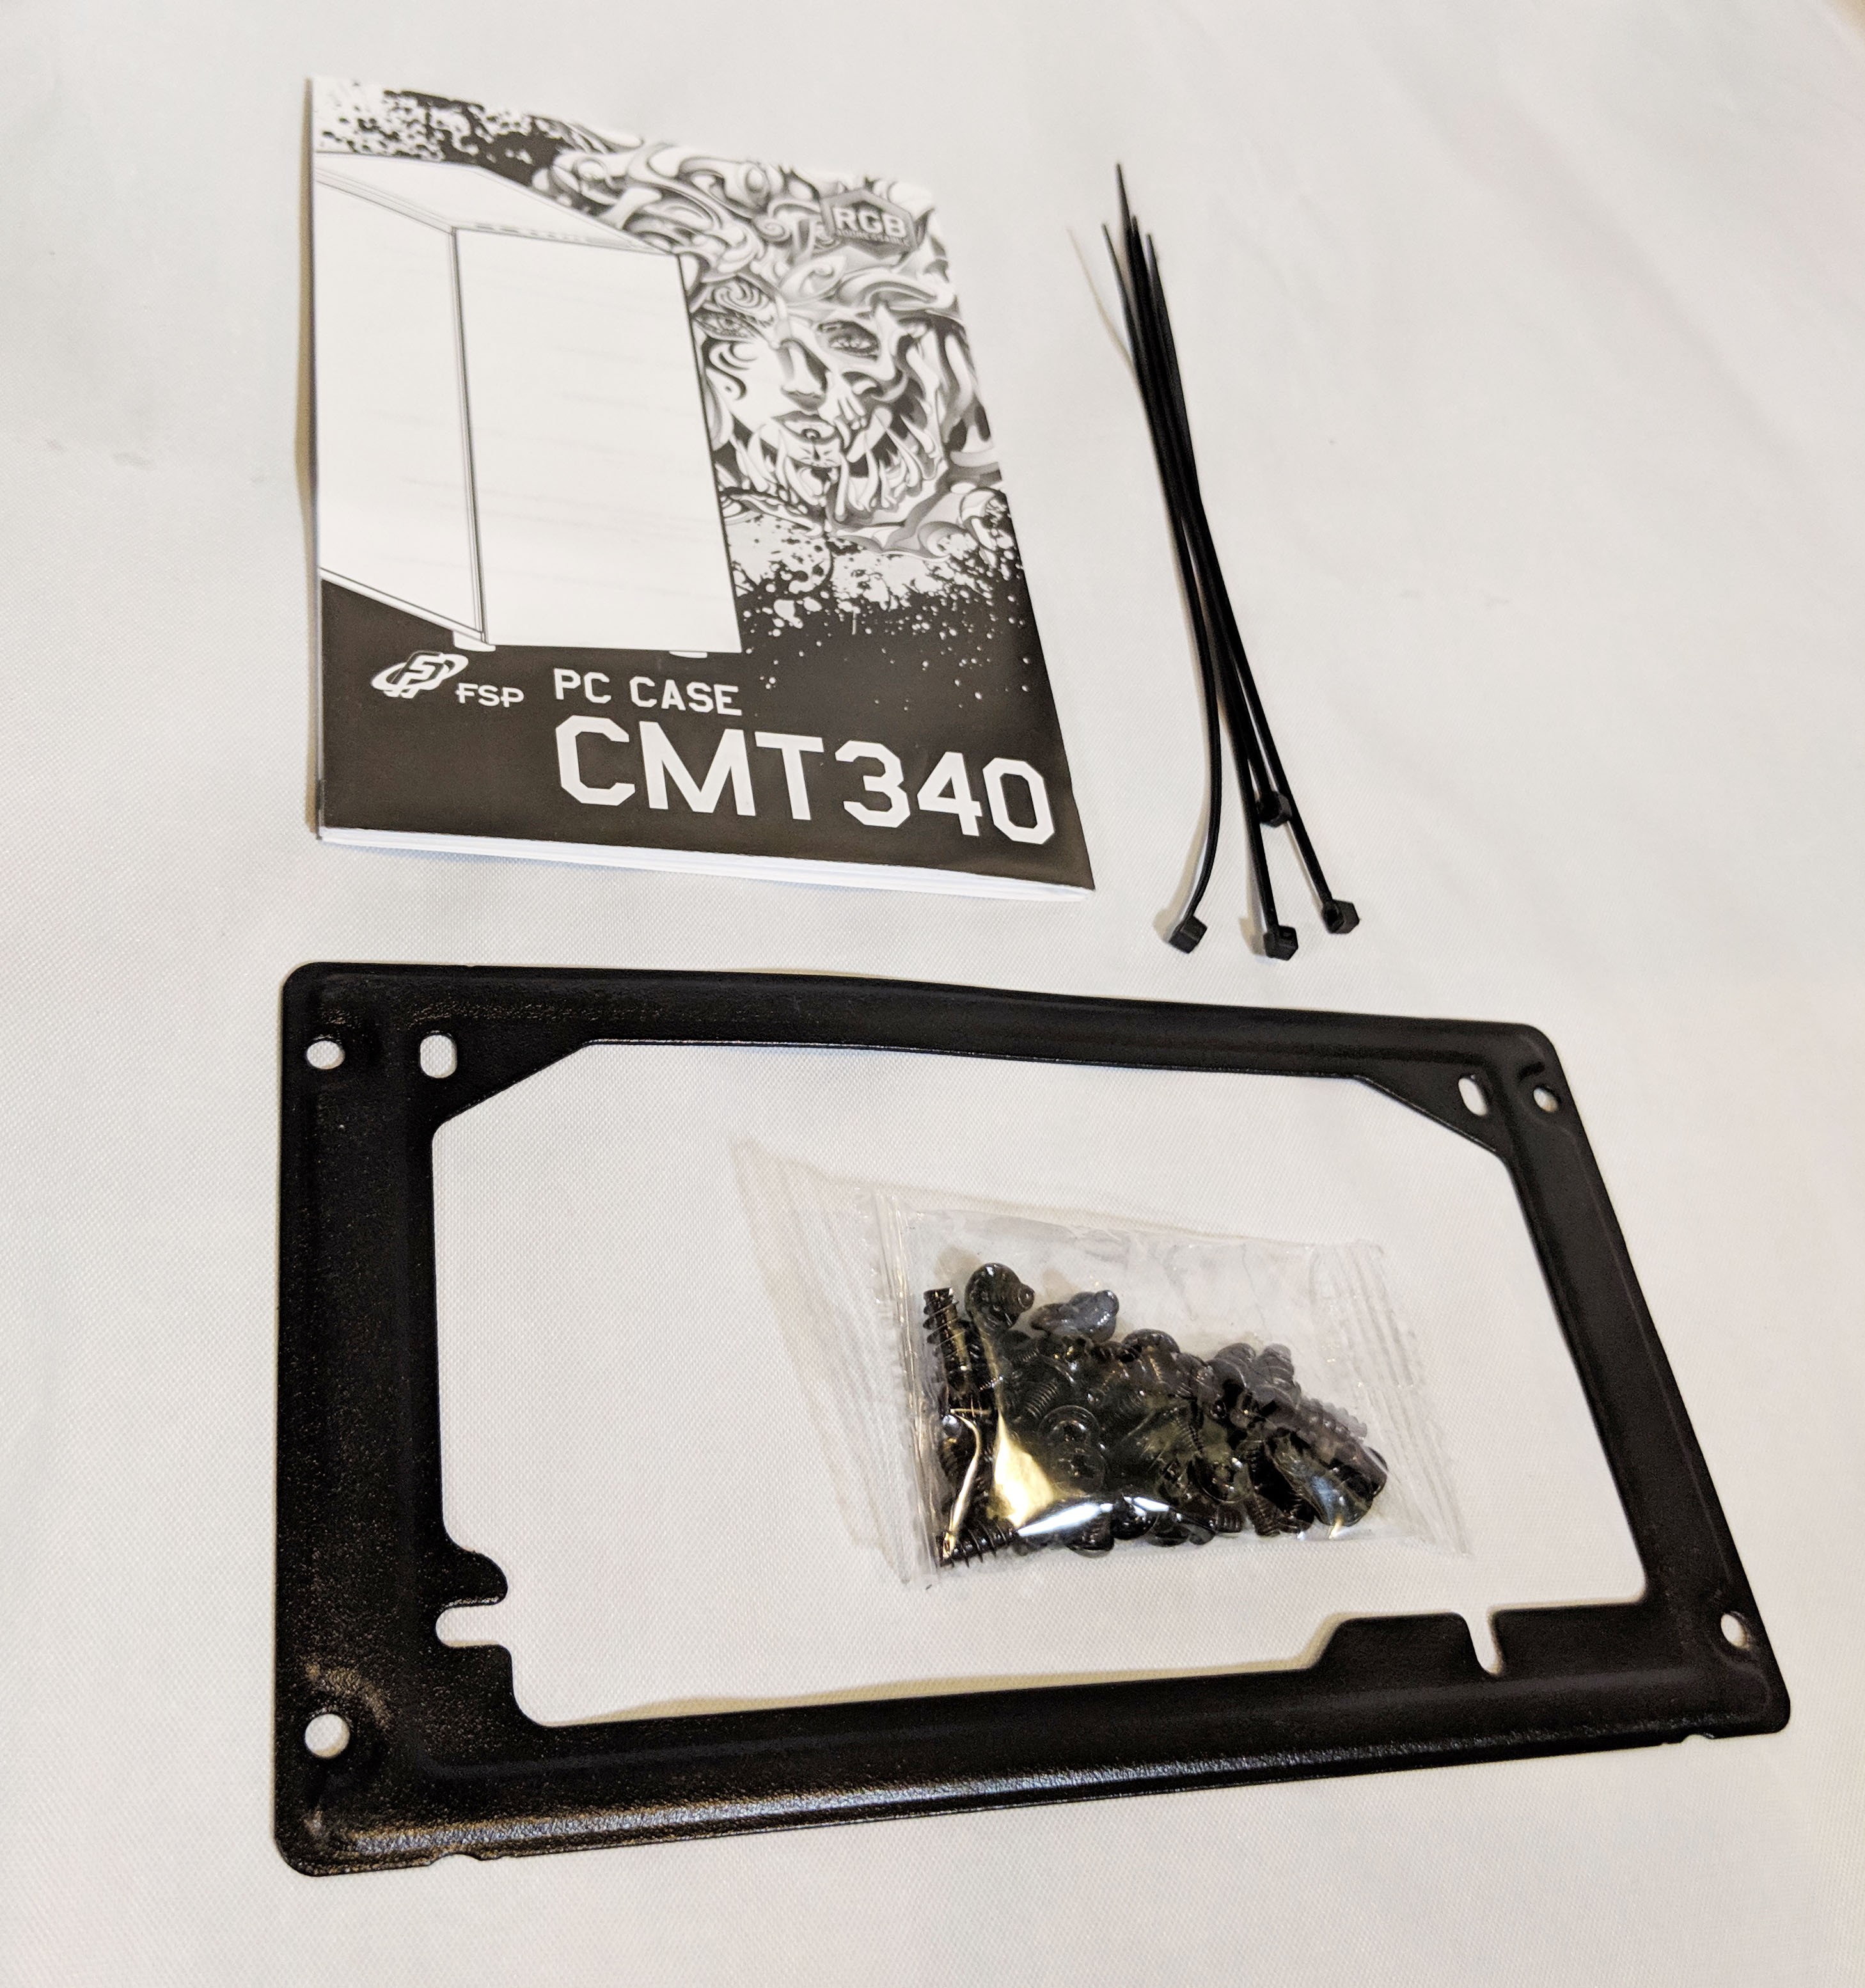
Included Items
The “bag of goodies” we mentioned earlier contains all the necessary hardware you’ll need to mount your components into the case. This includes the PSU mount bracket, a bunch of various screws, and some user guides and paperwork.
Hardware Installation
Next, let’s throw some hardware at the FSP CMT340 and see how she handles it! For this build we’ll use the following components:
- Processor: AMD Ryzen 2600X
- CPU Cooler: Corsair Hydro Series H60
- Memory: 8GB Corsair Dominator Pro
- Motherboard: ASUS ROG Strix B450-F Gaming
- Power Supply: FSP Hydro GE Series 650W
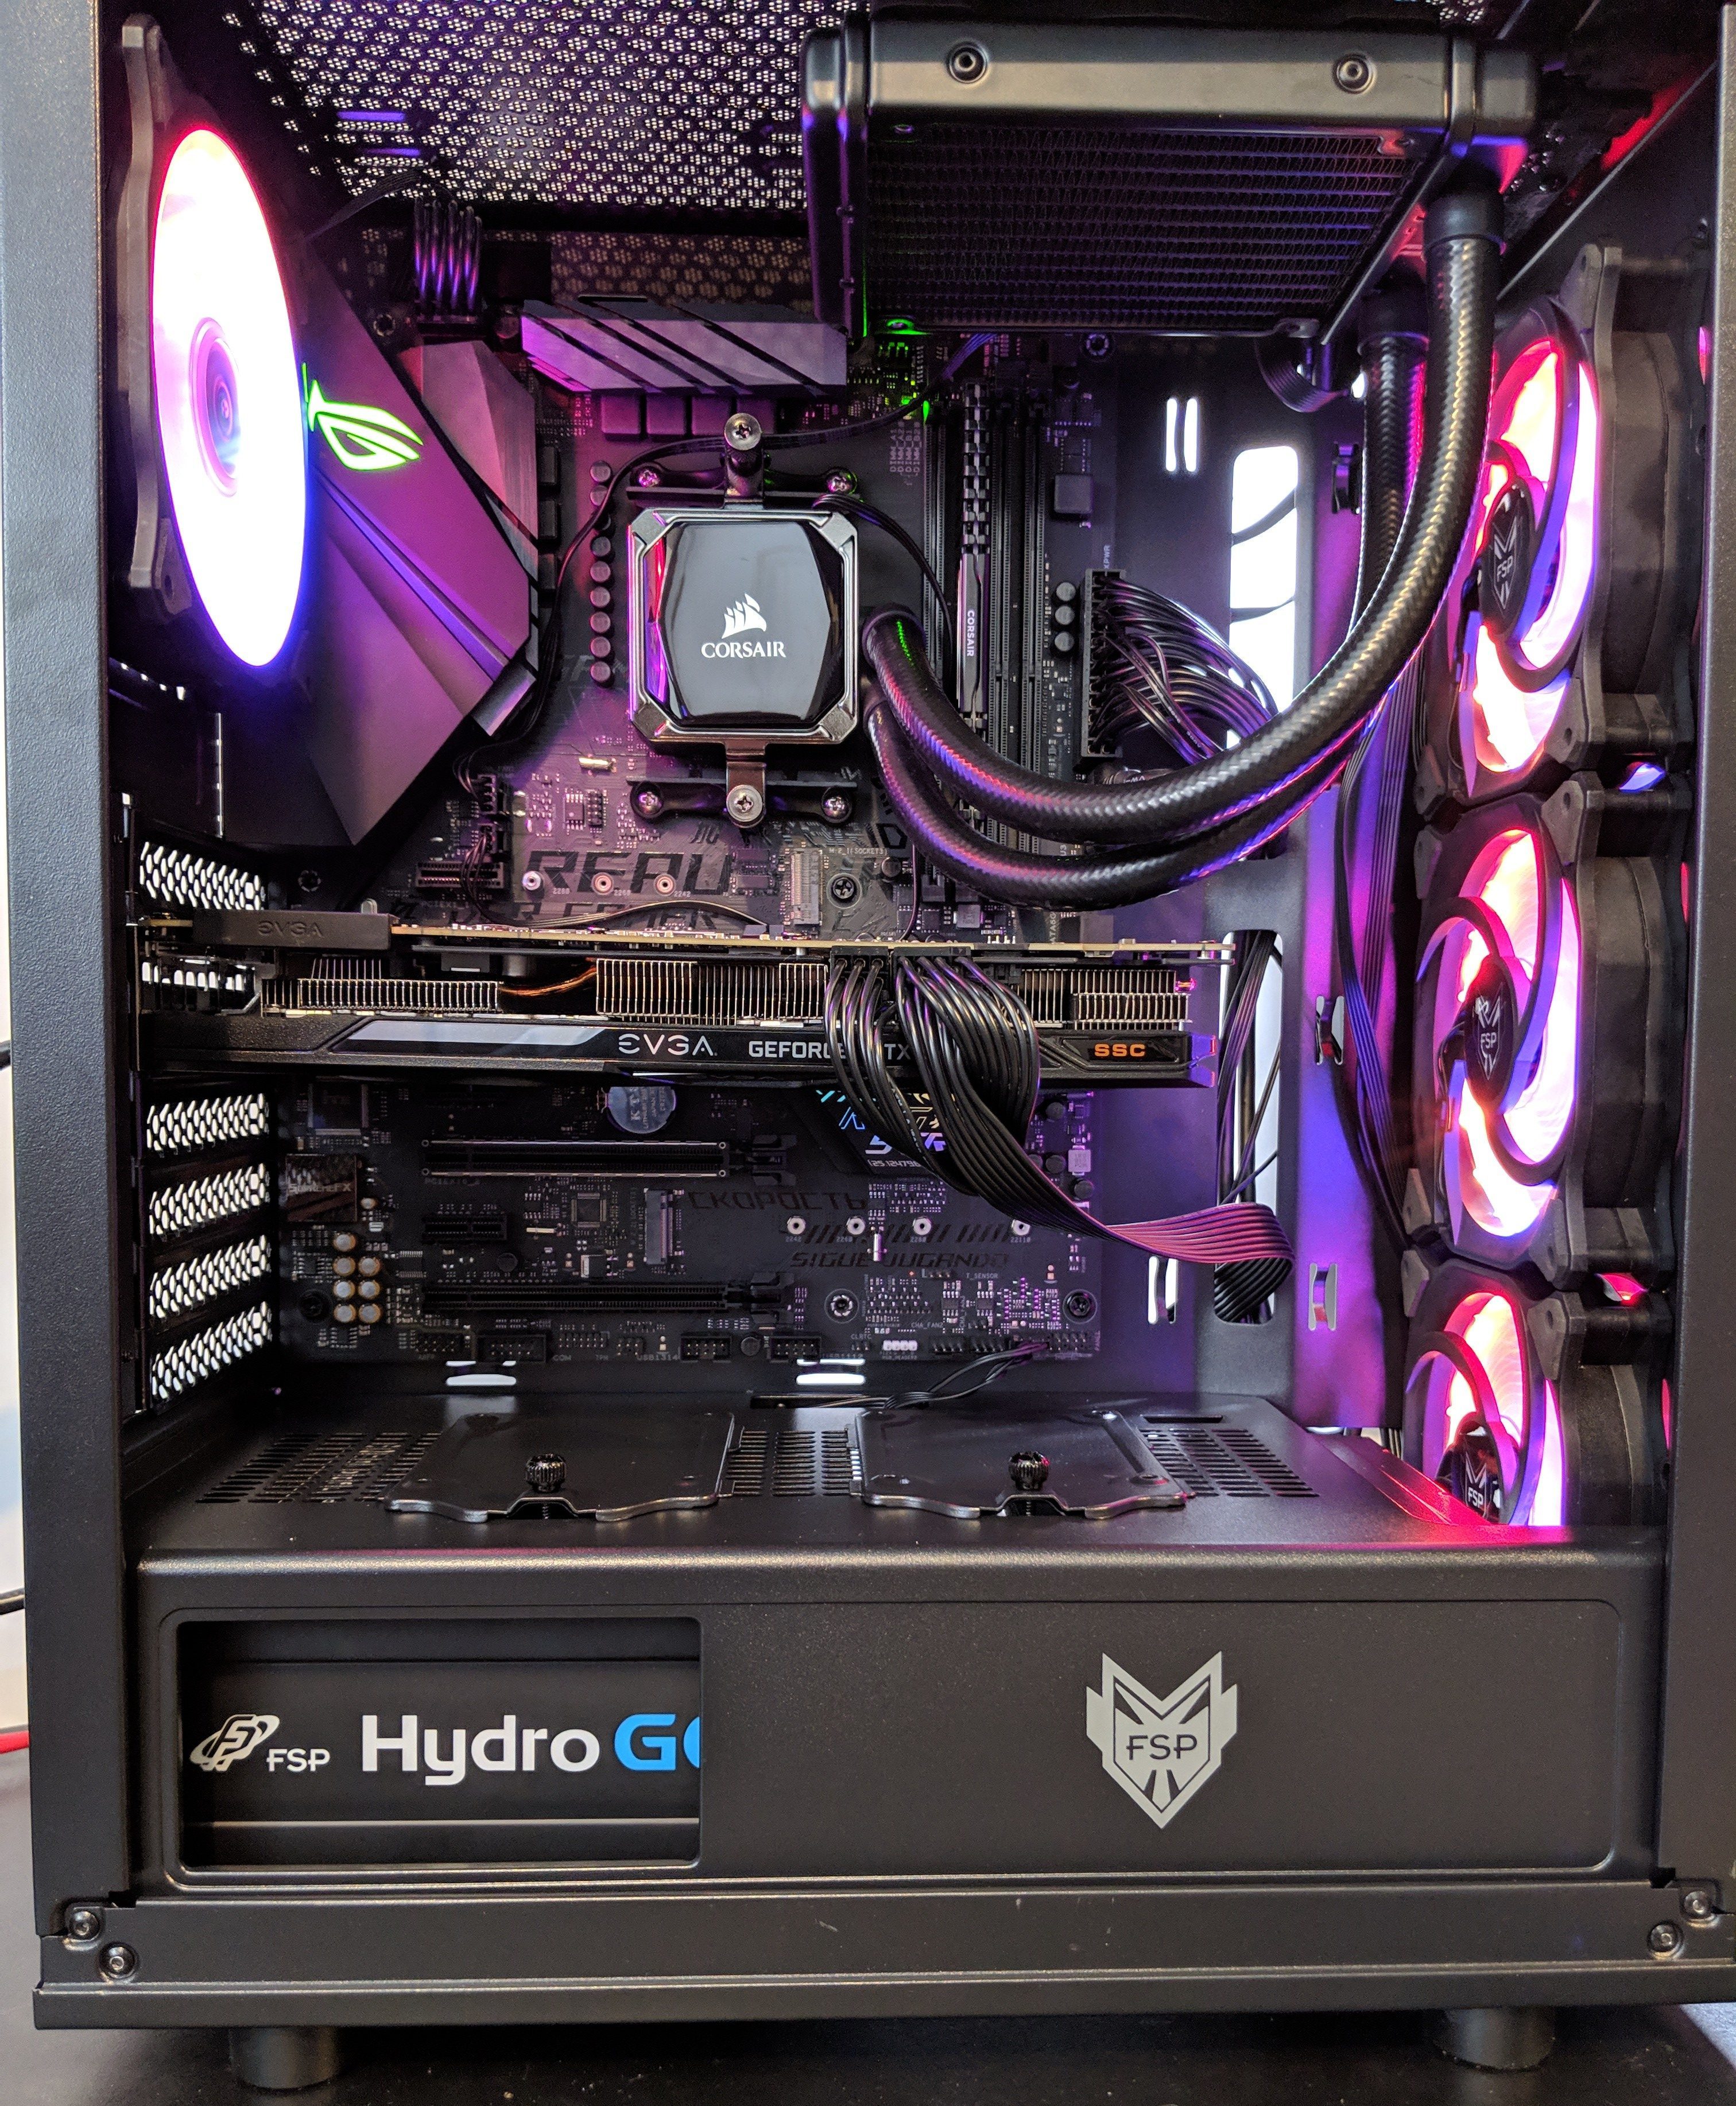
Installing hardware into the case is simple especially thanks to the open layout and convenient cable ports spread around the edges of the motherboard tray. At no point during the install did feel like I was limited or fighting for space. When installing the motherboard, I noticed that all necessary standoffs came pre-installed for a standard ATX motherboard so need to install any yourself.
Mounting the PSU is worth mentioning as it requires an extra bracket to be pre-installed before sliding the PSU into place. Overall, it’s a simple albeit required step which can be pretty much summed up in the image below:
Once the bracket is installed, slide the unit into the case and tighten it down with four more screws around the perimeter. It should be noted however, that once the PSU is installed, it is VERY difficult to access the modular cable ports. I recommend first connecting the modular cables you’ll need before completely mounting it.
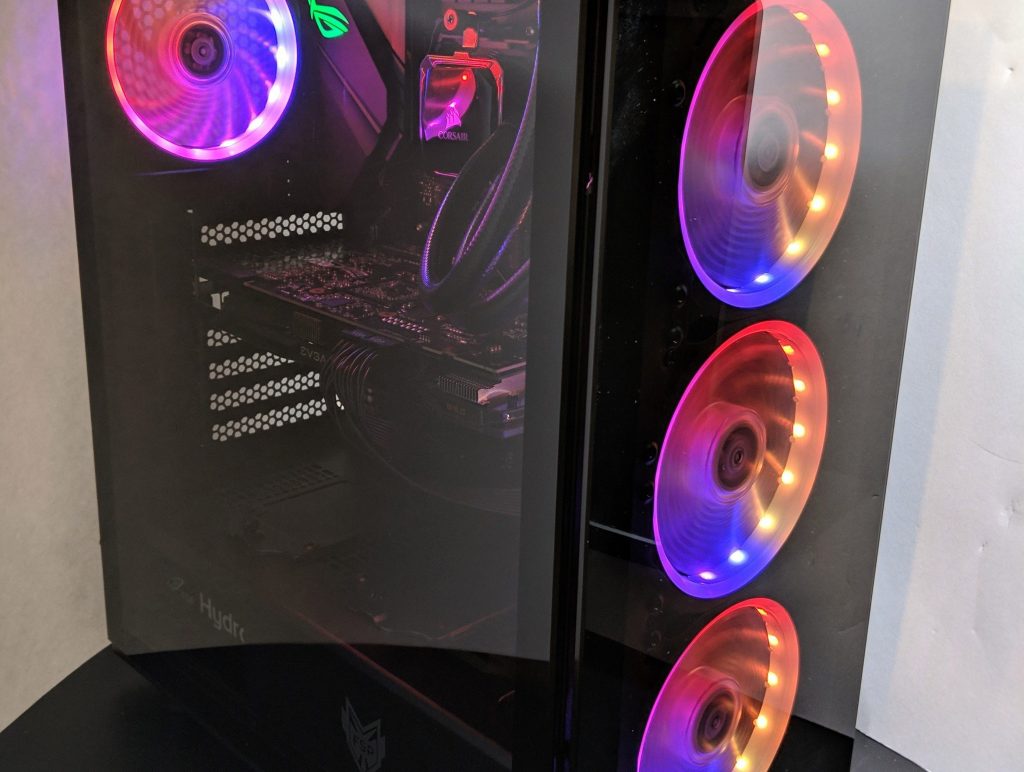
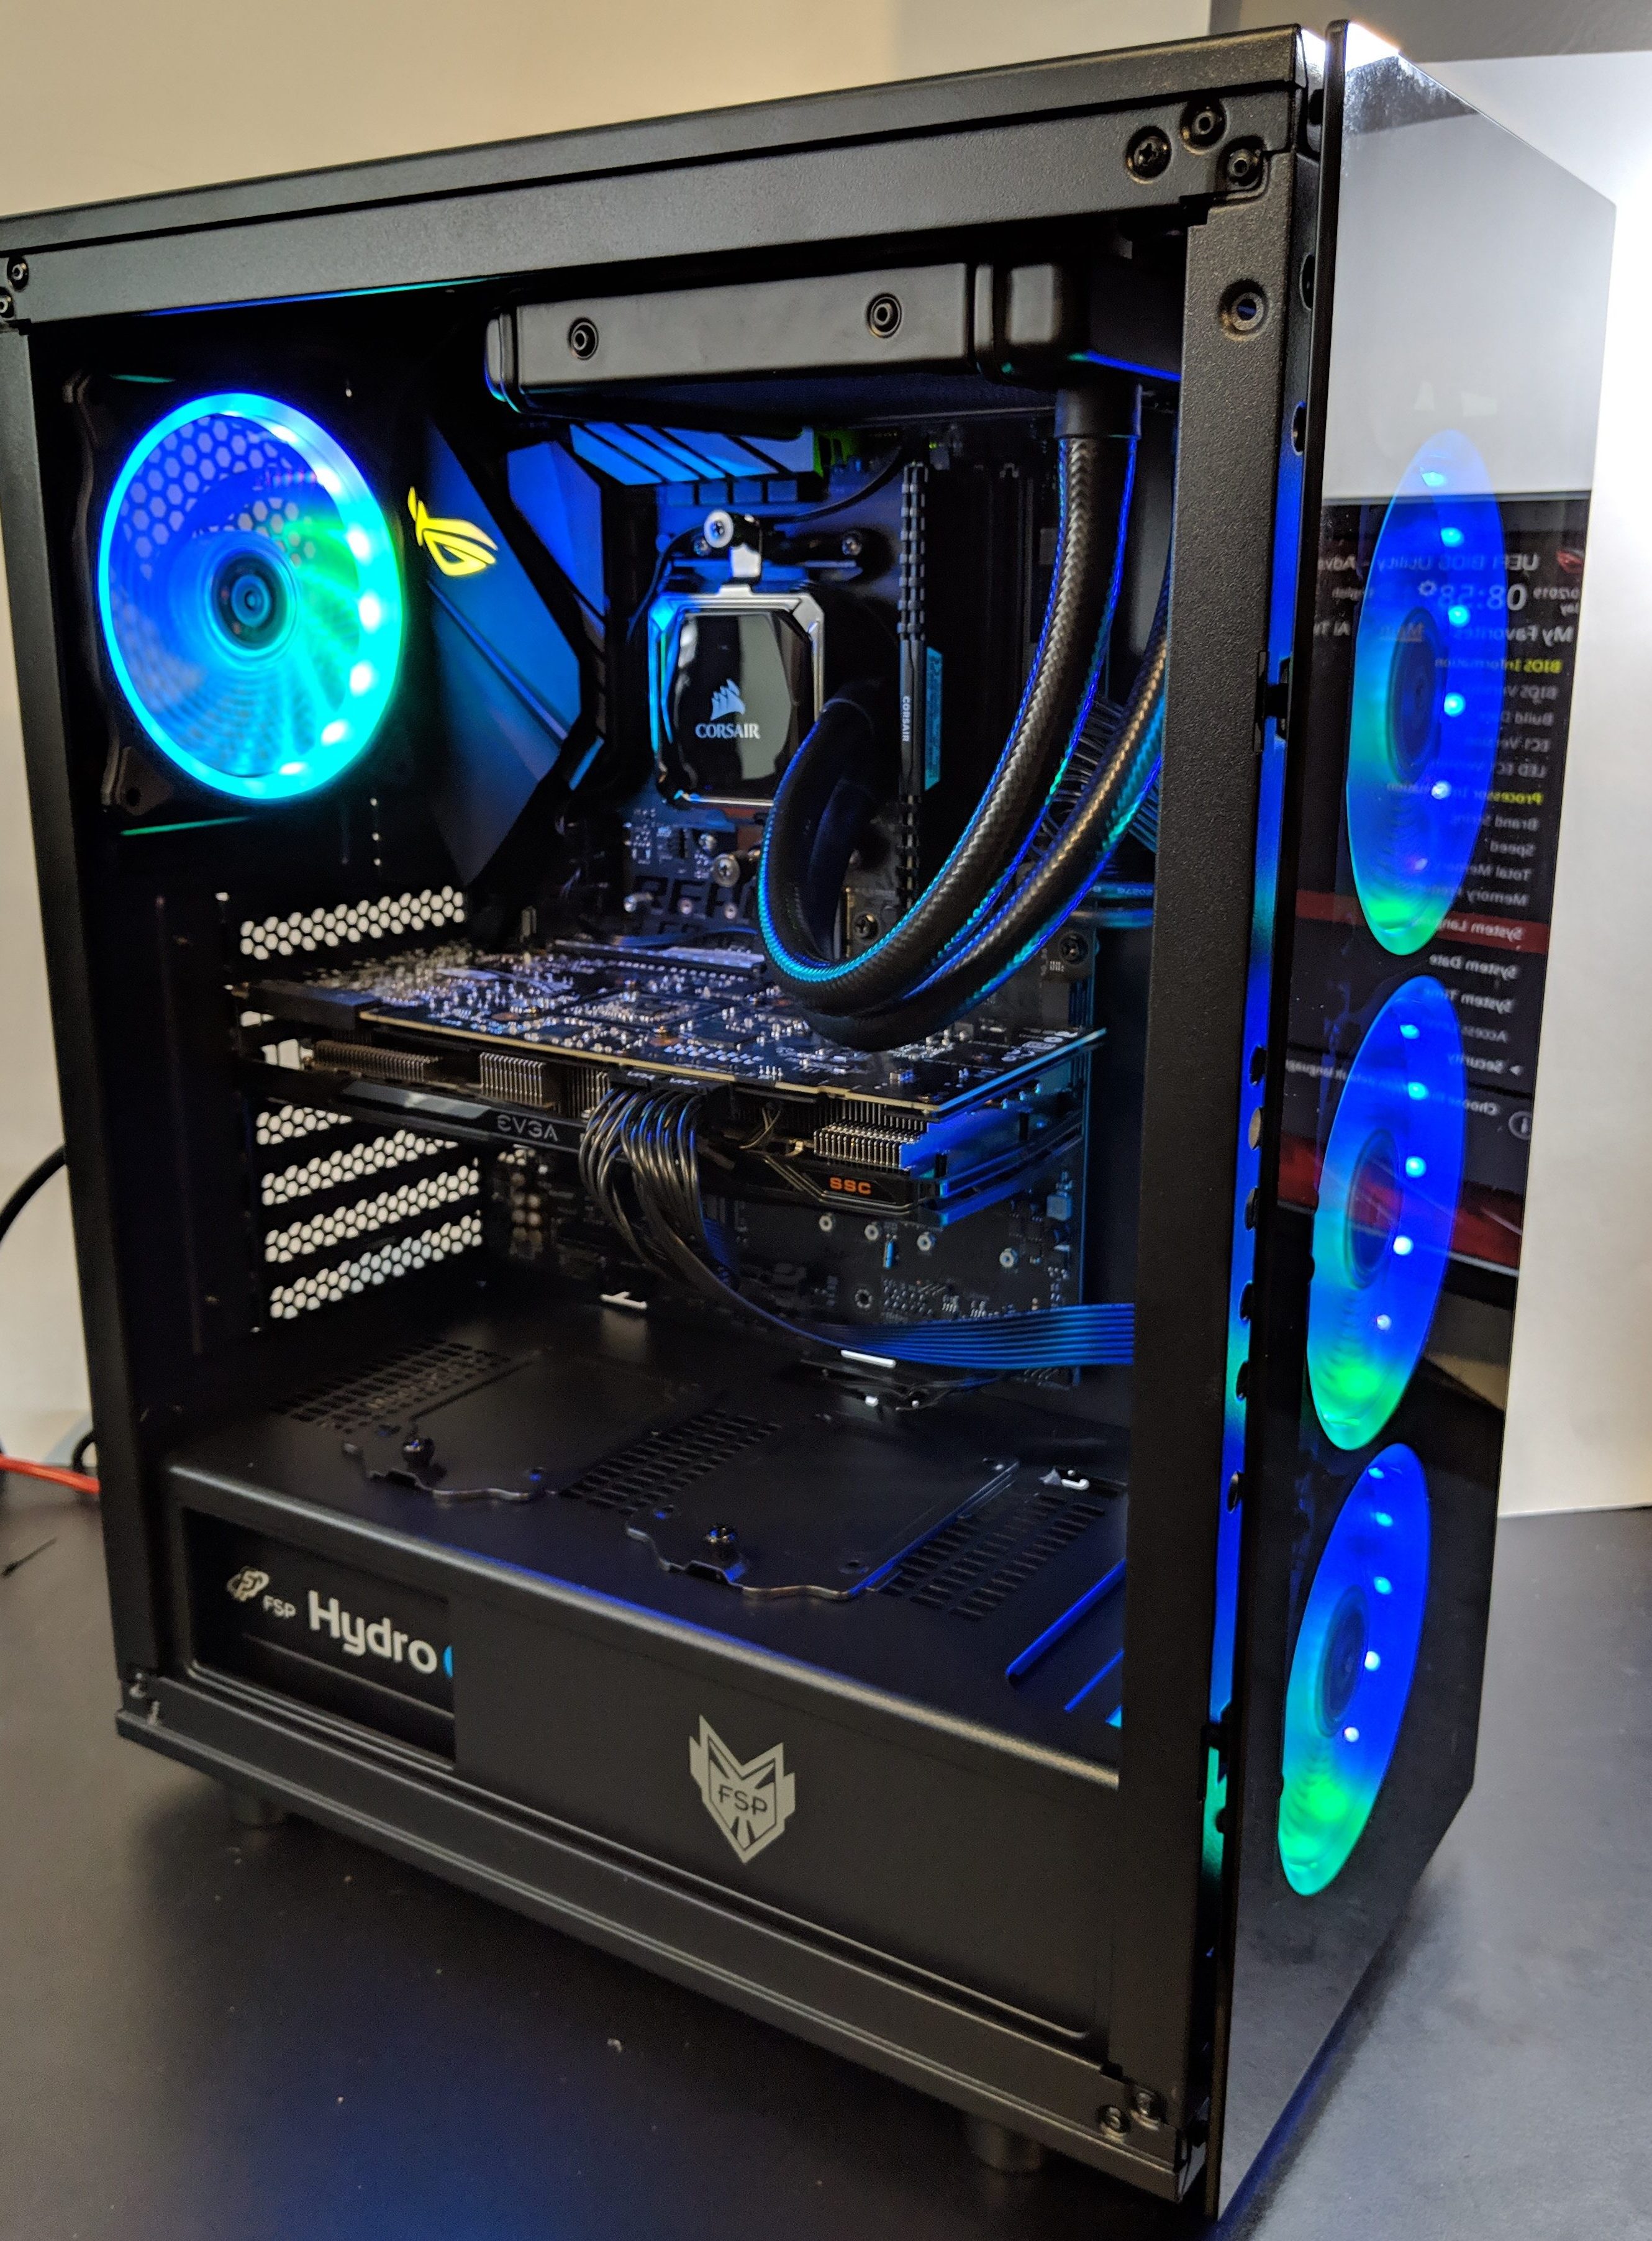
With all the hardware installed and the system powered on, we were immediately greeted with a brilliant display of RGB lights! The LED lights surrounding each fan blade are quite bright and easily shine through the tinted tempered glass panels. We’ll let the rest of the completed build images do the talking:


Final thoughts and Scoring
The FSP CMT340 turned out to be quite the little pocket rocket bursting with features all bundled into a clean and modern shell. On of my favorite features is its size. For a mid tower, it’s tiny and I absolutely love it. It completely removes all the wasted space cases from yesterday required in the days of 5.25″ drive options.
While space is sacrificed features definitely are not. The tiny case can easily sport up to seven 120mm fans with tons of liquid cooling options. Graphics cards up to 350mm and a CPU coolers up to 160mm are supported. You don’t need to feel like you’ll have any size constraints as even the Cooler Master Wraith Ripper will fit… which is the largest air cooler I think we’ve ever reviewed.
- Build Quality: 9.8/10 – The case is well built. At no point during the entire review process did I feel like there was anything that felt cheaply made. Starting with the packaging, all the way to powering on the system, the FSP340 emitted nothing but quality vibes.
- Appearance: 9.9/10 – While this category is highly subjective, I personally think that the case’s appearance is definitely one of its strong suits. Both case and fans really mesh well together to create a head turning display of clean RGB elegance.
- Functionality: 9.7/10 – Its small frame will have no issues keeping up with larger cases when it comes to component support. If you plan on running a custom loop, you may find things a bit tight and finding a pump and reservoir location might be a challenge.
- Performance: 9.3/10 – Keeping your components cool should be a non-issue for the CMT340. My only gripe in this category is the lack of dust filtration at the front of the case. Granted, including filters at the front would have blocked some RGB-ness coming from the front.
- Value: 9.5/10 – Currently, the case can be purchased for $99.99 USD which is probably a bit under what you’d expect for a case with full RGB support and tempered glass. Good deal overall!
Product Page: https://www.fspgroupusa.com/ecommerce/case-case-fans/pc-cases/cmt340.html
Pruchase: CMT340 Case on Amazon
EDIT: FSP is aware of the sticker issue (see above) and is working on a fix!
"...quite the little pocket rocket bursting with features all bundled into a clean and modern shell."FSP CMT340 Case Review