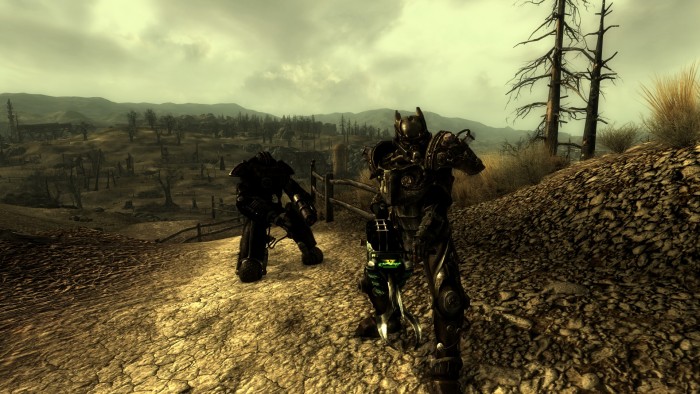
Since Fallout 3 is quite popular even today, we figured it would be useful to make this article. Here’s a list of mods that we consider to be must-haves for any Fallout 3 player. Our goal here is to make the game look better, but more importantly, make the gameplay more challenging and have more variety. For some gameplay videos using these mods, look here.
BE SURE TO READ THE DESCRIPTIONS FOR EVERY MOD, ENABLE ARCHIVE INVALIDATION AFTER INSTALLING THE MODS, READ EVERY PAGE OF THIS ARTICLE, AND BE SURE TO DOWNLOAD EVERY SINGLE MOD IN ORDER TO MINIMIZE ERRORS AND MAXIMIZE AWESOMENESS!
PRO TIP: Pretty much every mod is installed into Fallout 3\Data (e.g., C:\Program Files (x86)\Steam\Steamapps\common\Fallout 3\Data.
PRO TIP #2: As with some other mods, if you don’t have all the DLC, uncheck the version for the DLCs you don’t have in Fallout Mod Manager. For example, at some point I only had Broken Steel, so I had to uncheck Mart’s Mutant Mod for Mothership Zeta and Point Lookout.
PRO TIP #3: Install these mods BEFORE starting a new game.
PRO TIP #4: See the image below.
FIRST AND FOREMOST
Fallout Mod Manager
You must get the Fallout Mod Manager, which makes managing mods much easier and is necessary for adjusting mod load order, which is very important. Luckily it comes with a nice installer.
http://fallout3.nexusmods.com/mods/640
You’ll want to select archive invalidation in FOMM, and you don’t need to launch FO3 through it.
Large Address Aware Enabler
This mod is an absolute necessity for those who download graphics mods, otherwise the game might become unstable. It allows FO3 to use up to 3GB RAM instead of 2GB. Installation is a bit trickier, but just read the instructions carefully and you’ll be fine.
http://fallout3.nexusmods.com/mods/6510
CONSOLE COMMANDS
The console is a command prompt that lets you use developer-like functions. The default key for this is the tilde key, which is above TAB and below Escape. All the good stiff is listed here, but I’ll list some important things that most people would be interested in.
Just enter the bolded command listed below, and a value which I’ll explain right after it.
- fov <number value>– This changes the field of view. I personally prefer 75 which is more realistic. Most people prefer 90, since it lets them see more on-screen. But this just gives you a fish-eye look and it’s less realistic. It’s only good for Counter-Strike or Unreal Tournament players. So here’s an example of how I use this command: fov 75
- set timescale to <number value> – This changes the ridiculously fast time scale. I prefer 5, which means that one real hour is equal to five in-game hours. Default value is like 30 which is way too fast. Here’s how I use the command: set timescale to 5
- setscale <number value> – This controls the scale of an object. 1 is the default scale for everything. So setting this value to 2, for example, doubles the object’s size. This must be used after first clicking on an object while the console is opened. If you want to change the player scale, use this: player.setscale 1.1. Note that 1.1 is just an example. This makes your character significantly taller. Increasing your size also increases movement speed (naturally) and strength.
- addscriptpackage 4083b – This makes the selected NPC follow you. To use this, open the console, click on a non-hostile creature, and enter that command. They’ll follow you until death, or sometimes you might have to re-enter this after reloading a save. Also, sometimes your follower won’t follow you past a loading screen. I haven’t gotten any of them to follow me into Metro stations.
- removescriptpackage 4083b – Sick of your new follower? Just enter this command, and it makes them leave you alone.
- coc <cell ID> – This stands for Center on Cell. Using this combined with a cell ID (which can be found on FO3’s wikia website) teleports you to a new location.
- tcl – This enables/disables collisions, or no-clipping as people call it. Entering it once enables no-clipping (or disables collisions, same thing), while entering it again enables collisions. This is useful for if you get stuck between some objects and can’t move.
- tfc 0/1– Toggles free-fly camera. This command is used to set up screenshots. tfc 1 pauses the game and lets you float around as a spectator. tfc 0 returns you to your body and unpauses the game.
- tm – Removes all menu interfaces. To get the menus back, just enter the command again.
- player.placeatme baseid – This command places an object or creature in front of you. I personally use this to spawn creatures, pit them against each other, watch them fight and make bets. To use this command, combine player.placeatme with a base ID in the same line, then enter it. Base ID’s can be found on Fallout 3’s wikia website, and for Mart’s Mutants (a mod you’ll see later on), are some important base IDs.
- prid baseid – This command is helpful in many situations. It selects an actor, or anything, without actually having to see them. For instance, in combination with the addscriptpackage 4083b you can use this to have followers continue with you into new cells. You just need to get the actors id by clicking on them and enter prid _____ then once you enter the new cell, type in moveto player.
GRAPHICS MODS
This page contains various mods that improve the visual aspect of Ballsout 3. First and foremost, for NVIDIA users, make sure that ambient occlusion is set like so via NVIDIA Inspector (a free program you can find easily).

However you don’t necessarily need Ambient Occlusion setting to be set to High quality, since this can be too taxing for lower end systems. Just see whichever setting works best for you. Now I’ll tell you one quick INI tweak for enthusiast systems (e.g., NVIDIA GeForce GTX 600 series or AMD 7800/7900 series at 1080p): change the following lines in My Documents\My Games\Fallout3\fallout.ini (open this using Notepad or Notepad++).
- bDoTallGrassEffect=1
- bShadowsOnGrass=1
- bGrassPointLighting=1
- iMinGrassSize=20 (adjust to your liking, default is 80, higher value = less dense grass)
This will make grass much more dense and overgrown, in turn lowering frame rate noticeably. So once again, this is only for high end systems. Now lets look at those graphics mods.
NMC Texture Pack
This is an amazing texture mod for Fallout 3, replacing most textures in the world with high res models ranging from 1024 x 1024 to 2048 x 2048 for the FULL pack. They also include Performance and Lite packs for lower end systems, and Minimum/Medium/Maximum bump maps depending on your system. It’s quite self explanatory; an enthusiast PC should be fitted with FULL NMC textures and MAX bump maps.

http://fallout3.nexusmods.com/mods/12056
Installation is simple but read carefully:
- Make sure all parts you’ve downloaded are in the same directory.
- Remove the number from each part, e.g. “12056” at the end of the file name.
- Extract part 1 only
And that’s all. Move the extracted folder(s) to your data folder.
Xepha’s Dynamic Weather

Again, it’s quite self explanatory what this is. It’s a new dynamic weather system, making time of day settings look much more impressive at any given time of the day. Be warned, once installed, make sure it’s at the bottom of your load order.
http://fallout3.nexusmods.com/mods/10607
Realistic Interior Lighting

This mod makes indoor areas look much more realistic.
http://fallout3.nexusmods.com/mods/9250
Flora Overhaul
Flora Overhaul is a vegetation overhaul made by Vurt, a legendary modder for TES and Fallout games. An absolute must have.
http://fallout3.nexusmods.com/mods/19864/?


Fallout Character Overhaul
It’s about time this mod came out. Bring character models into the 21st century using this mod!
http://www.nexusmods.com/fallout3/mods/20004/
Enhanced Blood Textures
This mod is quite self-explanatory. It improves the resolution and quality of blood textures, making blood splatters even more exciting. Let the blood flow!
http://fallout3.nexusmods.com/mods/101


Pip-Boy 3000 4k Retexture
Quite self-explanatory, a 4096 x 4096 retexture for the Pip-Boy.
http://fallout3.nexusmods.com/mods/19290/
MGs Neat Clutter
This mod retextures lots of misc objects around the world, giving them the detail they deserve.
http://www.nexusmods.com/fallout3/mods/18101/?
GAMEPLAY MODS
These are, of course the most important mods. Fallout 3 has some amazing gameplay mods which I’ll list here.
Mart’s Mutant Mod
This fantastic, must-have mod adds a ton of new creatures to the game and makes the Wasteland more active, more unpredictable, and more challenging. You thought the Super Mutant Behemoth was bad? You better hope you don’t run into a Super Mutant Gargantuan (tip: go to Evergreen Mills).


http://fallout3.nexusmods.com/mods/3211
You can find many of these creatures in action here.
For those who like to spawn things in-game, here are some creature ID’s for these new creatures that I dug up.
http://www.gnd-tech.com/threads/63560-Fallout-3-Mart-s-Mutant-Mod-Creature-ID-s
DC Interiors Project
This mod adds a ton of new, explorable indoor areas especially in DC Ruins. Now you can enter just about every building you come across. All those houses in DC Ruins? Yep, you can go into just about every single one.


http://fallout3.nexusmods.com/mods/5573
Simple Needs
So simple, yet so necessary. Now you must eat, sleep, and drink in order to survive.

http://fallout3.nexusmods.com/mods/3769
Realistic Weapon Damages (RWD)
This mod makes all weapon damages more realistic. It lowers bullet count significantly.
http://fallout3.nexusmods.com/mods/7865
Classic Fallout Weapons
This mod adds the iconic guns found in the older games. Some of my personal favorites are the .223 Pistol and Bozar… be on the lookout for those if you use small guns.

http://fallout3.nexusmods.com/mods/2307
Point Lookout Reborn
This is a large scale mod that adds all sorts of content and fixes to the Point Lookout DLC. This requires all DLC to be owned.
http://fallout3.nexusmods.com/mods/19891/
Miscellaneous
These are necessary mods that don’t really fit into the other three categories.
Fallout 3 Re-Animated
Makes necessary improvements to animations, which are lacking in Fallout 3 especially before the mod.
http://fallout3.nexusmods.com/mods/7670
HeadBob
http://fallout3.nexusmods.com/mods/18648
A simple mod that adds headbob and new jumping animations.
Weapon Retexture Project
This mod retextures several guns, such as the 10mm pistol, scoped .44 magnum, hunting rifles, and sniper rifles.

http://fallout3.nexusmods.com/mods/18133
AK-47 Replacer
This simple mod replaces the “Chinese Assault Rifle” with a more realistic AK. Sorry but I can’t identify if in-fact it is the Chinese version of the AK-47, the Type-56.

http://fallout3.nexusmods.com/mods/18481/
AKS-74U
This mod adds a standalone AKS-74U to the game. It uses 5.56 x 45mm rounds though.

http://fallout3.nexusmods.com/mods/18137
Mauser C96 Replacer
This is a replacement for the Chinese pistol. Wonderful attention to detail.

http://fallout3.nexusmods.com/mods/18401/
Combat Shotgun Replacer
HD reskin for the Combat Shotgun.
http://fallout3.nexusmods.com/mods/18506
Hi-Res Weapons v3
Another weapon retexture mod. INSTALL THIS ONE AFTER ALL OTHER WEAPON RETEXTURES/REPLACERS, AND DO NOT OVERWRITE ANYTHING.
http://fallout3.nexusmods.com/mods/481/
Combat Armor Reskins
Default Combat Armor is low res and ugly. I recommend a reskin. I personally use the one made by CaBal120 and EmeraldReign, the former having the best Power Armor reskins.
http://fallout3.nexusmods.com/mods/18220

Power Armor Reskins
CaBaL120 has made some very nice, 4096 x 4096 reskins for T-45b Power Armor, Outcast Power Armor, and T-51b Power Armor. There are lower res versions too.
http://fallout3.nexusmods.com/mods/16882
http://fallout3.nexusmods.com/mods/18221
http://fallout3.nexusmods.com/mods/14123

Better Power Armor
This mod gives all Power Armor outfits more realistic stats/properties.
http://fallout3.nexusmods.com/mods/117
Load Order
Load order is important. Open Fallout: Mod Manager once all mods are installed, double check to see if Archive Invalidation is checked, and then check off all the mods (a check means they will load). Then rearrange them so that the master files are always above the slave files. For example, all of these mods are for Fallout 3, therefore Fallout3.esm should be at the top, then the DLC ESMs. All ESMs should be above all ESPs. Here is my load order as of May 2014, it’s perfectly stable. Use it as a reference, yours should be made very similar.

After installing all mods, enable Archive Invalidation in Fallout Mod Manager. If it was enabled already, disable it and re-enable it. This will solve many potential errors.
Good luck with your modding, and best of luck to you in the Capital Wasteland.


[…] Essential Mods for Fallout 3 […]