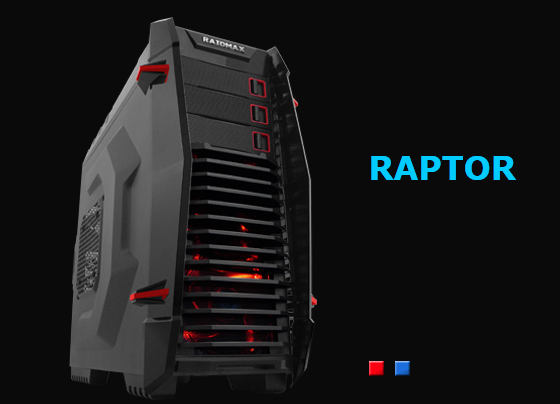
Hello my dear readers. Today I present a chassis review, but from a different manufacturer this time. What I have here is the RAIDMAX Raptor, a mid tower ATX chassis targeted toward gamers. This case claims to have it all, from high airflow to good cable management, good storage support, and water cooling support. Let’s see if it can deliver!
Packaging and Specifications
From the specifications, the case seems mostly ordinary, except maybe the amount of 2.5″ drives supported. You can use up to seven 2.5″ drives, or five 3.5″ and two 2.5″.
- External Drive Bays: 3 x 5.25″
- Internal Drive Bays: 5 x 3.5″ or 2.5″, plus 2 x 2.5″
- System Board: 10″ x 12″ ATX, micro ATX
- Expansion Slots: 7
- I/O Ports: 2 x USB2.0 / 2 x AUDIO / 1 X USB3.0
- Dimensions: 541mm (L) x 247mm (W) x 502mm (H)
COOLING SYSTEM
- Front: 1 x 120mm LED Fan
- Side: 1 x 180mm or 1 x 120mm fan (Optional)
- Back: 1 x 120mm Black Fan
- Top: 2 x 120mm LED Fan
As you can see, this is a larger mid tower case though not quite the largest. There is room for a 180mm or 120mm side fan. The rear supports a 92mm fan in place of the 120mm.
The box is fairly typical with artwork and some specifications on it. The case is packed normally two, with cardboard and foam protecting the front and rear panels, and a protective bag on the case. Inside you’ll find a (possibly crumpled) user’s manual as well as an accessory bag, which includes a few zip ties, screws, motherboard standoffs, etc.
Continue to the next page for the rest of the review!
Exterior
The RAIDMAX Raptor has an aggressive look, possibly over the top. This is what most refer to as a “gamer case”. It’s made out of steel and plastic, and painted black and grey with red on the interior. The interior and main body are steel, while the whole front and top panels are plastic.
[/CONFIG]
Notice the mismatched side panel? The camera flash enhances it, but that’s rather strange. I suppose you can also notice the 180mm and 120mm side panel fan mounts which have rubber anti-vibration dampeners. The lack of a dust filter for this vent couldn’t be more obvious. The left side panel is bulged out so the case could have proper symmetry. The right side panel is bulged to increase space for cable management (because this is such a necessity as you’ll see later), and it’s also mismatched in a lighter tone.
On the front, you’ll find three ventilated 5.25″ drive bay covers, each one is easily removable by pushing that little lever. A foam-like dust filter is also included for each one. A large ventilated area covers the lower front, which has a single 120mm fan. Sadly, no dust filter is present behind the front ventilation. Also, you cannot easily add a second front fan since the bottom HDD cage is riveted. This means most people are limited to one front intake fan. How disappointing. Little plastic “wings” function as design details, but they’re very wobbly and weak. Also, one of the front ventilation tabs came broken on mine, but these aren’t loose so this is unlikely to happen.
The I/O panel is located on top, as well as the power and reset buttons and activity LEDs. Here you’ll find two USB 2.0 ports, a headphone and microphone jack, a USB 3.0 port, and two knobs. The left knob controls fan speed, while the right one controls the fan LED. This is a very nice addition. By default, the rear and top fans are plugged into these controllers.
On the top you’ll find more cheap glossy plastic, adding style to the ventilation for the two 120mm top exhaust fans. These can be removed. A 240mm radiator is supported, though it would have to be crammed in and very thin as you’ll see later. A case like this is better suited for external water cooling.
Here is a shot of the top with the plastic decals removed. They’re held in by a series of screws inside the case.
A 120mm exhaust fan is installed on the rear, though it can be replaced with a 92mm fan for whatever reason. These fan mounts also have rubber anti-vibration dampeners. There are seven ventilated expansion slots, and next to this is more ventilation with three water cooling holes, complete with rubber grommets. The PSU mount is on the bottom, and allows for you to install the PSU in either direction. Each side panel is held on by two thumbscrews, each panel also has a handle for easier handling.
A slide out dust filter is accessible from the back. This is for the PSU vent. This and the optical drive bay vents are the only ones with filters sadly. At least this filter is of a good material.
Everyone has their own taste. Some might like over the top, gaudy, and aggressive while others may prefer a clean and sophisticated look. This case is really pushing the limits when it comes to aggressive aesthetics, to the point where it has some useless cheap plastic parts that function only as aesthetics. The mismatched side panels in relation to the body of the case has me puzzled. The build quality is more or less as one can expect, the steel is like most other cases in that price range but there’s a LOT of plastic. The plastic is decent in quality, except for the aesthetic pieces which are glossy and wobbly.
I’d like to see less of this unnecessary plastic next time around. Let’s not forget that mine came broken – one of the front ventilation tabs was snapped off. For an average user, this shouldn’t cause worry as they’re fairly sturdy, and in order for them to snap off under typical use you’d have to willingly pull them off, or drop the case. Next up is the interior.
Interior
The inside of the case is painted red, at least on this model. ATX and micro ATX are the supported form factors. Upon first glance, the amount of cable management holes and secure points, as well as the large CPU cooler backplate cut-out are obvious and nice to see. Rubber grommets are included on some of the cable management holes.
There are three 5.25″ optical drive bays, each one has a plastic tool free mechanism on the left side. To use these, turn left to unlock, and turn right to lock. The five 3.5″ / 2.5″ drive bays are split into two separate cages: two on the top and three on the bottom. The top HDD cage can be removed, and no tools are required. The bottom one is riveted unfortunately. This is why a second front fan can’t easily be installed. The mini 2.5″ drive cage can also be removed. It is held down by four screws.
Here’s a closer look at one of the hard drive cages. A 3.5″ or 2.5″ drive can be installed onto any of these plastic trays. Drives must be screwed onto the cage. The tray slides in and out of the hard drive cage with no tools.
Removing the top hard drive cage is an easy way to free up airflow. This allows air from the front fan to reach the GPU and other components more easily. The top 3.5″ cage can be installed in place of the 2.5″ cage.
Here’s a better look at how the top 120mm exhaust fans are mounted. A radiator would be a squeeze.
Expansion slots are secured with thumbscrews which is ideal. There is a vent on the bottom for the power supply. The dust filter slides out from the back of the case, as shown earlier. Four rubber pads are included for the PSU to rest on, so it stays in place and this reduces vibration.
Here’s the opposite side. There are plenty of places to secure cables using zip ties. Despite the supposed “roomy cable management” of 25mm, this isn’t a whole lot of space. It’s very little as a matter of fact. Good thing the right side panel has those bulges, otherwise the cables would be the only things making it bulge.
Overall I’m a little disappointed with the interior. Though it has most of the same features as other cases in the price range, the lack of space behind the motherboard tray for cables is disappointing. The riveted bottom hard drive cage is not desirable as this makes it difficult to install a dust filter in the front, as well as a second fan, both of which should have been included by default. Because of this, most users will be limited to one intake fan – that 120mm front intake fan. A side fan isn’t a possibility for anyone who uses a tower style CPU cooler. At least the Raptor is quite versatile, being able to hold up to seven 2.5″ drives or five 3.5″ and two 2.5″ drives.
Potential airflow is mediocre; by default a 120mm front fan, 120mm rear fan, and two 120mm top fans are included. This makes negative air pressure, which can draw dust and heat back into the case and it’s generally not recommended. Most people will be limited to negative pressure either way, especially since there is poor side panel fan compatibility (no clearance with large CPU coolers). In any case, we’ll see how this airflow suffices. If it doesn’t suffice, you can always add a 120mm or 180mm side fan, remove one or two of the HDD cages to free up airflow, and/or get creative with extra fans and zip ties like you’ll see soon.
Installation
For this review, the following hardware was used.
- EVGA P55 FTW motherboard (standard ATX)
- Intel Core i5 760 @ 4.2 GHz
- Mushkin Enhanced Radioactive 8GB DDR3 1600 CL9
- EVGA GTX 680 FTW LE (custom fan curve, 10.5″)
- Antec TruePower New 750W PSU (150mm long)
- Cooler Master TPC-812 CPU cooler (158mm long) with Panaflo U1 and Delta FFB1212EH push/pull
Both my CPU cooler and GPU fit, though without a whole lot of room to spare. However, if you have one of those 12+ inch video cards, removing the top HDD cage will allow it to fit with ease. Also note that if you use a large CPU cooler, you lose side fan compatibility whether you try to use a 180mm or 120mm side fan.
Sadly, this case is so small that there’s no hole for the CPU wire. So it must be routed inside of the case. Due to the lack of space behind the motherboard tray, you may find that you can’t keep all cables hid back there if you want to install the right side panel, especially if you don’t have a fully modular PSU such as mine. Also note my custom fan solution here – the Panaflo U1 120mm x 38mm fan in place of the top hard drive cage. This will be used in the custom results of the performance section, not the stock ones.
Finished look: note how dim the front LEDs are. The camera flash doesn’t even screw up the image that much, it’s very dim, and it’s on its max setting.
The installation went mostly as expected, though I had higher hopes for cable management. The CPU backplate cutout is wide enough for my LGA 1155 motherboard which is nice to see. Let’s move onto the performance section.
Performance
For this section, I’ll be using the RAIDMAX Raptor in its stock configuration (minus the rear exhaust fan, which hurts CPU temps, and removed top HDD cage, front fan on highest setting), and with my own custom airflow configuration to test both its stock airflow and potential airflow. The hardware configuration is as follows:
- EVGA P55 FTW motherboard
- Intel Core i5 760 @ 4.2 GHz
- Mushkin Enhanced Radioactive 8GB DDR3 1600 CL9
- EVGA GTX 680 FTW LE (custom fan curve)
- Antec TruePower New 750W PSU
- Cooler Master TPC-812 CPU cooler with Panaflo U1 and Delta FFB1212EH push/pull
This case will also be compared to the Cooler Master ATCS 840 case, both with stock airflow and custom. For the tests, I’ll be running 3DMark 11 on extreme (including opening intro) and recording peak temperatures for the CPU (average of all 4 cores) and GPU. CPU temps were recorded with RealTemp, while GPU temps were recorded with MSI Afterburner. Let the games begin!
Moving onto custom airflow. The Raptor will be used with two Thermalright FDB 2000 RPM top exhaust fans, and a Panaflo U1 fan in place of the removed HDD cage. Temps are noticeably lower – CPU is down to 61-62, and so is the GPU. This is good airflow.
The ATCS 840 however keeps the CPU slightly cooler, due to the three front intake fans. GPU temps or more or less the same.
Conclusion
The RAIDMAX Raptor is a mixed bag. Aesthetics are over the top, though some might like this. Build quality is a little bit disappointing, and so is the stock airflow, lack of dust filters on front and side vents, cable management space, and side panel fan clearance (or lack thereof). It benefits from good storage support and a low price. I’ll now score the case, with 5 being the highest in the subsections and 100 being the highest overall score.
- Appearance: The RAIDMAX Raptor takes on an aggressive appearance. Some may like it, others may not. However the slightly off-color side panels and use of unnecessary plastic aesthetic pieces don’t help the case. 3.5/5
- Construction: Steel and plastic are the materials used. The plastic is shiny and very wobbly in some places, but the important pieces should hold up fine. Although this sample came with a broken piece, I’ll let that slide since it would be hard to break that piece off under normal circumstances. 3.5/5
- Performance: Stock airflow could be greatly improved if only more fans were supplied. Only one intake fan and three exhaust fans leads to negative air pressure and mediocre cooling. The fans however are not loud, and will be drowned out easily by most other components. 3.5/5
- Functionality: This case benefits from great storage support, and for a mid tower case of this price, it’s not terribly small. A fan speed and LED controller are also included which is nice to see. USB 3.0 is a plus as is water cooling support, though internal water cooling isn’t a good idea due to the lack of space for radiators. Cable management leaves a bit to be desired: this case has a proper amount of cable management holes, but very little space behind the motherboard tray for cables. The lack of dust filters, except for the PSU vent and optical drive bays, is a bit disappointing. Users with large CPU coolers won’t like the fact that they’d be limited to one intake fan. 3.5/5
- Value: This case retails for around $90, putting it in line with other similarly sized mid tower cases that are very similar in size, features, and build quality, though others tend to have more dust filters and intake fans. So I’ll go with a 3.5/5 in this category.
- Overall: 70/100