AMD Recently introduced it’s new Threadripper HEDT platform late last year. Since its release, not only have we seen great success at watching it crunch out workloads, but the AMD Ryzen Threadripper overclocking community has taken an interest along with the gaming communities as well. Overclocking any HEDT processor can be a it bit trickier due to the higher TDP these processors have over traditional Desktop processors such as the Intel I7 lineup or AMD Ryzen processors.
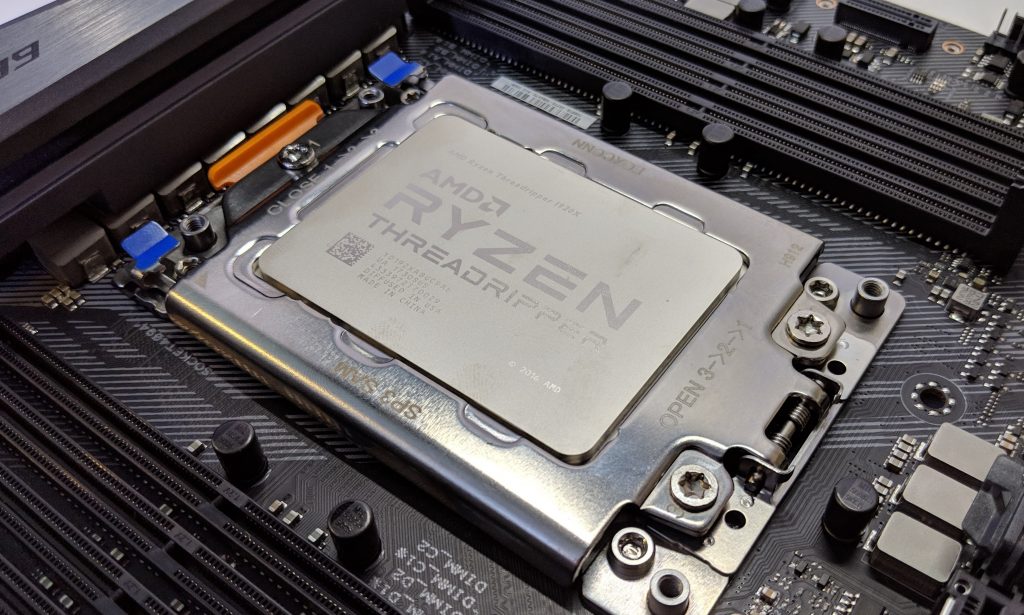
Currently the Threadripper Zen-based processors work on the AMD X399 chipset which use the TR4 socket. The socket features a whopping 4094 pins making it the largest CPU socket from both AMD and Intel.
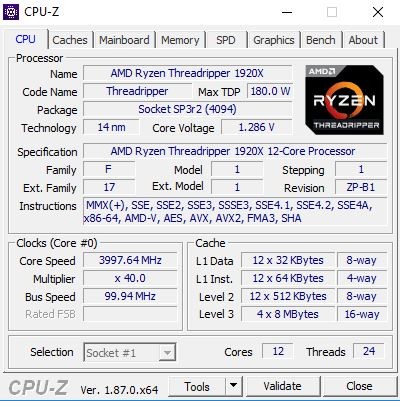
This guide applies to both the AMD Ryzen Threadripper 1st and 2nd generation processors. In this particular review we will be overclocking a mid-tier AMD Ryzen Threadripper 1920x processor which features 12 cores and 24 threads. Out of the box, the CPU runs at 3.5GHz base clock with a 4.0GHz boost clock. Not bad, but I’m sure we can get get a few more ponies out of it!
Hardware used:
- Processor: AMD Ryzen Threadripper 1920x
- CPU Cooler: Cooler Master Wraith Ripper
- Motherboard: ASUS ROG Strix X399 Gaming
- Memory: 32GB (4x8GB) Corsair Dominator RGB Pro
- Power Supply: OCZ ZX 850W
Overclocking Constraints
Before undertaking the overclocking voyage with your Threadripper be sure to understand the flowing constraints:
Heat: First, before overclocking your processor, be sure that you have adequate cooling. I highly recommend a very large tower cooler or an AIO (All In One) liquid cooler with at least a 240mm radiator. The absolute best would be a custom liquid cooling system if funds permit. If your CPU temperatures are already hot, I would definitely recommend not overclocking the CPU. Also be sure that your PC case has adequate ventilation to dispel of the increased heat overclocking can produce.
Motherboard Options: As overclocking is primarily done in the motherboard’s BIOS, ensure that your motherboard has plenty of overclocking related options such as CPU frequency, multiplier and voltage control. Normally you would also want to choose a motherboard with quality VRM. In the case of Threadripper, choices are a bit more slim and I personally haven’t seen a motherboard that didn’t not have at least an 8+0 phase VRM which should be adequate for overclocking. As this is pretty standard, do your reasearch and ensure that VRM components such as MOSFETs and inductors have high ratings. Most detailed motherboard reviews will publish this information.
Warranty: Depending on how you go about overclocking your Threadripper, your Warranty through AMD could be affected. For example, (and we’ll get into this later) overclocking with AMD’s Precision Boost 2 technology is an easy, automated and safe way to overclock your Threadripper that will not affect your warranty. However, manual overclocks might not be covered.
Automatic Ryzen Threadripper Overclocking Methods
There are several methods which will automatically overclock your processor, each of which fully depends on your motherboard’s BIOS. Before jumping in and manually tweaking numbers, it doesn’t hurt to run a few automatic attempts to see where they’ll take you.
Precision Boost 2 Technology
This technology works for any AMD Ryzen or Ryzen Threadripper processor. Precision Boost 2 builds on the original Precision Boost technology (which is slowly being phased out) with a host of new features. Basically, without getting too technical, PB2 technology actively monitors your processors temperature, VRM current and temp, SoC voltage and a few other parameters and actively modifies the CPU’s core clock and voltage (vCore) to get you the fastest, most stable overclock.
The overclock is not designed to approach any dangerous limits and will only produce an overclock for what is considered safe for your system. Precision Boost 2 was created from XFR 2 algorithms which is easily explained by AMD’s YouTube video highlighting the technology and how it works:
Precision Boost Overdrive
AMD Ryzen 2nd Gen processors now support Precision Boost Overdrive technology. This technology is not technically covered by your warranty so use at your own risk. Basically PBO is built on Precision Boost 2 and works by constantly monitoring your processor’s temperature. The lower the temperature, the higher the overclock as PBO will boost your core clock and power if temps stay down. Like PB2, this technology works automatically. Linus Tech Tips posted an excellent video which demonstrates how this works exactly.
For more detailed information on Precision Boos Overdrive, check out this guide over at AMD’s community.
In our example, since we’ll be overclocking a 1st Gen Threadripper, we won’t be overclocking this processor manually.
Manual Ryzen Threadripper Overclocking
When jumping into manual overclocking anything whether it’s a GPU or CPU, first clear you’re schedule and get rid of distractions. An effective and optimized overclock can’t be rushed or you’ll just end up getting frustrated with the results and/or process.
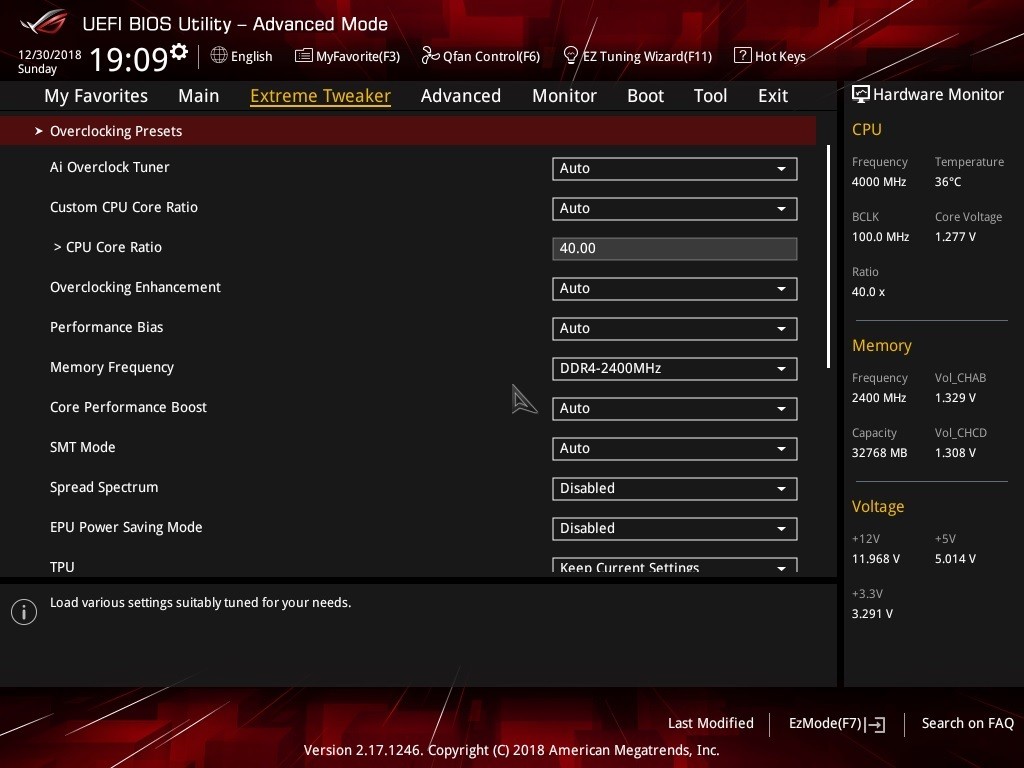
The process is pretty simple. Increase processor values, test, monitor, repeat. Our goal is to increase the processor’s frequency which in turn, increases performance. The Ryzen Threadripper processors run at a 100MHz base clock which is then multiplied (35x in our case) which gives us the final frequency. (3500MHz) As these processors are unlocked, meaning we’re able to adjust the core multiplier, we’ll just change this value to increase our clock speeds.
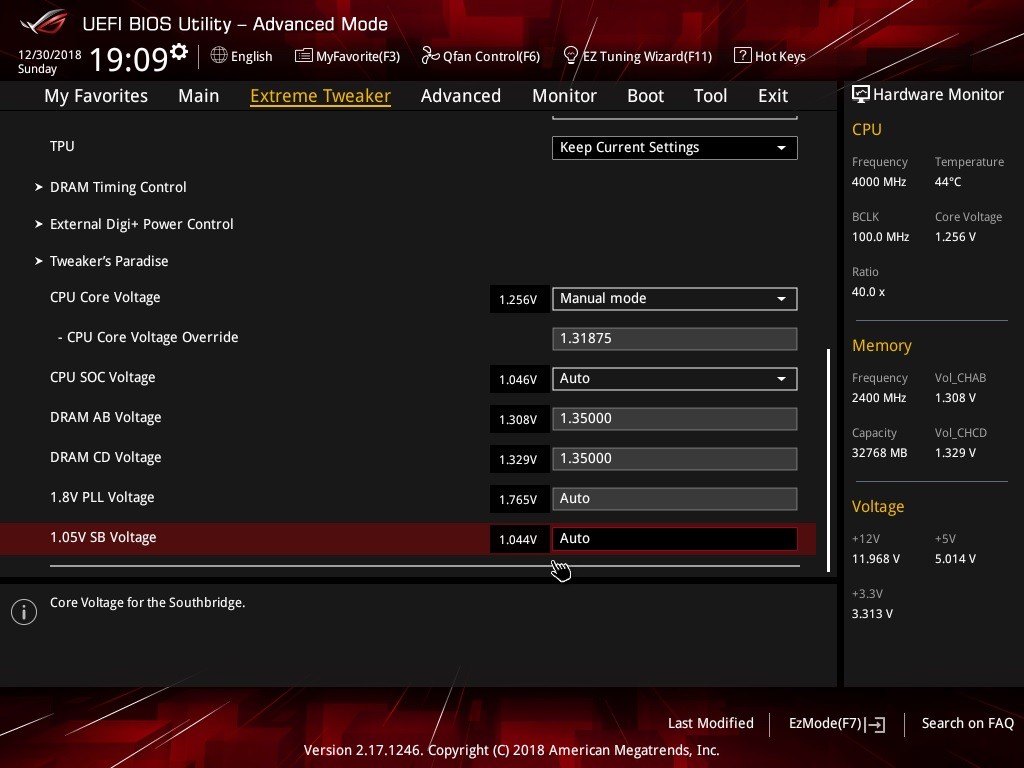
With added speed, comes an added need for power. Eventually we’ll need to feed the processor more power by increasing the voltage or vCORE options.
So the only two options we’ll need to adjust are the Core Multiplier and vCORE. Other options can be set for fine tuning such as disabling extra processor features. I recommend disabling any Spread Spectrum options as well.
The Process
Start with a very conservative overclock. These processors can do 3800MHz easily, so start by bumping the core multiplier up to 38x. Reboot and run your favorite stress test application. We recommend either Prime95 or Intel Burn Test. While the test is running, keep an eye on temperatures!
Stress Testing
For this, either HWMonitor or RealTemp are both good options. Let the test run all cores at 100% for at least 20-30 minutes for quick incremental checks and 4-8 hours for final stability checks. The longer the better.
Overall, the stress testing procedure is very simple. First run Prime95 Large FFT. The large FFT option is best for testing CPU stability. Monitor temperatures early on, if they stay within the safe range (not consistently over 80 degrees Celsius) after the first 10 minutes then there shouldn’t be a problem. If your system crashes during this test, go back and adjust your settings as needed. Either your voltage is too low or your speeds are just too high.
Assuming your computer didn’t crash, you’ve successfully applied a mild overclock to your processor! If you did experience a crash, no biggie. Simply reboot and apply a few more mV (milivolts) to your processor and retest.
A note on Applying Voltage
As mentioned earlier, as you increase your frequency, you’ll eventually need to apply more voltage for a stable clock. Depending on your motherboard, this can be done in two different ways. Offset mode which is a +/- option which works in typically 50mV increments, or manual entry. Personally, I prefer to manually enter the voltage so I know exactly what I’m applying to the CPU. Feel free to increase the voltage as needed however, avoid exceeding 1.45V unless you’re running extreme cooling options.
Overall, it’s a slow process of slowly increasing the multiplier, and increasing vCORE voltage to match.
In our case, we were able to achieve a nice stable medium overclock at 4.0GHz at 1.286V which ran cool and quiet (60C Max) at 100% load. Our max clock we achieved was 4.2GHz at 1.37V however temps were a bit too high for comfort. Please don’t use this as your maximum, if your cooling solution allows, keep going as long as temps stay down!
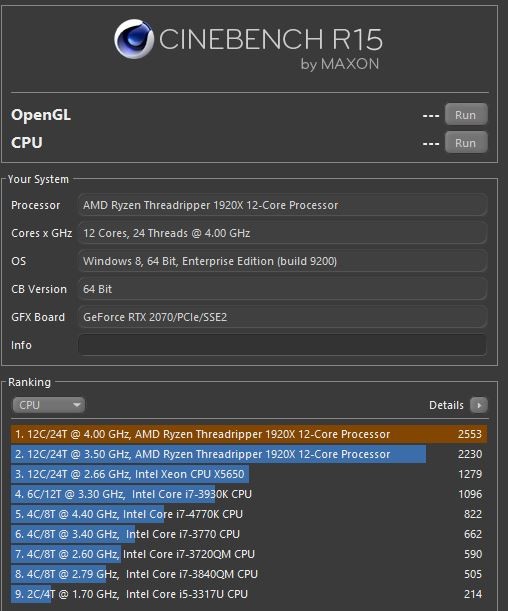
As for a quick performance comparison, in Cinebench we were able to push the score from 2230 stock to 2553.
Conclusion
Overall the AMD Ryzen Threadripper processors are a blast to work with and in the end, overclock quite well. Keep in mind that every CPU is different and will have its own personality when an overclock is applied. As we mentioned earlier, take your time and get your BIOS reset switch lubed up as typically the process can be a long one. In the end the performance increases are definitely worth it.
Thanks for reading and feel free to share your feedback and results below!